• Cake
  • Frosting
  • YouTube
  • My Favorite Tools
  • Nav Social Icons

  • Skip to primary navigation
  • Skip to main content
  • Skip to primary sidebar
  • Skip to footer
  • Recipes
    • Cake
    • Cupcakes
    • Frosting
    • Ice Cream
    • Vegan
  • Cake Basics
  • Tutorials
  • Blog
  • About
  • Mobile Menu Widgets

    Connect

    Search

Sugar & Sparrow logo in script font

Sugar & Sparrow

Lifestyle and Cake from Portland Oregon

  • Cake Basics
  • Recipes
    • Cake
    • Cupcakes
    • Cookies & Bars
    • Filling
    • Frosting
    • Ice Cream
    • No-Bake
    • Small Batch
    • Vegan
  • Tutorials
  • Book
  • Blog
  • About

Oreo Buttercream

July 26, 2025 · In: Featured, Frosting, Recipes

Jump to Recipe

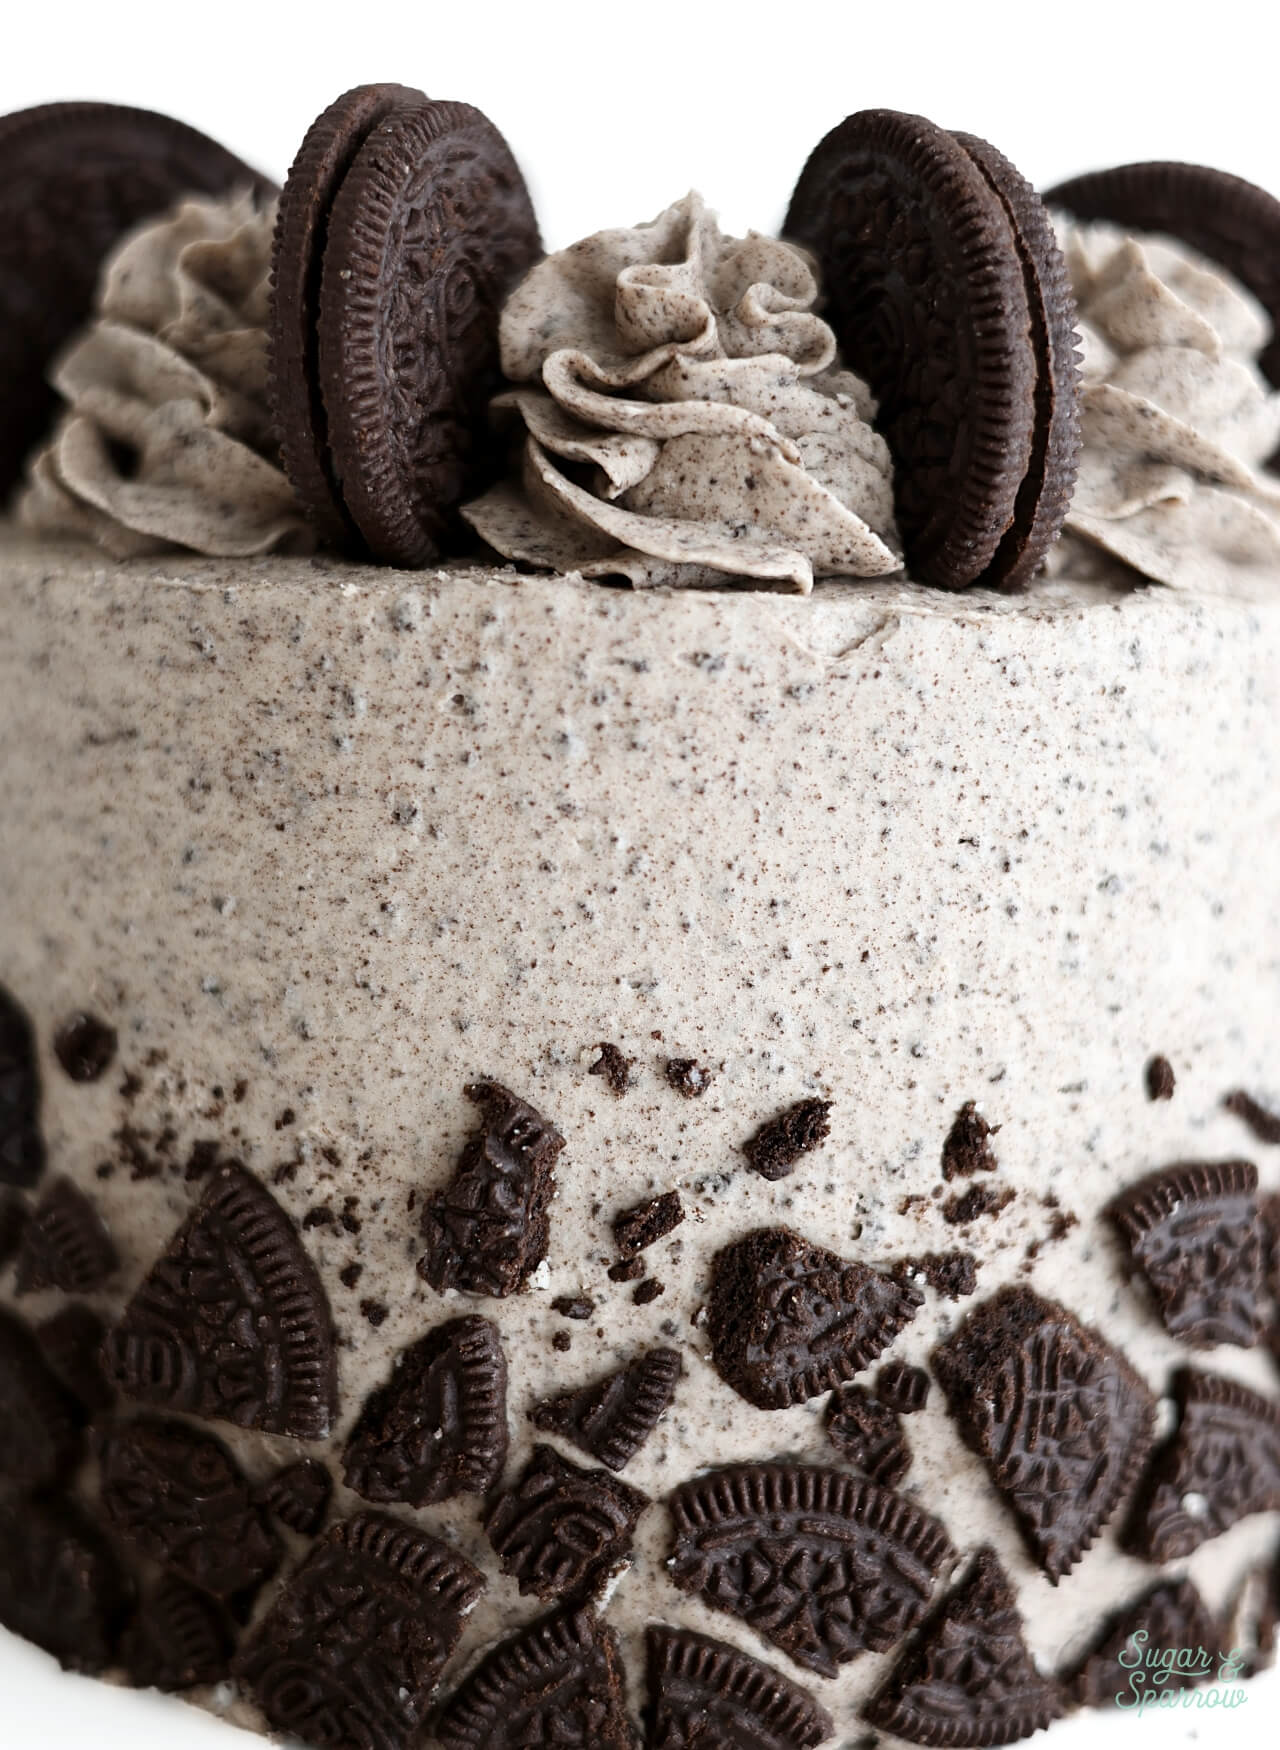
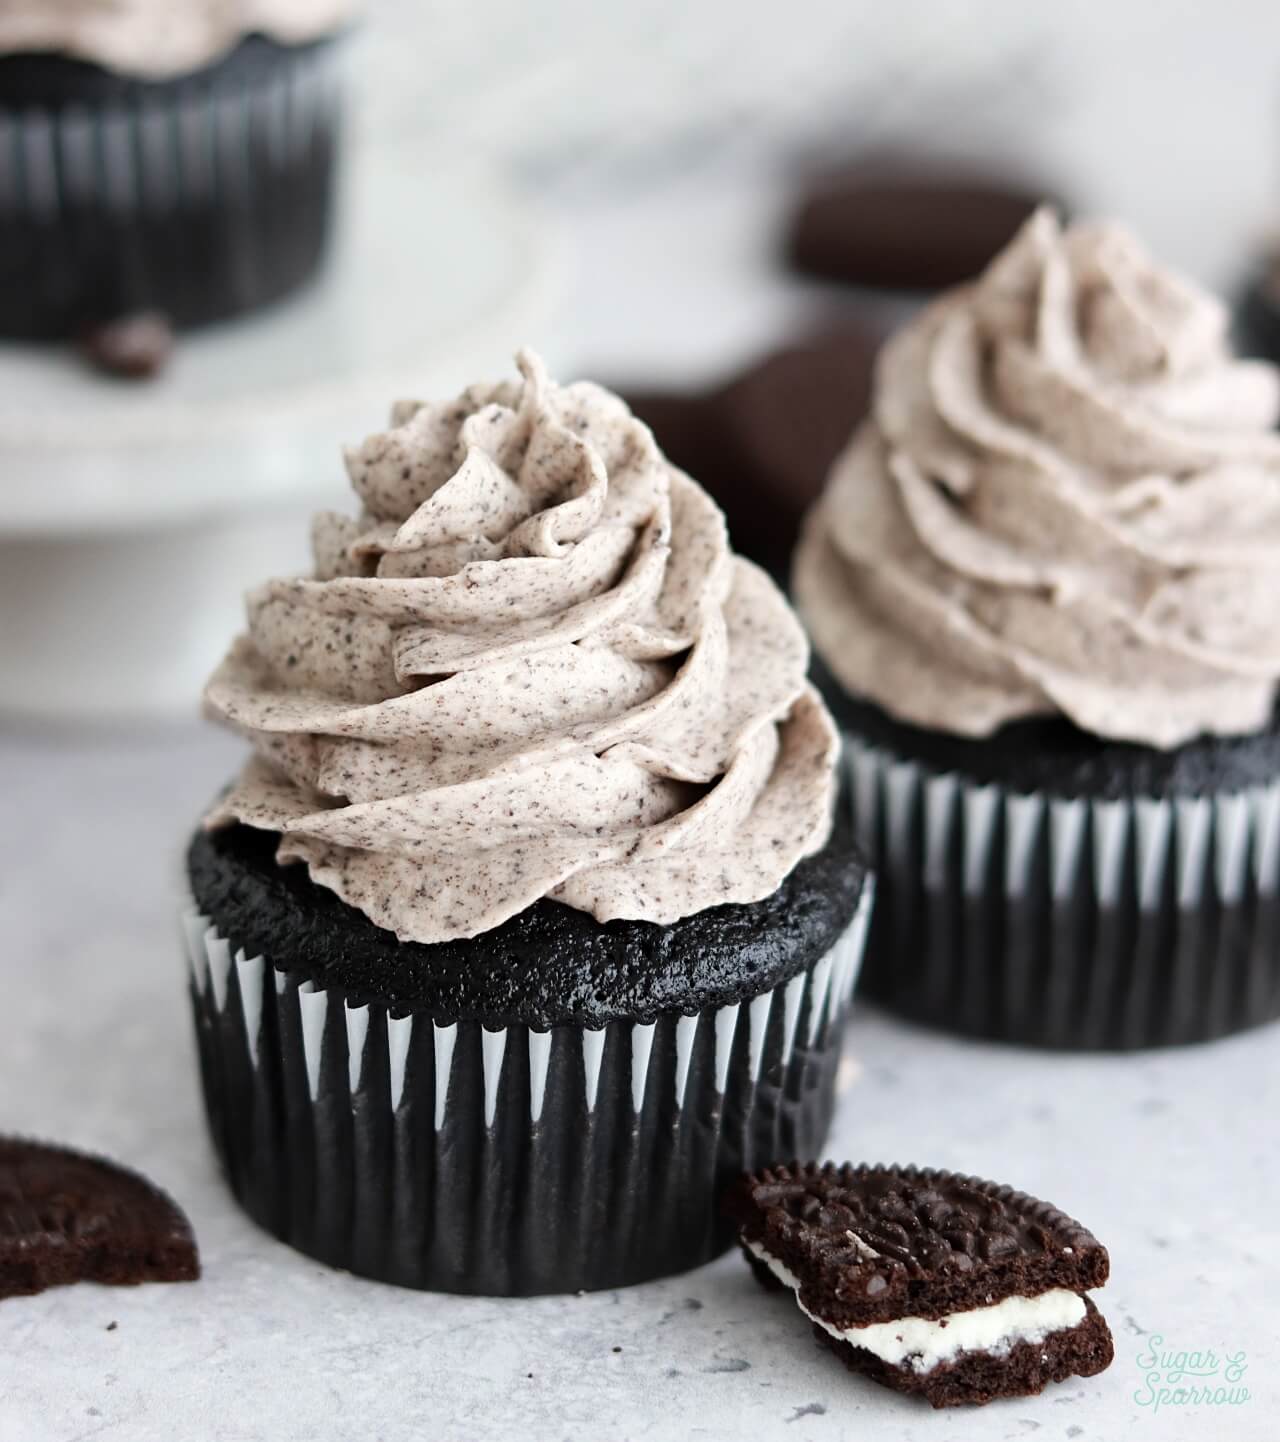
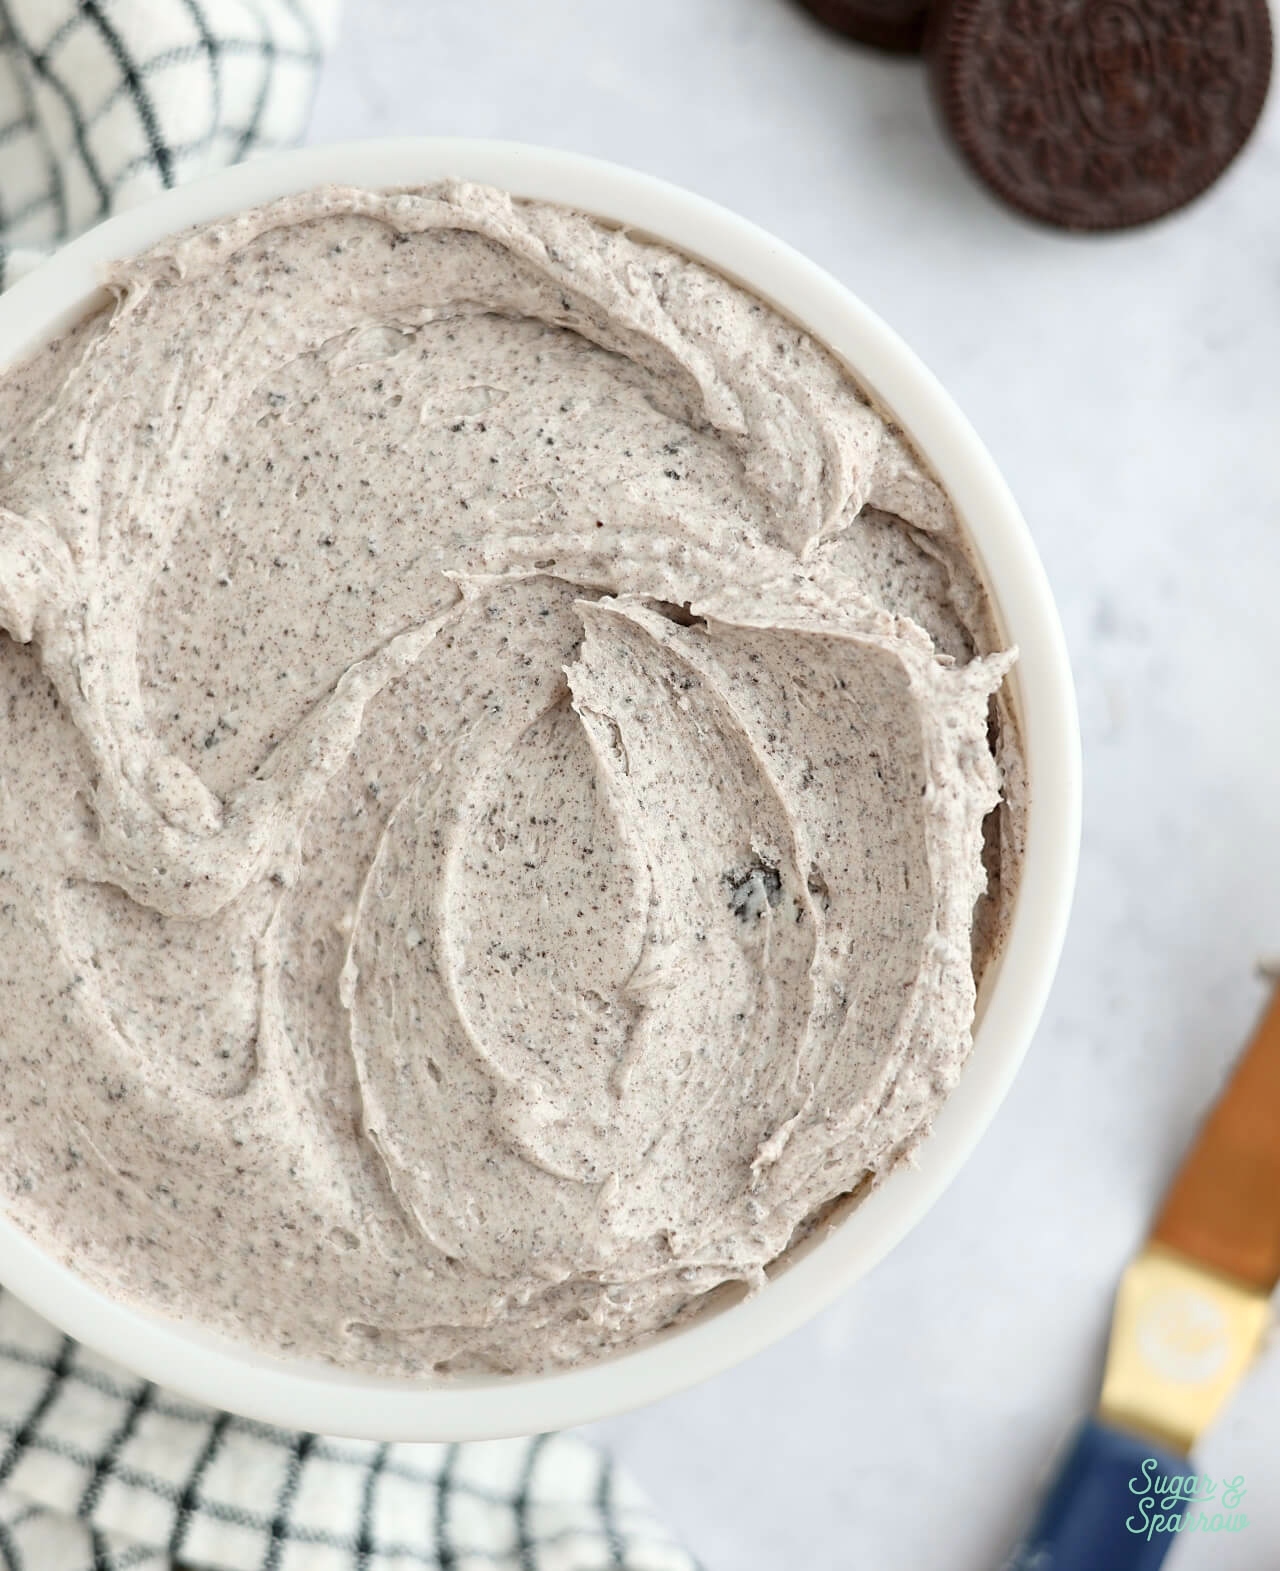
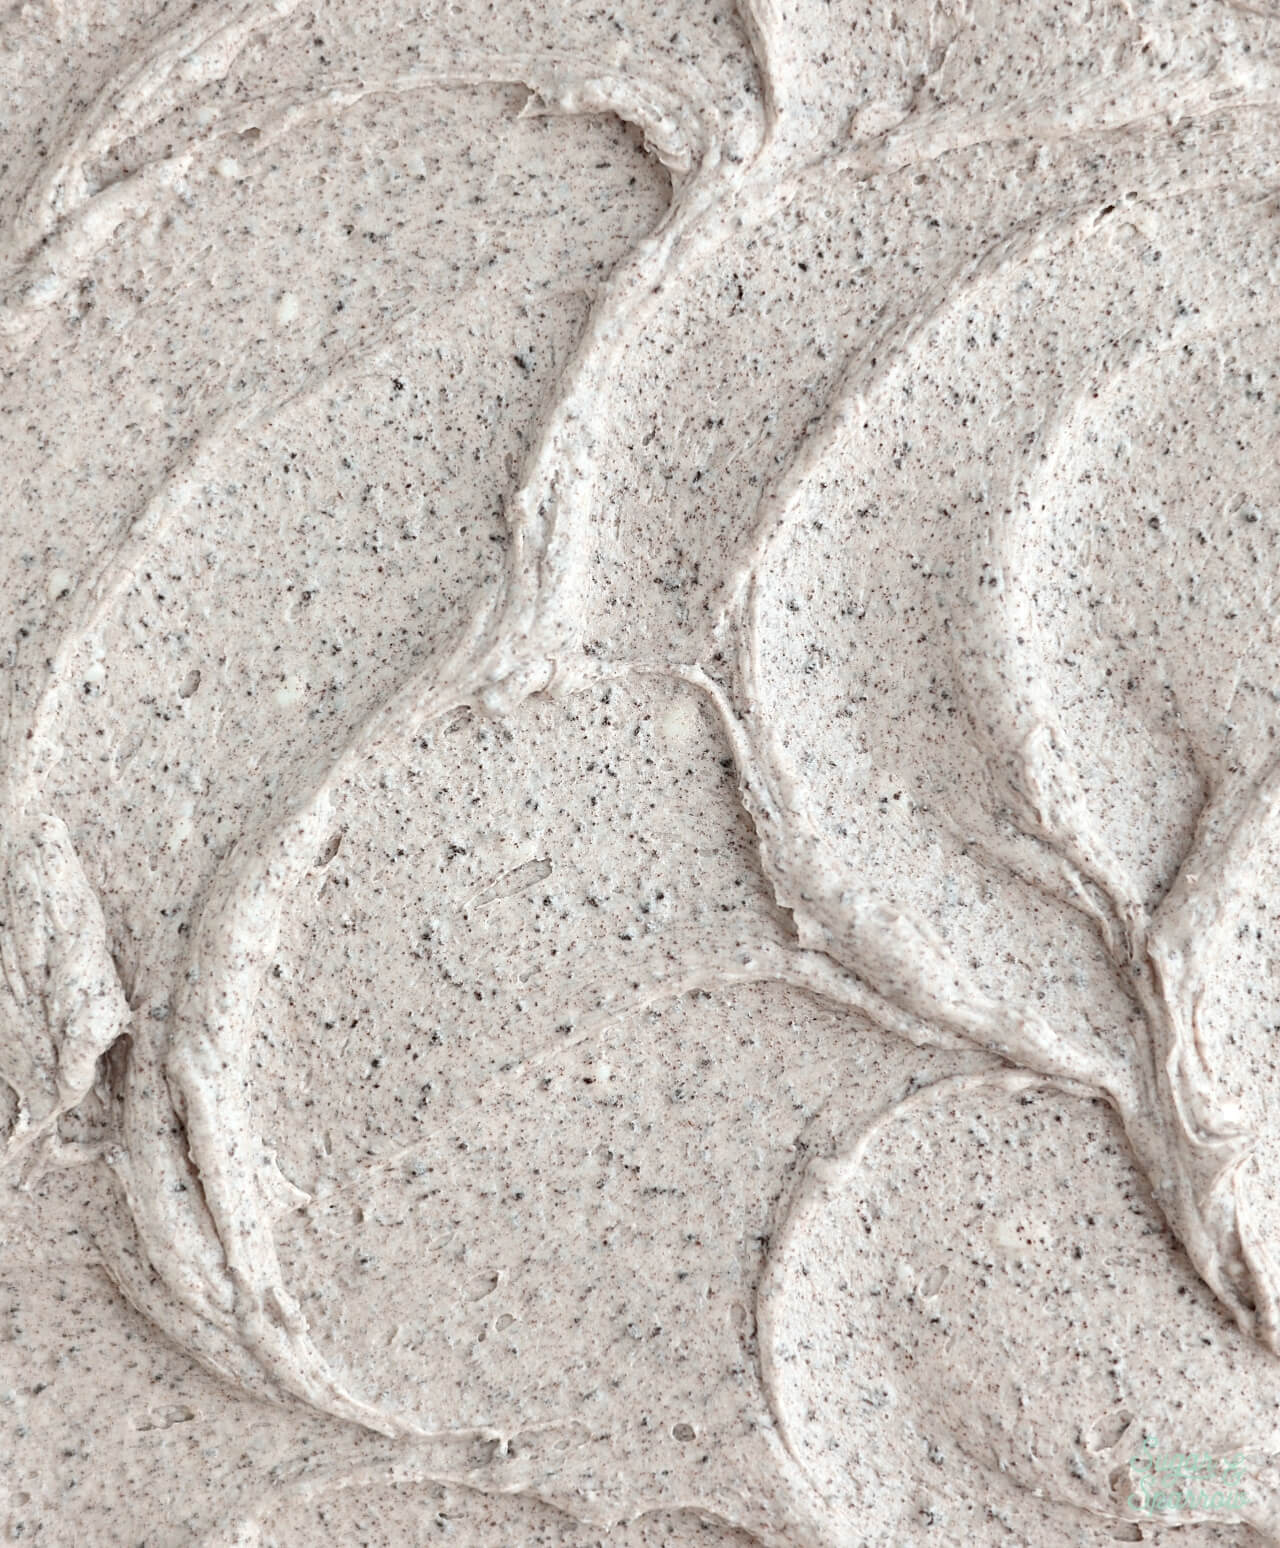
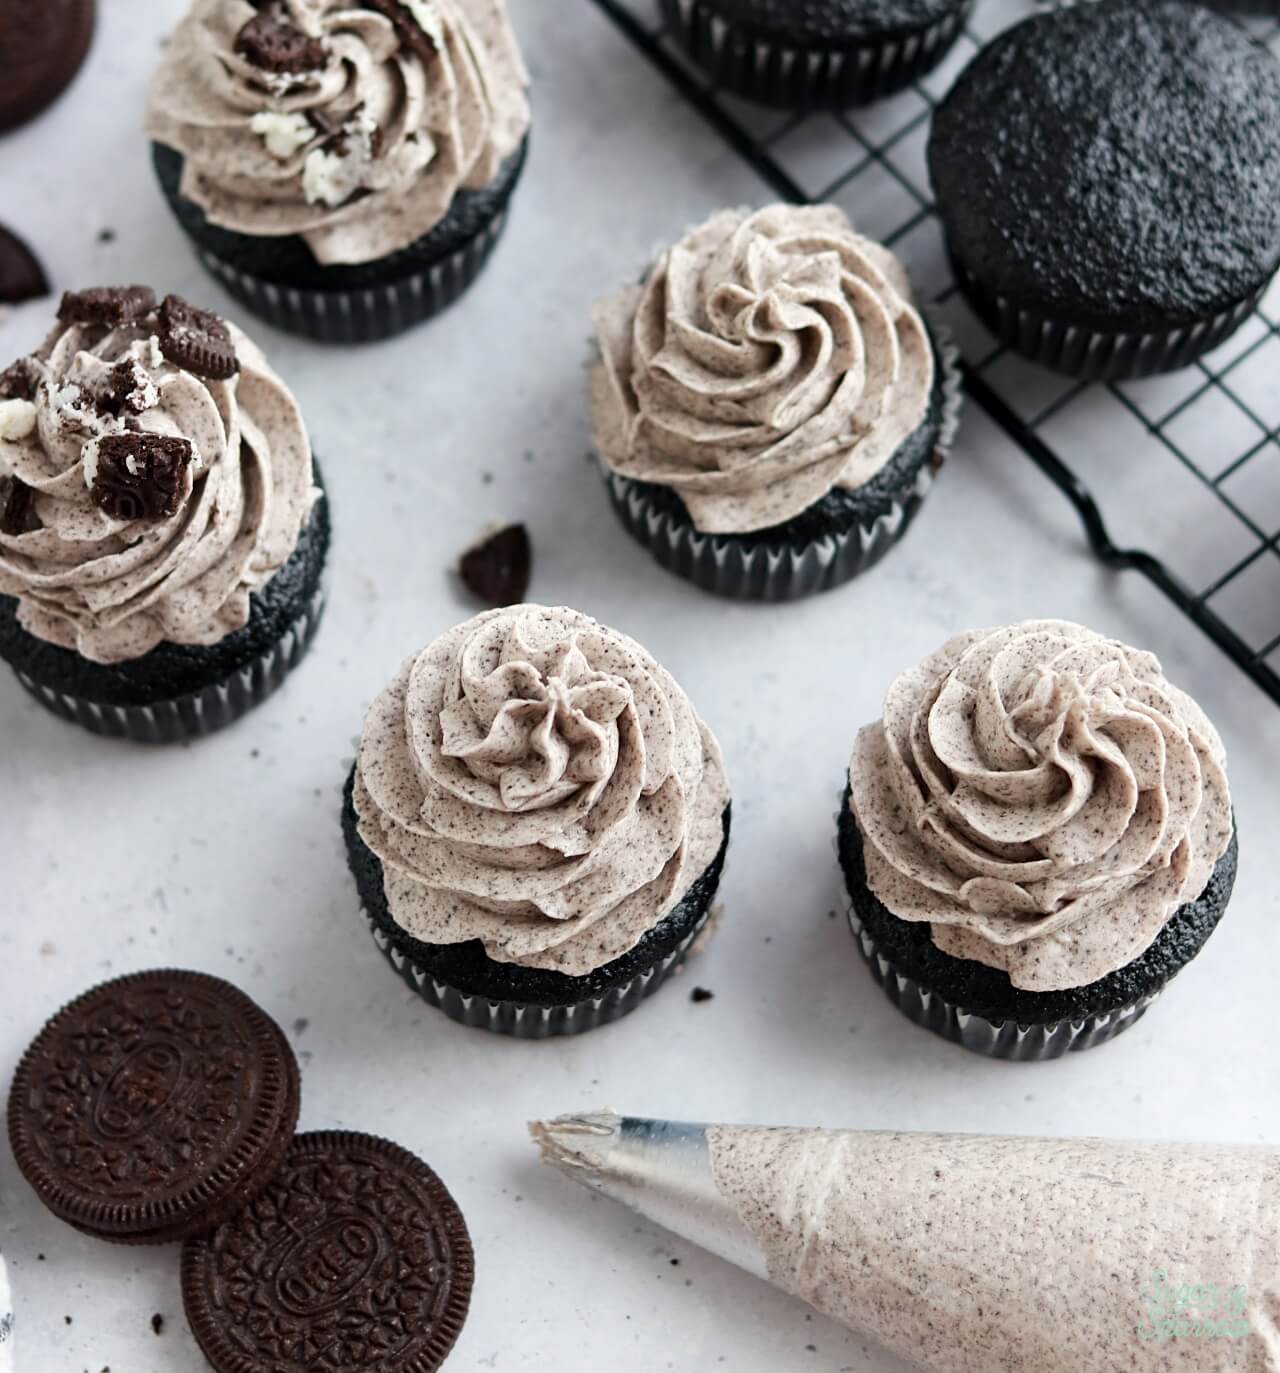
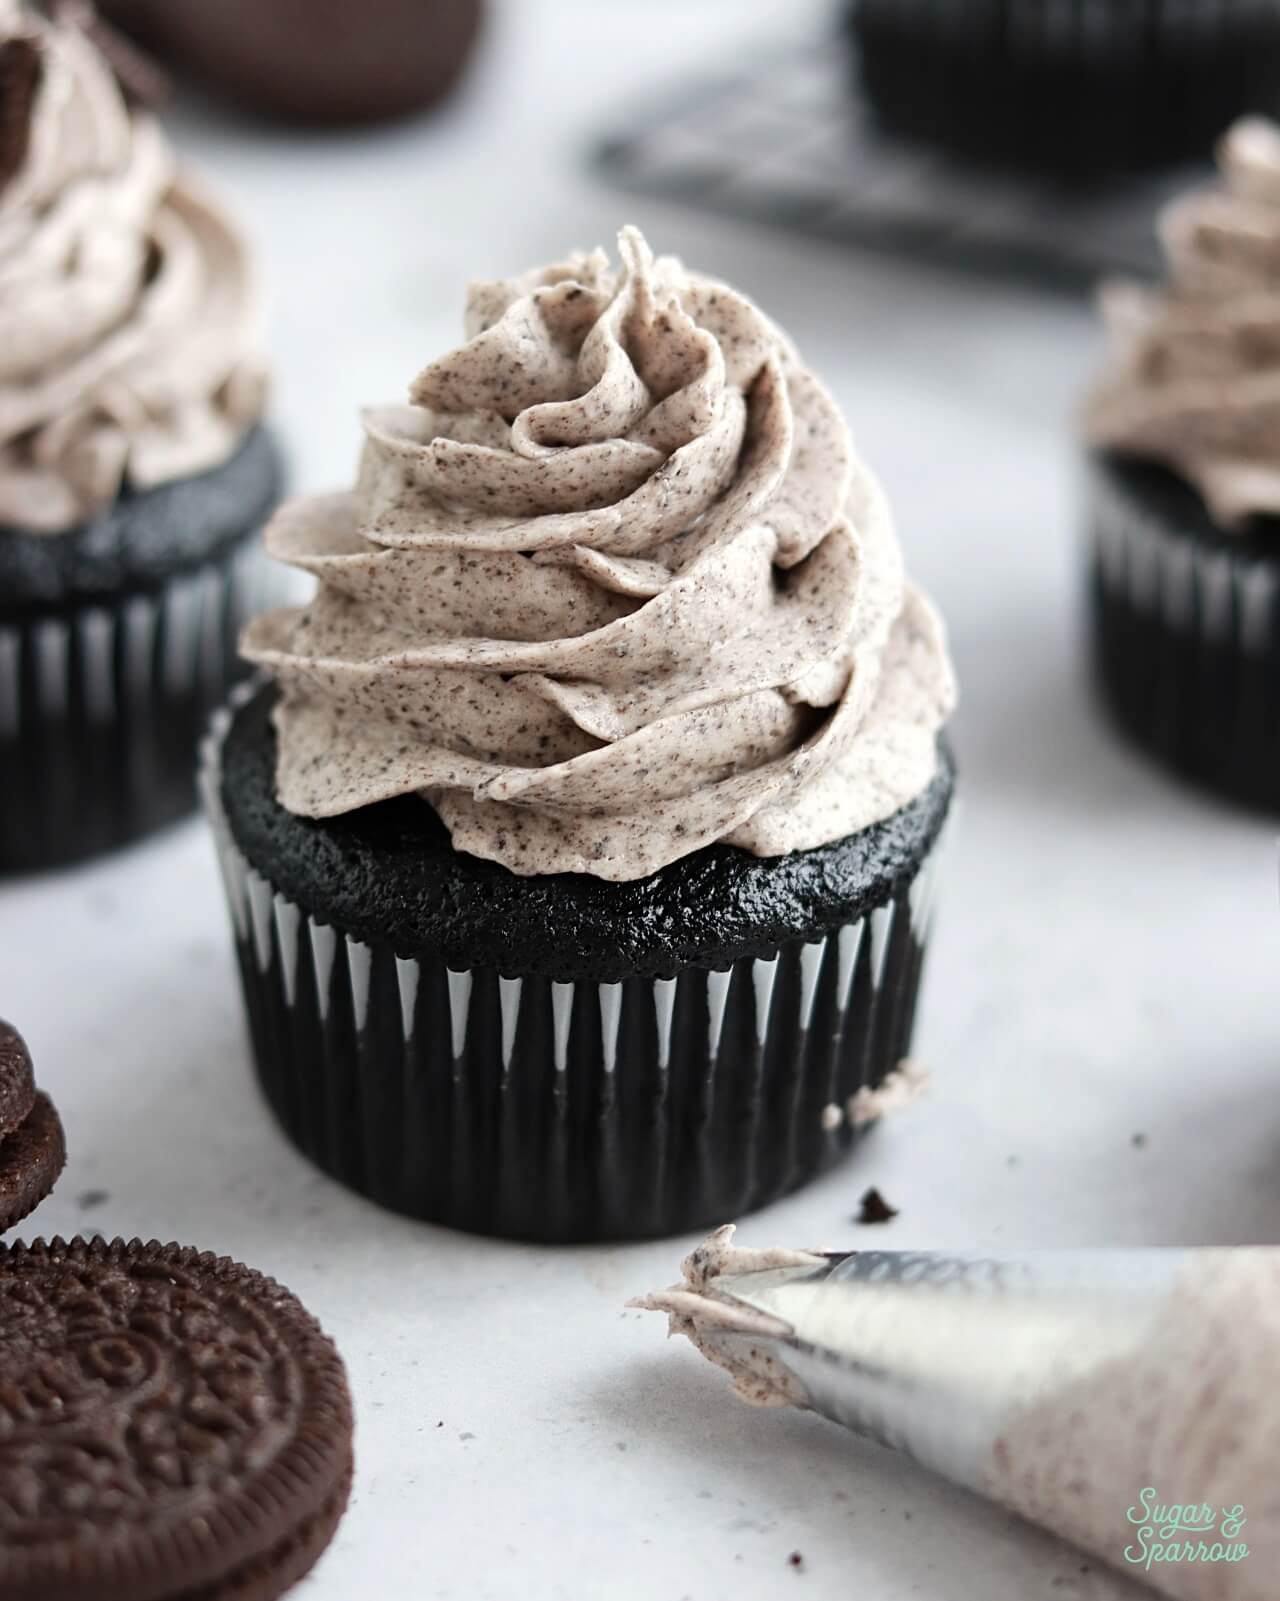
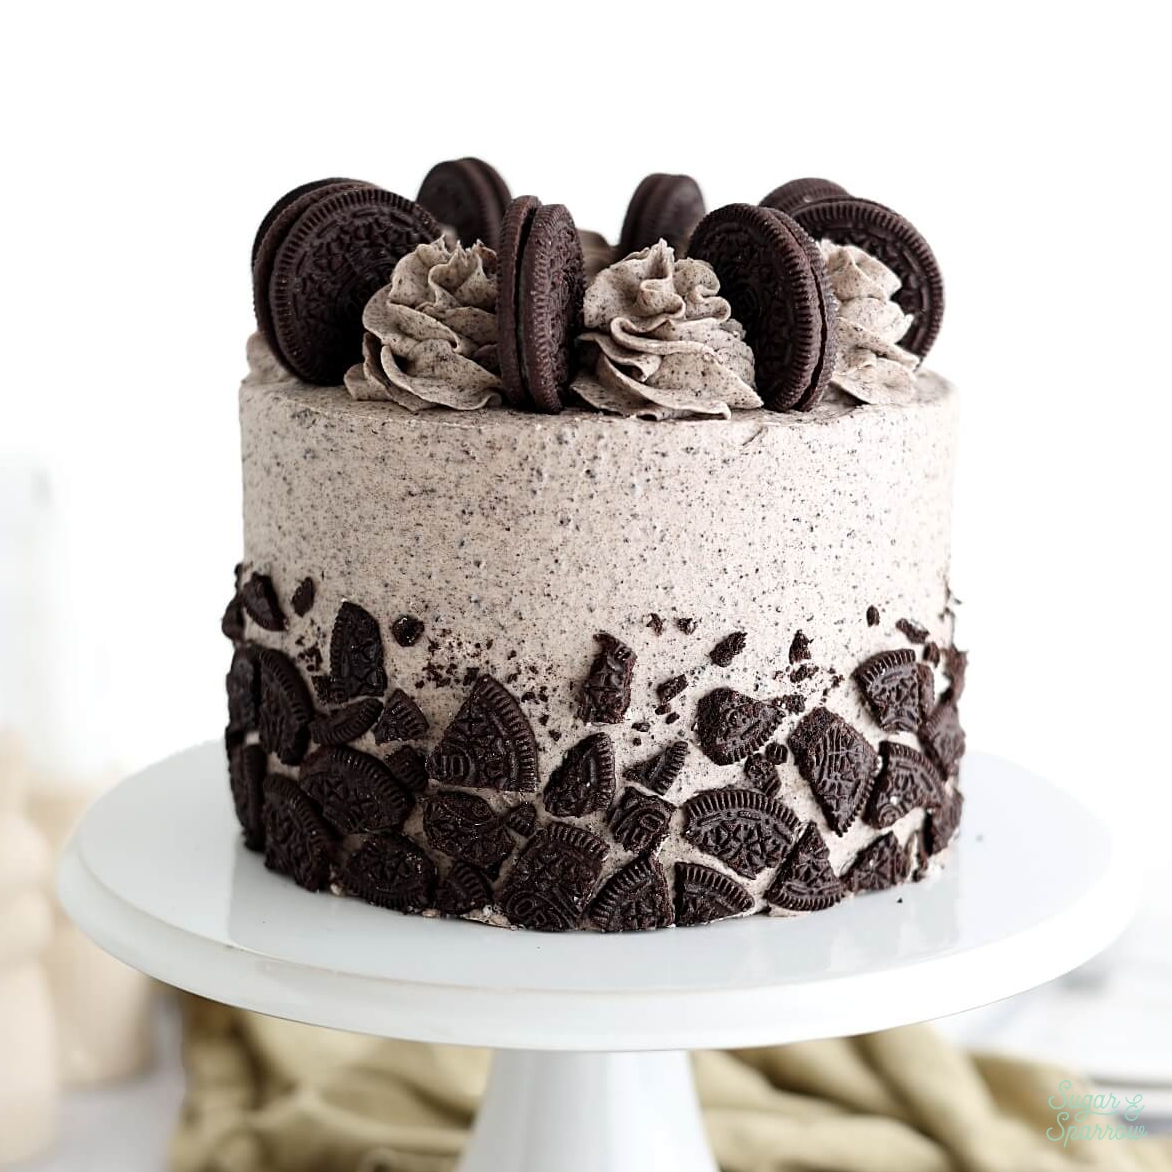
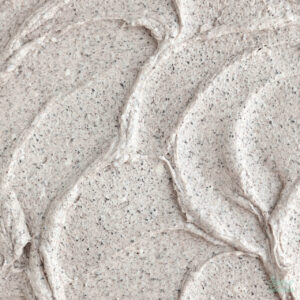
If you’re an Oreo lover, this cookies & cream buttercream is going to be among your favorite frostings! It’s silky smooth vanilla buttercream with crushed Oreo cookies added, filling and all. The little bits of cookie look so irresistible suspended in the frosting, and the vanilla buttercream base gives it the perfect cream-to-cookie ratio. It’s perfectly pipe-able, great consistency for decorating cakes and cupcakes, and can even be used as a macaron filling. I recently paired it with black velvet cake layers to make this Oreo cake and also whipped up a cupcake version that you’ll see pictured throughout this blog post. I’ll also provide other cake and cupcake suggestions below in case you need the flavor pairing inspiration! 

oreo cookies and cream buttercream recipe
oreo buttercream for cupcakes

Oreo Buttercream Ingredients

There are six simple ingredients that go into this Oreo buttercream. I’ll explain each ingredient’s role below, along with any substitutions you can make. 

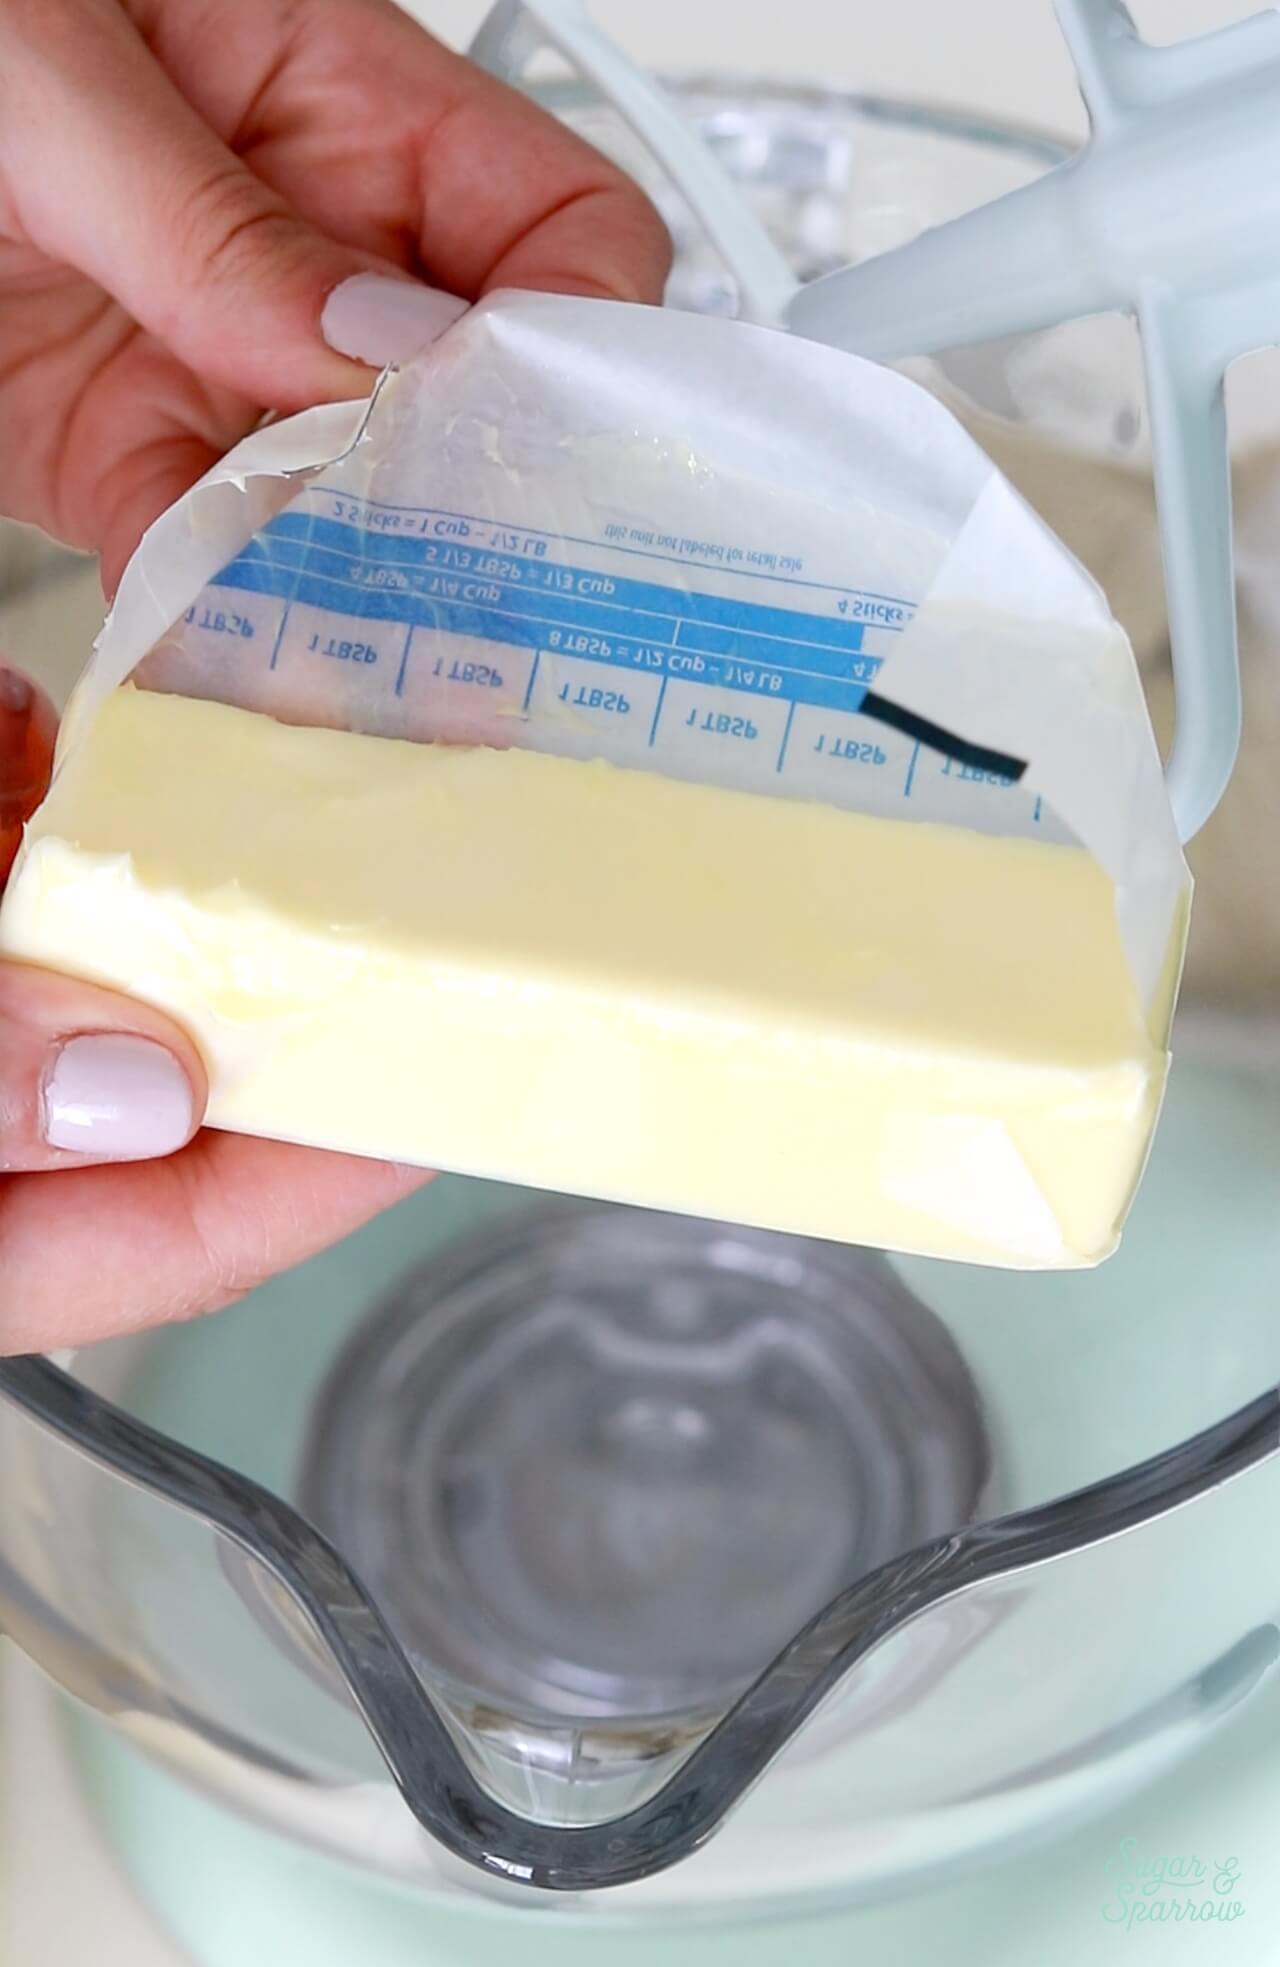
  • Unsalted Butter. The base of this recipe. It provides stability and structure as well as a rich, creamy undertone. If you want to use salted butter or vegan butter sticks instead, simply omit the salt from the recipe. 
  • Powdered Sugar. Also known as confectioner’s sugar, this helps sweeten the buttercream while providing the perfect amount of stability. 
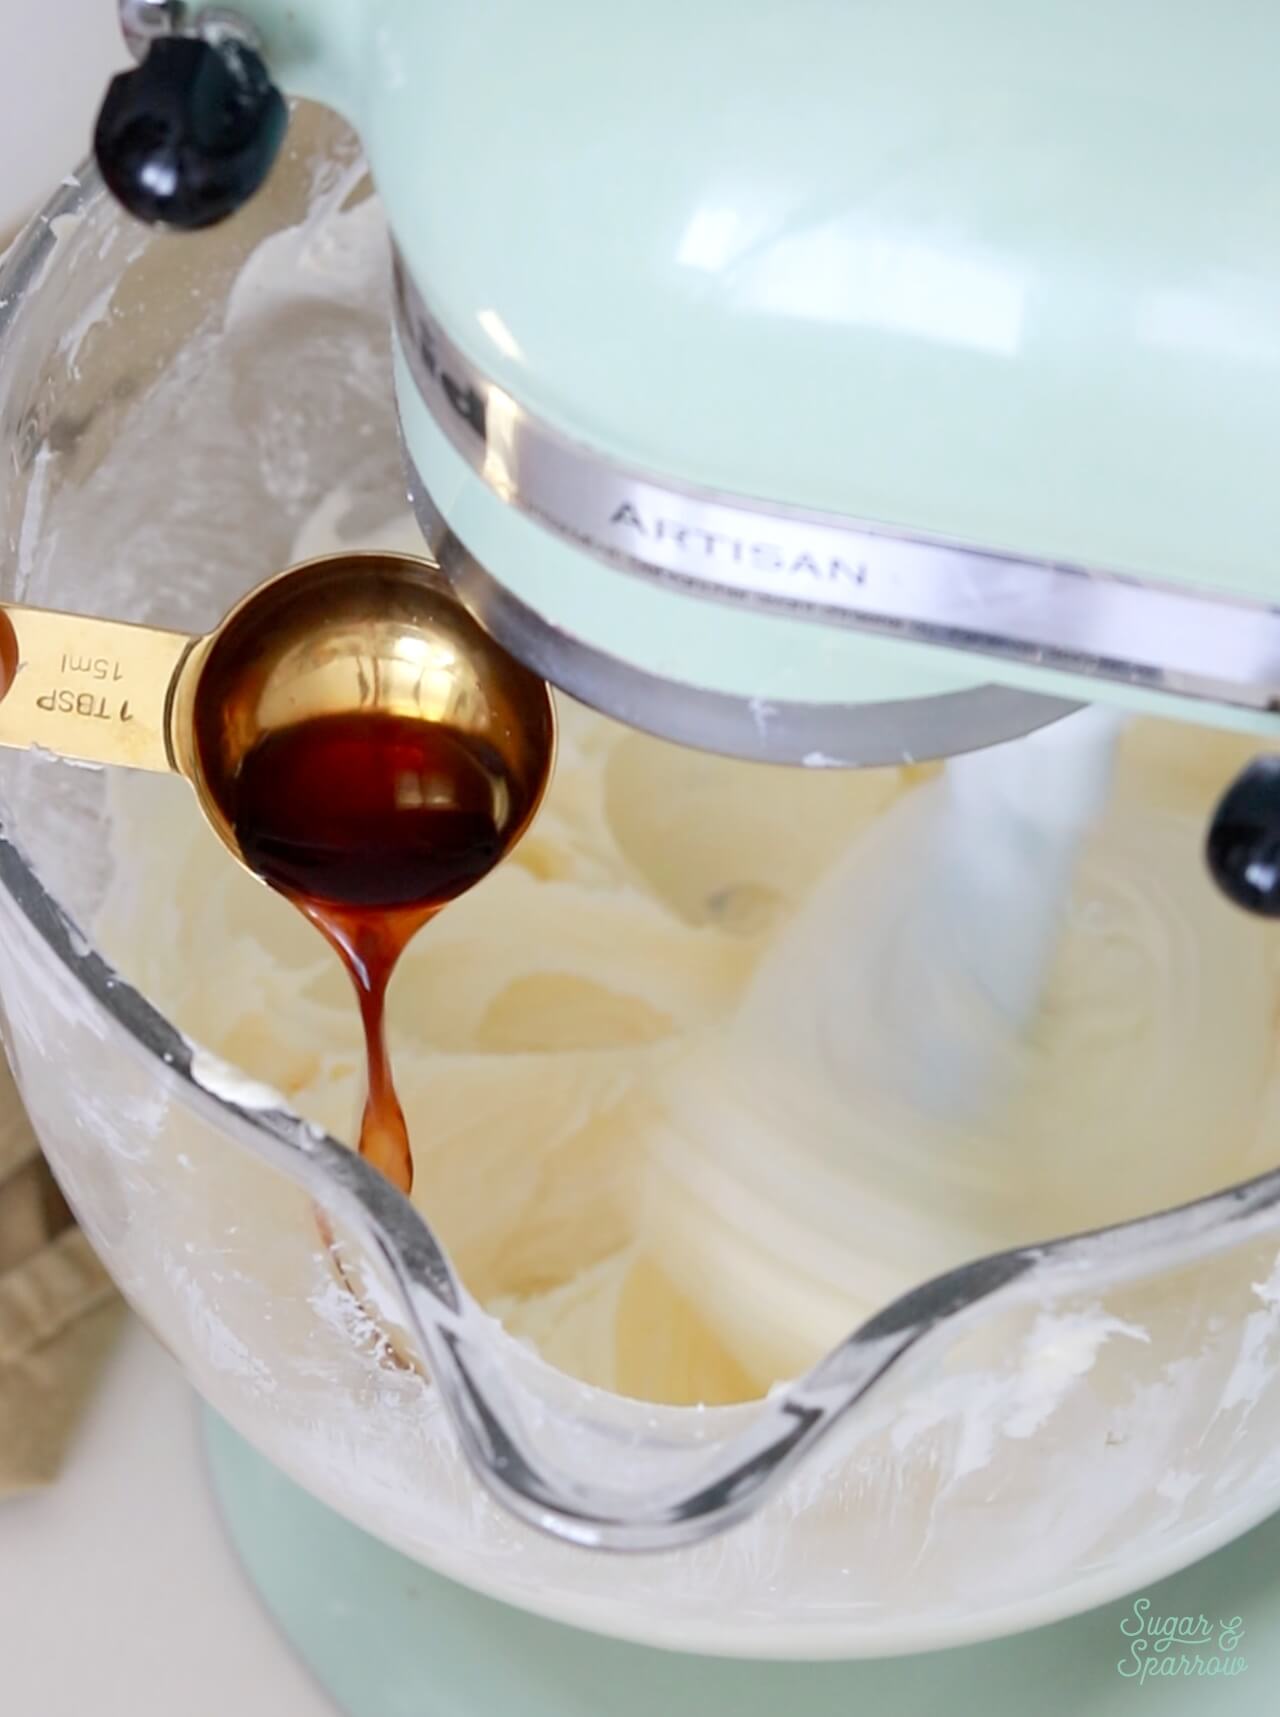
  • Pure Vanilla Extract. To give the buttercream base the perfect creamy vanilla flavor. 
  • Whole Milk. Helps lighten the texture of the frosting and dissolves the powdered sugar. I like using whole milk or heavy whipping cream because the high fat percentage provides a richness to the frosting. You can use any other kind of milk as a substitute, but just know that milks with a lower fat percentage might not end up as creamy and rich. For vegan milk options, my preferences are soy milk or coconut milk. 
  • Salt. A pinch of salt helps balance the sweetness beautifully.
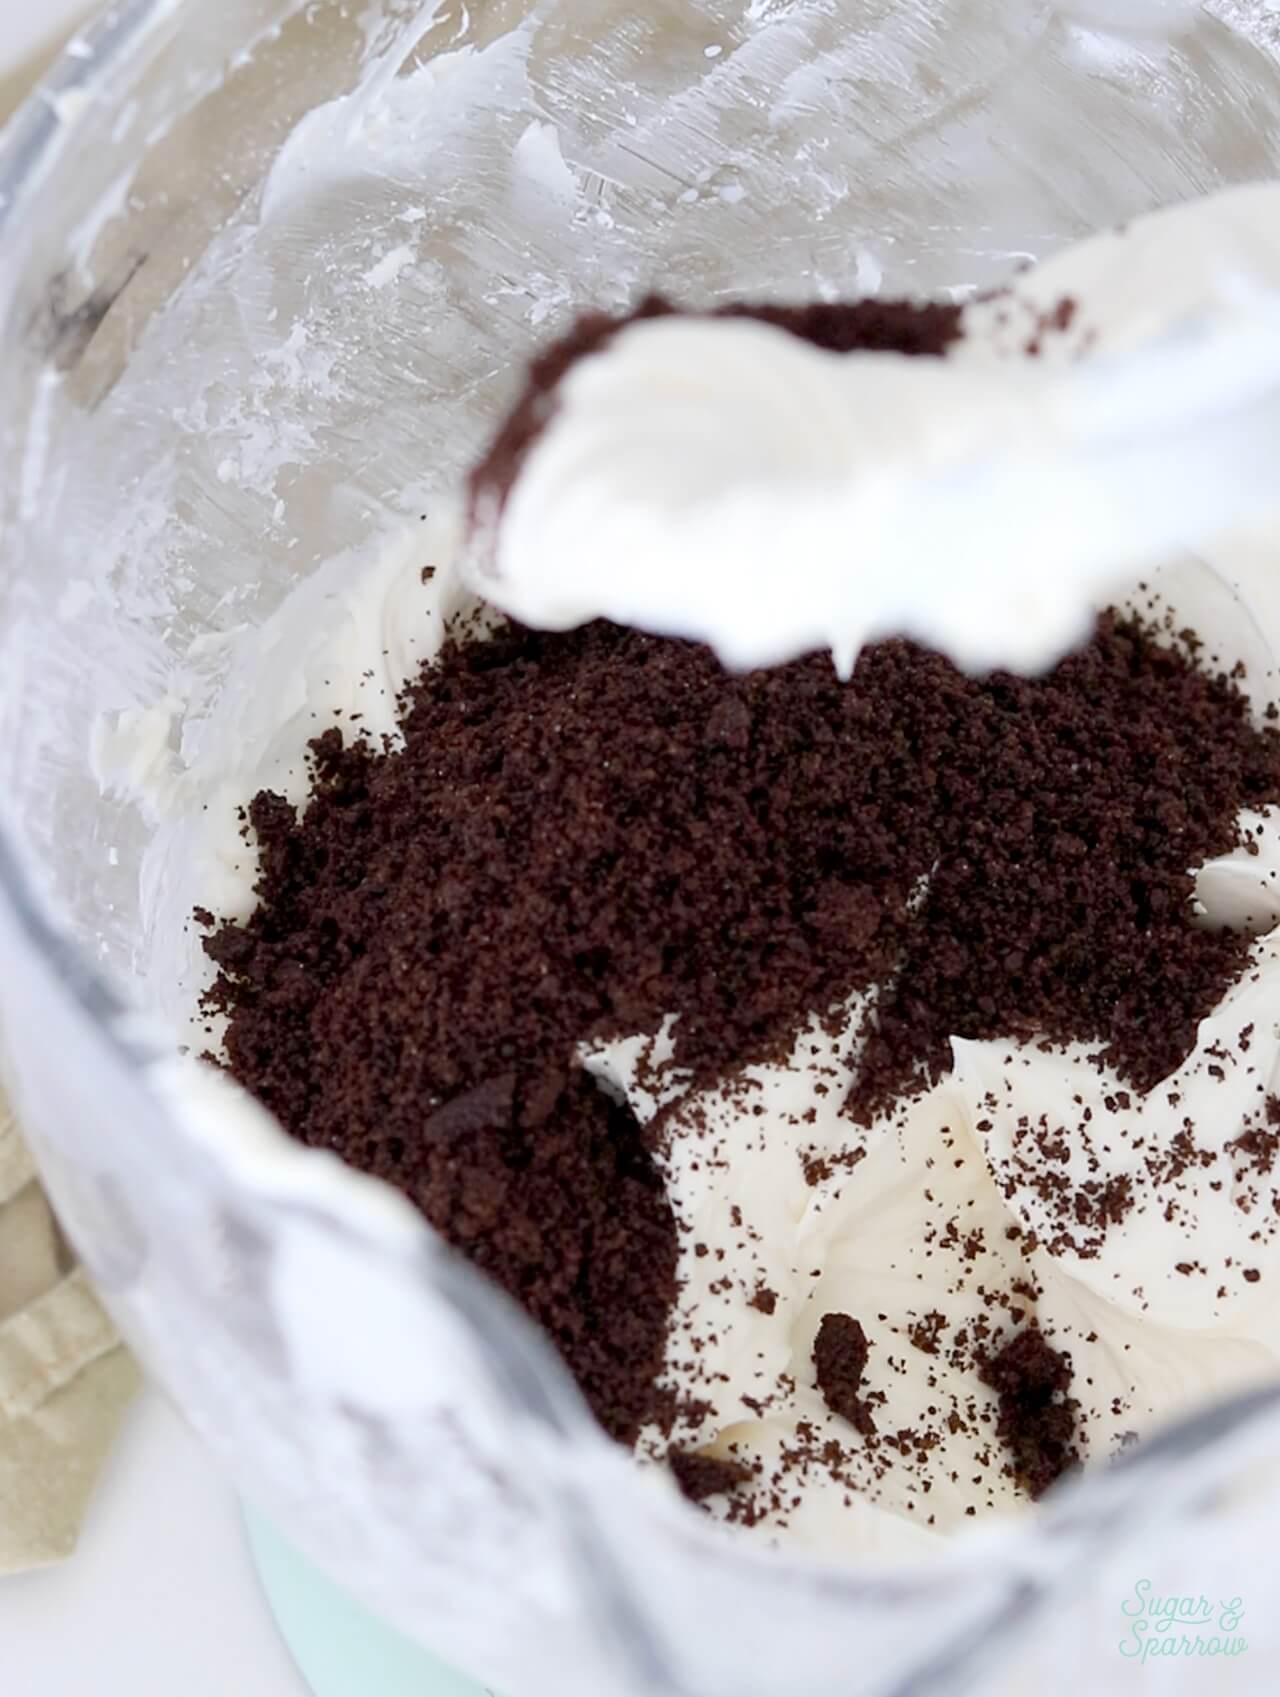
  • Oreo Cookies. Ground Oreos are mixed into the vanilla buttercream to create the perfect cookies & cream look and flavor. If you want to mix it up, you can substitute regular Oreos for any other Oreo flavor or try any other type of crunchy cookie. 
oreo frosting for cakes and cupcakes

How to Make Oreo Buttercream

Here’s how to make this frosting from start to finish:

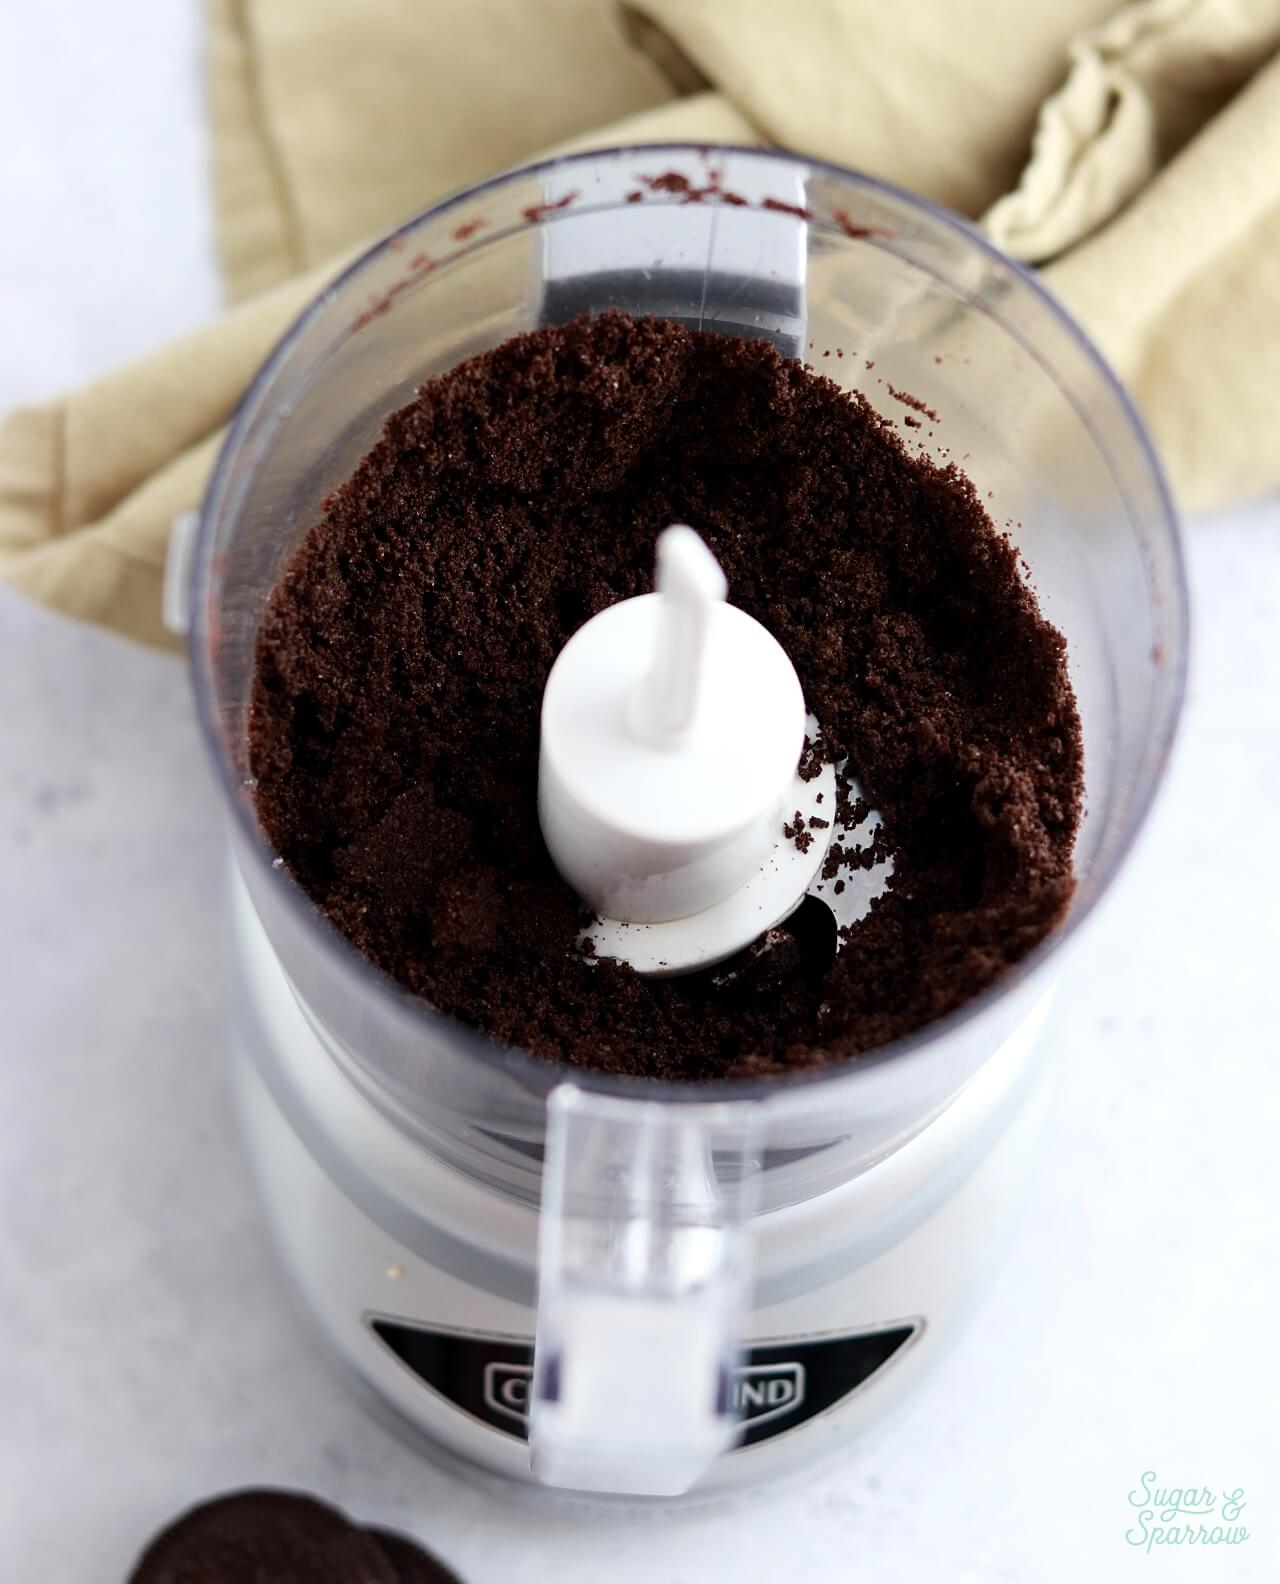
Step 1: Grind the Oreo cookies into fine crumbs. It’s easiest to do this with a food processor, but you could also place the cookies in a Ziploc bag and use a rolling pin to crush them up.

grinding oreos into crumbs using a food processor

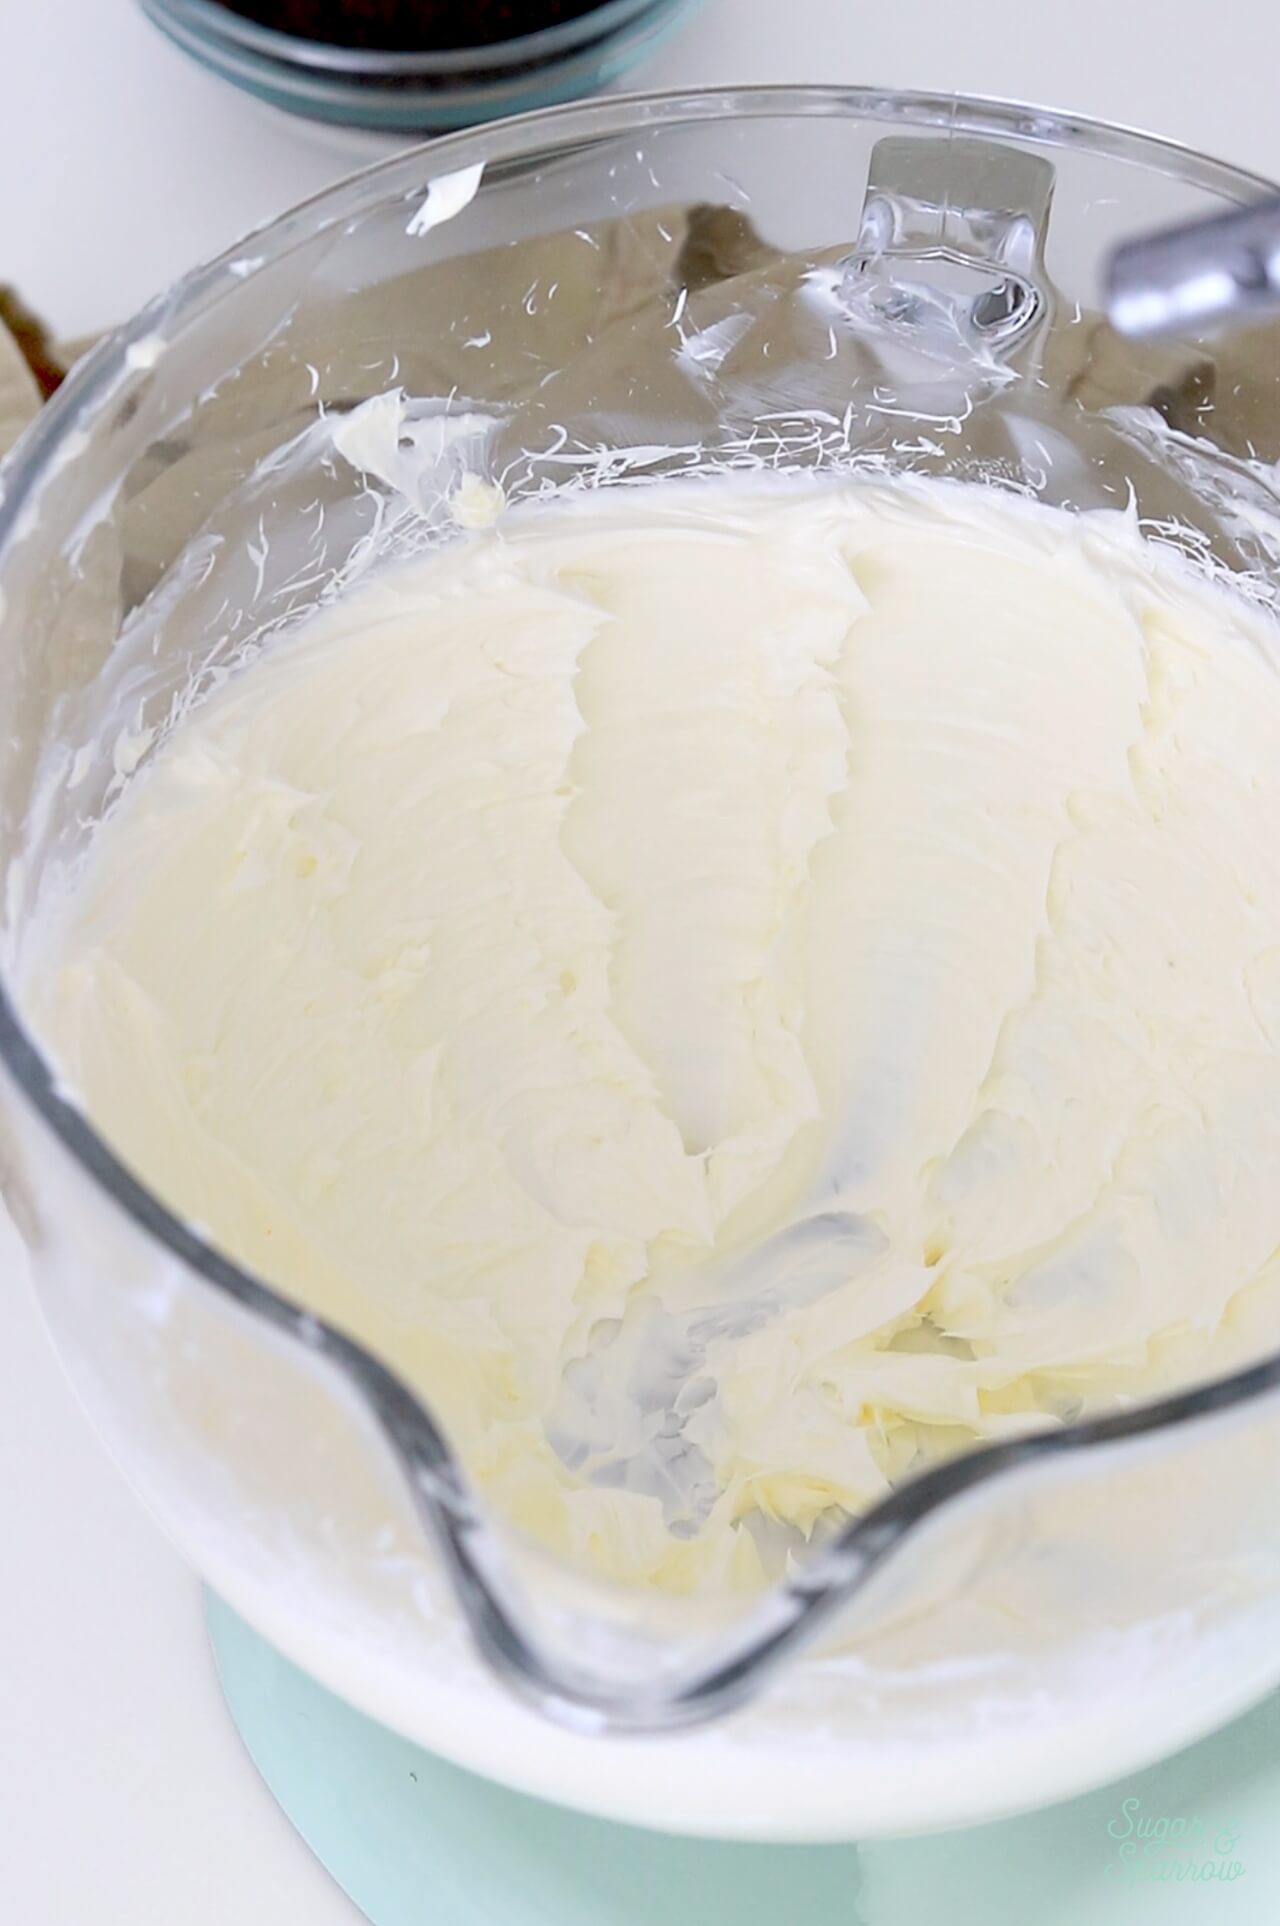
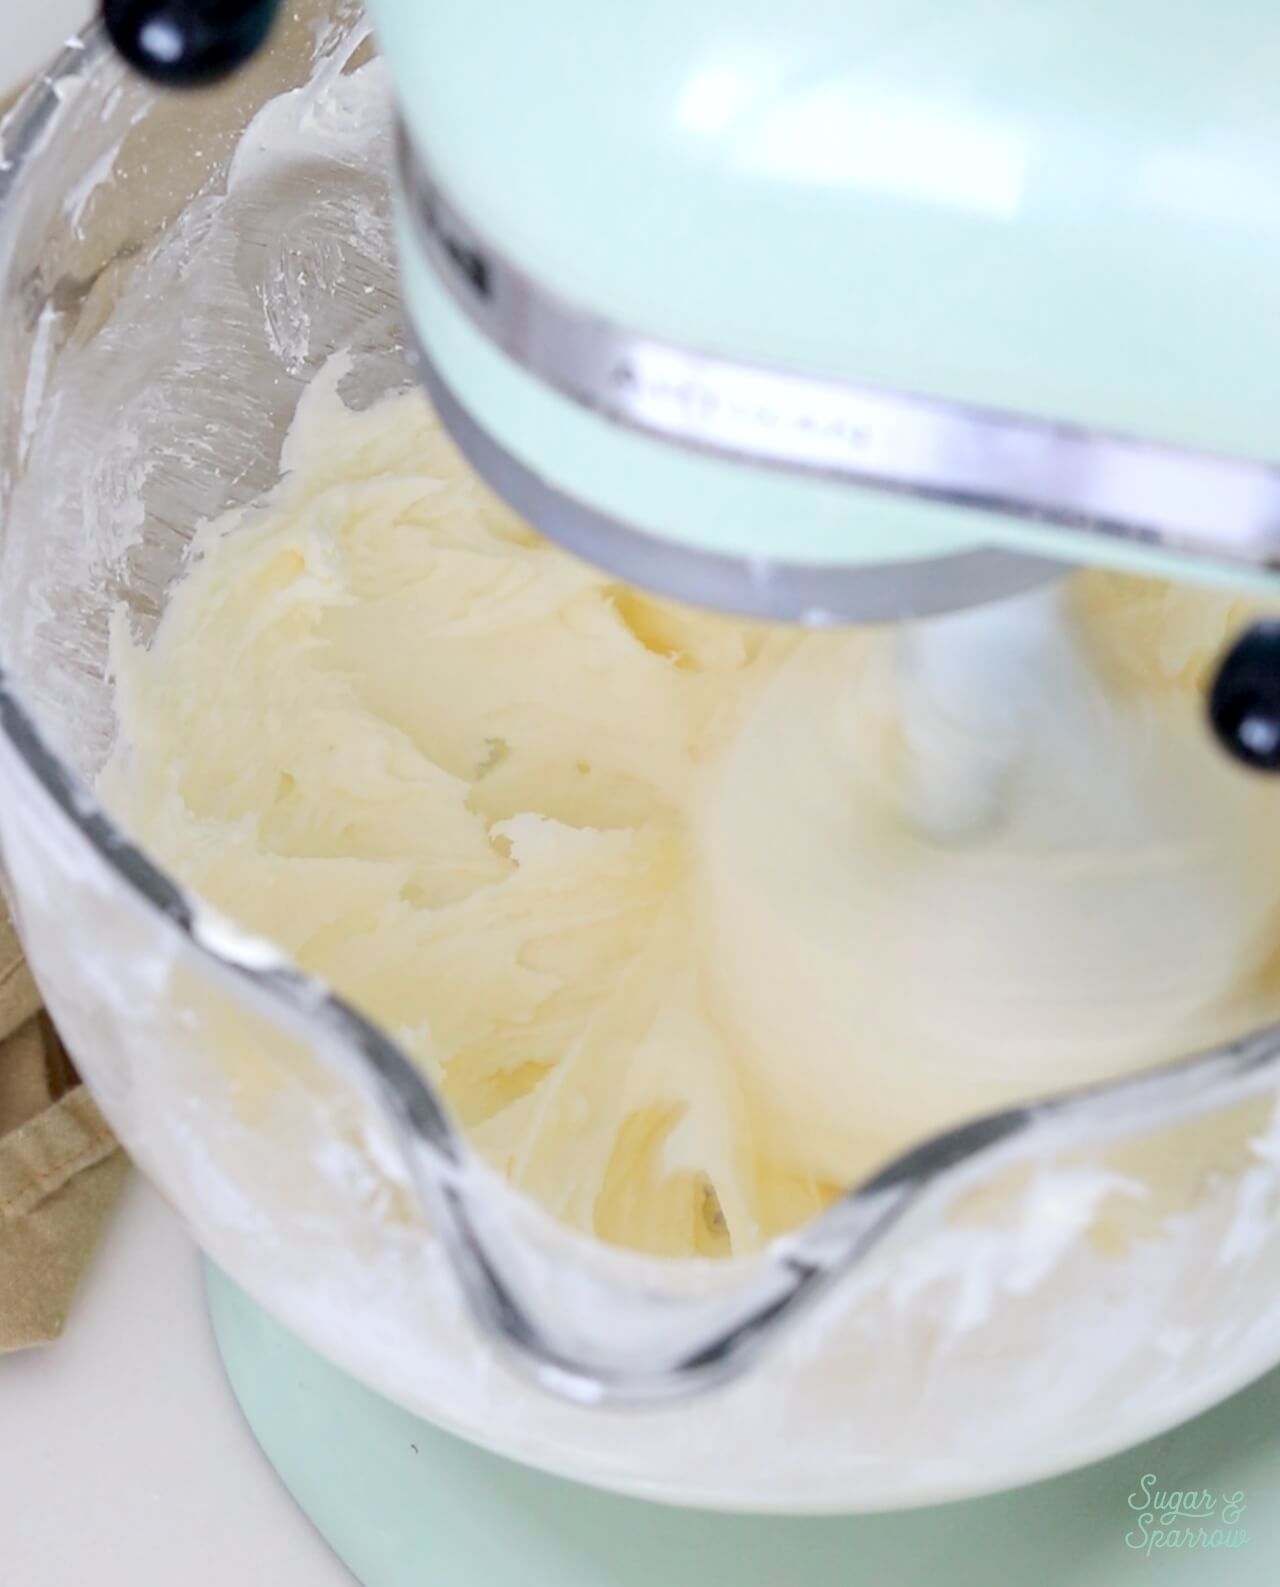
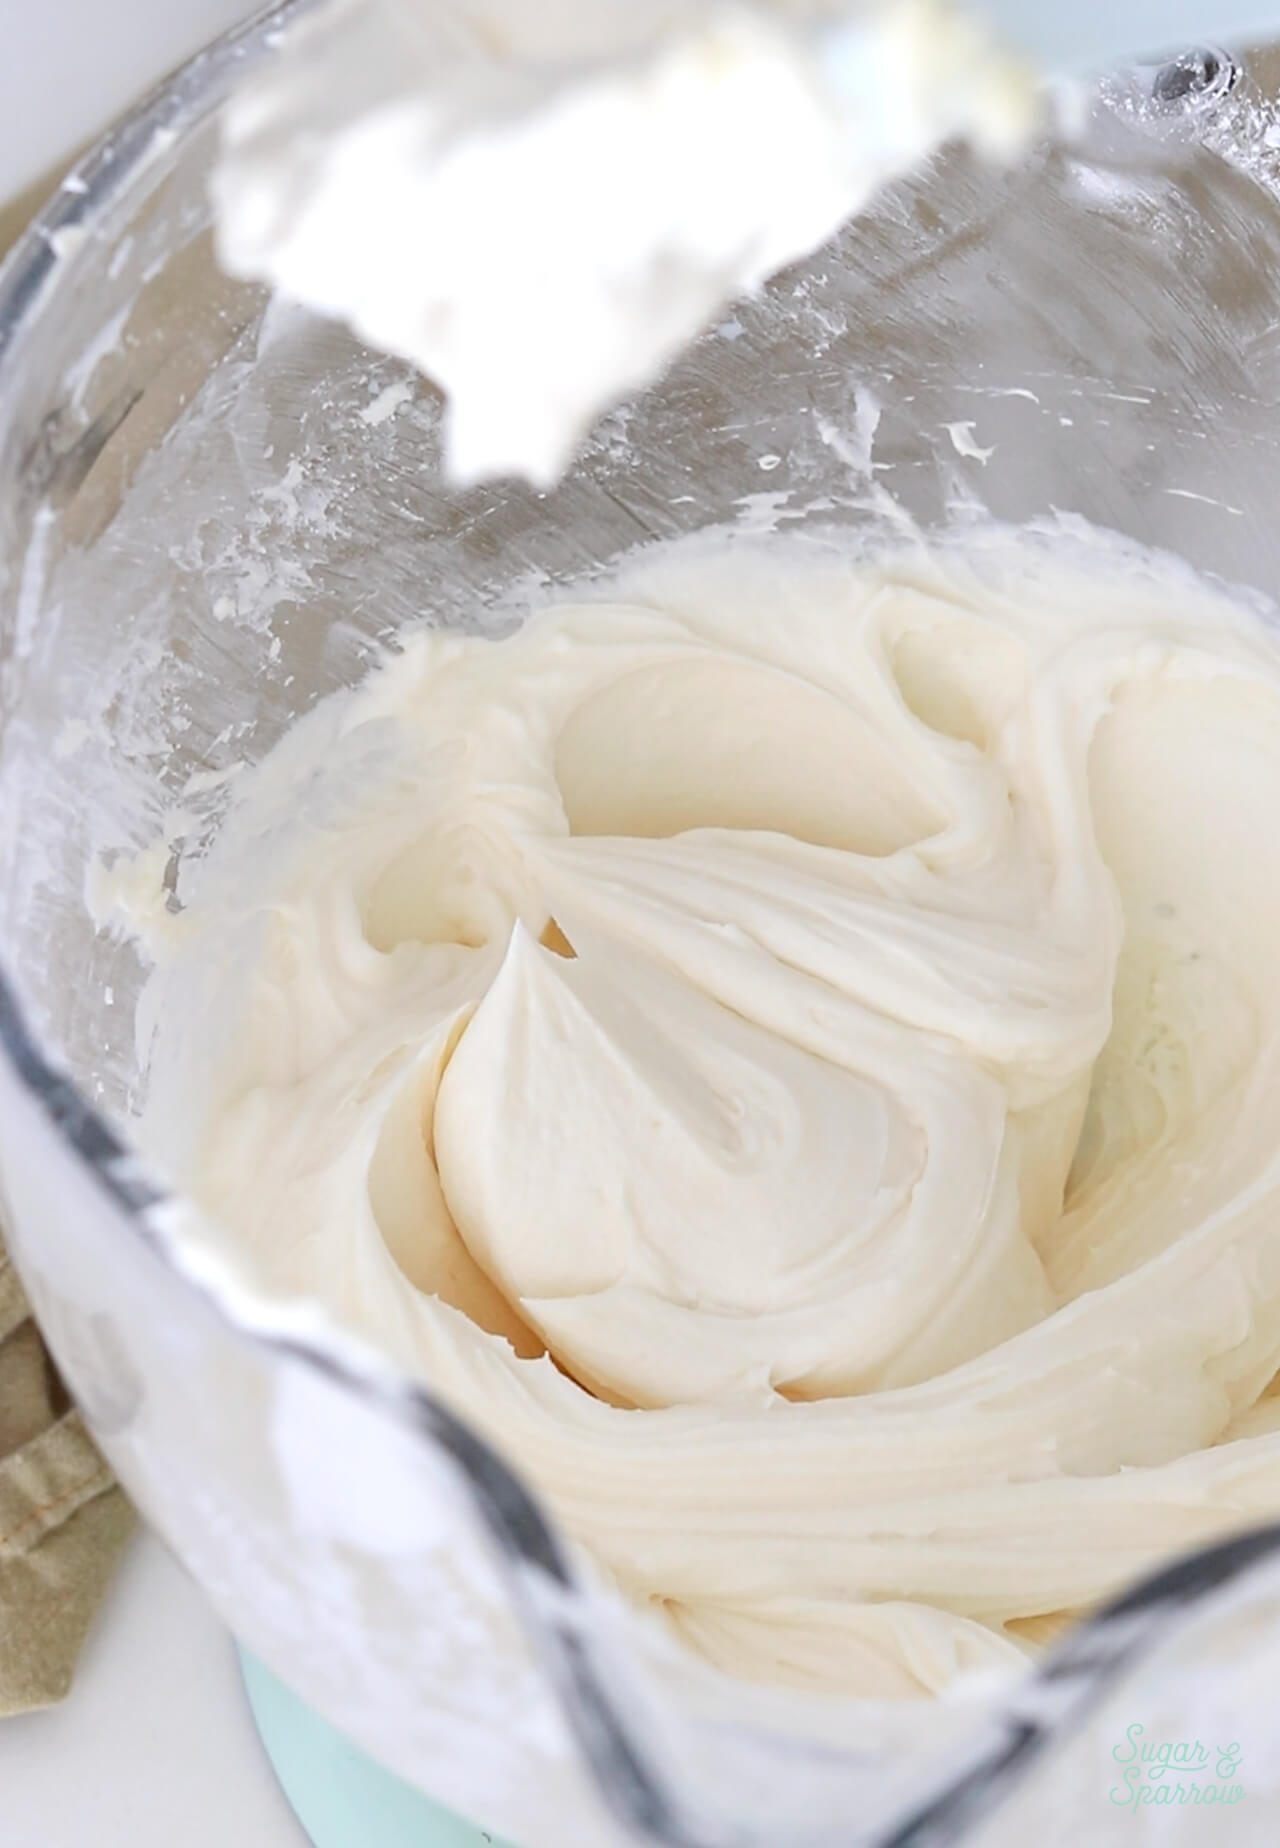
Step 2: Using a stand mixer with the paddle attachment, beat the butter until it’s creamy and pale. This takes about 5 minutes. 

holding a stick of butter
creaming butter in a stand mixer

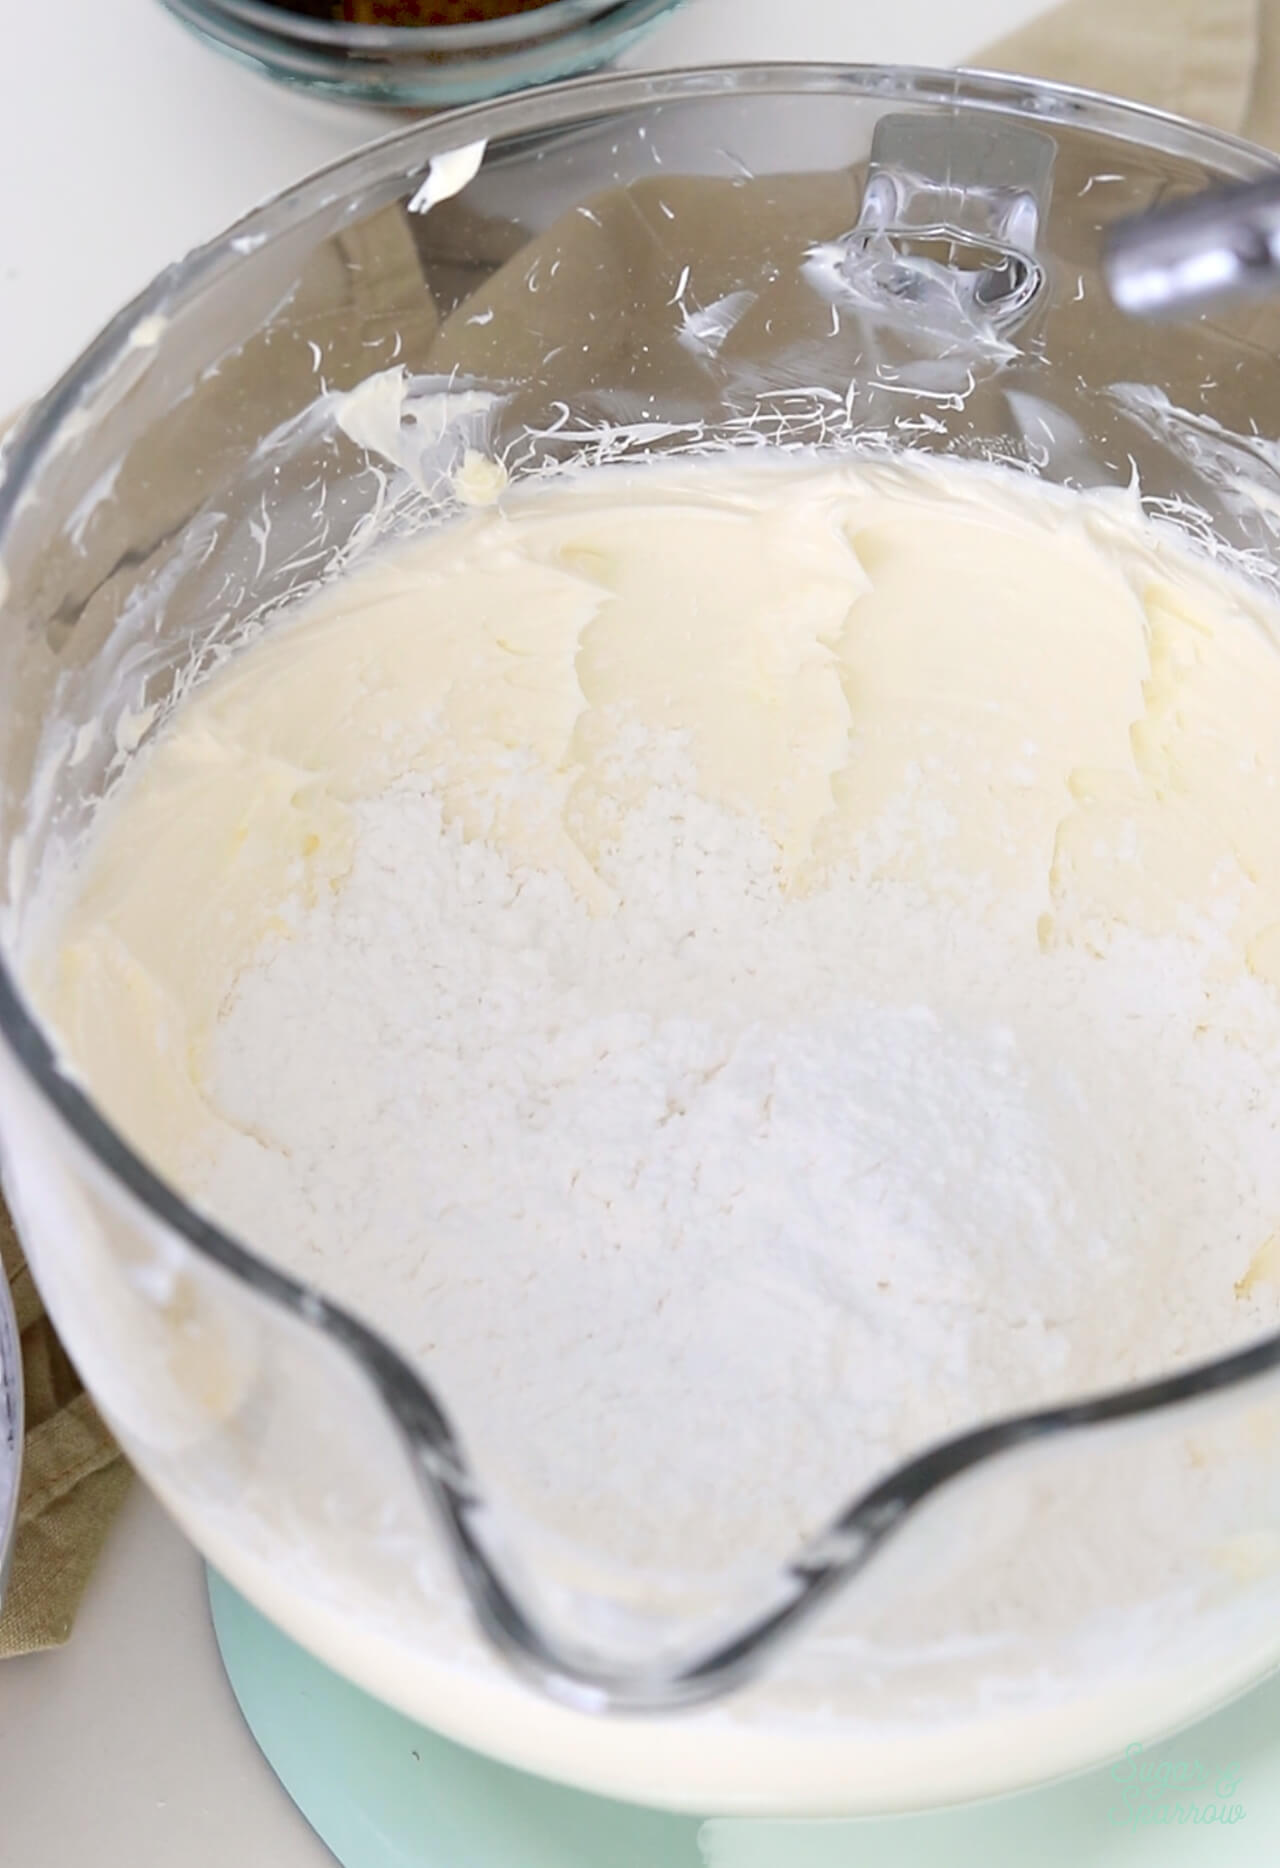
Step 3: Add the powdered sugar about 1 cup at a time and mix on low speed until each addition is incorporated.

add the powdered sugar to the creamed butter

Step 4: Mix in the vanilla, milk, and salt. 

add the vanilla to the buttercream
vanilla buttercream in a stand mixer

Step 5: Mix in the Oreo cookie crumbs. 

oreo cookie frosting on a stand mixer paddle
oreo cookie buttercream

Oreo Frosting FAQ

How Do I Make Vegan Oreo Buttercream? To make this recipe vegan, simply substitute vegan butter sticks in place of the unsalted butter, omit the salt (even when it’s unsalted, vegan butter still tastes a little salty), and substitute the whole milk with non-dairy milk of your choice. I like coconut milk or soy milk for frosting recipes like this one. 

Can I Use Other Oreo Flavors? Absolutely! Or try any other type of crunchy cookie (Biscoff would be delicious). 

Is it Easy to Pipe With? As long as you grind the cookies into a super fine crumb, you’ll be able to pipe simple decorations with this frosting. If the cookie crumbs aren’t small enough, they can clog up the piping tip (frustrating!) so be sure to grind them as small as you can without turning them into Oreo paste. 

oreo cupcakes recipe

What if I Don’t Have a Food Processor? As an alternative to a food processor, you can place the Oreo cookies in a Ziploc bag and grind them down with a rolling pin. It’s a little more time consuming but it works. 

Can I Make Oreo Buttercream Ahead? Yes, but I recommend not adding the cookie crumbs until the day you want to use the frosting, purely for aesthetics. If you store the cookies & cream buttercream with the Oreos already added, the cookie crumbs can change the color of the frosting to a slightly darker shade of brown as they break down. This doesn’t affect the flavor at all, but if you want the best look, make the frosting up through step 3 (store the cookie crumbs and buttercream in separate airtight containers), then mix in the cookie crumbs before you start decorating. 

Cake Flavors to Pair with Oreo Frosting

This Oreo frosting pairs amazingly with black velvet cake (which has the flavor profile of an Oreo cookie!) but here are some other cake flavors for inspiration. Be sure to make a double batch to fill and frost any of the cakes listed below: 

  • Black Velvet Cupcakes (the flavor combination pictured throughout this blog post!)
  • One-Bowl Chocolate Cake 
  • Chocolate Cupcakes
  • Vanilla Cake 
  • Vanilla Cupcakes
  • Funfetti Cake
  • Funfetti Cupcakes 
  • Chocolate Chip Cookie Dough Cake 
oreo buttercream with black velvet cupcakes
oreo cookies and cream cake

I hope you love this Oreo buttercream as much as I do! Let me know if you make it in the comments below and feel free to tag @sugarandsparrowco on Instagram to show me a photo. I love to see what you create with my recipes!

oreo buttercream recipe for cakes and cupcakes

Oreo Buttercream

5 from 1 vote
Delicious vanilla buttercream with crushed Oreo cookie crumbs folded in for the perfect cookies & cream flavor. The ideal frosting for cakes, cupcakes, macarons, and more!
Print Recipe Pin Recipe
Prep Time:20 minutes mins
Course: Dessert
Cuisine: American
Servings: 2.5 Cups

Ingredients

  • 9 Oreo cookies (96g)
  • 1 Cup (226g) unsalted butter, room temperature
  • 3 Cups (360g) powdered sugar
  • 2 tsp vanilla extract
  • 2 Tbsp whole milk, room temperature
  • pinch of salt, or to taste

Instructions

  • Place the Oreo cookies into a food processor and grind them into fine crumbs. It's important to get the crumbs as small as possible without over-grinding (which can turn them into an Oreo paste).
  • In the bowl of a stand mixer fitted with the paddle attachment (or with a large bowl and hand mixer), cream the butter on medium-high speed until it's creamy and pale in color, about 5 minutes. Scrape down the bowl and paddle as needed.
  • Add the powdered sugar a few cups at a time, mixing on low speed and scraping down bowl and paddle in between intervals. Keep the mixer on low speed and add the vanilla, milk, and salt. Mix until fully incorporated and uniform, 1-2 minutes, scraping down the bowl and paddle as needed.
  • Mix in the Oreo cookie crumbs on low speed until uniform and well-dispersed.

Notes

Oreo Cookies: You can use any flavor of Oreo cookies for this recipe, or substitute any kind of crunchy cookie (like Biscoff!) 
To Make Ahead: For best results, make the recipe up through step 3, then store the cookie crumbs and buttercream in separate airtight containers for up to 2 weeks (store the buttercream in the refrigerator). When you’re ready to use the buttercream, bring it to room temperature and re-mix with your stand mixer on low speed until smooth. Then, mix in the cookie crumbs.
Yield: This buttercream makes enough to:
  • Frost 12-15 cupcakes with a piping bag
  • Fill and crumb coat a three-layer 6-inch cake or two-layer 8-inch cake. To have enough for frosting and decorating as well, double the recipe. 

By: Whitney · In: Featured, Frosting, Recipes

you’ll also love

fruit pizza with berries recipePerfect Fruit Pizza with Berries
sugared cranberries and sugared rosemary recipeHow to Make Sugared Cranberries
raspberry filling recipe for cakesThick Raspberry Cake Filling

Join the List

Stay up to date & receive the latest posts in your inbox.

Reader Interactions

Comments

  1. Sahana says

    January 15, 2026 at 11:39 pm

    5 stars
    Hi, as you mentioned cookie crumbs does this include the cream as well or just the cookie?

    Reply
    • Whitney says

      January 16, 2026 at 10:35 am

      Hi Sahana! I use whole Oreos, cream and all. Enjoy!

      Reply
  2. Dino says

    August 25, 2025 at 4:22 pm

    For how long can the frosting stay unrefigerated/room temp?

    Reply
    • Whitney says

      August 26, 2025 at 12:46 pm

      Hi Dino! If it’s being stored in an airtight container (like before you use it to decorate), it can stay at room temp for one day and then should be refrigerated. If it’s already on a cake/cupcakes, it can be at room temp for up to 3 days.

      Reply

Leave a Reply Cancel reply

Your email address will not be published. Required fields are marked *

Recipe Rating


Next Post >

No-Churn Berry Crisp Ice Cream

Primary Sidebar

Welcome to Sugar & Sparrow

Welcome to Sugar & Sparrow

Helping you whip up pretty desserts with confidence and creativity. And hopefully sharing a few laughs with you along the way!

Learn More

Connect

let’s bake!

Get my very best recipes, baking tips, and decorating tutorials sent to your inbox

Featured Posts

easter egg cake tutorial

Colorful (Edible!) Easter Egg Cake Toppers Tutorial

pumpkin cream cheese cupcakes

Pumpkin Cream Cheese Halloween Cupcakes

how to transport cakes safely

How to Package and Transport Cakes (with Minimal Stress!)

Search

Archives

Follow Along

@sugarandsparrowco

RASPBERRY CAKE FILLING (recipe below) ♥️ this RASPBERRY CAKE FILLING (recipe below) ♥️ this perfectly sweet/tart raspberry cake filling is beautifully thick, seedless, and so rewarding to make from scratch! It takes just a handful of ingredients and can be made with fresh OR frozen raspberries 🙌🏼 

Get the full recipe + cake pairing suggestions at the link in my bio or at https://sugarandsparrow.com/seedless-raspberry-cake-filling/

INGREDIENTS:
2 1/2 Cups (10oz, 315g) fresh or frozen raspberries
1/2 Cup (100g) granulated sugar
1 Tbsp lemon juice
1 tsp lemon zest
1 1/2 Tbsp (12g) cornstarch
1 1/2 Tbsp (22ml) water

INSTRUCTIONS: 
1. In a saucepan set over medium heat, add the raspberries, granulated sugar, lemon juice, and lemon zest. Cook until the mixture begins to boil, stirring occasionally. 
2. Once boiling, lower the heat and simmer for 10-15 minutes while you continue stirring occasionally. Then, remove from heat and use a fine mesh sieve to strain out the seeds over a medium bowl. After straining, you’ll be left with about 1/4 Cup of seedy pulp.
3. In a small separate bowl, combine the cornstarch and water until uniform. Return the strained raspberry filling to the saucepan (wipe it free of any remaining seeds if needed) and add the cornstarch/water mixture. Cook over medium heat until boiling, stirring constantly, then reduce to a simmer and cook for 1-3 minutes, until the filling has thickened slightly, is no longer cloudy, and coats the back of the spatula.
4. Pour into an airtight container and refrigerate for at least 4 hours and up to 1 week. It will be jello-like once set but after stirring it will become a thick, jammy consistency that’s perfect to use as a cake or cupcake filling!

#raspberrycake #cakefilling #cakedecorating #raspberries #baking
STRAWBERRY LEMON CAKE 🍓🍋 this cake is so lig STRAWBERRY LEMON CAKE 🍓🍋 this cake is so light and refreshing and bursting with all-natural flavors! It’s layers of my favorite extra fluffy lemon cake + the most delicious freeze-dried strawberry buttercream that ends up the prettiest natural pink color. I’ll never get over those little flecks of strawberry in the buttercream or the tiny chamomile flowers adding so much cheer! 

Grab the recipe at the link in my bio or at https://sugarandsparrow.com/strawberry-lemon-cake/

#strawberrylemon #lemoncake #strawberrycake #cakedecorating #strawberrybuttercream
CHOCOLATE SHEET CAKE (recipe below) 🍫 🥳 this CHOCOLATE SHEET CAKE (recipe below) 🍫 🥳 this is everything I want in a chocolate cake: rich and decadent, stick-to-your-fork fudgy, ultra-chocolatey, shareable, and EASY! Like box mix easy but from-scratch and a MUST try if you’re in need of a good chocolate cake recipe to feed a crowd👩🏽‍🍳⁣ 
 
Get the full recipe (with chocolate frosting) at the link in my bio or at https://sugarandsparrow.com/chocolate-sheet-cake/ ✨⁣ 
⁣ 
CHOCOLATE SHEET CAKE
2 Cups (265g) all purpose flour⁣ 
1 2/3 Cups (340g) white granulated sugar⁣ 
2/3 Cup (60g) unsweetened natural cocoa powder⁣ 
2 tsp baking soda⁣ 
1 tsp baking powder⁣ 
1/2 tsp kosher salt⁣ 
1/2 Cup (120ml) vegetable oil⁣ 
2 eggs, room temperature⁣ 
1 1/2 tsp pure vanilla extract⁣ 
1 Cup (240ml) full-fat buttermilk⁣ 
1 Cup (240ml) hot coffee OR hot water⁣ 
⁣ 
INSTRUCTIONS⁣ 
1. Preheat the oven to 325ºF. Grease and line a 9x13 inch cake pan. ⁣ 
2. Place all of the dry ingredients into the bowl of a stand mixer (or use a large bowl with a hand mixer) and mix on low to combine. Add the vegetable oil, eggs, vanilla, and buttermilk and mix on low until combined. With the mixer still on low, add the hot coffee or hot water in a slow stream, then turn the mixer to medium and beat until smooth, about 2 minutes. The batter will be very thin. ⁣ 
3. Pour the batter into the prepared pan and bake for 35-40 minutes, until a toothpick inserted comes out clean.⁣ Full recipe (with frosting) link in my bio.
⁣ 
#chocolatecake #chocolate #sheetcake #chocolatelover #birthdaycake
VANILLA RASPBERRY LAYER CAKE ♥️ between the na VANILLA RASPBERRY LAYER CAKE ♥️ between the naturally pink raspberry buttercream, jammy homemade raspberry filling, and soft vanilla cake layers, this is the perfect cake for Spring!! It’s has amazing, authentic raspberry flavor in every bite from fresh (or frozen) raspberries in the filling + freeze-dried raspberries in the frosting 😋

Get the full recipe link in my bio or find it at https://sugarandsparrow.com/vanilla-raspberry-layer-cake/ 

#raspberrycake #raspberries #vanillacake #cakedecorating #pinkcake
SMALL BATCH VANILLA CAKE 🎂🥳 this mini vanill SMALL BATCH VANILLA CAKE 🎂🥳 this mini vanilla cake recipe makes the PERFECT amount for 2-4 people and can be baked as a tiny 4-inch layer cake or a single layer 6-inch cake. It goes with any frosting flavor but vanilla buttercream keeps it classic for date night, a small gathering, a smash cake, or satisfying a cake craving. 
⁣
✨Full recipe (with frosting) linked in my bio + at https://sugarandsparrow.com/small-batch-vanilla-cake/ 
⁣⁣⁣⁣
SMALL BATCH VANILLA CAKE⁣⁣⁣⁣
⁣⁣⁣⁣
INGREDIENTS⁣⁣⁣⁣
3/4 Cups (79g) sifted cake flour⁣⁣⁣
1 tsp baking powder⁣⁣⁣
1/4 tsp salt⁣⁣⁣
1/4 Cup (57g) unsalted butter, room temperature⁣⁣⁣
1/2 Cup (100g) granulated sugar⁣⁣⁣
1 large egg, room temperature⁣⁣⁣
2 Tbsp (30g) sour cream, room temperature⁣⁣⁣
1 tsp pure vanilla extract⁣⁣⁣
1/3 Cup (80ml) whole milk, room temperature⁣⁣⁣
⁣⁣⁣⁣
INSTRUCTIONS ⁣⁣⁣⁣
1. Preheat the oven to 350ºF. Grease and line three 4-inch or one 6-inch cake pan.⁣⁣⁣
2. In the bowl of your stand mixer (a handheld mixer works fine too!), cream together the butter and sugar on medium-high until light and fluffy, 3 min. Turn the mixer to low and add the egg, mixing until just combined. Add the vanilla and sour cream, turn the mixer to high, and beat for 1 min. ⁣⁣⁣
3. Turn the mixer to low speed and add the dry ingredients all at once. Mix until just combined, then slowly pour in the milk. Continue to mix on low speed until just combined, about 30 seconds. ⁣⁣⁣
4. Pour the batter evenly between the prepared cake 4-inch pans (or all into one 6-inch cake pan). If using 4-inch cake pans, bake for 18-22 minutes. If using a 6-inch cake pan bake for 24-28 minutes. The cake is done when it springs back to the touch and a toothpick inserted comes out with a few moist crumbs. ⁣⁣⁣
⁣⁣⁣⁣
#vanillacake #cakes #vanilla #minicake #cakedecorating

Footer

On the Blog

  • Cake Basics
  • Recipes
  • Tutorials

Info

  • About
  • Privacy Policy & Disclosure

stay in the know

Copyright © 2026 · Theme by Sugar & Sparrow