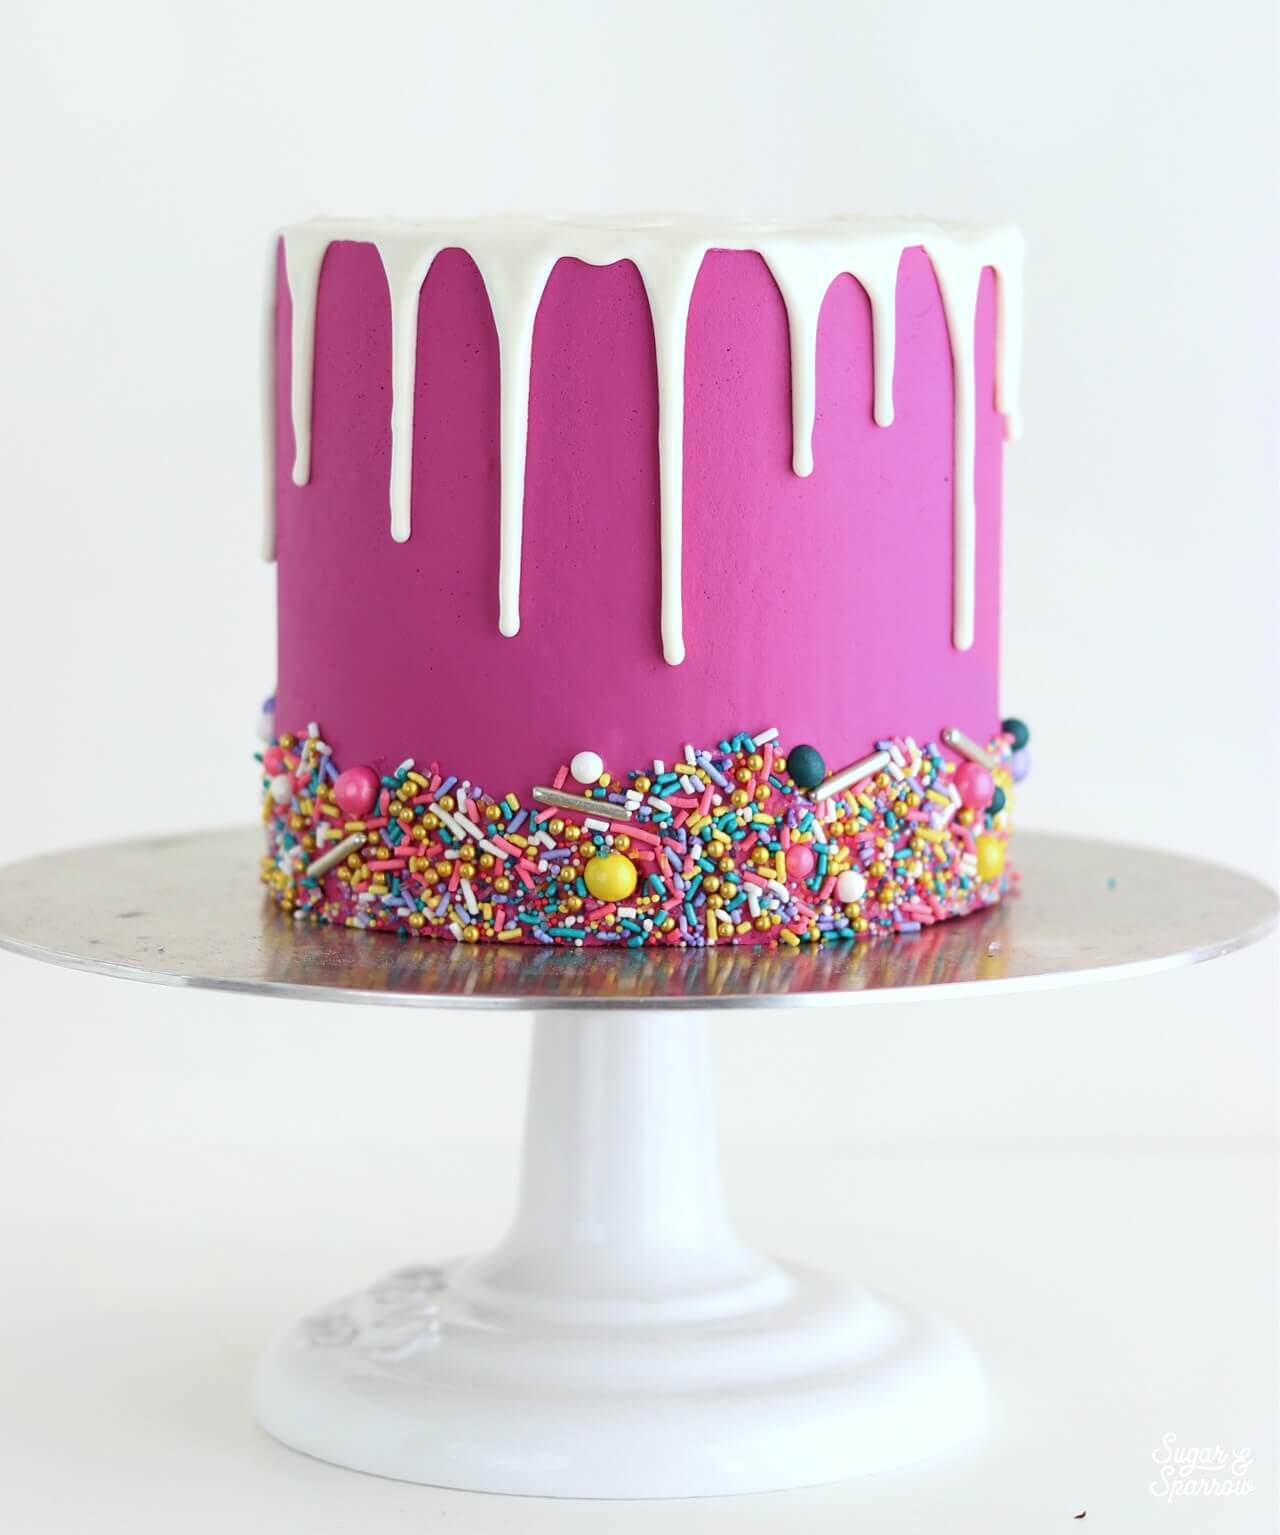
Ever since I shared this recipe and tutorial for semi-sweet chocolate ganache drip cakes, I’ve gotten so many questions about making white chocolate ganache drip cakes. I’m so excited to share these tips with you because I know how finicky white chocolate ganache can be if you don’t get the ratio and timing just right. In fact, the first time I made it (using a super popular recipe that won’t be named) the ganache was so thin and runny that the drips just ran down the side of the cake and pooled at the bottom, even after cooling it to below room temperature! I have since experimented with white chocolate ganache to find the perfect ratio of chocolate to heavy whipping cream, and have found some handy tips for making it extra white and beautiful.
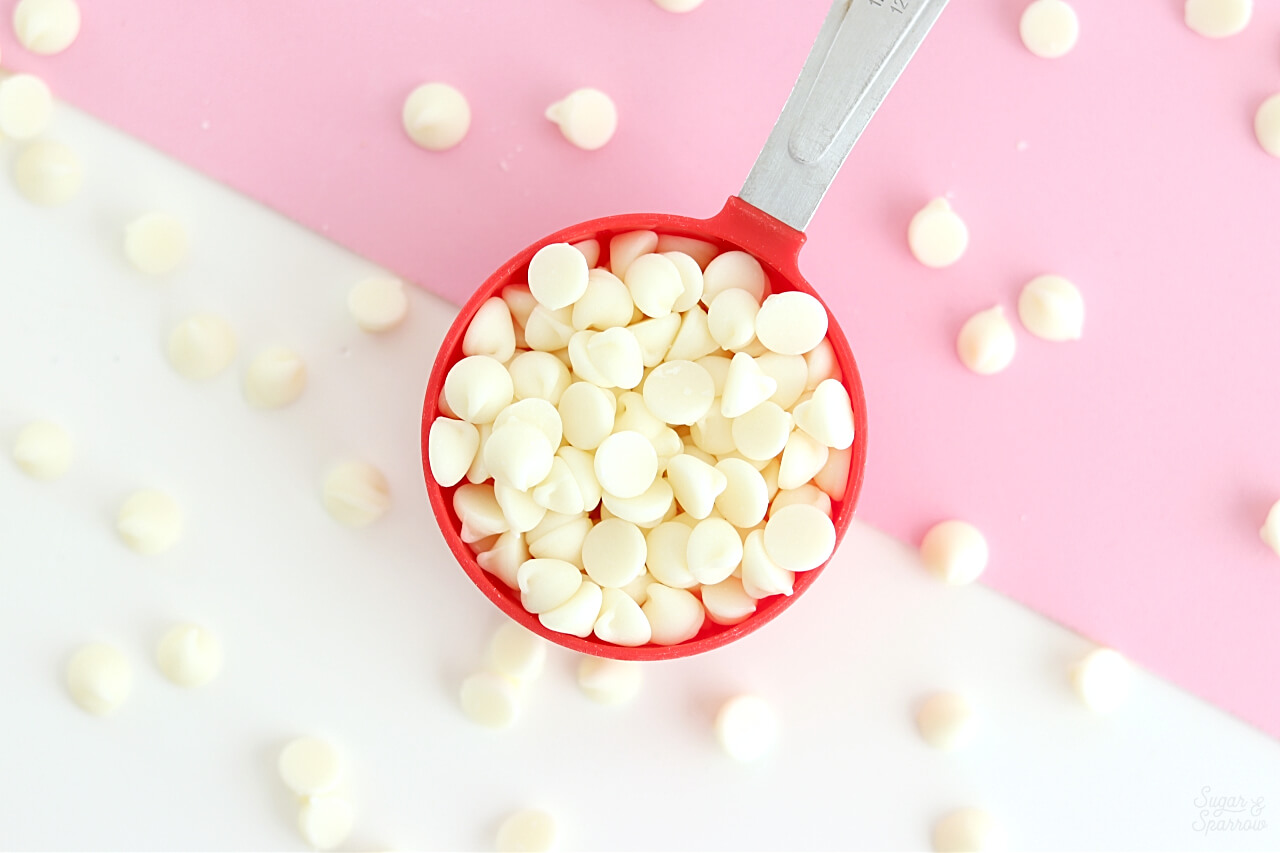
The first thing you need to know about white chocolate is that it’s not a true chocolate, meaning there’s a lack of chocolate solids and therefore doesn’t behave the same as semi-sweet, milk, or dark chocolate. Instead, it’s made from a mixture of sugar, cocoa butter, milk products, vanilla, and some sort of fatty substance called lecithin. Although I’ve never tried making white chocolate ganache with anything fancier than Hershey’s white chocolate chips, you can feel free to go as branded or non-branded as you want. Generic white chocolate chips or a white chocolate bar chopped into small pieces will work just fine.
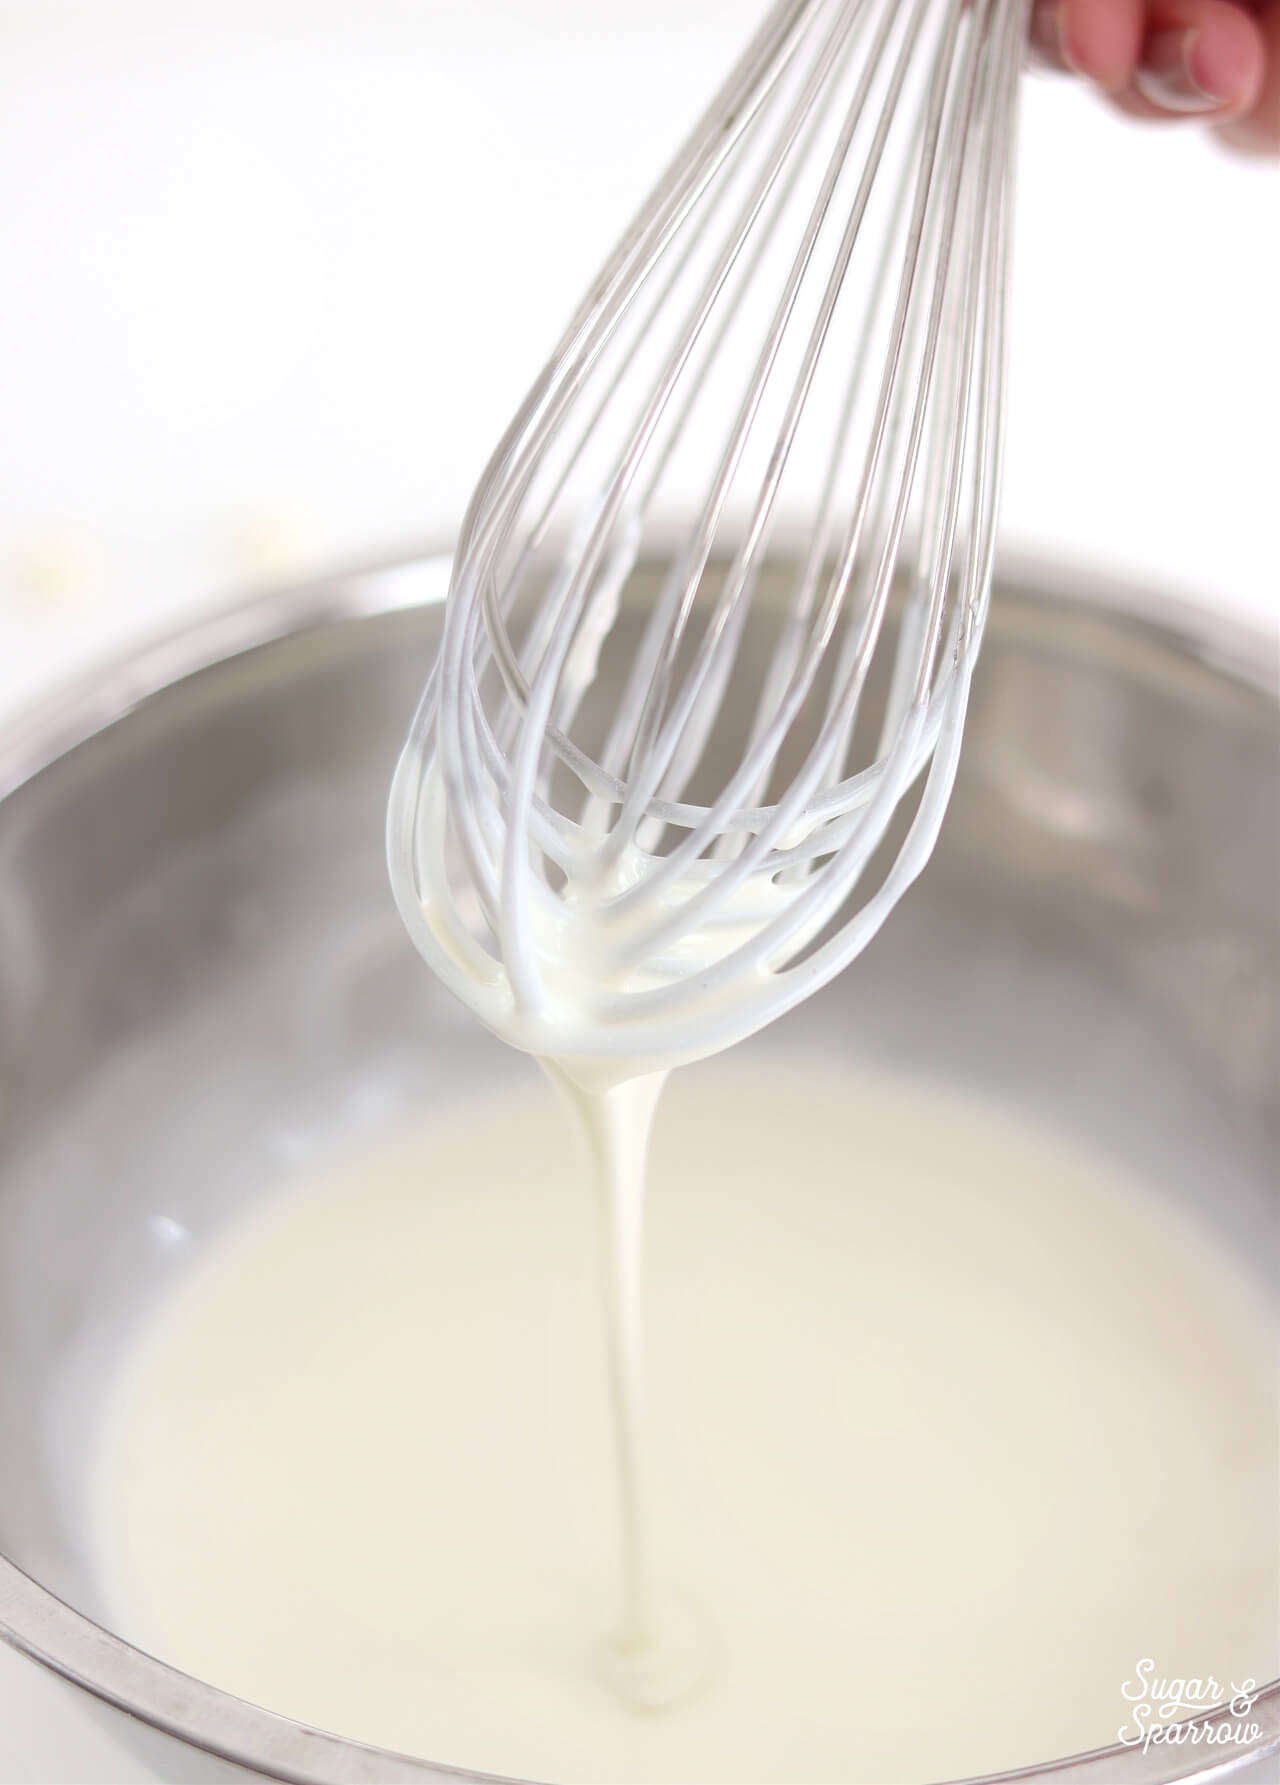
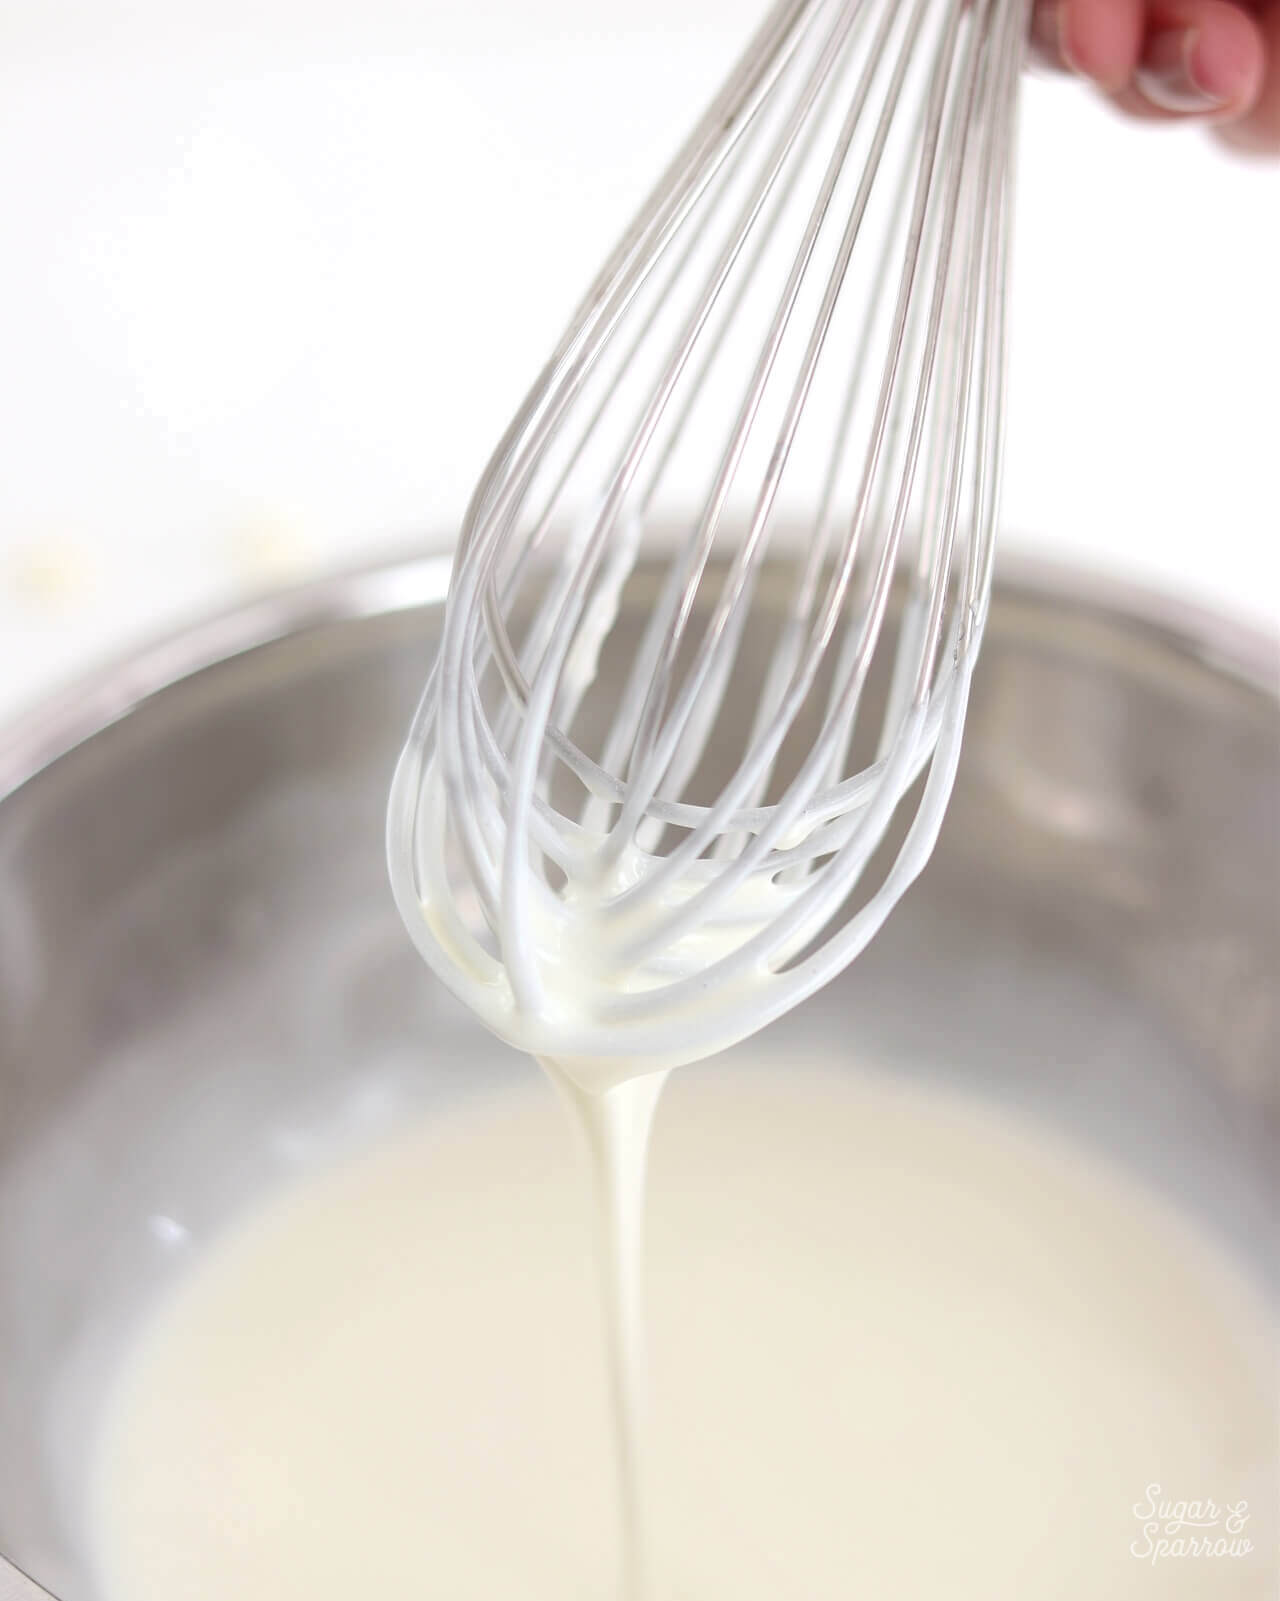
With the absence of chocolate solids, the ratio of heavy whipping cream to white chocolate chips is going to be different than other ganache recipes. I’ve found a 3:1 ratio to be absolutely perfect (exact recipe below), meaning three parts chocolate to one part heavy whipping cream. Just bring the cream to an almost-boil, pour it over the white chocolate chips, whisk it together until it’s uniform, and you’re good.
Here’s a detailed video of the recipe, and you can continue reading below for all of my tips on working with white chocolate ganache:
If you have yet to check out my YouTube channel, head there to see more cake recipe videos, decorating tutorials, and my entire Cake Basics series in video format. Hit the subscribe button while you’re there so you never miss a new video!
White Chocolate Ganache For Drip Cakes
Ingredients
- 1 Cup (190g) white chocolate chips or bar, chopped into bits
- 1/3 Cup (80ml) heavy whipping cream
- 1/2 tsp food color gel or whitening gel (optional)
Instructions
- Chop the white chocolate chips or bar as finely as you can and place it into a heat resistant bowl (glass or metal).
- In a saucepan over medium-high heat, warm heavy whipping cream until it just starts to simmer, whisking constantly. I always look for small bubbles forming around the edge and a soft boil starting in the middle. When it reaches this stage, pour the cream over the white chocolate.
- Whisk together until the ganache is uniform in consistency and there are no bits of chocolate left on your whisk. It can help to hold the bowl over the residual heat from the burner (once it's turned off) if you're having a hard time whisking everything together.
- Whiten or color the ganache (optional), then cool ganache at room temperature for anywhere from 5-20 minutes (depending on your kitchen environment), or until the ganache itself is slightly above room temperature. See the instructions for dripping a cake with white chocolate ganache + troubleshooting tips in the rest of this blog post below.
Notes
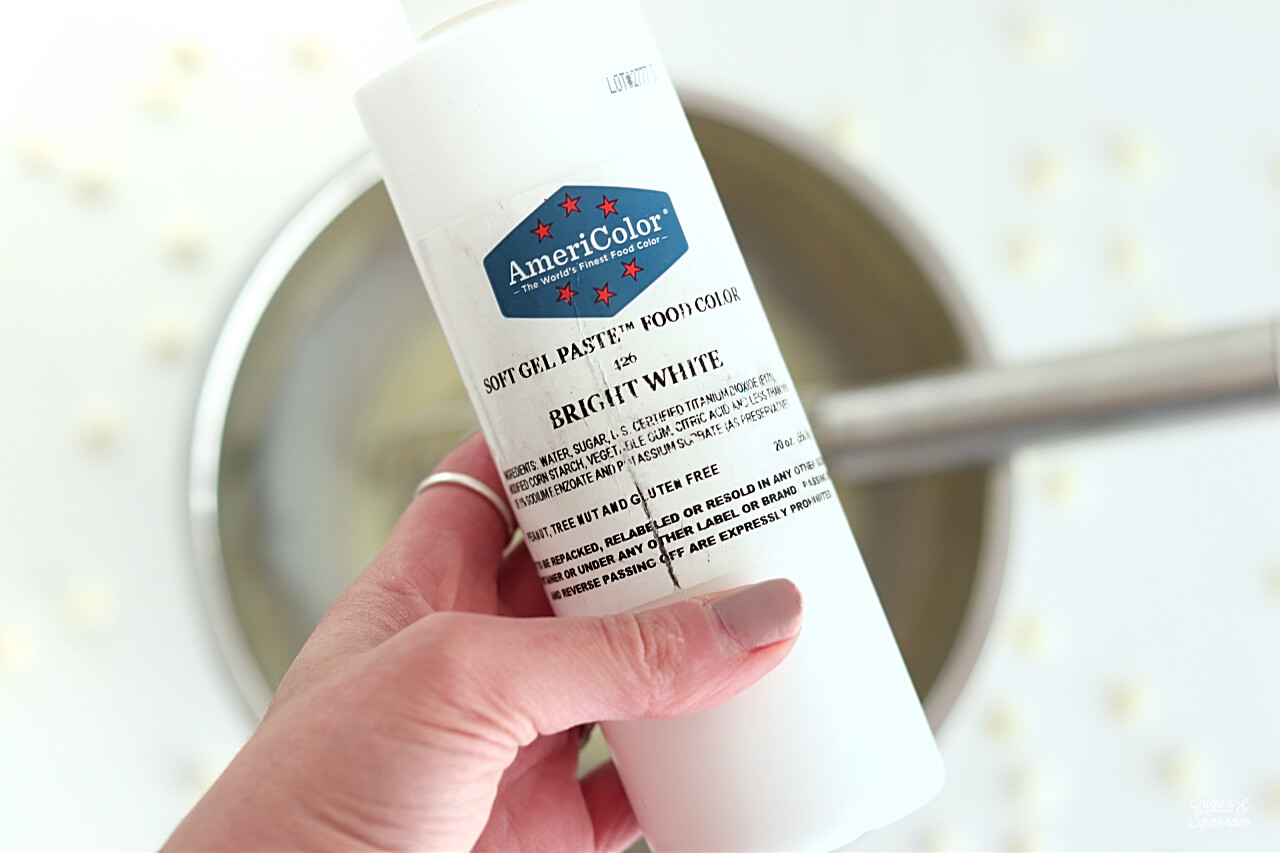
Tip 1: Whiten Your Ganache If It’s Too Yellow
The thing about white chocolate chips is that they aren’t exactly as white in color as they seem to be. To whiten the ganache, I swear by Americolor Bright White food color gel. It works like a dream every time, and you only need about half a teaspoon per batch of white chocolate ganache to get a perfectly bright white.
Some bakers like to use white candy melts in place of white chocolate chips to make white ganache, but I don’t like the taste of candy melts. So the whitening method is my favorite option.
Tip 2: Be Patient With The Cooling Process
Once you’ve whisked the ganache together, it’s crucial to let it cool on your countertop until it’s room temperature, about 20-30 minutes depending on how cold your environment is. Trying to speed up this process by placing ganache in the refrigerator doesn’t usually end well – I’ve found that it cools unevenly, leading to thick, globby drips.
Cooling in the fridge also leads to the urge to stir it too often. Ganache (especially white chocolate!) does not like to be stirred too often, and the end result can mean that your whipping cream starts to separate from the chocolate. You’ll know that this has happened because the ganache will look grainy and dull, or even separated like oil and water. To fix situations like these, you’ll need to reheat the ganache to 92ºF to melt the fat crystals and re-whisk to bring it back together.
Tip 3: Chill Your Buttercream
There’s a science to this tip. Since molecules move more slowly at cooler temperatures (and warp speed at higher temperatures), it makes a lot of sense that you can better control how far the white chocolate ganache drips when the buttercream is chilled. Make sure that after you do your final coat of buttercream, you chill the cake in the refrigerator for at least 30 minutes.
Tip 4: Start With A Test Drip
When your buttercream is nice and chilled, do a test drip by letting the ganache run down the side of your cake. If it travels rapidly and pools at the bottom, your ganache is too warm. Continue to cool the ganache for another 5-10 minutes and try your test drip again. If it’s globby or doesn’t travel very far down the side of the cake, it’s too cold. Reheat the ganache in the microwave for about 10 seconds, stir, and try again. Repeat the reheating process as needed until you get the perfect consistency.
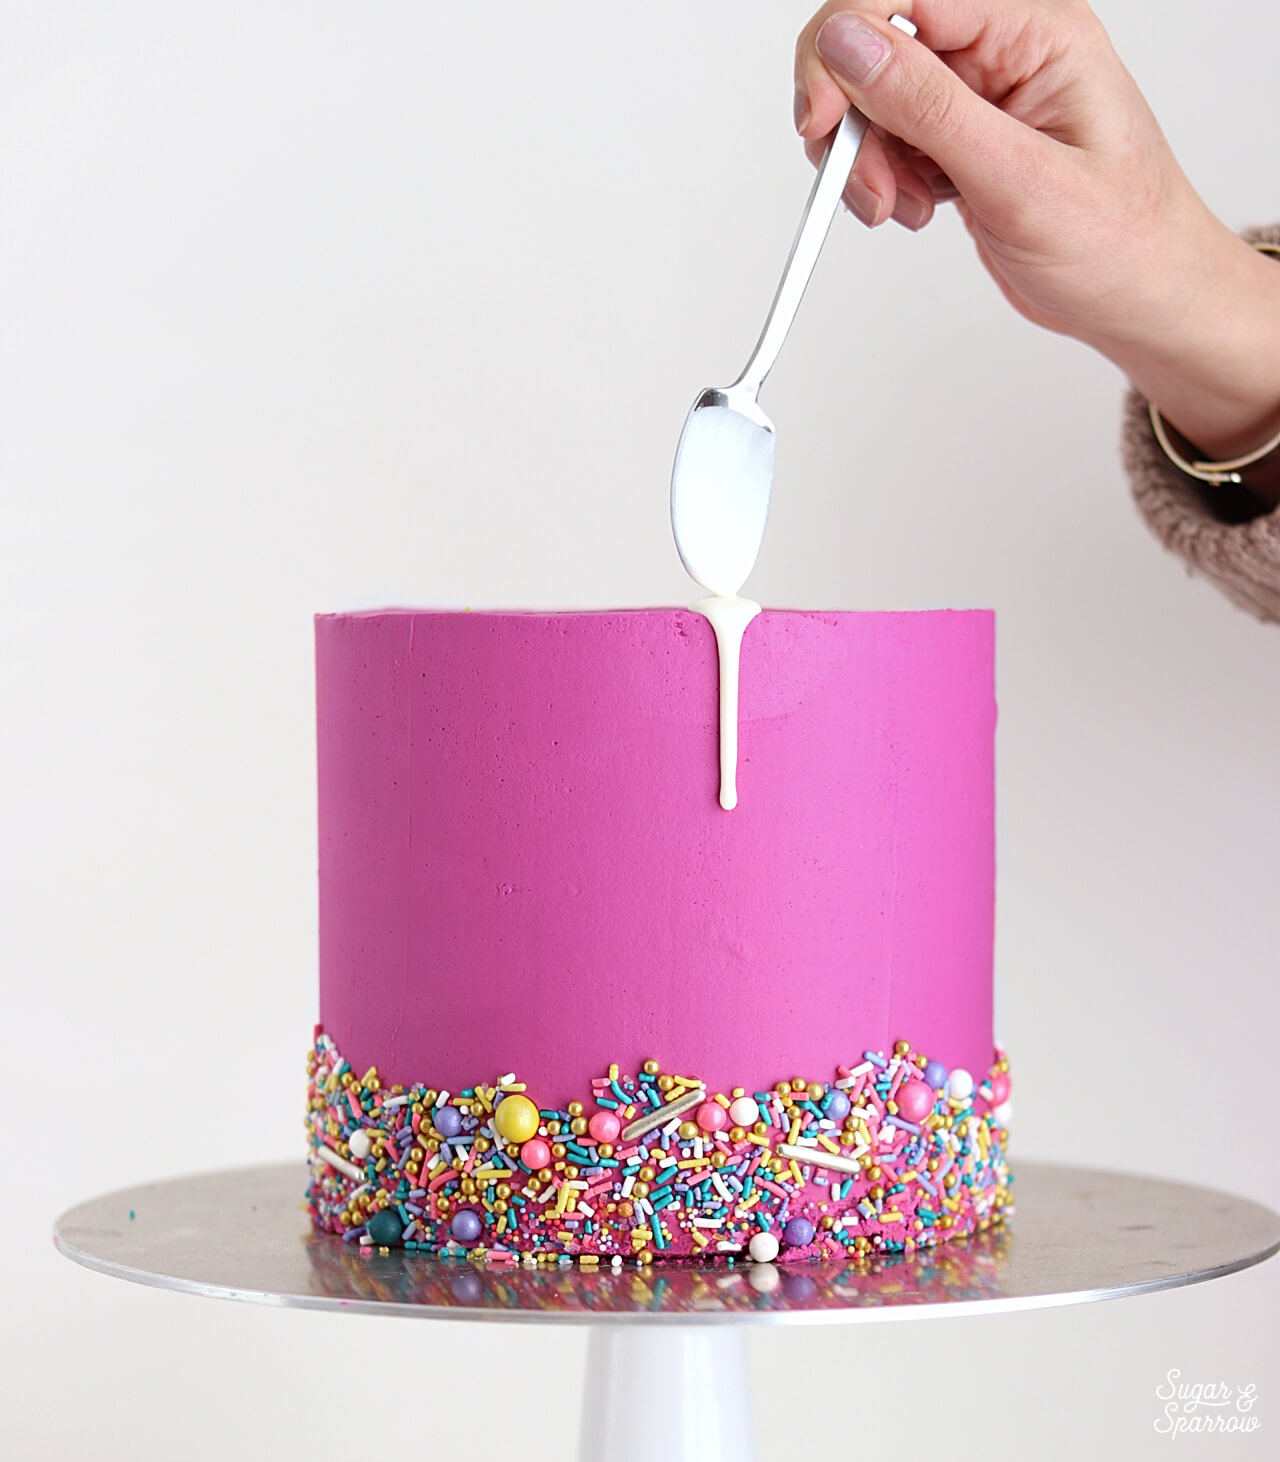
The good thing about a test drip is you’re able to see how the ganache will behave. That way you don’t have to commit until you like what you’re seeing.
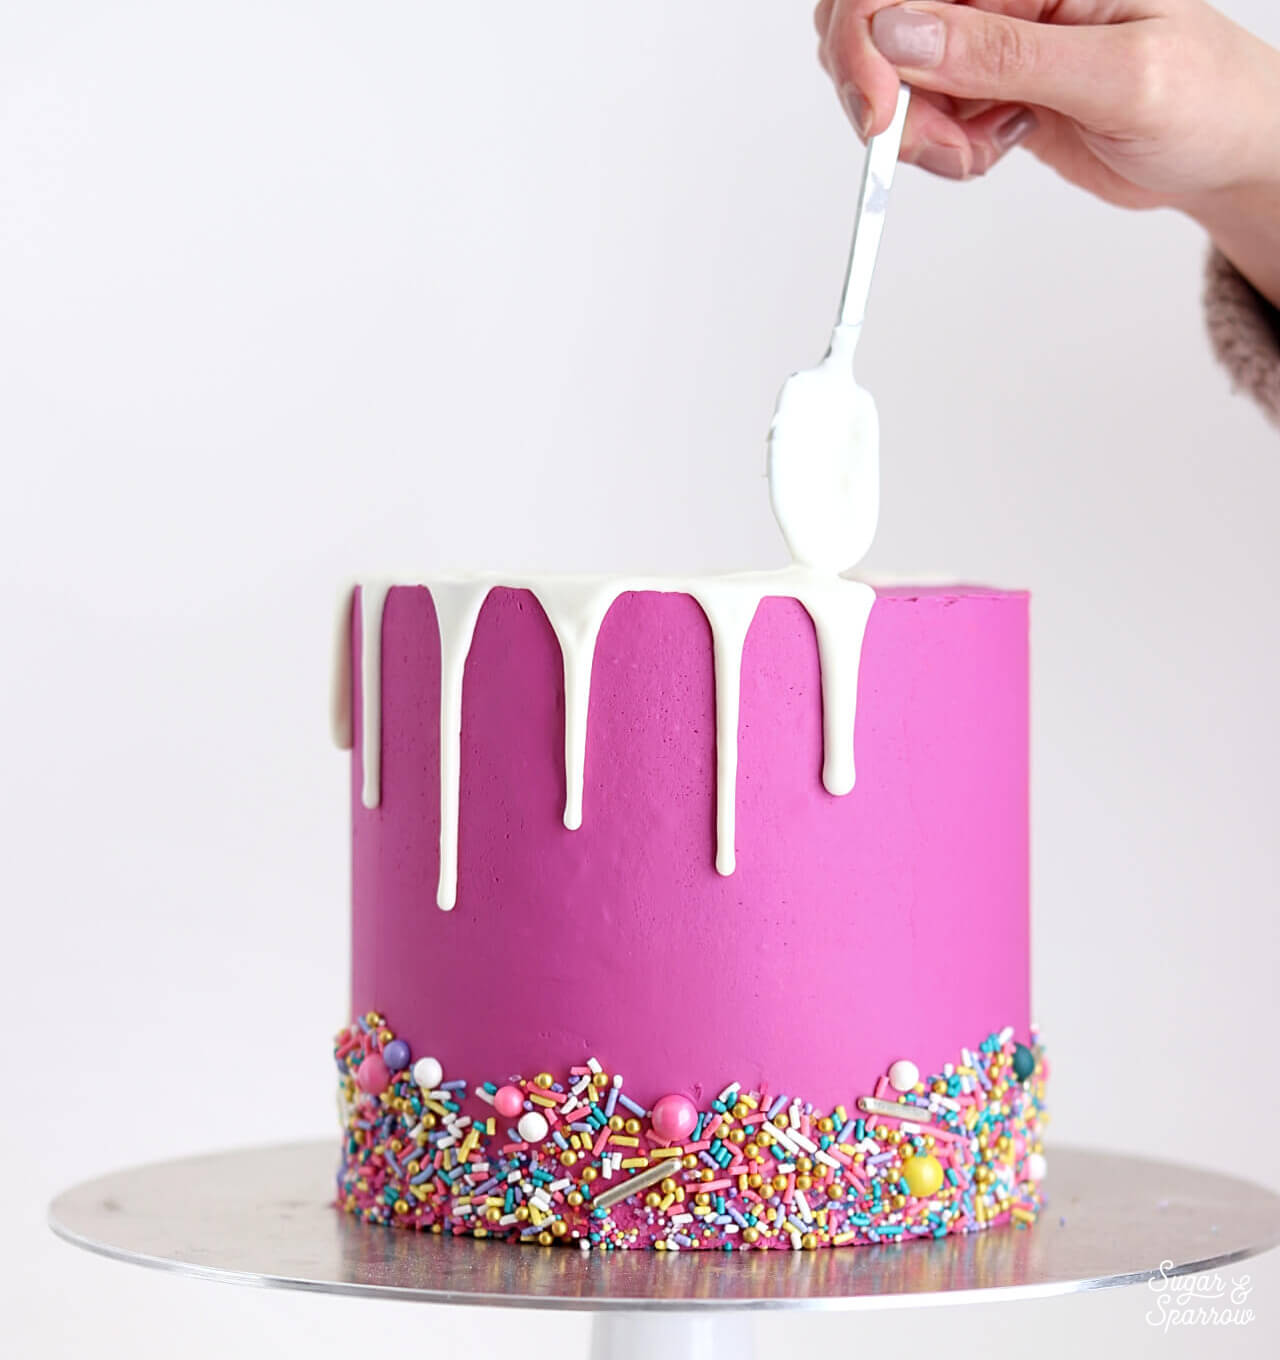
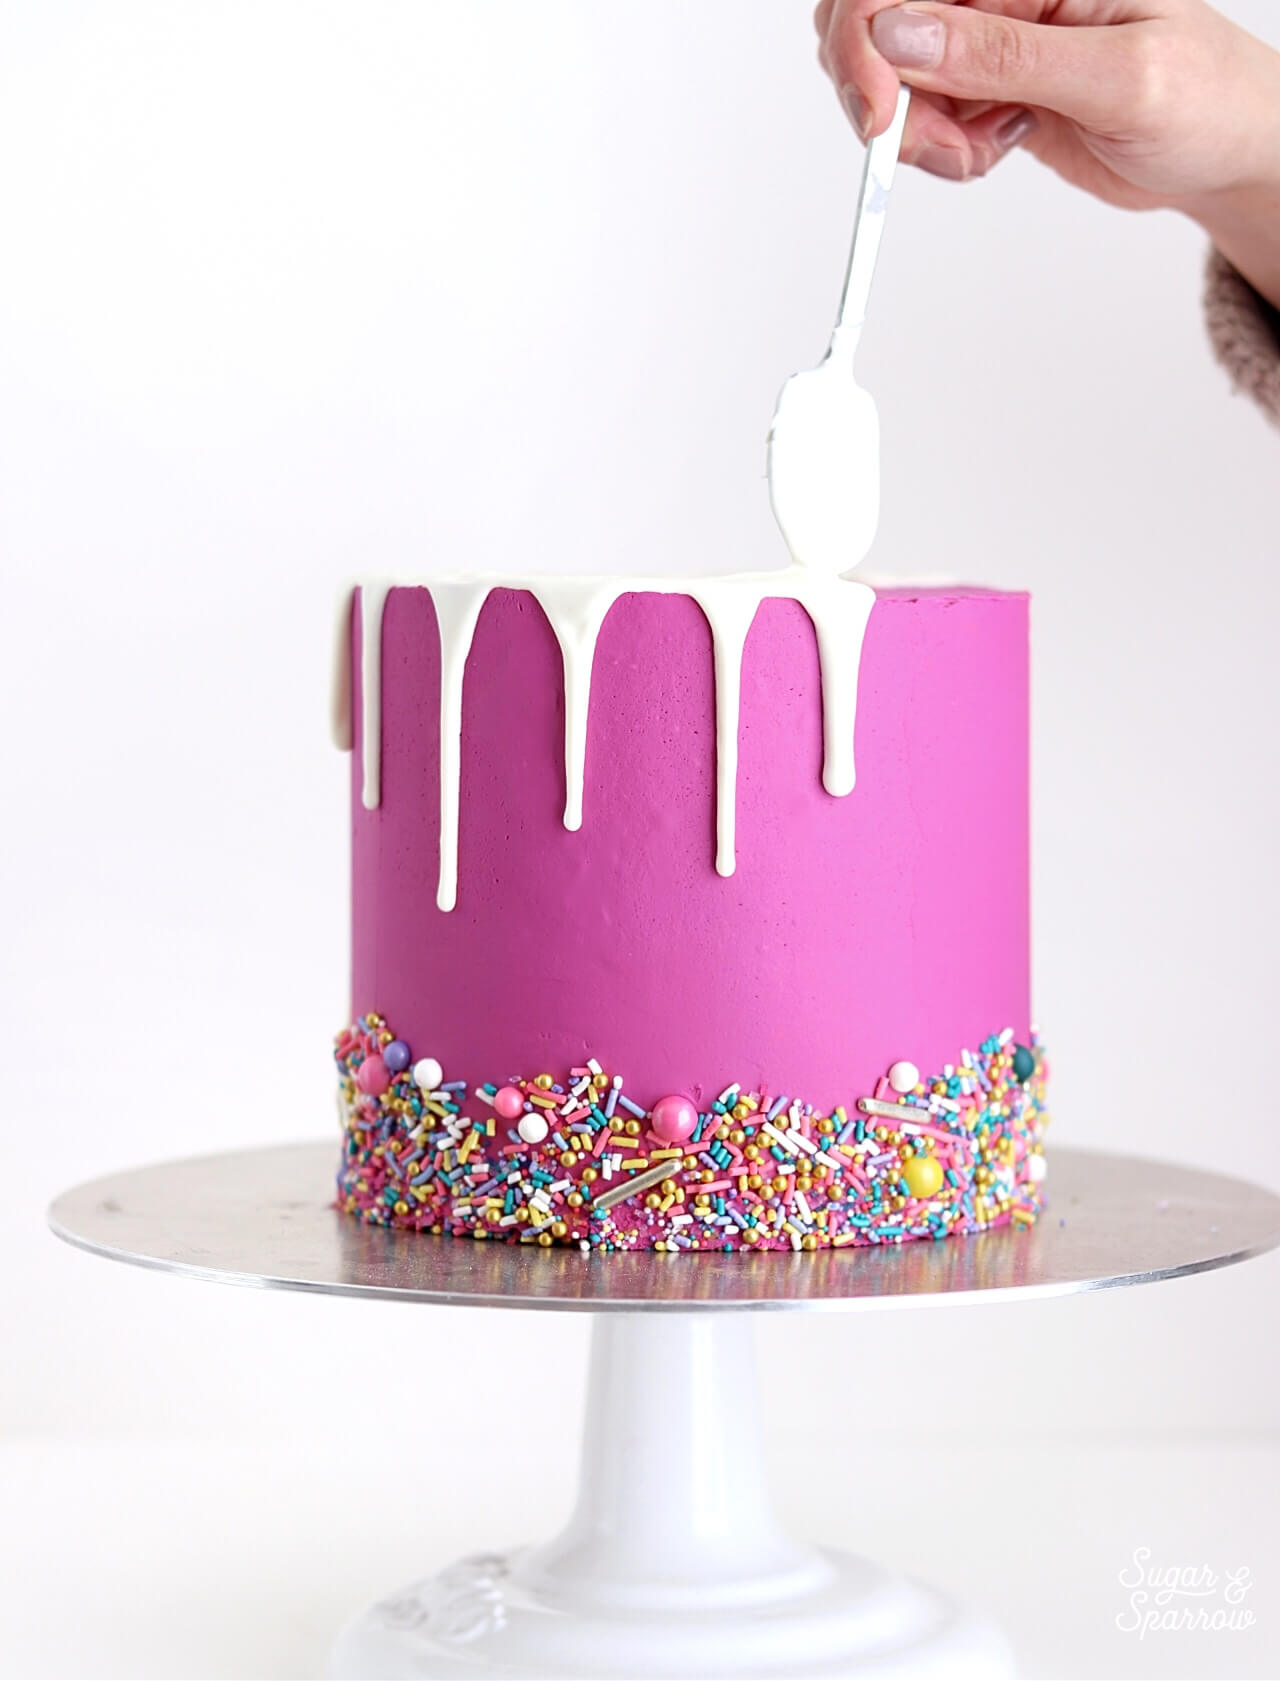
Tip 5: Drip The Sides Before Filling In The Top
Whether you’re using a spoon to create drips (like I am!) or you’re into the squeeze bottle method, it’s best to drip the sides of the cake before filling in the top. Although it might be tempting to just dump all of the ganache on the top of the cake and let the drips fall where they may, you’ll have more control over the length of each drip by starting with the sides (after a successful test drip of course).
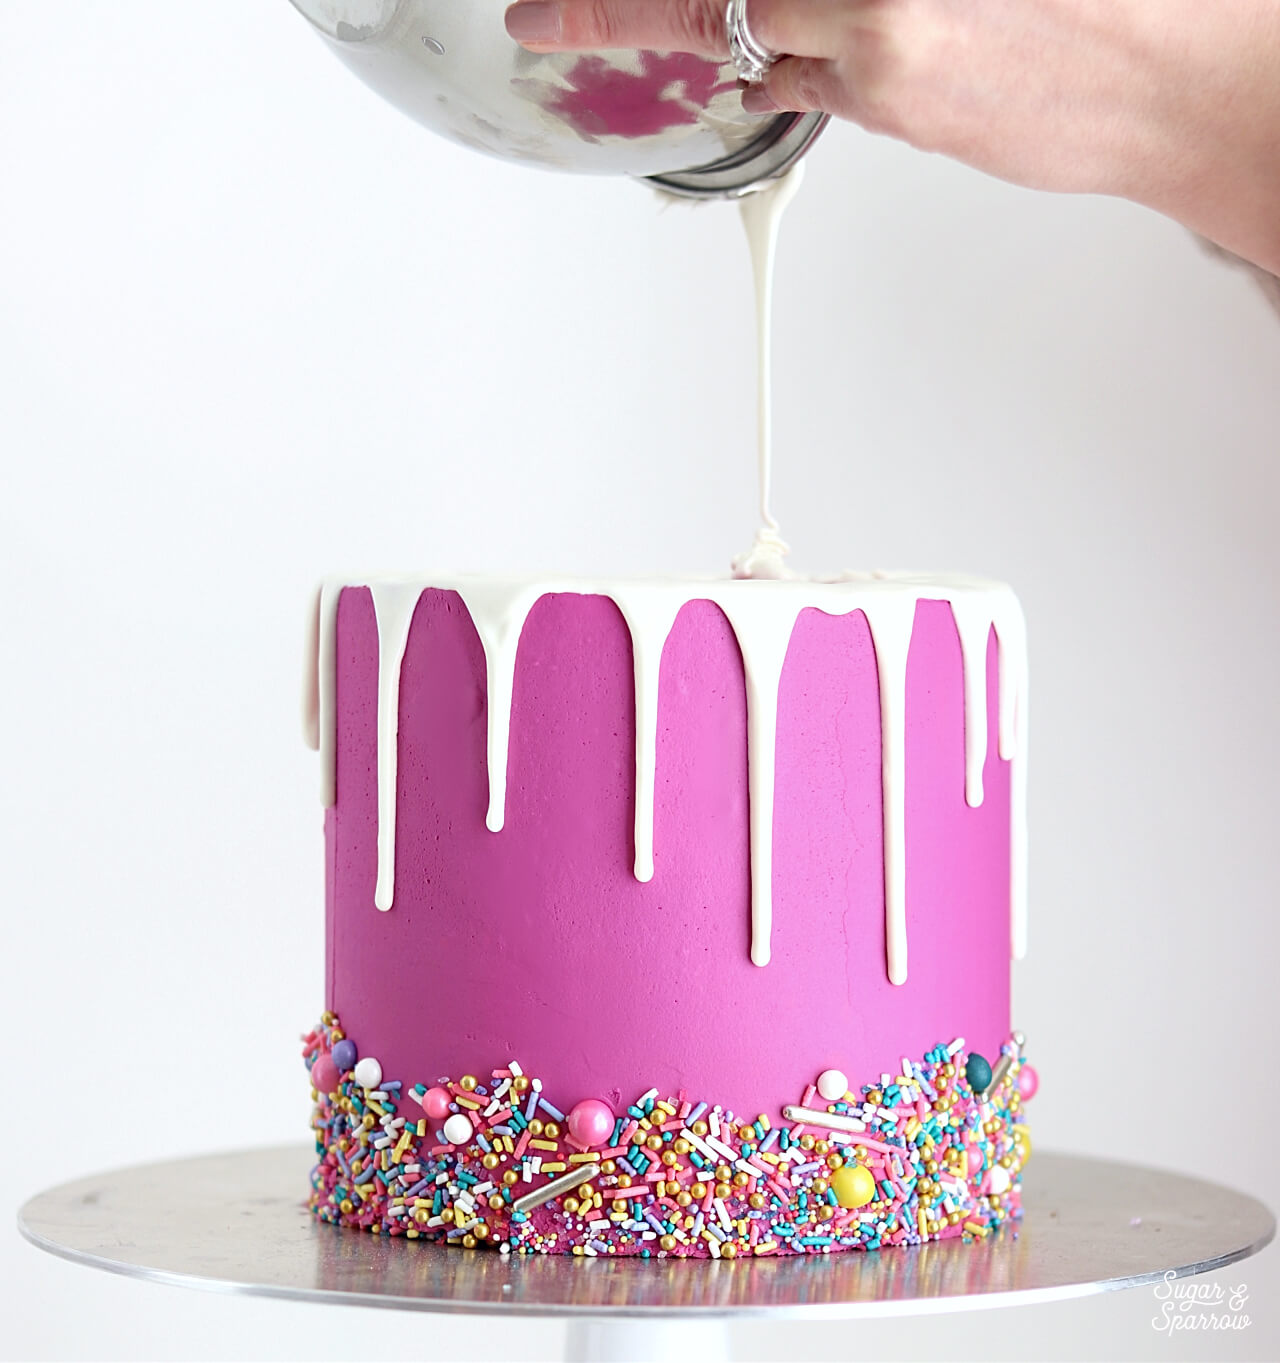
Try not to add too much ganache to the top when filling it in, because if you add any more to the drips you’ve created, it will make them travel farther than you’d like. Instead, try to use just a little ganache and spread it so that it just touches where your drips begin. The ganache on the top should self-level a bit, so don’t worry too much about getting it super smooth.
And there you have it – everything I know about dripping cakes with white chocolate ganache. It’s a really good skill to have in your cake decorating repertoire, especially with how versatile white chocolate ganache can be color-wise. Adding a little food color gel can turn it any vibrant color of the rainbow! And whether you keep it white or color it up, I promise it’ll taste a million times better than candy melts.
Is there anything else you’d like to know about drip cakes? I’m certainly not an expert per se, but if you have more questions, let me know in the comments below and I’ll do my best to answer!


Is Americilor water-based? I thought that kind of food coloring didn’t work with white chocolate? I’d love if I was wrong, I’m having a hard time finding oil-based or powdered color in store anywhere
Hi Ashley! Americolor is water-based, but it works really well for coloring ganache. I think it’s because the process of making ganache involves adding so much liquid, it changes the chemistry of the mixture. While melted chocolate will seize if you add water-based food color, chocolate ganache won’t since it’s so liquid to begin with. And since Americolor gels are so concentrated, you don’t need to add a ton to get a rich color. Hope that helps!
Worked great first try! The only issue I had is that it was on the cool side in my kitchen that day (probably around 65F), so letting it cool for 20 min was too long and it wouldn’t drip. I simply put the squeeze bottle full of chocolate in a hot water bath for a minute or two and it worked great after that. Thanks for the great tutorial!
Awesome, Nikki!! So happy it worked for you and great job troubleshooting the kitchen temperature!!
Hi
I am looking to use a dark chocolate ganache as my crumb coat, do you think it will be OK to then apply a white chocolate ganache as drip on my cake on top?
Thanks in advance
Hi Mandy! I’m sure it would work to do a white chocolate ganache drip on top of a dark chocolate ganache finish. I would just follow the same instructions as detailed above 🙂
Hi Whitney! Thank you so much for your straightforward advice and instructions. I have a question… can you substitute the heavy cream for whole milk? I am assembling the cake now for my daughters birthday tomorrow. I can’t find any heavy cream where I live believe it or not lol… Thank you in advance!
Hi Shannon! Although I have never tried it before, I hear you can substitute whole milk + butter to create a sort of DIY heavy whipping cream. I found some instructions here: https://www.itsyummi.com/making-chocolate-ganache-without-heavy-cream/
What color did you use for your buttercream?
Hi Monica! I used this Fuschia color gel by Americolor: https://amzn.to/2BzkrNO
So glad to have found this , but I have one question; Can this be used to “ganache” a cake? Would it be hard enough, or do you think it would be better to use less cream to give a “harder” finish? Thanks in advance! 🙂
Hi Iman! I have never covered an entire cake with white chocolate ganache before, but after a little research, it seems this recipe would be the right ratio with a few additional steps. First, after making the ganache, place it in an airtight container in the refrigerator for at least 4-5 hours so it can set. Next, remove the ganache from the fridge and leave it out on the counter to soften slightly, then whip with your stand mixer on medium for about 30 second. It should then be the consistency of peanut butter, which will be perfect for frosting the cake. After frosting the cake place it back in the fridge to make it extra firm. Like I said before, I haven’t done this with white chocolate ganache before but after reading several other blog posts this is the same ratio of white chocolate to heavy whipping cream that other bakers are using to ganache their cakes. Hope that helps!
Thank you very much!!! It worked perfectly on my first try! I have been having so many issues with white chocolate until now! I really appreciate it, you were right it was all about patience with the cooling process.
That is so wonderful to hear, Wendy! I’m so glad it worked out on your first try!!
Hello and thanks for the tips! White chocolate is so fussy haha. Two questions: what size cake did you use and where do you get your large bottles of Americolor? I wasn’t sure if Amazon’s were good quality or not. Thank you!
Hi Nikkole! Americolor sells their products on their website at https://www.americolorcorp.com/ and you can also find them directly from Americolor on Amazon. Both channels are totally reliable because they’re from the same company (as long as you make sure Americolor is the Amazon seller), just different means of selling them.
Thank you! I kind of had a derp moment when I read about their website. Of course they have a website. Thanks for being kind while letting me know haha.
Haha no problem!! 🙂
Hi there,
I’ve tried this method twice and it worked wonderfully at first. Glass like texture on top- perfect drips. I then stored the cake in the fridge and the ganache has become completely rippled. Like waves running across the entire top. Any idea why this happened? I used your buttercream recipe- and chilled the cake in the fridge for two days prior to dripping. Could it be the frosting dried out and it’s sucking the moisture from the ganache? I’m just at a loss.
Hi Megan! I’ve never ever had white chocolate ganache ripple before – it always looks just like when I first dripped it after storing in the fridge. I’ve never added a drip after chilling a cake for two days though. Typically I add a drip after chilling the cake for thirty minutes or overnight at the most. So your theory on adding the drip after the cake has had too much time in the fridge might be where things are going wrong. Did you use the same ratio in the recipe on this post or alter the ingredients in any way? Is it only the top of the cake that ripples or the drips as well?
I used the same ratio and have only noticed the ripples on the top. So odd! Fingers crossed the next one turns out- it’s resting with a crumb coat tonight- I’ll frost tomorrow and drip in the afternoon! Let’s see if that helps. For storage afterward would you suggest cover and refrigerate or room temp? Thanks!
Let me know how it goes!! After I drip the cake I usually pop it back in the fridge for about 5-10 minutes to let the ganache set up before continuing to decorate the cake. After I finish decorating I put it right back into the fridge until I’m ready to deliver it or bring it to room temperature for serving. I spent some time googling wrinkly ganache but I’m not finding concrete answers. The best guesses seem to be that the cake is too cold and makes the chocolate set too fast. Hoping this next round with less chilling time on the cake is perfection!
Hi, if I don’t have any heavy whipping cream can I use whole milk instead?
Hi there! I’ve never tried that before, but I don’t think whole milk will have enough fat to turn the white chocolate into ganache. You can feel free to give it a go, but I can only recommend heavy whipping cream for best results.
Hi Megan! Were you ever able to figure out the rippling on top of the cake! Same thing happened toe today. I used candy melts and the cake was chilled only for half a day before adding the drip. It went on smooth but after a couple of hours started to ripple on top.
I had the same problem as Megan except I didn’t chill my cake for two days. But the cake was chilled for longer than 30 minutes. I was doing a textured water color effect so I was chilling the cake for about 5 min after each color (it was chilled for about an hour before starting the colors). After I finished with last color I put it in the fridge and in the meantime made my ganache. The ganache was at room temp in less than 20 min for me. The ganache seemed perfect before I put the cake in the fridge at night and in the morning found the ganache wrinkled. Any new ideas since Megan’s post of what may have caused the wrinkles?
Hi Macy! It’s still a puzzler as to why the ganache wrinkled. I’m going to have to do some experiments to see if I can replicate that to see what the problem might be. I feel like it has to be a temperature thing, like the ganache is slightly too cool or warm, I’m just not sure which. I’ll let you know if I can figure it out after some experiments!
Hi I’m wondering if white chocolate Ganache be infused with anything? Like Thai tea or earl grey !
Hi Noora! Although I’ve never done it before, I’m sure you could soak a tea bag in the heavy whipping cream and infuse it before (or while) bringing it to a boil. I’ve definitely added spices like cinnamon to my heavy whipping cream before bringing it to a boil and pouring it over the chocolate and it’s worked amazingly as well. Let me know if you try infusing it with a tea bag, I’m so curious now!
Hi there, I’m about to attempt this as my first drip cake but it is for tomorrow so I’m worried about how to store the cake overnight. Some websites have said if I put the completed cake in the fridge overnight that the chocolate ganache will bubble and look bumpy for tomorrow. Can you please advise what best. (It’s very humid currently where I am so I’m worried about the chocolate continuing to drip if it stays too warm).
Thanks
Hi Paula! No need to worry about storing the cake in the fridge overnight. I do it all the time with no problems at all! The drip always looks the same after storing in the fridge (no bubbles or anything!). Just follow the steps in this tutorial and make sure that your test drip yields perfect results before completing the drip and you’ll be good to go!
I am a home-baker and I am soooo happy for this tutorial!!!
Love your cakes! Thanks again
Hi Nicola! That makes me so happy to hear!! I hope this tutorial helps 🙂
How do you get that perfectly smooth buttercream? I’ve tried and tried, but it always has an uneven look.
Hi Donna! Smooth buttercream took me a long time to master, but I wrote out a tutorial here with all of my best tips and recipe: https://sugarandsparrow.com/how-to-frost-a-cake I hope that helps!
What is that gorgeous color on the cake? The white looks wonderful next to it
Thanks, Linda! The color gel I used is Americolor Fuschia: https://amzn.to/2Pspabi
Thank you so much!
So, when I did a white chocolate drip recently, 2 things happened.
1) the frosting swirls that I put on the top of the cake slid off. (The chocolate was not warm and the cake was in the fridge over night)
2) even with the cake sitting in the fridge, and the drip being room temperature, the drip kept dripping even after the cake had been taken out of the fridge. The chocolate never stopped dripping. (Slowly..but it kept moving)
Any ideas?
Hi Amy, what ratio did you use for the white chocolate ganache recipe? It sounds like there was too much cream added to the white chocolate, making it too runny in consistency (that’s happened to me before when I’ve used a 1:1 ratio and even a 1:2 ratio). If the ganache is too runny even at room temperature, the drips will continue running and making other decorations (like the swirls on top of your cake) slide.
she did mention in the recipe it was a 3:1 ratio chocolate to cream
Hi.
Thank you for sharing
will the drip dry hard so that I can add silver or gold lustre dust on the drips ?
Hi Asmara! Although the drip sets up nicely, it won’t dry hard enough for you to add luster dust to it. If you want a metallic drip, I would recommend using plain melted White Chocolate or Candy Melts, since both of those will dry hard enough to paint over.
Hello, you mention that the chocolate can be colored to make different color drips. I am trying to color mine silver, is there any food gel silver I can use? I have read that a special coloring is needed when trying to color white chocolate?
Thank you!
Hi Nadia! To make a shiny silver metallic drip, you’ll actually need to drip the cake with melted white chocolate (instead of ganache) and paint on the silver color when the chocolate has hardened. It’s the only way to get a metallic finish on a drip, as there isn’t a way to make the ganache metallic or paint on top of ganache (it’s too sticky for a flawless finish). Here’s some more info on the technique: https://allthingscakeshop.com/gold-drip-cake/
Hi. When’s the right time to mix in the white food color gel?
After you whisk the white chocolate and heavy whipping cream together and have created a uniform consistency, then you can add a few drops of white food coloring to whiten it.
Freeze spray from chef rubber helps cool the drips quickly so you can control the length
Can you use can’t melts?
Hi Karina! You can use melts, but as I mentioned in the post, I never do because I don’t like the taste. The ratio for making ganache with candy melts is the same recipe though.
Can this ganache be used on fondant cakes
For drips
Hi Tameeka! I’ve never used ganache on a fondant finish but I hear that it can be done with this recipe.
Hi Whitney, I’ve just stumbled on your recipe. It’s very easy to follow. I like it very much. So what can the cake be covered with before dripping the ganache on it? Tnx very much.
Hi Lydia! I typically use this drip technique on a buttercream covered cake or ganache covered cake.
hi tameka, did you try it on a fondant cake?
yes. i used mine on fondant cake and it came out perfect.
can i pls have a slice?
Hi Whitney! First, I’d like to thank you for your amazing tutorials and
delicious recipes! Your videos have brought out my love of baking and I’m loving it! A couple questions, I’m making my son a birthday cake and I’m making a “blood” ganache drip. Do you suggest a specific food colouring to make it lol like blood? Also, I was wondering how you go about pricing cakes as I’m all of a sudden getting many requests to make cakes and I don’t know how to price them out! (Maybe new tutorial?) Thank you so much ❤️
Hi Nancy! I’m so happy to hear that your cakes are in demand and pricing cakes is such a good blog post idea! That was ALWAYS the hardest part of cake orders for me, but I’d basically charge a base price depending on the size of the cake and then try to calculate how much time the decorating would take me and add on from there (for example, $100 for a 6-inch cake as a base price, then go up from there depending on if they want custom decorations, lots of intricate piping, ganache drips, etc.). For the blood ganache, I’d use my white chocolate ganache recipe with AmeriColor Super Red: https://amzn.to/3Xngtjg. If you need to use more than 1/2 tsp of the food coloring, consider adding more melted white chocolate to the ganache to thicken it up (since food coloring is added liquid that could thin the consistency). Hope that helps!