• Cake
  • Frosting
  • YouTube
  • My Favorite Tools
  • Nav Social Icons

  • Skip to primary navigation
  • Skip to main content
  • Skip to primary sidebar
  • Skip to footer
  • Recipes
    • Cake
    • Cupcakes
    • Frosting
    • Ice Cream
    • Vegan
  • Cake Basics
  • Tutorials
  • Blog
  • About
  • Mobile Menu Widgets

    Connect

    Search

Sugar & Sparrow logo in script font

Sugar & Sparrow

Lifestyle and Cake from Portland Oregon

  • Cake Basics
  • Recipes
    • Cake
    • Cupcakes
    • Cookies & Bars
    • Filling
    • Frosting
    • Ice Cream
    • No-Bake
    • Small Batch
    • Vegan
  • Tutorials
  • Book
  • Blog
  • About

Buttercream Monster Cake Tutorial

October 22, 2024 · In: Featured, Halloween, Seasonal, Tutorials

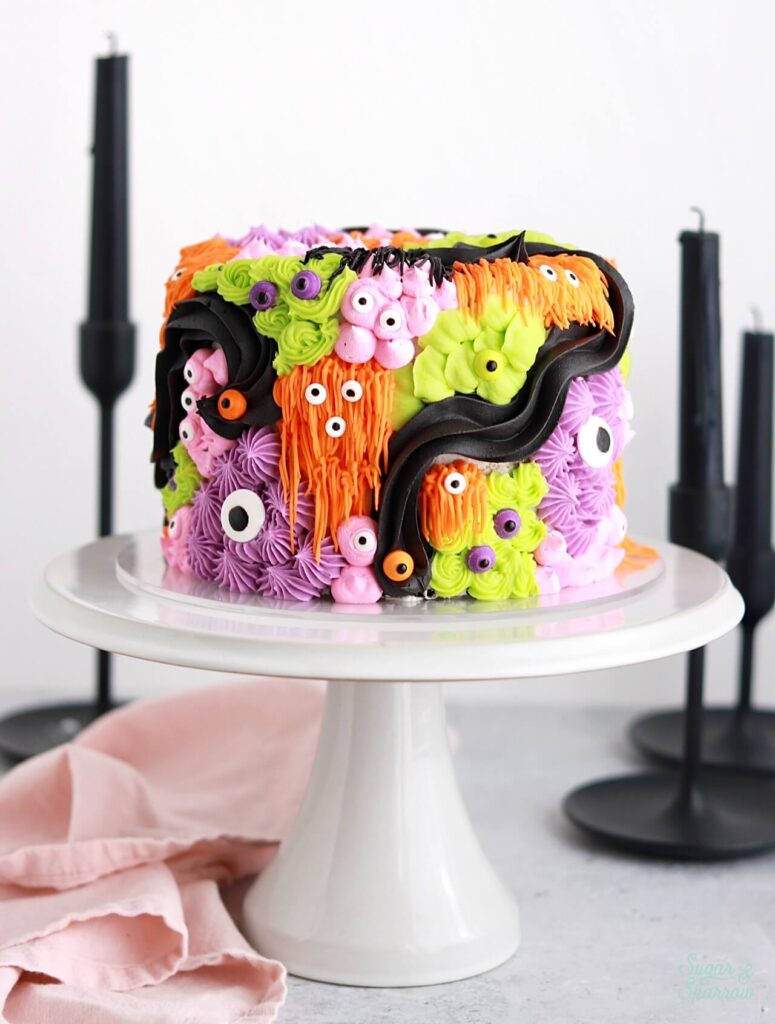
A few years back, I dreamed up this monster cake with colorful shag monsters and googly eyes. It’s one of my favorite Halloween cakes to date, and since I love the monster concept so much, I thought I’d do another variation of it. This time, I used the same piping techniques you see in my fiber art cake tutorial, added some googly eye sprinkles, and watched the monsters come to life with a variety of fun textures. How cute would this be on a Halloween party table?!

This post may contain affiliate links. For more information, see our disclosure policy.

monster cake by sugar and sparrow
buttercream monster cake tutorial

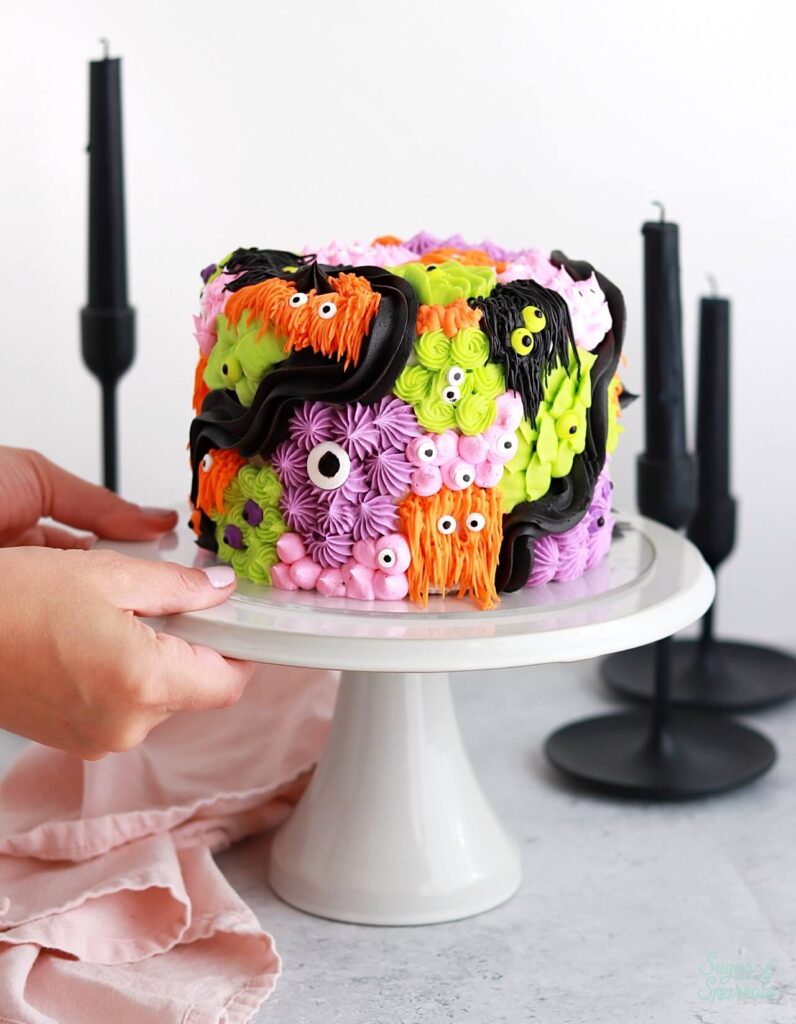
This monster cake design is really forgiving and go-with-the-flow, aka my favorite kind of cake project. You’ll essentially whip up a fun buttercream color palette (I made five colors) and use them with 6+ different piping tips to create the different monster shapes. After all the piping, it’s so much fun to add eye sprinkles onto each monster. I got creative with the eyeball amount, size, and placement as I went along. This sprinkle eyeball kit has a good variety of sizes that will keep things interesting. I had some colored sprinkle eyeballs left over from a different Halloween project so I added some of those in as well. 

buttercream piped monster cake
halloween cake ideas by sugar and sparrow

What Kind of Buttercream Works Best?

You can use any kind of buttercream you’re used to piping with, but I went with my vanilla buttercream recipe (for the majority of the colored buttercream) + my dye-free black buttercream recipe for the black piping. These are both medium-consistency American buttercream recipes, which are very easy to work with and hold the shapes of what you’re piping.

You Will Need

  • A cake that’s been crumb coated and chilled (mine is a 3-layer 6-inch). 
  • Cake turntable
  • 3 Cups of vanilla buttercream
  • 1 Cup of black buttercream
  • Bowls and spoons for color mixing
  • Food color gels of your choice
  • Piping bags
  • Piping Tips: Wilton 1M, 4B, 10, 104, 233, and 16
  • Googly eye sprinkles

Step 1: Prepare the Buttercream

You can mix up any color palette you want, but if you want to replicate this look, I divided the vanilla buttercream between four different bowls and added a few drops of each of these colors (one color per bowl): AmeriColor Deep Pink, Orange, Electric Green, and Electric Purple. 

halloween color palette by sugar and sparrow

You’ll then want to place each color into a separate piping bag fitted with the following piping tips: black buttercream with Wilton Tip 1M, green buttercream with tips 104 and 16, pink buttercream with tip 10, orange buttercream with tip 233, and purple buttercream with tip 4B. 

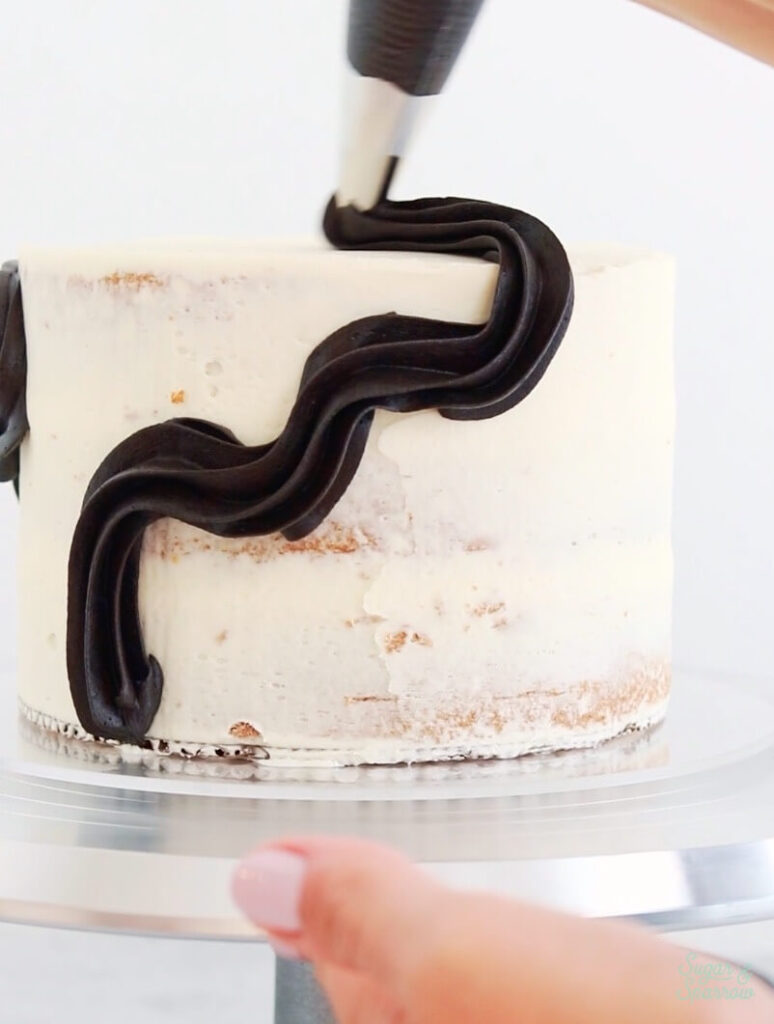
Step 2: Pipe the Monster Shapes

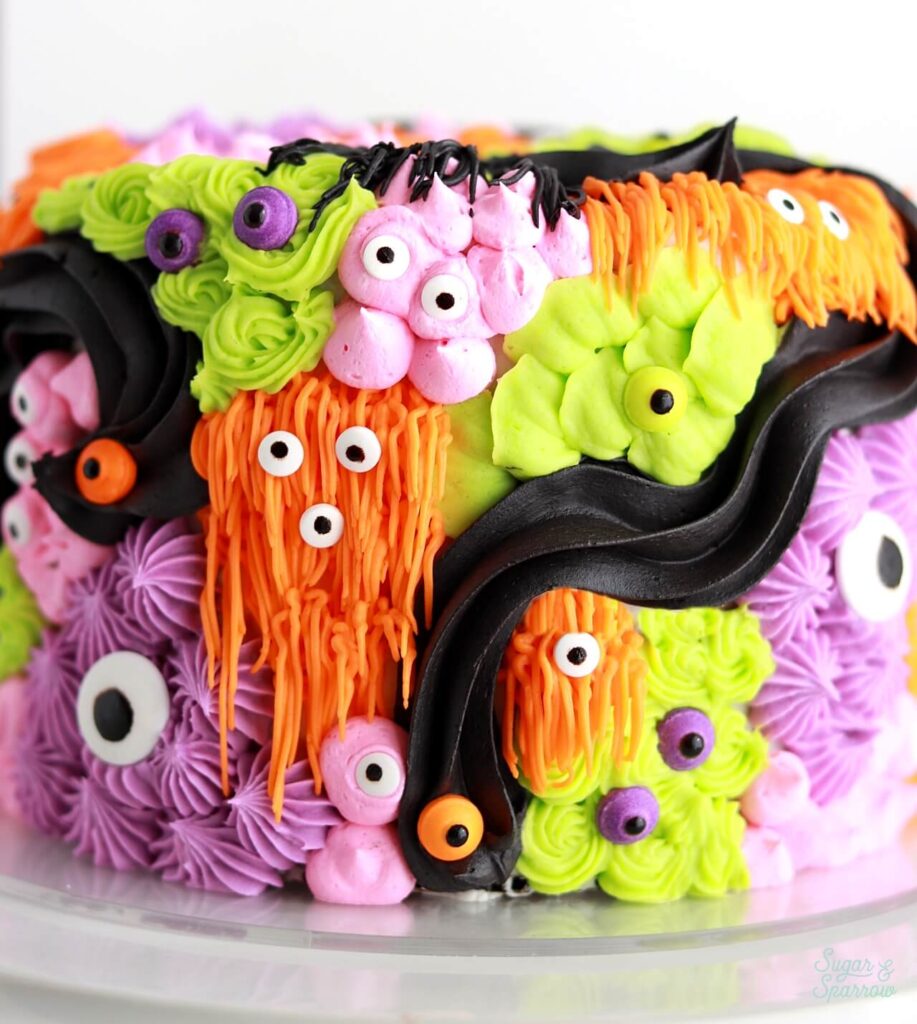
With your chilled and crumb coated cake on the turntable, pipe the monster shapes one by one. First, I used the black buttercream with Tip 1M to pipe three snakelike monster shapes. I literally just squeezed the piping bag and dragged it into a snake shape, twisting and turning wherever my heart desired.

Wilton Tip 1M

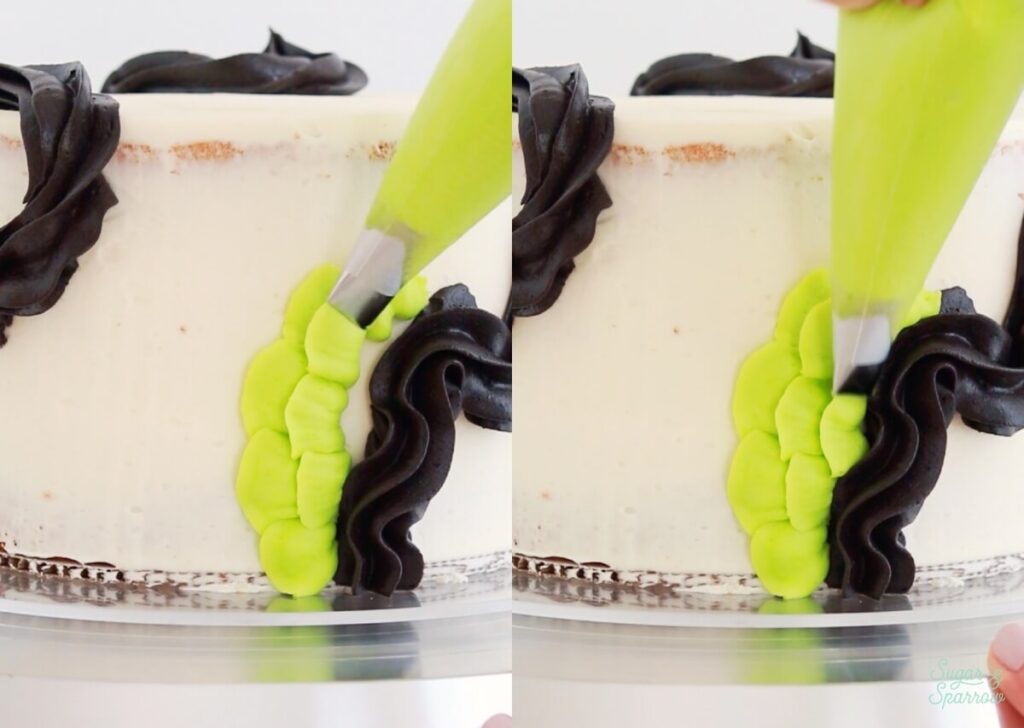
Next, I used Wilton Tip 104 with the green buttercream to create the scaly buttercream. I squeezed the piping bag while I moved my hand in an upside-down “u” (or rainbow) shape over and over. 

Wilton Tip 104

I then piped stars in blob-like shapes using the purple buttercream and Tip 4B, then shag using Tip 233 and the orange buttercream, and pink dots in blob-like shapes using Tip 10. 

Piping with buttercream

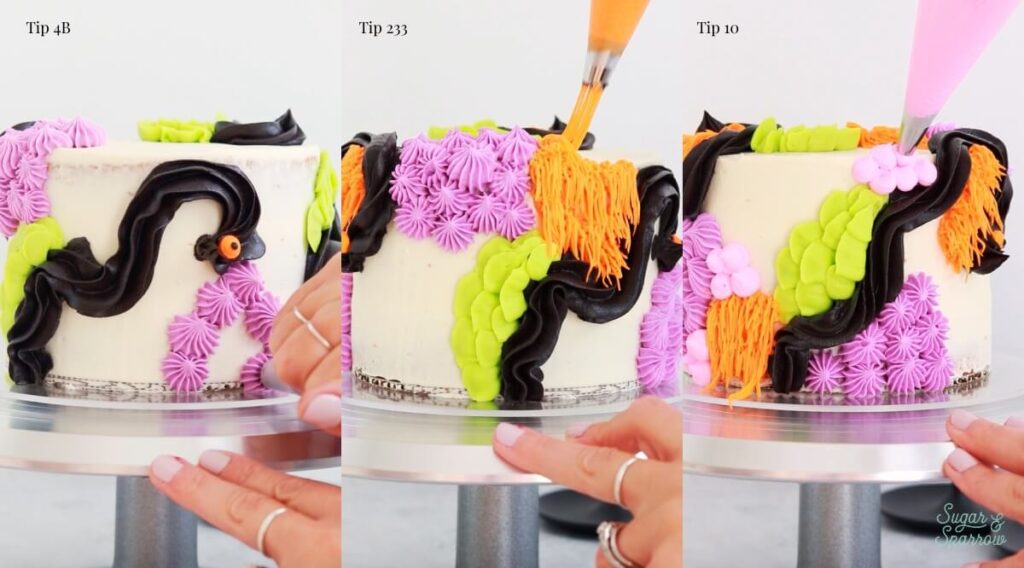
Now is the part where you have to get creative filling in empty spaces. I ended up using more green buttercream fitted with Tip 16 and piping curly shapes wherever it felt right. Every other space was filled in with what made the most sense.

Wilton Tip 16

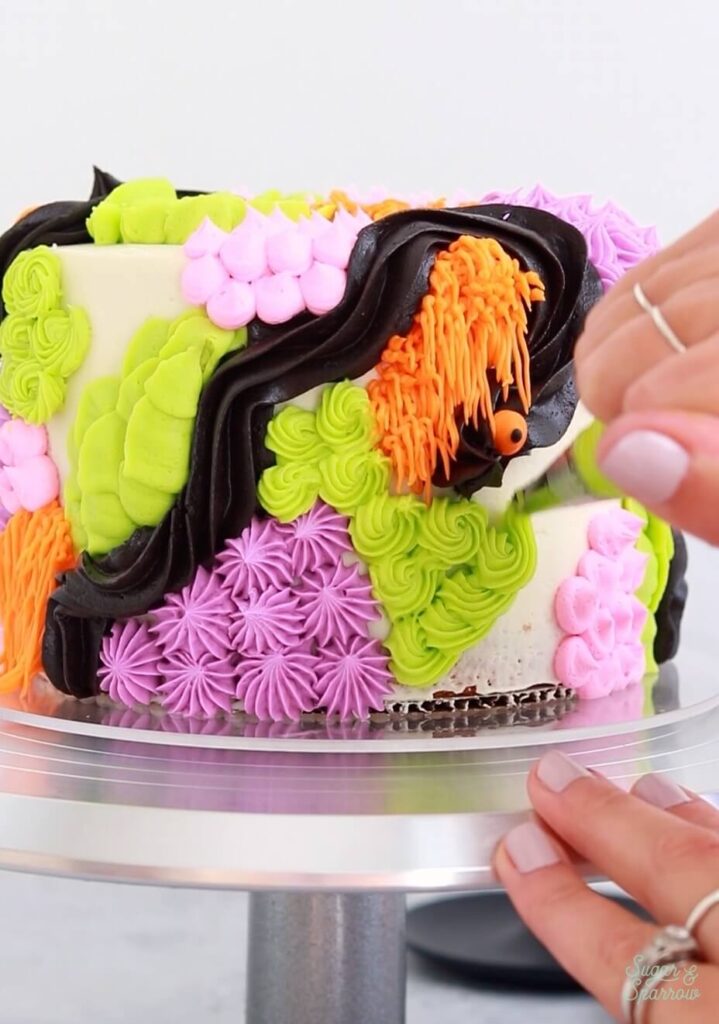
Step 3: Place the Googly Eyes

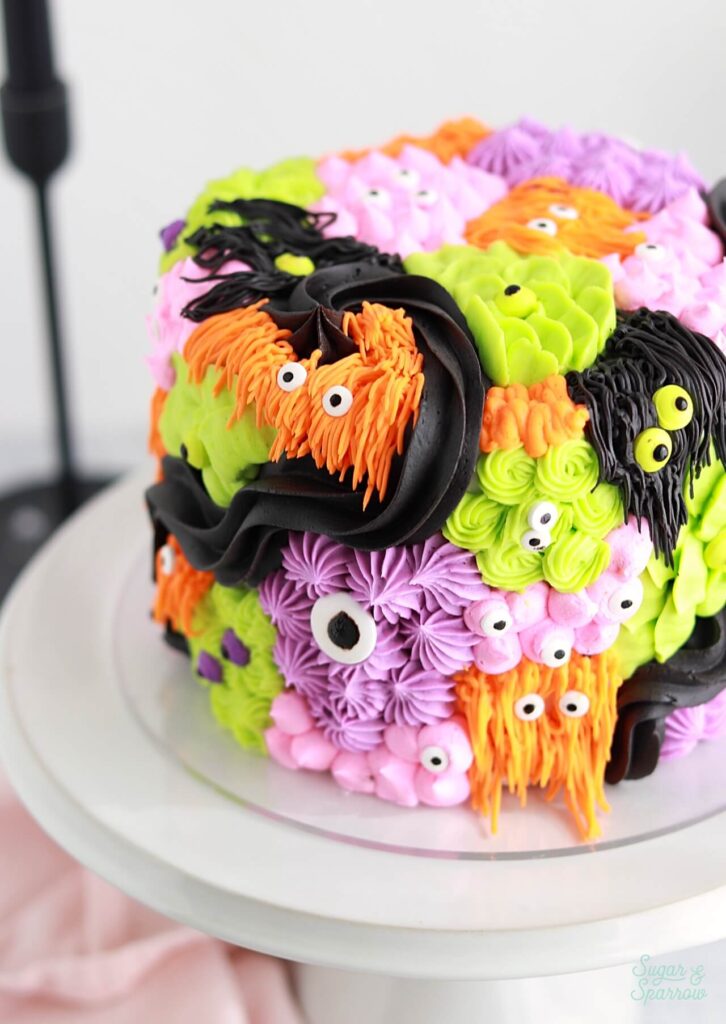
Once you have filled in every inch of the cake surface with monster shapes, it’s time to add googly eyes! Use your imagination as you place the eye sprinkles – some monsters might have three eyes, some might have one giant eye, and others might have two. It’s all up to you!

monster cake with googly eyes

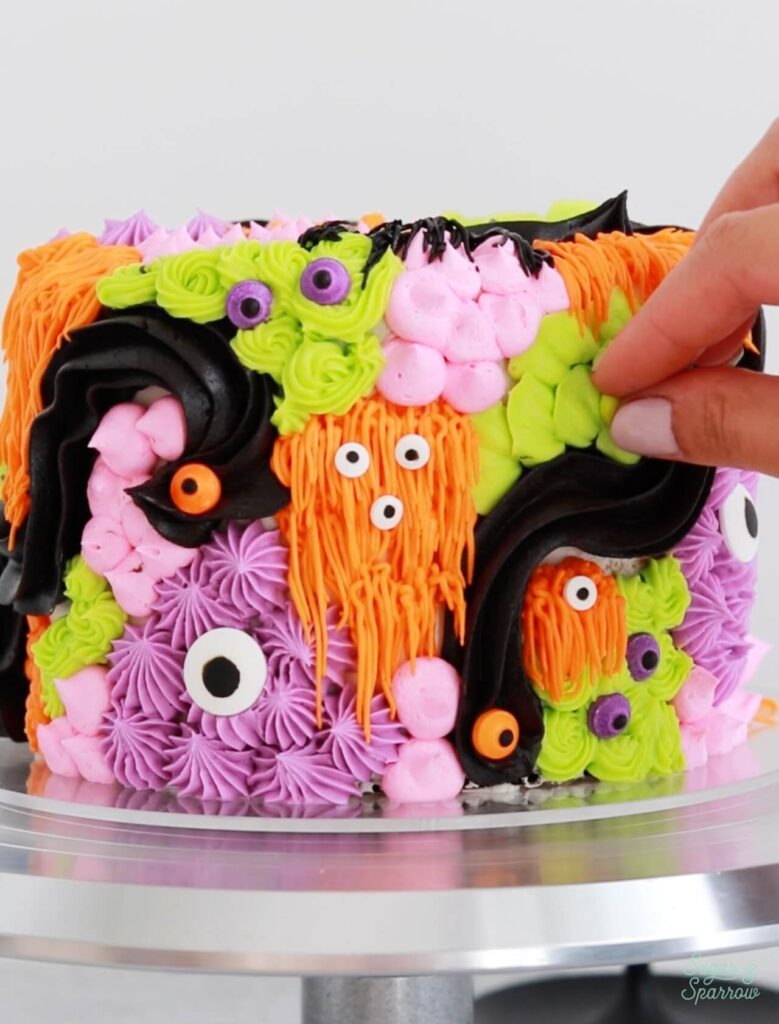
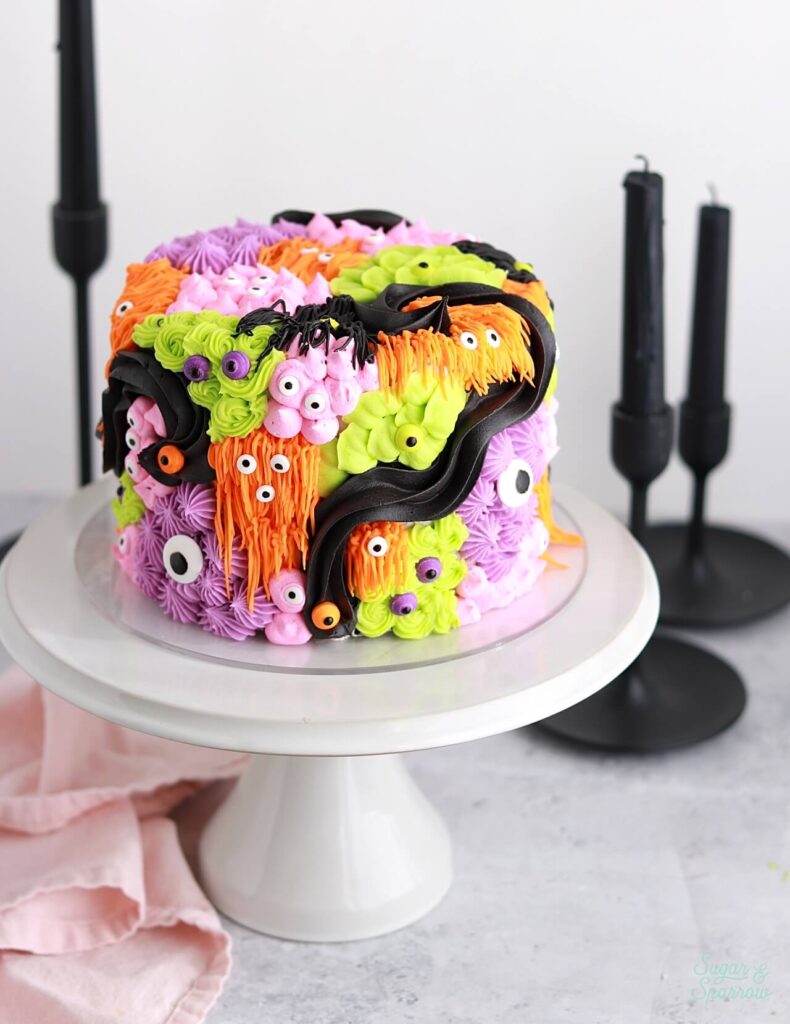
Isn’t this monster cake the cutest? I hope to see it in all sorts of color palettes. The details are just so fun and the overall design doesn’t take a whole lot of work, so it’s perfect for beginners! 

halloween monster cake tutorial
monster cake by sugar and sparrow

If you make this buttercream monster cake, I want to know how it goes! Leave a comment below and be sure to tag @sugarandsparrowco on Instagram if you share it. I love to see your cake creations!   

By: Whitney · In: Featured, Halloween, Seasonal, Tutorials · Tagged: googly eyes, halloween cakes, monster cake

you’ll also love

monster shag cake by sugar and sparrowMonster Shag Cake Tutorial
eggless chocolate birthday cake recipe by sugar and sparrowEggless Chocolate Cake Recipe (Can Be Made Vegan!)
Our Sweet Baby Boy is Here!

Join the List

Stay up to date & receive the latest posts in your inbox.

Reader Interactions

Leave a Reply Cancel reply

Your email address will not be published. Required fields are marked *

Recipe Rating


Next Post >

Black Chocolate Ganache Drip Cake Recipe

Primary Sidebar

Welcome to Sugar & Sparrow

Welcome to Sugar & Sparrow

Helping you whip up pretty desserts with confidence and creativity. And hopefully sharing a few laughs with you along the way!

Learn More

Connect

let’s bake!

Get my very best recipes, baking tips, and decorating tutorials sent to your inbox

Featured Posts

cactus cupcakes tutorial

Sprinkled Cactus Cupcakes Tutorial

pastel m&m cake

Rainbow Candy Mosaic Cake

st patricks day cake ideas by sugar and sparrow

St. Patrick’s Day Dessert Ideas

Search

Archives

Follow Along

@sugarandsparrowco

RASPBERRY CAKE FILLING (recipe below) ♥️ this RASPBERRY CAKE FILLING (recipe below) ♥️ this perfectly sweet/tart raspberry cake filling is beautifully thick, seedless, and so rewarding to make from scratch! It takes just a handful of ingredients and can be made with fresh OR frozen raspberries 🙌🏼 

Get the full recipe + cake pairing suggestions at the link in my bio or at https://sugarandsparrow.com/seedless-raspberry-cake-filling/

INGREDIENTS:
2 1/2 Cups (10oz, 315g) fresh or frozen raspberries
1/2 Cup (100g) granulated sugar
1 Tbsp lemon juice
1 tsp lemon zest
1 1/2 Tbsp (12g) cornstarch
1 1/2 Tbsp (22ml) water

INSTRUCTIONS: 
1. In a saucepan set over medium heat, add the raspberries, granulated sugar, lemon juice, and lemon zest. Cook until the mixture begins to boil, stirring occasionally. 
2. Once boiling, lower the heat and simmer for 10-15 minutes while you continue stirring occasionally. Then, remove from heat and use a fine mesh sieve to strain out the seeds over a medium bowl. After straining, you’ll be left with about 1/4 Cup of seedy pulp.
3. In a small separate bowl, combine the cornstarch and water until uniform. Return the strained raspberry filling to the saucepan (wipe it free of any remaining seeds if needed) and add the cornstarch/water mixture. Cook over medium heat until boiling, stirring constantly, then reduce to a simmer and cook for 1-3 minutes, until the filling has thickened slightly, is no longer cloudy, and coats the back of the spatula.
4. Pour into an airtight container and refrigerate for at least 4 hours and up to 1 week. It will be jello-like once set but after stirring it will become a thick, jammy consistency that’s perfect to use as a cake or cupcake filling!

#raspberrycake #cakefilling #cakedecorating #raspberries #baking
STRAWBERRY LEMON CAKE 🍓🍋 this cake is so lig STRAWBERRY LEMON CAKE 🍓🍋 this cake is so light and refreshing and bursting with all-natural flavors! It’s layers of my favorite extra fluffy lemon cake + the most delicious freeze-dried strawberry buttercream that ends up the prettiest natural pink color. I’ll never get over those little flecks of strawberry in the buttercream or the tiny chamomile flowers adding so much cheer! 

Grab the recipe at the link in my bio or at https://sugarandsparrow.com/strawberry-lemon-cake/

#strawberrylemon #lemoncake #strawberrycake #cakedecorating #strawberrybuttercream
CHOCOLATE SHEET CAKE (recipe below) 🍫 🥳 this CHOCOLATE SHEET CAKE (recipe below) 🍫 🥳 this is everything I want in a chocolate cake: rich and decadent, stick-to-your-fork fudgy, ultra-chocolatey, shareable, and EASY! Like box mix easy but from-scratch and a MUST try if you’re in need of a good chocolate cake recipe to feed a crowd👩🏽‍🍳⁣ 
 
Get the full recipe (with chocolate frosting) at the link in my bio or at https://sugarandsparrow.com/chocolate-sheet-cake/ ✨⁣ 
⁣ 
CHOCOLATE SHEET CAKE
2 Cups (265g) all purpose flour⁣ 
1 2/3 Cups (340g) white granulated sugar⁣ 
2/3 Cup (60g) unsweetened natural cocoa powder⁣ 
2 tsp baking soda⁣ 
1 tsp baking powder⁣ 
1/2 tsp kosher salt⁣ 
1/2 Cup (120ml) vegetable oil⁣ 
2 eggs, room temperature⁣ 
1 1/2 tsp pure vanilla extract⁣ 
1 Cup (240ml) full-fat buttermilk⁣ 
1 Cup (240ml) hot coffee OR hot water⁣ 
⁣ 
INSTRUCTIONS⁣ 
1. Preheat the oven to 325ºF. Grease and line a 9x13 inch cake pan. ⁣ 
2. Place all of the dry ingredients into the bowl of a stand mixer (or use a large bowl with a hand mixer) and mix on low to combine. Add the vegetable oil, eggs, vanilla, and buttermilk and mix on low until combined. With the mixer still on low, add the hot coffee or hot water in a slow stream, then turn the mixer to medium and beat until smooth, about 2 minutes. The batter will be very thin. ⁣ 
3. Pour the batter into the prepared pan and bake for 35-40 minutes, until a toothpick inserted comes out clean.⁣ Full recipe (with frosting) link in my bio.
⁣ 
#chocolatecake #chocolate #sheetcake #chocolatelover #birthdaycake
VANILLA RASPBERRY LAYER CAKE ♥️ between the na VANILLA RASPBERRY LAYER CAKE ♥️ between the naturally pink raspberry buttercream, jammy homemade raspberry filling, and soft vanilla cake layers, this is the perfect cake for Spring!! It’s has amazing, authentic raspberry flavor in every bite from fresh (or frozen) raspberries in the filling + freeze-dried raspberries in the frosting 😋

Get the full recipe link in my bio or find it at https://sugarandsparrow.com/vanilla-raspberry-layer-cake/ 

#raspberrycake #raspberries #vanillacake #cakedecorating #pinkcake
SMALL BATCH VANILLA CAKE 🎂🥳 this mini vanill SMALL BATCH VANILLA CAKE 🎂🥳 this mini vanilla cake recipe makes the PERFECT amount for 2-4 people and can be baked as a tiny 4-inch layer cake or a single layer 6-inch cake. It goes with any frosting flavor but vanilla buttercream keeps it classic for date night, a small gathering, a smash cake, or satisfying a cake craving. 
⁣
✨Full recipe (with frosting) linked in my bio + at https://sugarandsparrow.com/small-batch-vanilla-cake/ 
⁣⁣⁣⁣
SMALL BATCH VANILLA CAKE⁣⁣⁣⁣
⁣⁣⁣⁣
INGREDIENTS⁣⁣⁣⁣
3/4 Cups (79g) sifted cake flour⁣⁣⁣
1 tsp baking powder⁣⁣⁣
1/4 tsp salt⁣⁣⁣
1/4 Cup (57g) unsalted butter, room temperature⁣⁣⁣
1/2 Cup (100g) granulated sugar⁣⁣⁣
1 large egg, room temperature⁣⁣⁣
2 Tbsp (30g) sour cream, room temperature⁣⁣⁣
1 tsp pure vanilla extract⁣⁣⁣
1/3 Cup (80ml) whole milk, room temperature⁣⁣⁣
⁣⁣⁣⁣
INSTRUCTIONS ⁣⁣⁣⁣
1. Preheat the oven to 350ºF. Grease and line three 4-inch or one 6-inch cake pan.⁣⁣⁣
2. In the bowl of your stand mixer (a handheld mixer works fine too!), cream together the butter and sugar on medium-high until light and fluffy, 3 min. Turn the mixer to low and add the egg, mixing until just combined. Add the vanilla and sour cream, turn the mixer to high, and beat for 1 min. ⁣⁣⁣
3. Turn the mixer to low speed and add the dry ingredients all at once. Mix until just combined, then slowly pour in the milk. Continue to mix on low speed until just combined, about 30 seconds. ⁣⁣⁣
4. Pour the batter evenly between the prepared cake 4-inch pans (or all into one 6-inch cake pan). If using 4-inch cake pans, bake for 18-22 minutes. If using a 6-inch cake pan bake for 24-28 minutes. The cake is done when it springs back to the touch and a toothpick inserted comes out with a few moist crumbs. ⁣⁣⁣
⁣⁣⁣⁣
#vanillacake #cakes #vanilla #minicake #cakedecorating

Footer

On the Blog

  • Cake Basics
  • Recipes
  • Tutorials

Info

  • About
  • Privacy Policy & Disclosure

stay in the know

Copyright © 2026 · Theme by Sugar & Sparrow