
I don’t normally go for lemon flavored desserts, but for some reason this Spring has me craving all things lemon. Maybe it’s the reemergence of the sunshine after months of grey, or the blooming daffodils, or the general sense of new beginnings. There’s something about lemon that perfectly matches the start of this brighter, sunnier season. And while I already have a few lemon cake recipes (lemon lavender cake, lemon layer cake with lemon-cream cheese frosting, and lemon blueberry cake), I decided to go all-in on the lemon flavor in this one. It turned out deliciously light and refreshing, tender and moist, and one of the happiest looking cakes I’ve ever seen!
This post may contain affiliate links. For more information, see our disclosure policy.

One Reader, Justine, says: “THIS IS THE LEMON CAKE recipe! Throw away any other lemon cake recipe you have, you don’t need it anymore! I have been professionally baking for years, this tops all the lemon cake recipes I have tried. The crumb is perfect!” ★★★★★
The Most Tender, Moist Lemon Cake
This lemon cake is slightly different from the other lemon cake recipes on my blog. I still love the other ones (as do you!), but while I was testing recipes for my book I discovered an alternative way to make lemon cake that produced even softer cake layers. Both are flavored with lemon zest and lemon extract, are perfectly moist, and made with cake flour to produce a lighter crumb. The main differences are the types of moisturizers used. My previous recipes lean mostly on sour cream, while this recipe used vegetable oil and buttermilk to create moisture.
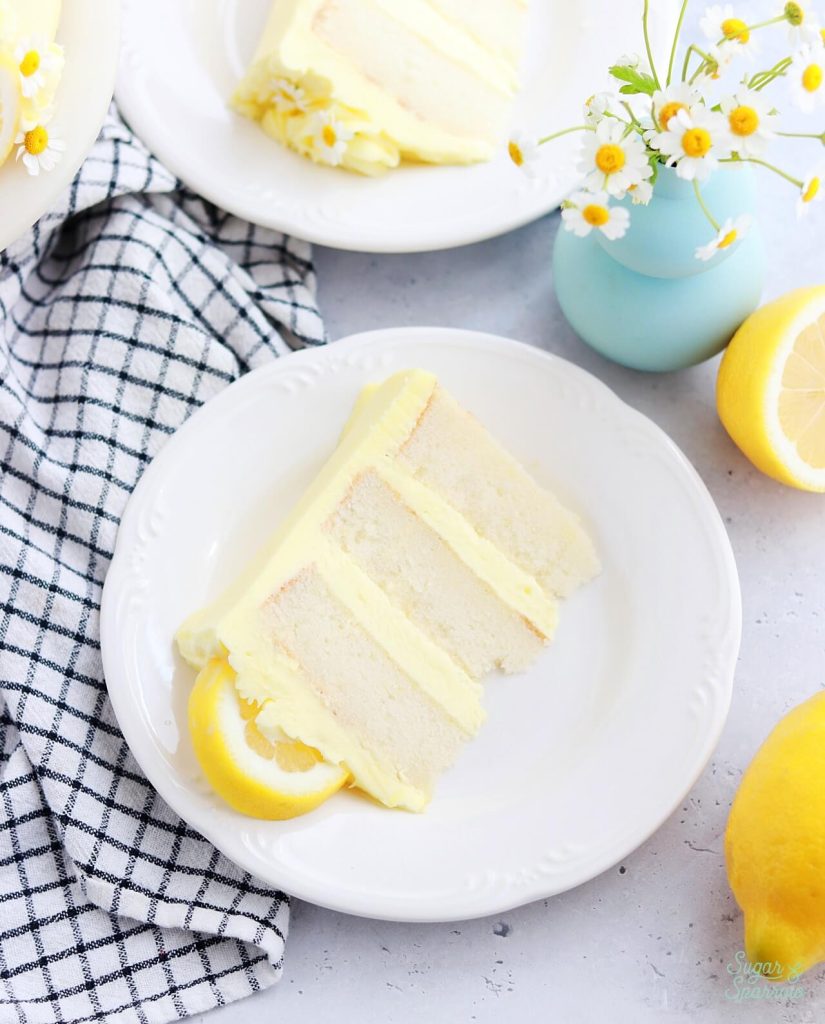
All in all, I do think that this recipe has the perfect balance of soft and fluffy texture, moist crumb, and amazing lemon flavor. Compare it with my previous lemon cake recipe to see which one you prefer!
How to Get the Best Lemon Flavor
There’s a lot of lemon involved in this cake: lemon zest, lemon juice, and lemon extract. The recipe starts with zesting a lemon into the sugar and combining until the natural oils are released. The zest is much more powerful as a flavor additive than the lemon juice in a baked good – the juice tends to mostly evaporate in the baking process. Still, this recipe doesn’t waste the juice of that lemon you zested! Instead, we combine it with milk to make buttermilk for the end of the recipe, which will help make the cake supremely moist.
The ingredient that lends the most powerful lemon flavor is lemon extract. Lemon extract is basically lemon zest that has been ultra-concentrated and therefore, takes the lemon flavor in the cake to the next level. I made this ingredient optional because even without the extract, this cake is still delicious and has a subtle lemon flavor that is amplified when frosted with the lemon buttercream. If you’re a diehard lemon fan, add the extract for the best lemon flavor!
Using Lemon Curd as Filling
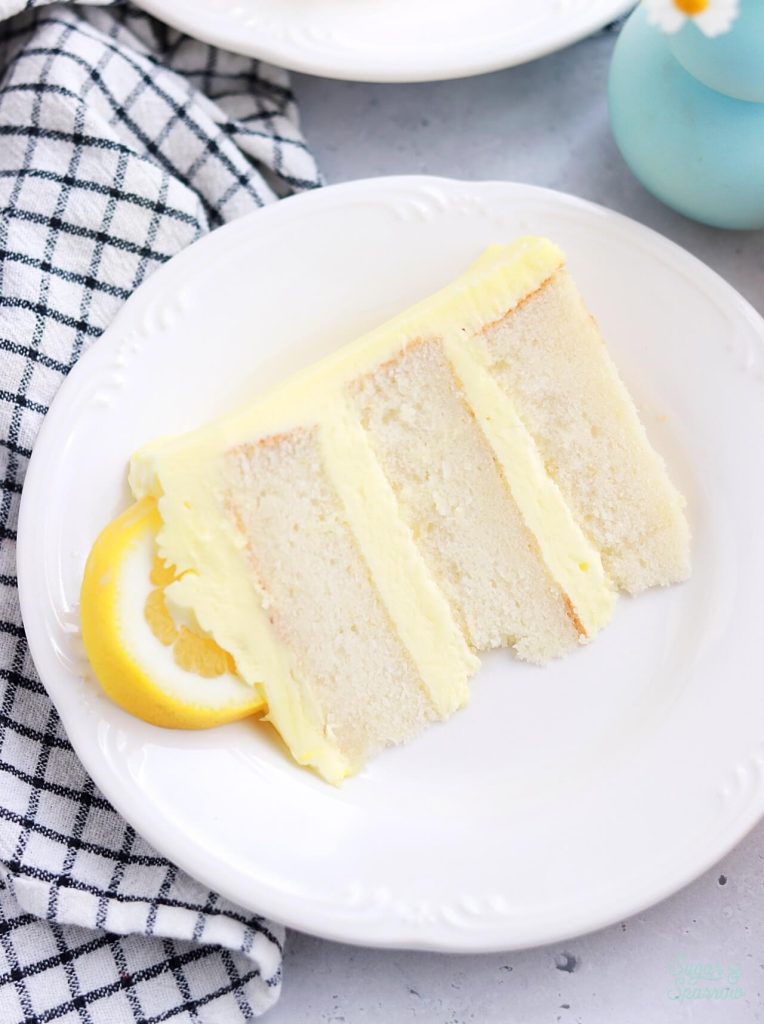
These soft and fluffy lemon cake layers are filled and frosted with a lovely lemon buttercream that’s just the right amount of sweet. One question I am anticipating is what about lemon curd filling? And the answer is that you can certainly add lemon curd in between the layers if you want to! It will only add more lemon flavor. If you do choose to add lemon curd, you’ll want to follow the Soft Fillings instructions in this blog post. Since lemon curd has a much thinner consistency than buttercream, you’ll want to add some support in between the layers so the filling doesn’t squish out.
How to Decorate a Lemon Cake
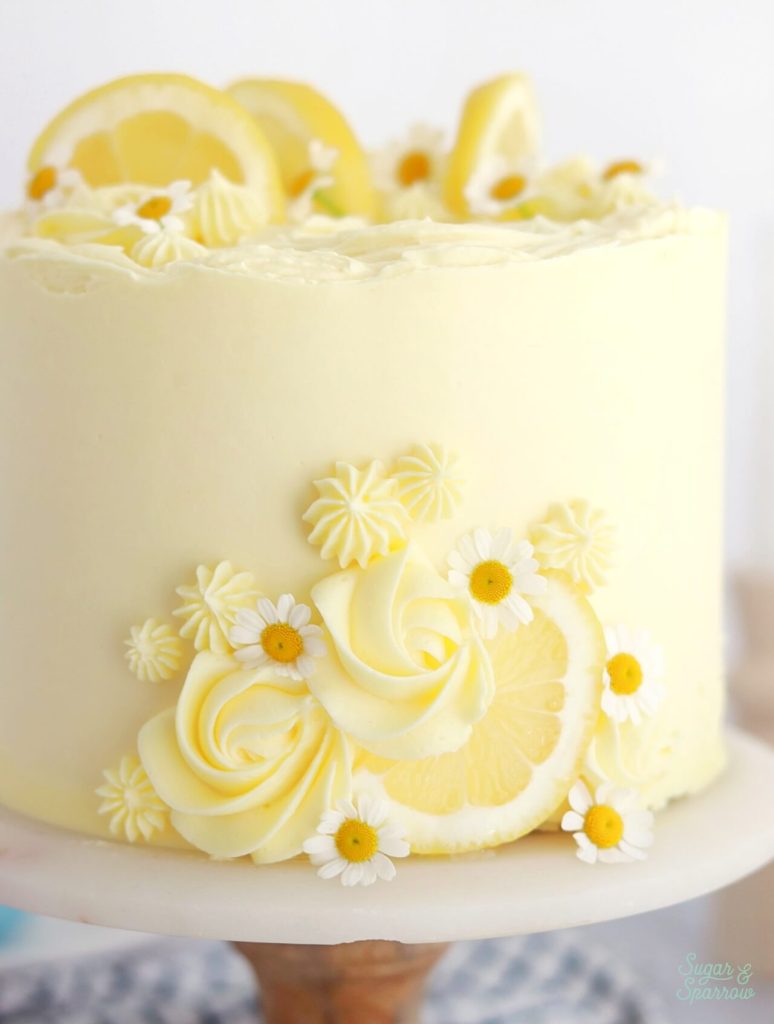
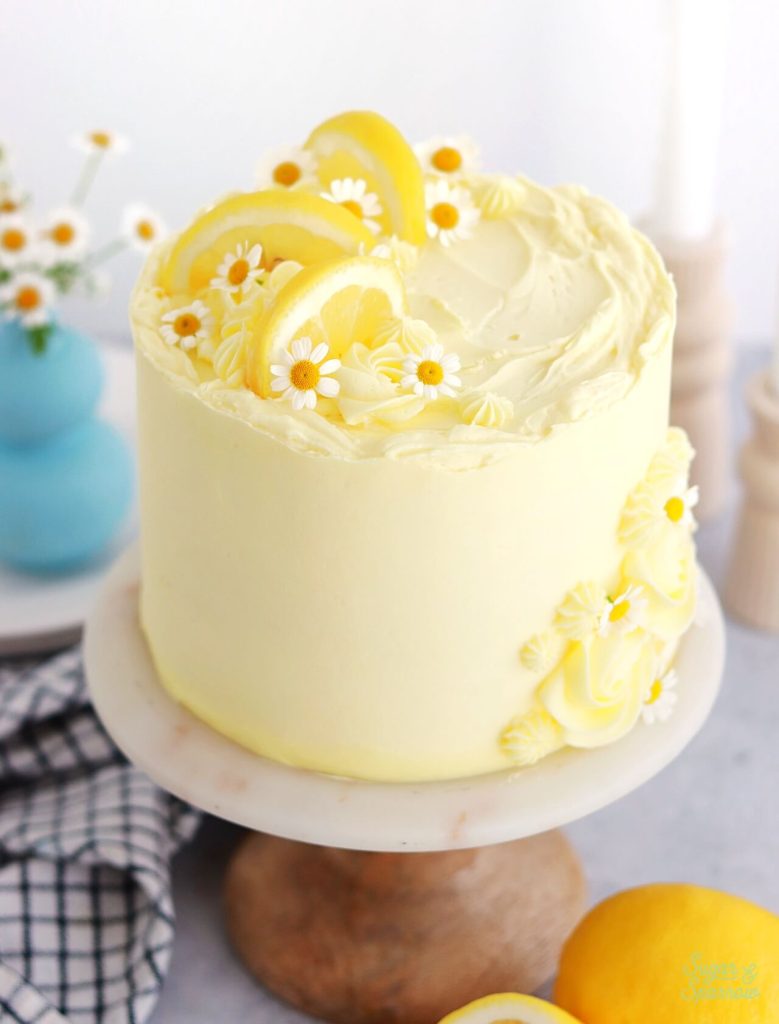
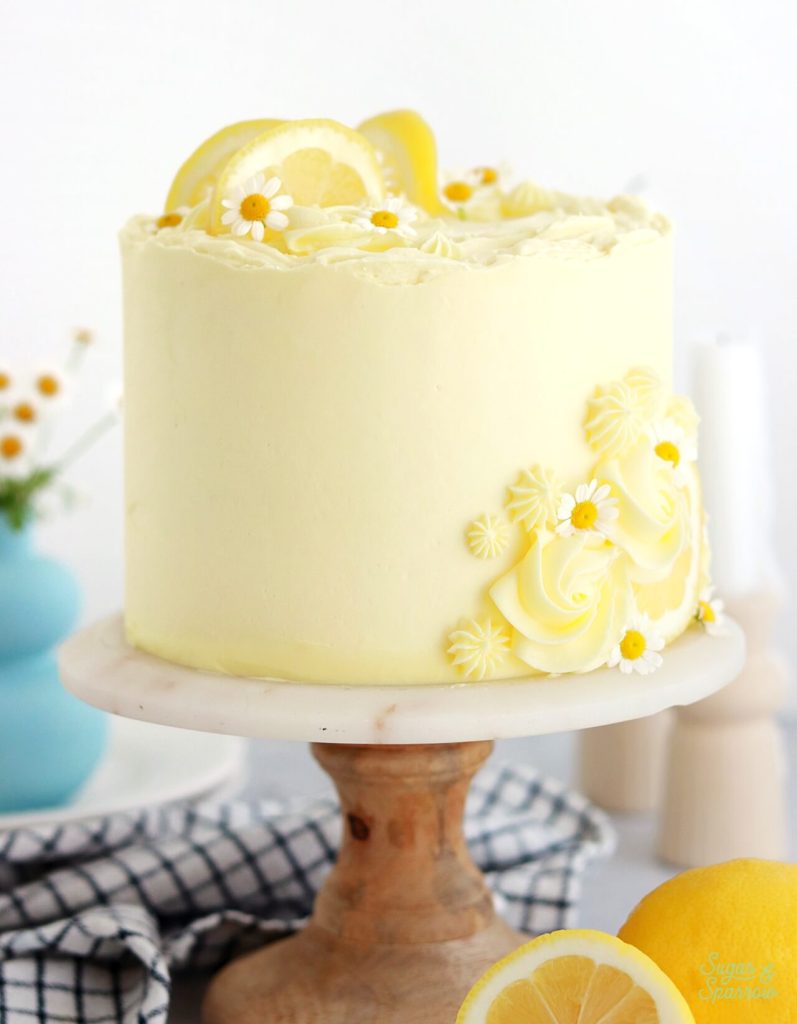
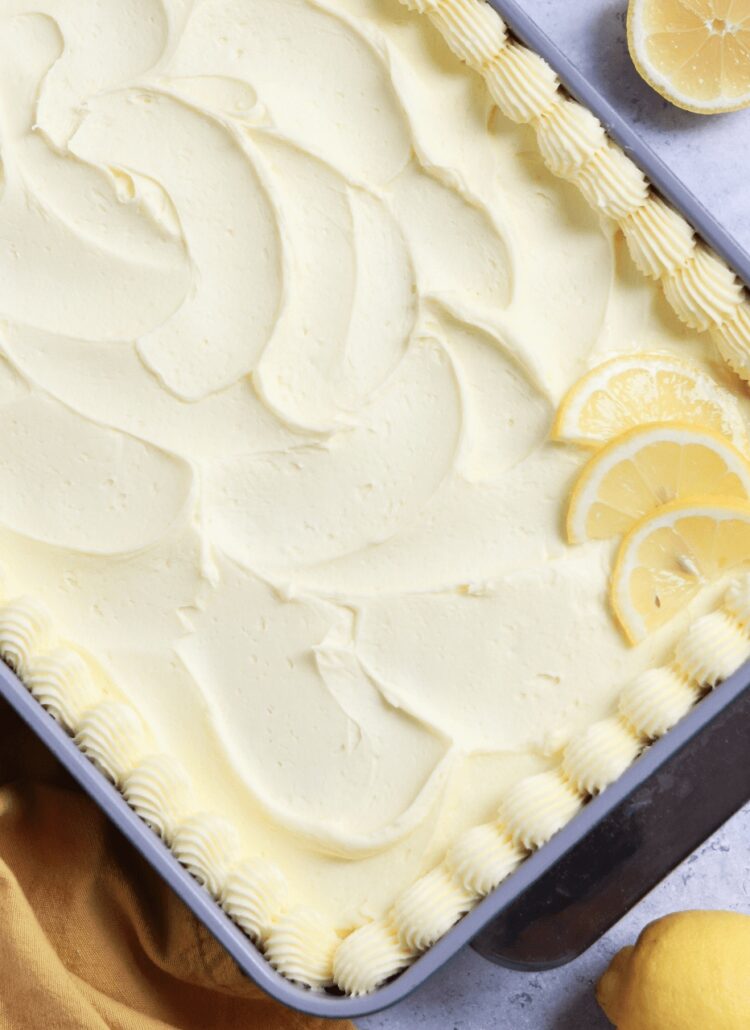
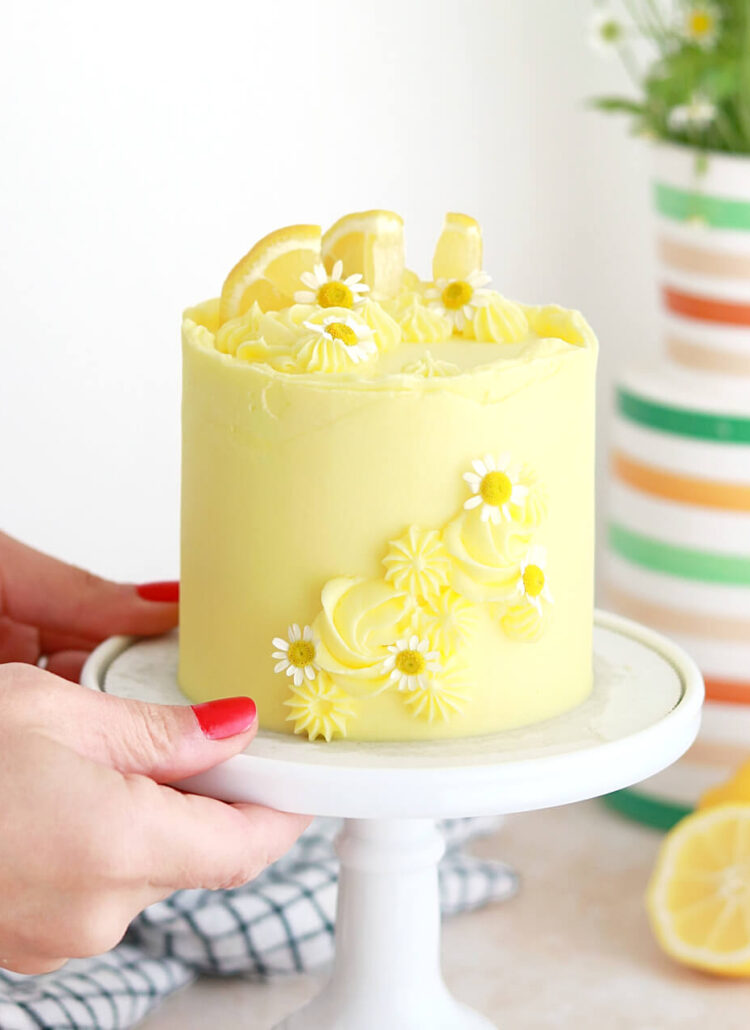
This lemon cake was one that I designed in real time, and I absolutely love how it turned out! It’s a bit rustic with the raw edge and textured top, but also polished with the smooth finish and dainty with the cute chamomile flowers. You can decorate this however you’d like, but feel free to copy this look if you’re inspired!
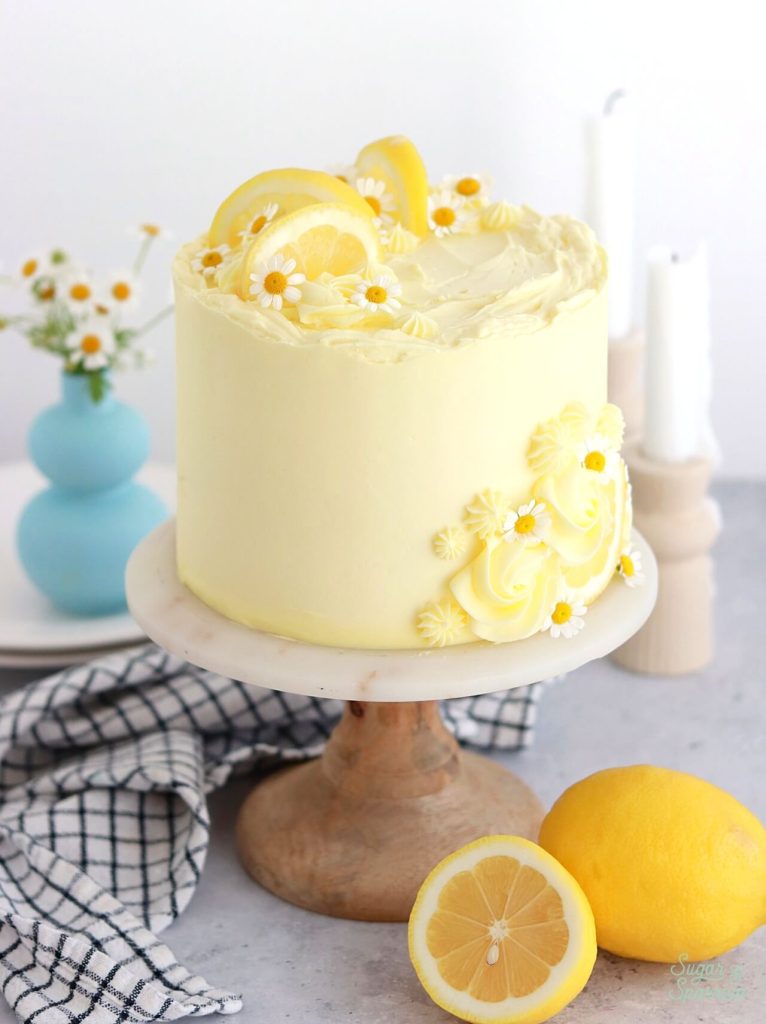
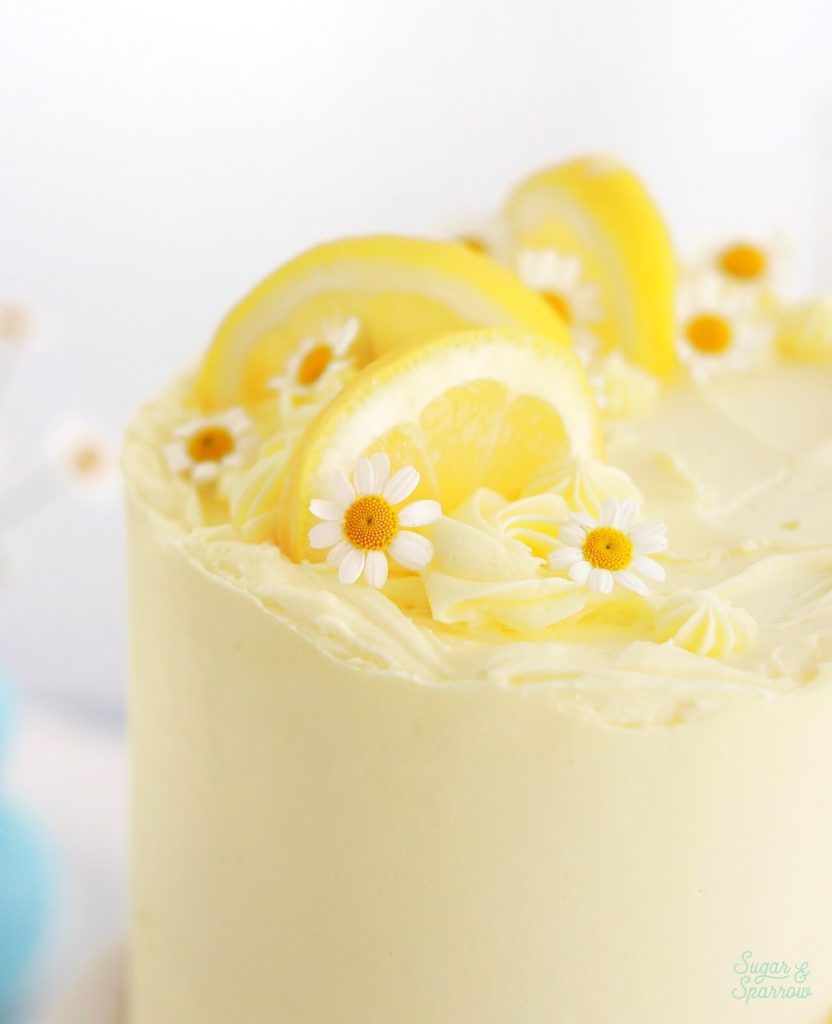
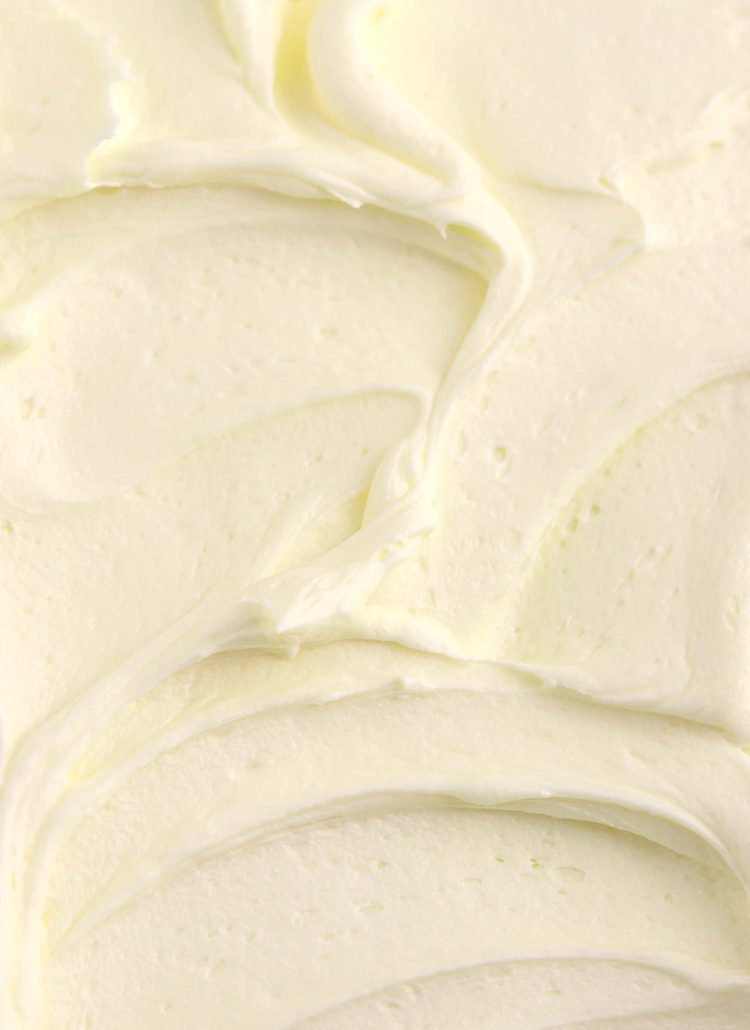
To create this design, I frosted the very top of the cake with rustic texture by swirling a small icing spatula through it. Then, I frosted the sides of the cake with a smooth buttercream finish, but kept the edge raw instead of swiping the edges inward (as you would if you were going for sharp edges). I went back and forth about adding piping to the top but I ultimately did pipe some rosettes and stars in a crescent shape before adding lemon slices and chamomile flowers. Then I piped more rosettes and stars on the side of the cake with more chamomile accents.
However you decorate, this cake is sure to be delicious! I can’t wait for you to try it.
UPDATE 2026: I changed the buttermilk to a homemade version that uses the juice of the lemon that is zested. This way, no lemons are wasted! I also made the lemon extract optional for those who like a more powerful lemon flavor.
Lemon Layer Cake
Ingredients
- 1 1/4 Cups (300ml) whole milk, room temperature
- 1/4 Cup (60ml) fresh lemon juice about 1 medium lemon
- 2 1/2 Cups (265g) sifted cake flour* DIY recipe in notes
- 1 Tbsp baking powder
- 1/2 tsp salt
- 1 1/2 Cups (300g) granulated sugar
- 1 Tbsp grated lemon zest about 1 medium lemon
- 1/2 Cup (113g) unsalted butter, room temperature
- 4 large egg whites, room temperature
- 1/2 Cup (120ml) vegetable oil
- 1/2 tsp pure lemon extract (optional)
Lemon Buttercream
- 1 1/2 Cups (339g) unsalted butter, room temperature
- 5 1/4 Cups (630g) powdered sugar
- 3 Tbsp (45ml) fresh lemon juice
- 1 Tbsp whole milk, room temperature
- 1/4 tsp salt, or to taste
- 2-3 drops yellow food color gel
Garnish
- 3 lemon slices
- fresh chamomile flowers
Instructions
Make the Lemon Layer Cake
- Preheat the oven to 350°F (177ºC). Grease and line three 6-inch or two 8-inch cake pans.
- In a jar or measuring cup, combine the lemon juice with the milk. Stir and set aside. It will curdle by the time you add it to the recipe at the end, and the curdling is the chemical reaction we want!
- Add the sifted cake flour, baking powder, and salt into a bowl and whisk to combine. Set aside.
- Using a stand mixer fitted with the paddle attachment, mix together the sugar and lemon zest until fragrant and well combined, about 1 minute. Add the butter and cream it together with the lemon-sugar mixture on medium speed until light and fluffy, 2-3 minutes.
- With the mixer on low, add the egg whites one at a time. Add the vegetable oil and lemon extract (if using) and beat at high speed for one minute.
- Turn the mixer off and add the cake flour mixture all at once. Mix on low speed until just combined, then slowly pour in the lemon-milk mixture. Mix until smooth and fully combined, about 30 seconds.
- Pour the batter evenly between the prepared cake pans and bake for 28-32 minutes, until a toothpick inserted into the centers comes out clean or with a few moist crumbs. Cool for 5 minutes before removing the cakes from the pans. Transfer the cake layers to a wire rack to cool completely to room temperature.
Make the Lemon Buttercream
- In a stand mixer fitted with the paddle attachment, whip the butter on high speed until creamy and light in color, about 5 minutes.
- Add the powdered sugar in two additions, mixing thoroughly for a minute and scraping down the bowl and paddle after each addition.
- Add the lemon juice, whole milk and salt and mix on low until the buttercream is well incorporated and smooth, 1-2 minutes. Mix in the yellow food color gel, if using.
Assembly
- Once the lemon cake layers are completely cooled, level them to your desired height. Add a swipe of lemon buttercream onto a cardboard cake circle and place the first cake layer on top. Fill and stack the cake with lemon buttercream. Crumb coat the cake with lemon buttercream, then place it in the refrigerator for at least 30 minutes to let the buttercream set firm.
- To create the design pictured, add about 1/3 Cup of lemon buttercream onto the top of the cake and smooth it down before creating rustic texture with a small icing spatula. Frost a smooth buttercream finish onto the sides of the cake but keep the top edge raw, meaning don’t swipe it inward to create sharp edges. Fit one piping bag with Wilton Tip 4B and another with Wilton Tip 1M and divide the remaining lemon buttercream between them. On the top of the cake, use the bag fitted with Tip 1M to pipe a few rosettes and the bag with Tip 4B to pipe a few stars in a crescent shape. Garnish with lemon slices and chamomile flowers. Pipe more rosettes and stars on the side of the cake before adding more chamomile accents.
Notes
- The lemon cake layers can be made ahead and stored at room temperature, covered tightly in plastic wrap, for up to two days. Alternatively, you can cover with plastic wrap and store in the freezer for up to two months before thawing to room temperature.
- The lemon buttercream can be made ahead and stored in an airtight container in the refrigerator for up to two weeks. When you’re ready to use it, bring it back to room temperature and re-whip in your stand mixer to bring back to smooth buttercream consistency.
Did you make this lemon layer cake? I want to know how it went! Leave a comment below and feel free to tag @sugarandsparrowco on Instagram to show me. I love to see what you create!

Hi Whitney,
I’ve made so many of your cake recipes and have had great success. I need a 3 layer 6 inch orange cake that is light and fluffy. and was hoping I could use this recipe and substitute orange zest, juice and extract but was wondering your thoughts. Thank you!
Hi Cathy! I’m so happy you’ve been loving my recipes! It will totally work to sub orange zest, juice, and extract in this recipe. I’ve also got an orange poppyseed cake recipe here that’s similar, but written for an orange-flavored cake without orange extract (just omit the poppyseeds if you use this one): https://sugarandsparrow.com/orange-poppyseed-cake-with-mascarpone-frosting/ enjoy!
Thank you so much! I will use that one. The frosting sounds amazing too. If it weren’t for someone else, I’d keep the poppy seeds in it…so pretty but I will definitely make it again as written. Thanks again.
Cathy
Hi! Can you leave the buttercream icing out on the counter while you let the cake with the crumb icing layer chill in the fridge?
Hi Chantal! Yes, you can leave the buttercream on the counter at room temperature while the crumb coat is chilling. Enjoy!
Sorry. Forgot my other question- do you measure the cake flour and then sift it or is it sifted before you measure?
No worries! You sift and then measure in this recipe.
I made this recipe as a 3-tiered, 6″ bridal cake for a wedding shower. It was delicious paired with your lemon buttercream frosting. I sprinkled lemon simple syrup onto each inner layer, created a well with buttercream, and added a layer of lemon curd covered with more buttercream. Several people asked for the recipe. Great recipe!
This sounds next level, Amy! I’m so happy it was such a hit!!
Hi!
I’ve just made this cake, and it does feel a little dense.. would a fan baked oven do that?
And How long would you recommend to let the cake cool for after removing it from the over and adding the frosting please?
Thanks in advance! 🙂
Bel
Hi Bel! Yes, a fan-assisted oven will overbake this cake unless you reduce the oven temperature by 25ºF to compensate. This recipe is written for a conventional oven. Next time, I would bake at the reduced temperature of 325ºF and start checking for doneness around the 25 minute mark. Let the cake cool in the pan for about 5 minutes, then remove from the pan and transfer the layers to a wire rack to cool completely to room temperature before adding the frosting. Hope that helps!
Hi Whitney!
I love your recipes and I often refer to your book, “Anyone Can Cake” for recipes and inspiration!
Question here: With cake flour giving a tighter crumb, do you think I would have a more “airy” cake if I used all purpose flour or a mix or both flours? Thank you.
Hi Paula! In my opinion cake flour gives this cake an airy crumb, moreso than all-purpose flour or a mix of the two flours. The recipe as-is yields a super light and fluffy cake texture, so that’s what I recommend.
Thank you for this recipe! I am going to make (2) 12×2 round, (2) 10×2 round, and (2) 8×2 round .. can you advise how I should duplicate this recipe?
Hi Jamie! For the two 8-inch rounds, one batch is perfect. For the two 10-inch rounds, double the recipe. For the 12-inch rounds, triple the recipe. Hope that helps!
Hi, I love your recipes, so I’m I will love this one. Backing is such a science that I, sometimes, hesitate in doubling recipes, I need to make this in a 10 x 15″ pan. can I double the recipe safely?
Thank you very much for sharing your incredible recipes.
Warm Regards,
Kathee
Hi Kathee! I’m so happy you love my recipes. How tall are the sides of your 10×15 pan? Is it a jelly roll pan or does it have taller sides?
Hi Whitney,
The 10 x 15 ” cake pan has 2 inch sides. Thank you so much for taking the time to respond.
Kathee
One batch of this recipe will bake about a 1-inch tall layer in a 10×15 pan (Bake at 325F for about 25-30 minutes). You can double the recipe for closer to a 2-inch tall layer and keep that oven temp at 325F, but the baking time will be 35-40(ish) minutes. Hope that helps!
Thank you for taking the time to answer my questions.
Sweet Dreams,
Kathee
Hi! This recipe looks so good! Can you halve the recipe or do 1 1/2? I’m thinking of doing a 3 layer 8 inch for a party because I didn’t think that the two layers would be enough. Thanks in advance
Hi Chantal! Yes, you can make 1.5x the recipe to make 3 8-inch cake layers. Just multiply each ingredient by 1.5 and you’ll have the perfect amount of batter. Enjoy!
Hello! I noticed you updated the recipe. It says 1 and 1/4 cups of whole milk and 1/4 c of fresh lemon juice and to mix them together. I was going to substitute the whole milk for homemade buttermilk – do I still need to mix the lemon juice with the homemade buttermilk? Thanks!
Hi Shadia! I like using lemon juice for this recipe because it adds more lemon flavor. I haven’t tried this recipe with actual buttermilk but you could try doing 1 1/4 Cups of buttermilk + 1/4 Cups of lemon juice (for flavor). My hunch is that it will just be more moist. Hope that helps!
I LOVE this cake and will make again but I would like to duplicate with the same light texture for cupcakes? Is this doable?
Thanks!
Hi Catriona! I’m so happy you love this cake recipe! After lots of recipe tests using this cake recipe as a starting point, this is the lemon cupcake recipe that best replicates this layer cake texture: https://sugarandsparrow.com/homemade-lemon-cupcakes/
I’m yet to make but this will hopefully be made this weekend. I’m in the UK and don’t have cake flour, I know there is the diy recipe, but what would happen if I was to use self-raising or plain with baking powder?
Hi Megan! I have never tried this recipe with self-raising or plain with baking powder, so it would definitely be an experiment. If you want to try it I would recommend researching what to do about the baking powder already in the recipe (whether to omit it or reduce it). My best suggestion would be to make the homemade cake flour. Let me know if you try it with an alternative flour though!
You are the MVP!
I wish I could leave a picture comment!
The cake turned out just beautiful. Could you double the lemon buttercream recipe to accommodate putting borders on and making buttercream roses for the top around the bottom thank you.
I’m so happy you loved this recipe, Rudolph! I think doubling the buttercream recipe will make more than enough to add a top and bottom border + make buttercream roses. If you want to make 1.5x the recipe I think that will be the perfect amount. Those measurements are:
2 1/4 Cups (508g) unsalted butter, room temperature
7 1/2 Cups (900g) powdered sugar
4 Tbsp (60ml) fresh lemon juice
1 1/2 Tbsp whole milk, room temperature
1/4 tsp salt, or to taste
3 drops yellow food coloring
I made yhis and the buttercream was amazing ! So addictive ! My lemon layer cake was dry though and lack the lemony flavor. Hmmph ? Any idea what I could have done wrong ? Oven temperature ? (I have a fan oven) Or I think there’s something wrong with my creaming process maybe ? Thank you.
Hi Mara! If you have a fan assisted oven I recommend lowering the oven temperature by 25ºF since those kinds of ovens bake cakes much faster/hotter. This is normally a very moist cake and if you followed the timing instructions and had all the ingredients at room temperature, it should be pretty fail proof as long as your oven is at the right setting/temp. Hope that helps for next time!
I made this cake yesterday for my daughter’s birthday. I was mildly surprised to see it called for a tablespoon of baking powder, as I’ve never used a recipe that called for that much. I thought maybe it was counteracted by the buttermilk, so I shrugged it off and tossed it in. But the final product tasted VERY strongly of baking powder. It wasn’t inedible, but not too far off. Am I crazy? Is no one else experiencing this issue? Did you really mean to call for a tblsp, or did you mean to say tsp?
Otherwise, the recipe seemed great, and I’d probably try it again with a tsp of baking powder…just trying to figure out what went wrong.
Hi Tina! Since citrus is so acidic, this cake relies primarily on baking powder to get its rise (as many lemon cake recipes do). I’m sorry that you feel the baking powder has flavored the cake, to me it just tastes really strongly of lemon. If you want to experiment, next time I would try 2 teaspoons of baking powder. Just note that the cake may not rise as much. Hope that helps!