• Cake
  • Frosting
  • YouTube
  • My Favorite Tools
  • Nav Social Icons

  • Skip to primary navigation
  • Skip to main content
  • Skip to primary sidebar
  • Skip to footer
  • Recipes
    • Cake
    • Cupcakes
    • Frosting
    • Ice Cream
    • Vegan
  • Cake Basics
  • Tutorials
  • Blog
  • About
  • Mobile Menu Widgets

    Connect

    Search

Sugar & Sparrow logo in script font

Sugar & Sparrow

Lifestyle and Cake from Portland Oregon

  • Cake Basics
  • Recipes
    • Cake
    • Cupcakes
    • Cookies & Bars
    • Filling
    • Frosting
    • Ice Cream
    • No-Bake
    • Small Batch
    • Vegan
  • Tutorials
  • Book
  • Blog
  • About

How to Level and Torte Cake Layers

July 17, 2020 · In: Cake Basics, Tutorials

Whether my cake layers come out of the oven with a domed top or a flat one, there’s one step I never miss once those cakes are cooled: torting the layers. Torting is a fancy word for leveling, and the process ensures that any domes get chopped off and any difference in height between layers is eliminated. Perfectly level layers not only make for the most picturesque cake slices, they also ensure that your cake is more level overall when frosted. In my humble opinion, it is a must. 
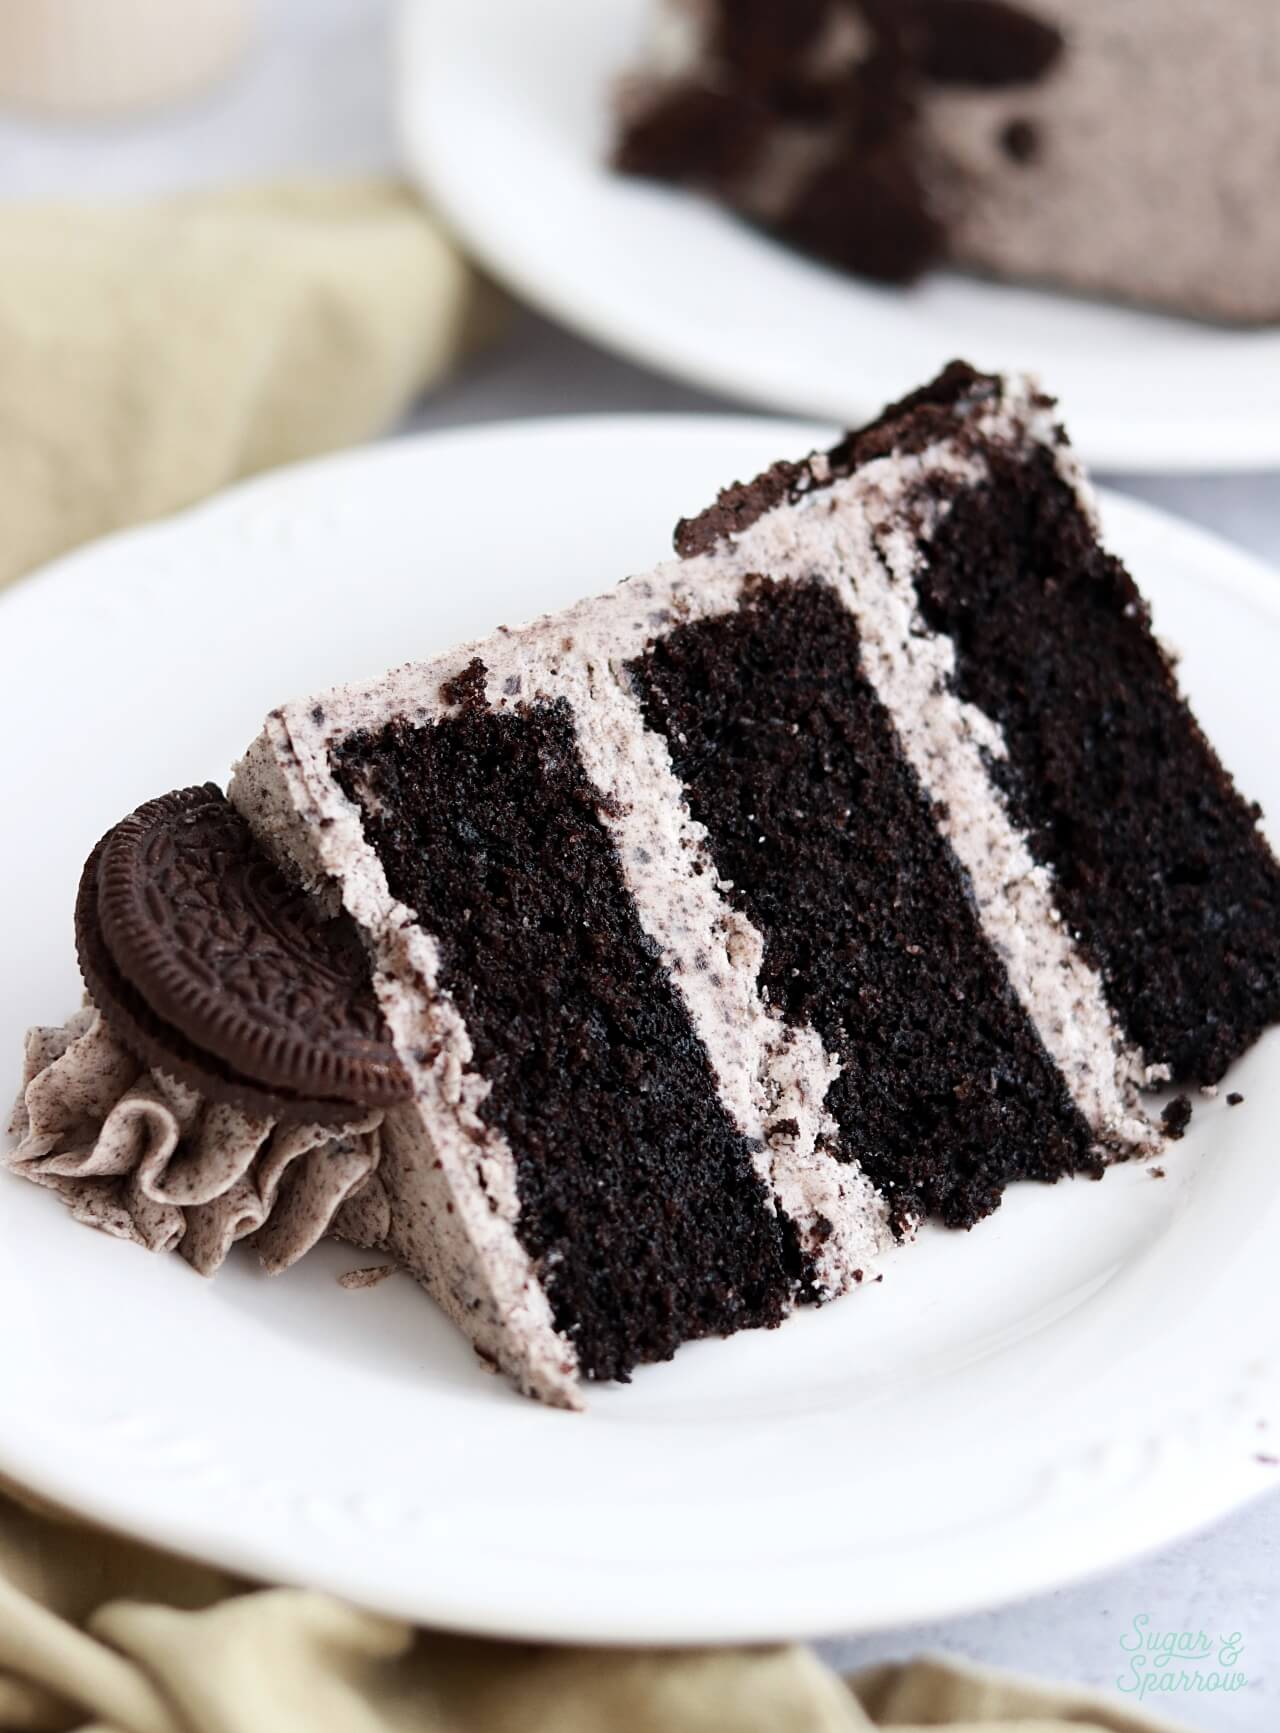
oreo cookie cake slice
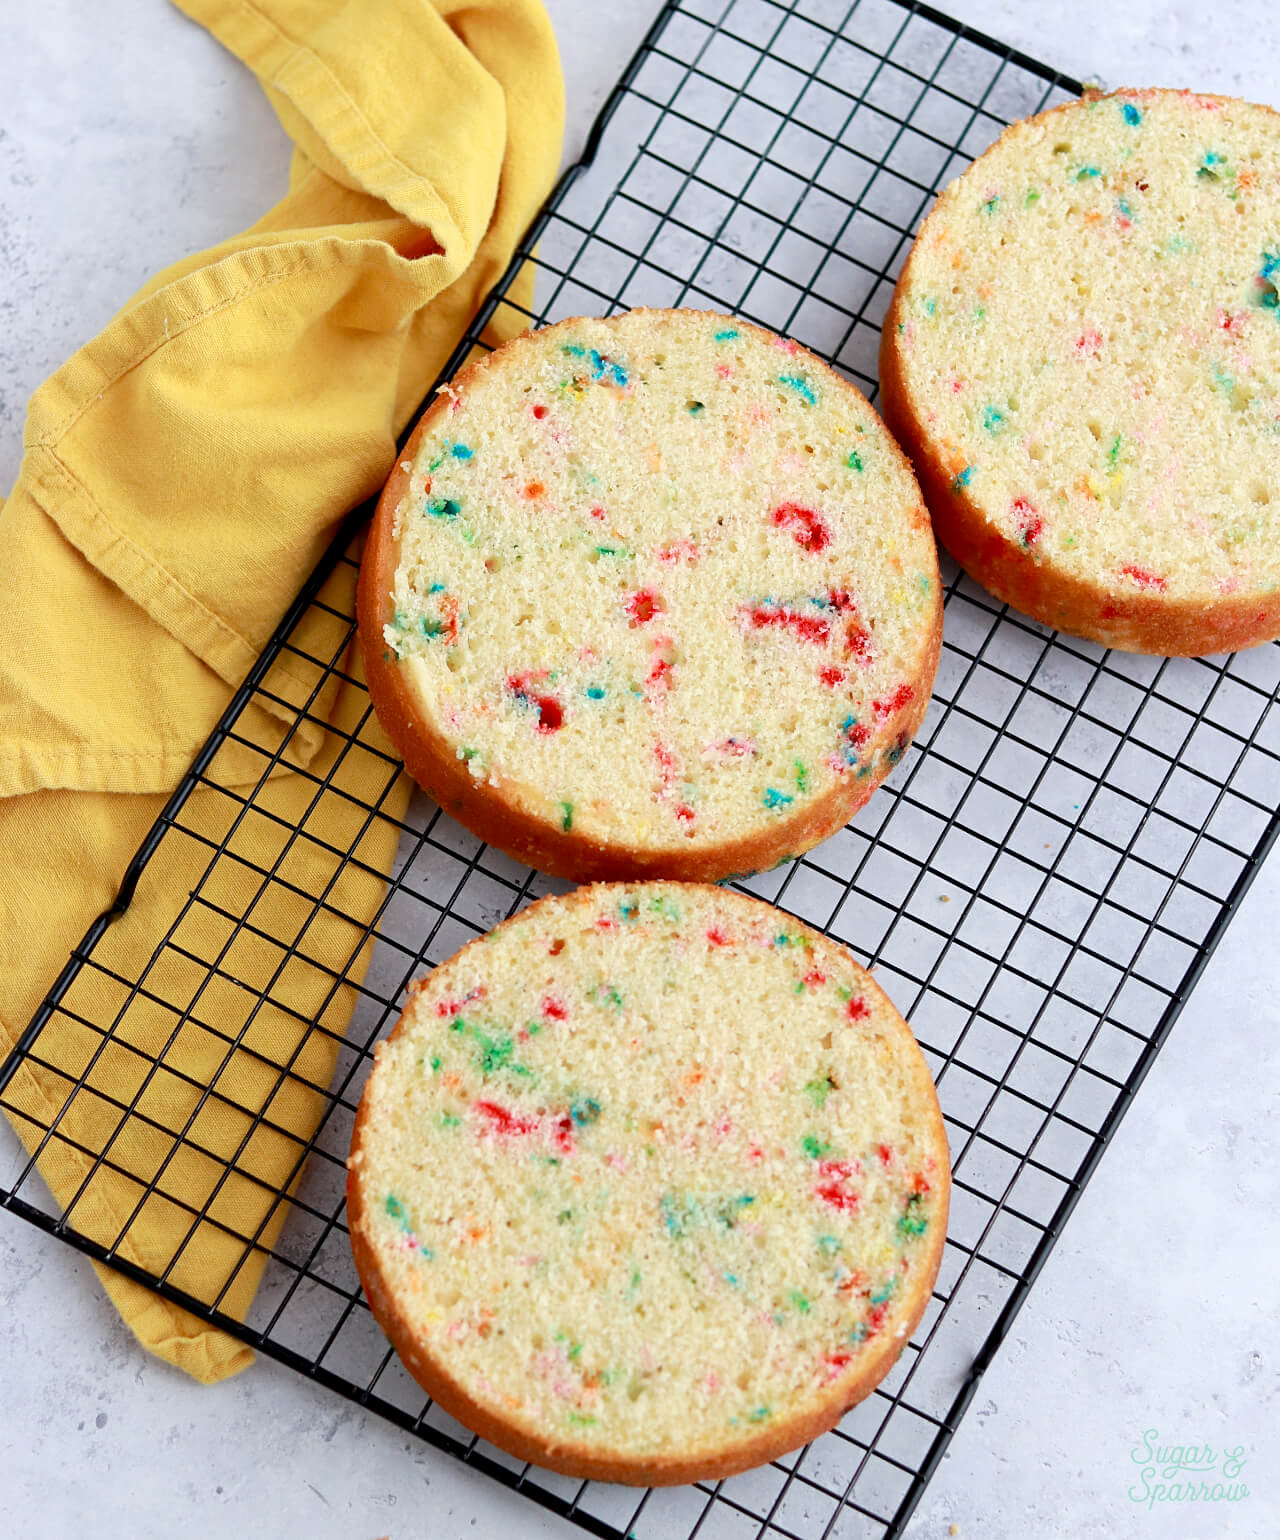
funfetti cake layers on a cooling rack

There are two main methods for torting cakes: using a Cake Leveler or using a serrated knife. I prefer the Cake Leveler method because it’s ultra failproof, but if you don’t have one on hand, a serrated knife will work just fine. You just need to be a little more careful when it comes to making sure the end result is even. Here’s a quick video to show you both before I walk you through each method below: 

Side note before we move on: If you’re wanting to see more Cake Basics videos like this one, you should definitely check out my YouTube Channel and watch more of this series! You’ll even find cake recipes and decorating tutorials there to help broaden your skill set and inspire you. Be sure to hit the Subscribe button so you never miss a new video!

Method 1: Using a Cake Leveler

Like I mentioned before, the Cake Leveler is my preferred tool for torting cakes. These contraptions come with an adjustable wire or blade, so you can set it at whichever height you want your cake layers to be. I have been using this one by Wilton for over a decade now and love it, but there are other brands out there. 
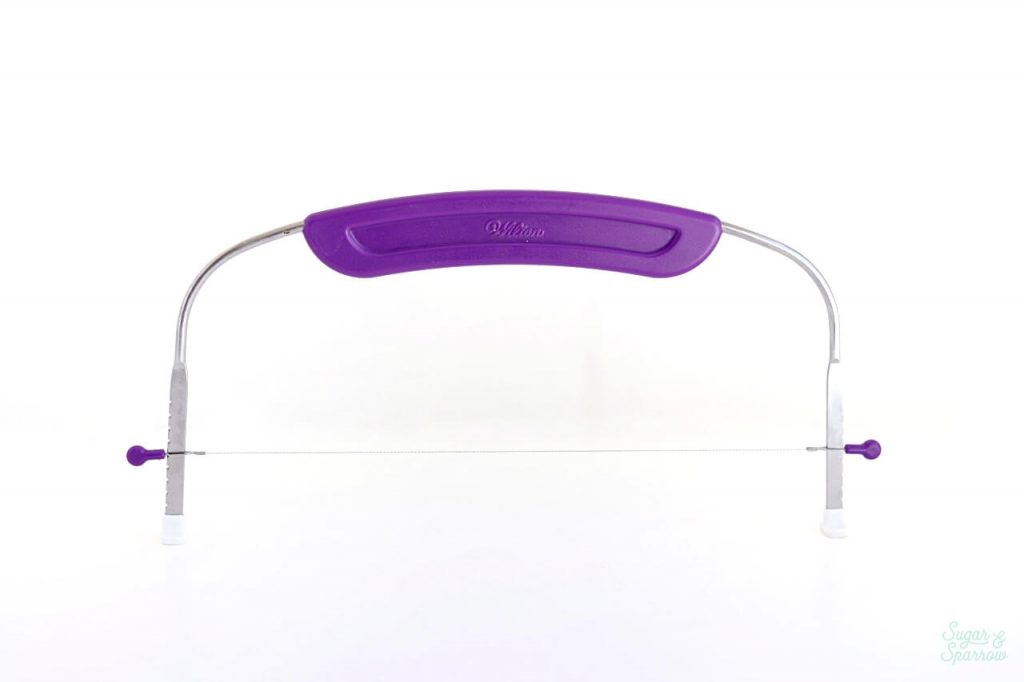
Wilton Cake Leveler tutorial

The size I use accommodates cakes up to 10 inches in diameter. I rarely make cakes larger than that anymore, but if you do, I can also recommend this large Cake Leveler by Wilton. 

To torte your cakes with a cake leveler, simply line up the wire at the height you want to cut and lock it into the groove. 
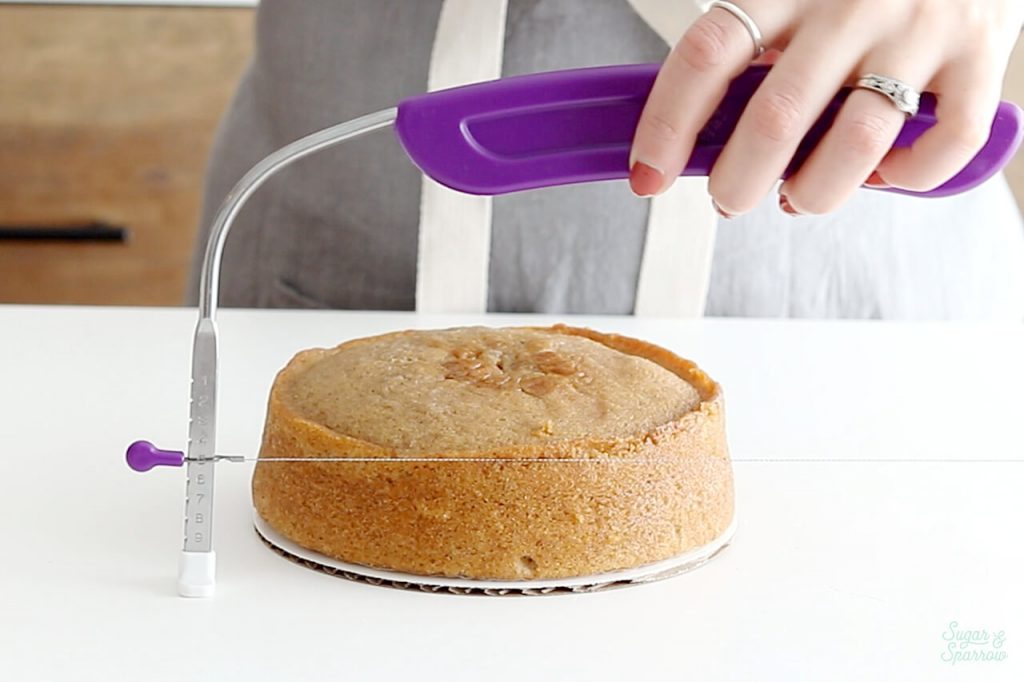
how to use a cake leveler

Then, use a gentle sawing motion as you slide the wire through your cake layer, ensuring that the “feet” of the Cake Leveler remain flat on the table the entire time.
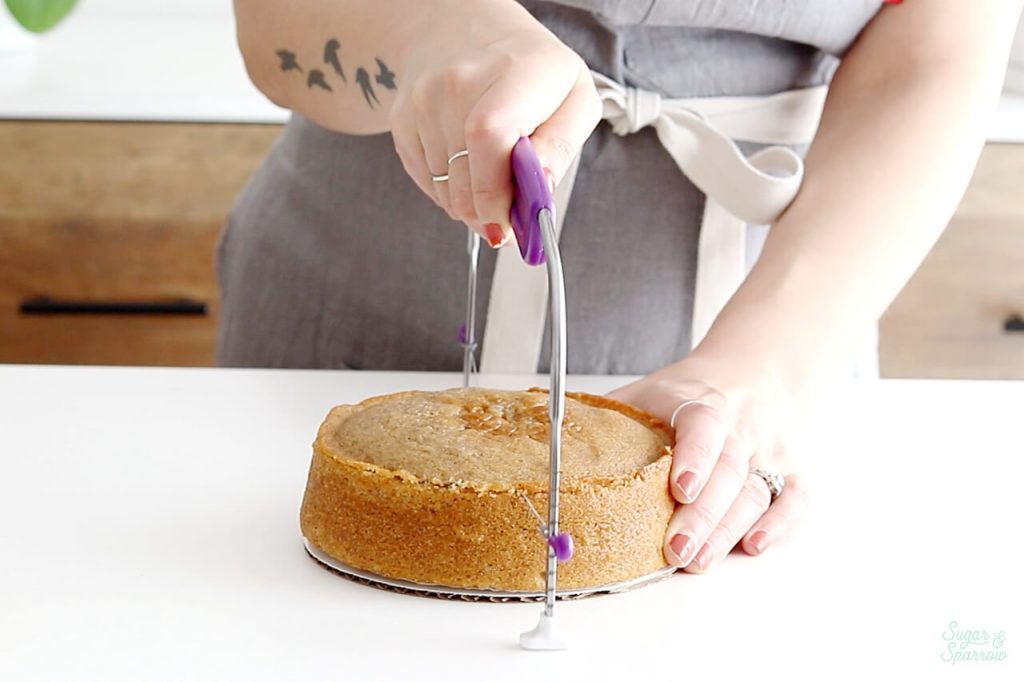
how to cut off domed top of cake

After that, remove the top of the cake that has been leveled off. 
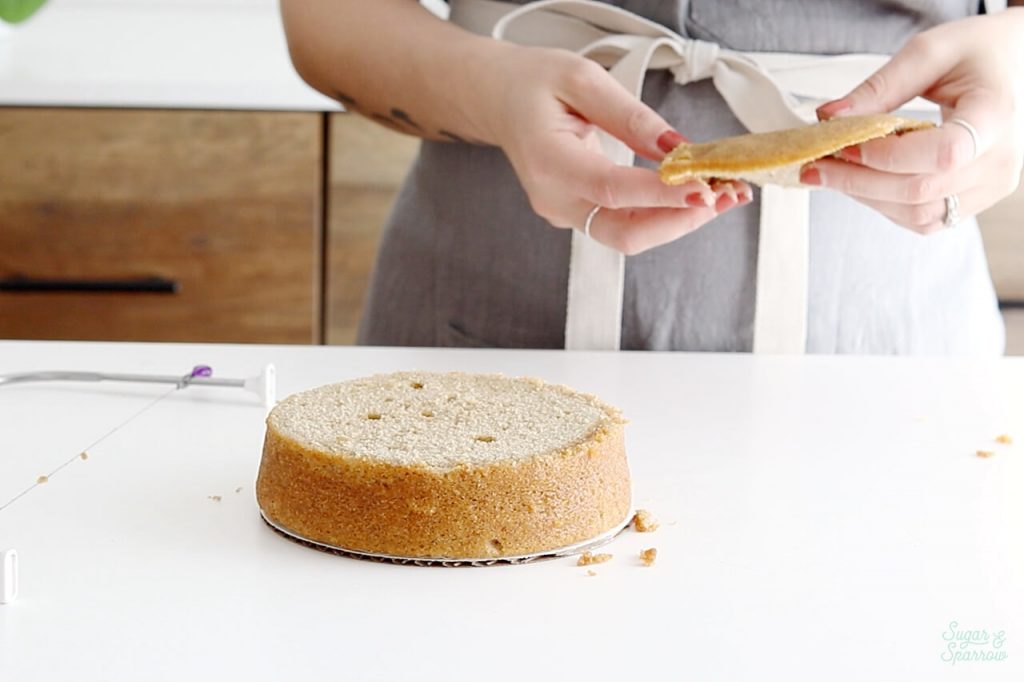
how to trim cake layers to make them level

I usually end up snacking on the leveled off tops with a little bit of buttercream. Gotta make sure it still tastes good, right? 

Method 2: Using a Serrated Knife

If you don’t have a Cake Leveler on hand, you can always use a serrated bread knife to torte your layers. The serrated edge is perfect for slicing through cake. Since this method is a little more freehand, you’ll need to use a little more focus to ensure your layer ends up level. 

First, you’ll want to create some score marks around your cake at the height you want to level off. You can eyeball this part or use a ruler to make each layer exact. 
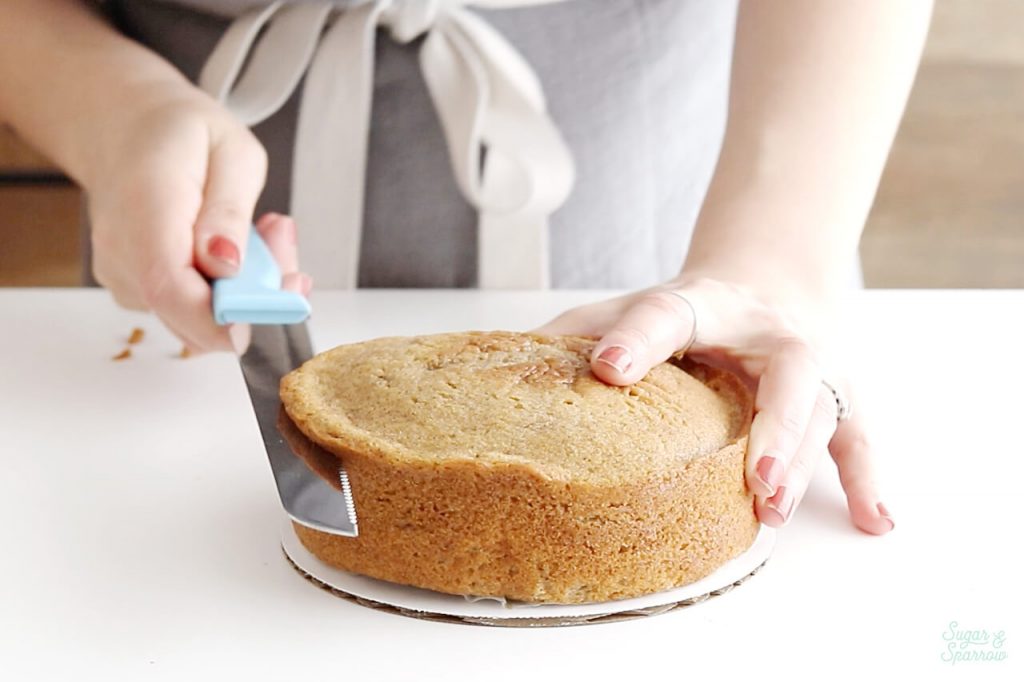
how to make cake layers even

Once your score marks are there, use a gentle sawing motion to level off the cake layer as close to your score marks as possible. Remove the top and continue torting until the layer looks perfectly level. 
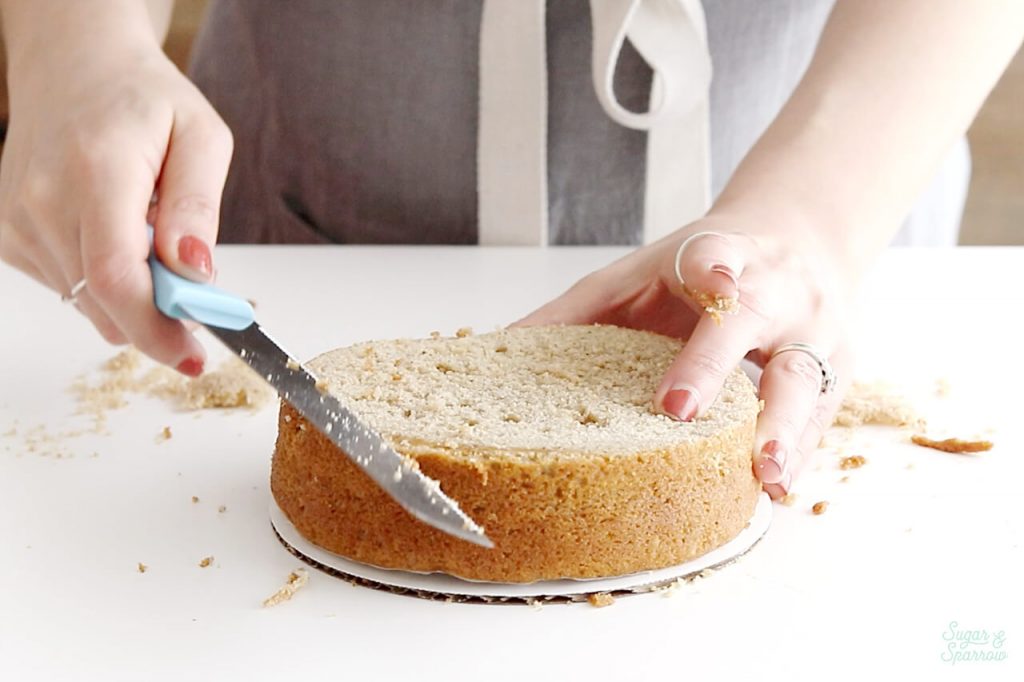
how to torte cake layers with a knife

Whichever method you use, torting your cake layers will ensure that when you’re filling and frosting your cake, the end result is nice and level.

how to make cakes level

What to Do Next

Now that you have perfectly level cake layers, it’s time to fill and stack them! Here’s a rundown of all the steps to building a perfect, structurally sound layer cake:

  • Fill and stack your cake layers
  • Crumb coat your cake
  • Frost a smooth buttercream finish, a rustic buttercream finish, or any kind of frosting texture!

Want more Cake Basics? Head here to see all of the posts and learn the methods of caking I’ve come to love over the years. I’m cheering you on every step of the way!

By: Whitney · In: Cake Basics, Tutorials · Tagged: cake decorating tips, cake leveler, cake tips, cut cake tops, domed cake tops, level cake layers, serrated knife, torte, torte cake layers, torting cake layers, tutorials, wilton

you’ll also love

Rustic cake tutorialHow to Frost a Cake with Rustic Texture
Anyone Can Cake giveaway with WiltonAnyone Can Cake x Wilton GIVEAWAY!
how to color buttercream frostingA Guide to Coloring Buttercream Frosting

Join the List

Stay up to date & receive the latest posts in your inbox.

Reader Interactions

Comments

  1. Manpreet Kaur says

    March 30, 2026 at 5:30 pm

    Hey Whitney,
    I tried this recipe, but my cake does not rise from the edges. What is the reason?

    Reply
    • Whitney says

      March 30, 2026 at 9:03 pm

      Hi Manpreet! Which recipe did you try?

      Reply
  2. charlotte says

    January 11, 2024 at 11:48 pm

    oh amazing! Iwill try to follow for every day. couse of we need to teach. then side on me we try .to make cake and tortes and to make decoration all the both. thank for this video

    Reply
  3. Mary says

    October 3, 2022 at 8:32 am

    Hi Whitney,

    If you were going to wrap and store your layers in the freezer, would you torte and level BEFORE wrapping them up or after they thaw/before you assemble?

    Reply
    • Whitney says

      October 6, 2022 at 9:07 pm

      Hi Mary! You can do either way, but I like to level the layers after freezing/thawing.

      Reply
  4. PollyS says

    September 21, 2022 at 11:13 am

    I seem to have trouble with bulging between layers. I have done the barrier ring before icing the layer. I’ve tried refrigerating the layers before icing. I, however, have never torted a cake. I’ve just used two single layers stacked. Any advice for beating the bulge?

    Reply
    • Whitney says

      September 21, 2022 at 9:05 pm

      Hi Polly! After leveling your single layers to make them flat and uniform, here are my favorite methods for filling and stacking cakes: https://sugarandsparrow.com/fill-and-stack-cake-layers/. After this I recommend crumb coating the cake and refrigerating it while it settles: https://sugarandsparrow.com/crumb-coat/ all of those steps should set you up for a successful smooth buttercream finish! Hope that helps and you’ll find more info on building layer cakes in the Cake Basics section of my blog and YouTube.

      Reply
  5. Kelly says

    June 13, 2021 at 7:59 pm

    I have been using the wilton cake leveler and prefer it over a knife however, I rip or tear the edges of some cakes beacause the edges of the cake are hard, not over cooked but maybe just carmelized. Do you have a fix for this? I cut the cakes prior to freezing them just a bit after they have cooled.

    Reply
    • Whitney says

      June 13, 2021 at 8:09 pm

      I don’t really have a quick fix for that one but I do find that if I cool the cakes to room temp, then wrap them in plastic wrap for a bit (usually overnight), the normally caramelized edges soften and make it easier to use the Wilton Cake Leveler. Hope that helps!

      Reply
      • Kelly says

        June 15, 2021 at 2:59 am

        Thank you for the tip. I will try that next!

        Reply
  6. Monica says

    November 10, 2020 at 3:08 pm

    I’ve seen that some people level off the sides as well. Is it necessary?

    Reply
    • Whitney says

      November 10, 2020 at 7:39 pm

      Hi Monica! I never level off the sides but I know that some people do when the edges are too dark or crisp.

      Reply
  7. Adriana says

    July 31, 2020 at 9:25 am

    Hi Whitney! Do you ever use cake strips around the pans when baking? I baked a couple of your cakes using them but still found the the tops puffed up in the middle. I ended up buying the cake leveler you recommended and of course it’s perfect! But I still wondered what you thought about using baking strips, yay or nay?

    Reply
    • Whitney says

      July 31, 2020 at 12:52 pm

      Hi Adriana! I’ve actually never tried cake strips before but I hear they work! I’d say give them a try and see. I always just like to level off my cakes to make sure they’re super precise, so I don’t mind having a bit of a dome.

      Reply
  8. Olivia says

    July 22, 2020 at 7:28 am

    Hi Whitney! What is the measure of the way you use to make the cake from the photos used in this post? Do you have a favorite shape brand? Thanks in advance

    Reply
    • Whitney says

      July 22, 2020 at 8:29 am

      Hi Olivia! Do you mean the cake pan? If so, I typically use Wilton cake pans and the layers pictured were made with their 6-inch pans: https://amzn.to/2ZOj1eU Hope that helps!

      Reply
  9. Paula says

    July 17, 2020 at 9:26 am

    Thank you Whitney! I have both the Wilton leveler and the knife and I’ve used both. I usually use the knife on partially frozen layers. Great video and instructions!

    Reply
    • Whitney says

      July 17, 2020 at 5:49 pm

      Thanks so much, Paula! Isn’t the cake leveler awesome? I can’t believe how long I’ve had it (over ten years!).

      Reply

Leave a Reply Cancel reply

Your email address will not be published. Required fields are marked *

Recipe Rating


Next Post >

How to Prepare Cake Pans for Easy Release

Primary Sidebar

Welcome to Sugar & Sparrow

Welcome to Sugar & Sparrow

Helping you whip up pretty desserts with confidence and creativity. And hopefully sharing a few laughs with you along the way!

Learn More

Connect

let’s bake!

Get my very best recipes, baking tips, and decorating tutorials sent to your inbox

Featured Posts

adding fresh blackberries to buttercream recipe

Blackberry Buttercream

pastel rainbow birthday cake

Pastel Rainbow Birthday Cake Tutorial

My Online Cake Decorating Course is HERE!

Search

Archives

Follow Along

@sugarandsparrowco

NO-CHURN BERRY CRISP ICE CREAM✨you don’t need any NO-CHURN BERRY CRISP ICE CREAM✨you don’t need any fancy equipment to whip up this delicious ice cream that tastes JUST like berry crisp a la mode! I layered my favorite 3-ingredient no-churn vanilla ice cream base with ribbons of homemade berry filling + buttery oat streusel in every bite. Even if you’ve never made ice cream from scratch before, I promise you can master this recipe!! 
 
🍦Full recipe linked in my bio or find it at https://sugarandsparrow.com/no-churn-berry-crisp-ice-cream/

#nochurnicecream #icecream #icecreamlover #berries #summerdessert
STRAWBERRY SHEET CAKE 🍓based on my favorite strawb STRAWBERRY SHEET CAKE 🍓based on my favorite strawberry layer cake recipe, this sheet cake version is so fun to decorate + such a crowd pleaser! I love using a combination of fresh and freeze-dried strawberries to create the most powerful authentic flavor ✨
 
🍓Full recipe (with strawberry buttercream) at https://sugarandsparrow.com/strawberry-sheet-cake-recipe/
⁣ 
STRAWBERRY SHEET CAKE⁣ 
Serves 24
⁣ 
INGREDIENTS⁣ 
1 Cup (12oz) fresh strawberries, pureed ⁣ 
3/4 Cup (180ml) whole milk, room temp⁣ 
2 1/2 Cups (265g) sifted cake flour⁣ 
2 tsp baking powder⁣ 
1/4 tsp baking soda⁣ 
1/2 tsp salt⁣ 
3/4 Cup (170g) unsalted butter, room temp⁣ 
1 2/3 Cups (350g) granulated sugar⁣ 
3 large eggs, room temp⁣ 
1/3 Cup (75g) sour cream, room temp⁣ 
2 tsp pure vanilla extract⁣ 
1-2 drops pink food coloring (optional)⁣ 
⁣ 
INSTRUCTIONS⁣ 
1. Simmer the strawberry puree in a saucepan over medium-low heat for 30-35 minutes, stirring occasionally. At this point the puree should have reduced from 1 Cup to 1/2 Cup (if you have more, keep cooking!). Refrigerate until room temp, then whisk together with the whole milk and set aside.⁣ 
2. Preheat the oven to 350ºF. Grease and line a 13×9 inch baking pan. 
3. In a medium bowl, whisk together the sifted cake flour, baking powder, baking soda, and salt. Set aside. ⁣ 
4. In the bowl of a stand mixer with the paddle attachment, whip the butter on high until creamy, 2 min. Add the sugar and beat with the butter until light and fluffy, 2 min. Turn the mixer to low and add the eggs one at a time. Add the vanilla and sour cream, then turn the mixer to high and beat for 1 minute.⁣ 
5. With the mixer on low, add all of the dry ingredients at once until just combined, then add the strawberry milk mixture and pink food coloring (if using) until just combined. Give the batter a few stirs by hand to make sure everything is incorporated without over-mixing. ⁣ 
6. Pour batter into the prepared cake pan and bake for 35-40 minutes. ⁣ Cool completely to room temperature before topping with strawberry buttercream (full recipe at the li
COOKIES & CREAM ICE CREAM CAKE 🤎 If you’re an Oreo COOKIES & CREAM ICE CREAM CAKE 🤎 If you’re an Oreo lover, this is your sign to make an ice cream cake this summer: no-churn cookies & cream ice cream set on an Oreo cookie crust, topped with hot fudge and whipped cream frosting. The perfect amount of Oreos in EVERY BITE! 

Full recipe link in my bio + at https://sugarandsparrow.com/cookies-and-cream-ice-cream-cake/ 

OREO CRUST
22 Oreo cookies
5 Tbsp melted butter

ICE CREAM LAYER
2 Cups (480ml) heavy whipping cream, cold
2 tsp pure vanilla extract
14 Oz sweetened condensed milk
15 Oreo cookies, roughly chopped

TOPPINGS
12.8 Oz jar of hot fudge
Whipped cream frosting (see full recipe link)
4 Oreo cookies, chopped

INSTRUCTIONS
1. Mix together the Oreo crust ingredients and pack tightly into the bottom of a 9-inch springform pan. Freeze while you make the ice cream.
2. In a chilled bowl, whip the heavy cream and vanilla to stiff peaks. Fold in the sweetened condensed milk until uniform, then fold in the chopped Oreos. Pile the ice cream on top of the Oreo crust, smooth it down, cover and freeze overnight.
3. When the ice cream layer is set, top with the hot fudge, whipped cream frosting, and more chopped Oreos. Store in the freezer until ready to serve! 

#oreocake #icecreamcake #nochurnicecream #birthdaycake #cookiesandcream
EASY OREO ICEBOX CAKE (recipe below) 🤎 You only ne EASY OREO ICEBOX CAKE (recipe below) 🤎 You only need 4 ingredients for this recipe and it sets into the perfect summer dessert in the refrigerator overnight! It’s 7 alternating layers of Oreos and homemade whipped cream + every bite tastes like a perfect milk-dunked Oreo in the very best way ✨
 
Full recipe at https://sugarandsparrow.com/oreo-icebox-cake/ 
 
INGREDIENTS: 
2 Cups (480ml) cold heavy whipping cream 
1/4 Cup (30g) powdered sugar 
1 tsp pure vanilla extract 
36 Oreo cookies 
 
INSTRUCTIONS: 
1. Add the heavy whipping cream, powdered sugar, and vanilla extract into a chilled mixing bowl. Using the whisk attachment on your stand mixer or a hand mixer, beat the ingredients until stiff peaks form. 
2. Line a loaf pan with plastic wrap, then add a thin layer of the whipped cream onto the bottom of the pan. Add a layer of Oreo cookies on top (cut some of the Oreos to fit as needed). 
3. Add 1/3 of the remaining whipped cream on top of the Oreo layer, followed by a second layer of Oreos. Repeat until you have seven total layers, ending with whipped cream. 
4. Cover the cake and refrigerate overnight, then enjoy!  
 
#oreocake #vintagecake #nobakecake #oreo #nobake
FRESH STRAWBERRY BUTTERCREAM (recipe below) 🍓if yo FRESH STRAWBERRY BUTTERCREAM (recipe below) 🍓if you’ve ever wondered how to make strawberry buttercream with fresh (or frozen) strawberries, this is the best way! I still think freeze-dried strawberries are the GOAT when it comes to flavoring frosting but this is a very close second 🙌🏼 

Search “strawberry buttercream” at http://sugarandsparrow.com to find this recipe + the freeze-dried version ⁣
⁣⁣⁣
FRESH STRAWBERRY BUTTERCREAM⁣⁣⁣
YIELD: 2.5 Cups⁣⁣⁣
⁣⁣⁣
INGREDIENTS:⁣⁣⁣
5 Oz (1 Cup) fresh strawberries, chopped ⁣⁣
1 Cup (226g) unsalted butter, room temp⁣⁣⁣
3 1/2 Cups (420g) powdered sugar⁣⁣⁣
pinch of salt⁣⁣⁣
⁣⁣⁣
INSTRUCTIONS:⁣⁣⁣
1. Purée the strawberries in a food processor, then place in a small saucepan set over medium heat. Bring to a boil, then reduce the heat to low and simmer for 10-15 minutes, until it becomes jam-like and has reduced by half. You’ll end up with about ¼ Cup of reduced purèe after this step. Let it cool completely to room temperature before moving on.⁣⁣⁣
2. With a hand mixer or paddle attachment on your stand mixer, beat the butter on medium-high until it’s creamy, about 5 minutes. Add the powdered sugar about a cup at a time and mix on low speed until fully incorporated. ⁣⁣⁣
3. Add the (room temperature!) reduced strawberry purèe and a pinch of salt. Continue mixing on low speed until fully incorporated and smooth.⁣⁣⁣
⁣⁣⁣
#strawberries #strawberrybuttercream #strawberrycake #buttercream #frosting

Footer

On the Blog

  • Cake Basics
  • Recipes
  • Tutorials

Info

  • About
  • Privacy Policy & Disclosure

stay in the know

Copyright © 2026 · Theme by Sugar & Sparrow