I haven’t been able to stop thinking about making my favorite bakery-style white cake into a festive holiday cake, and this white Christmas cake is the result! It’s layers of the softest, fluffiest white cake flavored with just a hint of almond extract (or keep it all vanilla if you prefer), filled and frosted with my favorite vanilla buttercream. To dress it up for the holidays, it features a piped white Christmas tree with sprinkle ornaments and I promise, it’s easier than it looks! I’ll share all the baking and decorating details in this blog post.
Why You’ll Love This White Christmas Cake
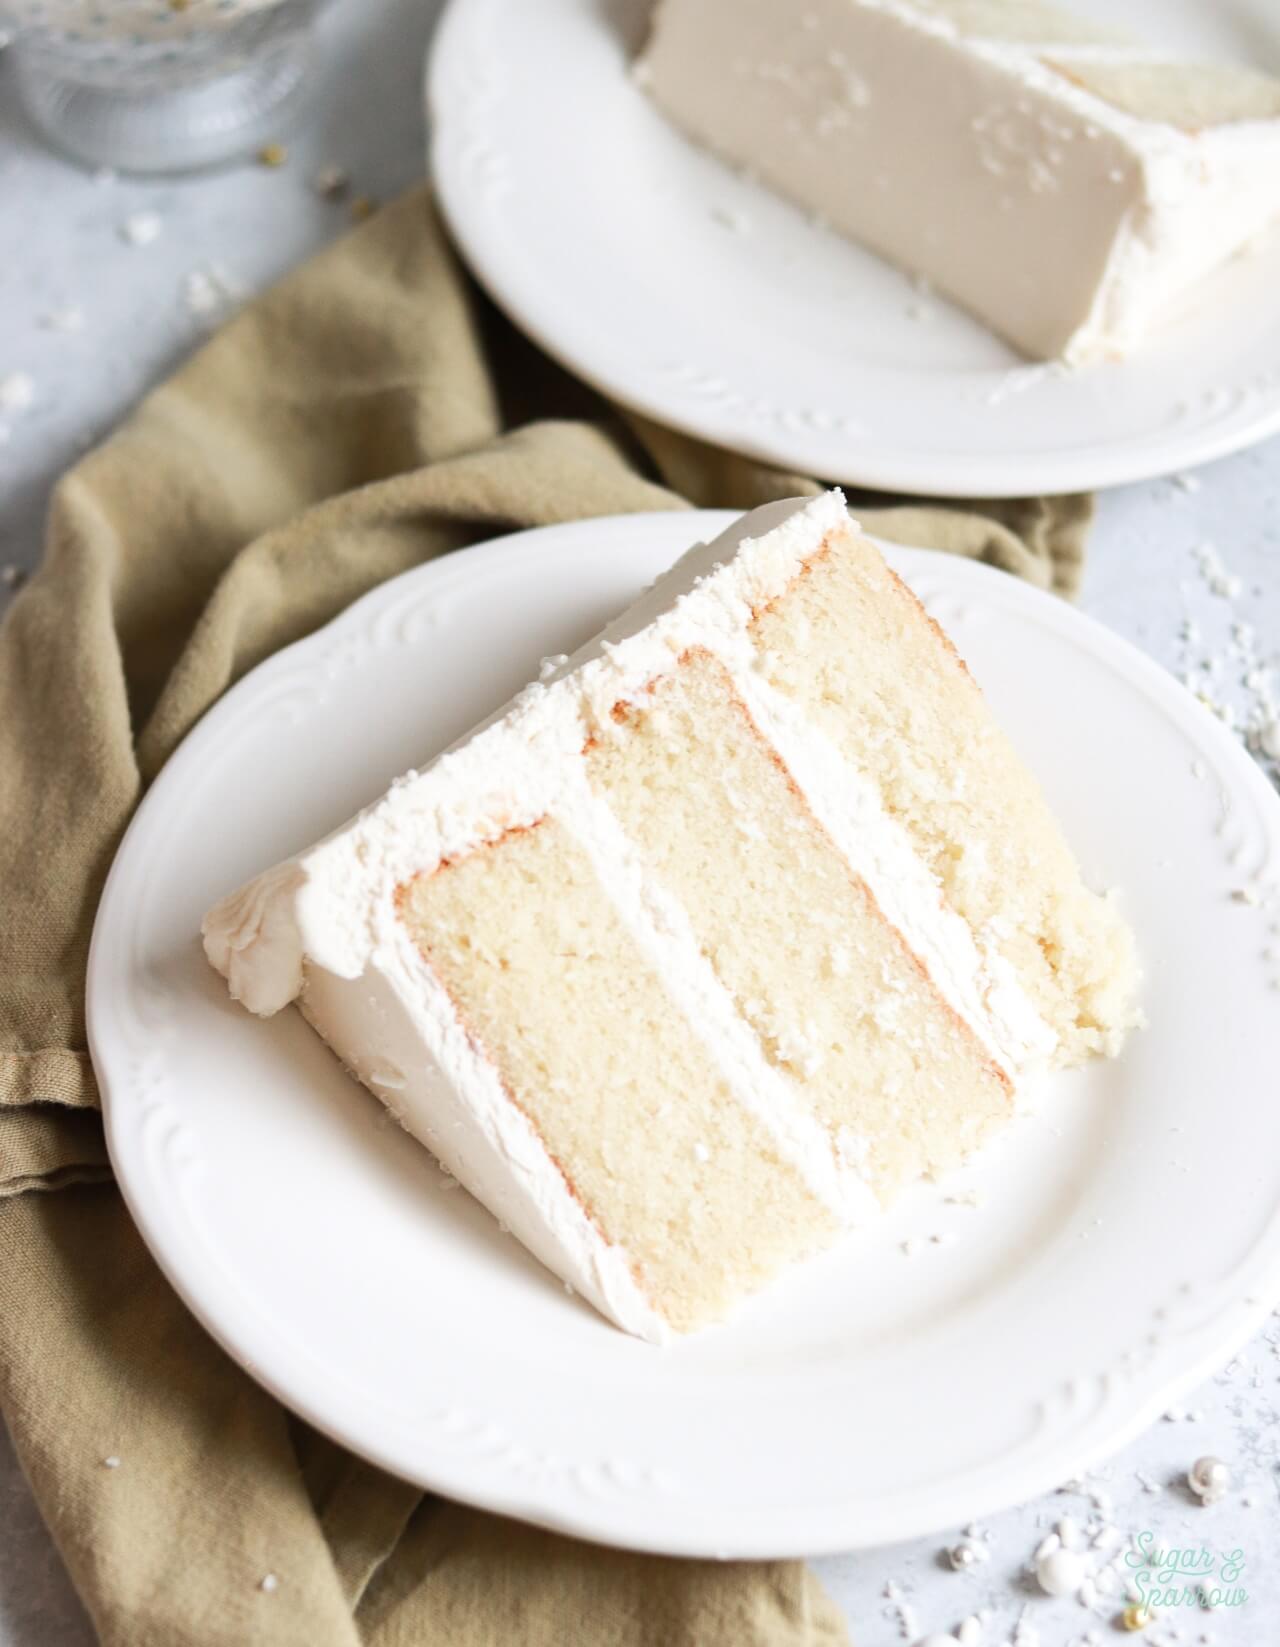
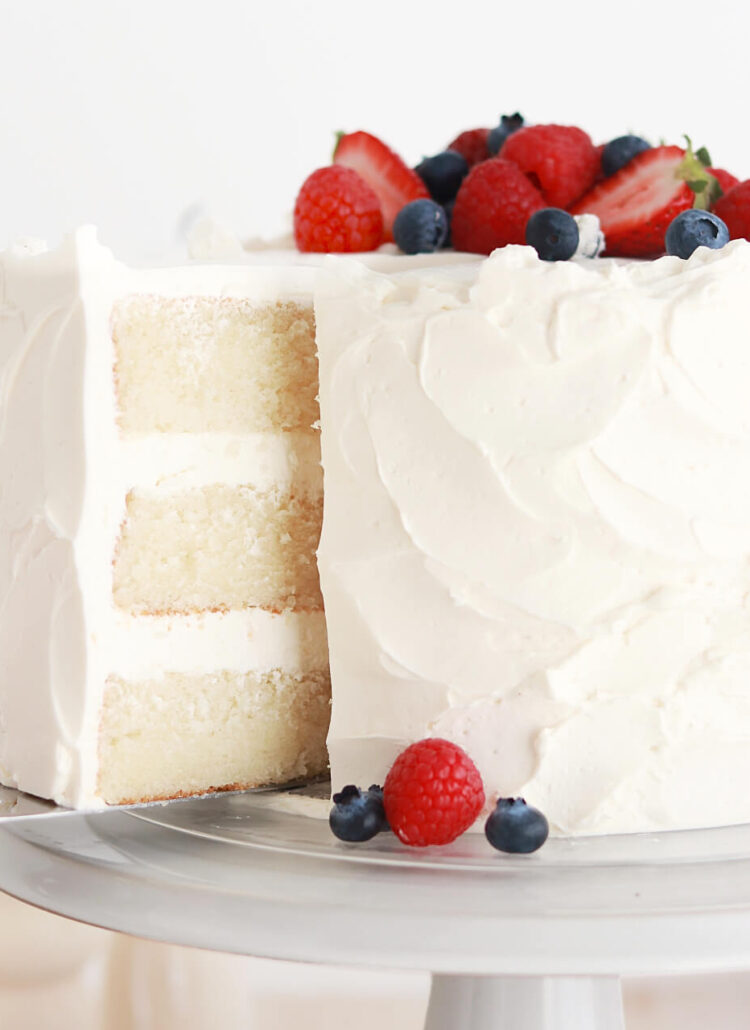
- Super Fluffy & Moist. This is the softest vanilla cake recipe on my website thus far (which is why I call it bakery-style white cake) and it stays moist for days. Key ingredients like cake flour and egg whites keep it extra light, while the vegetable oil and buttermilk makes it ultra-moist.
- Easy to Make. Even though it seems complicated to make a vanilla cake with the perfect texture, this recipe couldn’t be easier to make with a stand mixer or hand mixer. The instructions in the recipe card are so detailed that it’s hard to fail.
- Customizable Flavor. You can make this recipe as-is with the hint of almond (it reminds me of Christmas sugar cookies) or scrap the almond extract and use a full Tablespoon of vanilla instead. You could also sub the almond extract for peppermint extract or any other clear extract that sounds festive.
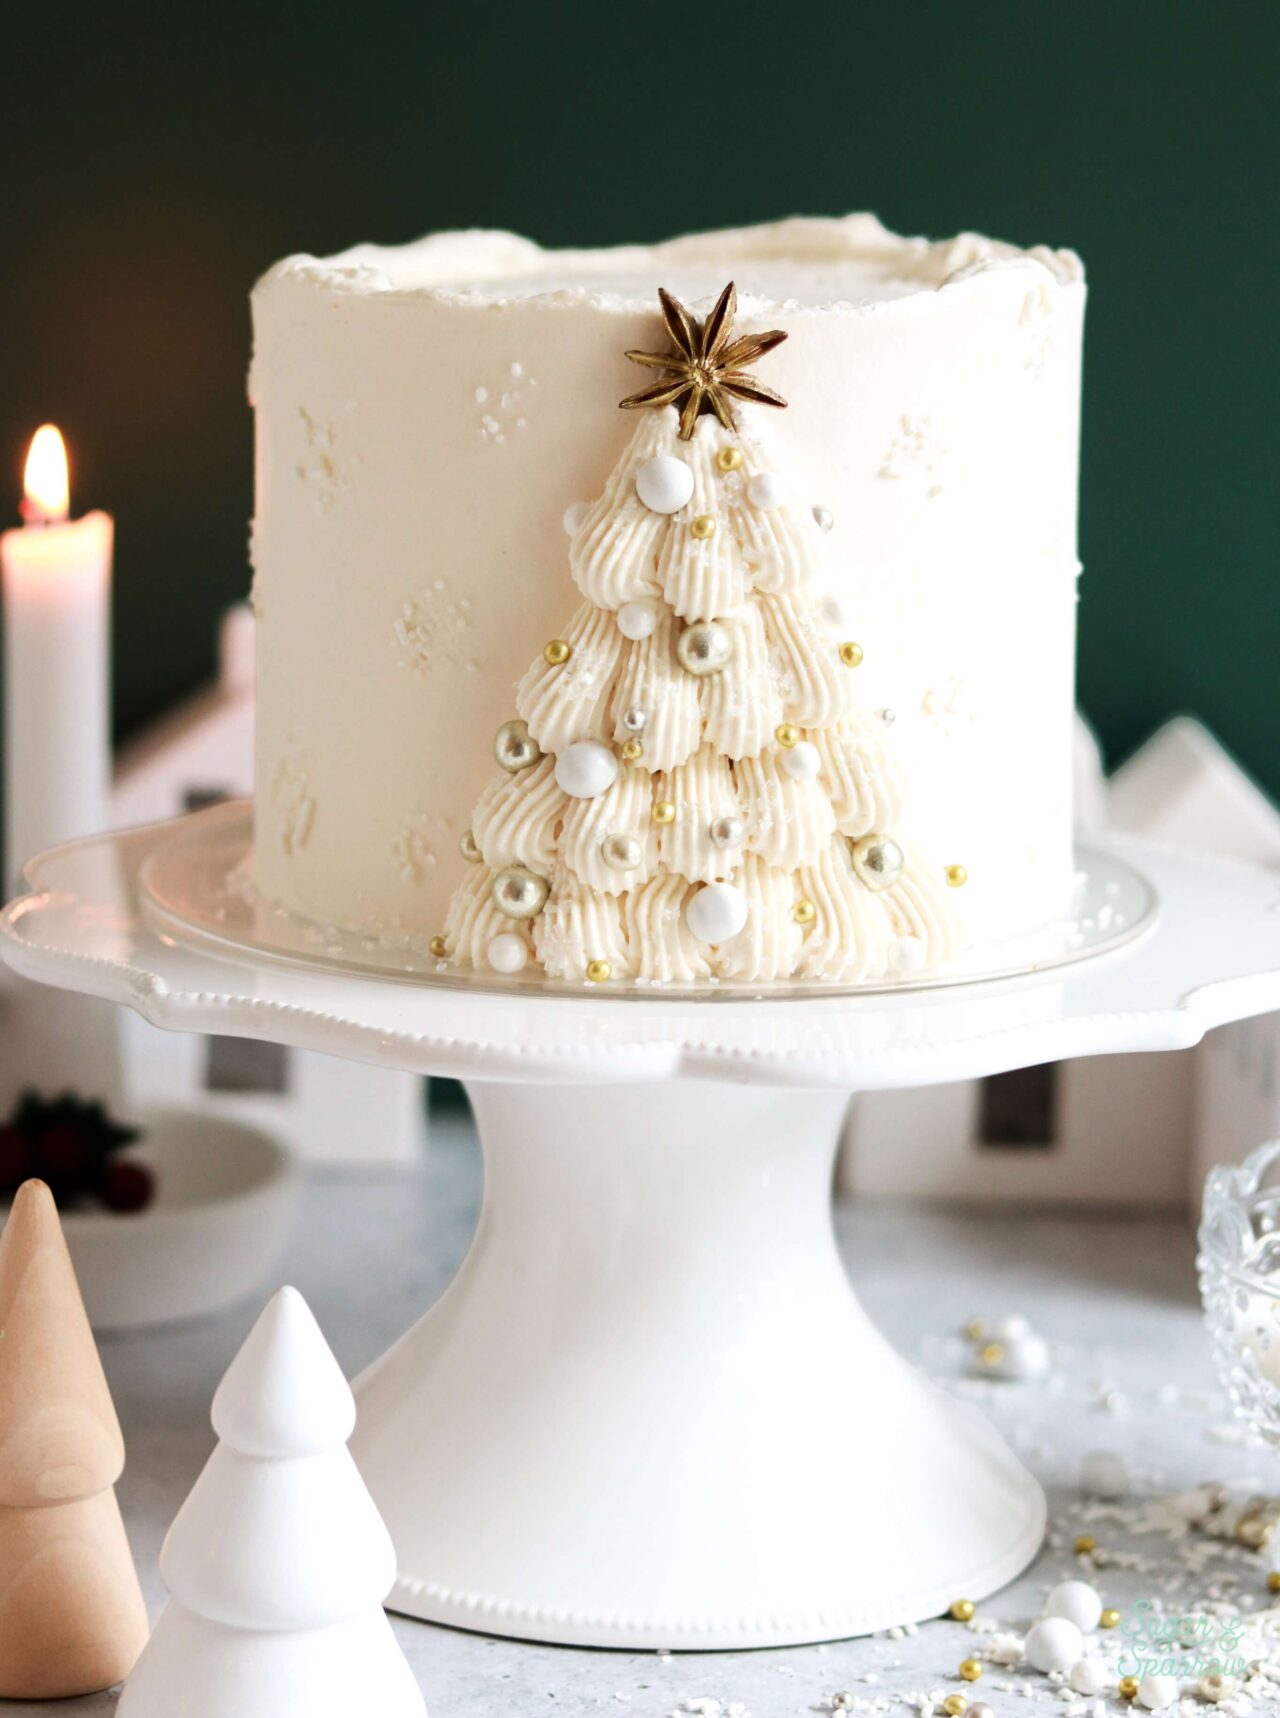
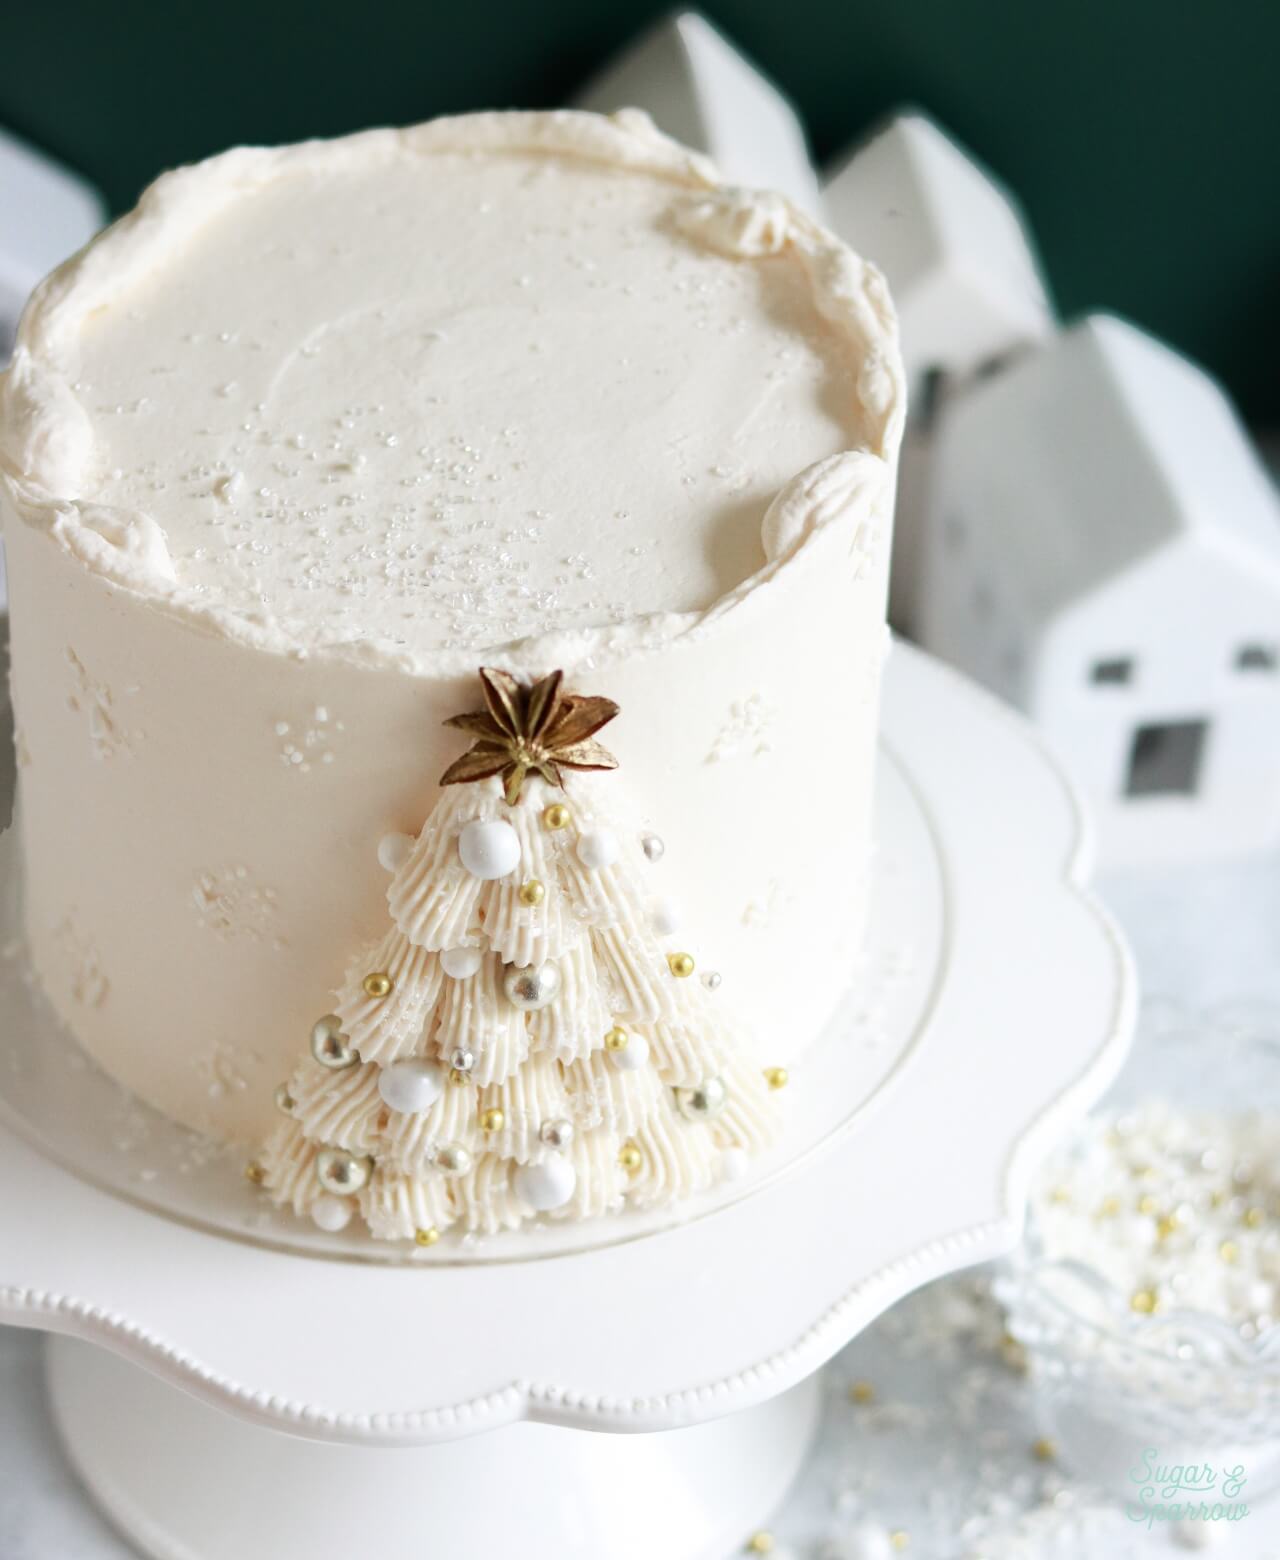
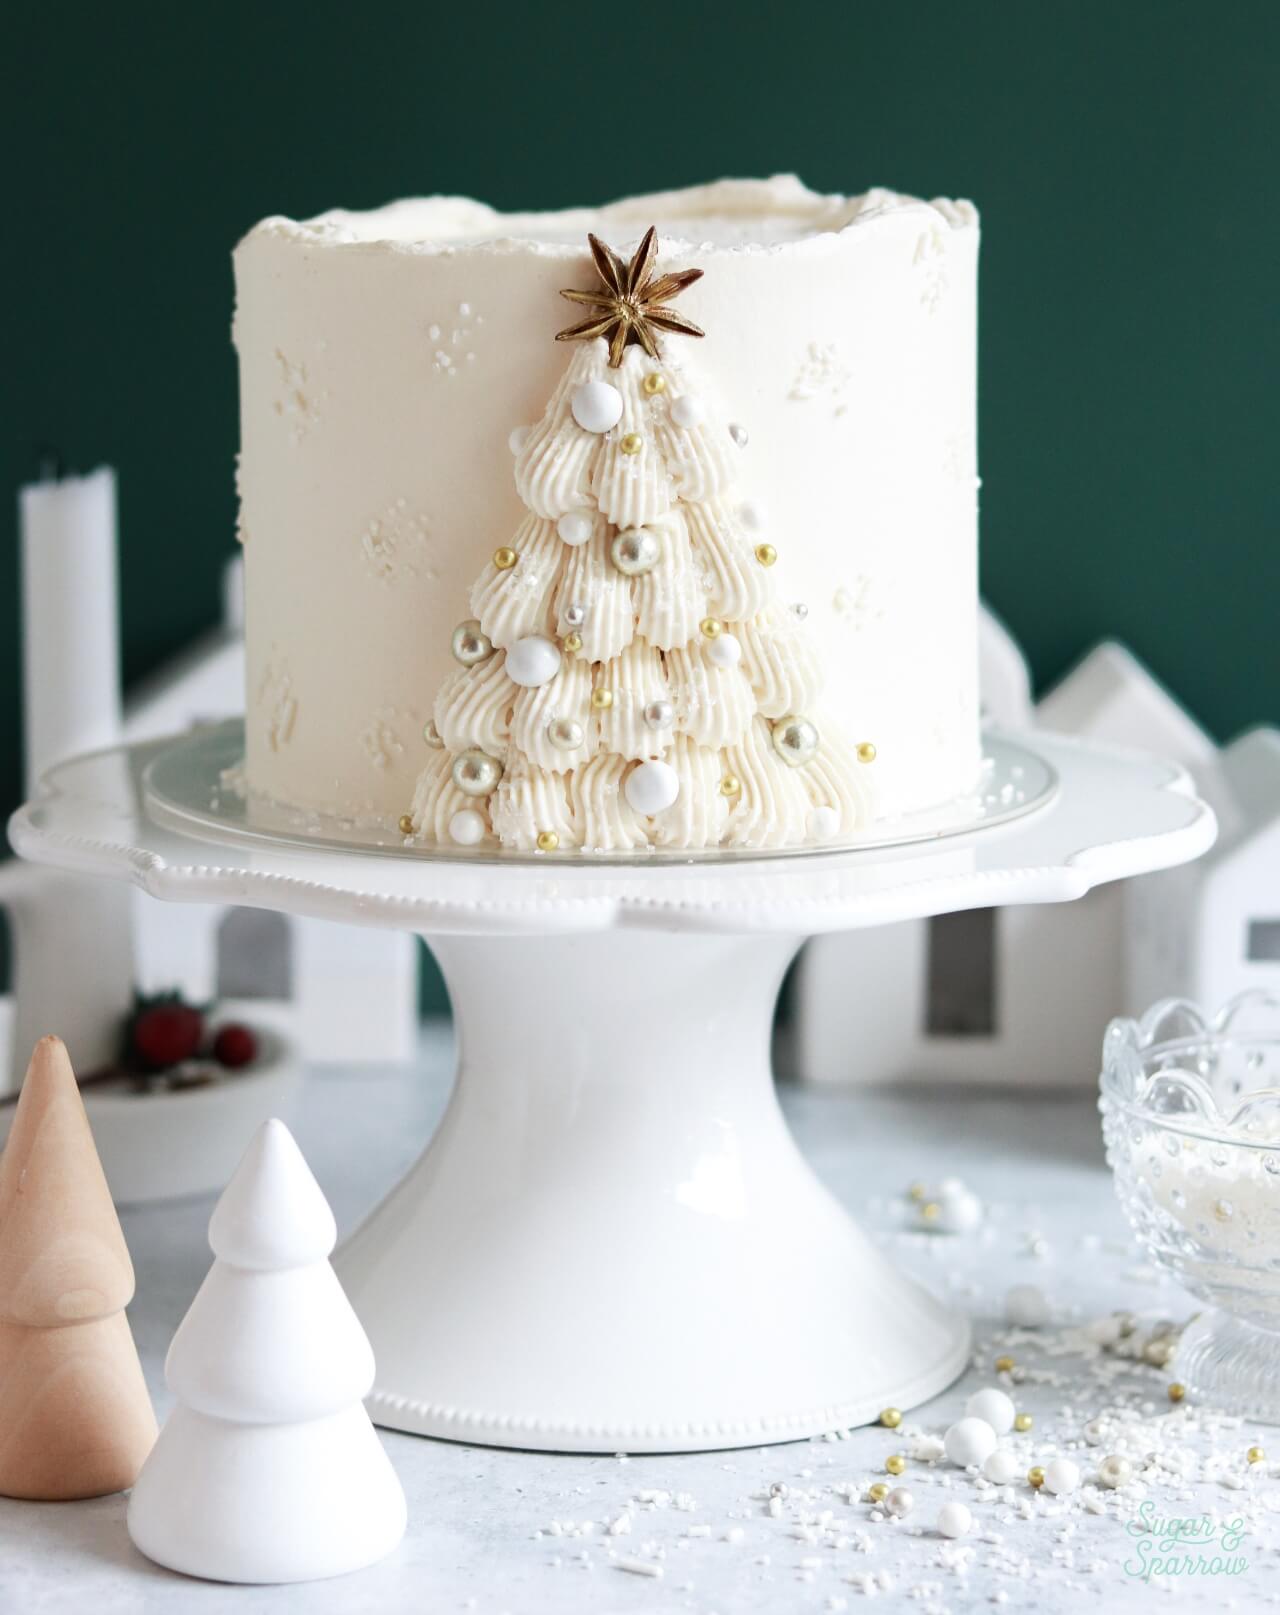
- Festive Holiday Cake Design. Keeping with the theme, this white cake is topped with vanilla buttercream and a piped white Christmas tree. I’ll show you how to map out and pipe that tree perfectly, then decorate it with sprinkle ornaments and a gold-painted anise star. The ideal showstopper for your holiday dessert table!
Soft & Moist White Cake
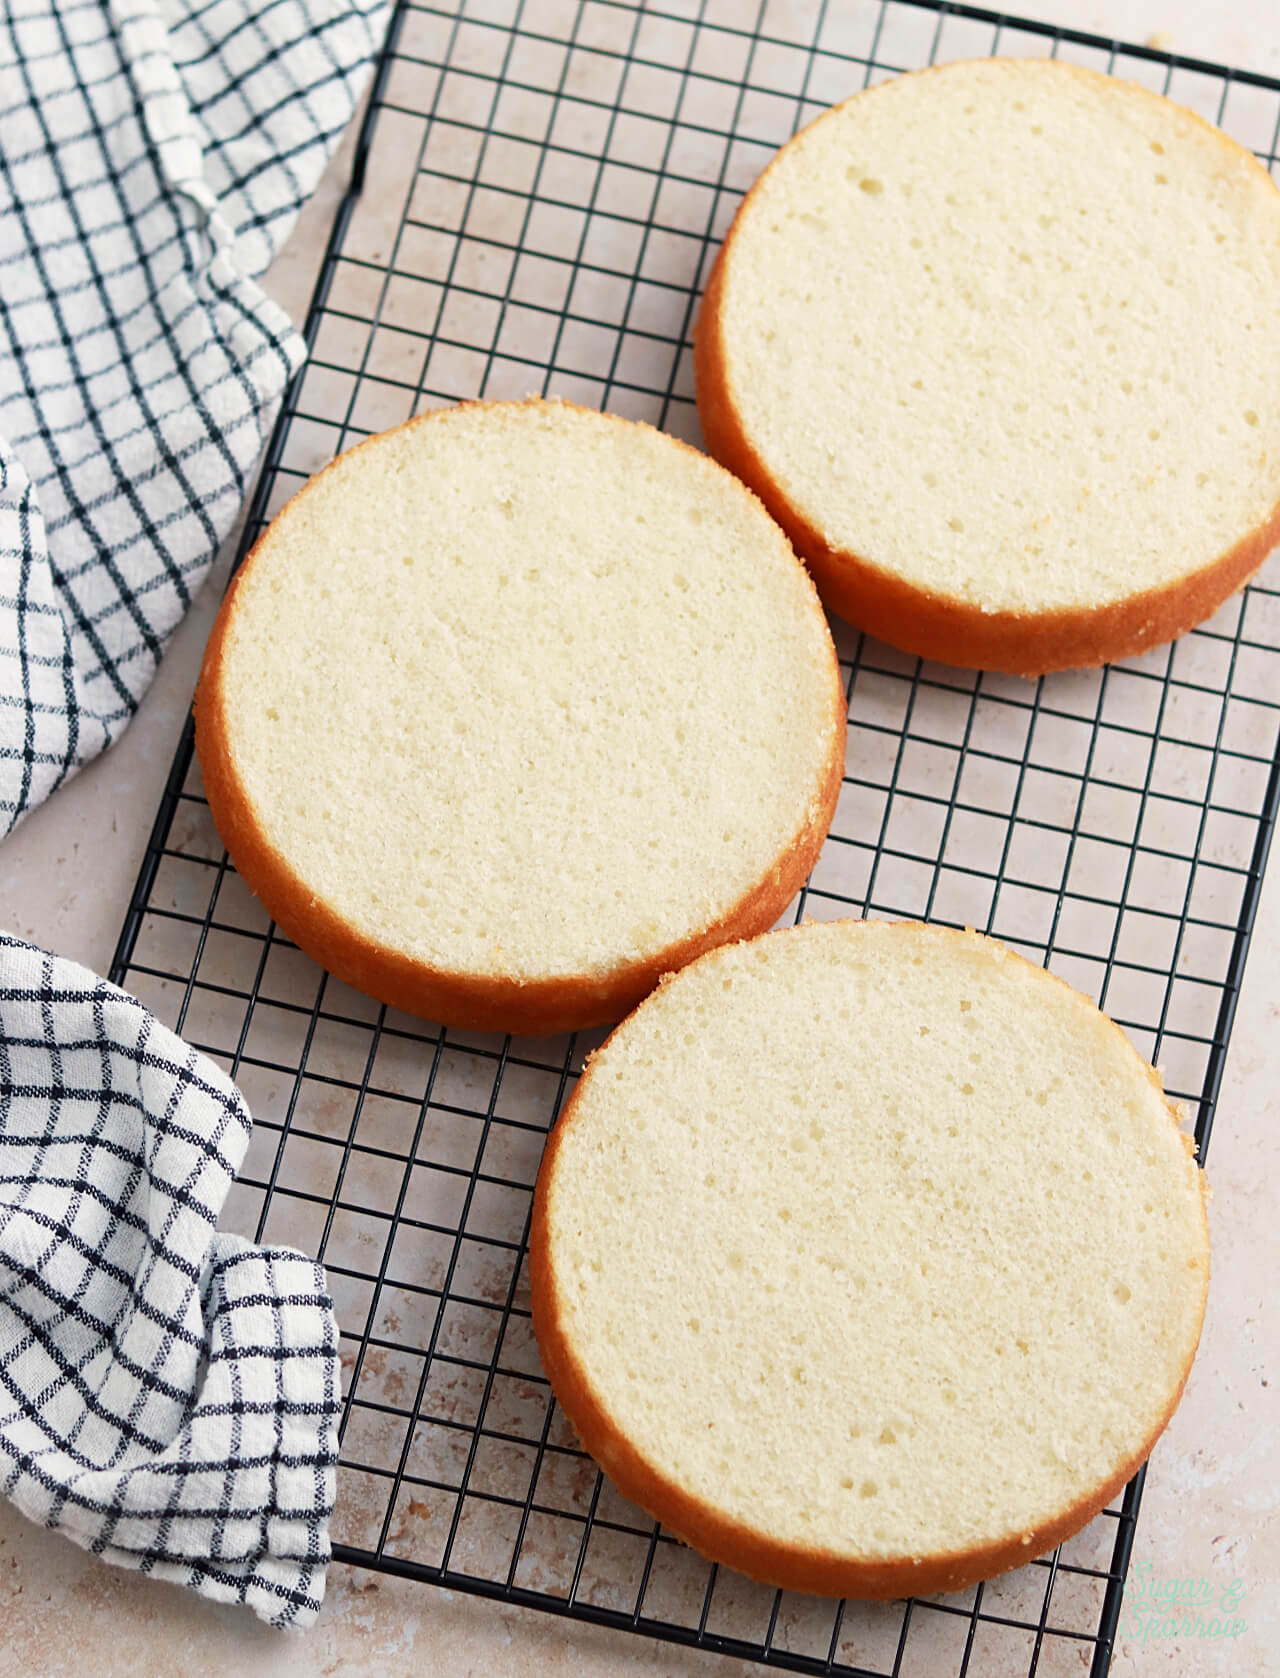
This is the softest, fluffiest white cake recipe that tastes like it came from your favorite bakery, but it’s 100% HOMEMADE! It’s super moist (and stays that way for days), packed with vanilla flavor, and made with egg whites to keep the color of the cake nearly white. To make it perfectly soft and moist with a bakery-style texture, there are a few key ingredients you’ll need. You should be able to find these at your local grocery store, but if not I have provided some substitution ideas as well:
- Cake Flour. To achieve the super soft bakery-style texture in this cake, you’ll need to use cake flour. It produces a much fluffier cake than all-purpose (or plain) flour because of its lower protein content (the more protein in your flour the stiffer the dough and less ability to maintain moisture). You can find cake flour at most grocery stores, but if all you’ve got is all-purpose flour in your pantry, here are instructions for how to make your own cake flour. Keep in mind that if you do use the homemade version, the gram measurement will weigh more (295g instead of 265g) since all-purpose flour is heavier than cake flour.
- Baking Powder + Baking Soda. These are the leavening agents used in this cake to give it the perfect rise.
- Unsalted Butter. A little bit of unsalted butter helps create moisture, great structure, and rich flavor. If you only have salted butter on hand, you can substitute that but be sure to omit the salt in the recipe if you do.
- Granulated Sugar. This not only sweetens the cake, it creates a tender crumb as well. You can substitute this with caster sugar if you wish and it will be even more soft.
- Egg Whites. Egg whites not only help keep this cake light in color, they also keep it light and fluffy in structure while binding all of the ingredients together. You can either use fresh egg whites or ½ Cup of carton egg whites.
- Vegetable Oil. This adds the perfect amount of moisture to the crumb. I like using plain vegetable oil but you can substitute for any kind of vegetable oil (canola, avocado, etc.). Just keep in mind that if the vegetable oil you choose has a strong flavor, it will end up flavoring the cake.
- Almond + Vanilla Extracts. To create that perfect holiday sugar cookie flavor, use a hint of almond extract + a good quality vanilla extract. Alternatively, you can omit the almond extract and use one tablespoon of vanilla extract for a pure vanilla flavor, or substitute it for another festive clear-colored extract like peppermint.
- Buttermilk. The fattiest of all the milks, buttermilk creates a rich texture and locks in lots of moisture. If you can’t find buttermilk locally, you can make a DIY version using whole milk and vinegar or lemon juice. The instructions are in the notes of the recipe below.
Bakery-Style White Cake Video
I made a YouTube video for this white cake recipe a little while back, and everything is the same except for the addition of almond extract in this recipe:
If you love recipe videos like this one, be sure to check out my YouTube channel! I’ve got a growing collection of cake recipes, decorating tutorials, and Cake Basics over there. Hit the subscribe button on my page so you never miss a new video.
Vanilla Buttercream That’s White in Color
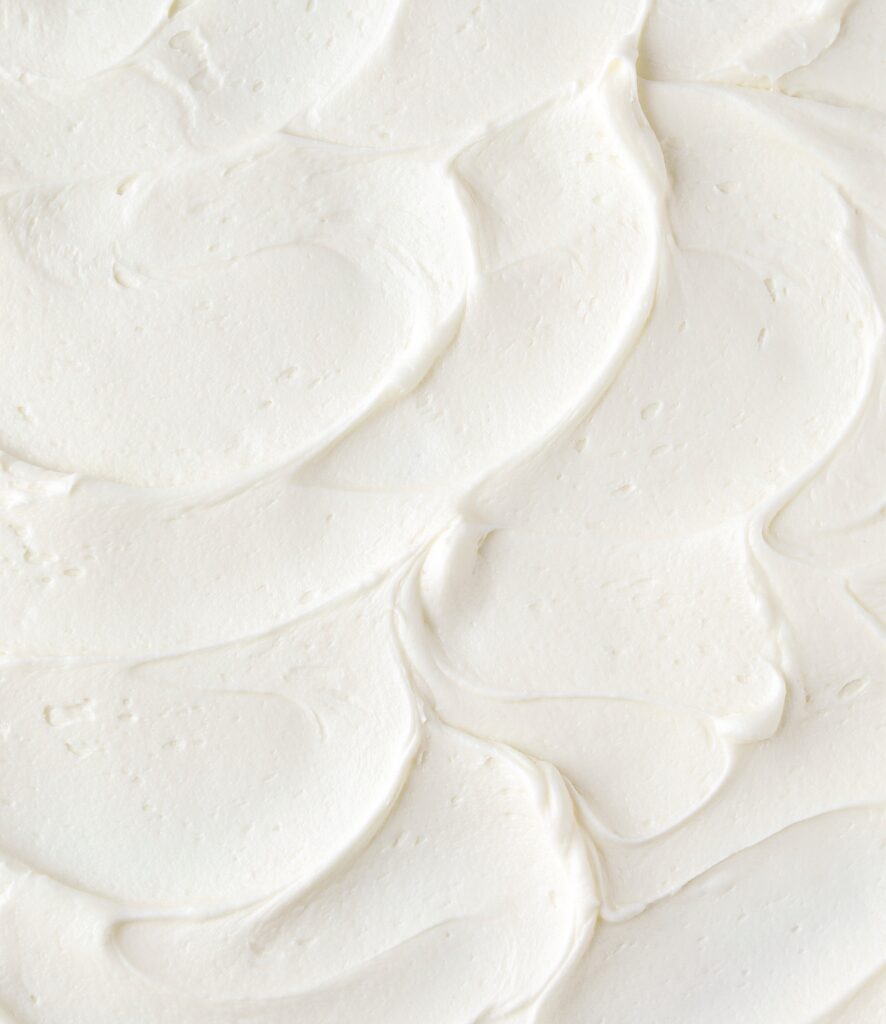
The vanilla buttercream recipe I use for this cake is technically an American buttercream, which basically means it has a butter base and is stabilized and sweetened with powdered sugar. Most American buttercream recipes use a ton of powdered sugar to give structure to the frosting, but I have tailored this recipe to use less powdered sugar and be less sweet than your average American buttercream. As a result, the vanilla flavor really shines through and it’s the perfect consistency for cake decorating!
The two ingredients that will make vanilla buttercream more yellow in color are the butter (especially grass-fed butter) and pure vanilla extract. Using clear (imitation) vanilla extract can help create a whiter buttercream, but I don’t personally use that method because I like the flavor of pure vanilla extract. Instead, here are a few things I do to make the buttercream white instead of yellow:
- Whip the Butter for a Long Time. To achieve the smoothest buttercream that’s also nearly white in color, you’ll start this recipe by whipping the butter for a long time – about 7 minutes. In this amount of time, the butter should go from yellow to almost white. This sets the rest of the recipe up for success color-wise.
- Add Icing Whitener. At the end of the recipe, I add a little AmeriColor Bright White to whiten the buttercream and it works like a charm.
How to Decorate a White Christmas Cake
Once you have your cake layers baked, cooled, and leveled + the buttercream made, here’s how to decorate this chai cake as pictured:
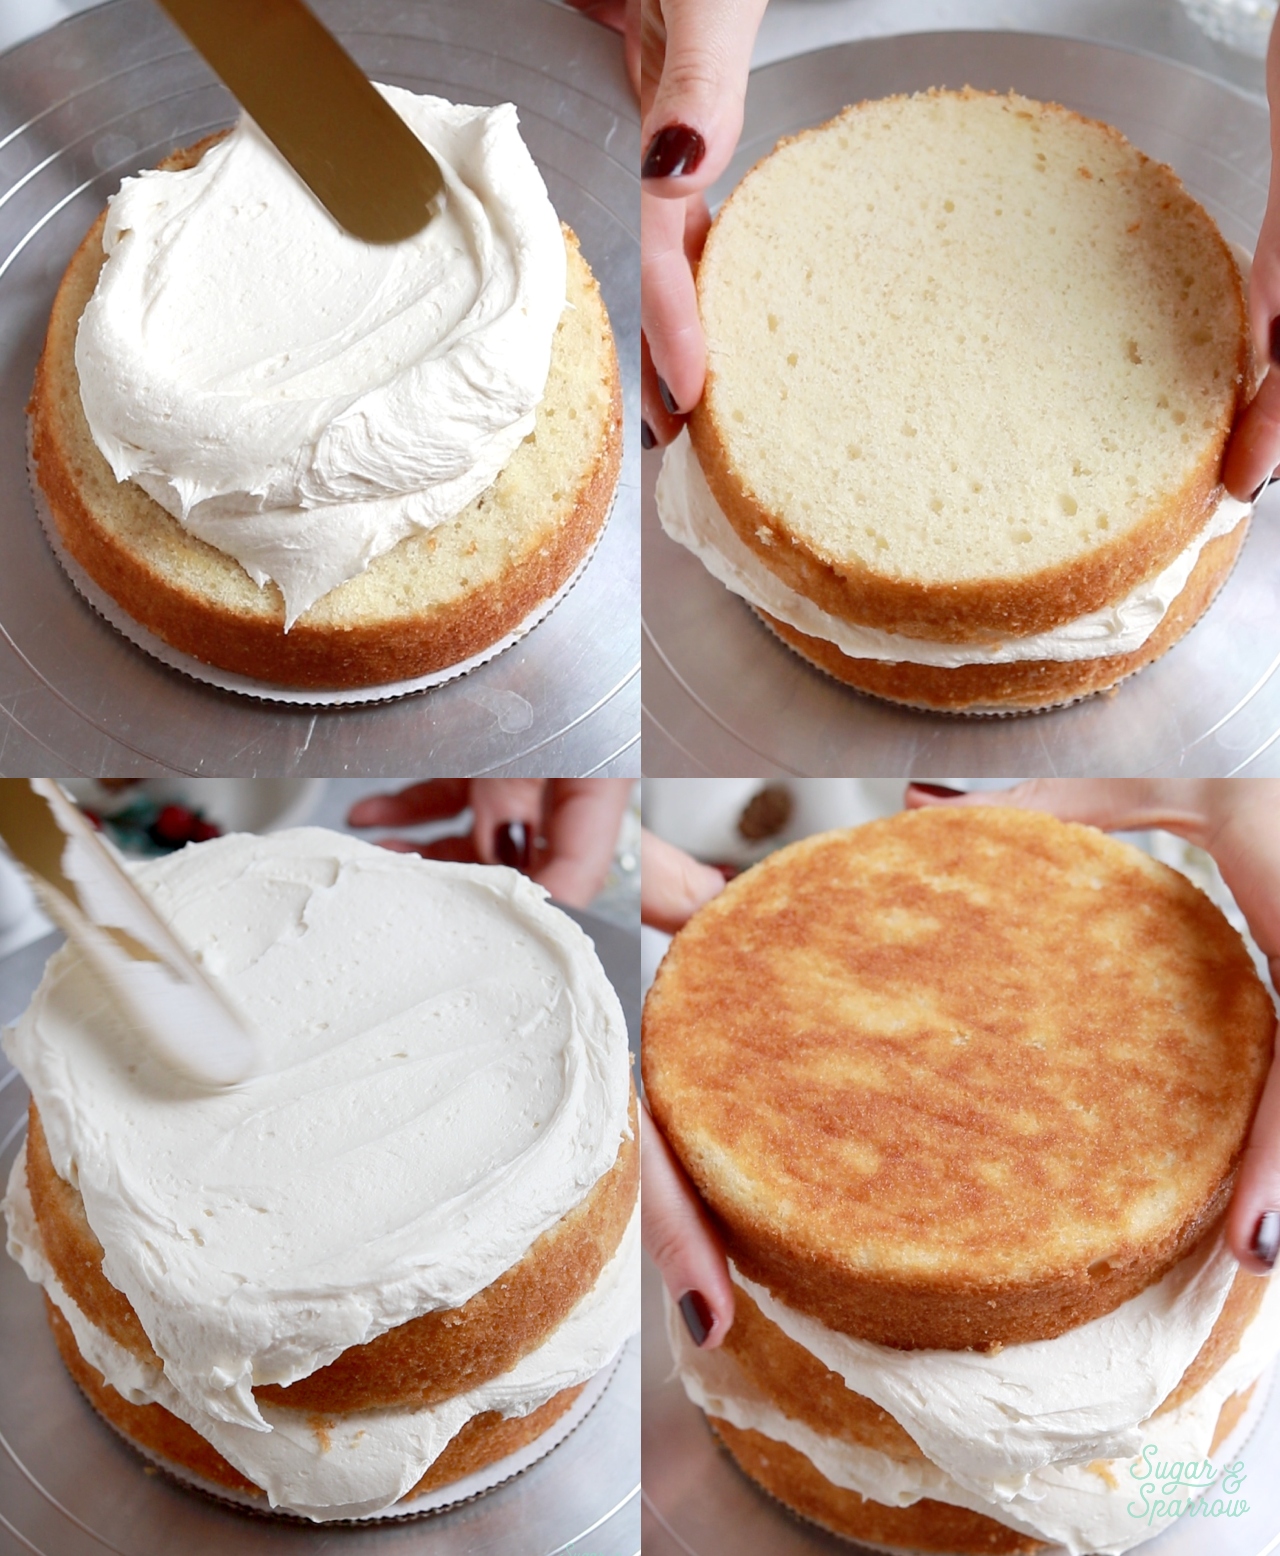
Step 1: Fill and Stack the Cake. Place a swipe of buttercream on top of a cardboard cake circle and place the first white cake layer on top. Fill and stack the cake with the vanilla buttercream, then crumb coat it and place it in the refrigerator to firm up before moving on to the next step.
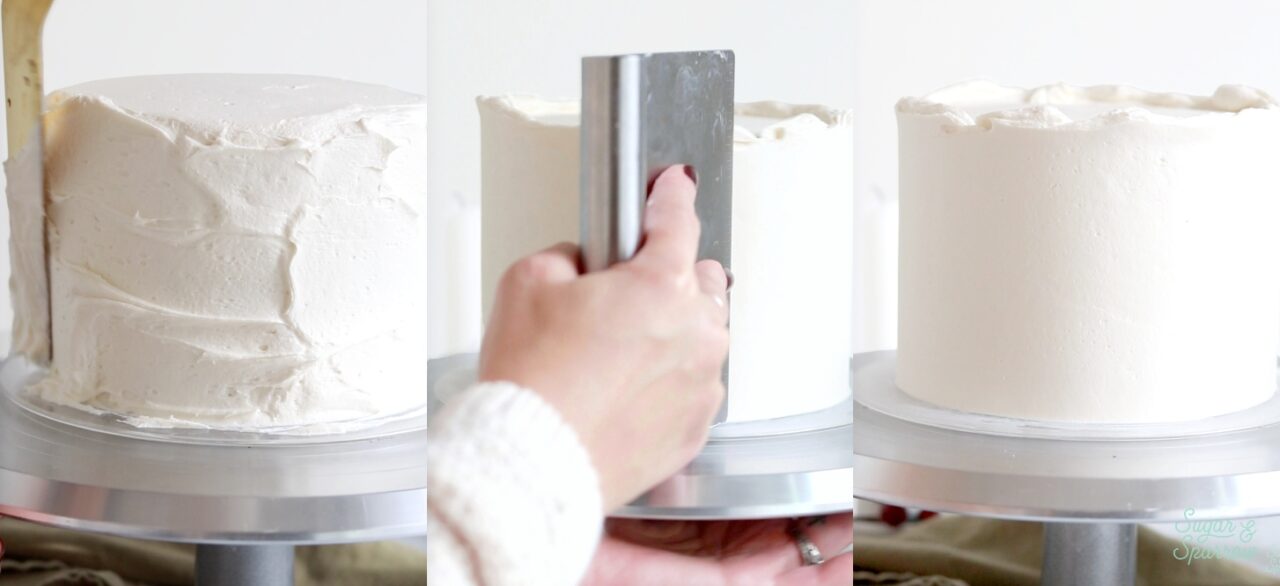
Step 2: Frost the Cake. Use the vanilla buttercream to create a smooth buttercream finish, but keep that top edge raw instead of swiping it inward to create sharp edges. The unfinished edge reminds me of snow drifts. Place the cake in the refrigerator for about 20 minutes to let the frosting firm up again – firm buttercream is the ideal surface for piping in the next step.
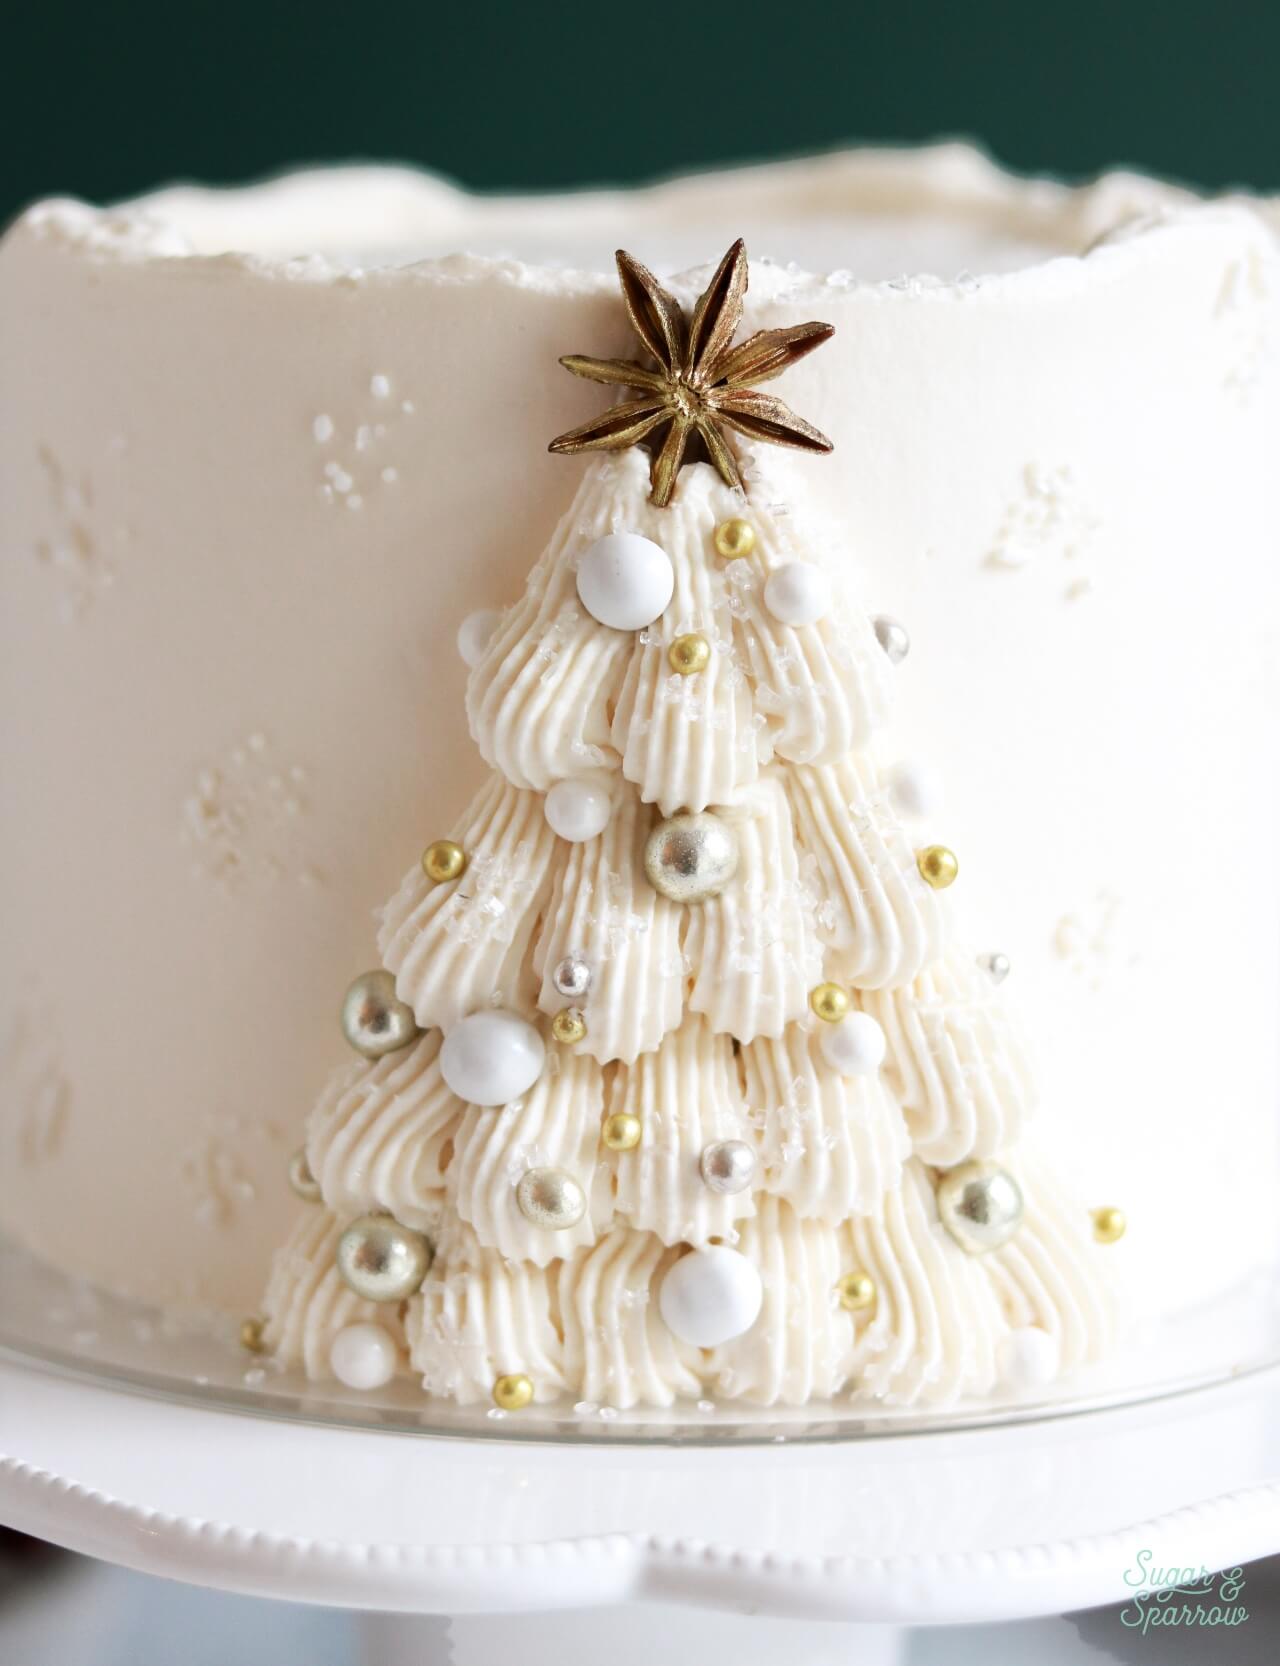
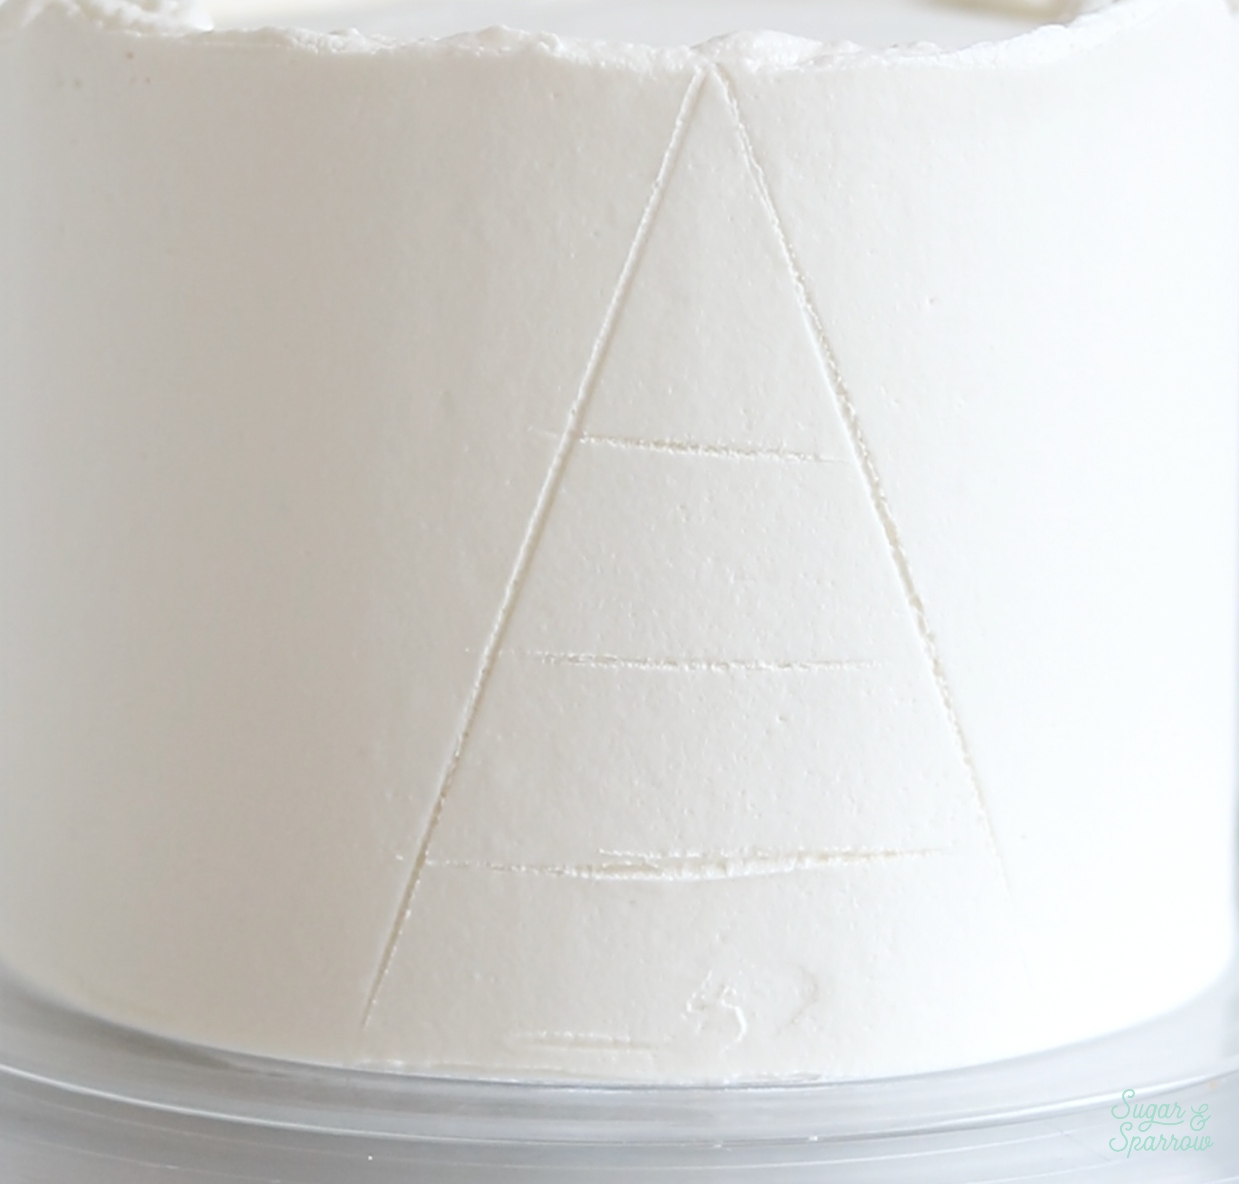
Step 3: Pipe the Christmas Tree. Now that the buttercream finish is firm to the touch, take your icing smoother (or other straight edge) and press it into the cake to create a triangular outline. This will be the area where the tree will be piped. Next, carefully press the icing smoother horizontally within that triangle to create four different sections. This is where each row of piping will go.
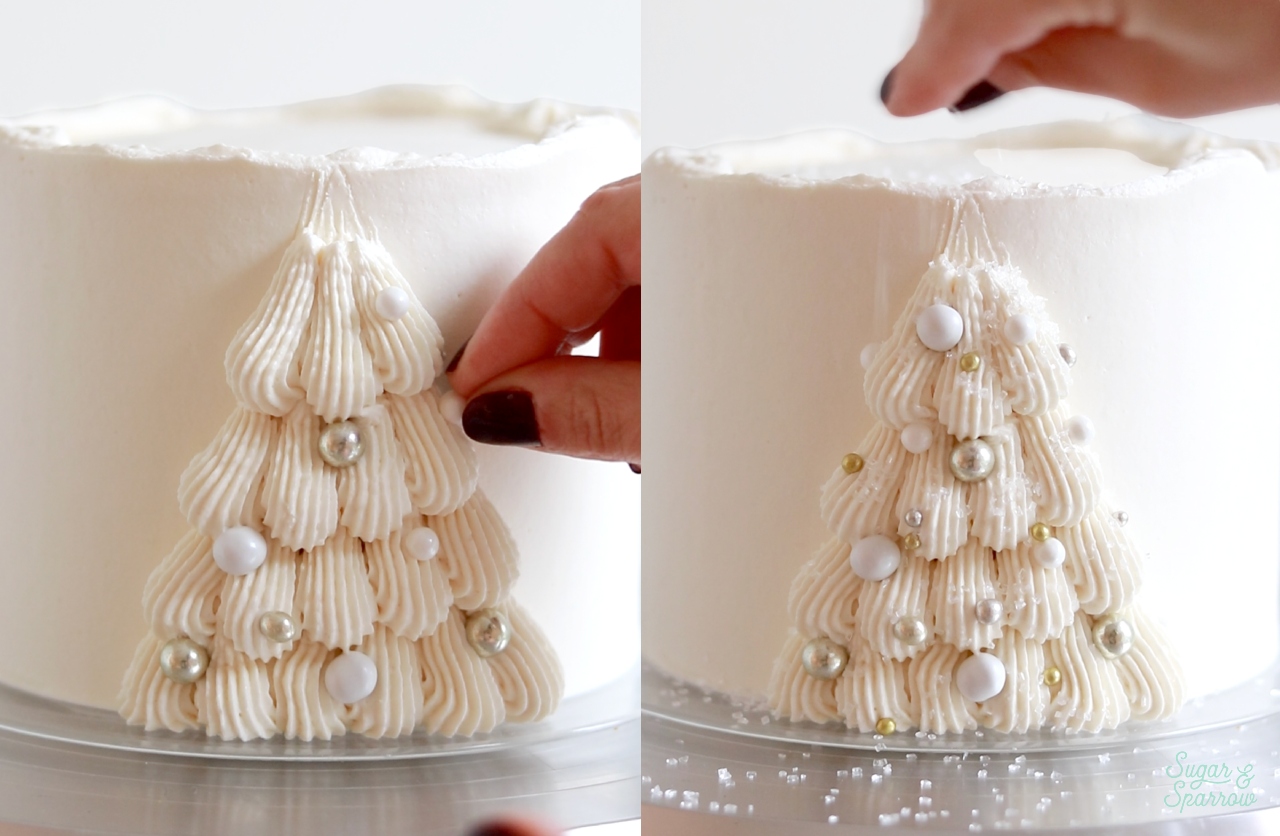
Fit a piping bag with Wilton Tip 4B and fill it with the rest of the vanilla buttercream. Starting at the bottom of the cake in the bottom section of the tree outline, pipe vertical shells to fill in each section.

Step 4: Add the Sprinkles. While the piped Christmas tree is still wet to the touch, carefully press some white and metallic sprinkles into the tree to look like ornaments. I threw some of the smaller sprinkles at the tree to stick them on without getting my fingers in the frosting. I ended up sprinkling (and tossing) some sugar sprinkles onto the tree as well.
Using some of the white jimmies sprinkles and sugar sprinkles, I added some texture around the rest of the cake randomly. This is easiest if you add the sprinkles onto a flat surface, then press your fingertip onto a cluster of them and carefully press them onto the cake while they’re still stuck to your finger.
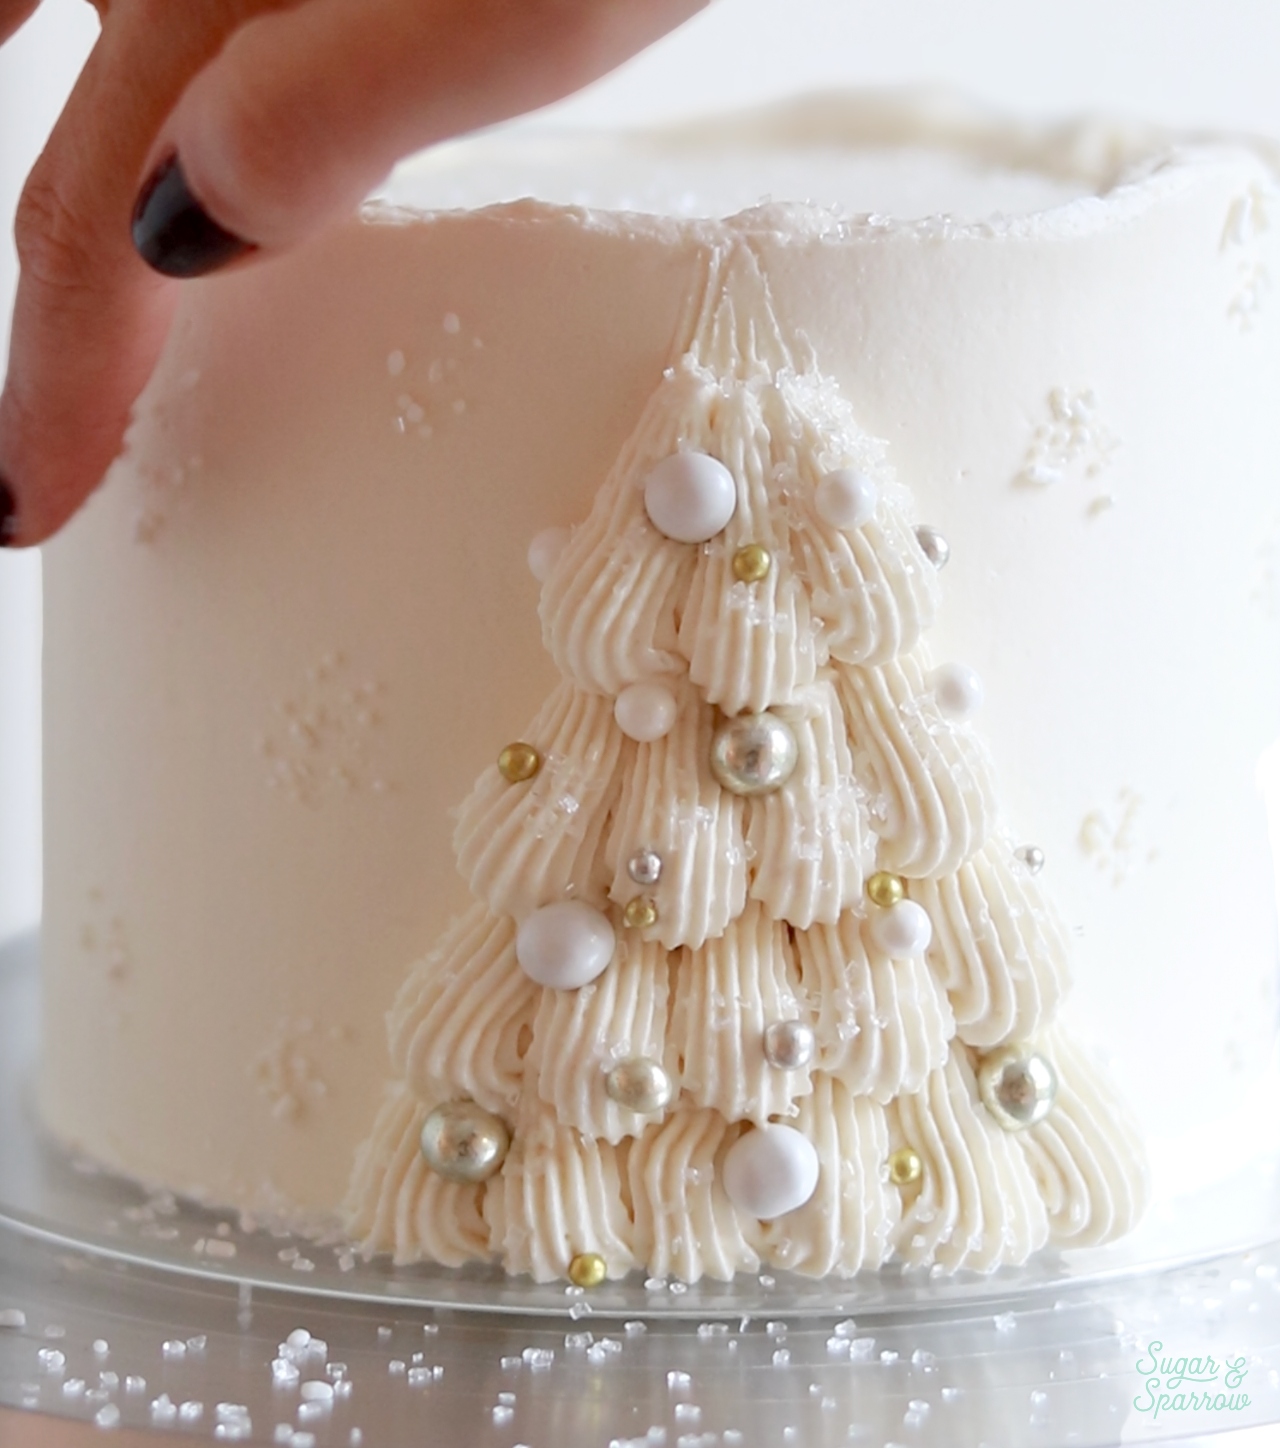
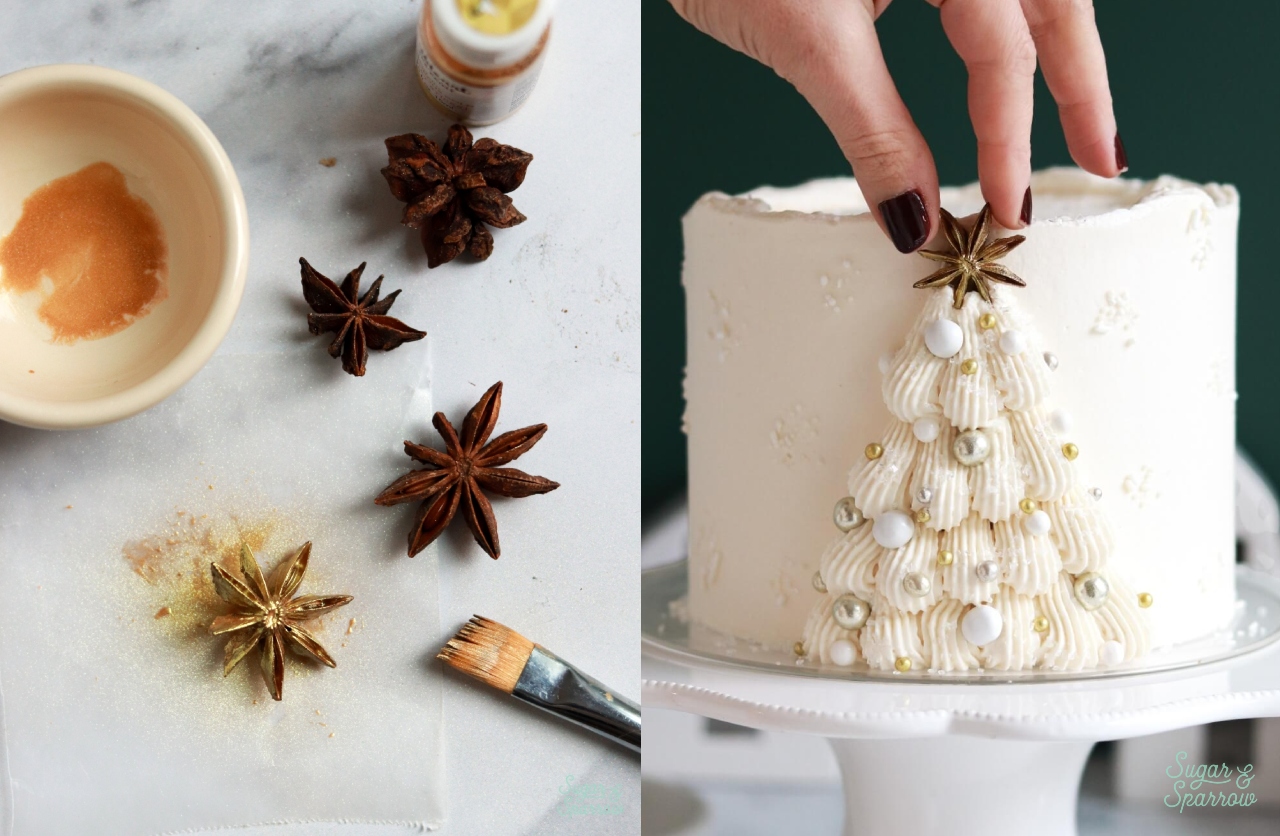
Step 5: Add the Anise Star. I used some edible metallic gold paint and spray luster dust to add a gold finish to a star anise, then pressed it onto the top of the Christmas tree. So pretty!
More Christmas Cakes You’ll Love
In case you need some more festive holiday cake ideas for your dessert table, here are some of my favorites:
- Christmas Funfetti Cake
- Christmas Sugar Cookie Dough Cake
- Vintage Christmas Red Velvet Cake
- Christmas Sweater Sheet Cake
- Festive Eggnog Cake
I hope you love this white Christmas cake as much as I do! Let me know if you make it in the comments below and feel free to tag @sugarandsparrowco on Instagram to show me if you post a photo. I love to see what you create with my recipes!
White Christmas Cake
Ingredients
Bakery-Style White Cake
- 2 1/2 Cups (265g) sifted cake flour* DIY recipe in notes
- 2 tsp baking powder
- 1/2 tsp baking soda
- 1/2 tsp salt
- 1 1/2 Cups (300g) granulated sugar
- 1/2 Cup (113g) unsalted butter, room temperature
- 4 large egg whites, room temperature fresh or 1/2 Cup carton egg whites
- 1/2 Cup (120ml) vegetable oil
- 2 tsp pure vanilla extract
- 1/2 tsp almond extract
- 1 1/4 Cups (300ml) full-fat buttermilk**, room temperature DIY recipe in notes
Vanilla Buttercream
- 1 1/2 Cups (339g) unsalted butter, room temperature
- 5 Cups (600g) powdered sugar
- 1 Tbsp pure vanilla extract
- 2 Tbsp whole milk, room temperature
- 1/4 tsp salt, or to taste
- 1-2 tsp icing whitener optional
Decorations (Optional)
- 1 Tbsp White and metallic sprinkles (for ornaments)
- 1/8 Cup Sugar sprinkles
- 1 Star anise
- 1 tsp edible metallic gold paint and/or gold luster dust spray
Instructions
Make the Bakery-Style White Cake
- Preheat the oven to 350°F (177°C) and prepare three 6-inch or two 8-inch cake pans by spraying the sides with baking spray and fitting a parchment paper circle to the bottom of each pan.
- In a medium bowl, add the flour, baking powder, baking soda and salt. Whisk together and set aside.
- In the bowl of a stand mixer fitted with the paddle attachment, beat the butter at high speed until creamy, about 2 minutes. Add the sugar and cream it together with the butter at medium-high speed until light and fluffy, about 2 minutes, scraping the bowl and paddle at the halfway point. Turn the mixer to low and add the egg whites one at a time, mixing until they are just combined and scraping down the bowl and paddle as needed. Add the vegetable oil, vanilla, and almond extract, Increase the mixer speed to high and beat for 1 minute.
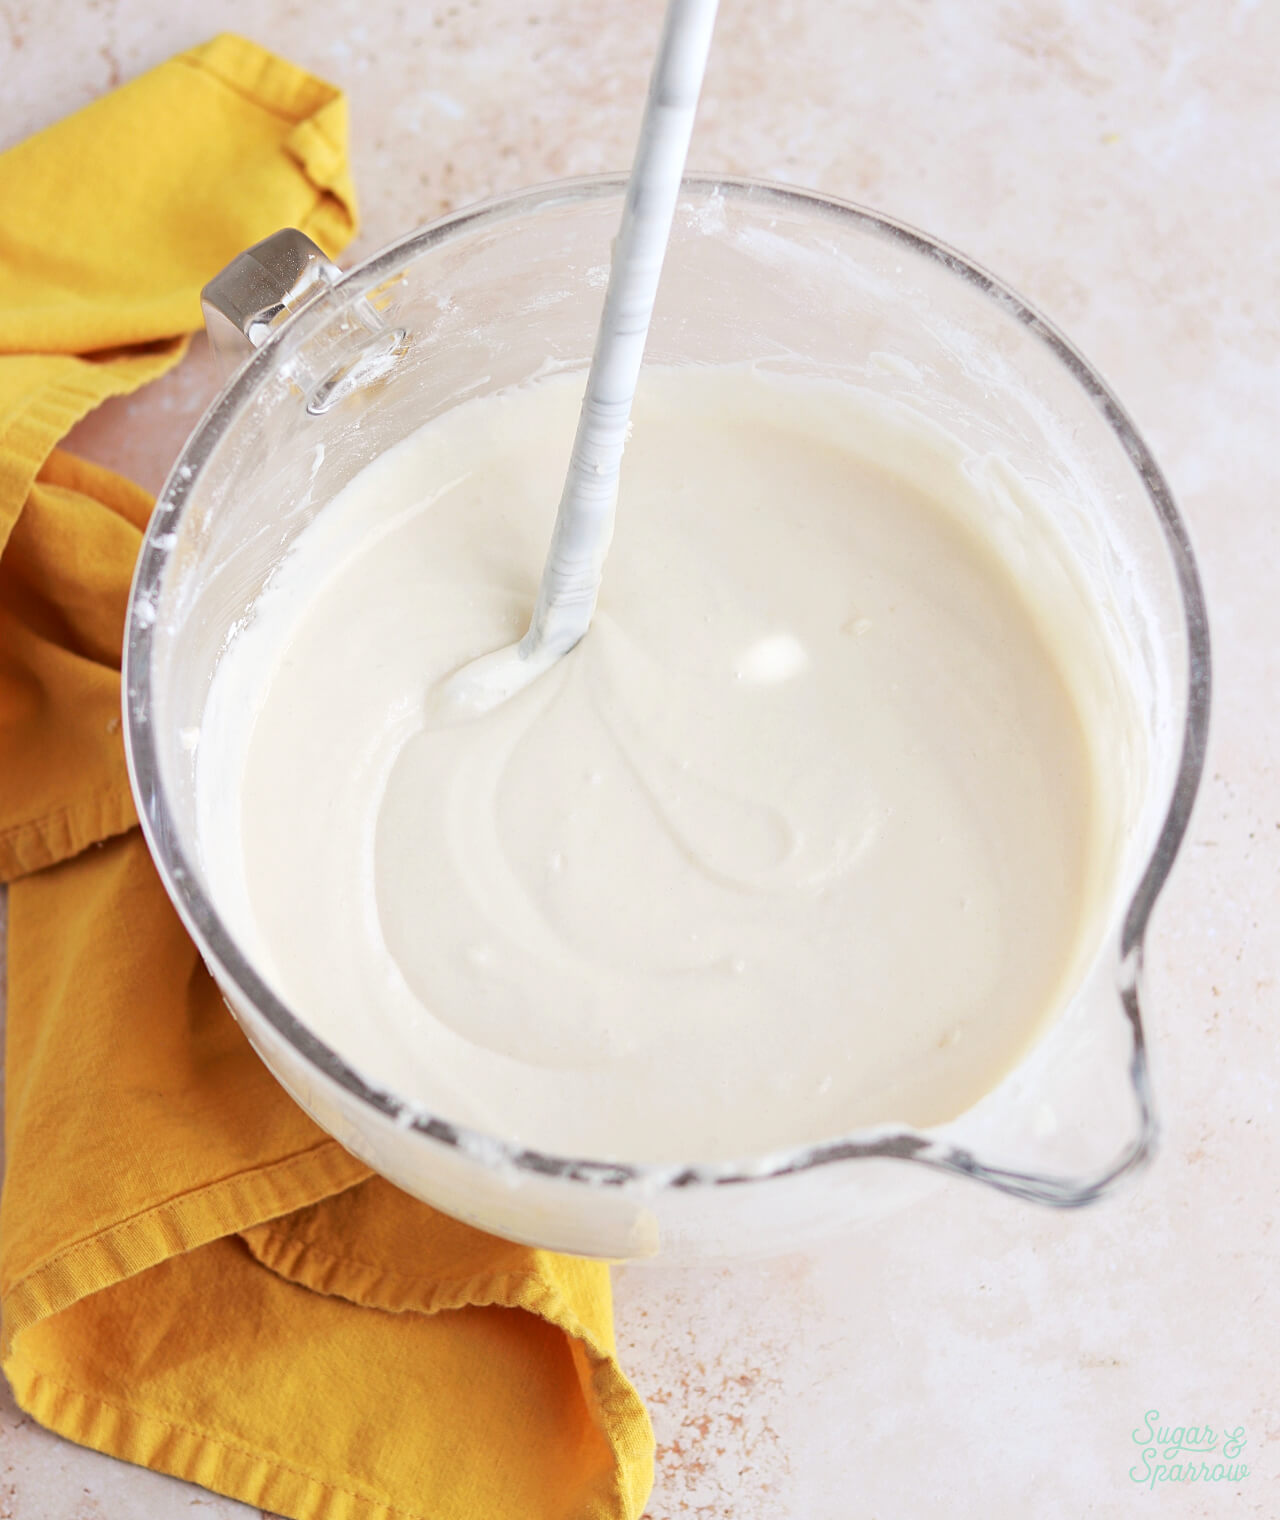
- Turn the mixer off and add the flour mixture all at once. Mix the ingredients on low speed until just combined, then slowly pour in the buttermilk. Continue mixing at low speed for about 30 seconds, until the batter is uniform and combined. The batter will be slightly thin.
- Divide the batter evenly between the prepared cake pans and bake for 28 to 32 minutes. They’re done when they spring back to the touch and a toothpick inserted into the centers comes out clean or with just a few moist crumbs on it. Let the cakes cool in their pans for 5 minutes, then remove them from the pans and allow them to cool completely on a wire rack.
Make the Vanilla Buttercream
- With a hand mixer or paddle attachment on your stand mixer, cream the butter on medium-high until it’s creamy and light (almost white) in color. About 7 minutes.
- With the mixer on low, add the powdered sugar a few cups at a time, scraping down after each addition and making sure each cup is fully incorporated before adding the next one.
- Add vanilla, milk, and salt and mix on low for another minute until fully incorporated. Add the icing whitener if using and continue mixing on low until uniform and white in color.
Assembly
- Once the white cake layers are completely cooled, level them to your desired height. Add a swipe of vanilla buttercream onto a cardboard cake circle and place the first cake layer on top. Fill and stack the cake with vanilla buttercream, then crumb coat the cake. Refrigerate the cake for 15-20 minutes to let the crumb coat firm up before frosting the cake with vanilla buttercream.
- To create the design pictured, use the vanilla buttercream to create a smooth buttercream finish and keep the top edge unfinished (don't swipe it inward to create sharp edges). Refrigerate the cake to let the frosting firm up once more.
- Using an icing smoother or other straight edge, mark out the triangle shape of the Christmas tree on the cake. Then, mark out four horizontal sections for the piping inside the tree (photos of this process are in the blog post above). Fit a piping bag with Wilton Tip 4B and fill it with the rest of the vanilla buttercream. Starting at the bottom of the tree and working your way up to the top, pipe vertical shells in each marked off section. Decorate the tree with white and metallic ornament sprinkles and sugar sprinkles, then add more sprinkle texture in small clusters all around the cake. Paint the star anise with edible metallic gold paint and/or gold luster dust spray, then place it on top of the Christmas tree.
Notes
- The white cake layers can be made ahead and stored at room temperature, covered tightly in plastic wrap, for up to two days. Alternatively, you can cover with plastic wrap and store in the freezer for up to two months before thawing to room temperature.
- The vanilla buttercream can be made ahead and stored in an airtight container at room temperature for up to 2 days. You can also refrigerate the buttercream for up to 2 weeks or freeze for up to 3 months. When you’re ready to use it, bring back to room temperature before mixing on medium speed until creamy and smooth.


This is the second time I chose a Sugar and Sparrow recipe, and I am glad I did. The cake was moist and the frosting delicious. I made a 3 layer 6” cake and did not have enough frosting to pipe the tree (so go easy on the filling between layers if you make the 6”) but I had enough to make a snowman, which I decorated with mini chocolate chips for the eyes and buttons. It was a last minute pivot but it was very cute! This has become my go to spot for baking recipes!