• Cake
  • Frosting
  • YouTube
  • My Favorite Tools
  • Nav Social Icons

  • Skip to primary navigation
  • Skip to main content
  • Skip to primary sidebar
  • Skip to footer
  • Recipes
    • Cake
    • Cupcakes
    • Frosting
    • Ice Cream
    • Vegan
  • Cake Basics
  • Tutorials
  • Blog
  • About
  • Mobile Menu Widgets

    Connect

    Search

Sugar & Sparrow logo in script font

Sugar & Sparrow

Lifestyle and Cake from Portland Oregon

  • Cake Basics
  • Recipes
    • Cake
    • Cupcakes
    • Cookies & Bars
    • Filling
    • Frosting
    • Ice Cream
    • No-Bake
    • Small Batch
    • Vegan
  • Tutorials
  • Book
  • Blog
  • About

Small Batch Raspberry Chocolate Cake

February 8, 2025 · In: Cake, Featured, Recipes, Seasonal, Small Batch, Valentines

Jump to Recipe

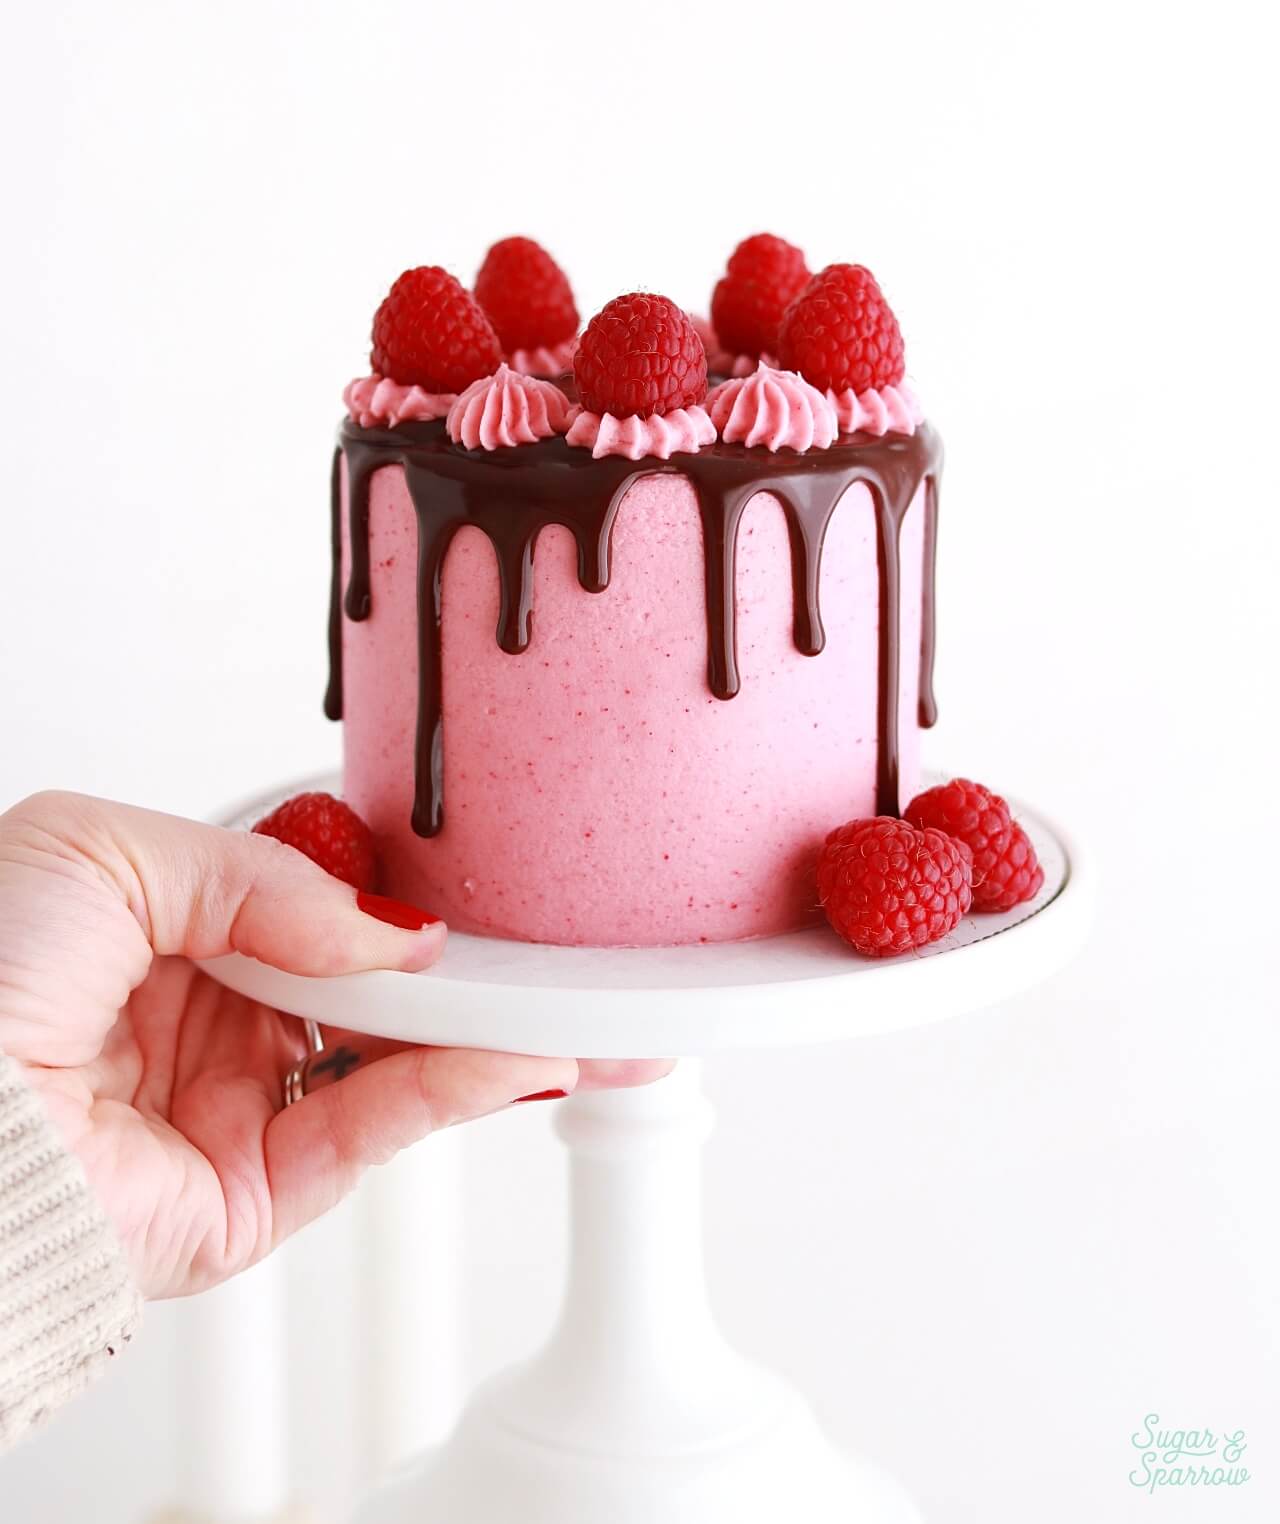
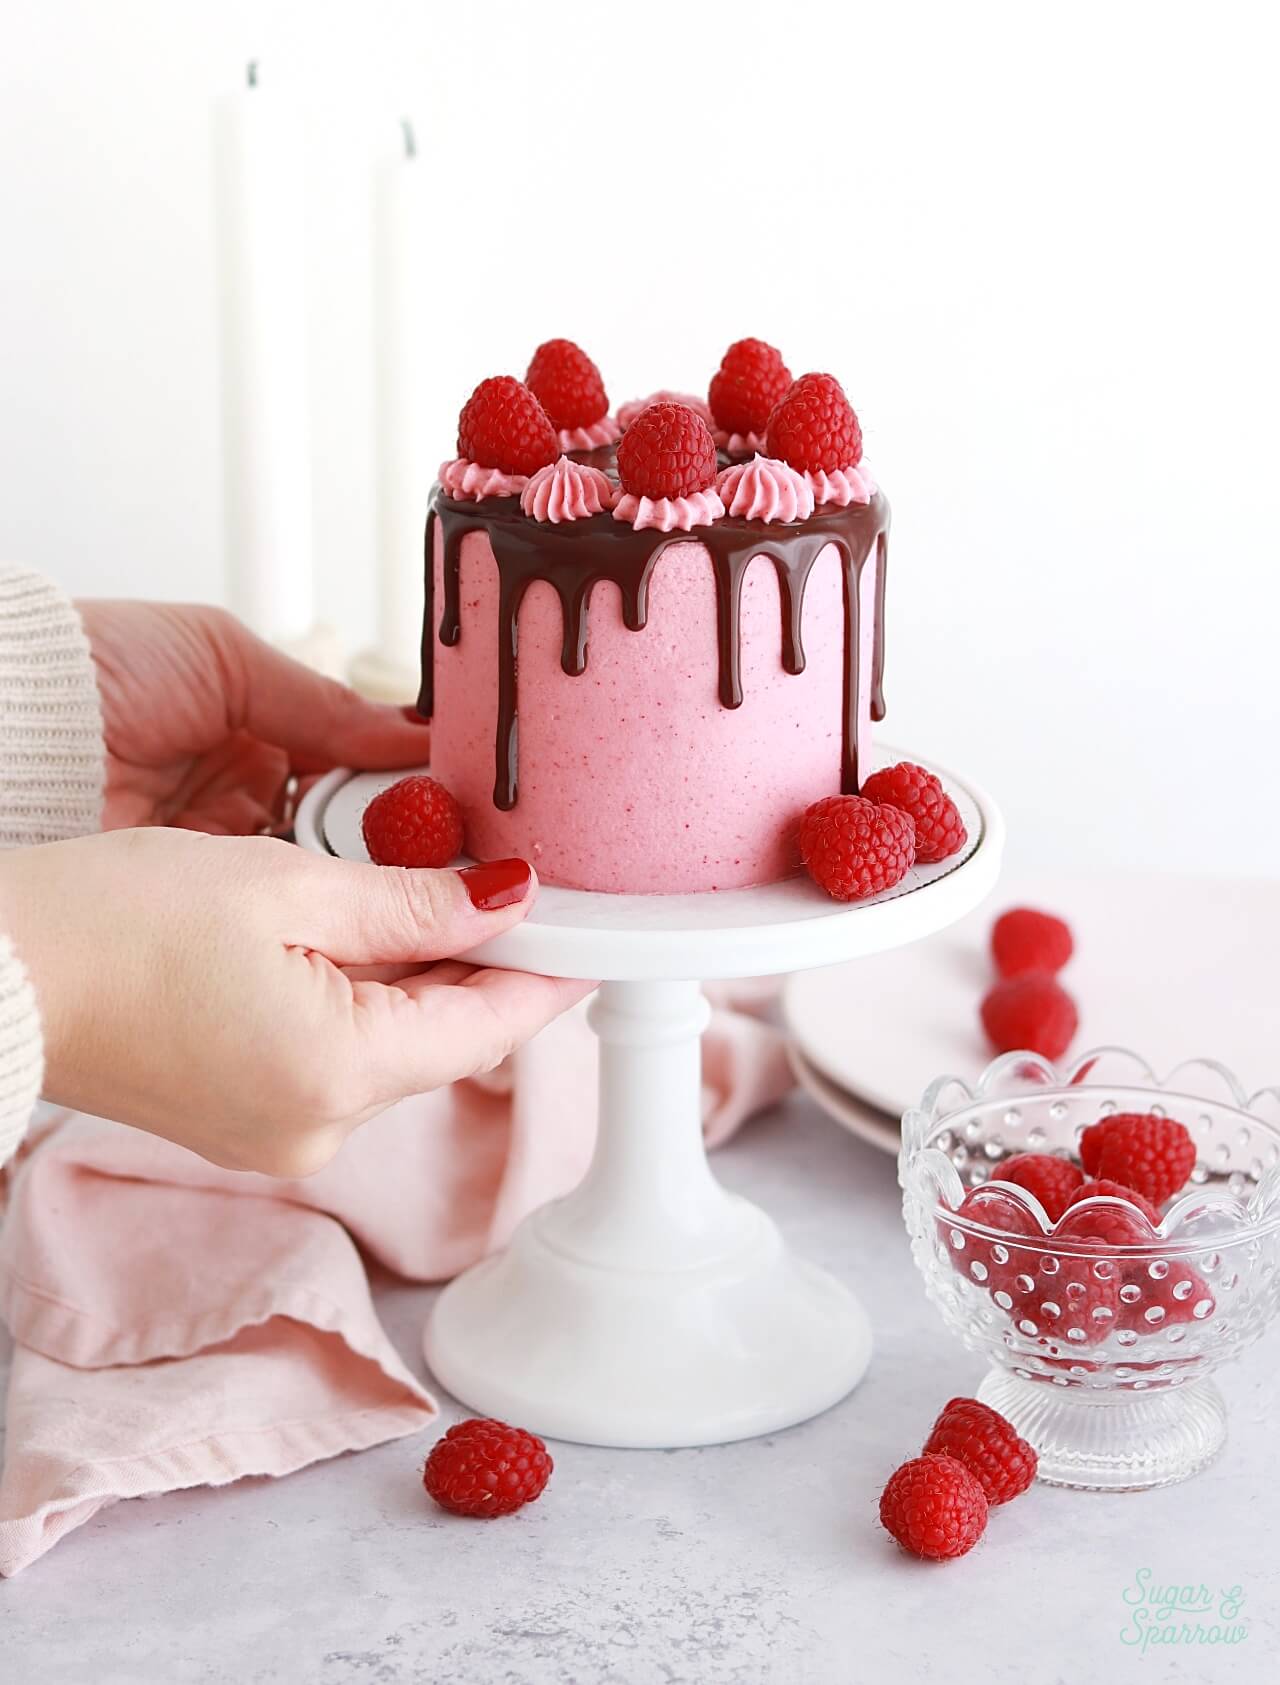
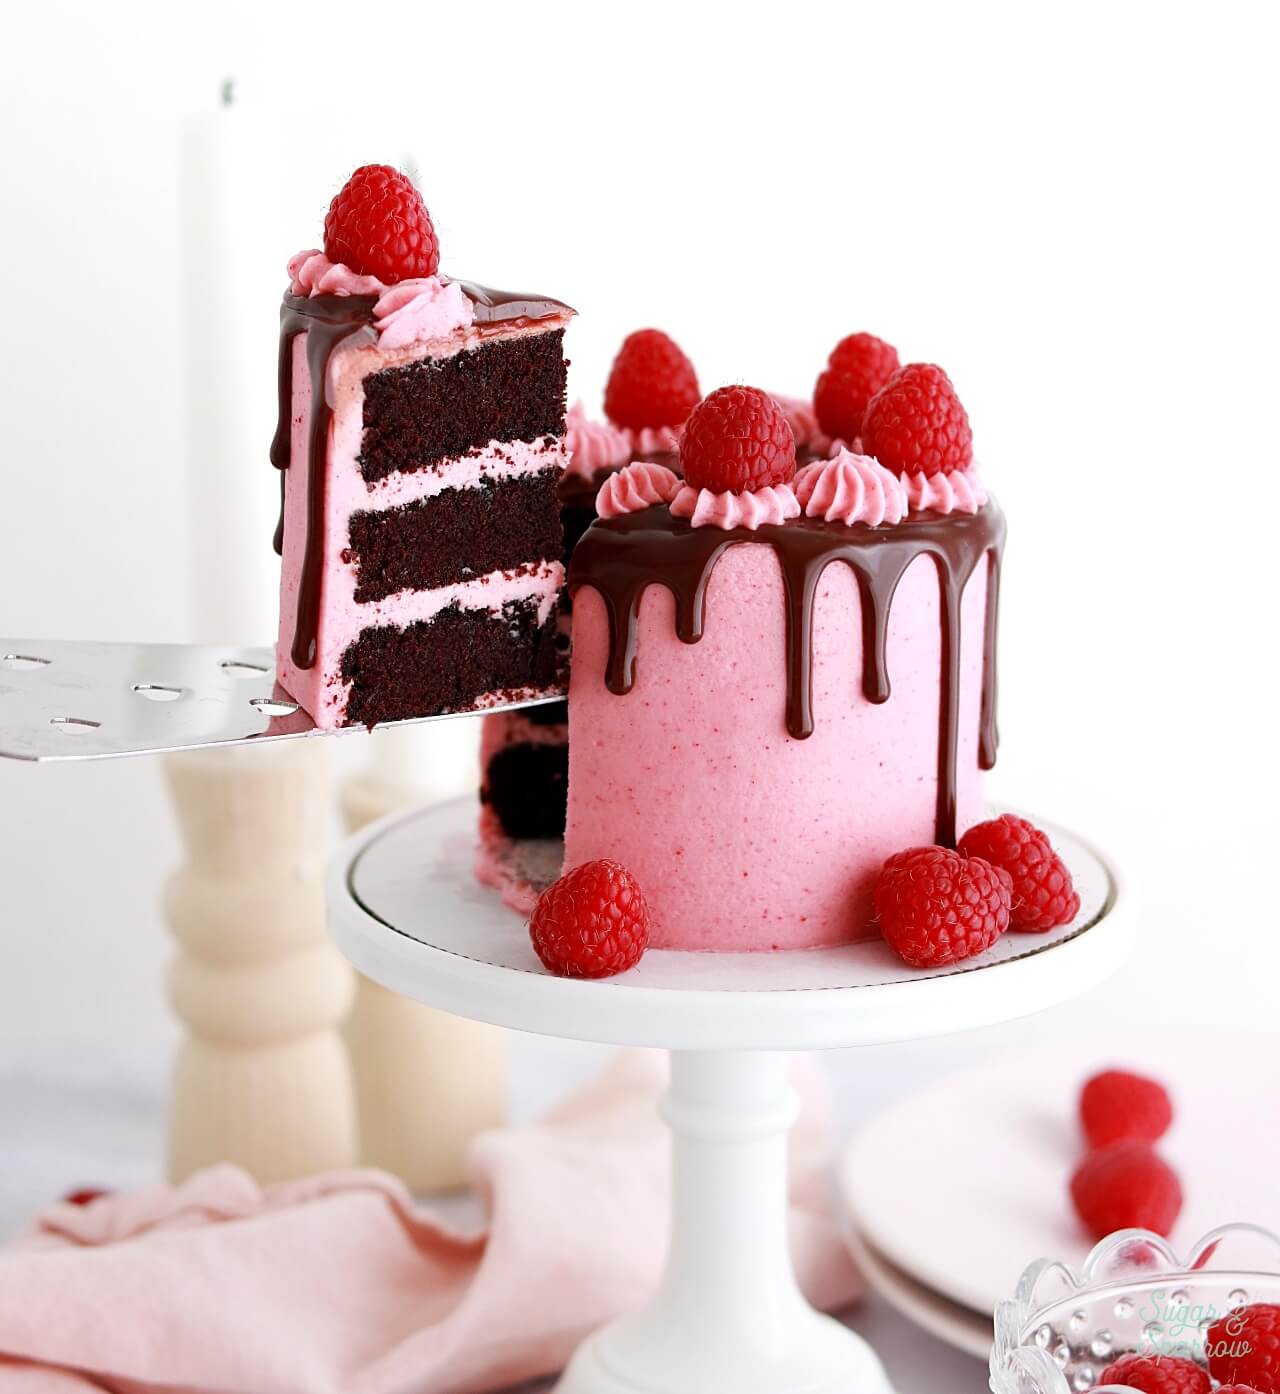
With Valentine’s Day fast approaching, I couldn’t help but continue this small batch cake series with a mini version of my favorite raspberry chocolate cake recipe! It’s a decadent chocolate cake with delicious raspberry buttercream and a beautiful chocolate ganache drip, perfectly portioned for 2-4 people. You can bake this recipe as a three layer 4-inch cake like I did, or as a single layer 6-inch cake. It’s the perfect flavor combination for date night or a small gathering!
small batch raspberry chocolate cake recipe
mini raspberry chocolate cake valentines day recipe

Small Batch Chocolate Cake

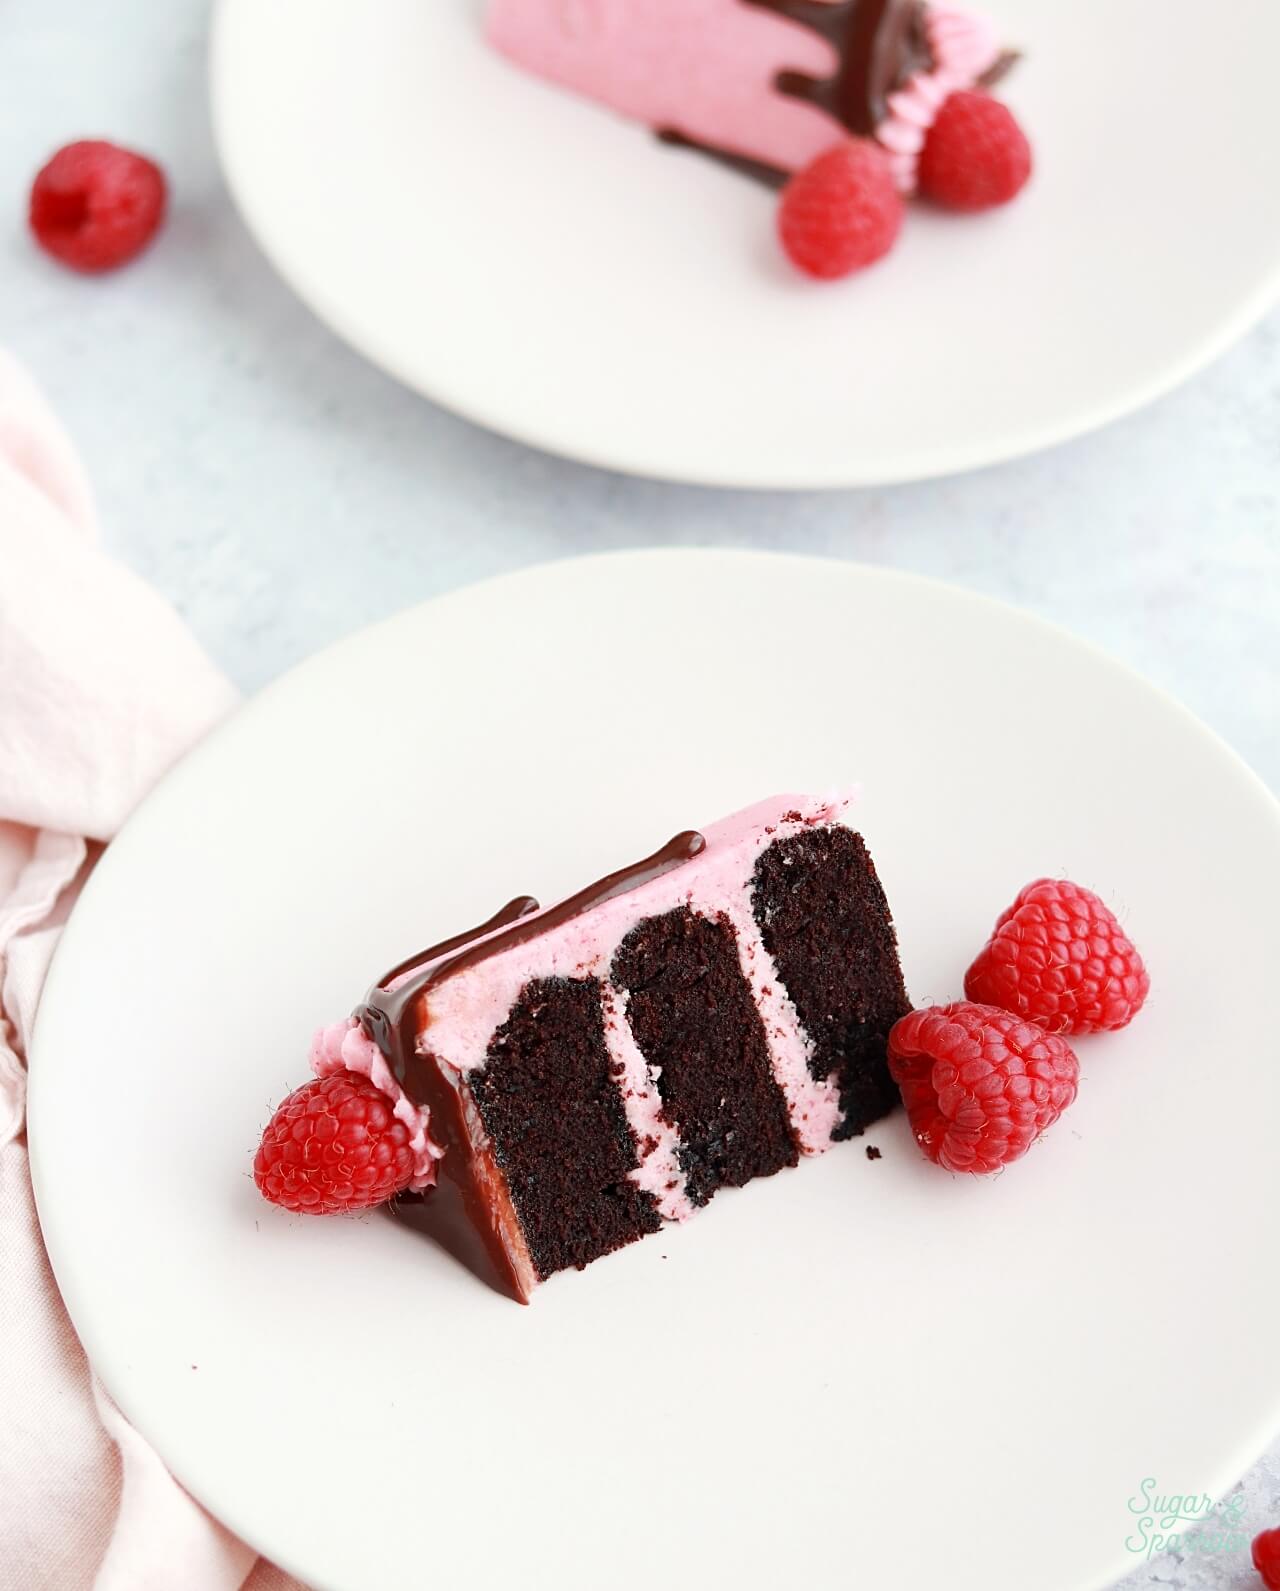
This mini cake recipe starts with a scaled down version of my one-bowl chocolate cake recipe, which makes enough batter for one 6-inch cake layer or three 4-inch cake layers. It’s so moist and decadent with amazing chocolate flavor. The perfect texture comes partly from the moisture that the oil and buttermilk add, and partly from the hot liquid added at the end. The heat helps to bloom the cocoa powder and really incorporate the ingredients before the baking process. You can use either hot coffee or hot water for that part, but I prefer coffee because it amplifies the chocolate flavor even more!
small batch chocolate cake recipe with raspberry buttercream

Pro Tip: If you don’t have easy access to buttermilk you can easily make a DIY version by adding about 1/2 teaspoon of white vinegar, apple cider vinegar, or lemon juice into a measuring cup, then topping it with whole milk until it measures 1/4 Cup (the amount of buttermilk called for in this recipe). Give the mixture a stir and let it sit for at least 15 minutes, which is how long it takes for the ingredients to chemically react. 

Delicious Raspberry Buttercream

The Raspberry Buttercream is the filling and the frosting on this one, and it’s just perfect that way. The secret to the beautiful flavor and consistency of this buttercream is freeze-dried raspberries. The process of freeze-drying removes the liquid from the berry and keeps ALL the flavor intact, so it’s easy to grind the berries into a powder and add them right to the buttercream. This gives you the most powerful flavorful and keeps the consistency of the frosting perfect for cake decorating. And just look at that naturally gorgeous color! No food color gel necessary. 
mini raspberry chocolate cake recipe for two
chocolate raspberry cake recipe for two

You can find freeze-dried raspberries at most grocery stores, Trader Joe’s, and even Target if you’d rather shop local. And if you can’t find freeze-dried raspberries, I do have this raspberry buttercream recipe that uses fresh berries. It works beautifully as a substitute!

What Cake Pans to Use for Small Batch Cakes

There are two different cake pan sizes that work with this recipe: 4-inch and 6-inch. If you want to make a mini layer cake like the cake pictured here, you’ll need three 4-inch cake pans. These are the ones I love to use for mini layer cakes. If you’re making a single layer, you’ll need one 6-inch cake pan. 

How to Decorate a Mini Chocolate Raspberry Cake 

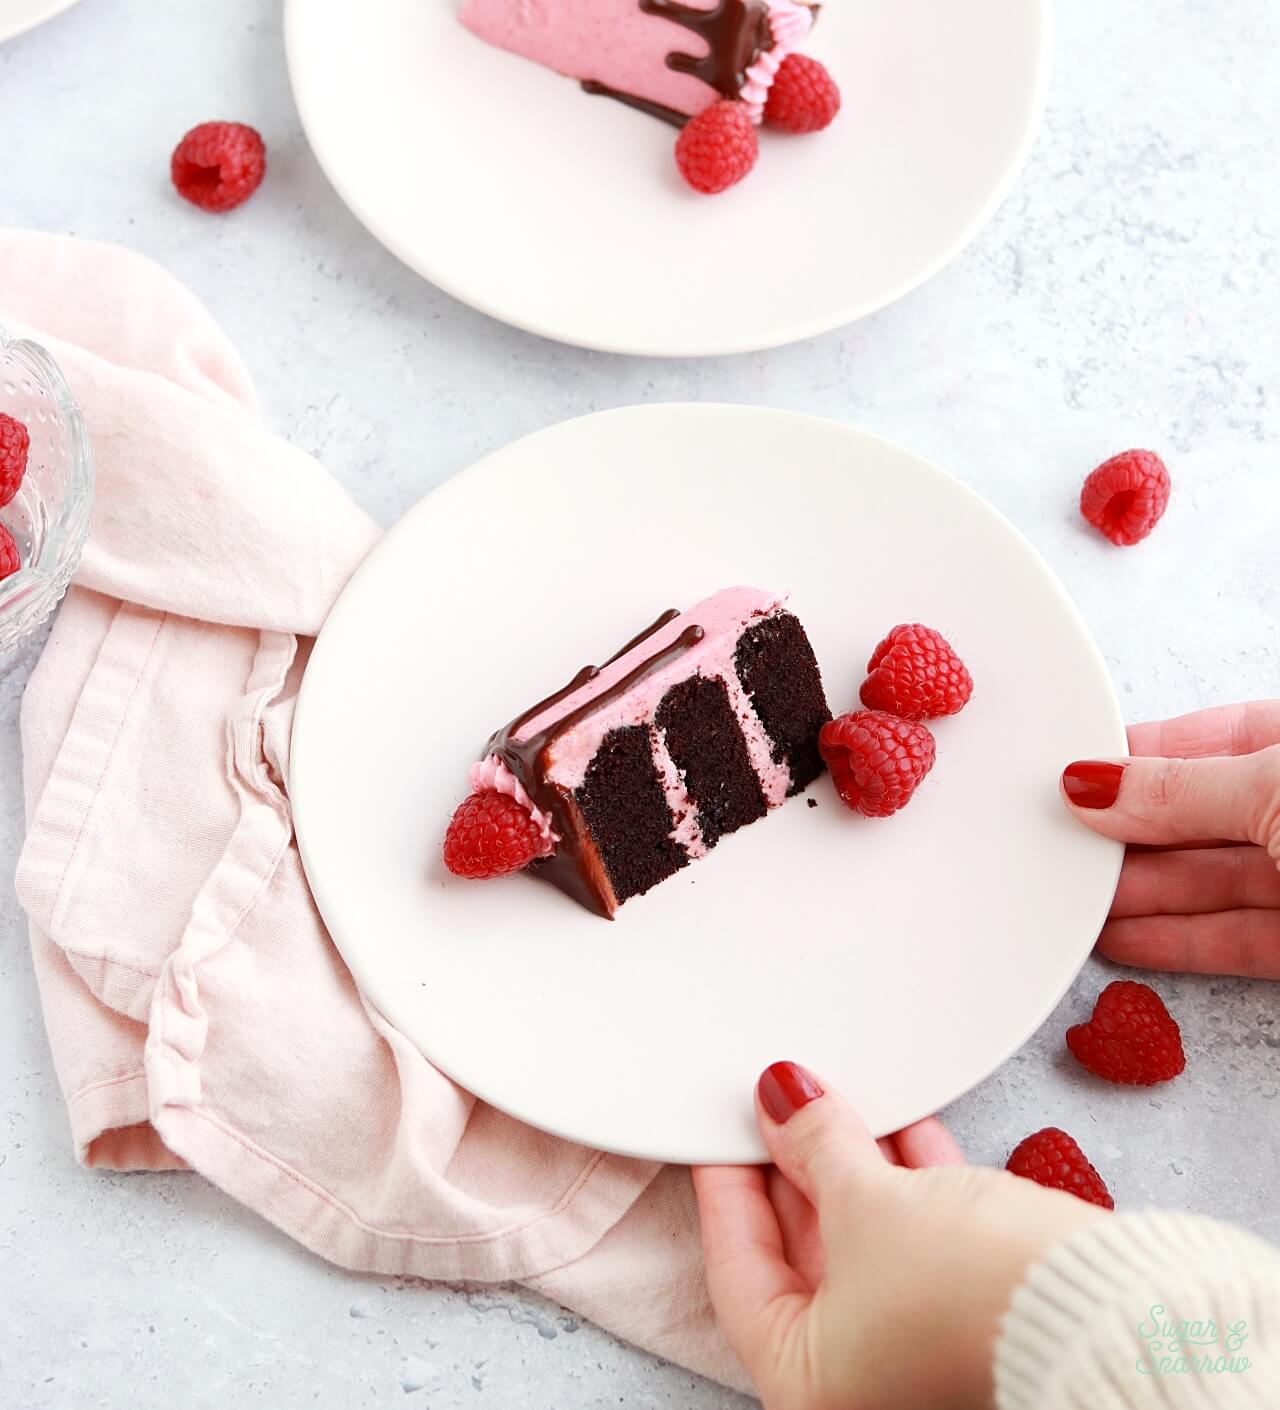
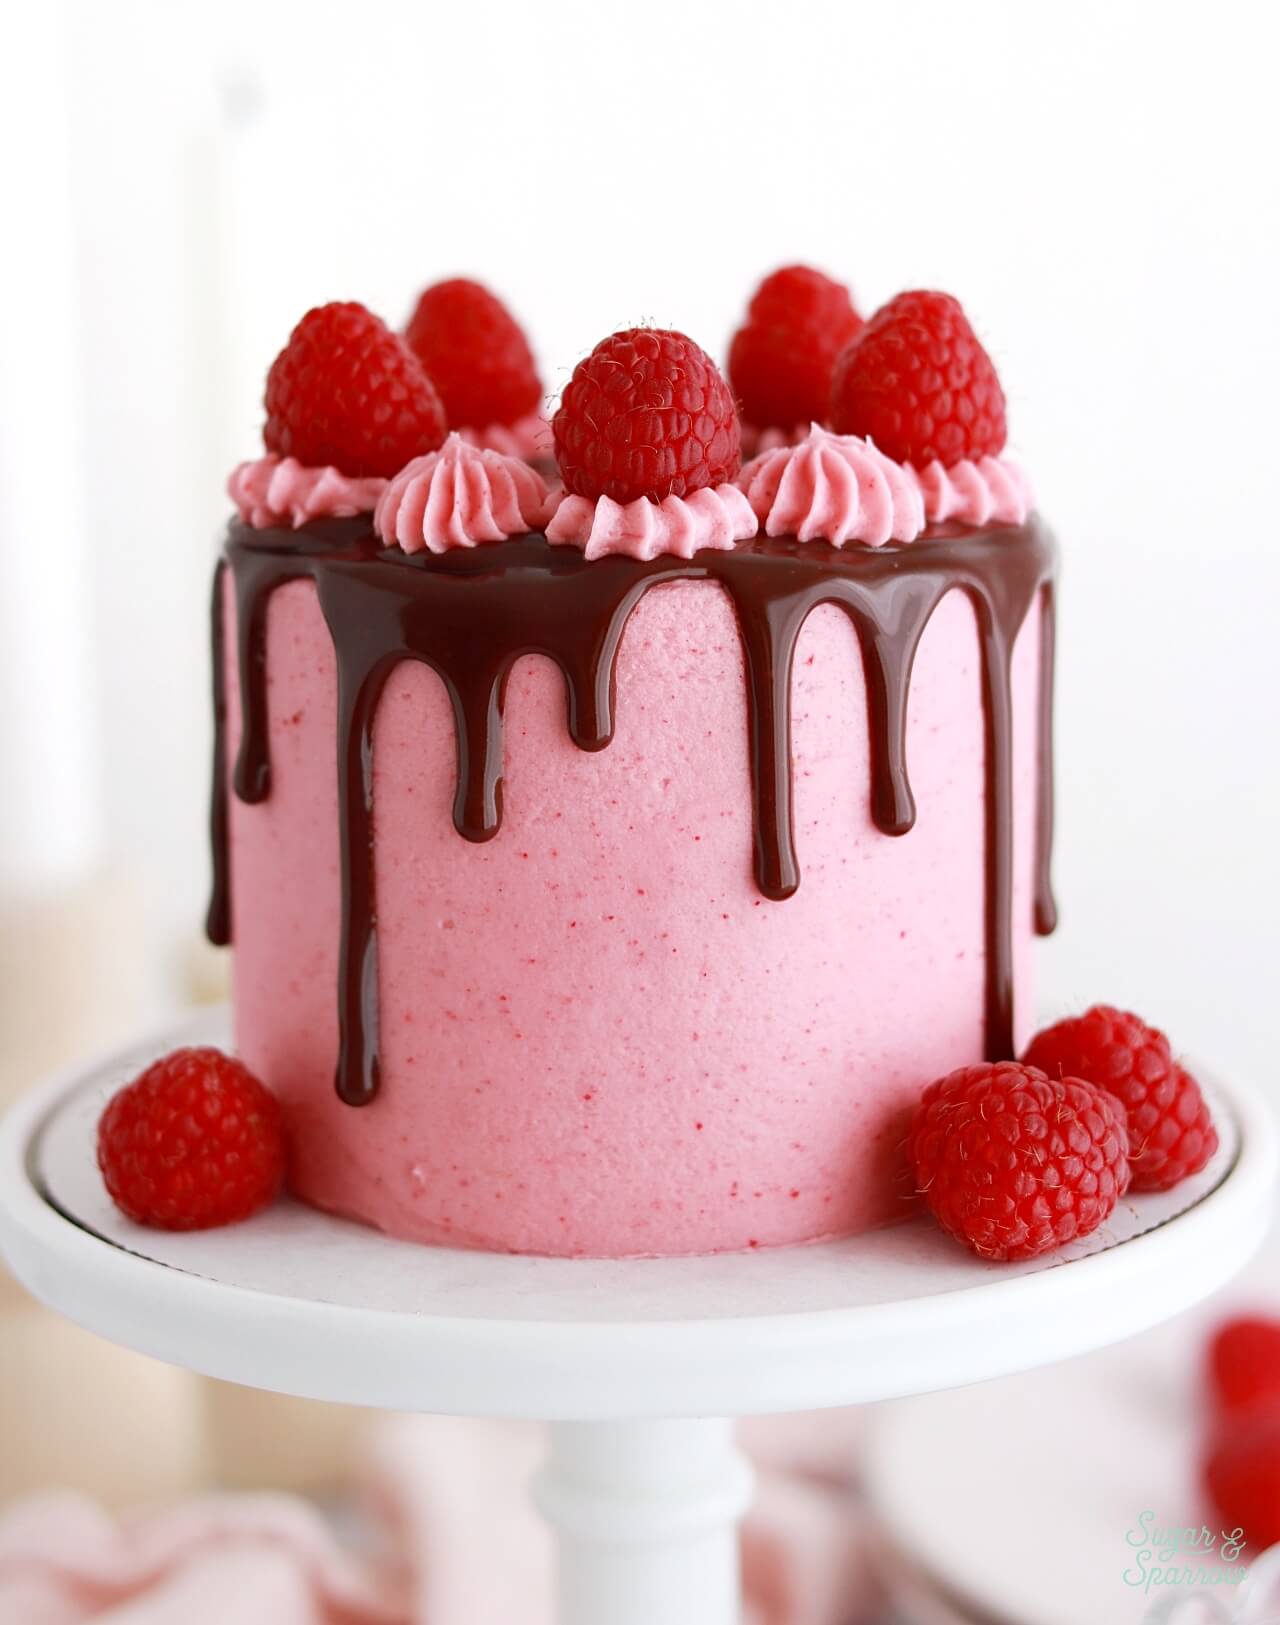
Decorating a mini layer cake will require a bit more patience than the single-layer version, but I find it so much fun! I wanted this one to look almost exactly like my full sized raspberry chocolate cake recipe and it turned out so cute. After filling and frosting the cake with raspberry buttercream, I used more of the buttercream to create a smooth finish on the cake before dripping it with chocolate ganache. I topped the cake with the rest of the raspberry buttercream, which I piped with Wilton Tip 4B and then added fresh raspberries on top. 
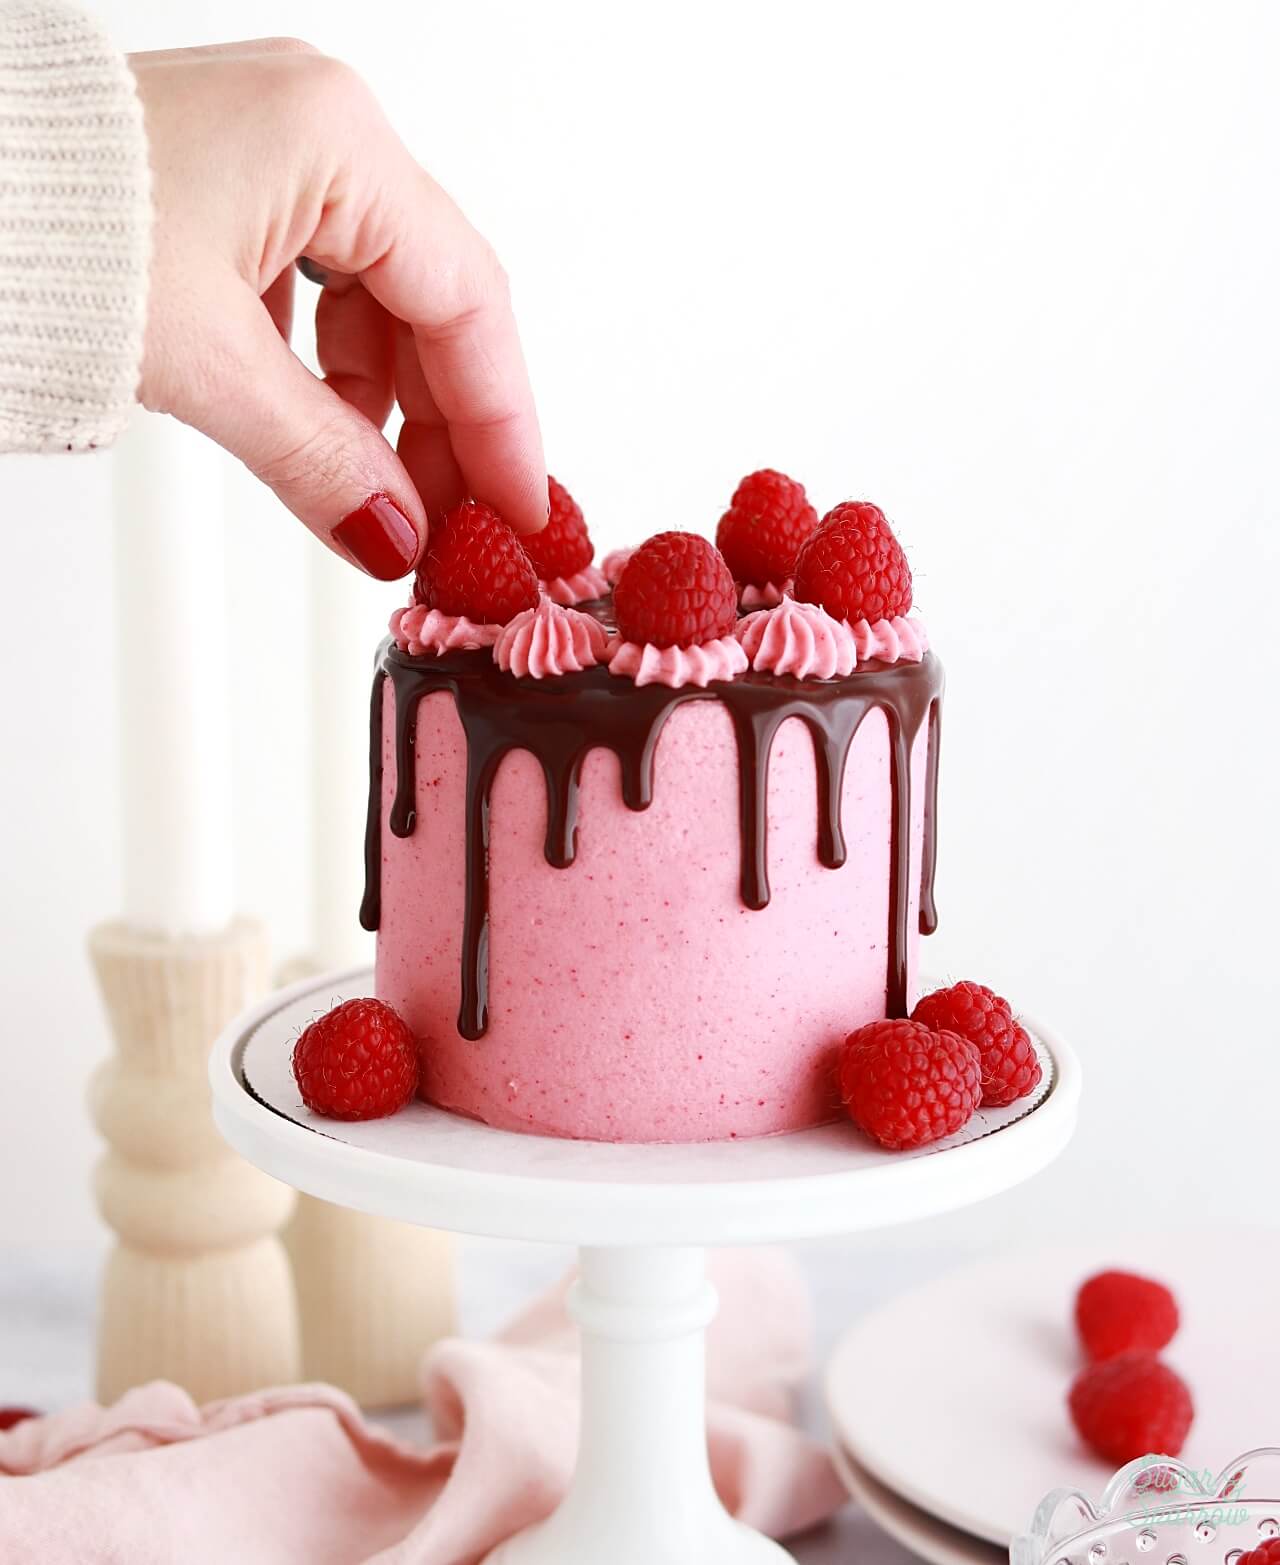
small batch raspberry chocolate cake recipe for two
four in raspberry chocolate layer cake

You could use all of these techniques on a single layer 6-inch cake, get creative with piping the buttercream on top, or simply frost the cake layer with a rustic finish. However you decorate, it’s sure to be a hit for Valentine’s Day, Galentine’s Day, or any day!
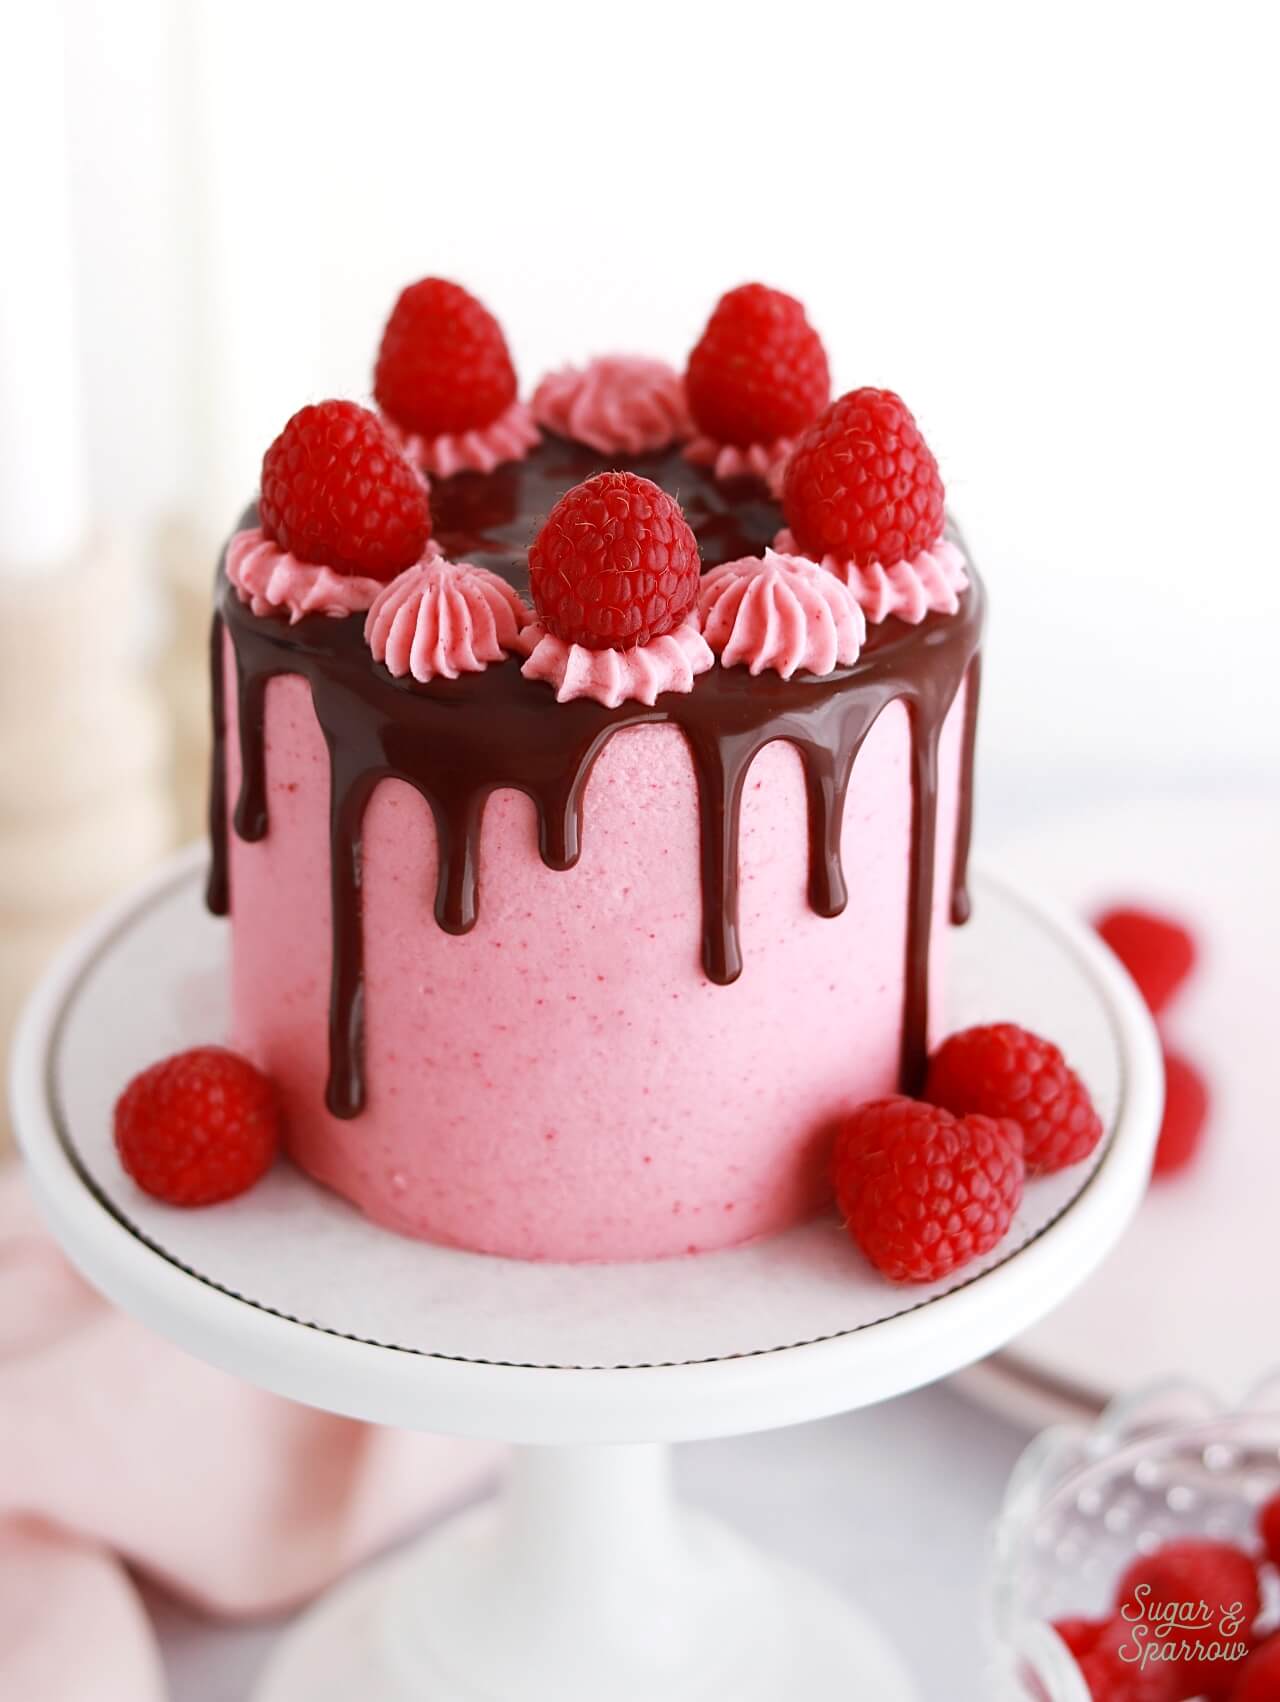
raspberry chocolate cake for two
small batch raspberry chocolate cake recipe by sugar and sparrow

Small Batch Raspberry Chocolate Cake

5 from 1 vote
Moist and decadent chocolate cake with delicious raspberry buttercream and chocolate ganache, perfectly portioned for 2-4 people. Ideal for date night, a small birthday celebration, a smash cake, or to brighten someone's day!
Print Recipe Pin Recipe
Prep Time:35 minutes mins
Cook Time:30 minutes mins
Cooling Time:2 hours hrs 10 minutes mins
Total Time:3 hours hrs 15 minutes mins
Servings: 2 slices

Equipment

  • 3 4-inch cake pans OR
  • 1 6-inch cake pan

Ingredients

Small Batch Chocolate Cake

  • 1/2 Cup (65g) all purpose flour
  • 1/2 Cup (100g) granulated sugar
  • 1/4 Cup (21g) unsweetened cocoa powder
  • 1/4 tsp baking soda
  • 1/4 tsp baking powder
  • 1/8 tsp salt
  • 1 large egg, room temperature
  • 2 Tbsp vegetable oil
  • 1/2 tsp pure vanilla extract
  • 1/4 Cup (60ml) buttermilk, room temperature* DIY recipe in notes
  • 1/4 Cup (60ml) hot coffee or hot water

Raspberry Buttercream

  • 1/3 Cup (9g) freeze-dried raspberries** instructions for fresh raspberries in notes
  • 1/2 Cup (113g) unsalted butter, room temperature
  • 1 1/2 Cups (180g) powdered sugar
  • 1 1/2 Tbsp whole milk, room temperature
  • 1/2 tsp pure vanilla extract
  • pinch of salt, or to taste

Chocolate Ganache

  • 1/4 Cup (46g) chocolate chips
  • 1/4 Cup (60ml) heavy whipping cream

Garnish

  • fresh raspberries

Instructions

Make the Small Batch Chocolate Cake

  • Preheat the oven to 350ºF and prepare three 4-inch or one 6-inch cake pan by spraying the sides with cooking spray and fitting the bottom(s) with a wax paper or parchment paper cake circle. 
  • Place all of the dry ingredients into a medium bowl and whisk them together. Add the egg, vegetable oil, vanilla, and buttermilk and whisk until fully combined. Add the hot coffee (or hot water) in a slow stream and whisk until fully combined and smooth. The batter will be very thin. 
  • Pour the batter into the prepared cake pan(s). If using 4-inch cake pans, bake for 18-22 minutes. If using a 6-inch cake pan bake for 24-28 minutes. The cake is done when it springs back to the touch and a toothpick inserted comes out clean. Cool completely before assembling and decorating.

Make the Raspberry Buttercream

  • With a food processor, grind the raspberries into a fine powder. Sift out the seeds (if a few seeds end up in the powder that is totally ok) and set the powder aside.
  • In a stand mixer fitted with a paddle attachment, whip the butter on medium-high speed until creamy and light in color, 4-5 minutes. Add the raspberry powder, vanilla, and milk and continue to mix on medium until fully combined.
  • Scrape down the bowl and paddle, then add the powdered sugar in two additions, mixing on low speed until incorporated. Add a small pinch of salt and mix on low speed until fully combined and smooth, 1-2 minutes. 

Make the Chocolate Ganache

  • Place chocolate chips into a heat resistant bowl (glass or metal) and set aside.
  • In a saucepan over medium heat, warm the heavy whipping cream until it just starts to simmer, whisking frequently. I always look for small bubbles forming around the edge and a soft simmer starting in the middle. When it's reached this point, pour the cream into your bowl of chocolate and let sit for about 30 seconds. 
  • Whisk it together until it’s uniform in consistency and there are no bits of chocolate left on your whisk. Cool ganache at room temperature for 10-20 minutes, or until the ganache itself is room temperature or slightly above. 

Assembly

  • Once the chocolate cake is completely cooled, frost and decorate with the raspberry buttercream. To create the mini layer cake pictured, level the cake layers to your desired height. Add a swipe of raspberry buttercream onto a cardboard cake circle and place the first cake layer on top. Fill and stack the cake with raspberry buttercream, then crumb coat the cake with raspberry buttercream. Place the crumb coated cake in the refrigerator for at least 20 minutes to let the buttercream set firm.
  • Use more raspberry buttercream to create a smooth buttercream finish and place the cake back into the refrigerator for 20 minutes to let the buttercream chill before dripping with chocolate ganache. Place the cake back into the refrigerator for another 5 minutes to let the ganache set, then use the remaining raspberry buttercream to pipe a star border on top using Wilton Tip 4B. Top every other star with a fresh raspberry.

Notes

*DIY Buttermilk recipe: add 1/2 tsp of white vinegar (or apple cider vinegar or lemon juice) into a jar and top it with 1/4 Cup of whole milk. Stir and let sit for 15 minutes before using in the recipe. 
**If you can’t find freeze-dried raspberries, you can make this raspberry buttercream recipe with fresh raspberries as an alternative. 
Make ahead tips: 
  1. The small batch chocolate cake layer(s) can be made ahead and stored at room temperature, covered tightly in plastic wrap, for up to two days. Alternatively, you can cover with plastic wrap and store in the freezer for up to two months before thawing to room temperature. 
  2. The raspberry buttercream can be made ahead and stored in an airtight container at room temperature for up to 1 day. Alternatively, you can store it in an airtight container in the refrigerator for up to two weeks. When you’re ready to use it, bring it back to room temperature and rewhip with your stand mixer to bring back to frosting consistency. 
  3. The chocolate ganache can be made ahead and stored in the refrigerator in an airtight container for up to two weeks. When you’re ready to use it as a drip, microwave it in 10 second increments, stirring after every interval until your ganache is room temperature and uniform in consistency.

I hope you love making this small batch raspberry chocolate cake recipe! Let me know who you made it for in the comments below + be sure to tag @sugarandsparrowco on Instagram to show me. I love to see what you create!

By: Whitney · In: Cake, Featured, Recipes, Seasonal, Small Batch, Valentines · Tagged: chocolate raspberry cake, raspberry chocolate cake, small batch cakes

you’ll also love

raspberry chocolate cake recipeRaspberry Chocolate Cake Recipe
thin mint chocolate cakeThin Mint Chocolate Cake Recipe
toasted smores cupcakes by sugar and sparrowToasted S’mores Cupcakes

Join the List

Stay up to date & receive the latest posts in your inbox.

Reader Interactions

Comments

  1. Vanessa says

    April 20, 2026 at 12:44 pm

    Can I use this recipe for a small batch of cupcakes?

    Reply
    • Whitney says

      April 20, 2026 at 1:56 pm

      Hi Vanessa! Yes, it will make about 9 cupcakes. Fill your cupcake tins no more than 2/3 full and bake at 350F for 14-18 min. Enjoy!

      Reply
  2. Ashley says

    February 26, 2026 at 10:10 am

    Hey! Would this work if i substitute buttermilk with regular milk?

    Reply
    • Whitney says

      February 26, 2026 at 10:49 am

      Hi Ashley! It will work, but buttermilk makes it more moist. If you have vinegar or lemon juice on hand I would recommend making DIY buttermilk. Add 1/2 tsp of white vinegar (or apple cider vinegar or lemon juice) into a jar and top it with 1/4 Cup of whole milk. Stir and let sit for 15 minutes before using in the recipe.

      Reply
      • Ashley says

        February 26, 2026 at 12:37 pm

        Thanks, trying this tomorrow!!

        Reply
  3. Glenda Travis says

    February 20, 2026 at 10:37 am

    5 stars
    Made this cake last weekend and I’m pretty sure it’s the best chocolate cake recipe I’ve ever used. The raspberry buttercream with the dried raspberries fantastic! I am now looking for a lemon cake recipe. Thank you!!!!

    Reply
    • Whitney says

      February 22, 2026 at 9:06 pm

      Yay, Glenda! I’m so happy to hear that! I have a small batch version of my lemon cake recipe here: https://sugarandsparrow.com/small-batch-lemon-cake/

      Reply
  4. Teresa says

    February 8, 2026 at 6:52 am

    How would I incorporate either fresh or frozen raspberries in the frosting?

    Reply
    • Whitney says

      February 8, 2026 at 8:18 pm

      Hi Teresa! I have a recipe for buttercream with fresh/frozen raspberries here: https://sugarandsparrow.com/fresh-raspberry-buttercream-recipe/

      Reply
  5. Lance Sanford says

    January 10, 2026 at 2:49 pm

    Does it matter if it’s Dutch or Natural cocoa powder for this cake recipe?

    Reply
    • Whitney says

      January 11, 2026 at 3:41 pm

      Hi Lance! You can use either natural or Dutch processed cocoa powder for this cake. Both work!

      Reply

Leave a Reply Cancel reply

Your email address will not be published. Required fields are marked *

Recipe Rating


Next Post >

Fudgy Chocolate Nutella Cake

Primary Sidebar

Welcome to Sugar & Sparrow

Welcome to Sugar & Sparrow

Helping you whip up pretty desserts with confidence and creativity. And hopefully sharing a few laughs with you along the way!

Learn More

Connect

let’s bake!

Get my very best recipes, baking tips, and decorating tutorials sent to your inbox

Featured Posts

matcha cake recipe

Favorite Matcha Cake Recipe

small batch lemon cake recipe by sugar and sparrow

Small Batch Lemon Cake

Buttercream Embroidery Cake Tutorial

Search

Archives

Follow Along

@sugarandsparrowco

SALTED CARAMEL BUTTERCREAM ✨I could eat this salty SALTED CARAMEL BUTTERCREAM ✨I could eat this salty-sweet caramel frosting by the spoonful but it’s absolutely delicious on cakes, cupcakes, macarons, and more 🙌🏽 I use my homemade EASY salted caramel recipe here but you can use any salted caramel sauce that you love.⁣

✨Full recipe (including homemade salted caramel) + cake pairing suggestions are on my blog at https://sugarandsparrow.com/salted-caramel-buttercream-recipe/ 
⁣
SALTED CARAMEL BUTTERCREAM⁣
Yield: 2.5 Cups ⁣
⁣
INGREDIENTS⁣
1 Cup (226g) unsalted butter, room temperature⁣
3 1/2 Cups (420g) powdered sugar⁣
2 tsp vanilla extract⁣
1/2 Cup (120ml) salted caramel sauce, room temperature⁣
Pinch of salt⁣
⁣
INSTRUCTIONS:⁣
1. In a stand mixer fitted with the paddle attachment, whip the butter on high until it’s creamy and light in color, 5-6 minutes. ⁣
2. Turn the mixer to low and add the powdered sugar a few cups at a time, scraping down the bowl and paddle after each interval.⁣
3. With the mixer still on low, mix in the vanilla extract, salted caramel, and a pinch of salt. Continue mixing on low speed until fully combined. ⁣
⁣
#saltedcaramel #caramel #cakedecorating #frosting #buttercream
NO-CHURN BERRY CRISP ICE CREAM✨you don’t need any NO-CHURN BERRY CRISP ICE CREAM✨you don’t need any fancy equipment to whip up this delicious ice cream that tastes JUST like berry crisp a la mode! I layered my favorite 3-ingredient no-churn vanilla ice cream base with ribbons of homemade berry filling + buttery oat streusel in every bite. Even if you’ve never made ice cream from scratch before, I promise you can master this recipe!! 
 
🍦Full recipe linked in my bio or find it at https://sugarandsparrow.com/no-churn-berry-crisp-ice-cream/

#nochurnicecream #icecream #icecreamlover #berries #summerdessert
STRAWBERRY SHEET CAKE 🍓based on my favorite strawb STRAWBERRY SHEET CAKE 🍓based on my favorite strawberry layer cake recipe, this sheet cake version is so fun to decorate + such a crowd pleaser! I love using a combination of fresh and freeze-dried strawberries to create the most powerful authentic flavor ✨
 
🍓Full recipe (with strawberry buttercream) at https://sugarandsparrow.com/strawberry-sheet-cake-recipe/
⁣ 
STRAWBERRY SHEET CAKE⁣ 
Serves 24
⁣ 
INGREDIENTS⁣ 
1 Cup (12oz) fresh strawberries, pureed ⁣ 
3/4 Cup (180ml) whole milk, room temp⁣ 
2 1/2 Cups (265g) sifted cake flour⁣ 
2 tsp baking powder⁣ 
1/4 tsp baking soda⁣ 
1/2 tsp salt⁣ 
3/4 Cup (170g) unsalted butter, room temp⁣ 
1 2/3 Cups (350g) granulated sugar⁣ 
3 large eggs, room temp⁣ 
1/3 Cup (75g) sour cream, room temp⁣ 
2 tsp pure vanilla extract⁣ 
1-2 drops pink food coloring (optional)⁣ 
⁣ 
INSTRUCTIONS⁣ 
1. Simmer the strawberry puree in a saucepan over medium-low heat for 30-35 minutes, stirring occasionally. At this point the puree should have reduced from 1 Cup to 1/2 Cup (if you have more, keep cooking!). Refrigerate until room temp, then whisk together with the whole milk and set aside.⁣ 
2. Preheat the oven to 350ºF. Grease and line a 13×9 inch baking pan. 
3. In a medium bowl, whisk together the sifted cake flour, baking powder, baking soda, and salt. Set aside. ⁣ 
4. In the bowl of a stand mixer with the paddle attachment, whip the butter on high until creamy, 2 min. Add the sugar and beat with the butter until light and fluffy, 2 min. Turn the mixer to low and add the eggs one at a time. Add the vanilla and sour cream, then turn the mixer to high and beat for 1 minute.⁣ 
5. With the mixer on low, add all of the dry ingredients at once until just combined, then add the strawberry milk mixture and pink food coloring (if using) until just combined. Give the batter a few stirs by hand to make sure everything is incorporated without over-mixing. ⁣ 
6. Pour batter into the prepared cake pan and bake for 35-40 minutes. ⁣ Cool completely to room temperature before topping with strawberry buttercream (full recipe at the li
COOKIES & CREAM ICE CREAM CAKE 🤎 If you’re an Oreo COOKIES & CREAM ICE CREAM CAKE 🤎 If you’re an Oreo lover, this is your sign to make an ice cream cake this summer: no-churn cookies & cream ice cream set on an Oreo cookie crust, topped with hot fudge and whipped cream frosting. The perfect amount of Oreos in EVERY BITE! 

Full recipe link in my bio + at https://sugarandsparrow.com/cookies-and-cream-ice-cream-cake/ 

OREO CRUST
22 Oreo cookies
5 Tbsp melted butter

ICE CREAM LAYER
2 Cups (480ml) heavy whipping cream, cold
2 tsp pure vanilla extract
14 Oz sweetened condensed milk
15 Oreo cookies, roughly chopped

TOPPINGS
12.8 Oz jar of hot fudge
Whipped cream frosting (see full recipe link)
4 Oreo cookies, chopped

INSTRUCTIONS
1. Mix together the Oreo crust ingredients and pack tightly into the bottom of a 9-inch springform pan. Freeze while you make the ice cream.
2. In a chilled bowl, whip the heavy cream and vanilla to stiff peaks. Fold in the sweetened condensed milk until uniform, then fold in the chopped Oreos. Pile the ice cream on top of the Oreo crust, smooth it down, cover and freeze overnight.
3. When the ice cream layer is set, top with the hot fudge, whipped cream frosting, and more chopped Oreos. Store in the freezer until ready to serve! 

#oreocake #icecreamcake #nochurnicecream #birthdaycake #cookiesandcream
EASY OREO ICEBOX CAKE (recipe below) 🤎 You only ne EASY OREO ICEBOX CAKE (recipe below) 🤎 You only need 4 ingredients for this recipe and it sets into the perfect summer dessert in the refrigerator overnight! It’s 7 alternating layers of Oreos and homemade whipped cream + every bite tastes like a perfect milk-dunked Oreo in the very best way ✨
 
Full recipe at https://sugarandsparrow.com/oreo-icebox-cake/ 
 
INGREDIENTS: 
2 Cups (480ml) cold heavy whipping cream 
1/4 Cup (30g) powdered sugar 
1 tsp pure vanilla extract 
36 Oreo cookies 
 
INSTRUCTIONS: 
1. Add the heavy whipping cream, powdered sugar, and vanilla extract into a chilled mixing bowl. Using the whisk attachment on your stand mixer or a hand mixer, beat the ingredients until stiff peaks form. 
2. Line a loaf pan with plastic wrap, then add a thin layer of the whipped cream onto the bottom of the pan. Add a layer of Oreo cookies on top (cut some of the Oreos to fit as needed). 
3. Add 1/3 of the remaining whipped cream on top of the Oreo layer, followed by a second layer of Oreos. Repeat until you have seven total layers, ending with whipped cream. 
4. Cover the cake and refrigerate overnight, then enjoy!  
 
#oreocake #vintagecake #nobakecake #oreo #nobake

Footer

On the Blog

  • Cake Basics
  • Recipes
  • Tutorials

Info

  • About
  • Privacy Policy & Disclosure

stay in the know

Copyright © 2026 · Theme by Sugar & Sparrow