Ever since I was a kid I’ve been fascinated with the ocean. I think this is solely because The Little Mermaid was my favorite movie growing up, and I’m still so smitten with colorful coral reefs and the sea life that surrounds them. So when I stumbled upon this Sea Life Gumpaste & Fondant Mold at my local JOANN store, I was so inspired to turn my love for ocean life into an under the sea themed cake! Just look at how magical:
UPDATE 2025: JOANN has (sadly!!) gone out of business, so I have slightly changed these product links.
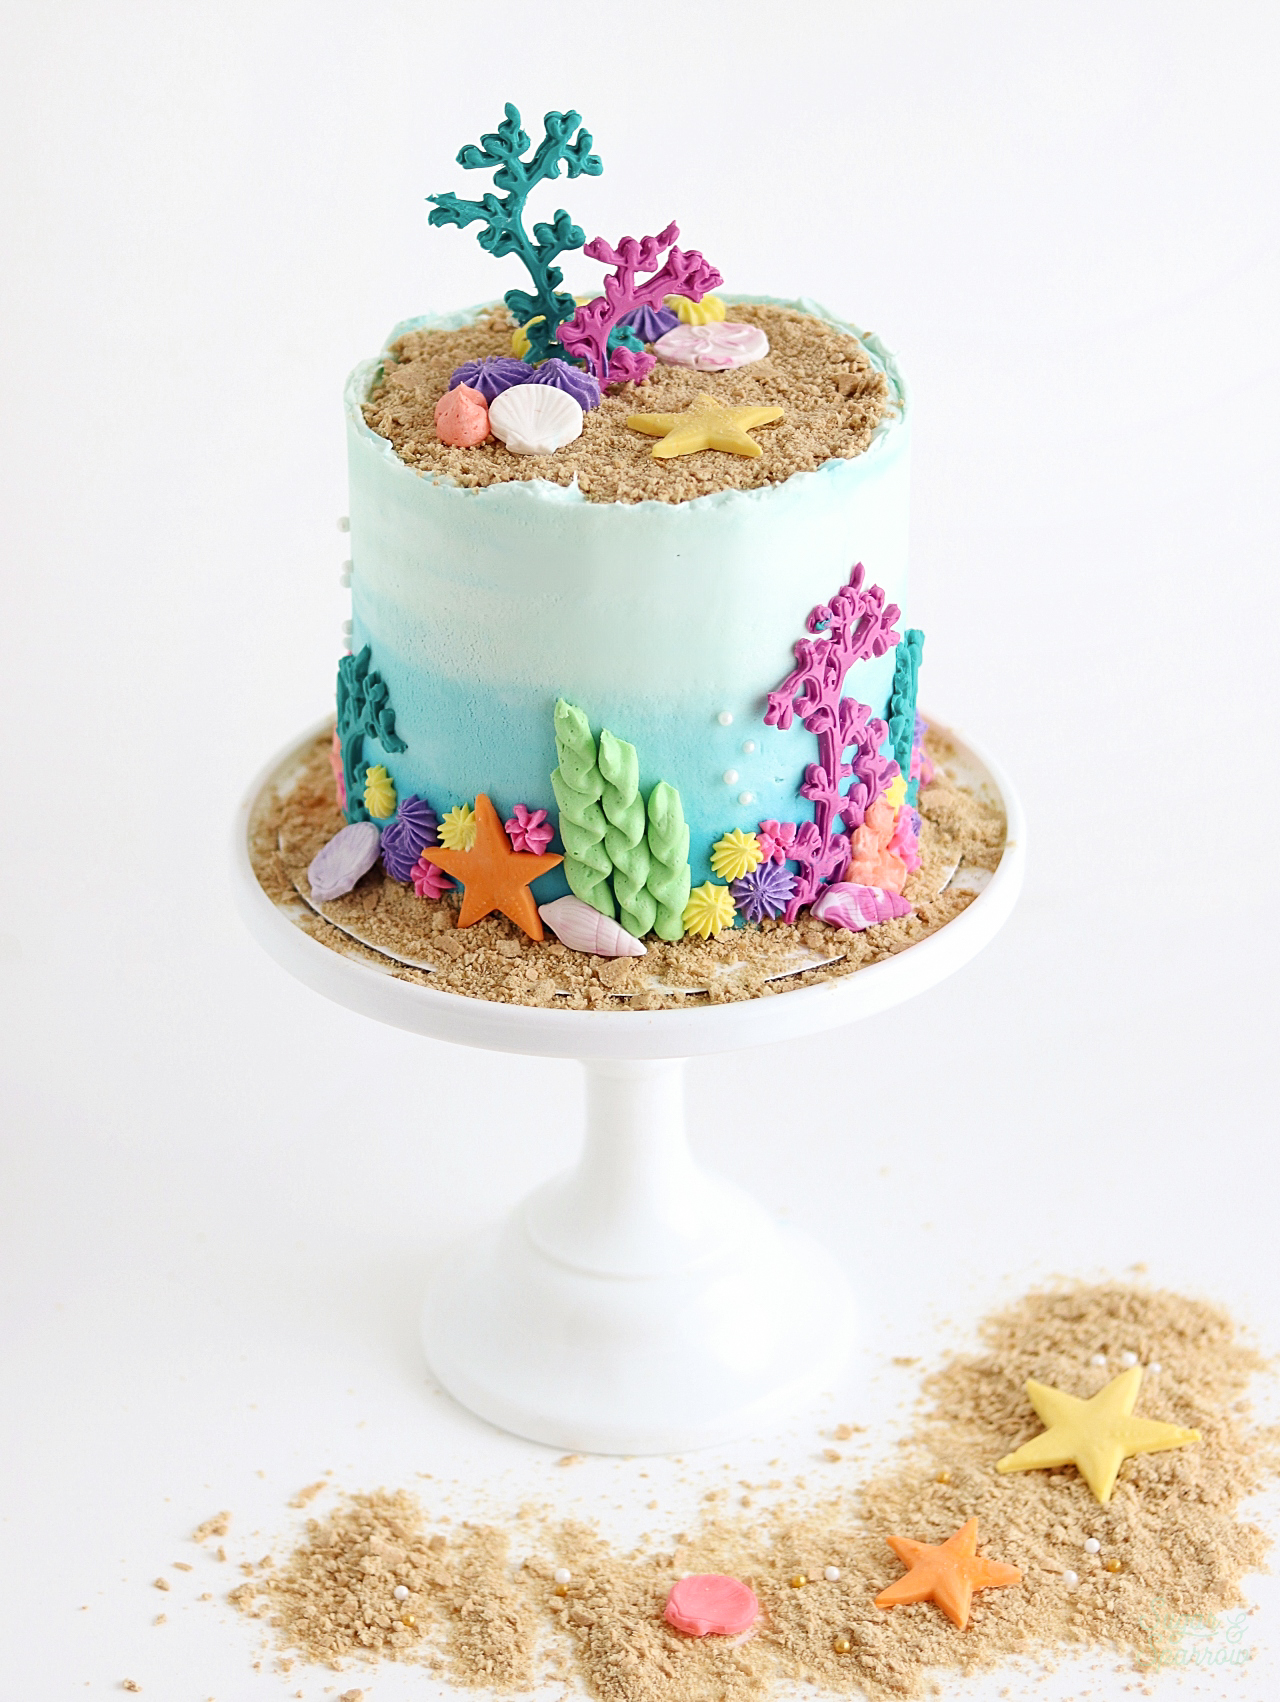
This Sea Life mold made it so easy to turn gumpaste into brilliant sea shells, coral, and starfish. It will work with fondant too, but I chose gumpaste just because I wanted the sea life pieces to dry more quickly. If you make them a week ahead, fondant is a great option. But if you’re like me and wait until the last minute, gumpaste will dry much quicker (in about 24 hours!) and is still as easy to color and work with as fondant.

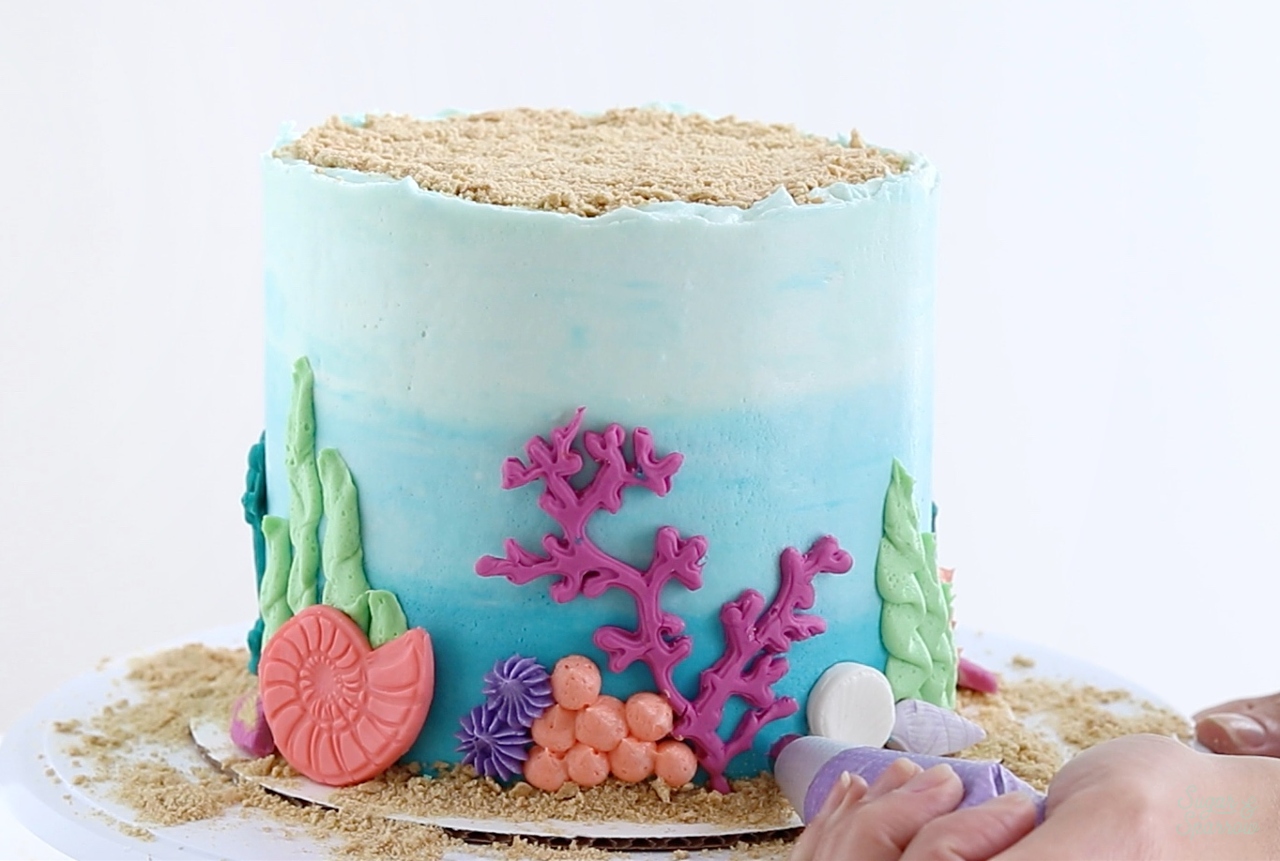
To supplement my pretty gumpaste sea life accents, I used some of my favorite Wilton piping tips and pearl sprinkles to create some additional under the sea textures. And to make things even more sea-themed, I crushed up some graham crackers to create edible sand for decorating.
Before I detail exactly how to get this under the sea look, here’s a quick video to show you the techniques in action:
If you love tutorial videos like this one, be sure to check out my YouTube channel! I’ve got a growing collection of cake recipes, decorating tutorials, and Cake Basics over there. Hit the subscribe button on my page so you never miss a new video.
Gumpaste Sea Life Materials:
- Wilton Ready-To-Use Gumpaste or fondant
- Sea Life Gumpaste & Fondant Mold
- Color gels of your choice
- Shortening
- Small rolling pin
- X-Acto knife
Under The Sea Cake Materials:
- A 6-inch cake that’s been crumb coated and chilled
- Cake turntable
- 2 batches of vanilla buttercream
- Icing smoother
- Angled Icing Spatula
- 8 inch cake circle
- Crushed graham crackers
- Sea life pieces (from the first part of the tutorial)
- Piping tips 104, 4B, 2A, and 225
- Piping bags
- Pearl sprinkles
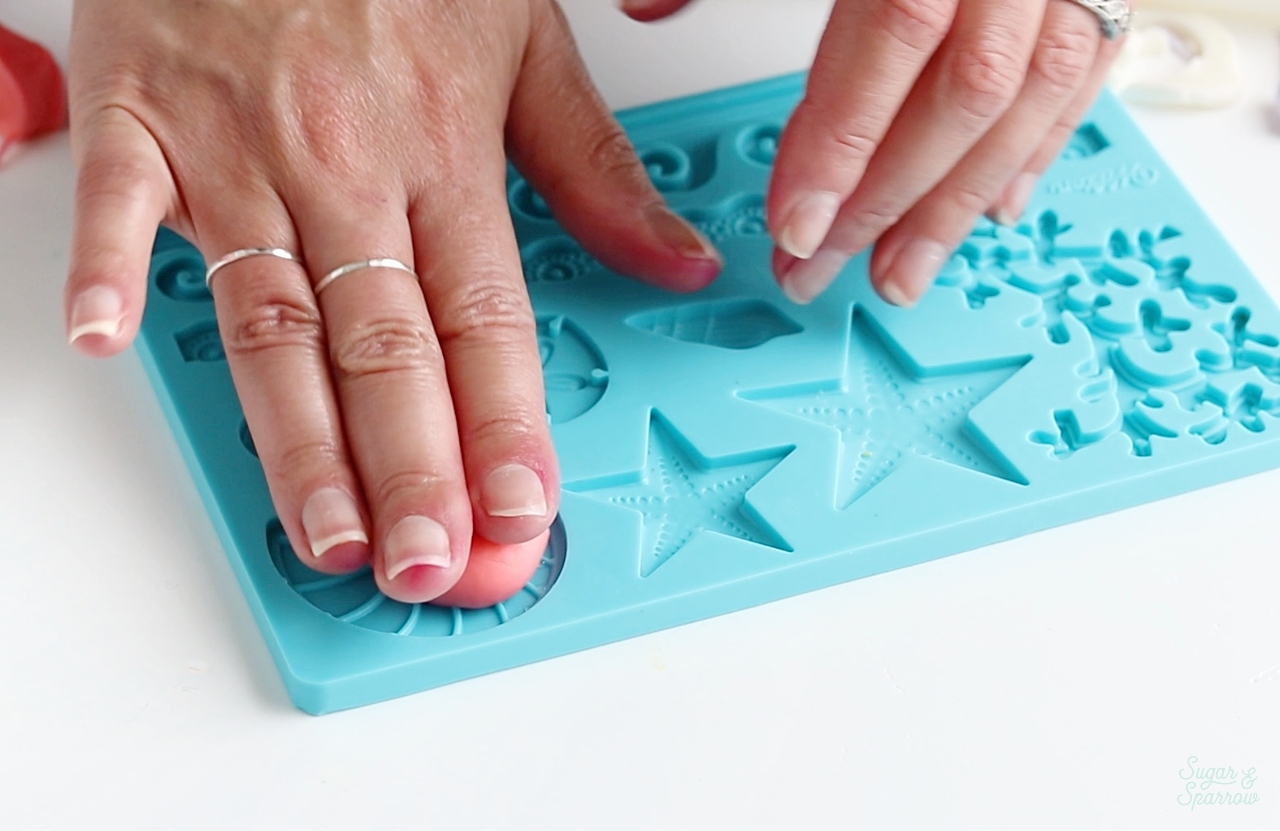
Step 1: Make The Gumpaste Sea Life
Separate the Ready-To-Use Gumpaste (or fondant!) into 1 inch pieces and knead each one with a little shortening until it feels uniform in consistency, like play-doh. Use the food color gels of your choice to color each piece. Here’s my color palette:
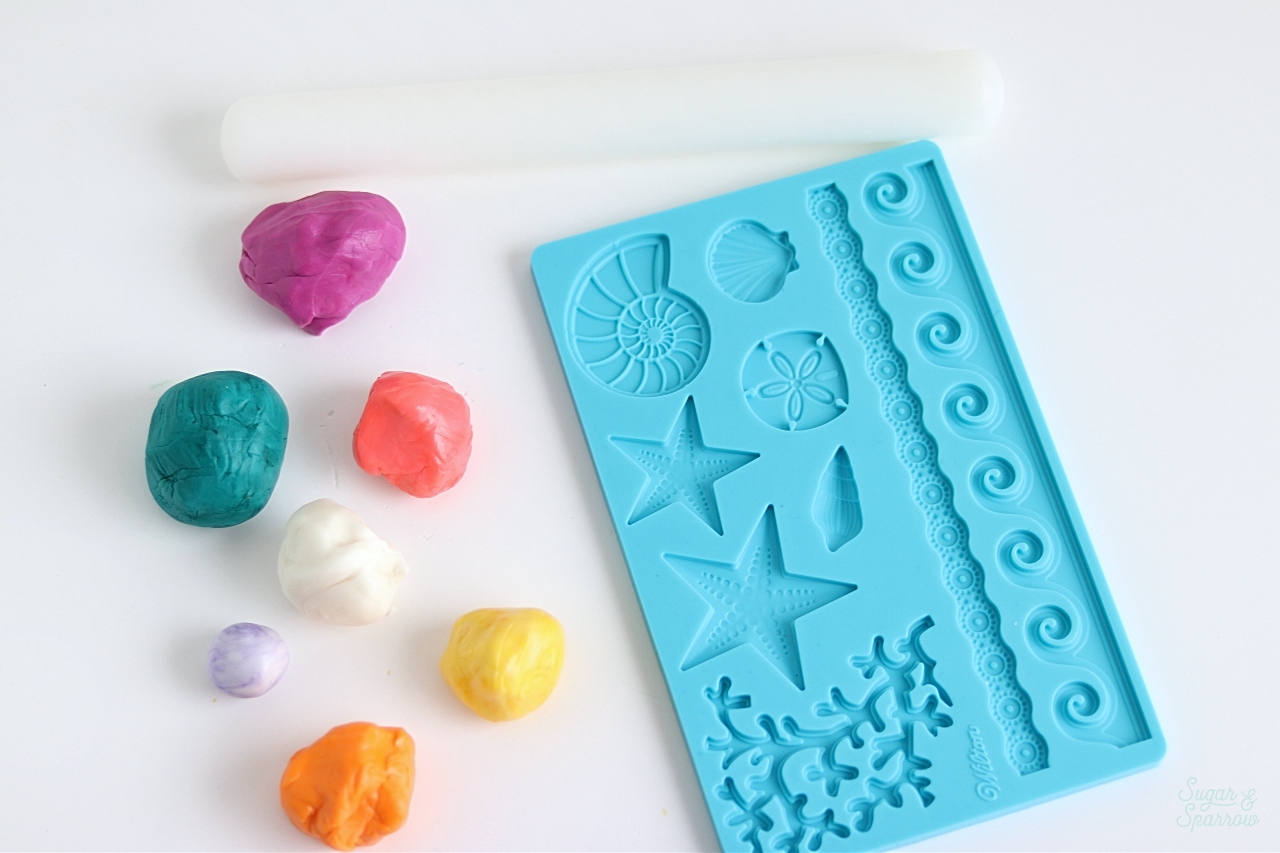
Color by color, press the gumpaste into portions of the Sea Life Mold and use a small rolling pin to flatten it out. This mold is pretty flexible, so it should be easy to release each piece by gently pulling it away from the mold.
Cut away the excess gumpaste with an X-Acto knife and place each sea life piece onto a sheet of wax or parchment paper to begin the drying process.
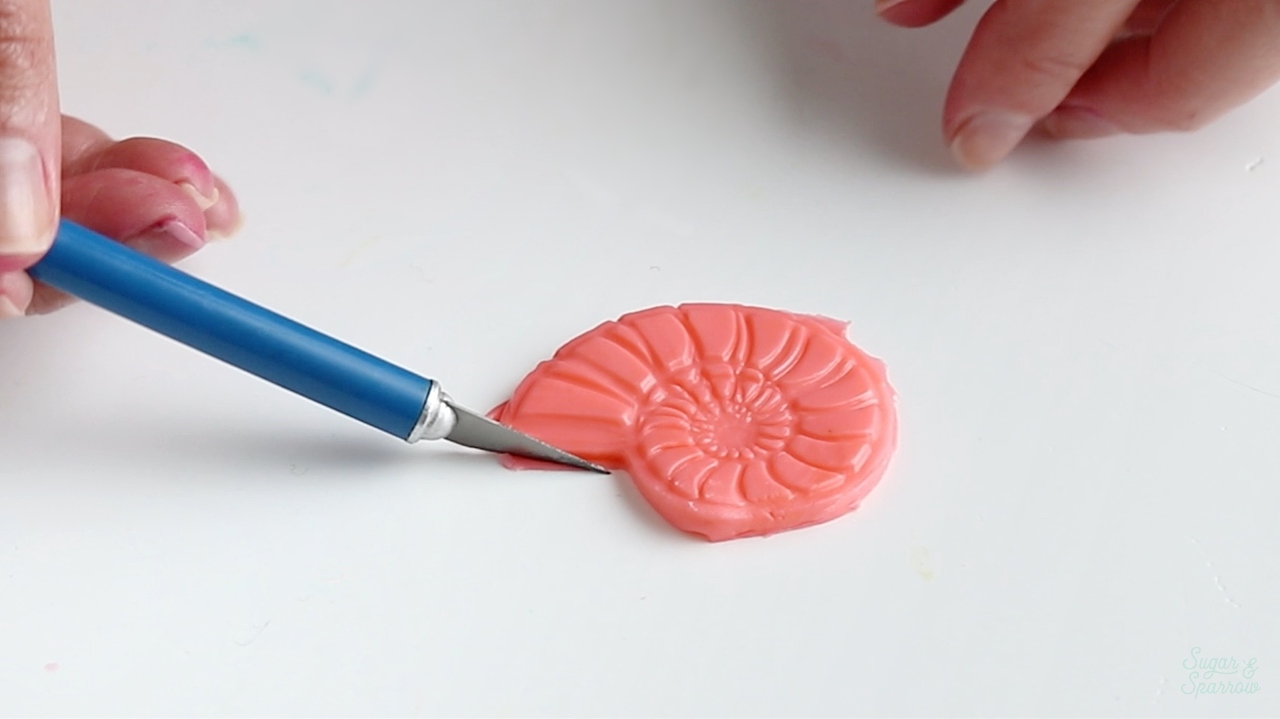
Allow the gumpaste to dry for at least 24 hours, flipping it over once in between to let both sides dry evenly. If you’re using fondant, allow it to dry for at least 72 hours, flipping the pieces over once in between.

Once all of your sea life pieces are dry and firm, you can move on to decorating the cake.
Step 2: Color The Buttercream
Divide the buttercream into separate bowls: divide 4.5 cups between three separate bowls for the base frosting. Since I went for a blue ombre effect on my buttercream finish, I colored one bowl a dark blue, one bowl a medium blue, and one bowl a light blue.
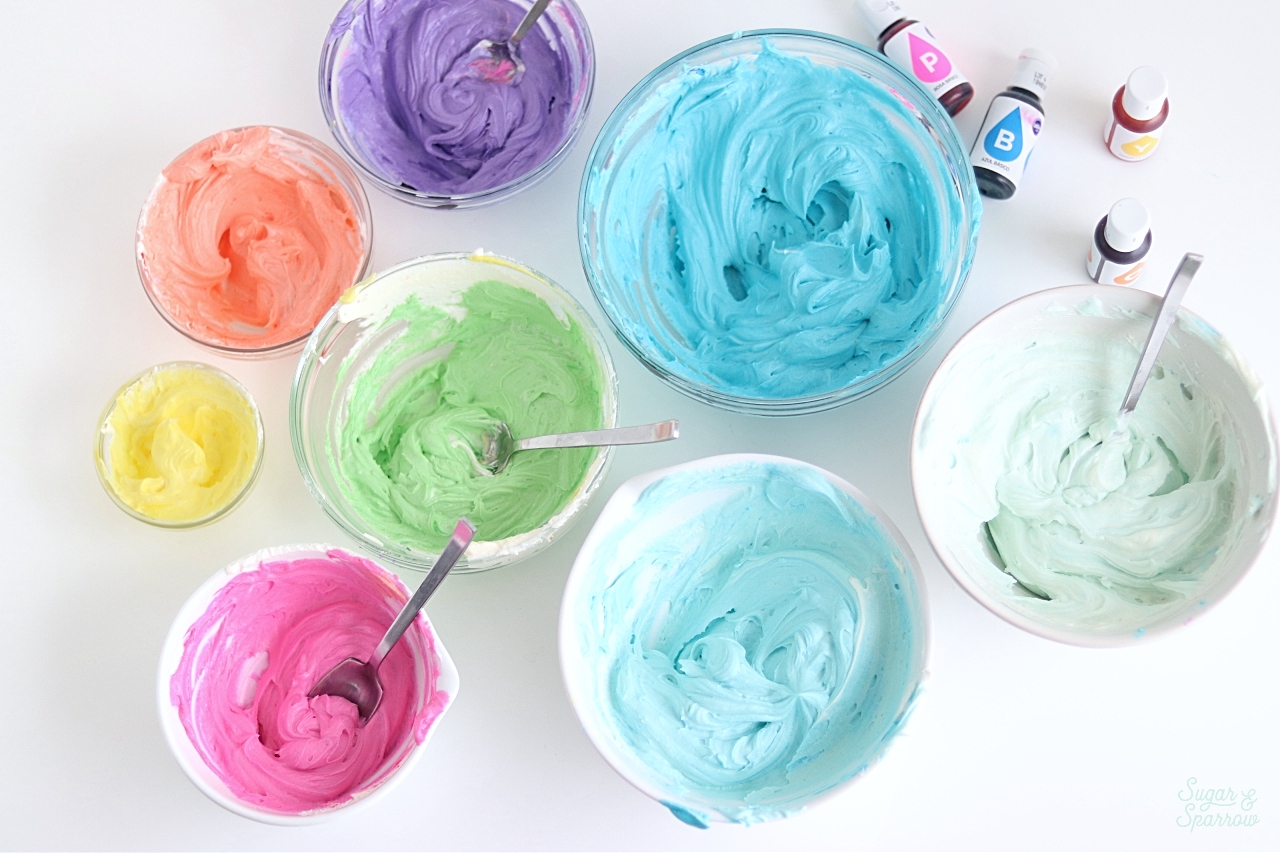
Divide the remaining buttercream into a four or five separate bowls for the colors you’ll be piping. These colors will end up being your additional buttercream textures like coral and sea grass, so feel free to copy the above color palette or follow your heart on these colors.
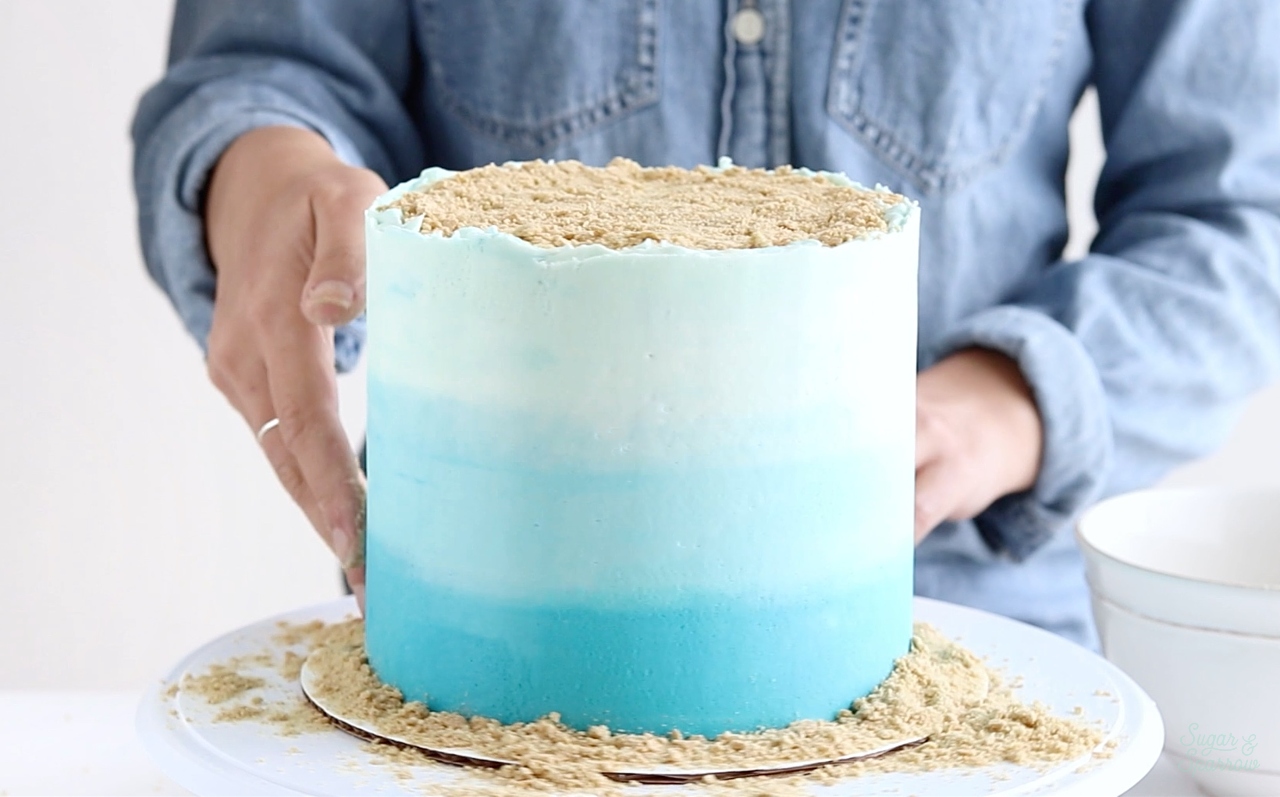
Step 3: Frost The Cake
With your crumb coated cake on a turntable, frost and smooth the top of the cake with the lightest blue buttercream using an angled spatula. Then, working from the bottom of the cake up, frost the bottom third of the cake with the deepest blue buttercream, the middle third with medium blue, and the top third with the lightest blue.
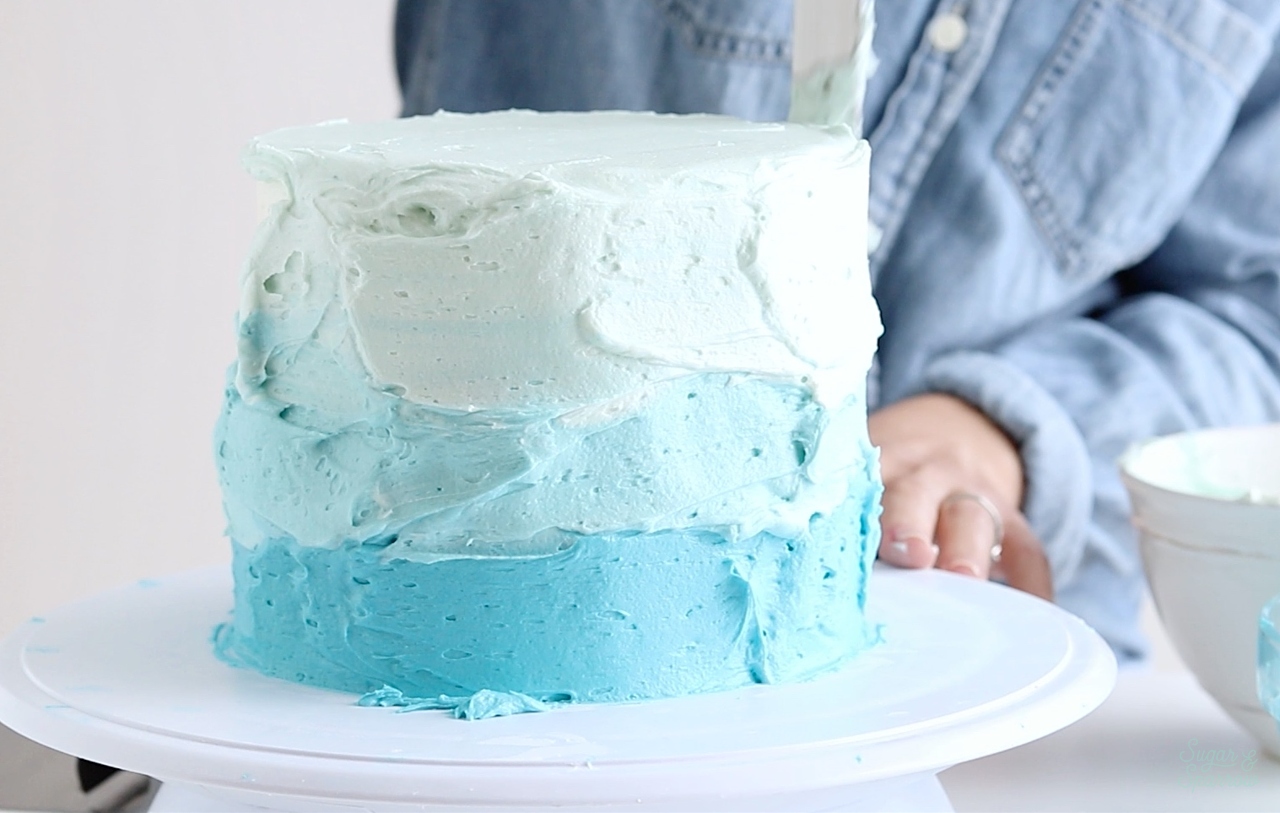
Use your icing scraper to smooth the sides of the cake, keeping the top edge uneven. I think leaving the top edge like this gives the illusion of tiny waves around the top of the cake.

At this point in the decorating process I like to chill the cake for at least 30 minutes to let the buttercream firm up. If you need more help creating a smooth buttercream finish, this tutorial should answer all your questions!
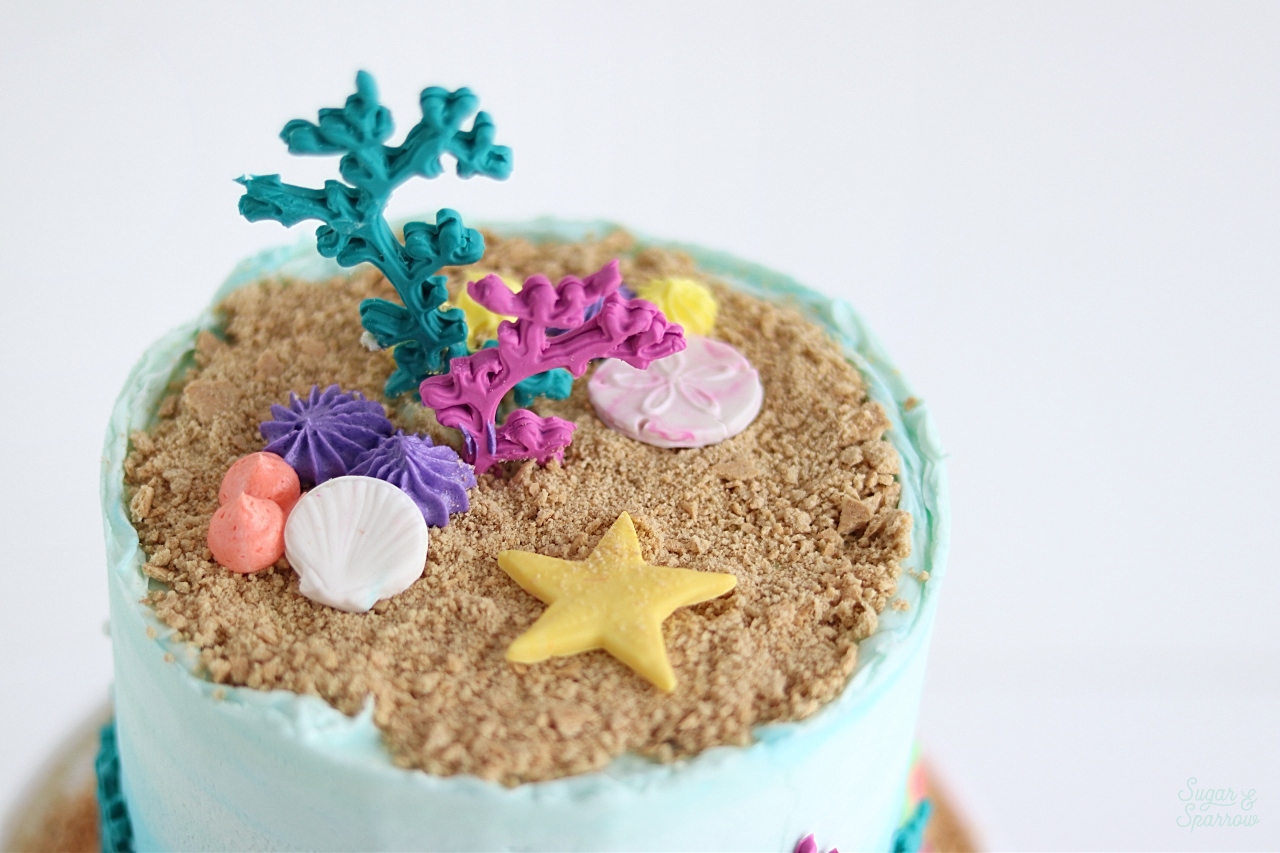
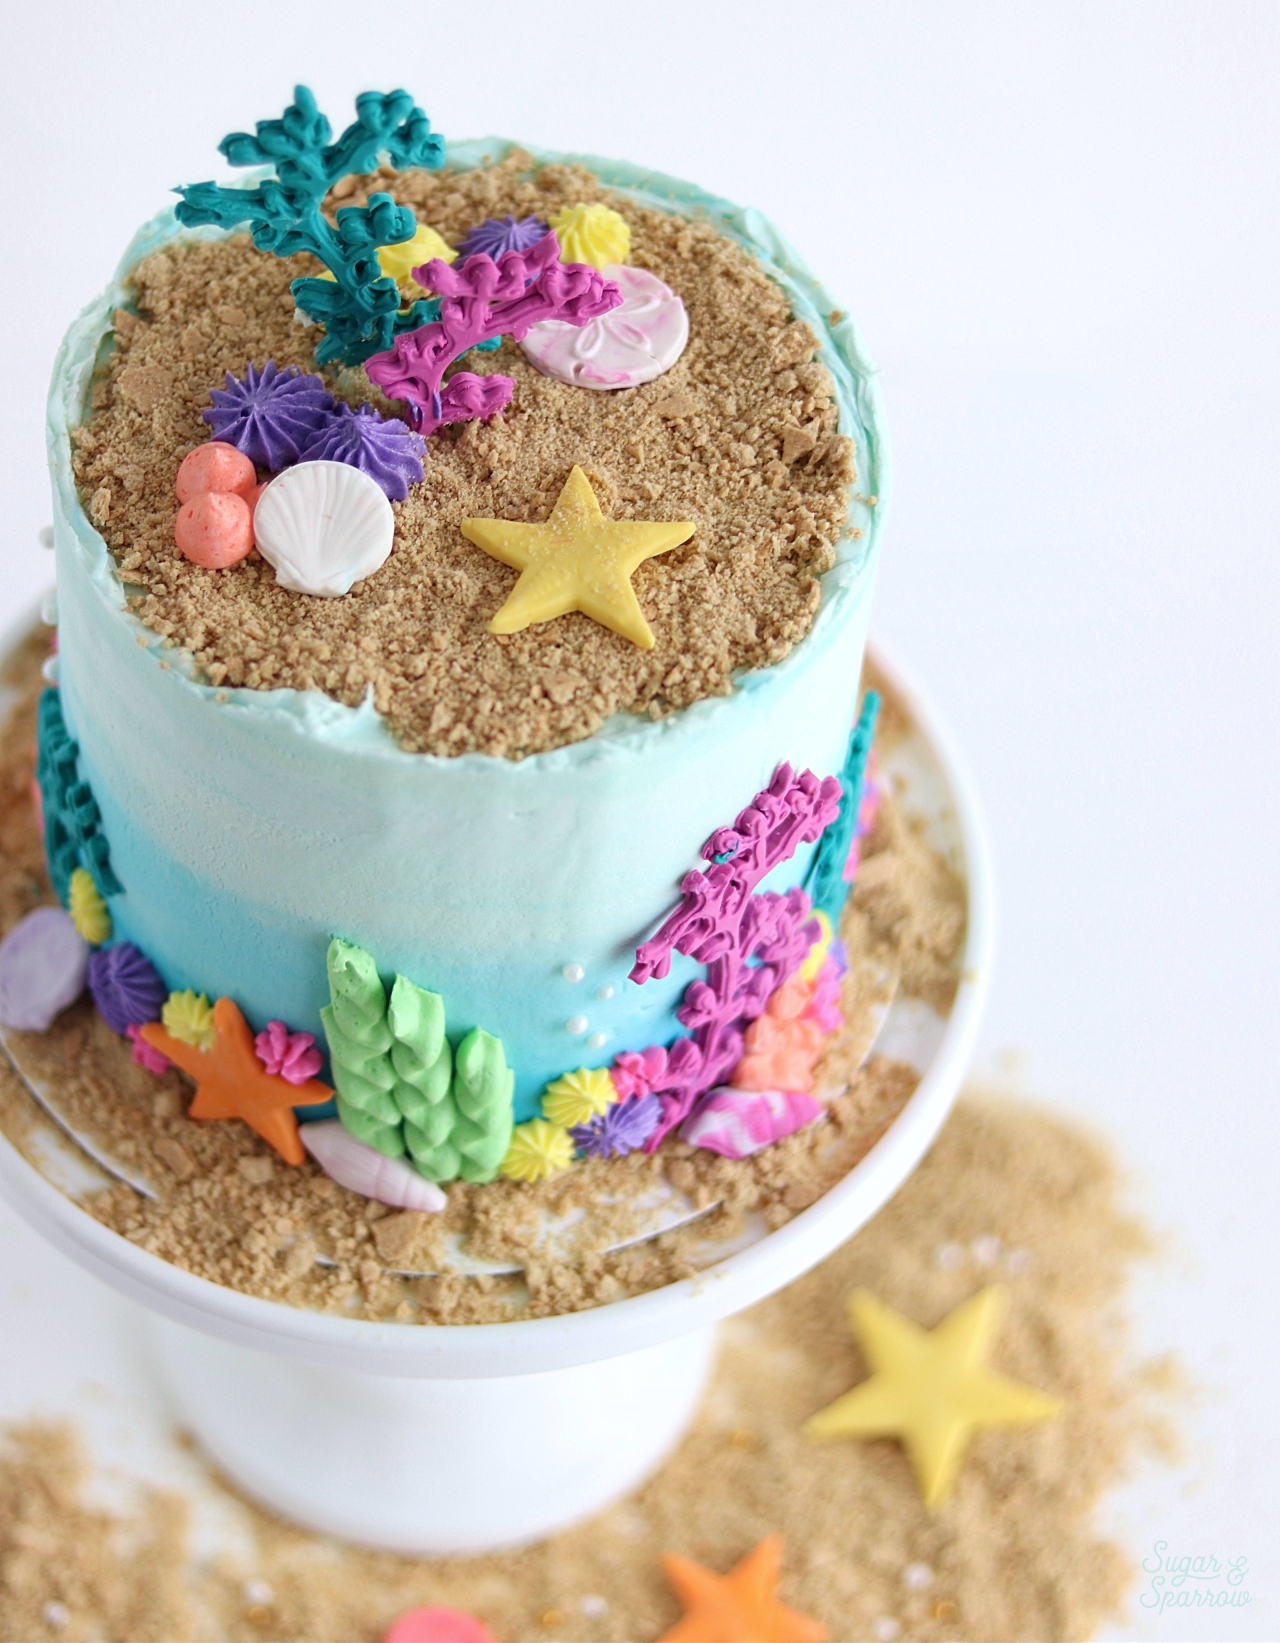
Step 4: Add the Crushed Graham Cracker Sand
Transfer the chilled cake to an 8 inch cake circle and place the whole thing back on your clean turntable. Fill in the top of the cake with crushed graham cracker sand, then add some more sand to the bottom edges.
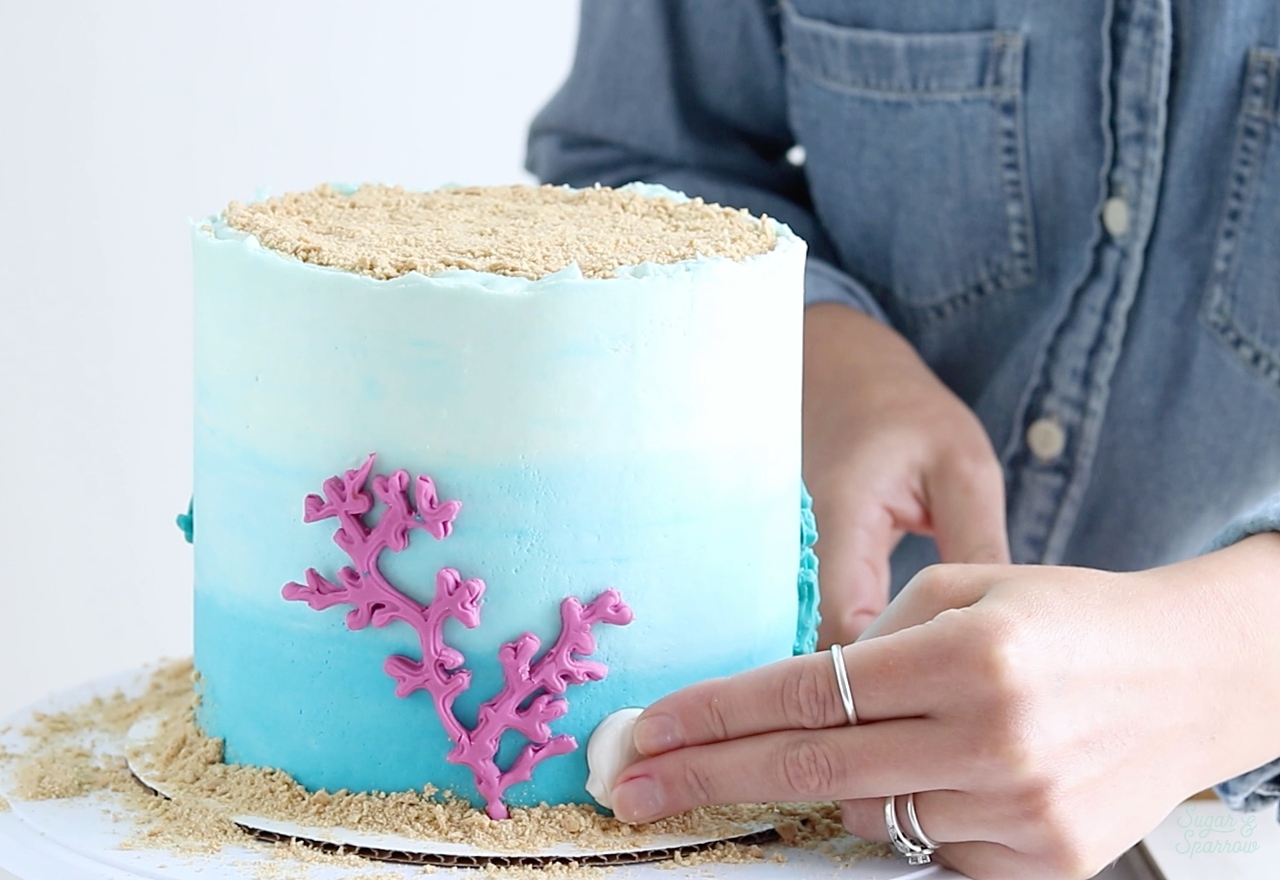
Step 5: Add The Gumpaste Sea Life
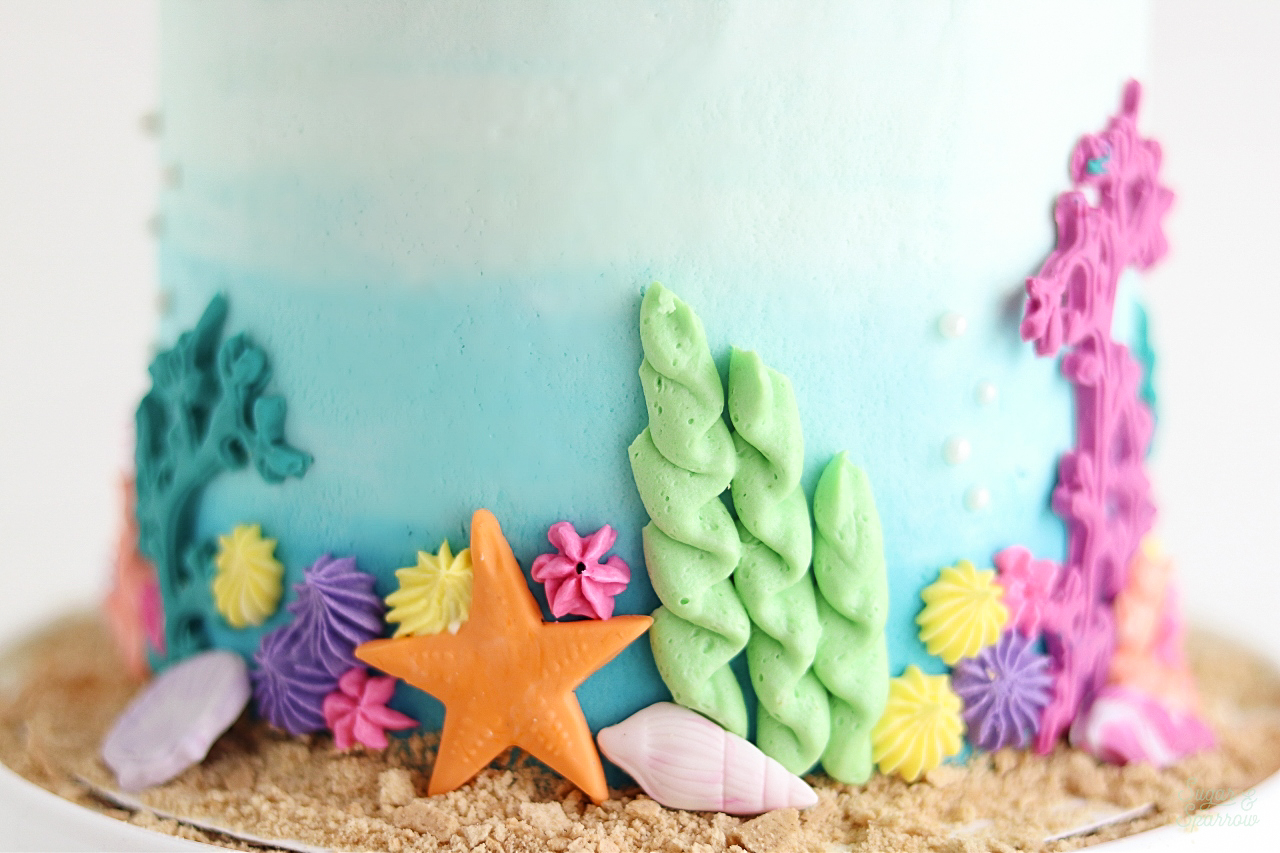
Press your gumpaste sea life pieces into the sides of the cake wherever you feel like. For the smaller pieces (like shells) you can reserve them until you pipe the additional textures in the next step. You do you!
Step 6: Pipe Additional Textures
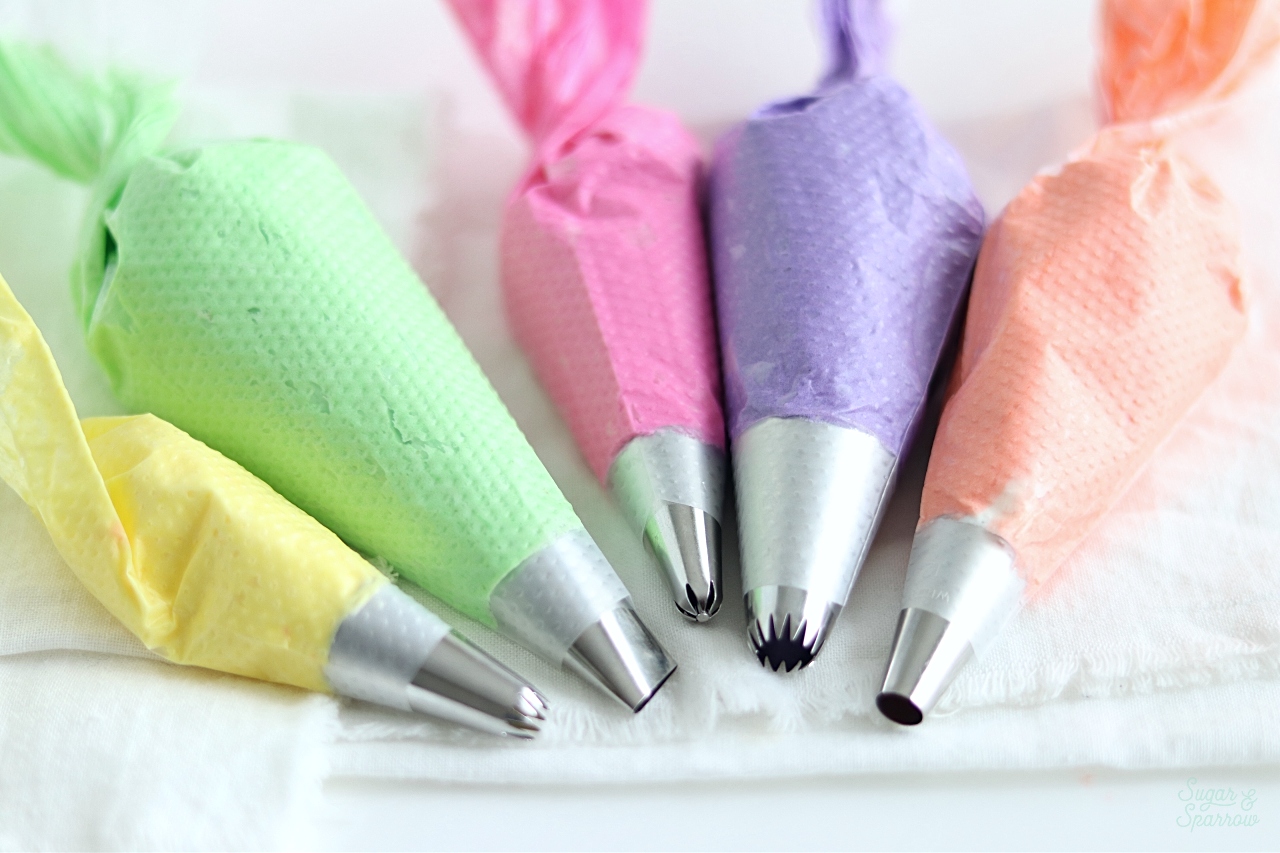
Prepare separate piping bags by fitting them with piping tips and filling them with the additional buttercream colors you mixed up in Step 2. I used Wilton Tip 104 for the green sea grass, Wilton Tip 4B for the open stars, Tip 2A for the coral textures, and Tip 225 for some small drop flowers.
You can pipe these textures in any order, but here’s what I did: first, I piped some coral dots with Wilton Tip 2A, then piped squiggles with the green buttercream using Wilton Tip 104:
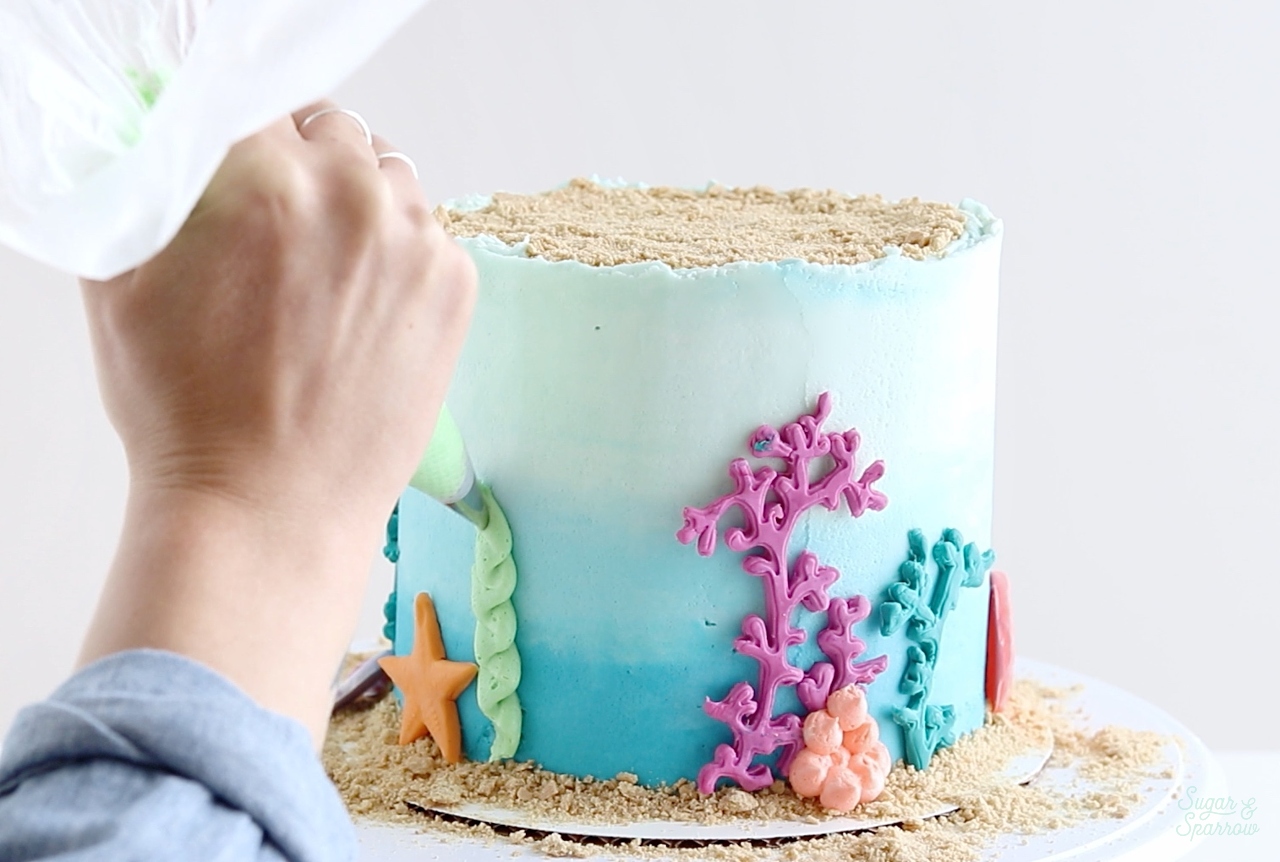
Next, I added vibrant purple and yellow open stars using Wilton Tip 4B:
Finally, I added some little pink drop flowers with Wilton Tip 225:

You’ll find that it’s super easy to pipe these under the sea textures, and the buttercream really makes everything come together. Once your piping is finished, you can add in some of the smaller gumpaste pieces like seashells, and press some sprinkle pearls into the sides of the cake to create the illusion of bubbles. So fun!
Step 7: Decorate The Top Of The Cake
You can choose to leave the top of the cake sand-only, but I used some of the gumpaste coral as a cake topper, piped some open stars, and added some gumpaste shells to make an ocean floor scene.
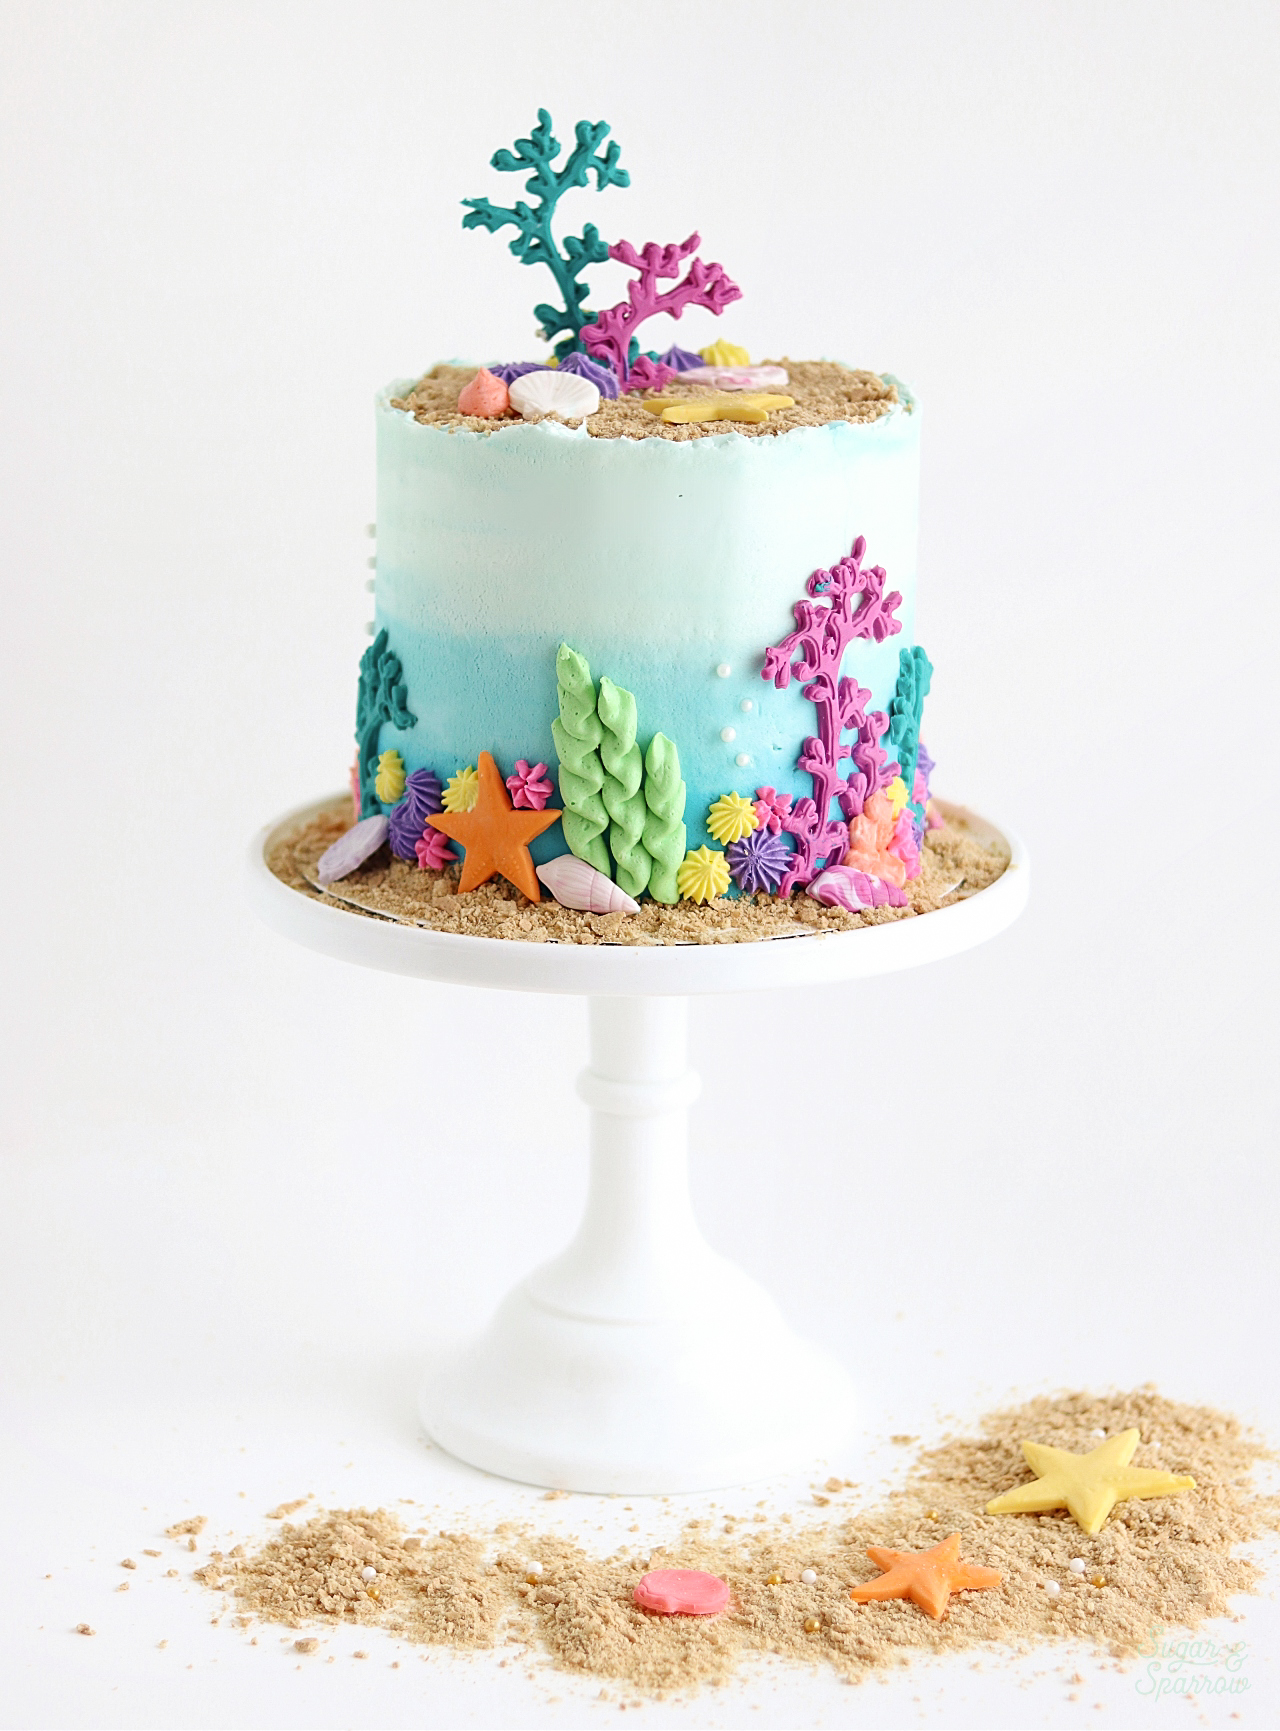
So pretty, right? This Under The Sea Cake is so much more detailed with the gumpaste sea life pieces!
Disclaimer: I was compensated by JOANN for my work of creating this project, styling, filming, photographing, and writing about their products. As always, all opinions are honest and my own. Thank you for supporting brands that support Sugar & Sparrow.


Hi Bec!
Do you recommend a particular brand of gumpaste?
Hi Chelsea-Anne! I use this one by Wilton: https://amzn.to/3rorGVN
Hi!
I need to make 3 batches of buttercream. Do I just triple the ingredients and follow instructions as is or do I need to triple the whipping time for butter/sugar etc?
Thank you,
Bec x.
Hi Bec! You’ll just triple the ingredients, no need to triple the mixing time. Enjoy!
I’d like to make the gumpastes figures on Monday for a Sunday birthday. What is the proper way to store them so they won’t dry out
Hi Holly! I usually dry them on a wax or parchment lined cookie sheet and then put them in an airtight container once they’re dry. Be sure to store them in a dark place like your pantry – too much sun exposure will make the colors fade. Hope that helps!
Im making this beautiful cake for my grand daughter and I’m confused. Do I make one 8in cake a cut it into three layers or do I make 3 8” cakes and stack them on top of each other
Hi Holly! Excited for you to make this cake! This is actually three 6″ cake layers (I baked three separate cakes), but you could easily replicate this tutorial with three 8″ layers. Here’s a tutorial on how to fill and stack cake layers if you need it: https://sugarandsparrow.com/fill-and-stack-cake-layers/
Hello! just about to make this for my kids’ birthdays. The wilton Color right system is based on 2 cups of buttercream. Obviously the gum paste is a different medium…did you still follow the chart for number of drops for each color? thanks for this easy to follow tutorial!
Hi Alissa! I never follow the color charts since I never work with such exact measurements of frosting/gum paste/etc. Instead, I just use a toothpick to apply a little bit of color gel at a time until I like what I see! Hope that helps and I’m excited for you to make this cake to celebrate your kiddos!
Hi Whitney! I made the cake but the frosting on the outside looks painfully uneven and the ombré effect is not coming through. How do you get your icing so clean ? I do have the scraper but it’s still not uniform.
Also how do you cut all of your cakes evenly?
Hi Nithya! To get the ombre effect, I do exactly what’s shown in the video on this post – the darkest color on the bottom third of the cake, the middle tone in the middle, and the lightest color on the top third and top of the cake, then smooth everything with my icing scraper. If you’re struggling with obtaining a smooth finish with your icing, I would recommend checking out this post I created on how to create a smooth buttercream finish: https://sugarandsparrow.com/smooth-buttercream-cake-tutorial/ that post is part of my Cake Basics series that shows you how to build a cake from start to finish. And to answer your second question, here is another post from that same series on how to level and torte cake layers: https://sugarandsparrow.com/level-and-torte-cake-layers/
Hi Whitney, awesome recipe. I’m just about to make it for my little sister’s Birthday. Would you be able to tell me how far in advance I can make it/how long it would last in the fridge?
Hi Finn! I have a sample cake timeline at the end of this post: https://sugarandsparrow.com/crumb-coat/ I usually decorate the day before and keep the cake in the refrigerator until about an hour or two before serving. Hope that helps!
Hi.. may i know which buttercream u use for this cake?
Hi Norah! I used my Vanilla Buttercream Recipe: https://sugarandsparrow.com/vanilla-buttercream-recipe/
Thanks so much for the beautiful pictures, and the easy to follow directions with video. My little girls wanted to learn about using fondant, and after searching for some beginning cake decorating with fondant, they chose to make your cake. It was a great cake for little kids to learn and experiment with! We had a great time cooking together and following your inspiring cake.
I’m so happy to hear that, Ginger! Glad it was a fun project for you and your girls!
Hello again,
I’m just about to make the gum paste molds.
There is only one size of the standing coral. How did you get two sizes?
Thanks for all your help.
Hi Lupe! To get two different sizes, I just partially filled the coral mold for the smaller one.
Cake has how many layers and what size. Looks bigger than 6 inch round.
Hi Lupe! It’s a three layer 6-inch cake. Each cake layer ends up being about 1.5 inches tall, so with filling the cake ends up being about 6 inches tall.
Thanks! What color blues did you use for the ombré effect.
Hi Lupe! For this cake I used the blue from the Wilton Color Right system mixed with the tiniest bit of yellow to make it more blue-green. This Americolor Sky Blue is about the same color if you don’t want to custom mix: https://amzn.to/3cgjbzN