• Cake
  • Frosting
  • YouTube
  • My Favorite Tools
  • Nav Social Icons

  • Skip to primary navigation
  • Skip to main content
  • Skip to primary sidebar
  • Skip to footer
  • Recipes
    • Cake
    • Cupcakes
    • Frosting
    • Ice Cream
    • Vegan
  • Cake Basics
  • Tutorials
  • Blog
  • About
  • Mobile Menu Widgets

    Connect

    Search

Sugar & Sparrow logo in script font

Sugar & Sparrow

Lifestyle and Cake from Portland Oregon

  • Cake Basics
  • Recipes
    • Cake
    • Cupcakes
    • Cookies & Bars
    • Filling
    • Frosting
    • Ice Cream
    • No-Bake
    • Small Batch
    • Vegan
  • Tutorials
  • Book
  • Blog
  • About

Marshmallow Creme Filling

September 10, 2024 · In: Featured, Filling, Recipes

Jump to Recipe

I recently discovered a new way to make marshmallow creme filling that makes me want to revise every marshmallow-filled cake recipe I’ve ever made. That’s one of the things I love most about my job – I’m perpetually learning and improving and having epiphanies about cake that I want to shout from the rooftops. This marshmallow creme filling is everything I was hoping for as a cake filling. Soft and gooey. Not cloyingly sweet. Perfect marshmallow flavor. Easy to make with a few simple ingredients. If you’ve been on the hunt for a marshmallow creme filling, I’m certain this one will satisfy. 

This post may contain affiliate links. For more information, see our disclosure policy.

marshmallow creme filling recipe

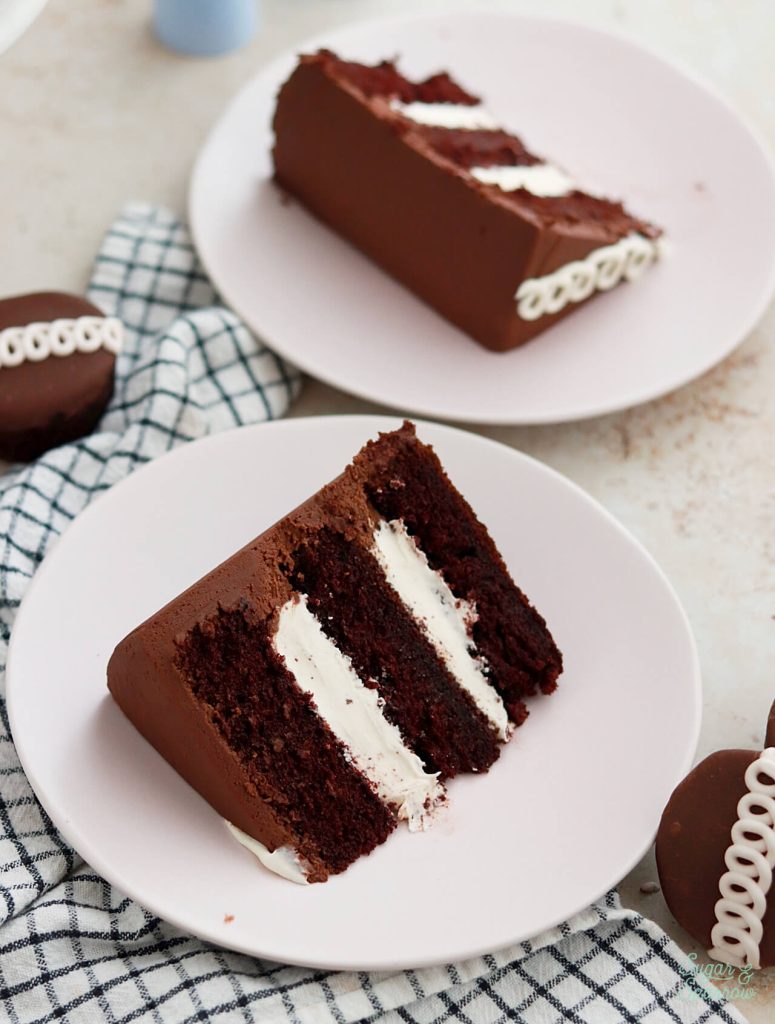
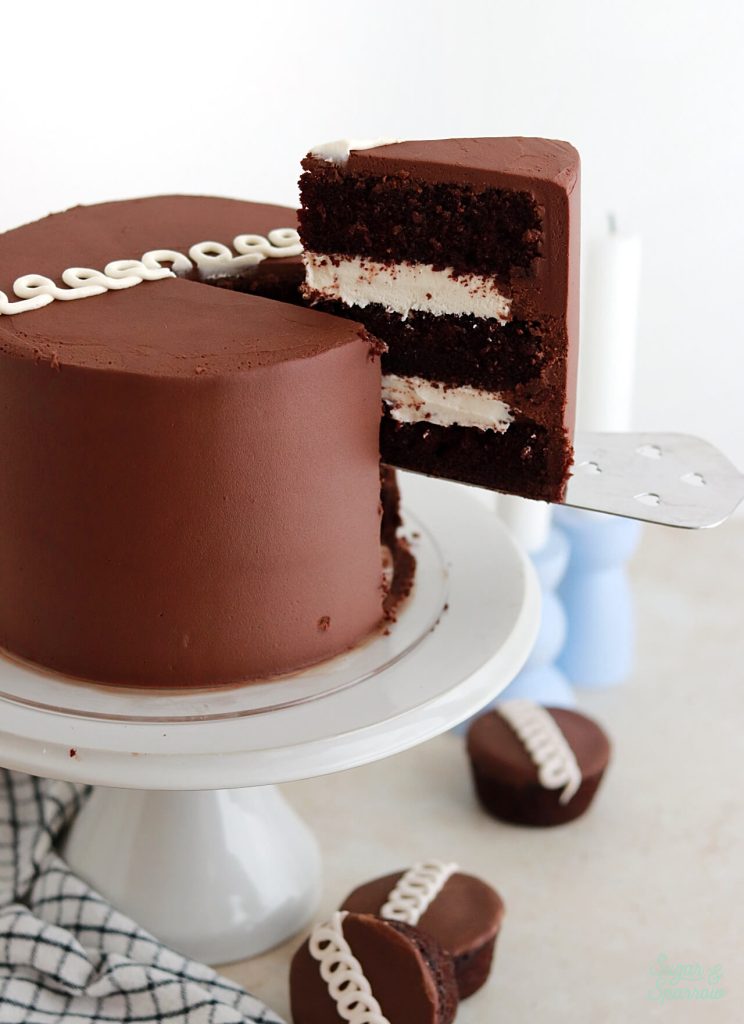
The first time I made this marshmallow creme filling was for my Hostess Cupcake layer cake recipe, and it turned out exactly as I imagined. I was inspired by the marshmallow creme center of Hostess Cupcakes and the homemade version exceeded my expectations. So much that my son requested this marshmallow filling for his birthday cake + I am currently working on an Oatmeal Creme Pie layer cake recipe that will include this filling between oatmeal cookie cake layers (more on that asap). 

chocolate cake with marshmallow filling recipe

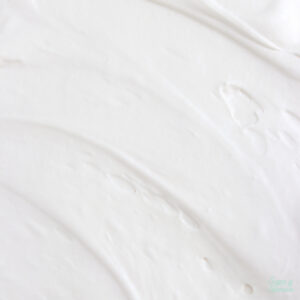
You’ll only need a handful of ingredients for this filling: butter, a little bit of powdered sugar (mostly for stability), a splash of vanilla extract, an entire 7 ounce jar of Marshmallow Fluff, and a pinch of salt to balance everything out. 

How to Fill a Cake with Marshmallow Filling

Since this marshmallow creme filling is so creamy and soft, it needs a little extra stability in the form of a buttercream dam. That simply means you’ll want to pipe buttercream (or any other thick frosting) around the edge of your cake layer before filling in the center with the marshmallow creme. The dam will help support the cake layer(s) above instead of letting them squish the filling out with their weight. Here’s how to make a buttercream dam:

how to fill a cake with marshmallow filling
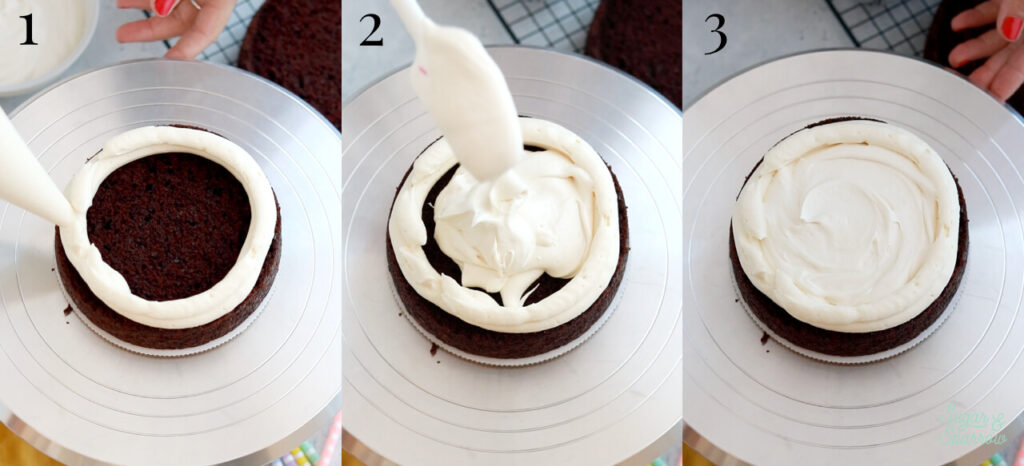
  1. Fill a piping bag with buttercream (or another thick frosting), snip off ½ inch opening, and pipe a circle of buttercream about ¼ inch inward from the edge of the cake layer.
  2. Fill in the center of the dam with marshmallow creme filling and smooth it down until it’s level with the top of the dam. 
  3. Place the next cake layer on top and repeat the process if there will be additional filling layers.

Cake Flavors to Pair with Marshmallow Filling

I’ve paired this marshmallow filling recipe with a couple different cakes so far (both inspired by Hostess snack treats). Here are a few other flavor recommendations that I imagine would be amazing:

  • One-Bowl Chocolate Cake
  • S’mores Cake
  • Banana Nutella Cake
  • Chocolate Vanilla Marble Cake
  • Funfetti Cake
  • Pumpkin Biscoff Cake
  • Vanilla Cake
  • Strawberry Cake
  • Cookies & Cream Cake
hostess cupcake layer cake recipe by sugar and sparrow

Keep in mind that this marshmallow filling will work with cupcakes as well (and almost any other baked good that you can fill). Whatever you pair this marshmallow creme filling with, it’s sure to be a hit!

marshmallow filling recipe for cake and cupcake

Marshmallow Creme Filling

A soft and gooey, perfectly marshmallowy filling that's perfect for layer cakes and cupcakes.
Print Recipe Pin Recipe
Servings: 2 Cups

Ingredients

  • 1/2 Cup (113g) unsalted butter, room temperature
  • 1 Cup (105g) powdered sugar
  • 7 Oz (198g) Jet-Puffed Marshmallow Creme
  • 1 tsp pure vanilla extract
  • pinch of salt, or to taste

Instructions

  • In the bowl of a stand mixer with the paddle attachment or using a hand mixer, whip the butter on high speed until smooth and creamy, about 5 minutes. Turn the mixer to low speed and add the powdered sugar. Mix until fully combined, about 2 minutes.
  • Add the marshmallow fluff, vanilla, and salt. Continue to mix on low speed until combined and uniform, 1-2 minutes.

Notes

To Make Ahead: this filling can be made ahead and stored in an airtight container in the refrigerator for up to two weeks. When you’re ready to use it, bring back to room temperature and re-mix until smooth. 
Yield: this recipe makes enough to fill a triple layer 6-inch or 8-inch cake, or to fill 20-24 cupcakes. 

By: Whitney · In: Featured, Filling, Recipes · Tagged: marshmallow creme filling, marshmallow filling

you’ll also love

peppermint hot cocoa cakePeppermint Hot Cocoa Cake Recipe
lavender buttercream recipe by sugar and sparrowLavender Buttercream Frosting
german chocolate cake recipe by sugar and sparrowGerman Chocolate Cake Recipe

Join the List

Stay up to date & receive the latest posts in your inbox.

Reader Interactions

Comments

  1. Kalea Williams says

    September 25, 2025 at 9:40 am

    Can you torch this to give a toasted appearance?
    I was too afraid to try this and ruin the cream.

    Reply
    • Whitney says

      September 25, 2025 at 12:51 pm

      Hi Kalea! I don’t think you can torch this because of the butter. If you want a marshmallow filling that you can torch, this one works great: https://sugarandsparrow.com/marshmallow-meringue-frosting-recipe/

      Reply
  2. Janie says

    December 7, 2024 at 1:41 am

    Can you freeze a cake filled with this type of filling

    Reply
    • Whitney says

      December 7, 2024 at 9:39 pm

      Yes you can! Just be sure to thaw it in the refrigerator a day ahead of when you want to serve it, then remove it from the refrigerator a few hours beforehand so it comes back to room temp.

      Reply
  3. Whitney says

    December 4, 2024 at 1:55 pm

    I’m sorry you didn’t like the flavor of this, Gwen. Did you use salted butter or unsalted? Or make any substitutions? I’m wondering what might have happened since you got different results both times you made it.

    Reply
  4. Shery Badawy says

    October 29, 2024 at 12:18 pm

    What is the alternative for marshmallow cream there is not in my country there is only marshmallow as a candy.

    Reply
    • Whitney says

      October 30, 2024 at 8:45 pm

      Hi Shery! I have never tried substituting the marshmallow creme for anything else, so I don’t have a good solution. I’ll report back if I hear of one though!

      Reply

Leave a Reply Cancel reply

Your email address will not be published. Required fields are marked *

Recipe Rating


Next Post >

Brown Butter Chocolate Chip Skillet Cookie with C&H® Sugar

Primary Sidebar

Welcome to Sugar & Sparrow

Welcome to Sugar & Sparrow

Helping you whip up pretty desserts with confidence and creativity. And hopefully sharing a few laughs with you along the way!

Learn More

Connect

let’s bake!

Get my very best recipes, baking tips, and decorating tutorials sent to your inbox

Featured Posts

valentines day cupcakes

Sprinkled Ombrè Valentine’s Day Cupcakes

toasted coconut cupcakes recipe

Toasted Coconut Cupcakes Recipe

striped buttercream cake by sugar and sparrow

How To Create Striped Buttercream Cakes With A Cake Comb

Search

Archives

Follow Along

@sugarandsparrowco

ROCKY ROAD CUPCAKES ✨ inspired by the classic ice ROCKY ROAD CUPCAKES ✨ inspired by the classic ice cream flavor: moist and decadent chocolate cupcakes filled with homemade marshmallow creme, then topped with fudgy chocolate buttercream, mini marshmallows, and chopped almonds. The marshmallow creme filling comes together in minutes and is SO MUCH BETTER than the store bought stuff – perfectly creamy yet fluffy and the best surprise when you bite into these cupcakes. 

Full recipe is linked in my bio + at https://sugarandsparrow.com/rocky-road-cupcakes/
 
#chocolatecupcakes #rockyroad #marshmallow #chocolatemarshmallow #cupcakes
FUNFETTI SHEET CAKE 🥳 the most celebratory flavor FUNFETTI SHEET CAKE 🥳 the most celebratory flavor of all and so perfect for a crowd. It’s extra soft and moist vanilla cake speckled with rainbow sprinkles + captures that box mix texture but it’s 100% homemade and EASY! Top it with vanilla buttercream and rainbow sprinkles for the perfect party cake 🎉
 
Full recipe (w/ frosting) at the link in my bio or at https://sugarandsparrow.com/funfetti-sheet-cake/ 

INGREDIENTS 
2 1/2 Cups (265g) sifted cake flour 
2 tsp baking powder 
1/2 tsp baking soda 
1 tsp salt 
3/4 Cup (170g) unsalted butter, room temp 
1 3/4 Cup (340g) granulated white sugar 
3 large eggs, room temp 
1/2 Cup (120g) sour cream, room temp 
1 Tbsp pure vanilla extract 
1 Cup (240ml) whole milk, room temp 
1/3 Cup (60g) rainbow sprinkles, coated in 1 tsp flour 
 
INSTRUCTIONS 
1. Preheat the oven to 325°F (163ºC). Grease and line a 9×13 baking pan. 
2. In a medium bowl, whisk together the sifted cake flour, baking powder, baking soda, and salt. Set aside.  
3. In the bowl of your stand mixer fitted with the paddle attachment (or with a large bowl and hand mixer), beat the butter and sugar on medium-high speed until light and fluffy, 4 min. Add the eggs one at a time, then add the vanilla and sour cream and mix for one minute on high speed. 
4. Turn the mixer off and add the dry ingredients all at once. Mix on low speed until just combined, then add the milk and mix until just incorporated.  
5. Coat the rainbow sprinkles in 1 teaspoon of flour, then gently fold them into the cake batter. Pour the batter into the prepared baking pan and bake for 30-35 minutes, or until the cake springs back to the touch and a toothpick inserted into the middle comes out clean. Let the cake cool in the baking dish until room temperature, then decorate with vanilla buttercream + rainbow sprinkles (full recipe link in bio!) 
 
#funfetti #funfetticake #sheetcake #cake #birthdaycake
COOKIE DOUGH ICE CREAM CAKE 🍪🍦this is the birthday COOKIE DOUGH ICE CREAM CAKE 🍪🍦this is the birthday cake of my DREAMS and I’m so excited to share the recipe with you!! It’s chocolate and vanilla no-churn ice creams with homemade cookie dough chunks in every bite, swirled together and set on a delicious Oreo cookie crust 😍 easy, perfectly sliceable, and ideal for making ahead! I’m already dreaming about when I can make it again ✨

Get the recipe link in my bio + at https://sugarandsparrow.com/chocolate-chip-cookie-dough-ice-cream-cake/

#birthdaycake #icecreamcake #cakedecorating #nochurnicecream #icecreamlover
My kitchen in May 💛 some of these recipes had me f My kitchen in May 💛 some of these recipes had me feeling CRAZY with how many tests they took 🤪 but in the end I am so happy with these ones I got to hit the publish button on + I made my DREAM birthday cake that I can’t wait to share ASAP!!

Comment “MAY” to get all the recipes that are available now:

-Strawberry Shortcake Sheet Cake
-Lemon Cupcakes
-Lemon Cream Cheese Buttercream
-Orange Poppyseed Cake
-Whipped Mascarpone Frosting
-No-Bake Marbled Strawberry Cheesecake
-Chocolate Chip Cookie Cake

https://sugarandsparrow.com/everything-i-baked-in-may
 
#dessert #bakersofinstagram #baking #bakinglove #dessertlovers
CLASSIC BIRTHDAY CAKE 🥳 yellow cake with chocolate CLASSIC BIRTHDAY CAKE 🥳 yellow cake with chocolate frosting makes me so nostalgic for my childhood birthdays + my homemade version captures that moist and fluffy texture of box mix, but it’s 100% HOMEMADE! Pair it with chocolate frosting + lots of rainbow sprinkles and make it to celebrate someone special 💛
  
Full recipe (with chocolate frosting) is linked in my bio or at https://sugarandsparrow.com/yellow-cake-recipe/
  
INGREDIENTS  
2 Cups (210g) sifted cake flour  
1 1/2 tsp baking powder  
1/2 tsp baking soda  
1/2 tsp salt  
1/2 Cup (113g) unsalted butter, room temp  
3 Tbsp (45ml) vegetable oil  
1 1/3 Cups (267g) granulated sugar  
2 large eggs, room temp  
2 large egg yolks, room temp  
1/3 Cup (80g) sour cream, room temp  
2 tsp pure vanilla extract  
3/4 Cup (180ml) whole milk, room temp  
  
INSTRUCTIONS  
1. Preheat the oven to 350°F (177°C). Grease and line three 6-inch or two 8-inch cake pans.  
2. In a medium bowl, add the sifted cake flour, baking powder, baking soda and salt. Whisk together and set aside.  
3. In the bowl of your stand mixer fitted with the paddle attachment (or with a handheld mixer and large bowl), beat the butter on high speed until it’s creamy, 2 min. Add the vegetable oil and sugar, then continue to mix on medium-high until pale and fluffy, 2 min. Add the eggs and egg yolks one at a time, mixing on low speed for 10-15 seconds after each addition. Add the vanilla and sour cream and turn the mixer to high speed for 1 min.   
4. Turn the mixer off and add the dry ingredients all at once. Mix on low speed until the ingredients just start to combine, then add the milk in a steady stream and continue mixing until incorporated, about 30 seconds.   
5. Pour the batter evenly into the prepared cake pans and bake for 28-32 minutes. Let the cakes cool, then fill and frost with chocolate buttercream (full recipe linked in my bio!)
  
#birthdaycake #yellowcake #cakedecorating #chocolatecake #cakelover

Footer

On the Blog

  • Cake Basics
  • Recipes
  • Tutorials

Info

  • About
  • Privacy Policy & Disclosure

stay in the know

Copyright © 2026 · Theme by Sugar & Sparrow