• Cake
  • Frosting
  • YouTube
  • My Favorite Tools
  • Nav Social Icons

  • Skip to primary navigation
  • Skip to main content
  • Skip to primary sidebar
  • Skip to footer
  • Recipes
    • Cake
    • Cupcakes
    • Frosting
    • Ice Cream
    • Vegan
  • Cake Basics
  • Tutorials
  • Blog
  • About
  • Mobile Menu Widgets

    Connect

    Search

Sugar & Sparrow logo in script font

Sugar & Sparrow

Lifestyle and Cake from Portland Oregon

  • Cake Basics
  • Recipes
    • Cake
    • Cupcakes
    • Cookies & Bars
    • Filling
    • Frosting
    • Ice Cream
    • No-Bake
    • Small Batch
    • Vegan
  • Tutorials
  • Book
  • Blog
  • About

Pastel Rainbow Birthday Cake Tutorial

April 24, 2019 · In: Featured, Seasonal, Spring, Tutorials

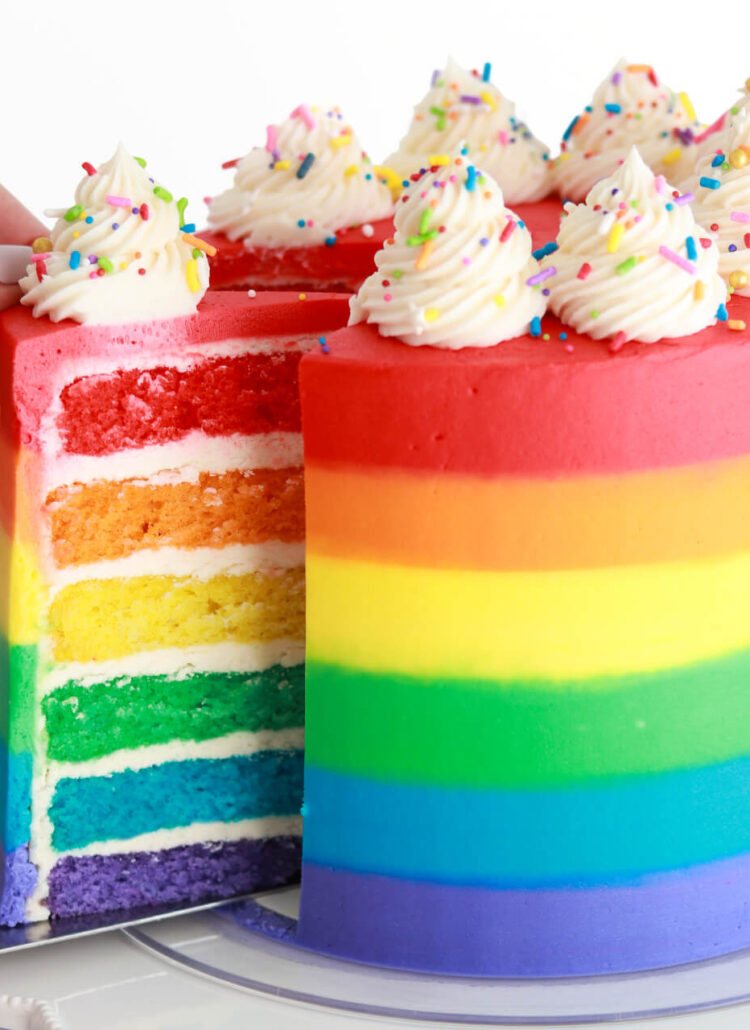
Something totally magical happened this week – I got the opportunity to do an Instagram takeover for the one and only Wilton! They’ve been my favorite supplier of cake decorating tools for forever, so to say I was elated would be an understatement. For my takeover tutorial, I showed how to create a whimsical birthday cake that’s as easy to make as it is eye-catching, and I want to share it in blog post form for you here. This fun cake design will make any birthday feel extra special:

Rainbow birthday cake tutorial
cake with buttercream piping

Wilton sent me a big box of supplies to create this birthday cake, and there are a few I want to highlight here because they’re total cake game changers. First, the Wilton cake leveler is something I always, ALWAYS use to level my cake layers before filling and stacking them. You can adjust the height of the leveler and just run it through your cake to create nice, even layers. Having even cake layers is a must for creating perfectly level cakes as an end result.

Second, having a trusty cake turntable is key for creating a smooth buttercream finish. Wilton sent me their high and low turntable and it was stellar for the job! It’s got adjustable legs so you can really get the turntable height that’s comfortable for you.

how to make a smooth buttercream cake

This cake design all starts with a smooth buttercream cake, so in addition to having level cake layers and a trustworthy turntable, the last keys to success are having a great icing smoother and angled spatula. I prefer both of these items to be stainless steel, because sometimes getting a smooth finish means slightly heating up the scraper/spatula to erase wrinkles. If you’re still trying to master a smooth buttercream finish, I’ve detailed all my best tips in this post.

Ok, back to this birthday cake design! Although it looks intricate, I promise it’s way easier than it looks. Watch this quick video of the process to show you how it’s done, then I’ll walk you through the step by step below.

If you love tutorial videos like this one, be sure to check out my YouTube channel! I’ve got a growing collection of cake recipes, decorating tutorials, and Cake Basics over there. Hit the subscribe button on my page so you never miss a new video.

You Will Need:

  • A 6-inch cake that’s been filled and frosted with a smooth buttercream finish
  • 1 batch of vanilla buttercream
  • Food color gels of your choice (I used the Wilton Color Right system)
  • Bowls and spoons for mixing buttercream colors
  • A piece of saran wrap
  • Wilton Tips 104, 1M, and 4B (x4)
  • Gold pearlized sprinkles
  • Tall gold birthday candles

Step 1: Mix Up A Buttercream Color Palette

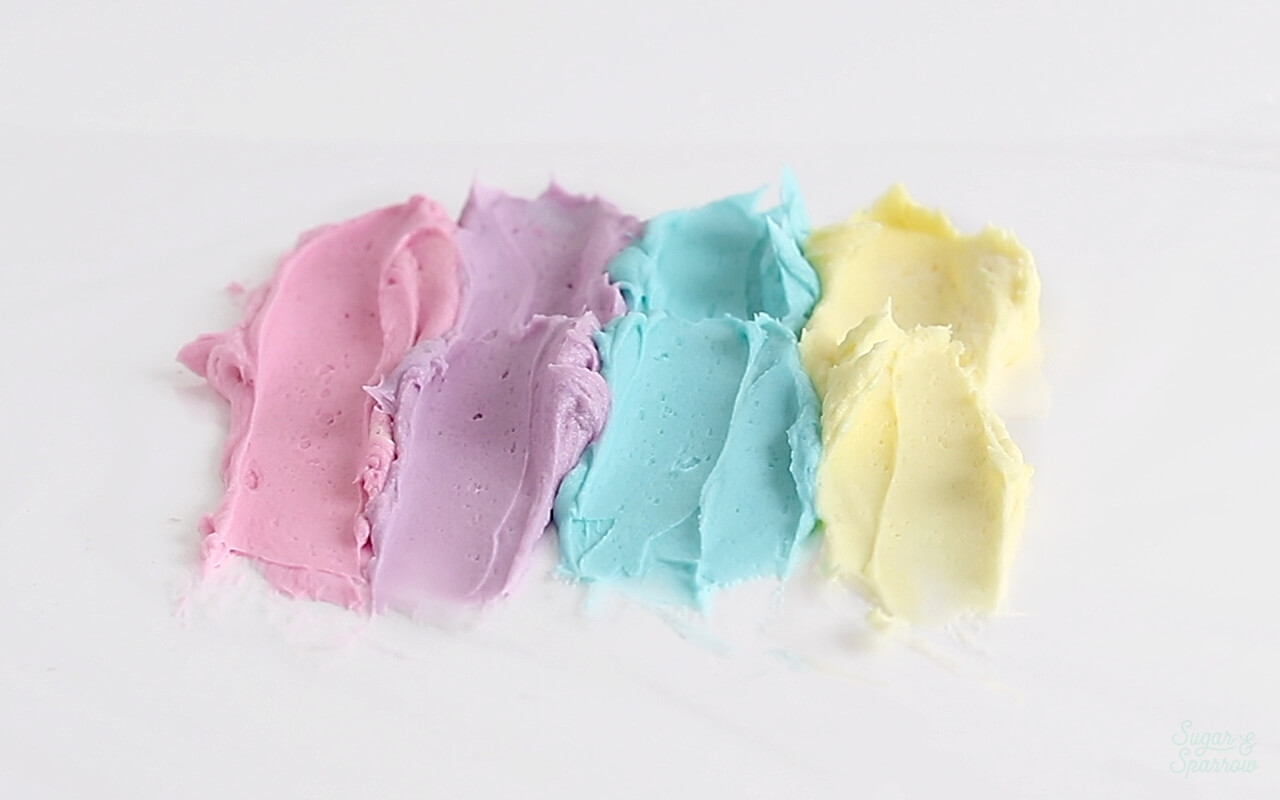
For this cake, I created a pastel rainbow color palette using the Wilton Color Right system.

coloring buttercream with the Wilton Color Right System

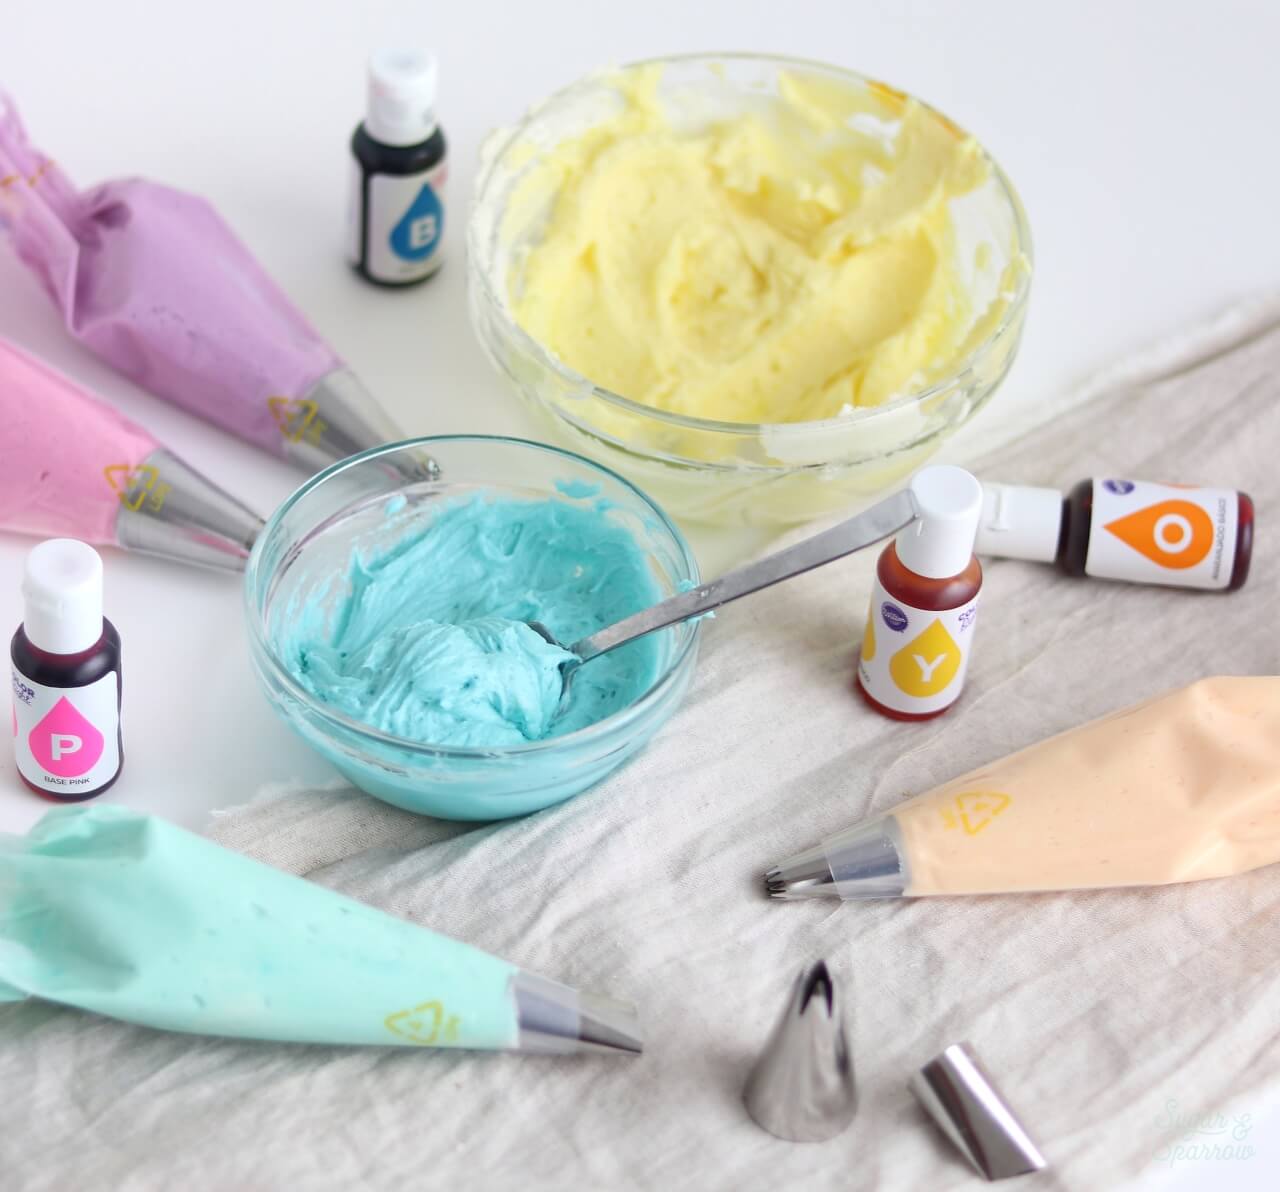
A really easy way to do this is to divide the batch of buttercream into three bowls and color one bowl pink, one bowl yellow, and one bowl blue. Then, mix part of the blue with the pink in a separate bowl to create purple, part of the blue with part of the yellow to make green, and part of the pink with part of the yellow to make orange.

Step 2: Prepare Your Piping Bags

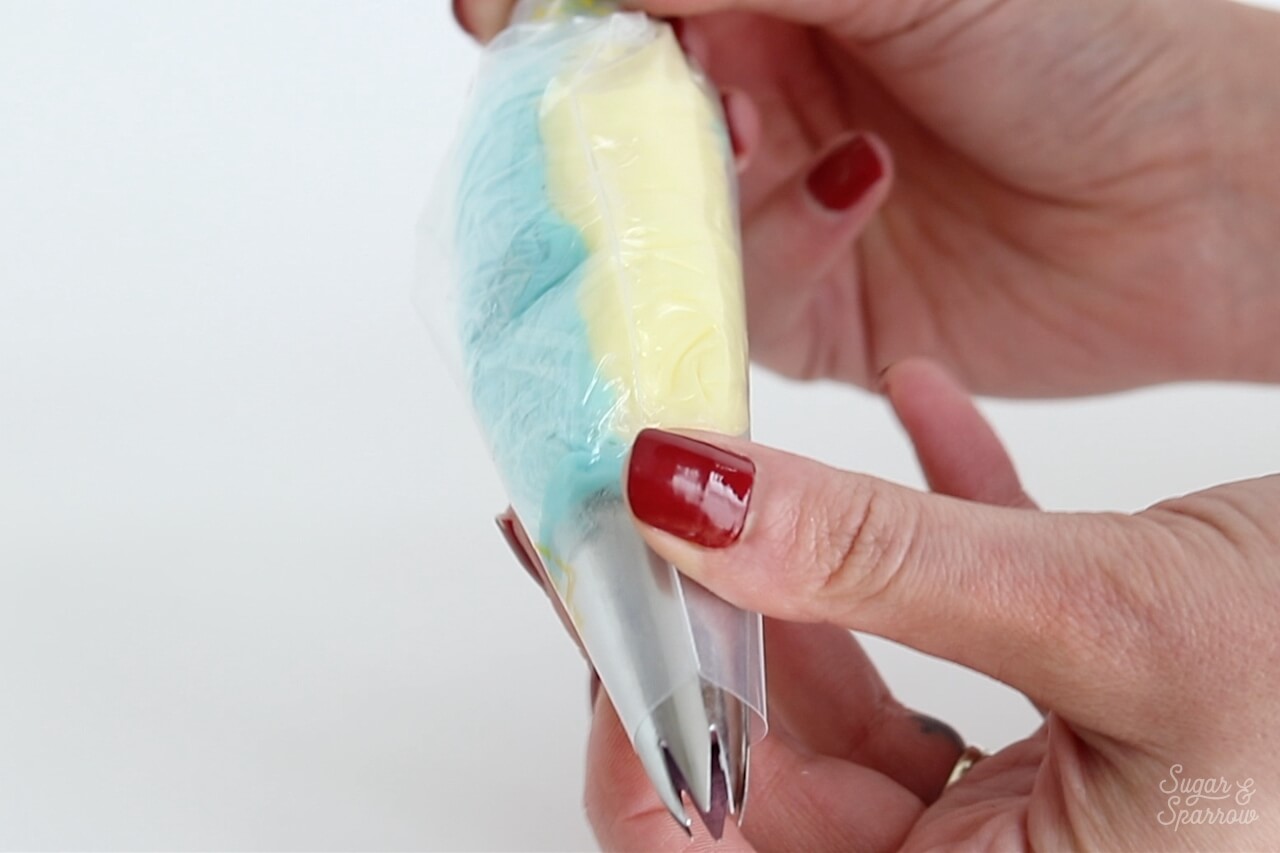
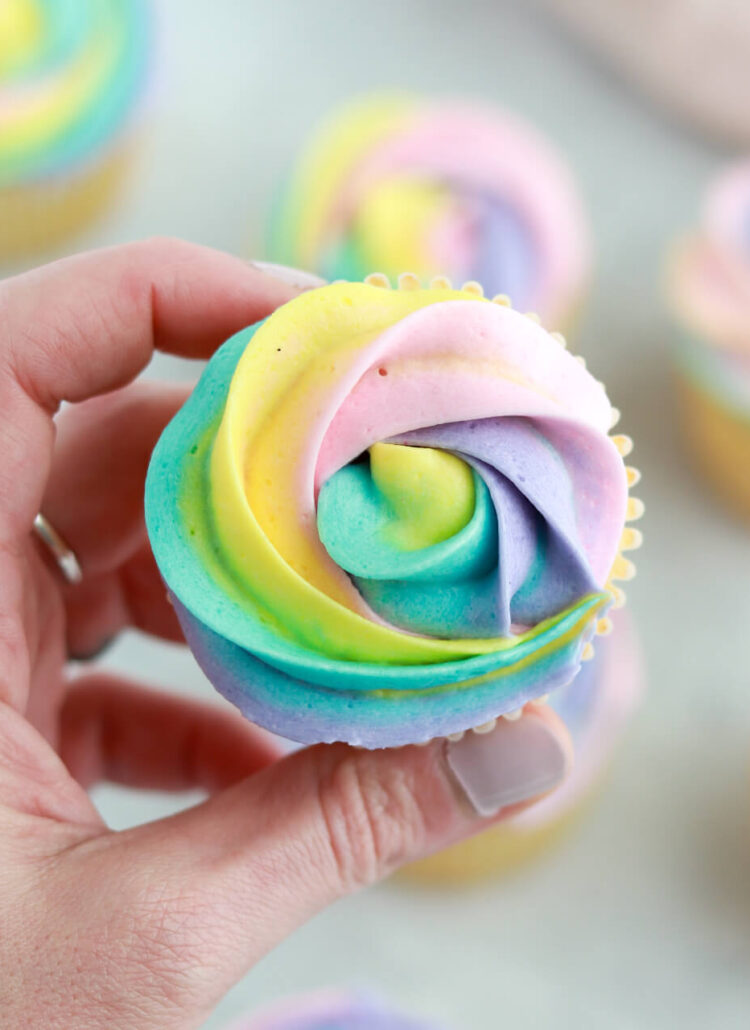
Before placing each buttercream color in its own piping bag, I created a multi-colored piping bag for making some rainbow rosettes! The easiest way to do this is to lay a piece of saran wrap down, then swipe four colors next to one another on top of it.

how to add multiple buttercream colors to piping bag

Roll the saran wrap up like a colorful burrito and snip off one of the ends before placing it into a piping bag fitted with Wilton Tip 1M.

how to add more than one color to piping bag

Then, place each individual color into separate piping bags fitted with Wilton Tips 104 and 4B. I used Tip 104 for the green and blue colors and Tip 4B for the rest.

Rainbow buttercream

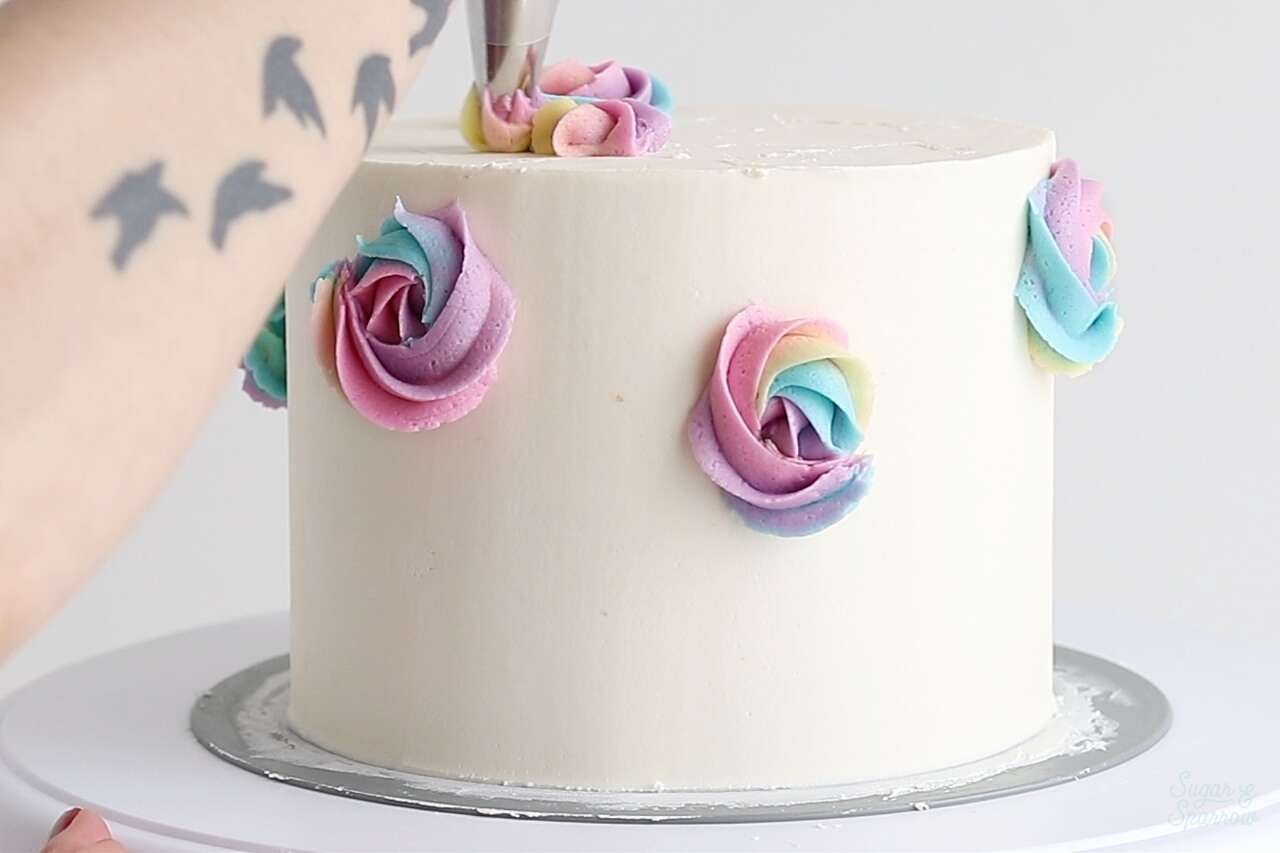
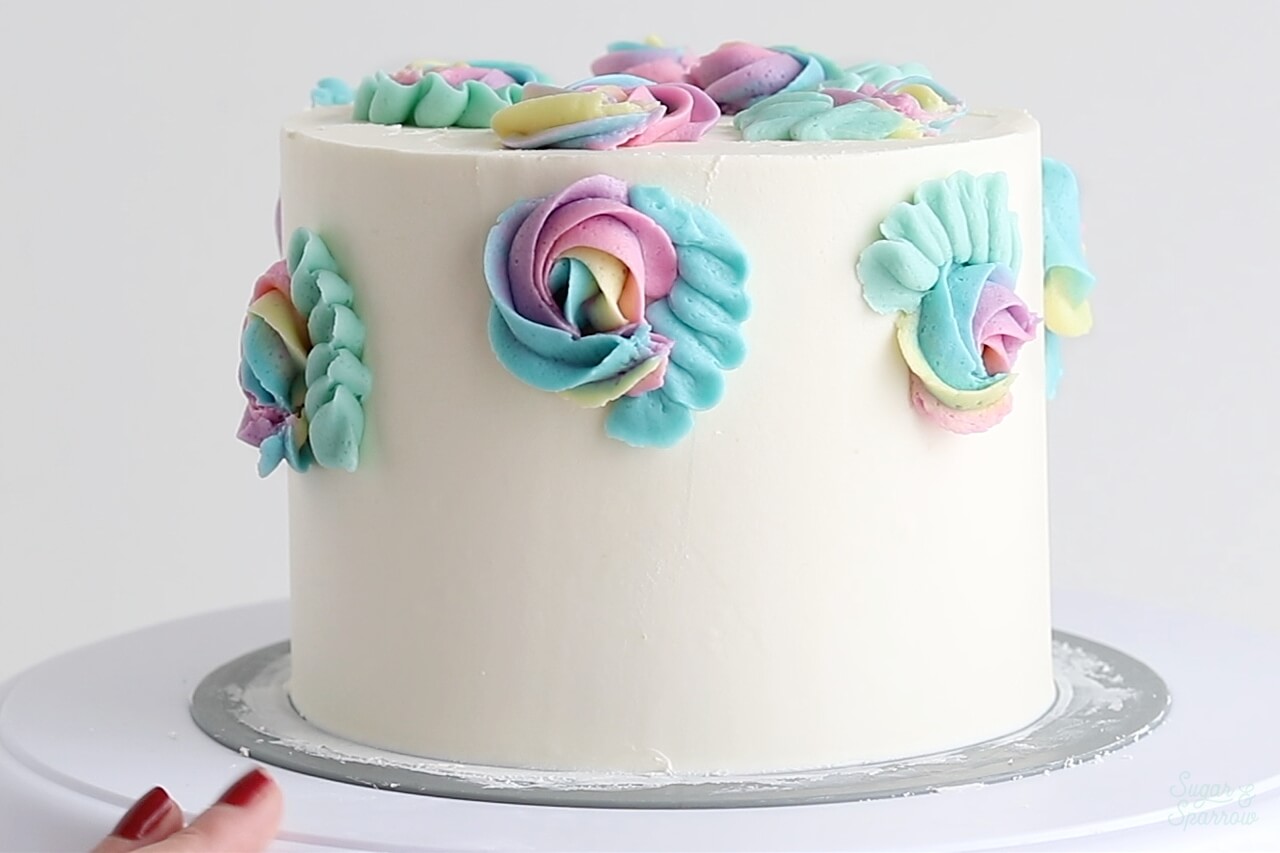
Step 3: Pipe The Cake

With your smooth buttercream cake on the turntable, pipe the rainbow rosettes on the upper half of the cake and the top of the cake in a random pattern.

rainbow buttercream rosettes

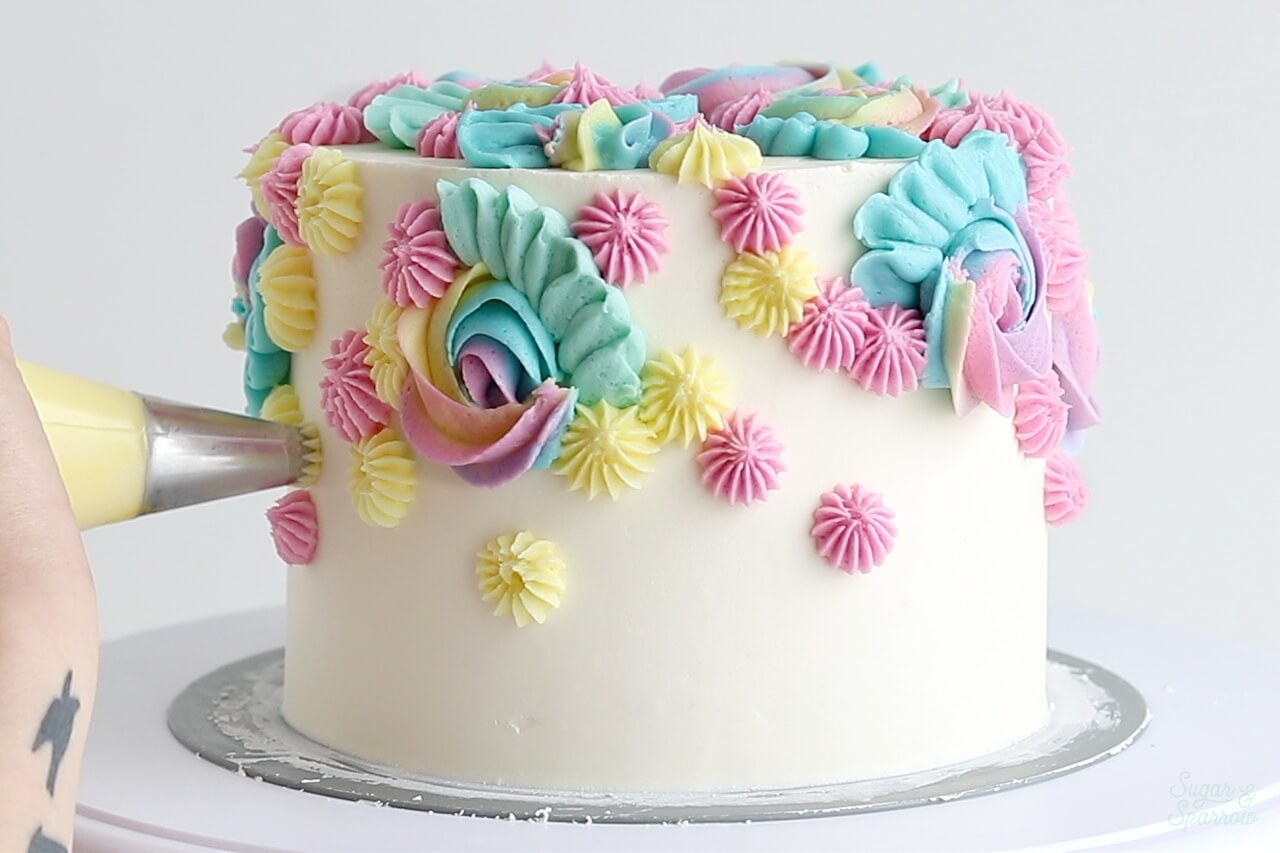
Next, use the piping bags fitted with Tip 104 to pipe ruffles next to each rainbow rosette.

piping ruffles with Wilton Tip 104

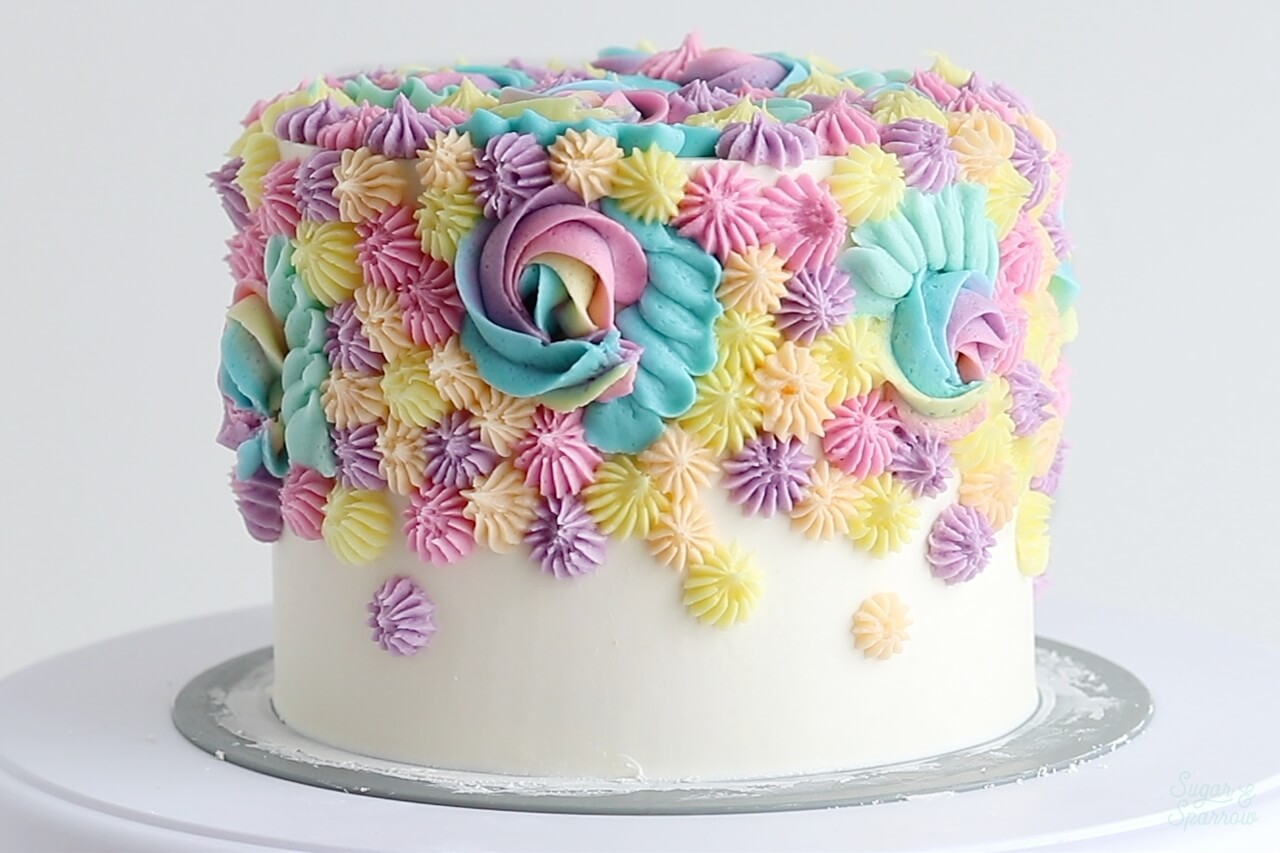
Finally, fill in all the empty spaces with stars using the piping bags fitted with Tip 4B. The goal here is to create a sort of ombrè effect with the piping, so feel free to pipe some stray stars toward the bottom of the cake.

piping buttercream with Wilton Tip 4B
buttercream piping on cake

Step 4: Add Sprinkles

I love using sprinkles to add even more texture to whimsical buttercream, and these Wilton Pearlized Sprinkles are perfect for the job. Using either your fingers or a pair of tweezers, add the sprinkles to the centers of some of the stars and the edges of some of the rosettes.

how to add sprinkles to cake

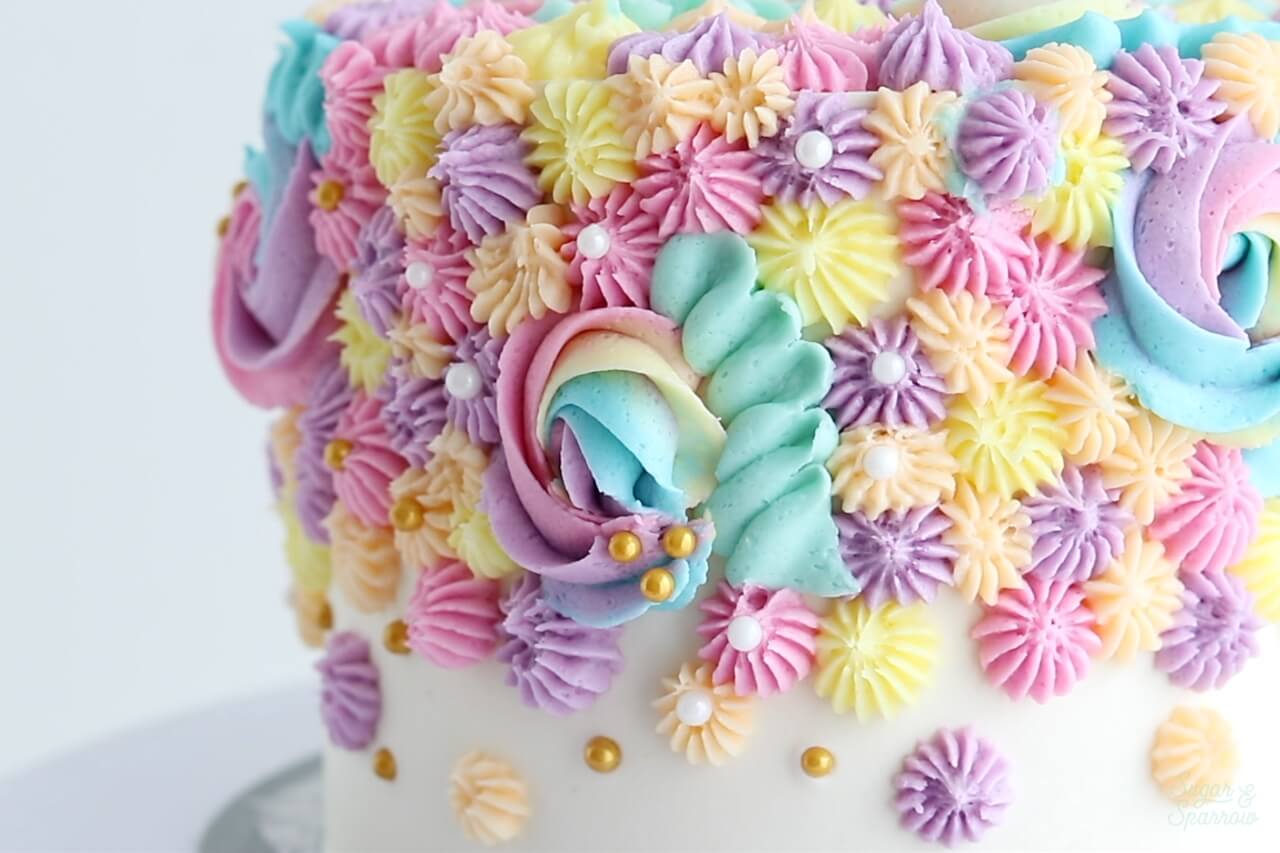
There is no right or wrong way to add sprinkles here. To keep with the ombrè look, I placed a few stray gold sprinkles toward the bottom of the cake.

Step 5: Top With Birthday Candles

No birthday cake is complete without some pretty candles, and the taller the better! These Tall Gold Candles are perfection. Place them on top of your cake and get ready to party!

birthday cake with tall candles

Wilton has a ton of great birthday cake ideas on their site as well, so be sure to check them out for inspiration. If you’re inspired to make this cake design for a birthday or any day, be sure to tag me on Instagram (and @wiltoncakes as well!) to show us what you’re caking!

By: Whitney · In: Featured, Seasonal, Spring, Tutorials · Tagged: birthday cake, buttercream cake, buttercream piping, cake decorating, cake tutorial, pastel rainbow cake, rainbow cake, tall cake candles, wilton, wilton tip 104, wilton tip 1m, wilton tip 4b

you’ll also love

Rainbow layer cake with rainbow frostingThe Ultimate Rainbow Cake (Inside and Out!)
st patricks day cake ideas by sugar and sparrowSt. Patrick’s Day Dessert Ideas
rainbow swirl cupcakes tutorialHow to Make Rainbow Swirl Cupcakes

Join the List

Stay up to date & receive the latest posts in your inbox.

Reader Interactions

Comments

  1. Noosh says

    August 23, 2019 at 5:31 am

    Hello- and thank you for your beautiful blog. so nice of you to share all the knowledge !! what kind of cake did you use inside this pastel rainbow cake?
    Also if i want to add almond flour( and cake flour) to one of your recipes which one would you suggest?
    Thanks,
    Noosh

    Reply
    • Whitney says

      August 23, 2019 at 11:31 am

      Hi Noosh! The cake underneath this design is my vanilla cake recipe (https://sugarandsparrow.com/vanilla-cake-recipe/). I’ve actually never tried baking with almond flour so I can’t say for sure which cake recipe it will work with or how it will turn out. I’m intrigued by it though! Maybe try it with the vanilla cake and see how it goes.

      Reply

Leave a Reply Cancel reply

Your email address will not be published. Required fields are marked *

Recipe Rating


Next Post >

Rainbow Candy Mosaic Cake

Primary Sidebar

Welcome to Sugar & Sparrow

Welcome to Sugar & Sparrow

Helping you whip up pretty desserts with confidence and creativity. And hopefully sharing a few laughs with you along the way!

Learn More

Connect

let’s bake!

Get my very best recipes, baking tips, and decorating tutorials sent to your inbox

Featured Posts

pumpkin chocolate marble cake

Pumpkin Chocolate Marble Cake with Brown Butter Frosting

red velvet cake recipe by sugar and sparrow

Red Velvet Cake with Cream Cheese Frosting

carrot cake recipe small batch

Small Batch Carrot Cake

Search

Archives

Follow Along

@sugarandsparrowco

FUNFETTI SHEET CAKE 🥳 the most celebratory flavor FUNFETTI SHEET CAKE 🥳 the most celebratory flavor of all and so perfect for a crowd. It’s extra soft and moist vanilla cake speckled with rainbow sprinkles + captures that box mix texture but it’s 100% homemade and EASY! Top it with vanilla buttercream and rainbow sprinkles for the perfect party cake 🎉
 
Full recipe (w/ frosting) at the link in my bio or at https://sugarandsparrow.com/funfetti-sheet-cake/ 

INGREDIENTS 
2 1/2 Cups (265g) sifted cake flour 
2 tsp baking powder 
1/2 tsp baking soda 
1 tsp salt 
3/4 Cup (170g) unsalted butter, room temp 
1 3/4 Cup (340g) granulated white sugar 
3 large eggs, room temp 
1/2 Cup (120g) sour cream, room temp 
1 Tbsp pure vanilla extract 
1 Cup (240ml) whole milk, room temp 
1/3 Cup (60g) rainbow sprinkles, coated in 1 tsp flour 
 
INSTRUCTIONS 
1. Preheat the oven to 325°F (163ºC). Grease and line a 9×13 baking pan. 
2. In a medium bowl, whisk together the sifted cake flour, baking powder, baking soda, and salt. Set aside.  
3. In the bowl of your stand mixer fitted with the paddle attachment (or with a large bowl and hand mixer), beat the butter and sugar on medium-high speed until light and fluffy, 4 min. Add the eggs one at a time, then add the vanilla and sour cream and mix for one minute on high speed. 
4. Turn the mixer off and add the dry ingredients all at once. Mix on low speed until just combined, then add the milk and mix until just incorporated.  
5. Coat the rainbow sprinkles in 1 teaspoon of flour, then gently fold them into the cake batter. Pour the batter into the prepared baking pan and bake for 30-35 minutes, or until the cake springs back to the touch and a toothpick inserted into the middle comes out clean. Let the cake cool in the baking dish until room temperature, then decorate with vanilla buttercream + rainbow sprinkles (full recipe link in bio!) 
 
#funfetti #funfetticake #sheetcake #cake #birthdaycake
COOKIE DOUGH ICE CREAM CAKE 🍪🍦this is the birthday COOKIE DOUGH ICE CREAM CAKE 🍪🍦this is the birthday cake of my DREAMS and I’m so excited to share the recipe with you!! It’s chocolate and vanilla no-churn ice creams with homemade cookie dough chunks in every bite, swirled together and set on a delicious Oreo cookie crust 😍 easy, perfectly sliceable, and ideal for making ahead! I’m already dreaming about when I can make it again ✨

Get the recipe link in my bio + at https://sugarandsparrow.com/chocolate-chip-cookie-dough-ice-cream-cake/

#birthdaycake #icecreamcake #cakedecorating #nochurnicecream #icecreamlover
My kitchen in May 💛 some of these recipes had me f My kitchen in May 💛 some of these recipes had me feeling CRAZY with how many tests they took 🤪 but in the end I am so happy with these ones I got to hit the publish button on + I made my DREAM birthday cake that I can’t wait to share ASAP!!

Comment “MAY” to get all the recipes that are available now:

-Strawberry Shortcake Sheet Cake
-Lemon Cupcakes
-Lemon Cream Cheese Buttercream
-Orange Poppyseed Cake
-Whipped Mascarpone Frosting
-No-Bake Marbled Strawberry Cheesecake
-Chocolate Chip Cookie Cake

https://sugarandsparrow.com/everything-i-baked-in-may
 
#dessert #bakersofinstagram #baking #bakinglove #dessertlovers
CLASSIC BIRTHDAY CAKE 🥳 yellow cake with chocolate CLASSIC BIRTHDAY CAKE 🥳 yellow cake with chocolate frosting makes me so nostalgic for my childhood birthdays + my homemade version captures that moist and fluffy texture of box mix, but it’s 100% HOMEMADE! Pair it with chocolate frosting + lots of rainbow sprinkles and make it to celebrate someone special 💛
  
Full recipe (with chocolate frosting) is linked in my bio or at https://sugarandsparrow.com/yellow-cake-recipe/
  
INGREDIENTS  
2 Cups (210g) sifted cake flour  
1 1/2 tsp baking powder  
1/2 tsp baking soda  
1/2 tsp salt  
1/2 Cup (113g) unsalted butter, room temp  
3 Tbsp (45ml) vegetable oil  
1 1/3 Cups (267g) granulated sugar  
2 large eggs, room temp  
2 large egg yolks, room temp  
1/3 Cup (80g) sour cream, room temp  
2 tsp pure vanilla extract  
3/4 Cup (180ml) whole milk, room temp  
  
INSTRUCTIONS  
1. Preheat the oven to 350°F (177°C). Grease and line three 6-inch or two 8-inch cake pans.  
2. In a medium bowl, add the sifted cake flour, baking powder, baking soda and salt. Whisk together and set aside.  
3. In the bowl of your stand mixer fitted with the paddle attachment (or with a handheld mixer and large bowl), beat the butter on high speed until it’s creamy, 2 min. Add the vegetable oil and sugar, then continue to mix on medium-high until pale and fluffy, 2 min. Add the eggs and egg yolks one at a time, mixing on low speed for 10-15 seconds after each addition. Add the vanilla and sour cream and turn the mixer to high speed for 1 min.   
4. Turn the mixer off and add the dry ingredients all at once. Mix on low speed until the ingredients just start to combine, then add the milk in a steady stream and continue mixing until incorporated, about 30 seconds.   
5. Pour the batter evenly into the prepared cake pans and bake for 28-32 minutes. Let the cakes cool, then fill and frost with chocolate buttercream (full recipe linked in my bio!)
  
#birthdaycake #yellowcake #cakedecorating #chocolatecake #cakelover
S’MORES ICEBOX CAKE 🔥 Every bit as gooey and decad S’MORES ICEBOX CAKE 🔥 Every bit as gooey and decadent as it seems and I am blown away at how EASY this recipe is! It’s layers of graham crackers, chocolate ganache, and homemade marshmallow creme, piled high in a loaf pan and refrigerated overnight. The graham crackers soften into a cake-like texture and transform this dessert into the easiest s’mores cake ever.  
 
Recipe linked in my bio and at https://sugarandsparrow.com/smores-icebox-cake/
 
#smorescake #iceboxcake #nobake #smores #cakedecorating

Footer

On the Blog

  • Cake Basics
  • Recipes
  • Tutorials

Info

  • About
  • Privacy Policy & Disclosure

stay in the know

Copyright © 2026 · Theme by Sugar & Sparrow