
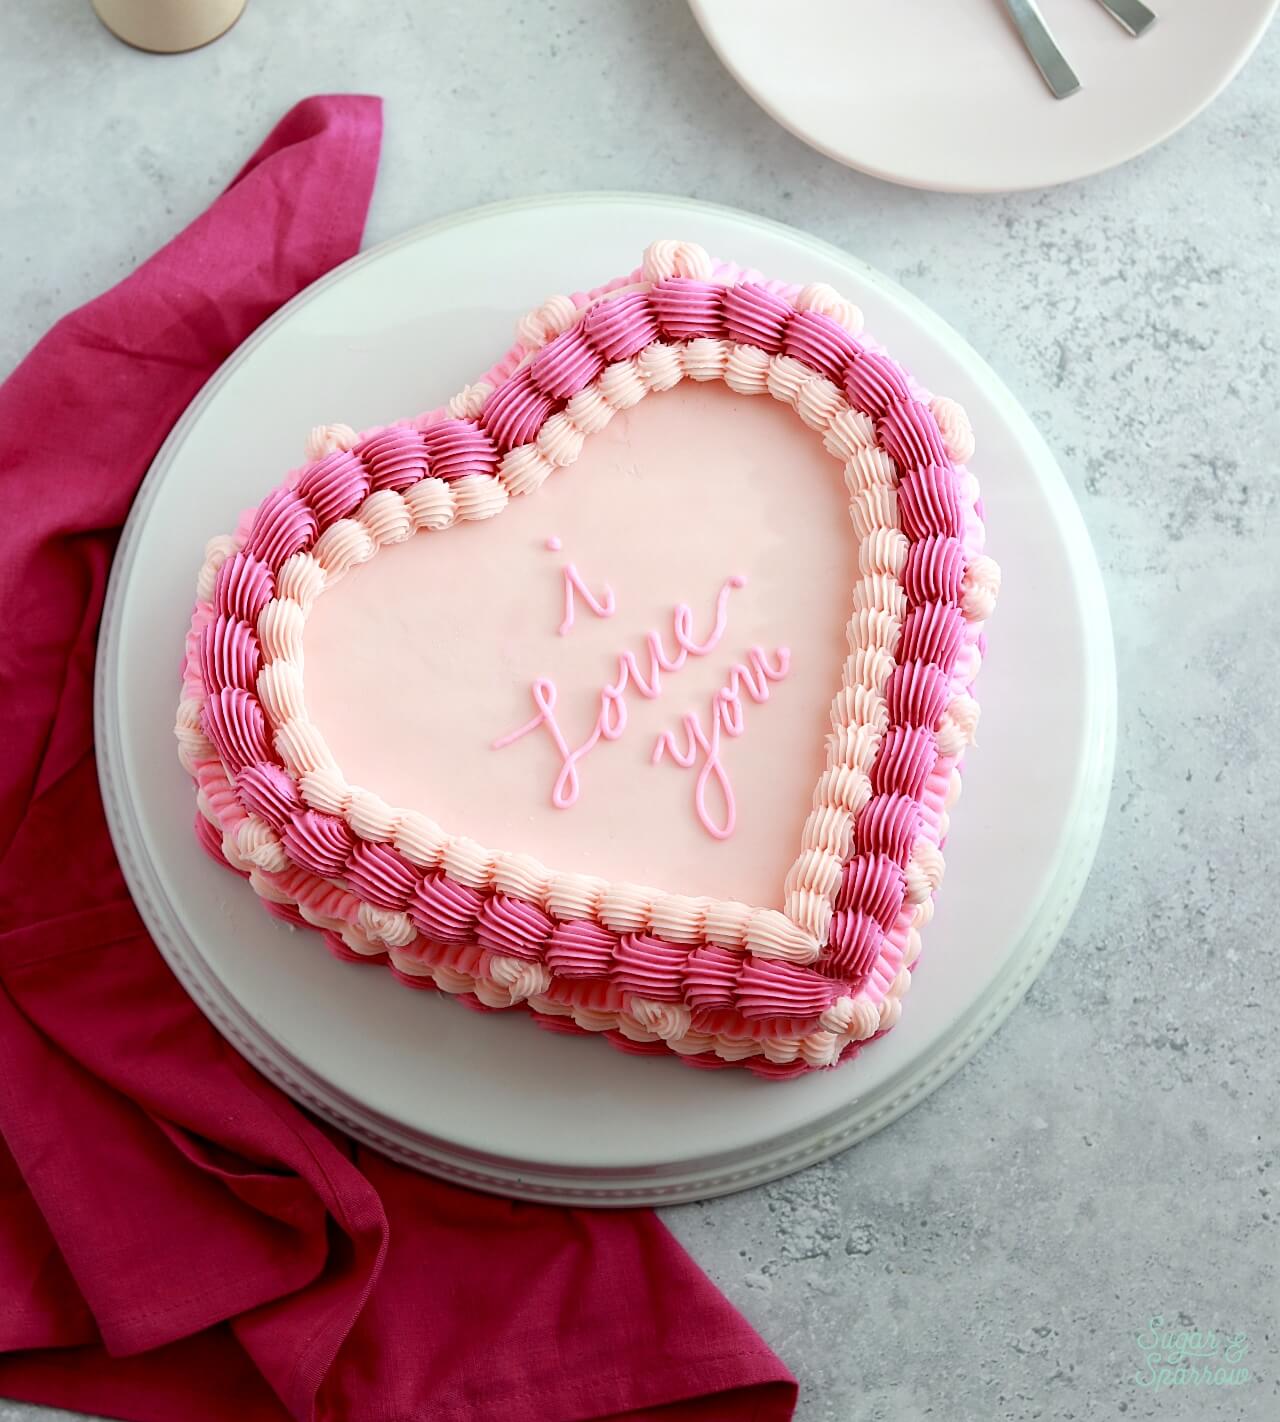
This may very well be the dreamiest cake design of all time. A vintage piped cake is always a looker, but when you make it heart-shaped and add some cute piping on top, it’s perfect for celebrating so many things – birthdays, baby showers, bridal showers, engagements, valentine’s day, or even as a cut cake for a wedding. And ever since I discovered this hack for making heart-shaped cakes out of round cake layers, I have been making more and more with beautiful vintage piping. You never need a novelty cake pan for this design (unless you really want one).
This post may contain affiliate links. For more information, see our disclosure policy.
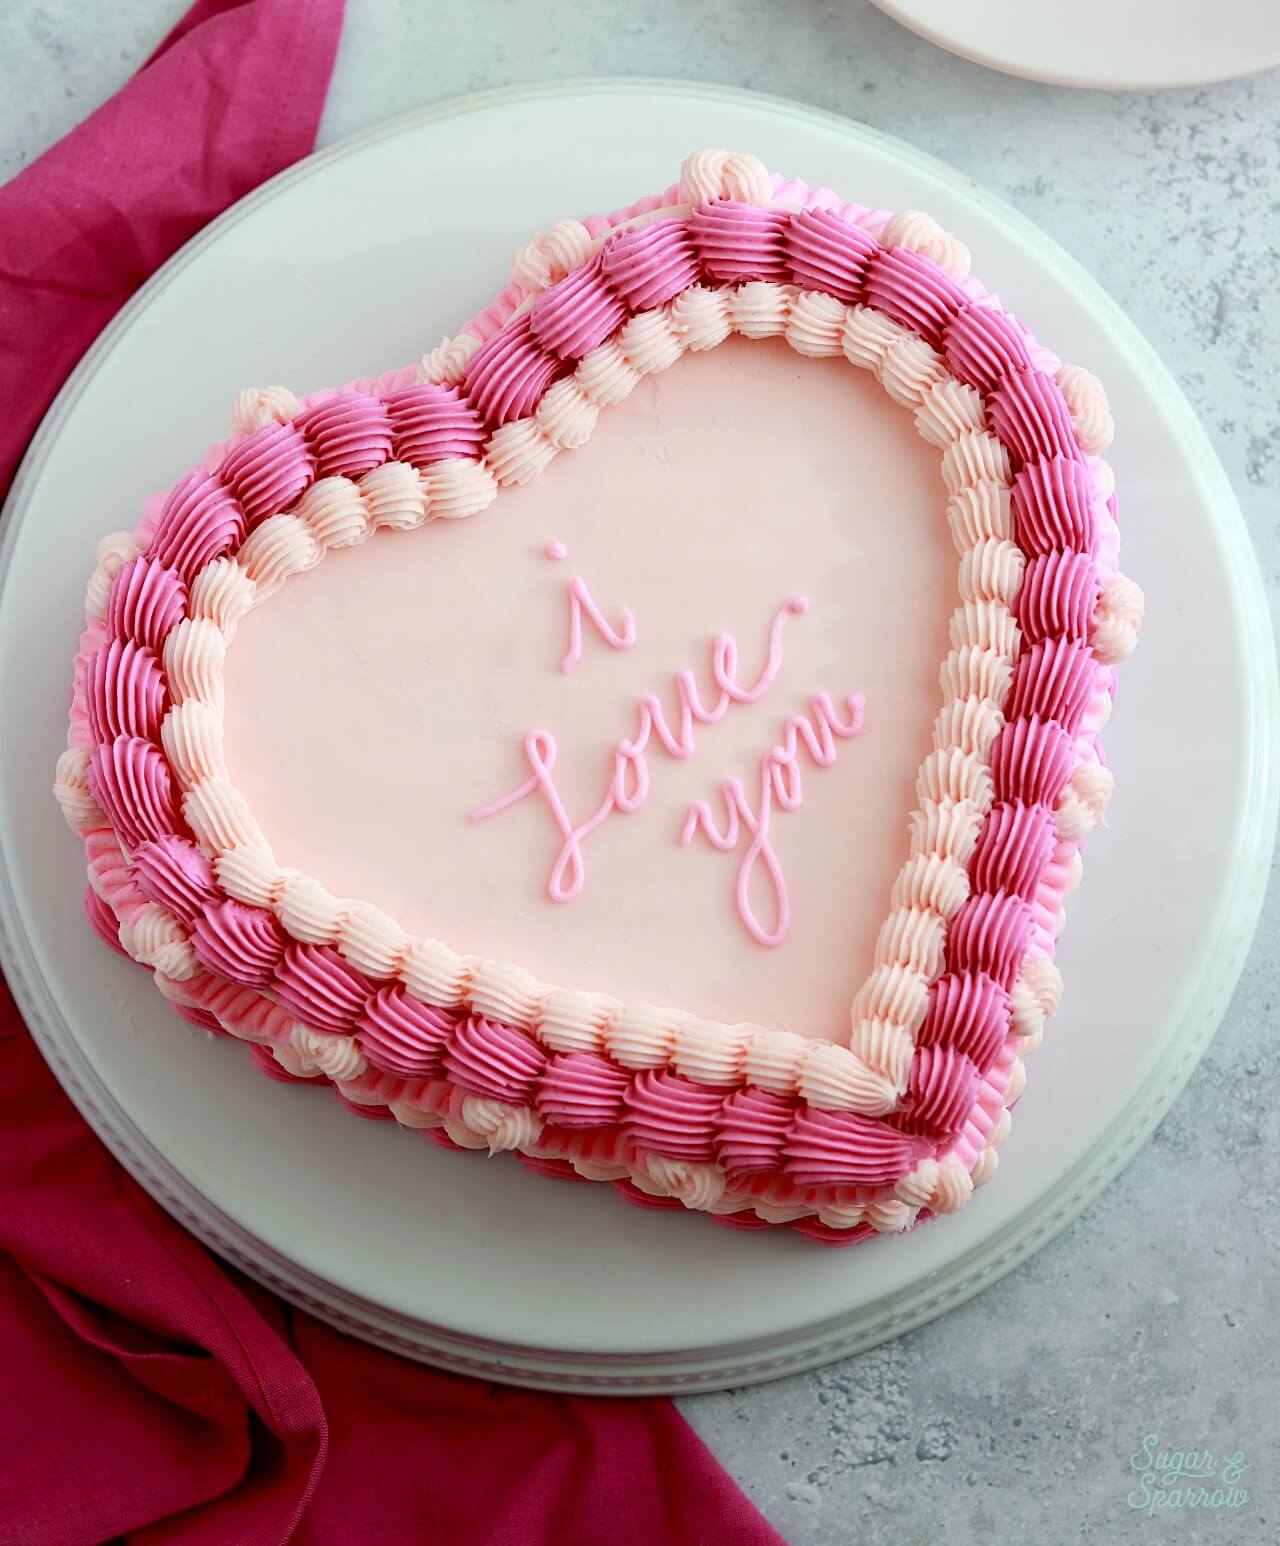
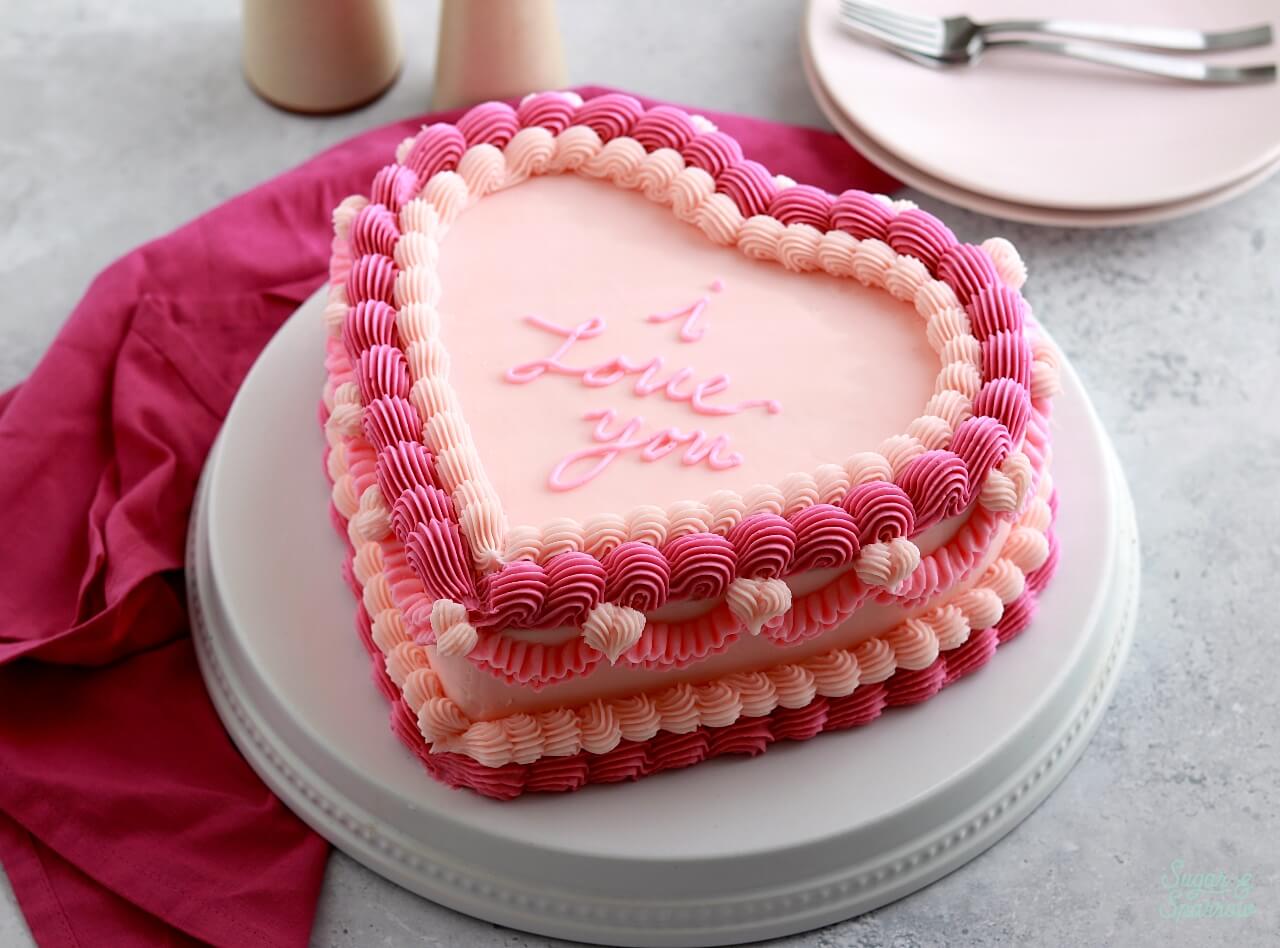
I’m working with two 8-inch cake layers made with my one-bowl chocolate cake recipe for this tutorial, and I’ll show you how I turn them into heart-shaped layers. You can start with round (or already heart-shaped) cake layers of any size, but the buttercream amount will change slightly depending on whether your cake layers are larger or smaller than mine. And speaking of buttercream, you can use whatever kind you prefer to frost and pipe cakes with. I am using 3 batches of my favorite vanilla buttercream recipe.
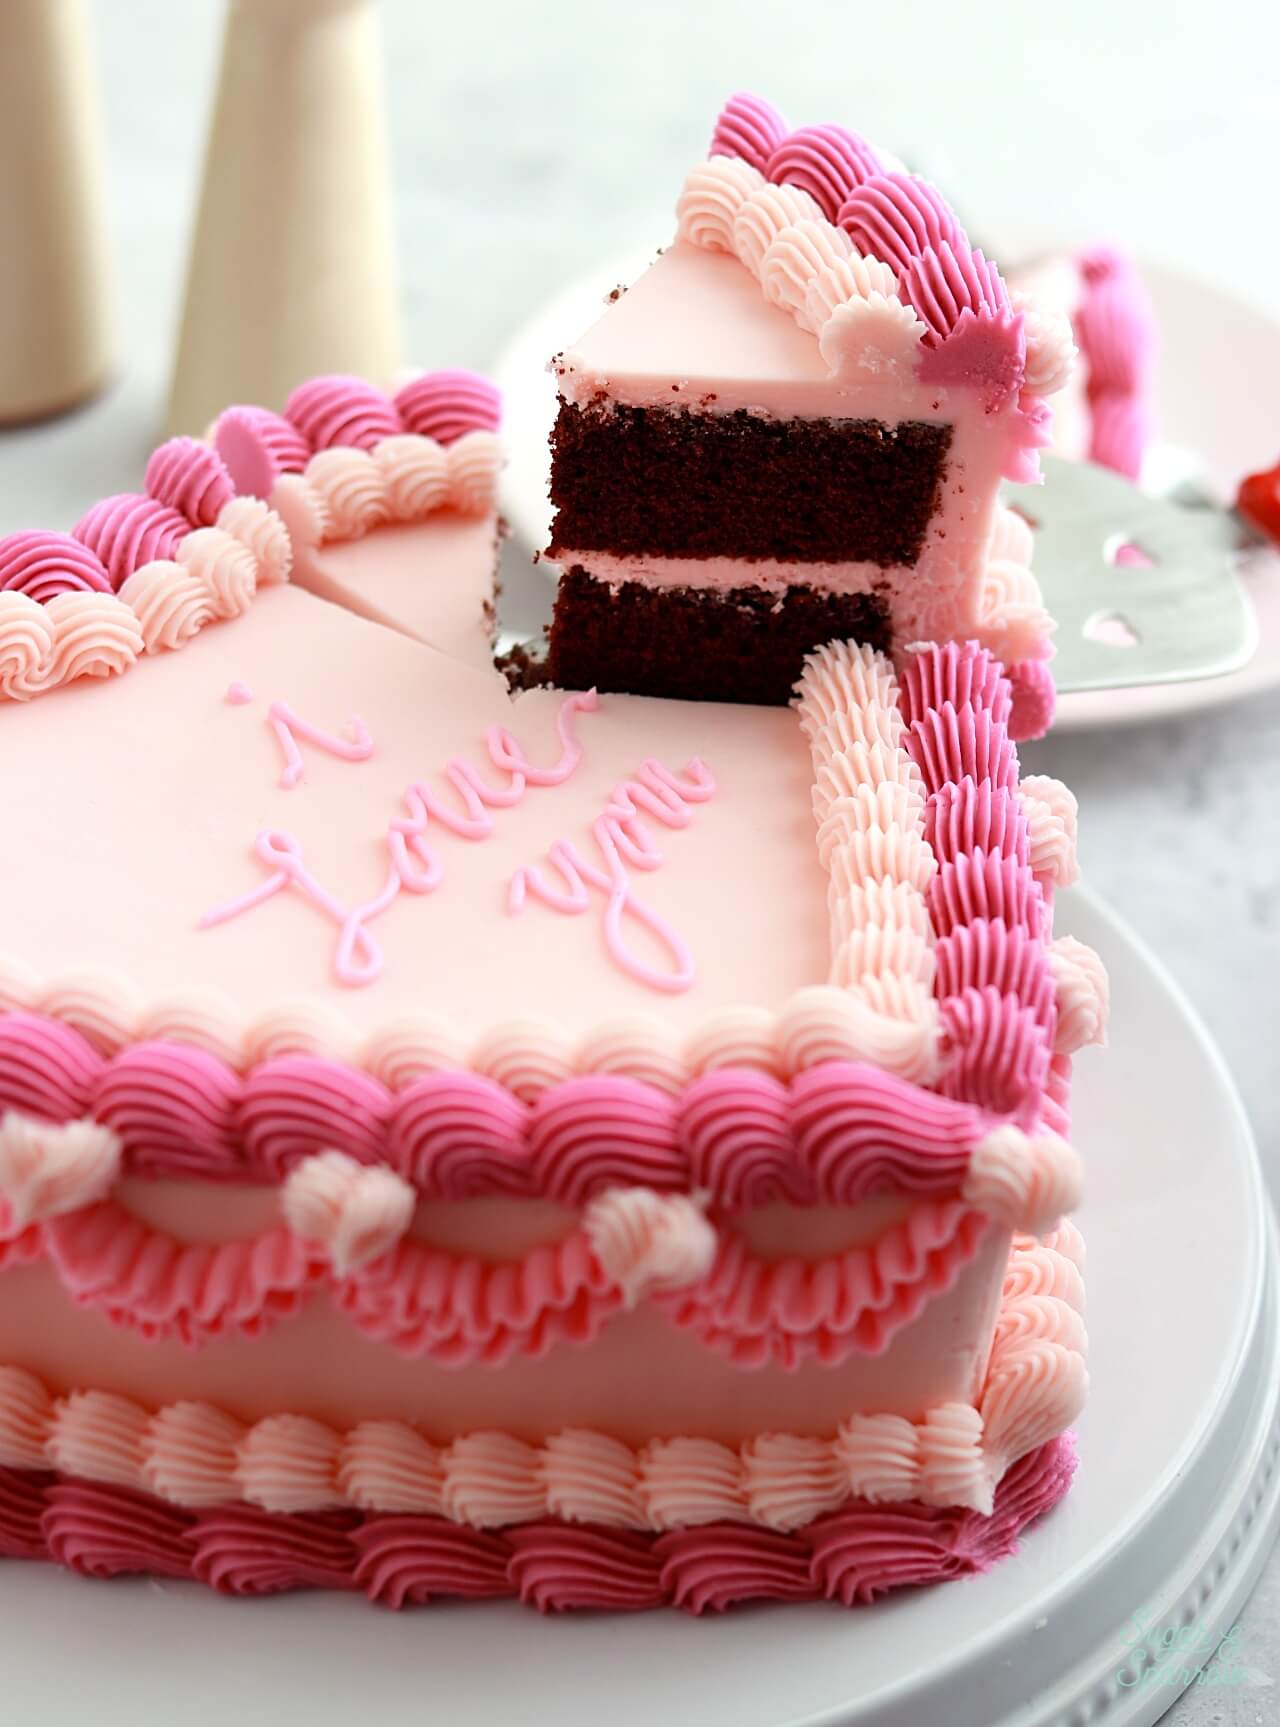
This design will work in all sorts of color palettes, but with Valentine’s Day around the corner I could not stop imagining an all-pink color palette. I used a mix of AmeriColor Deep Pink and Fuchsia to get three different shades of pink for this beauty. And I kept things simple-ish by only using 3 piping tips for all the vintage piping pictured (okay, four piping tips if you count the writing on top).
What Kind of Buttercream is Best for Vintage Piping?
The beauty of this tutorial is that you can use any kind of buttercream or frosting that you prefer to pipe cakes with. I used this American buttercream recipe (3 batches of it!) to create the design pictured. There are just a couple things to note regardless of what buttercream recipe you decide to use along with this decorating tutorial:
- Use the Right Buttercream Consistency. I find that it’s best to use a medium consistency buttercream when piping vintage designs. If the buttercream is too soft, the piping will look wilted. If it’s too stiff, the intricate designs will look jagged. The vanilla buttercream recipe I use is already medium-consistency, so you don’t have to alter it. If you want to learn more about how you can prepare your buttercream to be the perfect consistency for piping, read this blog post!
- Make a Lot of Buttercream. Vintage piping (large shell borders especially!) require a lot of frosting. I used about 9 Cups of buttercream for the 8-inch heart cake pictured. This was for assembling, filling, crumb coating, frosting, and piping the cake. There are few things more frustrating than running out of frosting in the middle of piping and having to drop everything to make more. So make a little more than you think you’ll need! You can always freeze the extras.

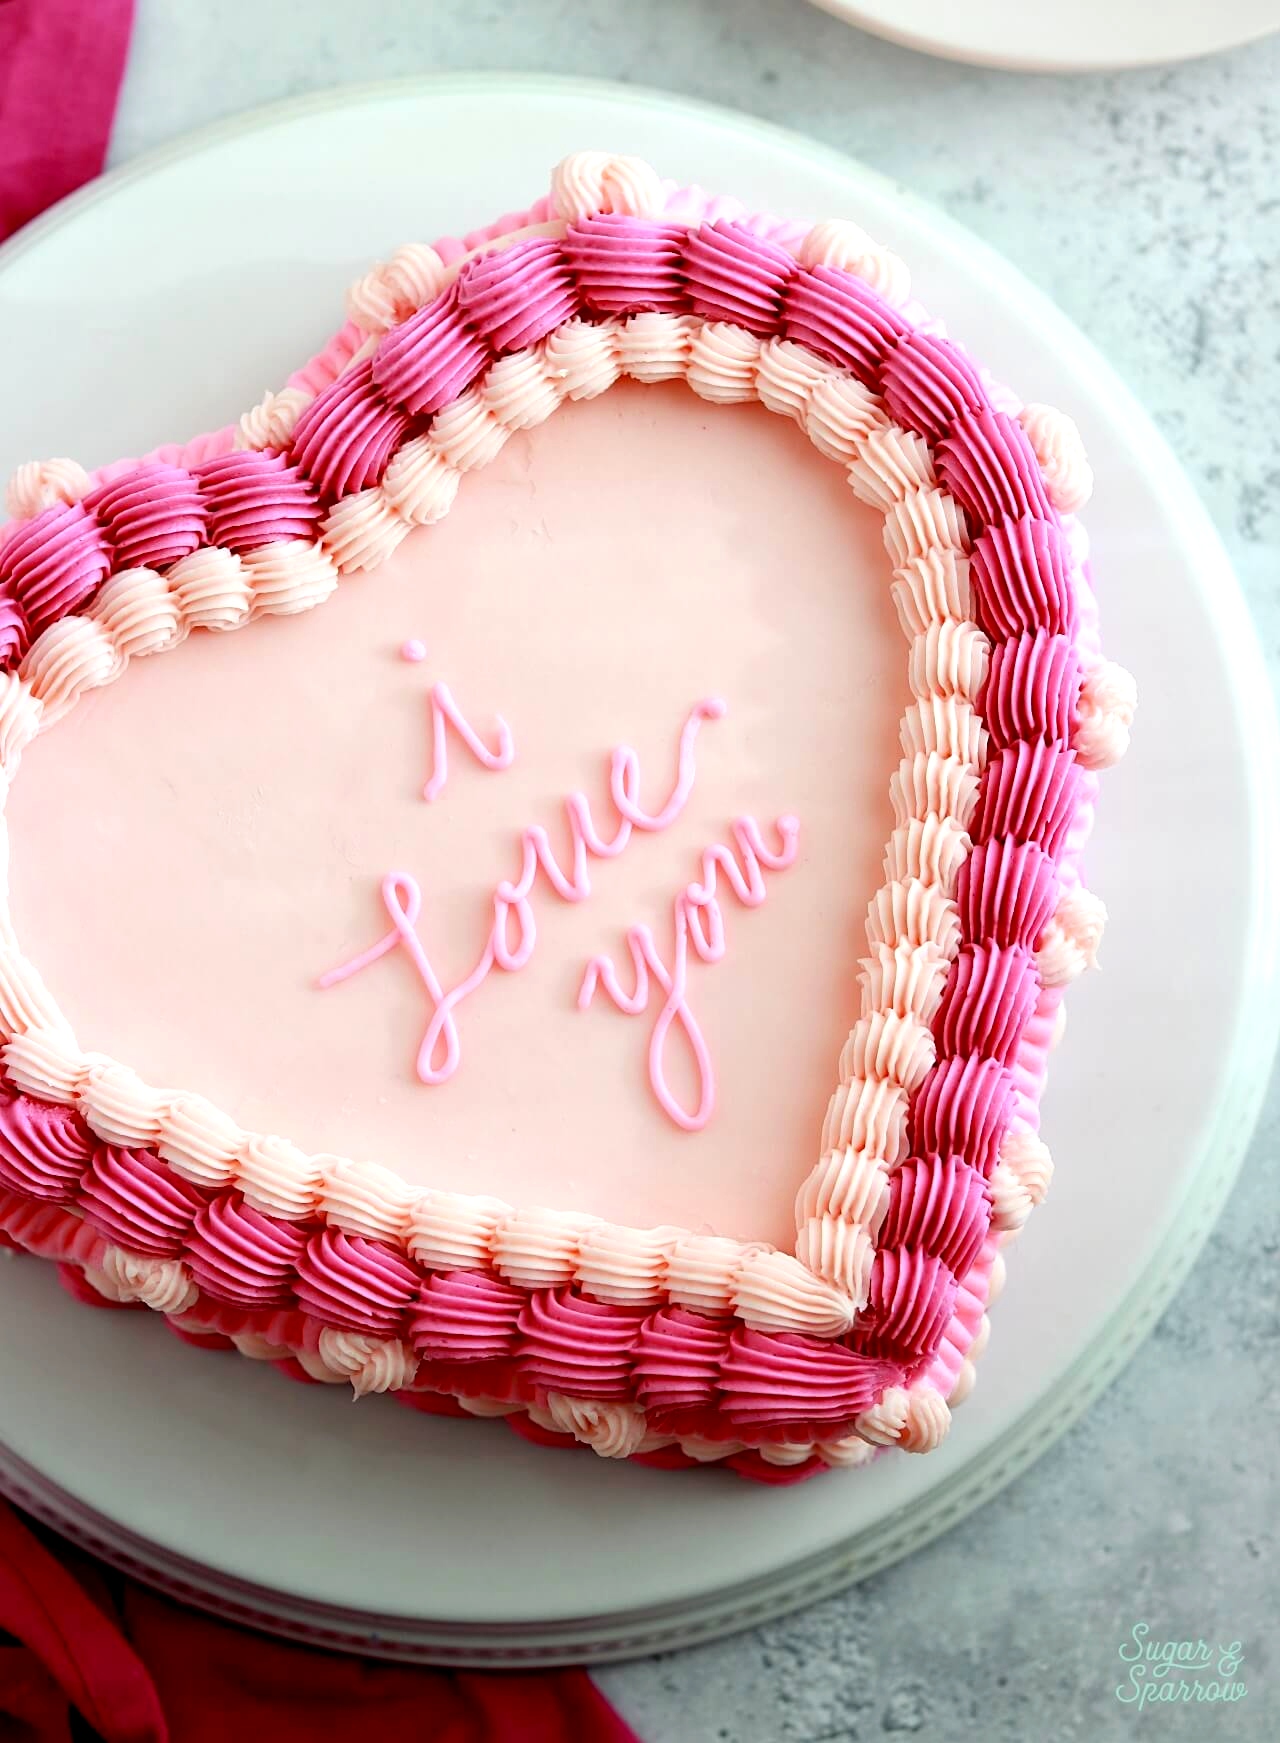
What to Write on a Vintage Heart Cake
I kept this cake pretty basic with “I love you” but there are so many fun things you can write depending on the event or occasion. Here are a couple ideas for you:
- Song lyrics. You’ll have to keep them short since there’s not a ton of room, but song lyrics are always fun if they’re meaningful.
- Classic Valentine’s Phrases. Think in terms of those little conversation heart candies and write “be mine,” “xoxo,” “you’re cool,” etc.
- Birthday Wishes. If the cake is for a birthday, aside from the classic “happy birthday,” you could alternatively write something based on their star sign (“aries baby”) or write out their age (“twenty one”).
- Look for the Perfect Message. If you’re struggling with writer’s block, scroll through these vintage cakes on Instagram and you might find the perfect message to fit the occasion.
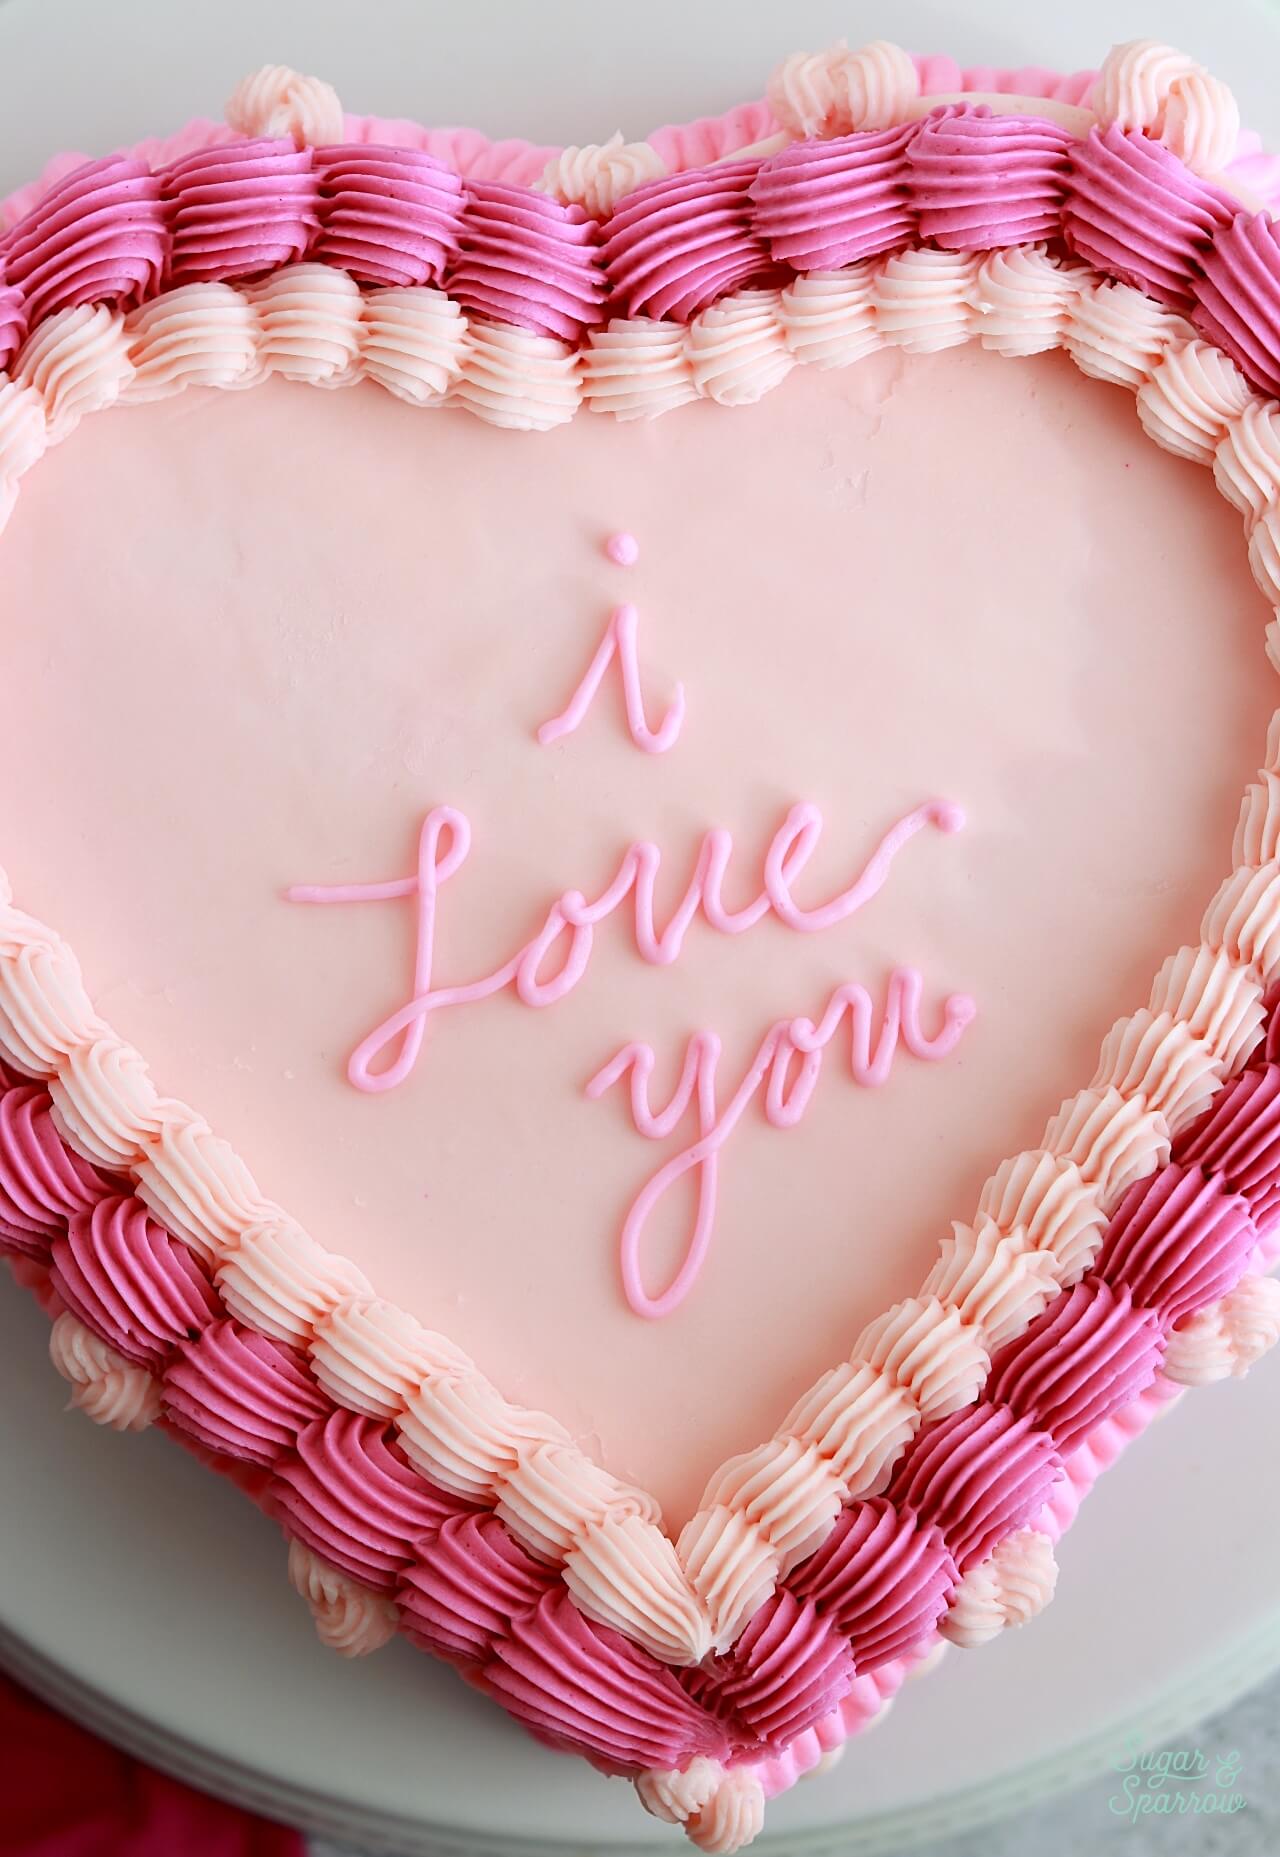
Here’s a video I made to show you the entire process of making this vintage heart cake, from creating the heart-shaped layers to frosting, piping, and writing on the cake.
If you love cake decorating tutorial videos like this one, be sure to check out my YouTube channel! I’ve got a growing collection of recipes, decorating tutorials, and Cake Basics over there. Hit the subscribe button on my page so you never miss a new video.
You Will Need
- 2 8-inch round cake layers, cooled and leveled
- Serrated knife
- 10×10 inch piece of cardboard and/or a 12-inch cake drum
- X-acto knife
- 3 batches (about 9 cups) of vanilla buttercream
- Food color gels (I used AmeriColor Deep Pink and Fuchsia)
- Cake turntable
- Icing smoother
- Angled spatula
- For vintage piping: Wilton Tips 4B, 32, and 102
- For writing on the cake: Wilton Tip 3
- Piping bags
Step 1: Create the Heart-Shaped Cake Layers
Place the first cake layer onto a cutting board. Use a serrated knife to make the two cuts that will end up being the pointed part of the heart. I usually just eyeball this. The two smaller pieces you cut off will become the rounded parts of the heart.
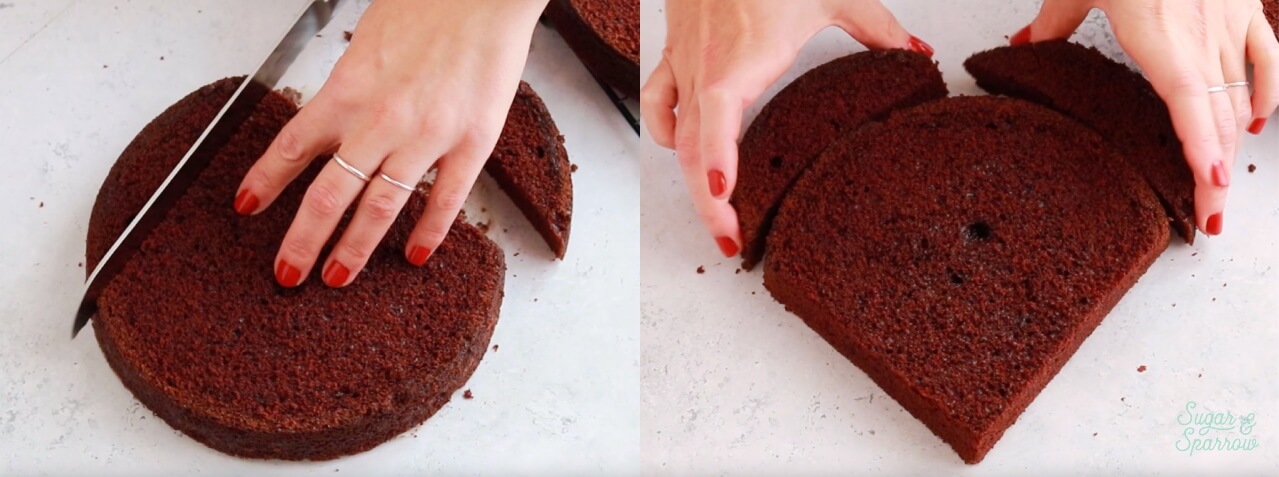
Repeat this step with the second cake layer. You can use the first cake layer you trimmed as a template to make things super easy.
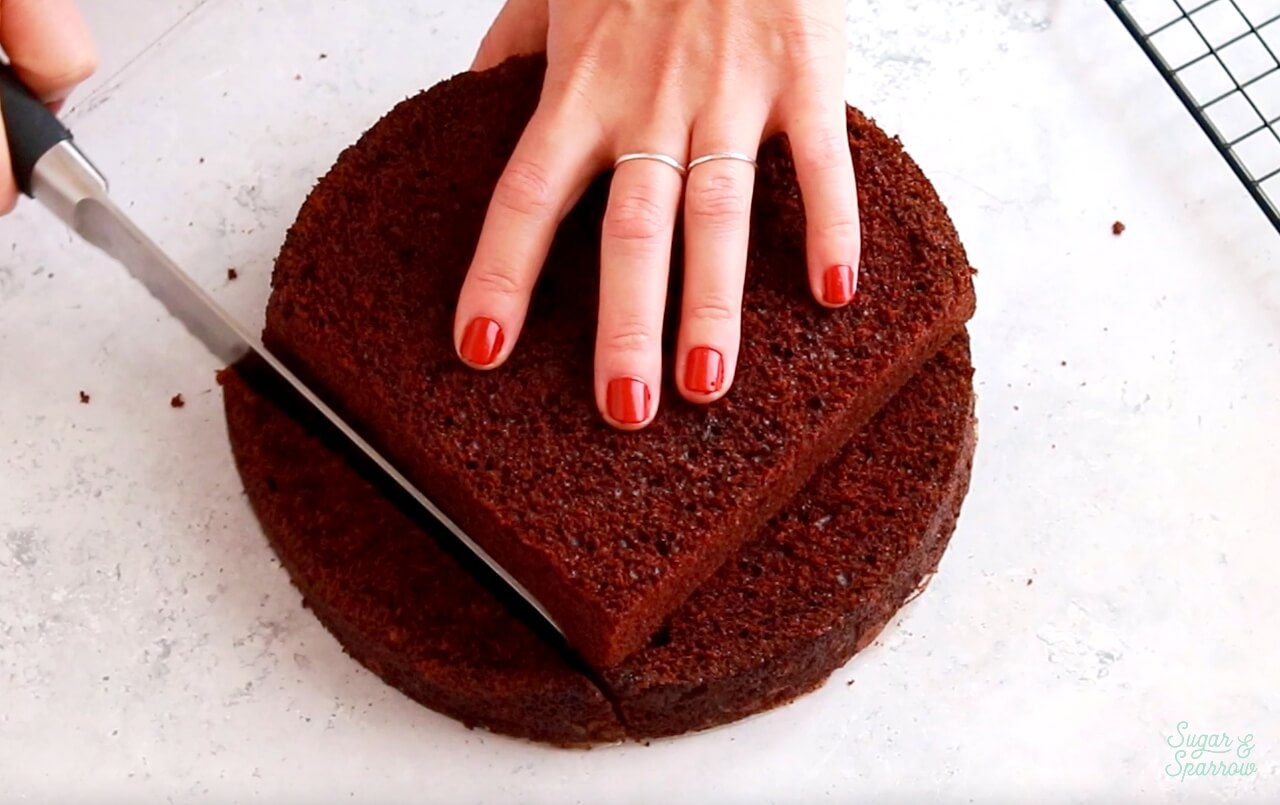
I ended up tracing the cut cake pieces onto a piece of cardboard, then cutting out the heart shape with an x-acto knife to create a cake board for building the cake on. You can skip the handmade cake board if you’re planning on assembling and serving the cake on a larger cake drum.
Step 2: Assemble & Crumb Coat the Cake
Place the cardboard base you created in Step 1 (or the cake drum) onto the turntable. Spread a little buttercream onto it before adding the first cake layer on top. Position the two curved pieces that you cut off in Step 1 to be the top of the heart, then pipe on some buttercream “glue” to adhere them.
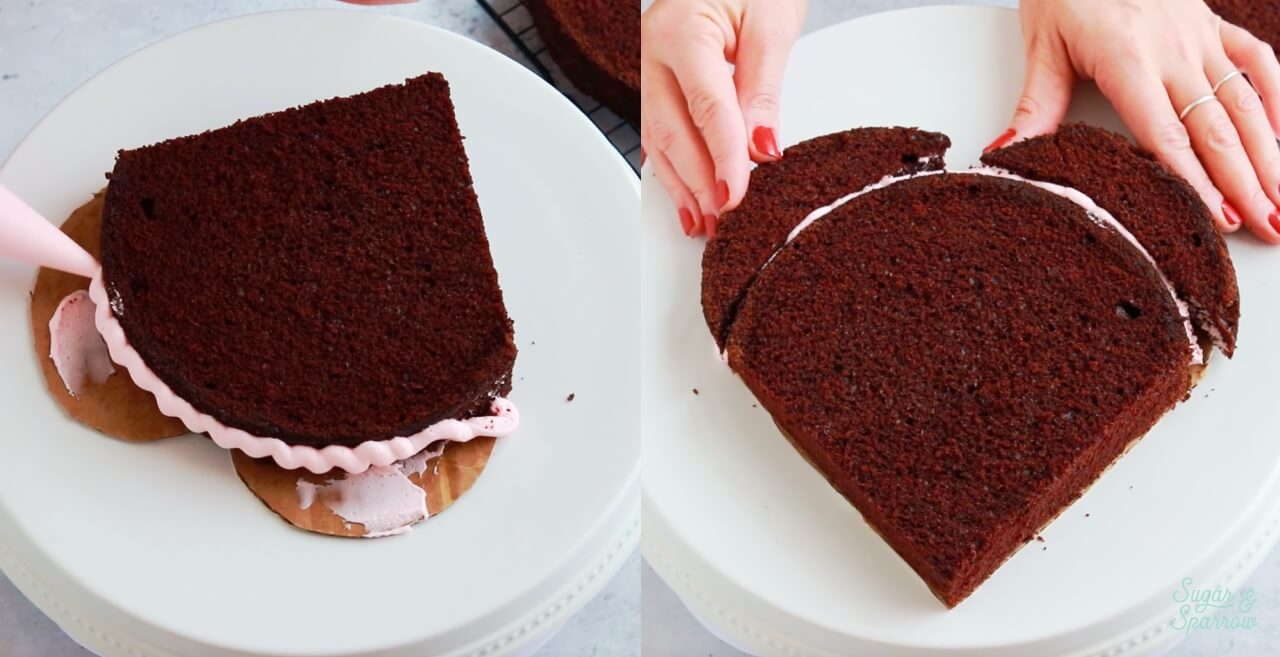
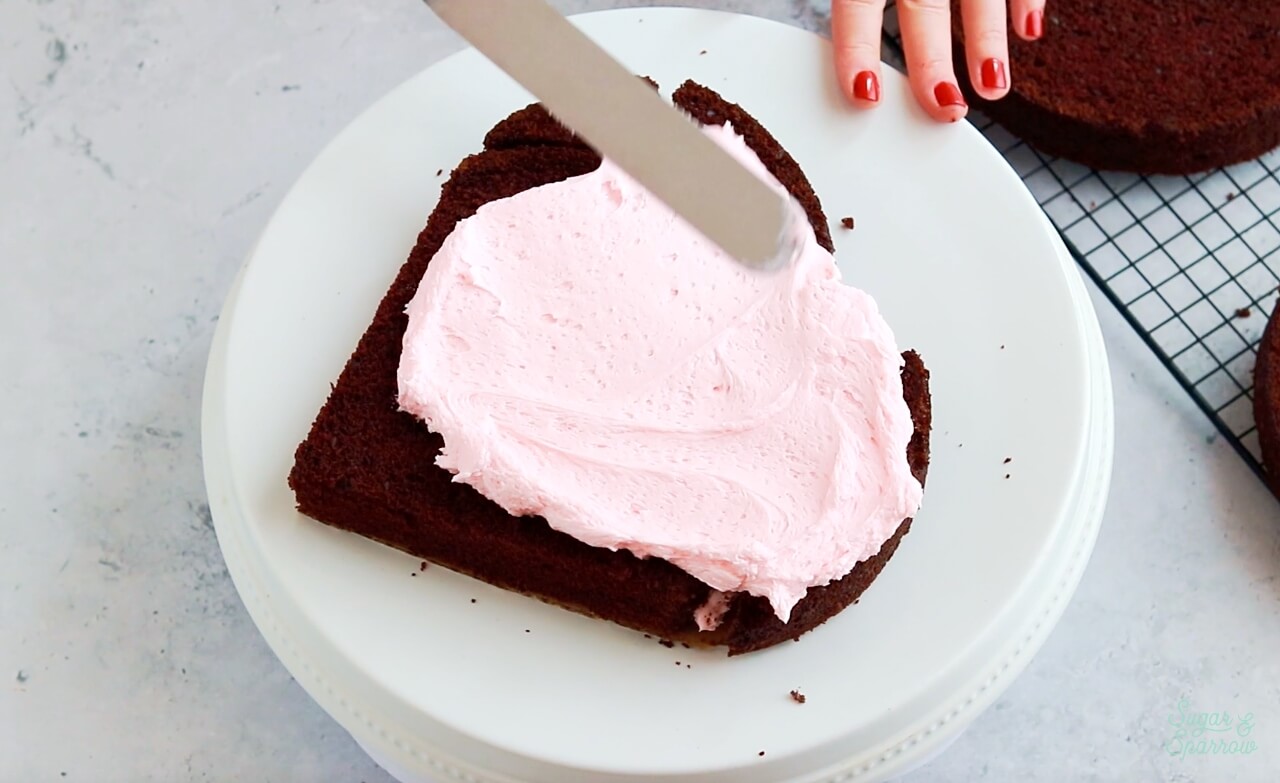
Add a few scoops of buttercream filling and smooth it down until it’s about ¼ inch. Position the next layer of cake on top, adhering the curved pieces of the heart with buttercream just like you did with the bottom cake layer.
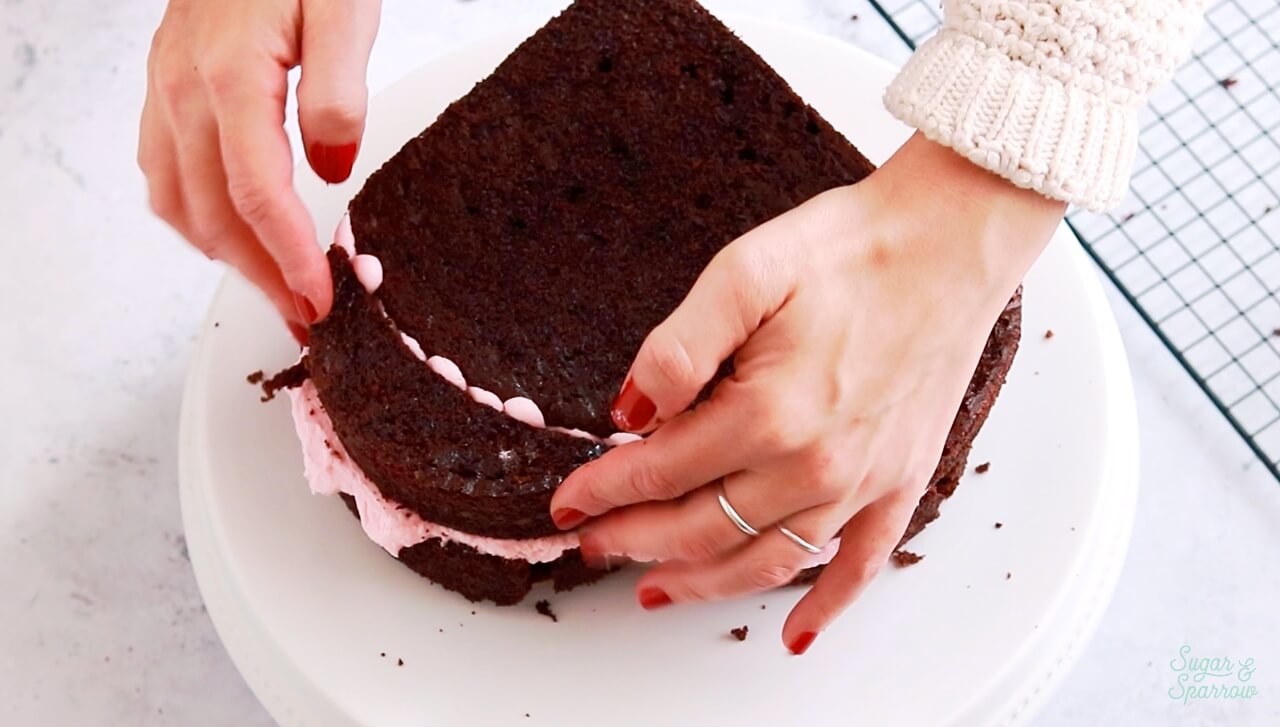
Crumb coat the cake with a thin layer of buttercream to really emphasize the shape of the heart and lock in all the crumbs. I ended up using a paring knife to carve out a more emphasized “v” shape at the top of the cake and crumb coating over that.
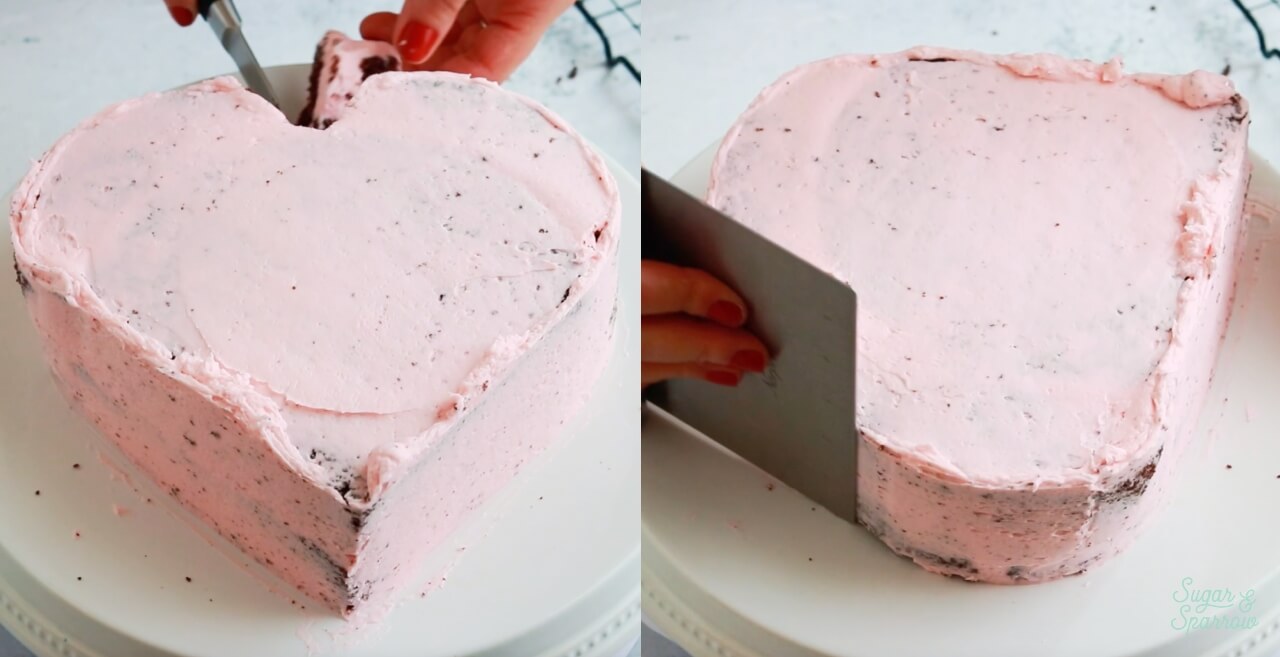
Place the crumb coated cake into the refrigerator for at least 30 minutes to let the frosting firm up.
Step 3: Frost the Cake
With the chilled, crumb coated cake on the turntable, create a smooth buttercream finish with the buttercream. You’ll use the same process for frosting and smoothing the cake as you would with a round cake: add frosting to the top of the cake and smooth it down with an angled spatula, then frost the sides of the cake and smooth them with an icing smoother while you turn the turntable.
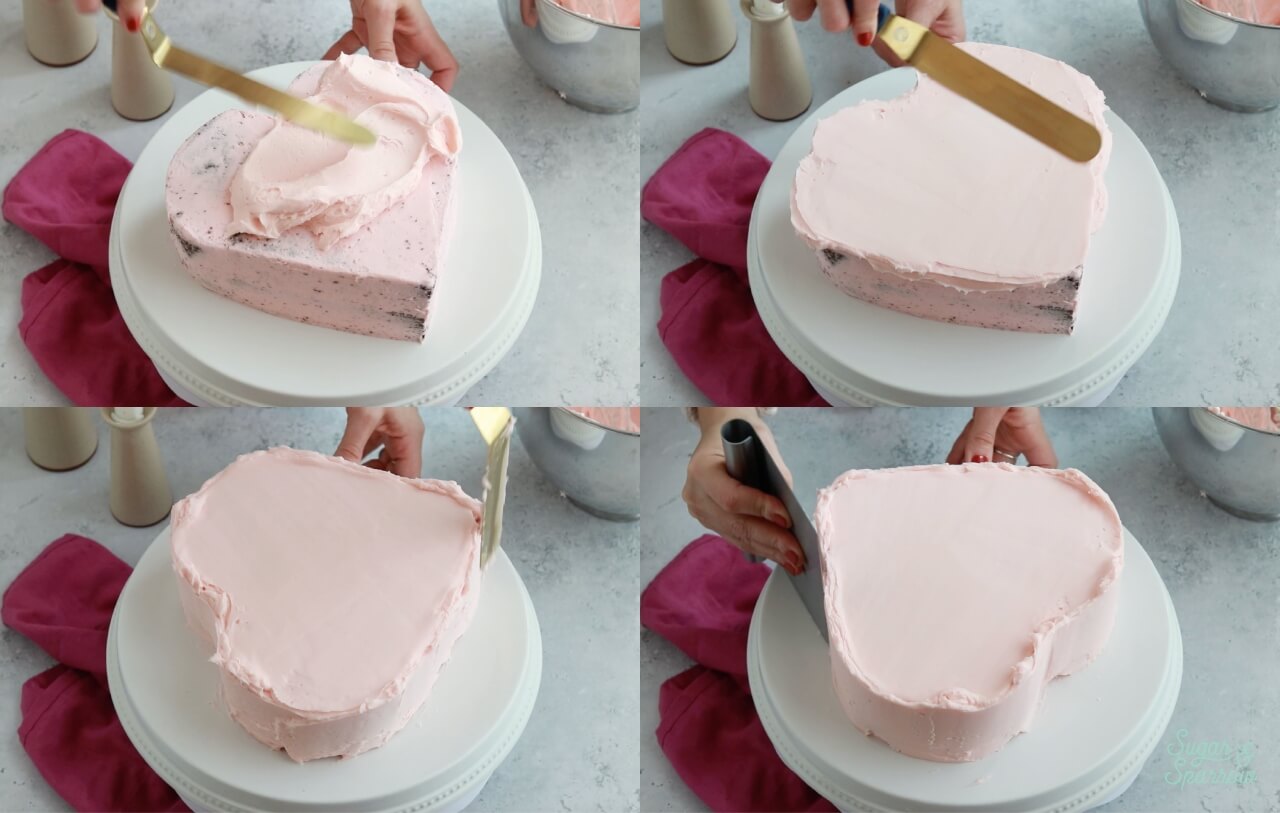
Use an angled spatula to swipe the buttercream “crown” that forms along the top edges inward to create sharp edges.
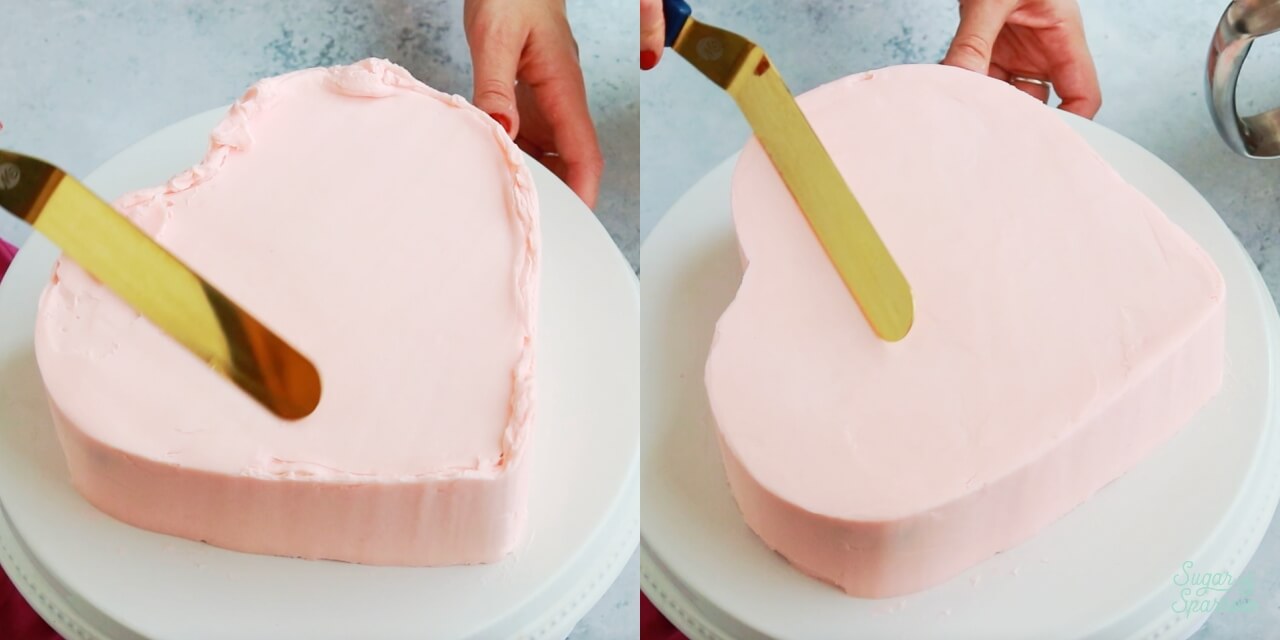
When you’re finished frosting the cake, add it back to the refrigerator for at least 20 minutes to let the frosting firm up while you color the remaining buttercream and prepare your piping bags.
Step 4: Color the Buttercream (Optional)
I started with 3 batches (about 9 Cups) of my vanilla buttercream recipe which was tinted pink with one drop of AmeriColor Deep Pink.
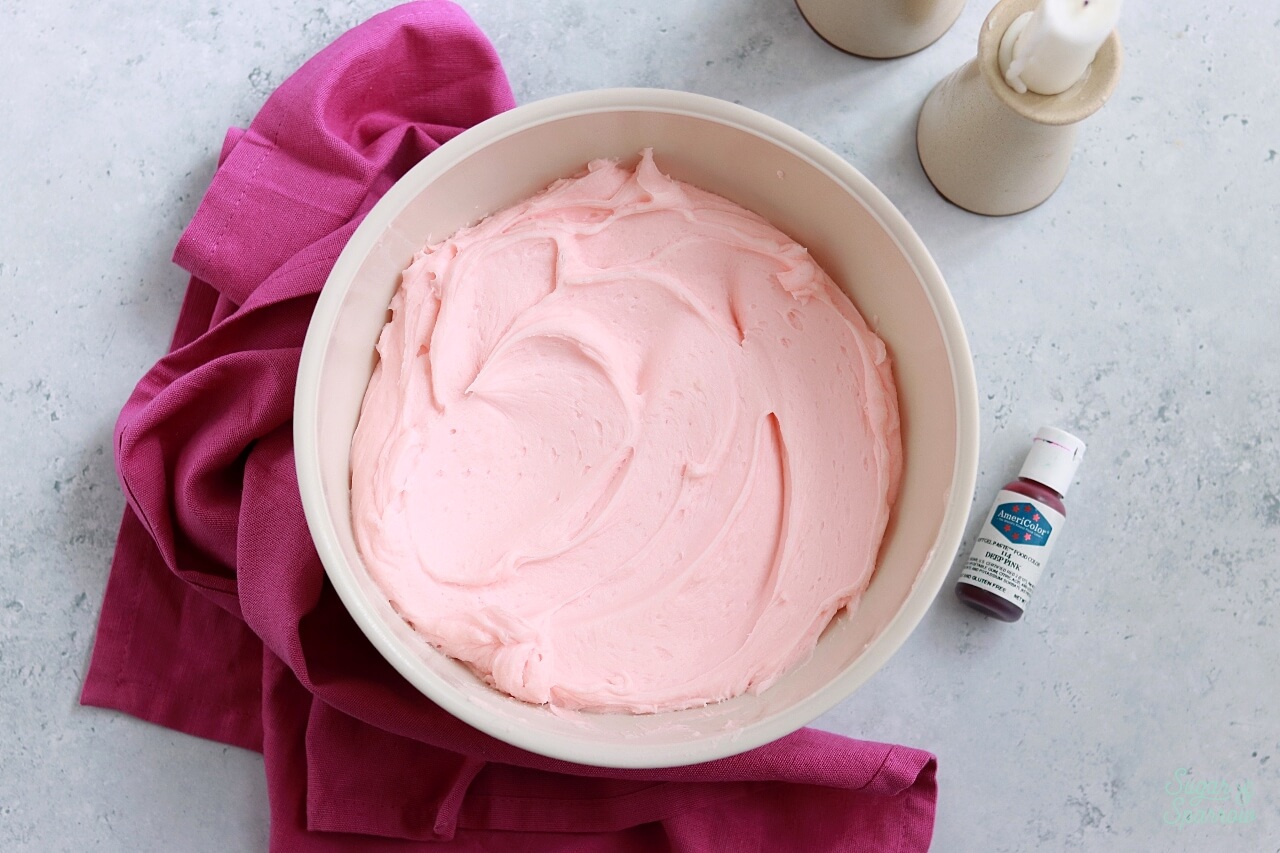
After assembling, crumb coating, and frosting the cake, I divided the remaining buttercream into 3 separate bowls. I added slightly more to one of those bowls (roughly ½ of the buttercream in one bowl and ¼ of the buttercream in each of the other bowls). In the bowl with the most buttercream, I used 2 drops of AmeriColor Fuchsia + 2 drops of AmeriColor Deep Pink to create a bold fuchsia color. In the second bowl, I used 2 drops of AmeriColor Deep Pink to create a darker pink color. I kept the third bowl the same light pink color I started with.
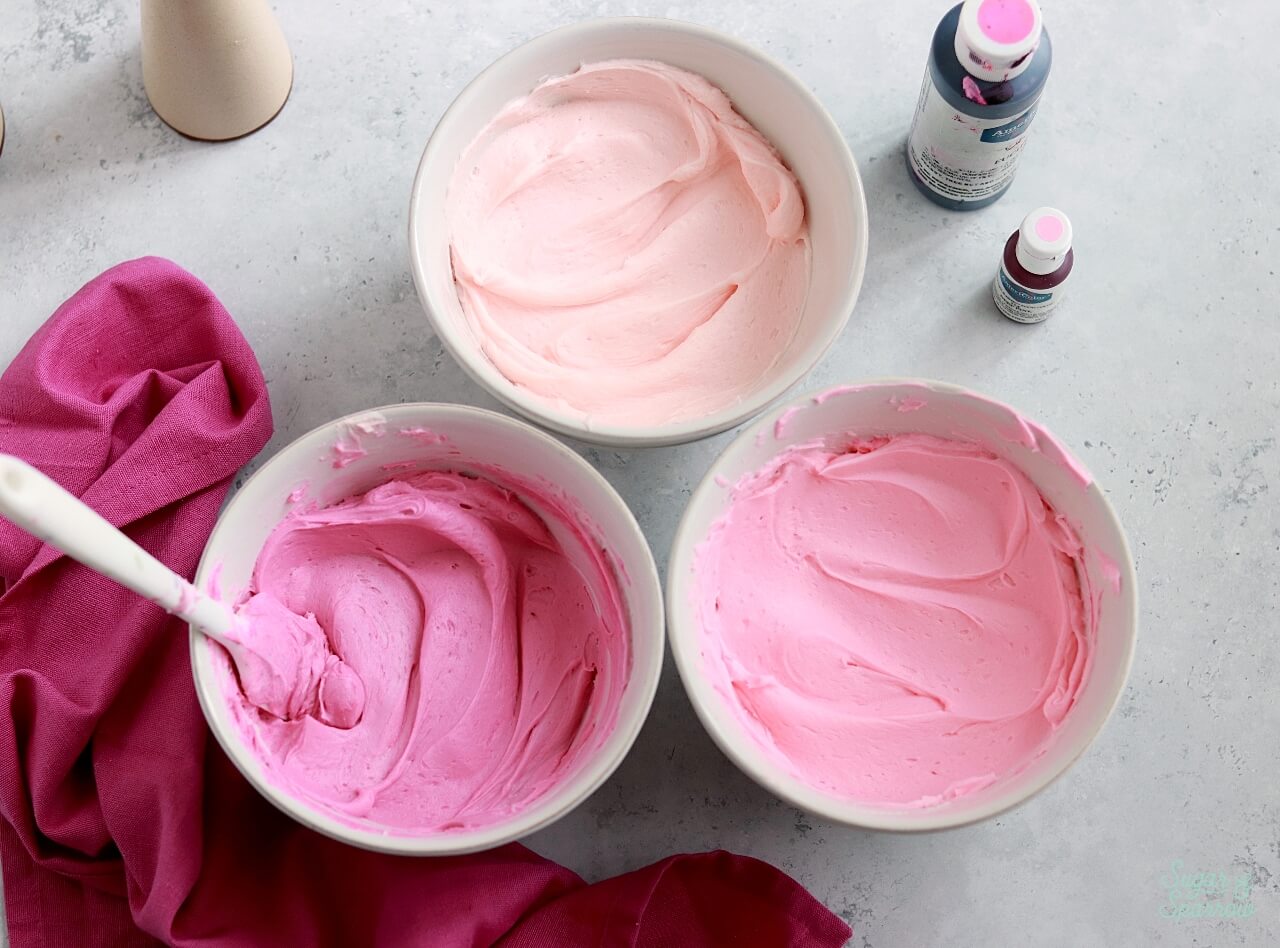
Add the darkest pink buttercream (or the bowl with the most buttercream) to a piping bag fitted with Wilton Tip 4B. This will be used to pipe the large shell borders, which is why it requires more buttercream than the other piping bags. Add the lightest pink buttercream to a piping bag fitted with Wilton Tip 32 (for the small shell borders) and the mid-toned pink buttercream to a piping bag fitted with Wilton Tip 102 (for the ruffles).
Step 5: Create the Vintage Piping
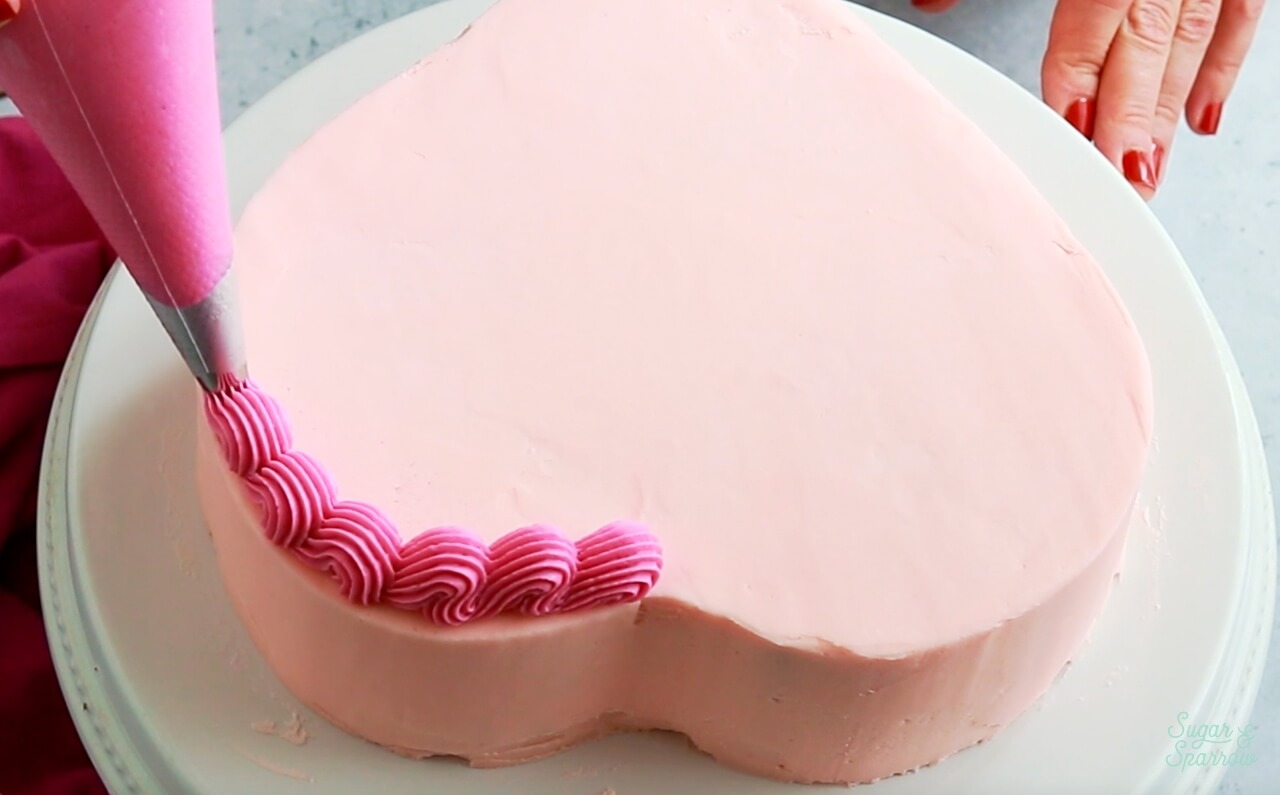
Place the chilled, frosted cake on the turntable. Starting with the top edge of the cake, pipe a large shell border using Wilton Tip 4B. To pipe a shell border, hold the bag at a 45 degree angle and squeeze the piping bag until the buttercream fans out and forces the tip upward. Gradually relax pressure as you lower the tip and pull the bag toward you to create a tail. Pipe the next shell directly onto the tail of the first.
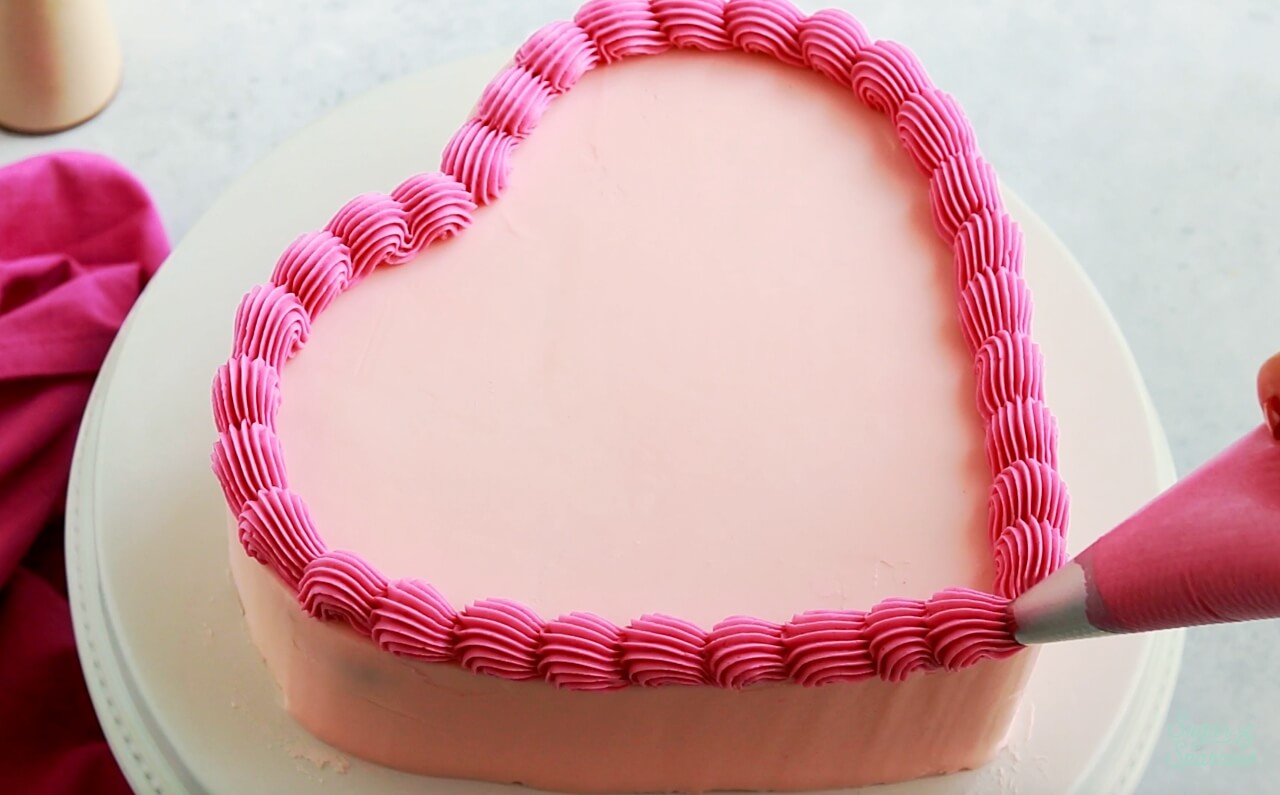
Repeat the large shell border along the bottom edge of the cake.
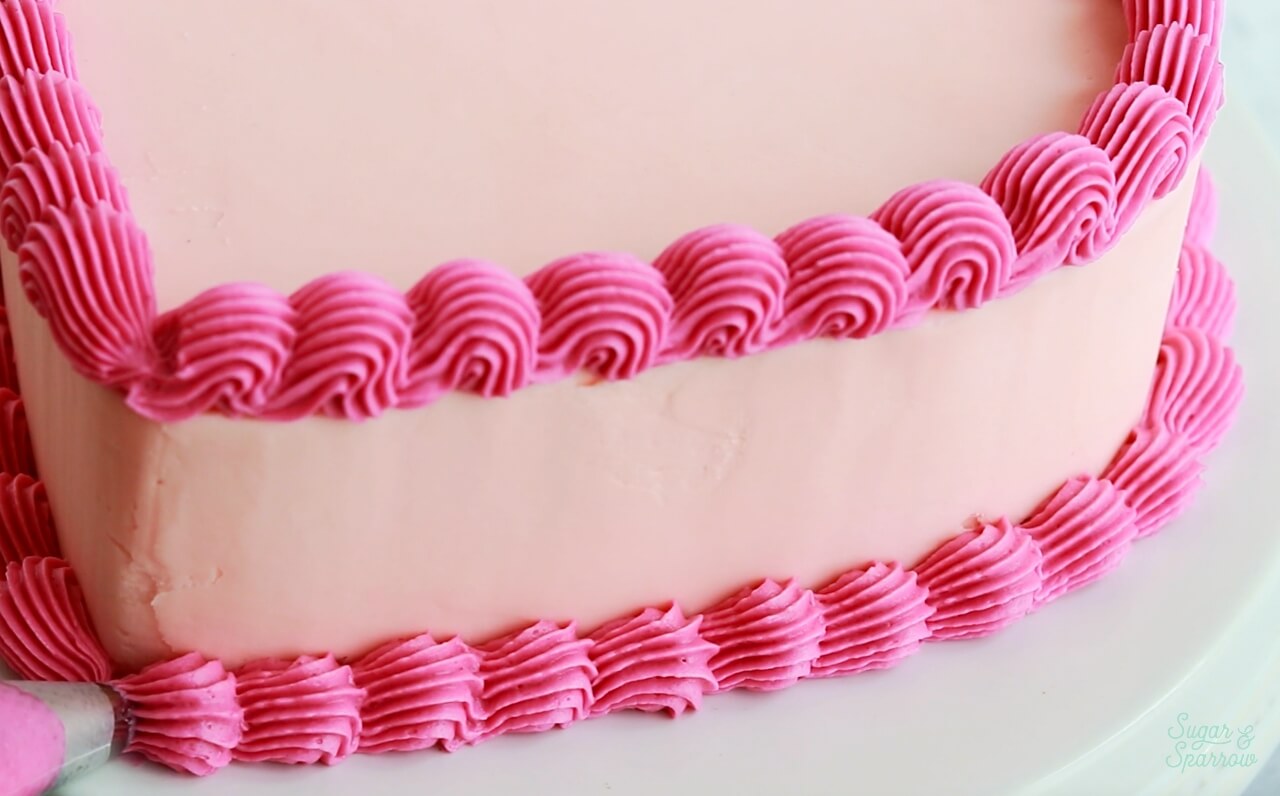
Starting just inside that large shell border on top of the cake, pipe a smaller shell border using Wilton Tip 32. Then, repeat the process next to the large shell border on the bottom of the cake.
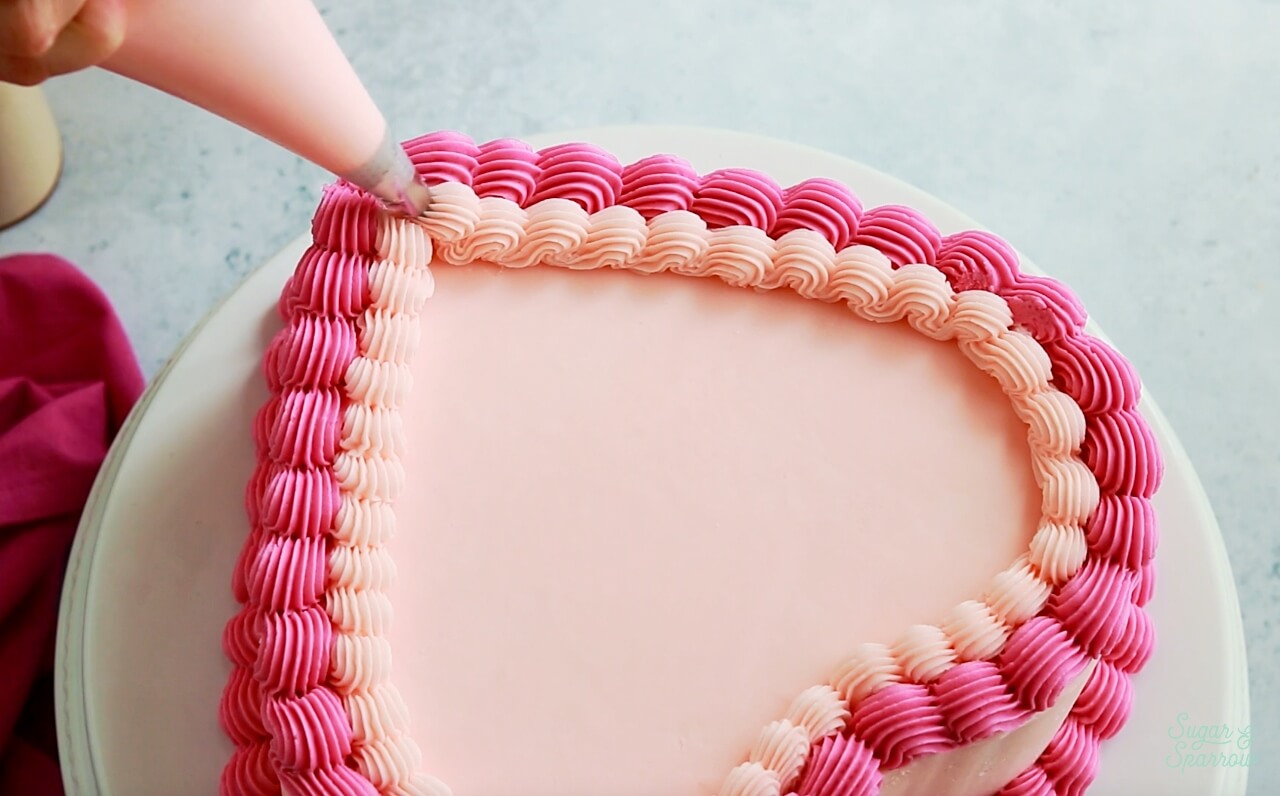

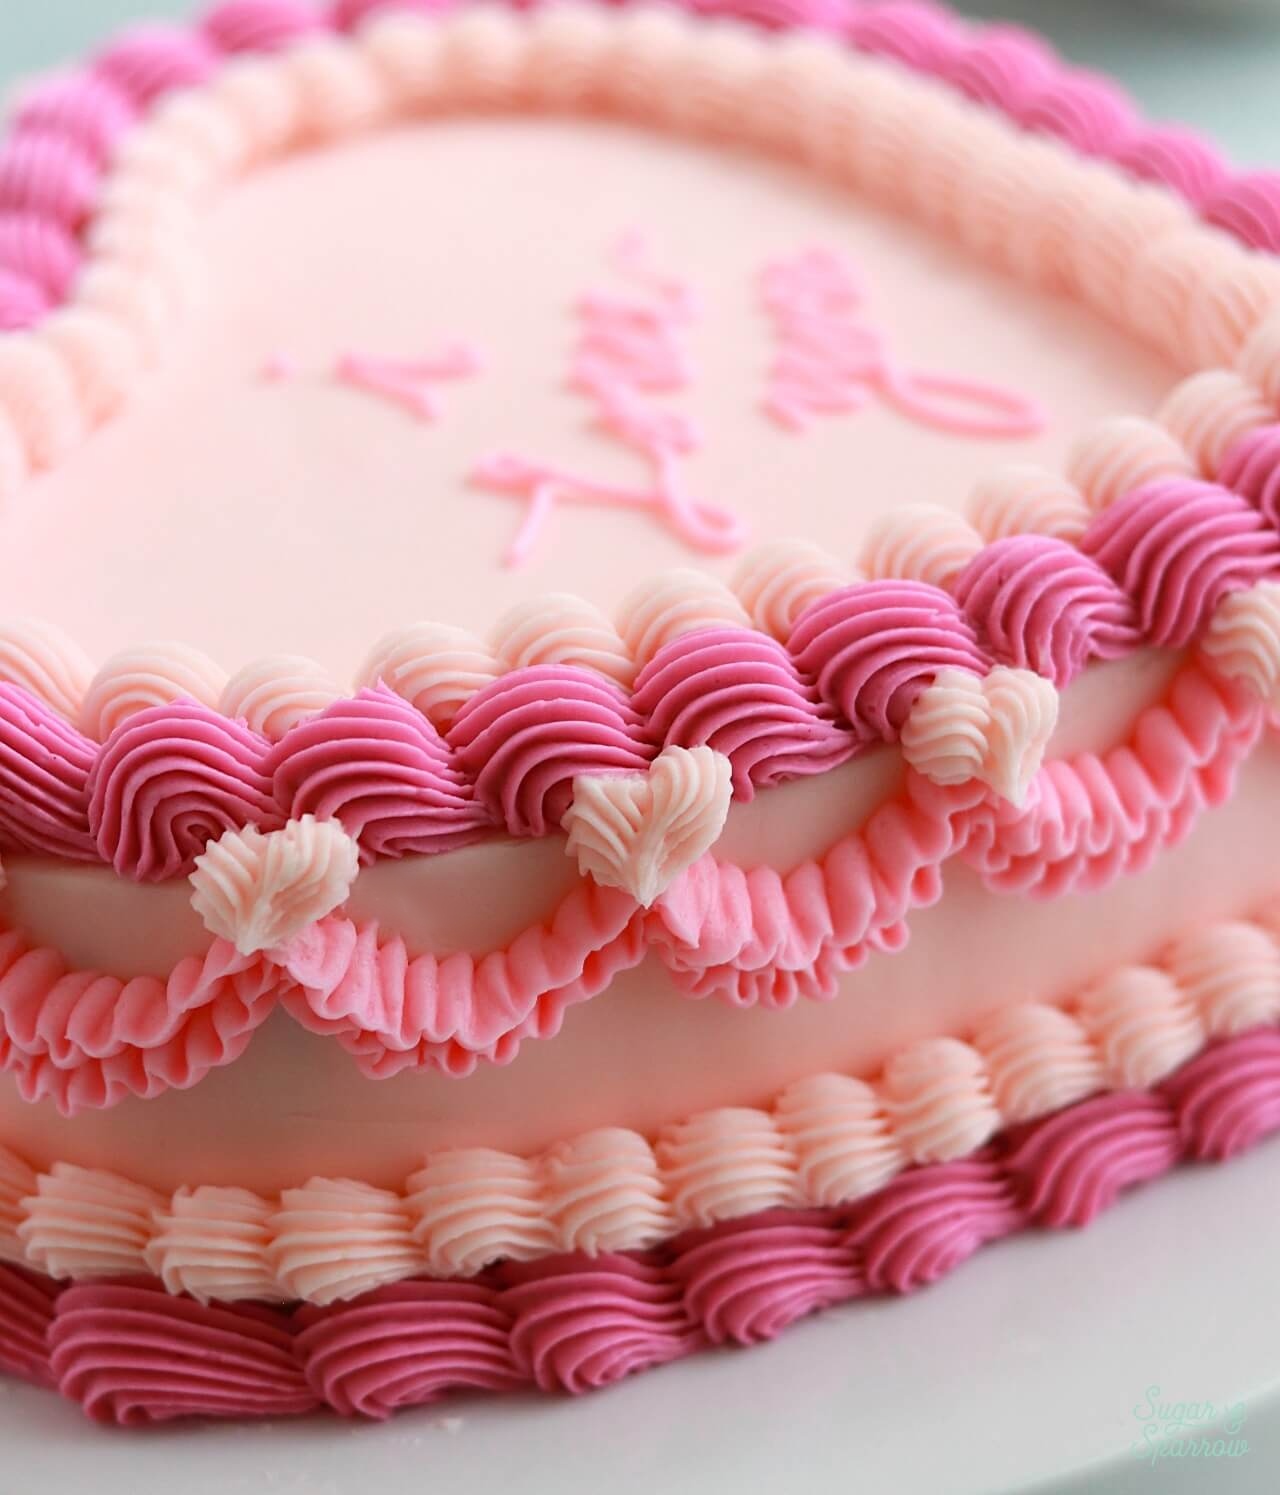
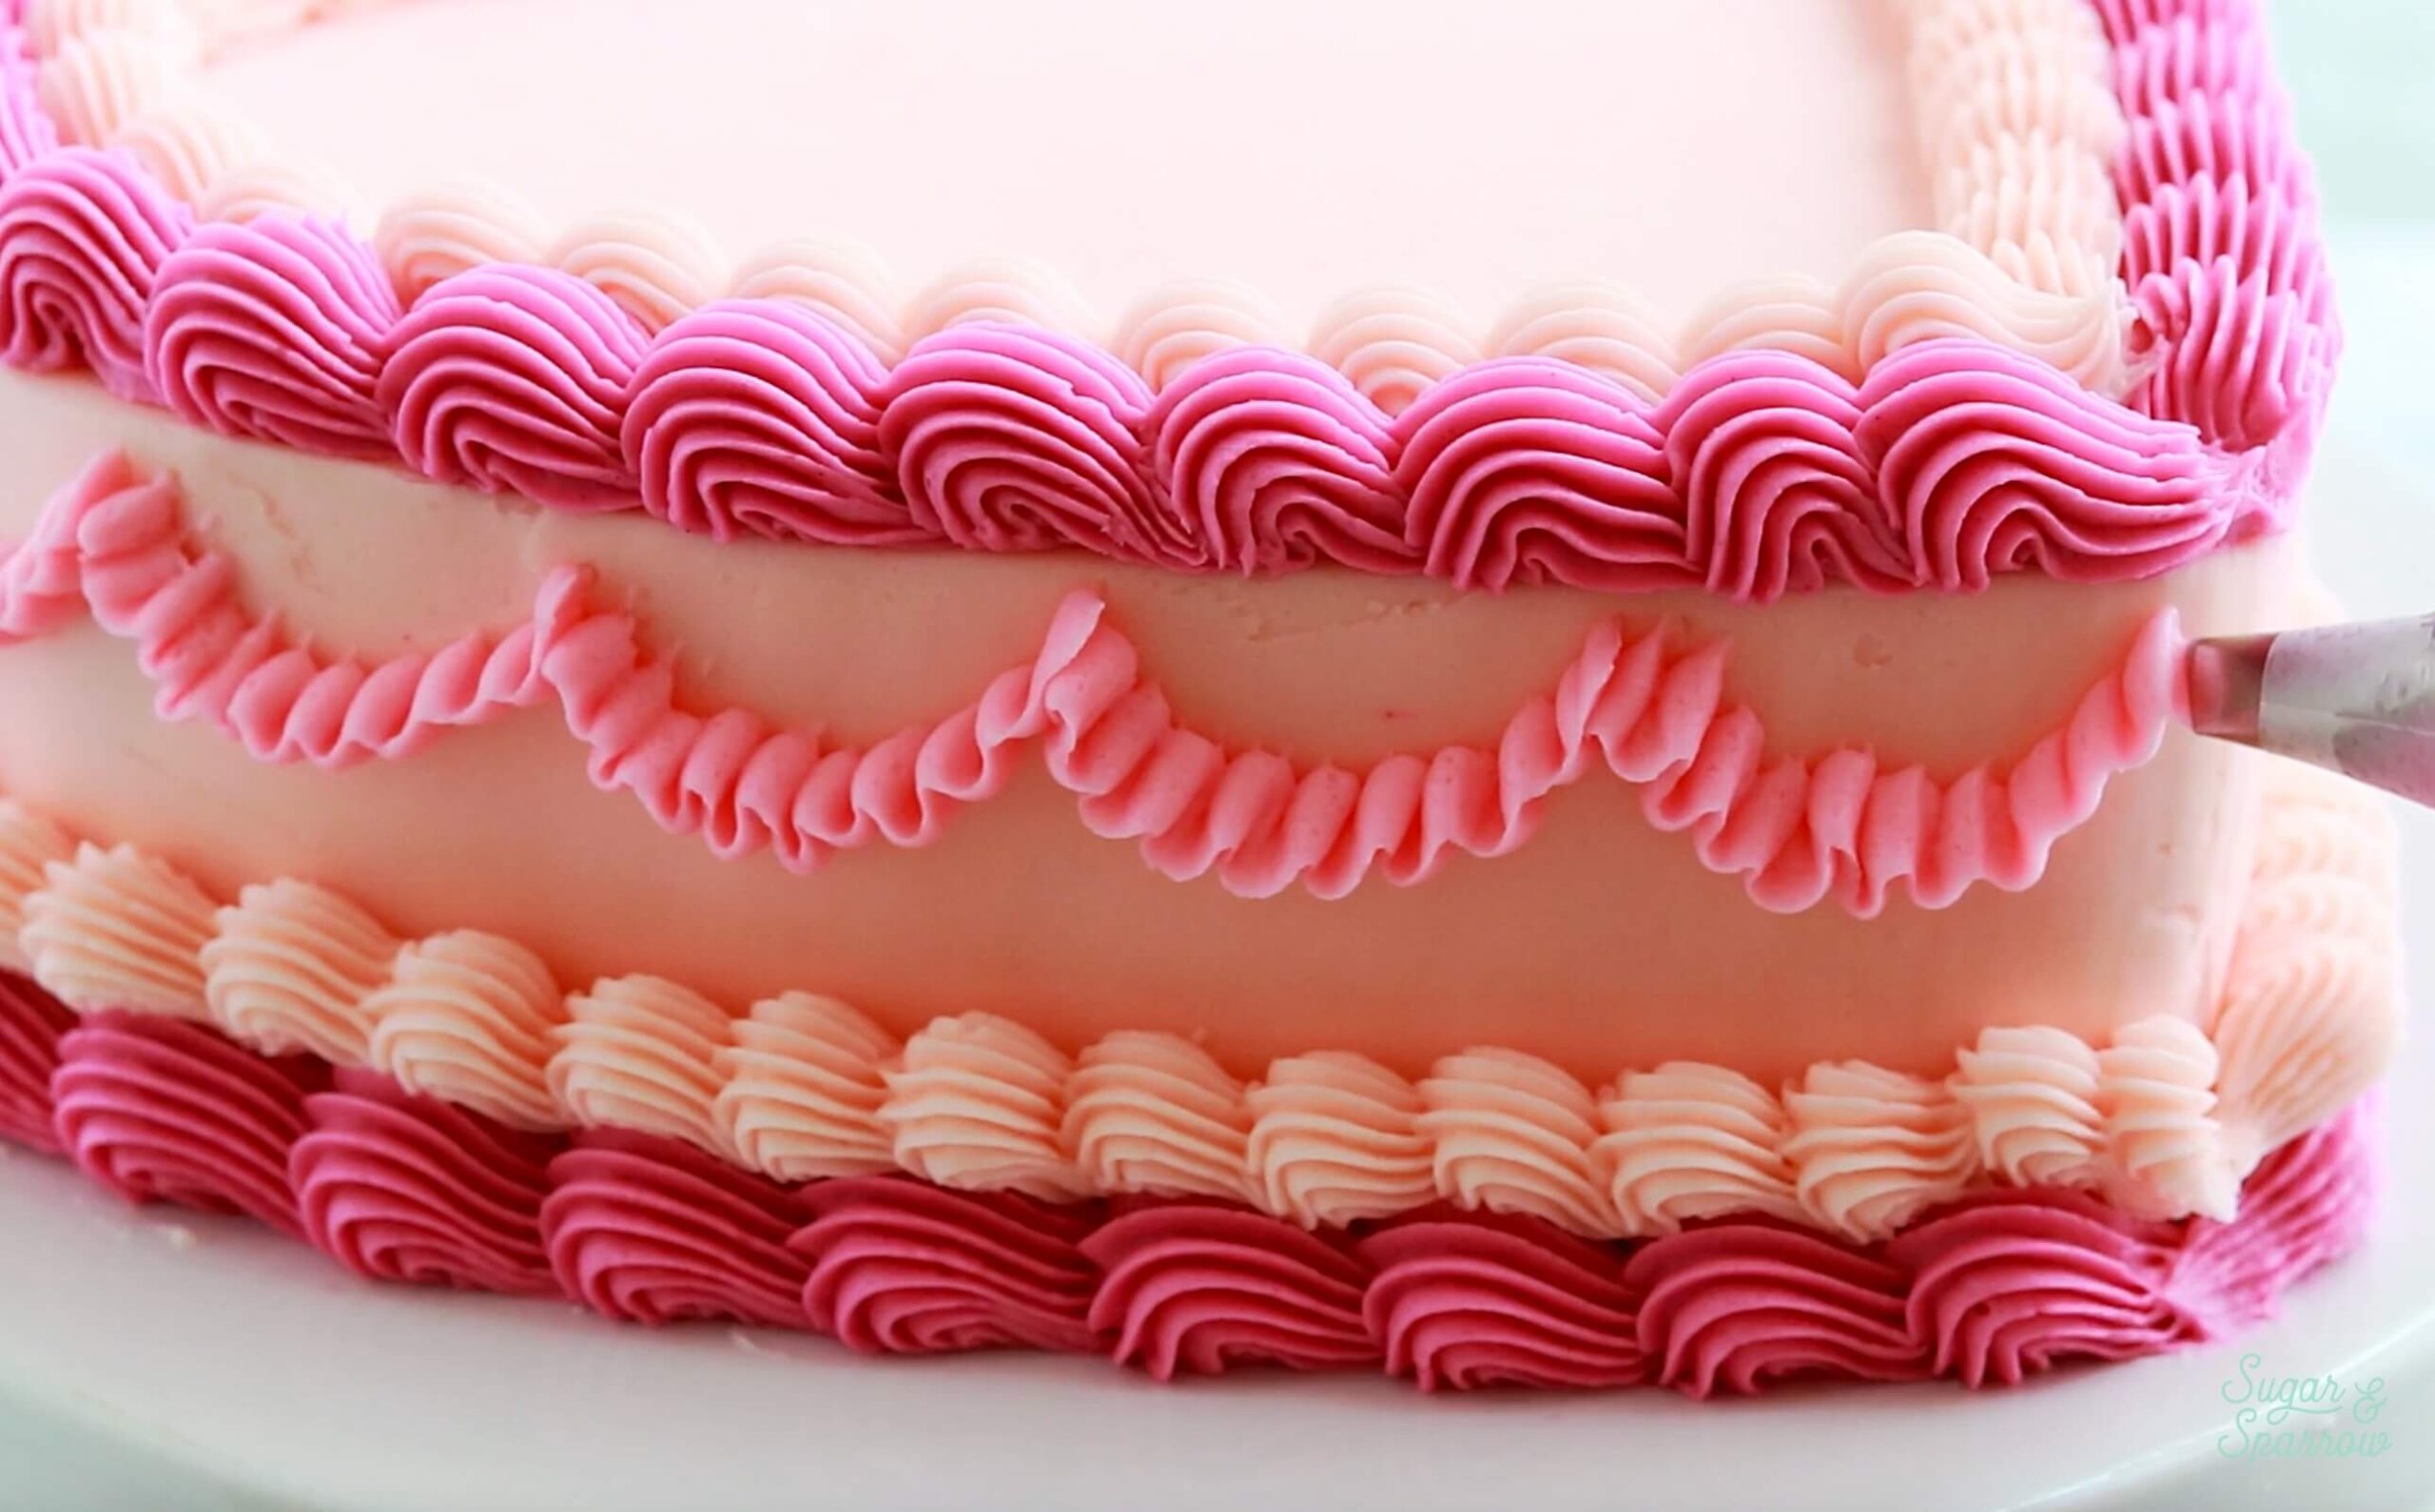
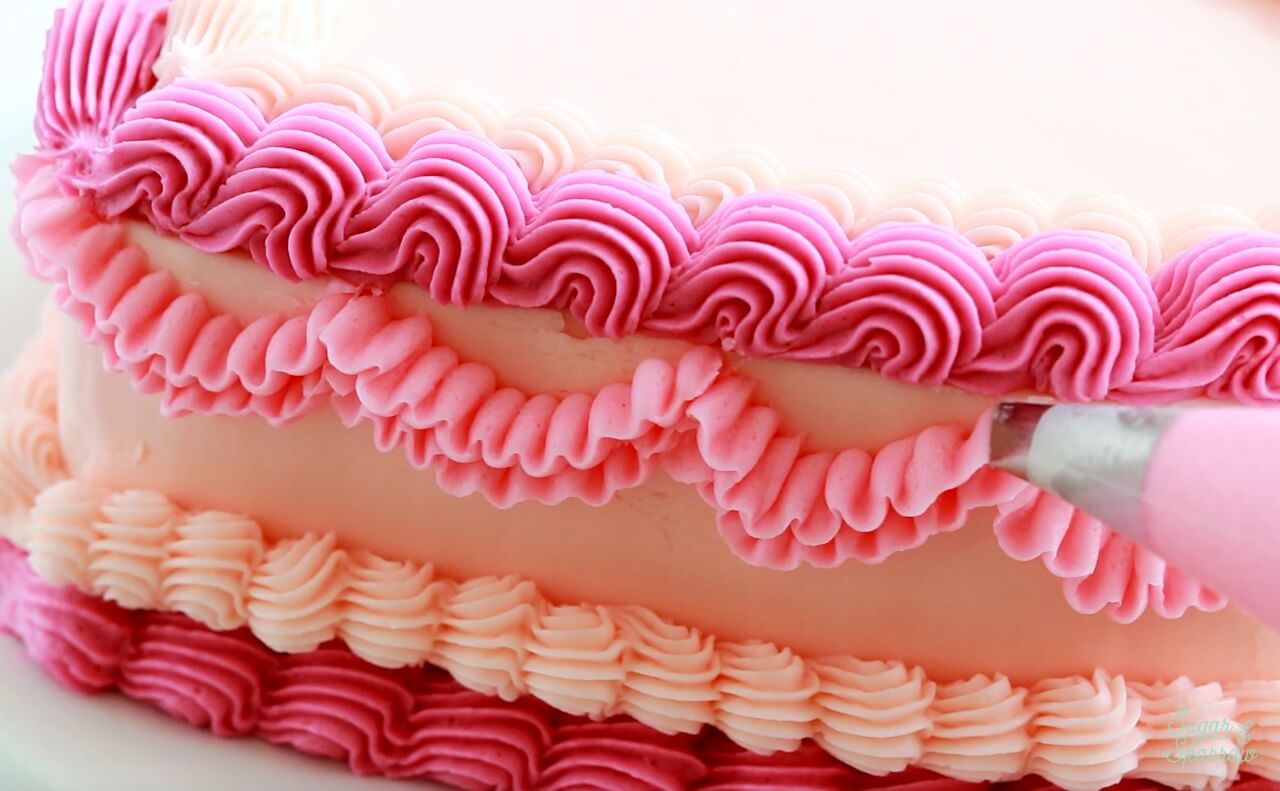
Next, pipe the double ruffle garlands on the sides of the cake using Wilton Tip 102. To pipe a ruffle garland, hold the piping bag at a 45 degree angle to the surface of the cake with the skinny end of the tip facing away from the cake. Squeeze the bag as you move your hand slightly up and down to create the ruffle texture as you pipe a semicircle. Release pressure on the bag once you’ve ended the ruffle where you desire.
Repeat the process on top of each ruffle garland to create a double ruffle garland.
I totally eyeballed where these ruffle garlands began and ended, but if you’d rather be more prepared you can use a circular cookie cutter to create a template that you can follow (like I did in this blog post).
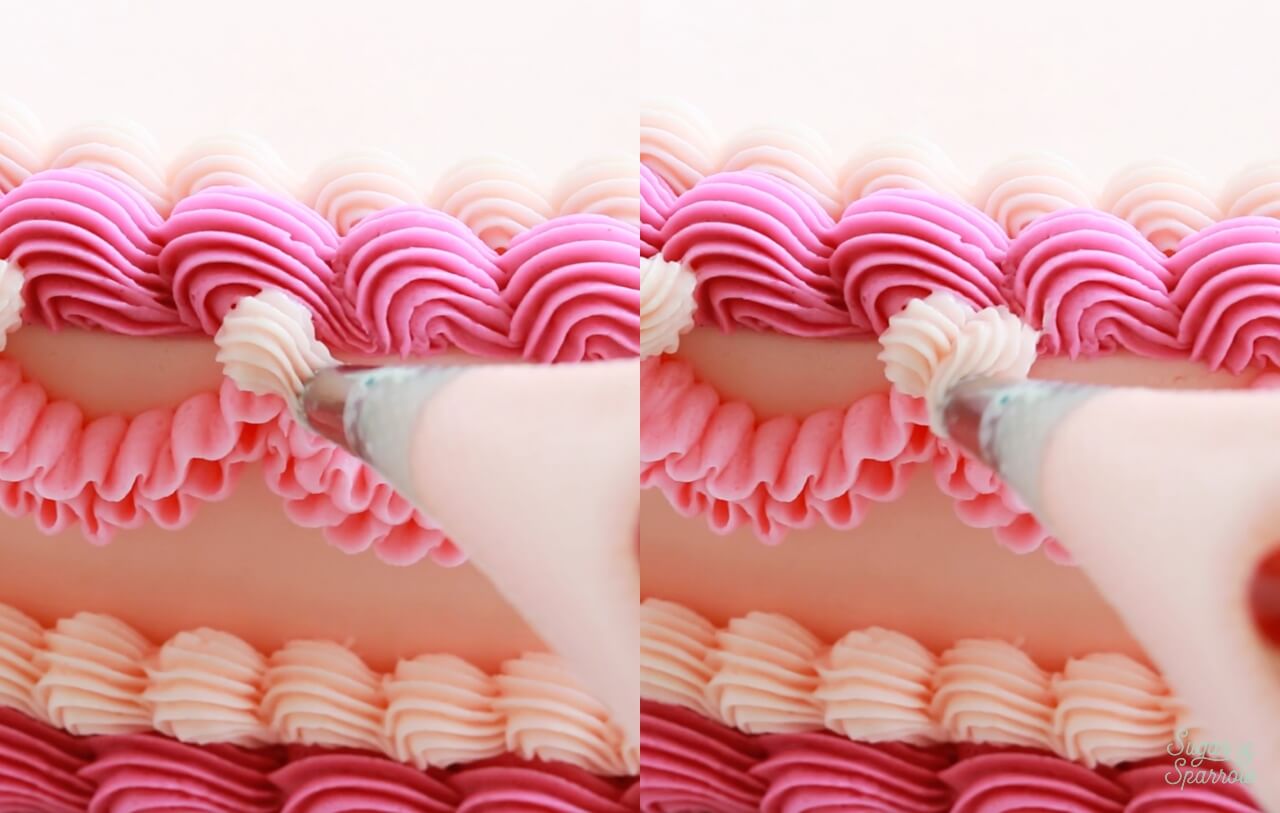
Finally, connect each ruffle garland with a simple piped heart using Wilton Tip 32. I basically piped two overlapping shells to create these little heart shapes.
Step 6: Write a Message
Add the remaining mid-toned pink buttercream to a piping bag fitted with Wilton Tip 3 (or you could also use a coupler with the original piping bag and replace the piping tip). Write out your message on top of the cake. Again, I eyeballed this and actually ended up hating where the first word was placed, so I scraped it off with a spatula and re-piped it to make the message centered.
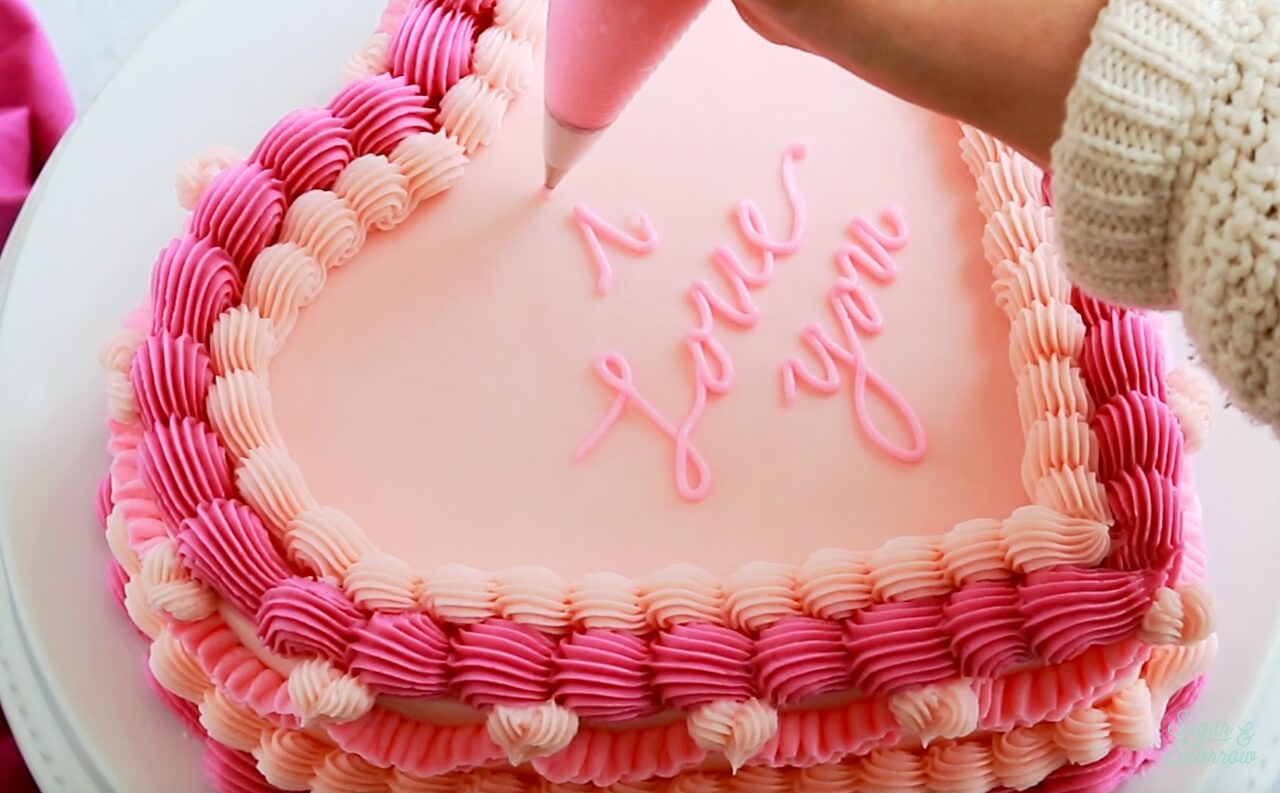
My best tips for piping your message:
- Practice off the cake if you’re not super confident. You can always pipe onto a cutting board or plate first.
- Make sure the buttercream is a thin consistency. My buttercream was slightly warmer from my hand piping the ruffles in Step 5, which naturally led to a thin consistency. If your buttercream is too stiff it won’t be easy to pipe letters with, so be sure to thin it out by adding the slightest bit of milk or massaging the piping bag with warm hands.
- If you don’t like the way your message looks, you can chill the cake until the lettering is easy to remove with an angled spatula, then re-pipe it. This doesn’t always work well (especially if the letters are super dark on a light-colored cake), so try to get it right the first time!
Once your message is looking picture perfect, you’ve got yourself the cutest vintage heart cake that is sure to brighten anyone’s day! It’s a great way to celebrate any occasion and so easy to whip up with a little practice and a lot of buttercream.

I hope you love making this gorgeously satisfying vintage heart cake as much as I did! If you do end up making one, let me know how it went in the comments below + be sure to tag @sugarandsparrowco on Instagram to show me. I love to see what you create!

Hi Whitney!! The size of the heart cake you made is bigger than I need, so should I make your 6-in chocolate cake and have an extra layer I don’t use, or would your small batch recipes be enough for two 6 inch layers? Hope this isn’t confusing. Thank you!!
Hi Addie! You can either bake the three 6-inch layers and have one left over, or scale the recipe you’re using by 2/3 to have the perfect amount of batter for two 6-inch cakes (the math can get complicated though), or double any of my small batch recipes. Hope that helps!
Thanks so much I’m about to attempt for my birthday cake!
If you take a round cake and an 8×8 square you get the same results. A little less work and less waste. Cut the circle in half place it on either side of the angled square and poof a “heart”.