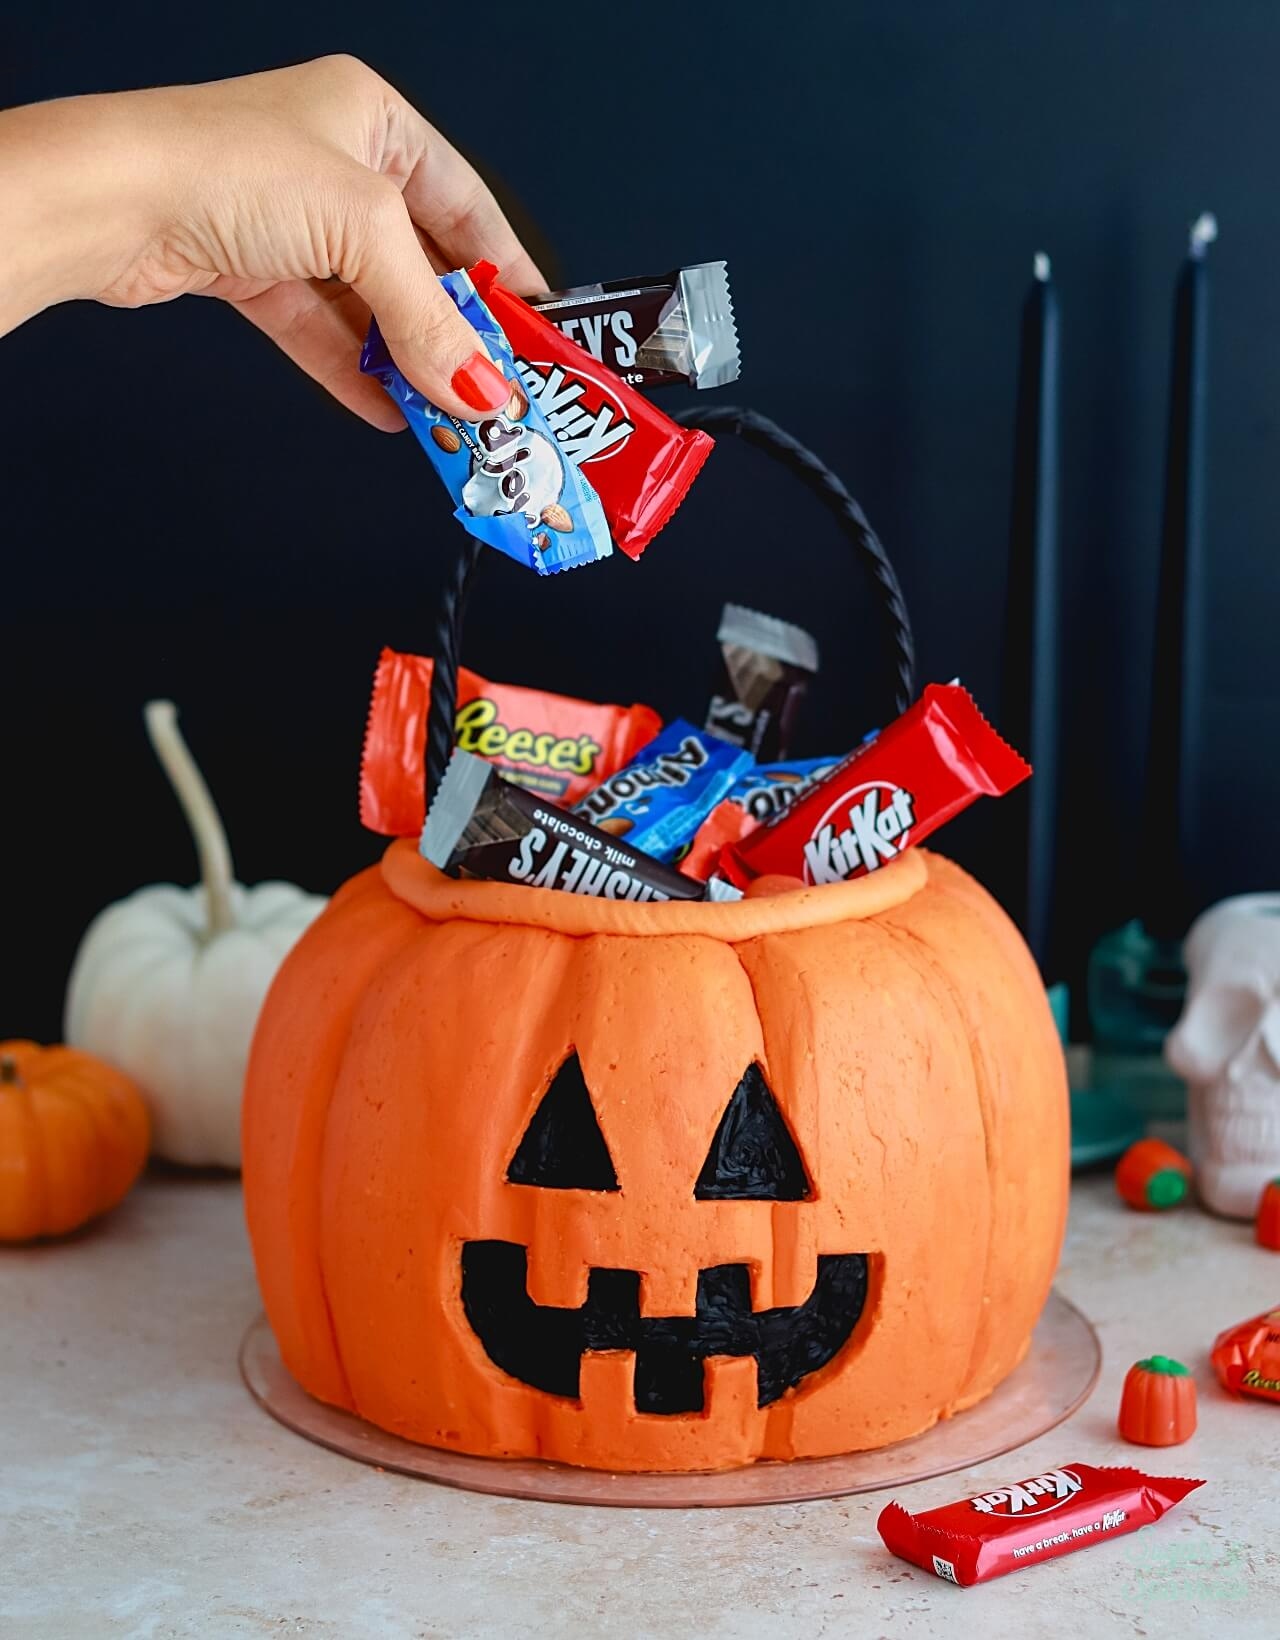
It’s hard to start this blog post without gushing about HOW CUTE this jack o lantern candy bucket cake turned out! I am honestly shocked at how realistic it turned out with just a couple of stacked bundt cakes and a buttercream finish (zero fondant here). After filling it with Halloween candy, it’s the perfect showstopper cake for any spooky party!
Candy Bucket Cake Tools & Ingredients
I’ll list every single tool and ingredient in the recipe card below, but here are the most important tools and ingredients you’ll need for this candy bucket cake:
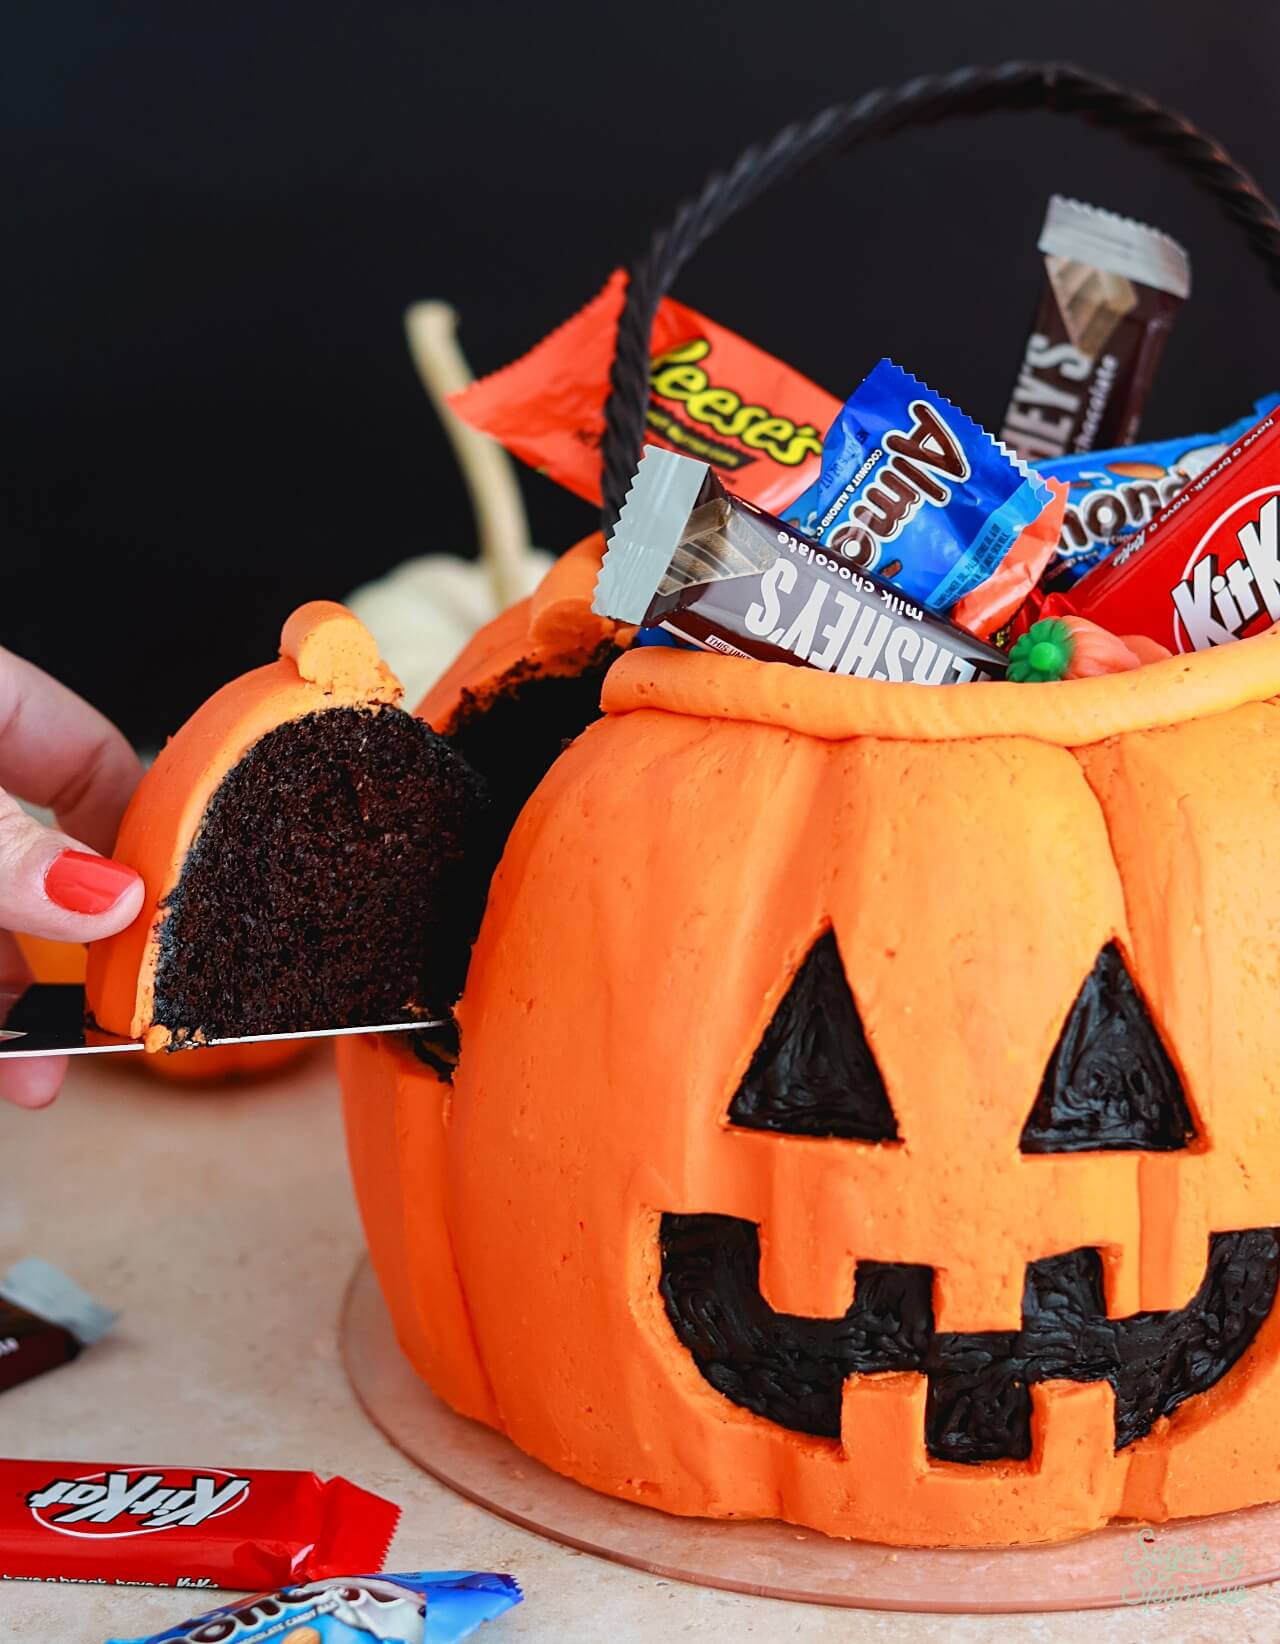
- Bundt cake pans. The base of this jack o lantern cake is two bundt cakes stacked on top of one another to form a pumpkin shape. I used a double batch of my one-bowl chocolate cake to fill two bundt cake pans, but note that you can use any of my cake recipes for this part.
- Buttercream. I made my dye-free black buttercream for the filling and crumb coat of this cake, as well as for piping the eye sockets and mouth. You’ll also need a double batch of my vanilla buttercream recipe and some orange food coloring for the pumpkin colored buttercream finish.
- Cake board. For building the pumpkin cake on. I used this 10-inch acrylic cake board, but a cardboard cake round will also do. This will help you carry the jack o’ lantern cake anywhere it needs to go.
- Cake turntable. A cake turntable helps make the process of smoothing and shaping the pumpkin cake easier because it gives you easy access to all sides of the cake.
- Flexible plastic scraper. This is important for smoothing the curved surfaces of the pumpkin shape. I used this one from Amazon, but you can also make your own from any food-grade flexible plastic packaging. In fact, I ended up making another scraper for the grooves of the pumpkin using a plastic yogurt container (more on that below).
- Parchment paper. I use this to smooth the pumpkin surface after chilling the buttercream.
- X-acto knife. For carving out the eyes and mouth on your jack o’ lantern.
- Black licorice and flexible wire. To make the handle of the candy bucket cake, I slipped some craft wire through some hollow black licorice. The wire helps to stick it into the cake.
- Halloween candy. For filling your candy bucket!
How to Make a Jack O Lantern Candy Bucket Cake
Step 1: Bake the Bundt Cakes
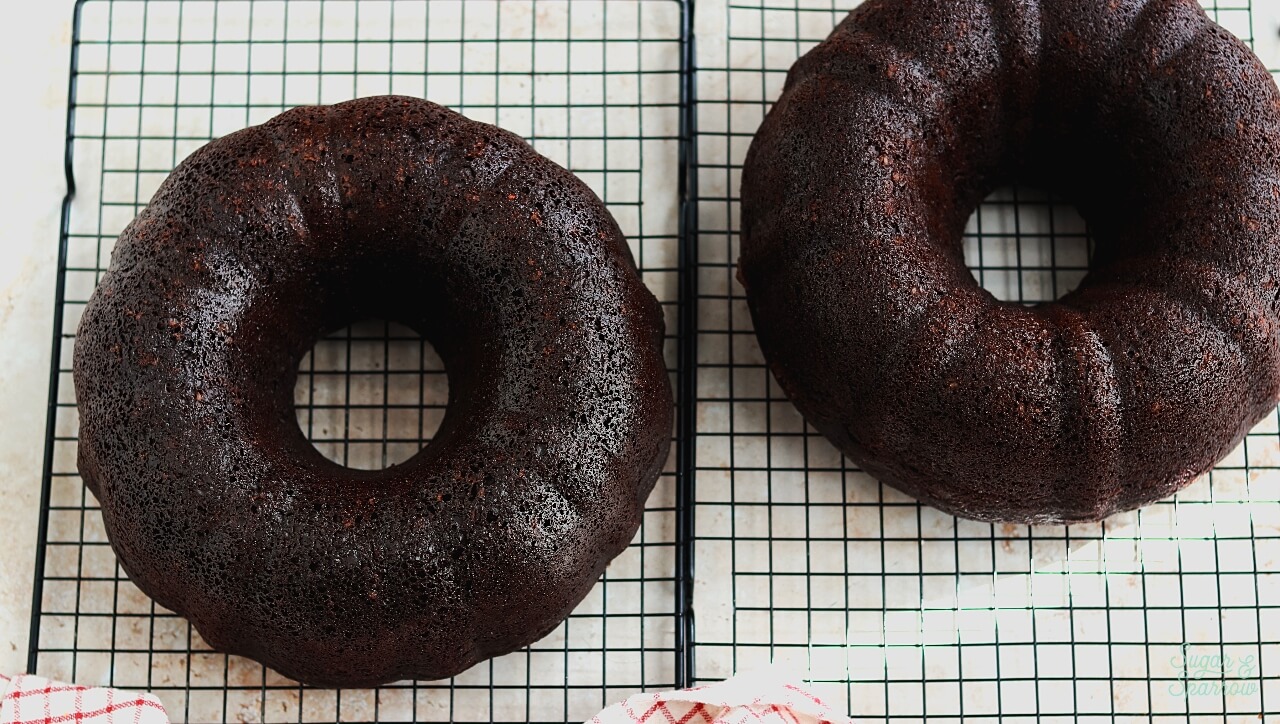
I made two batches of my one-bowl chocolate cake and poured each into separate 9.5-inch bundt cake pans. I actually ended up baking both bundt cakes at the same time and they turned out great at 350ºF (177ºC) for about 35 minutes.
Step 2: Prepare the Buttercream
I made one batch of my dye-free black buttercream for the filling and crumb coat, plus a double batch of my vanilla buttercream recipe. I tinted the vanilla buttercream with AmeriColor Electric Orange to get the perfect pumpkin candy bucket color.
Step 3: Create a Pumpkin Shaped Cake
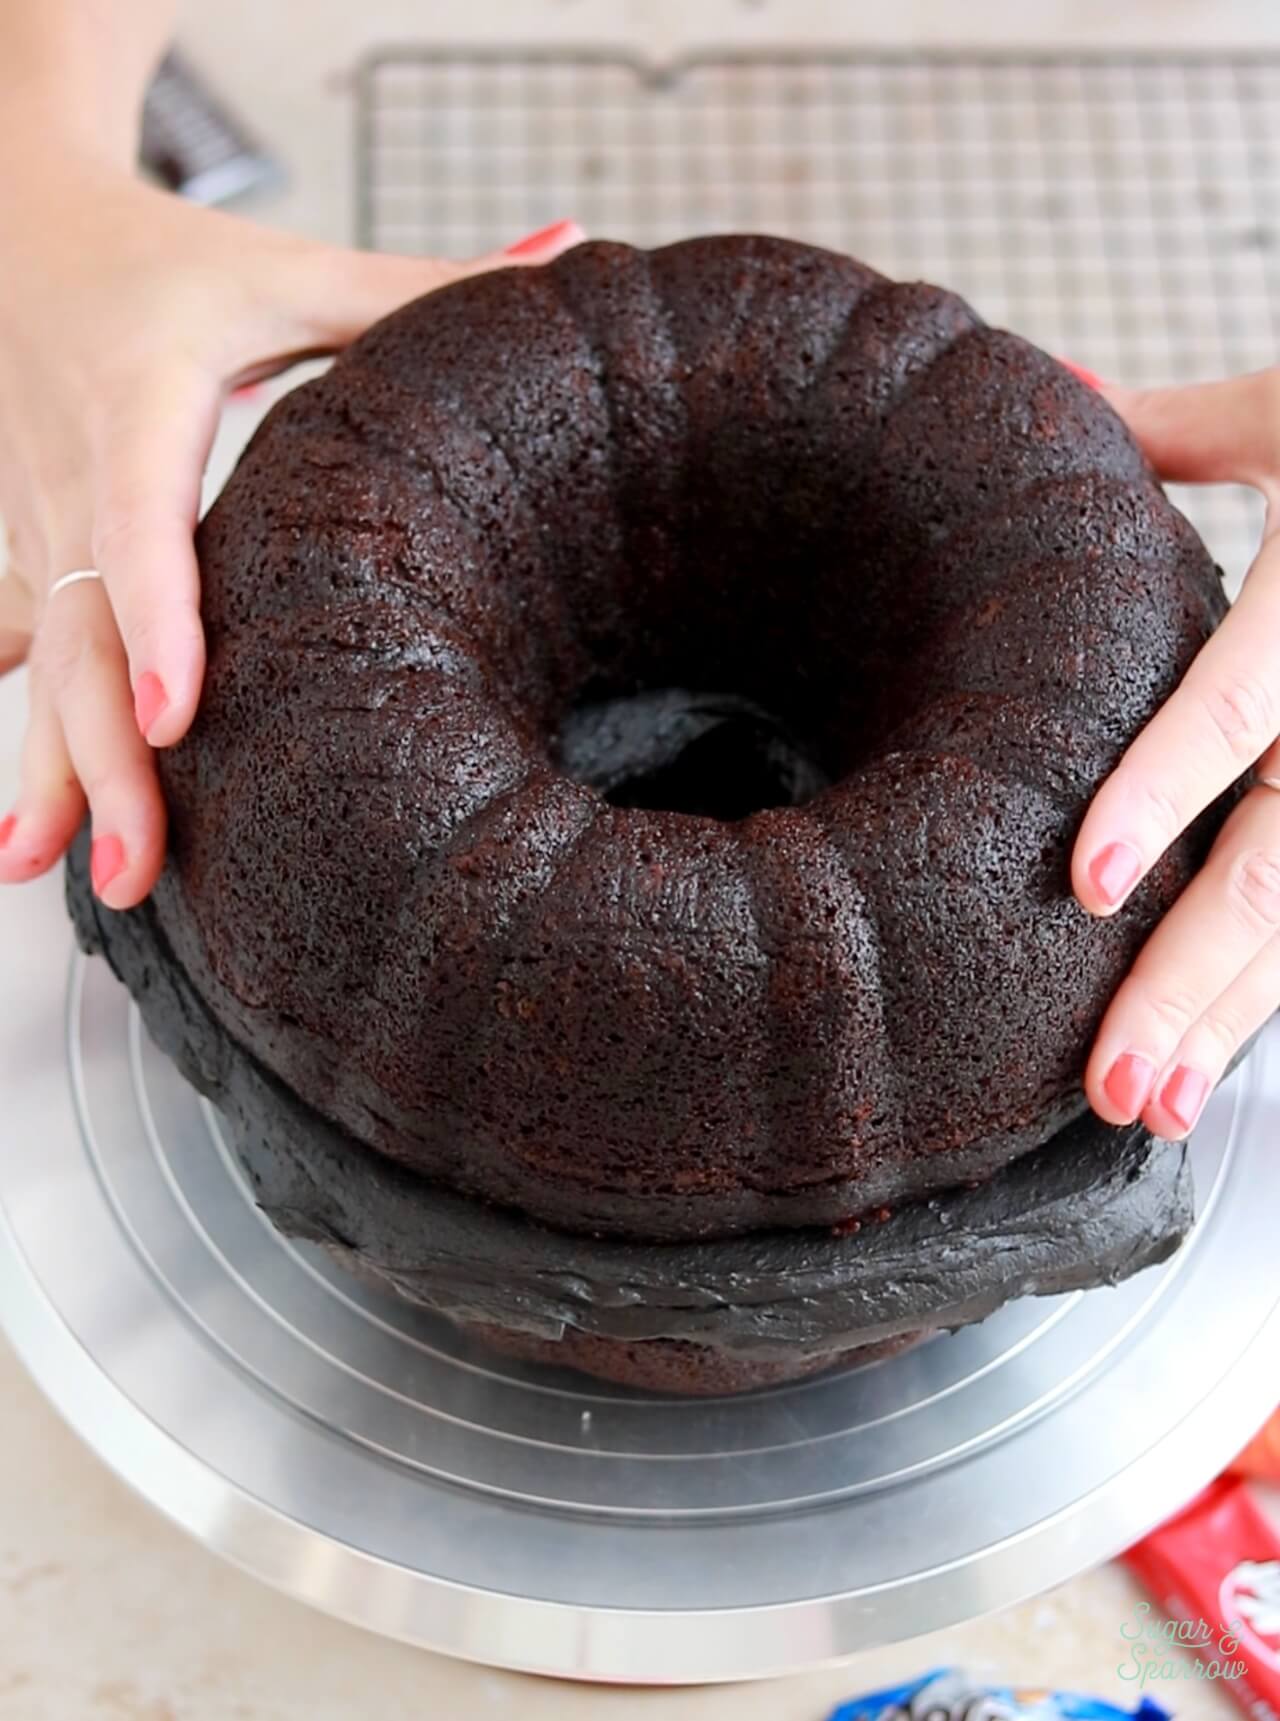
Place the cake round on top of the turntable and add the first (cooled!) bundt cake layer on top, with the flat end up. Feel free to trim off the uneven surface of the bundt cake to make it flat if you want. Adhere it with a little buttercream so it doesn’t slide around too much. Add a layer of the black buttercream as filling, then place the second bundt cake on top of the first, matching up the flat sides to create a pumpkin shape.

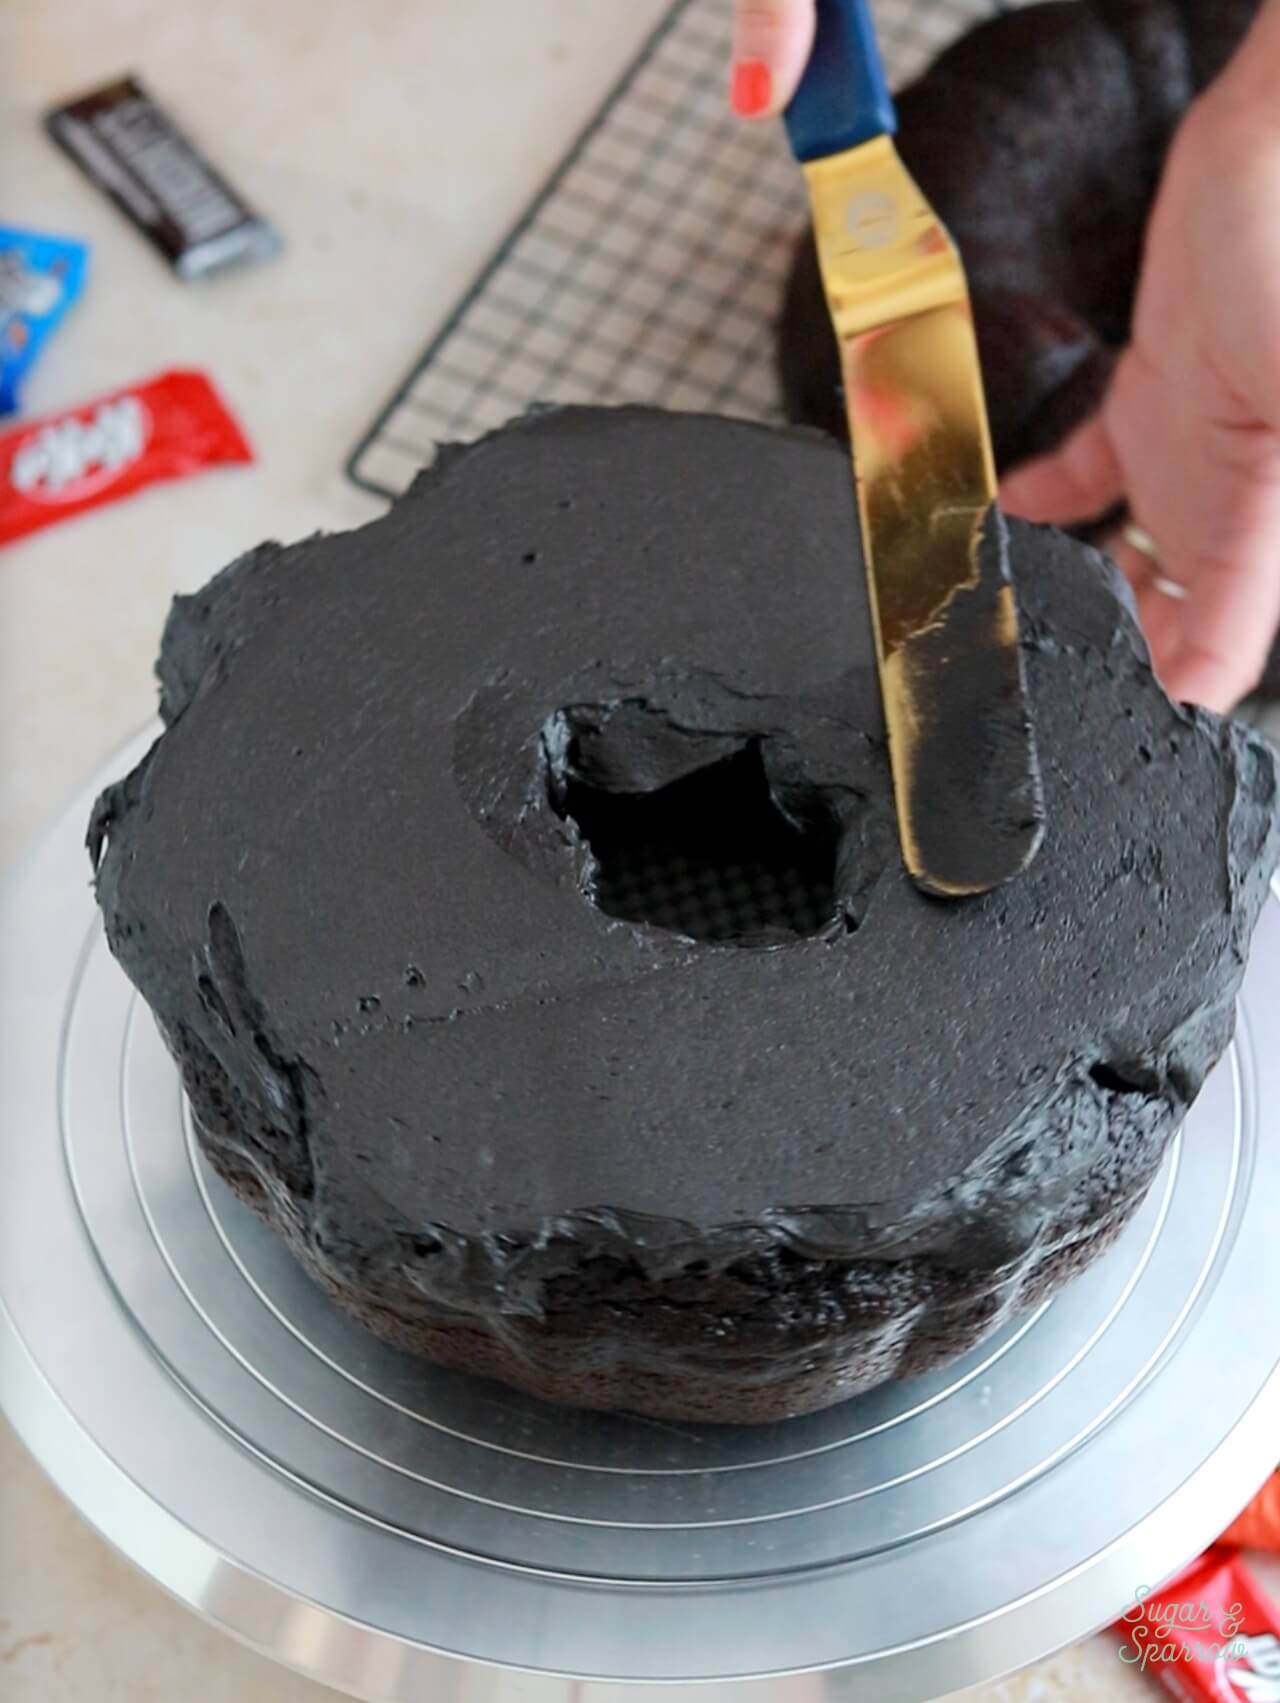
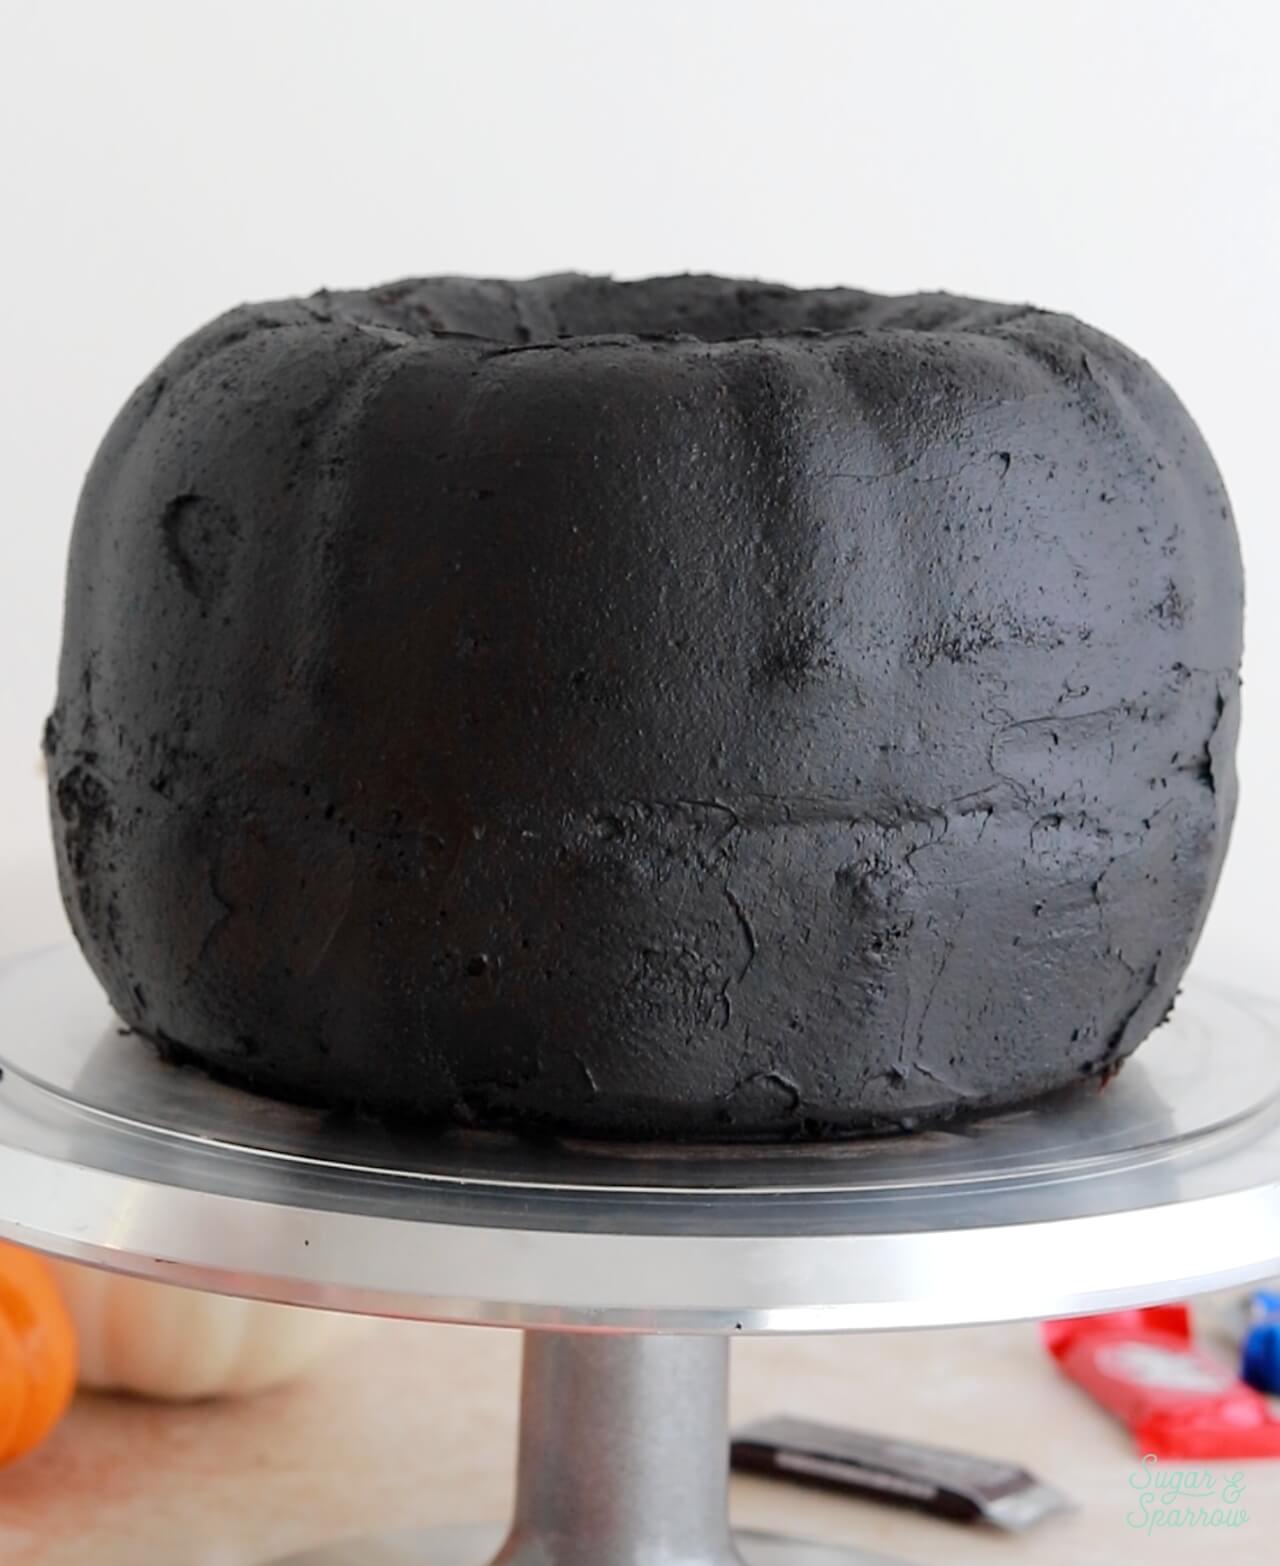
Crumb coat the entire surface of the bundt cakes with black buttercream to lock in the shape, then refrigerate it for at least 30 minutes to let the frosting firm up.
Step 4: Create the Buttercream Pumpkin Finish
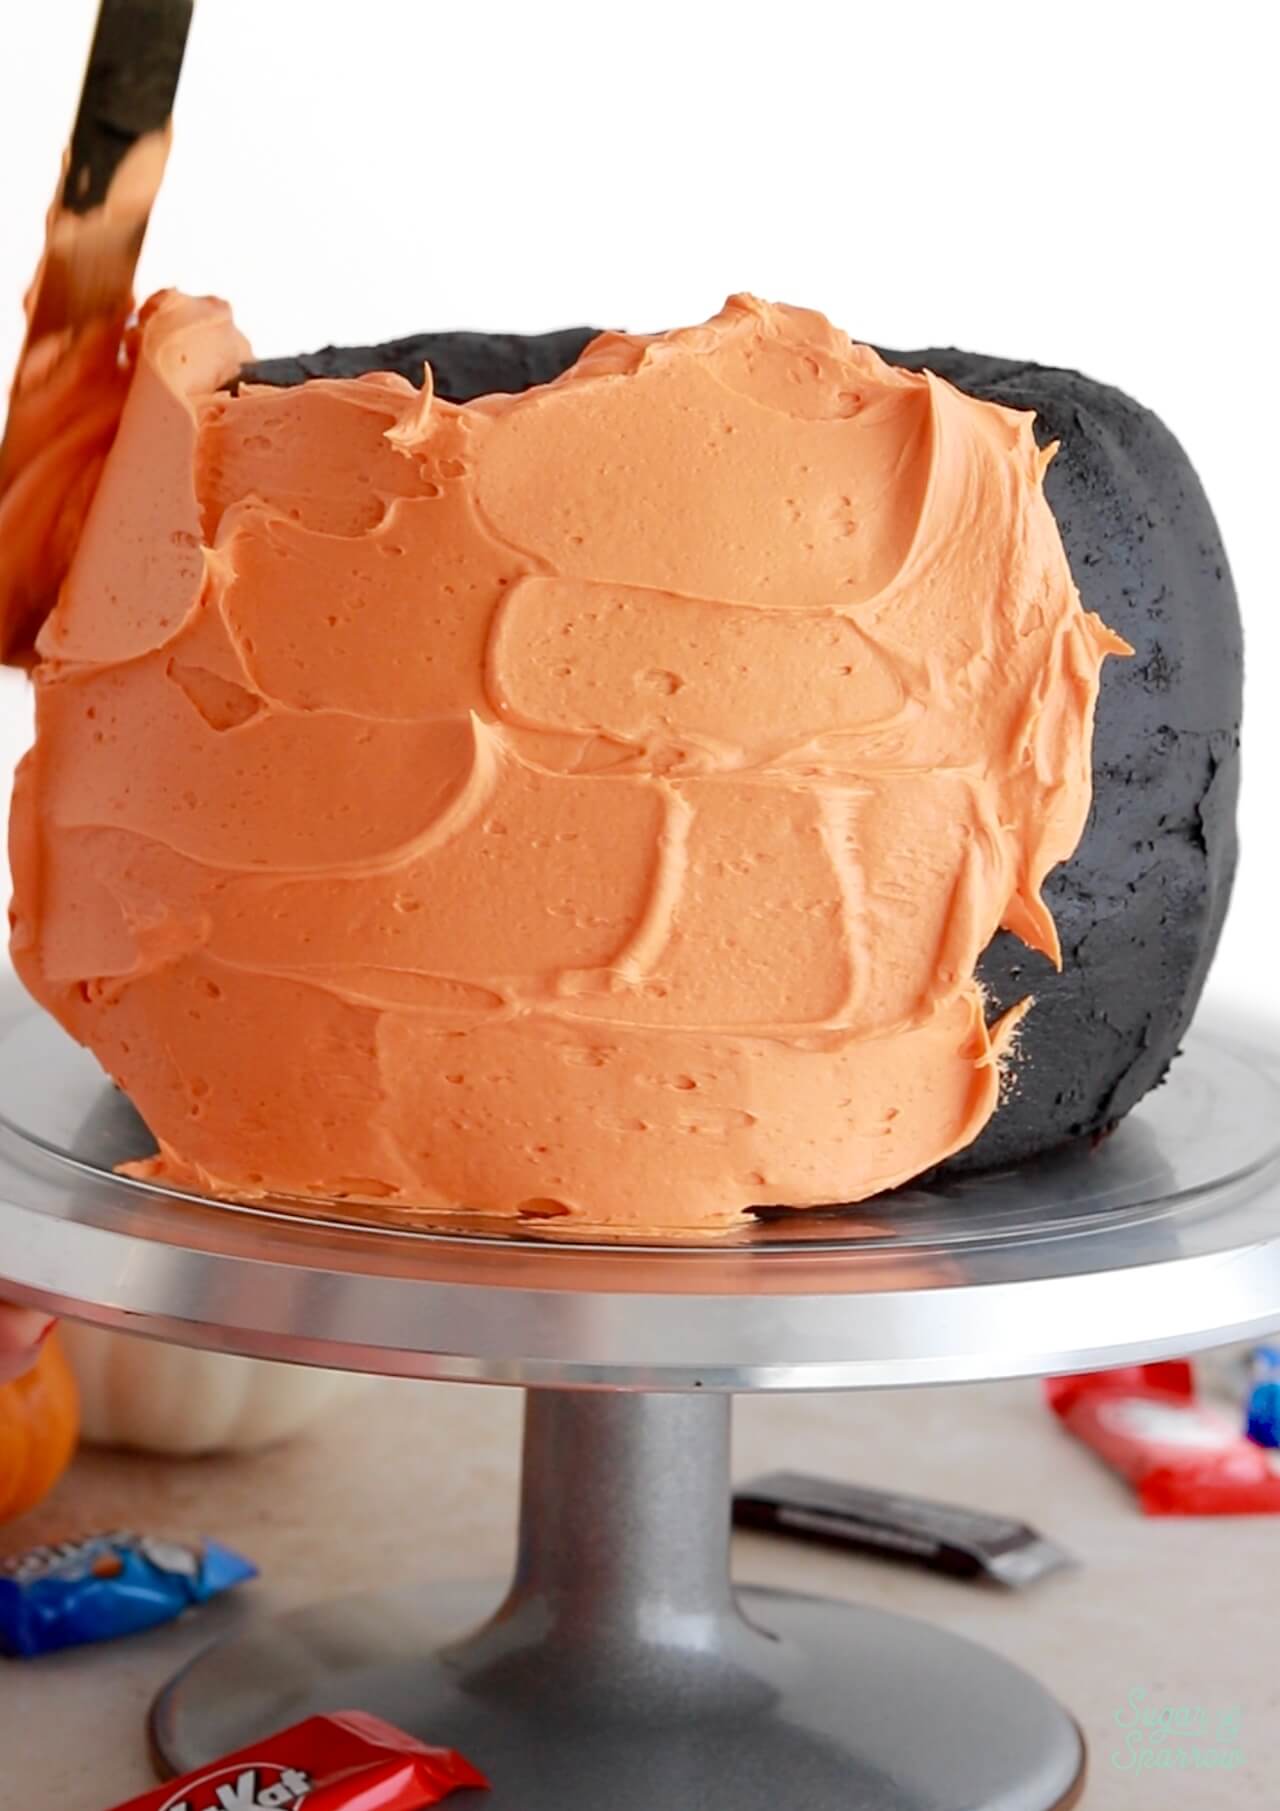
Add a thick layer of the orange buttercream around the entire exposed surface of the cake (no need to frost inside the cavity where the candy will go unless you really want to). Then, swipe the flexible plastic scraper upward to create a semi-smooth finish all around the cake.
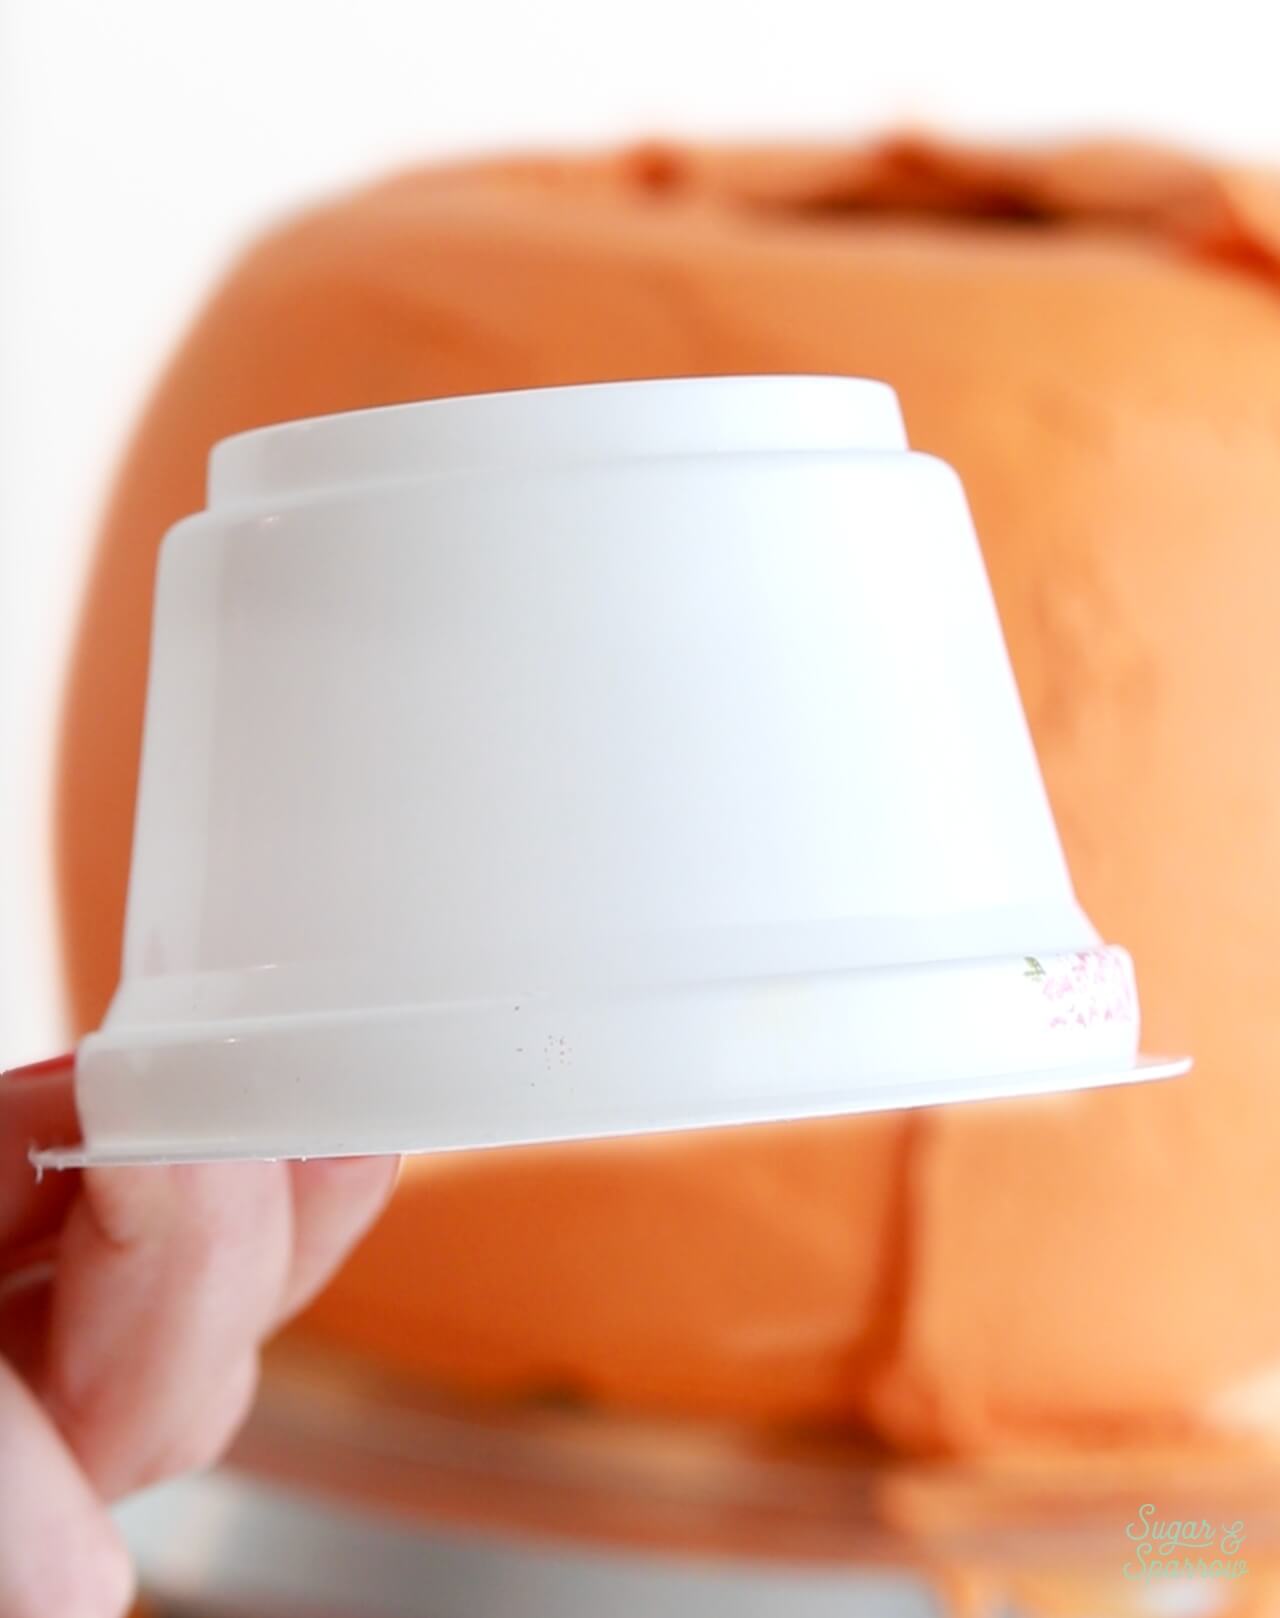
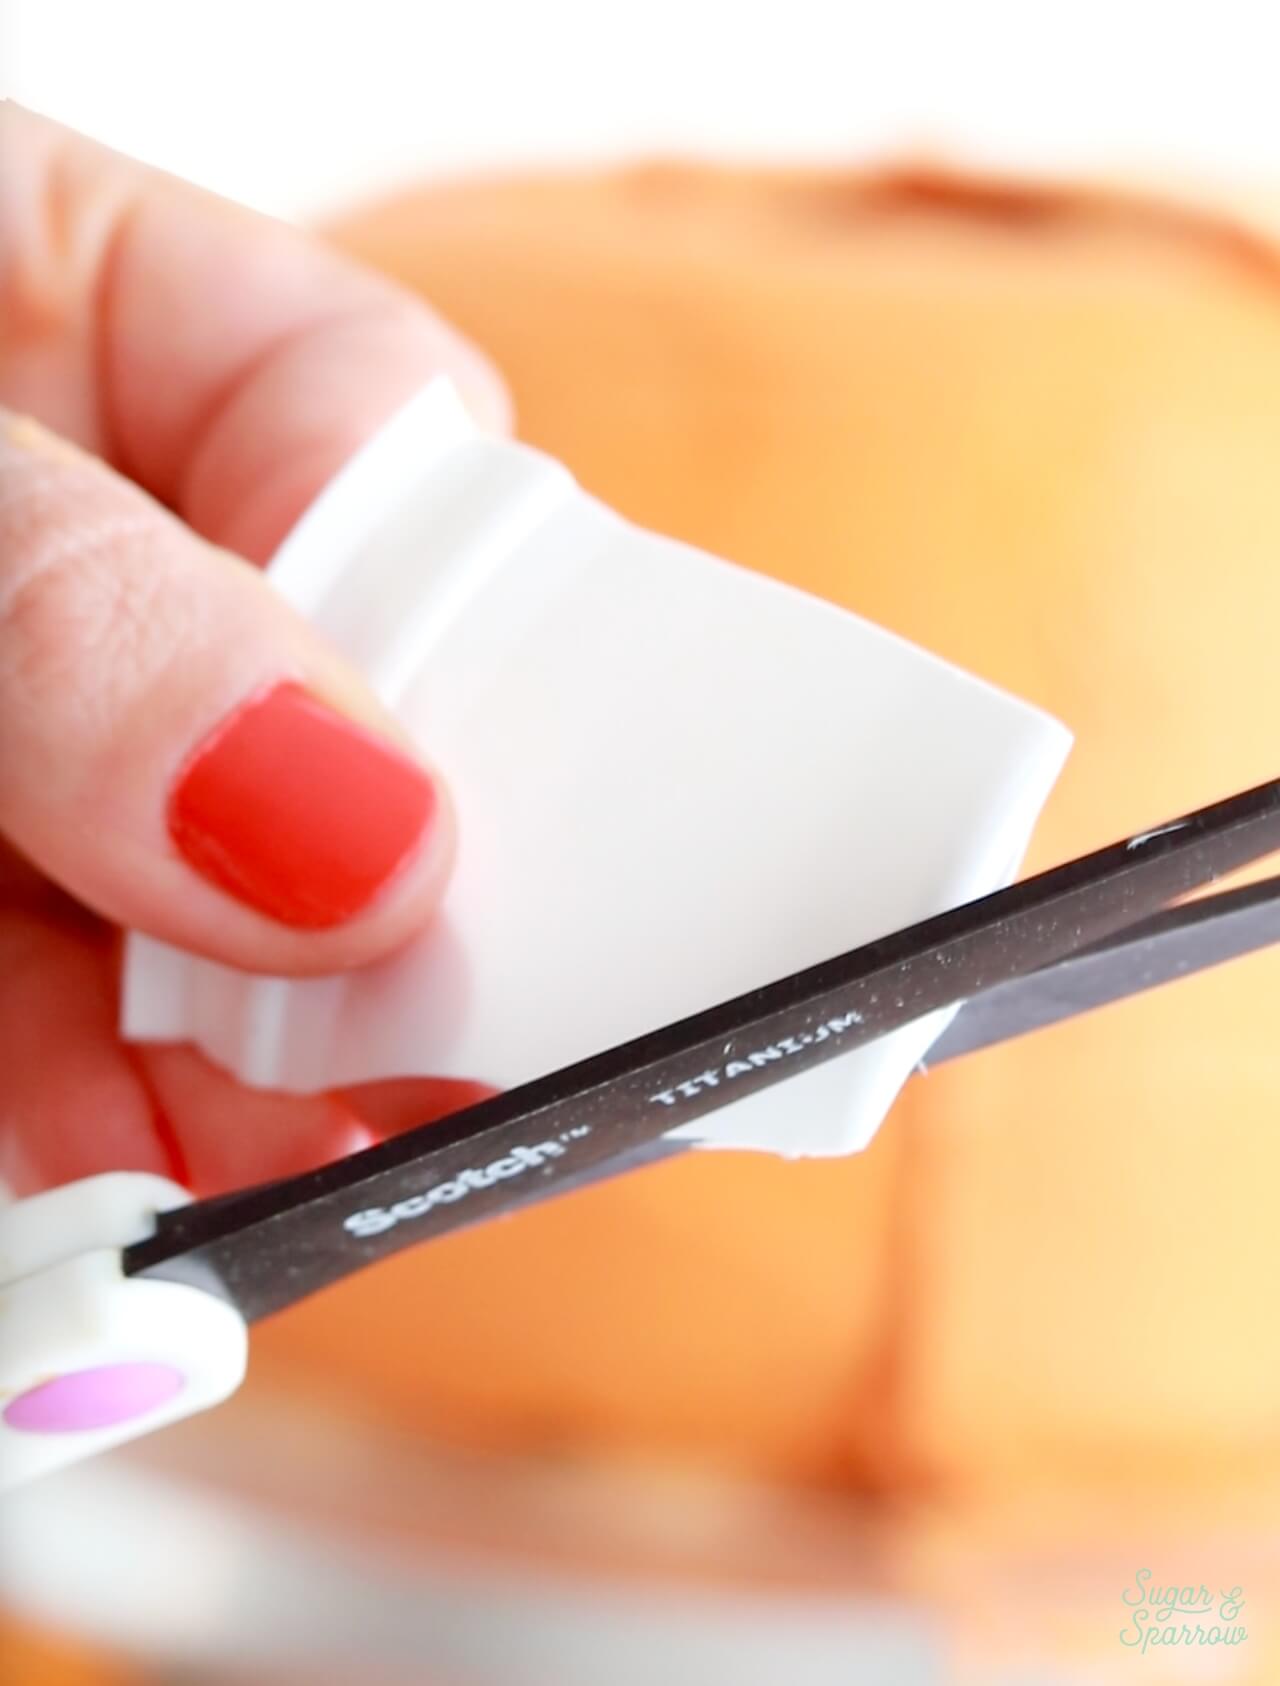
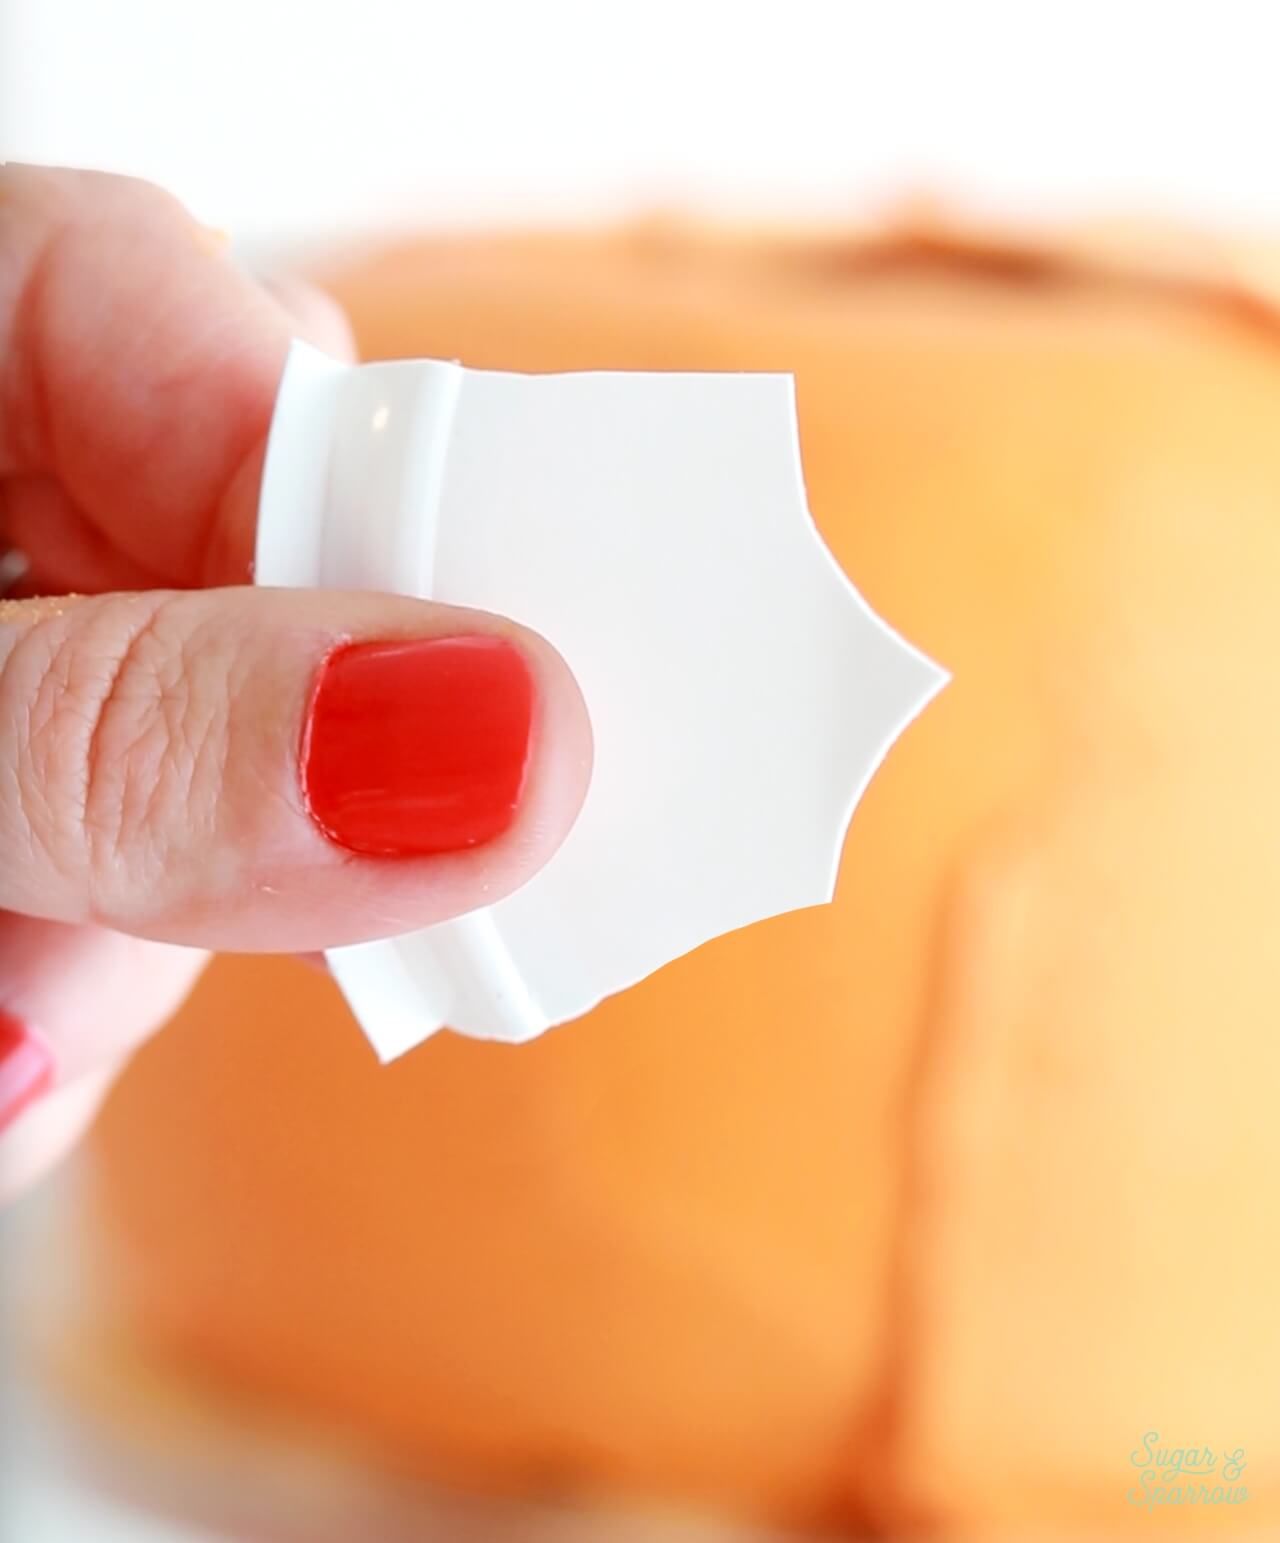
To create the grooves of the pumpkin, I ended up making my own plastic groove scraper out of a leftover yogurt container. I basically cut a piece out of it, then snipped off some pieces from that to create a point as shown below. You can do this with any food-grade plastic container.
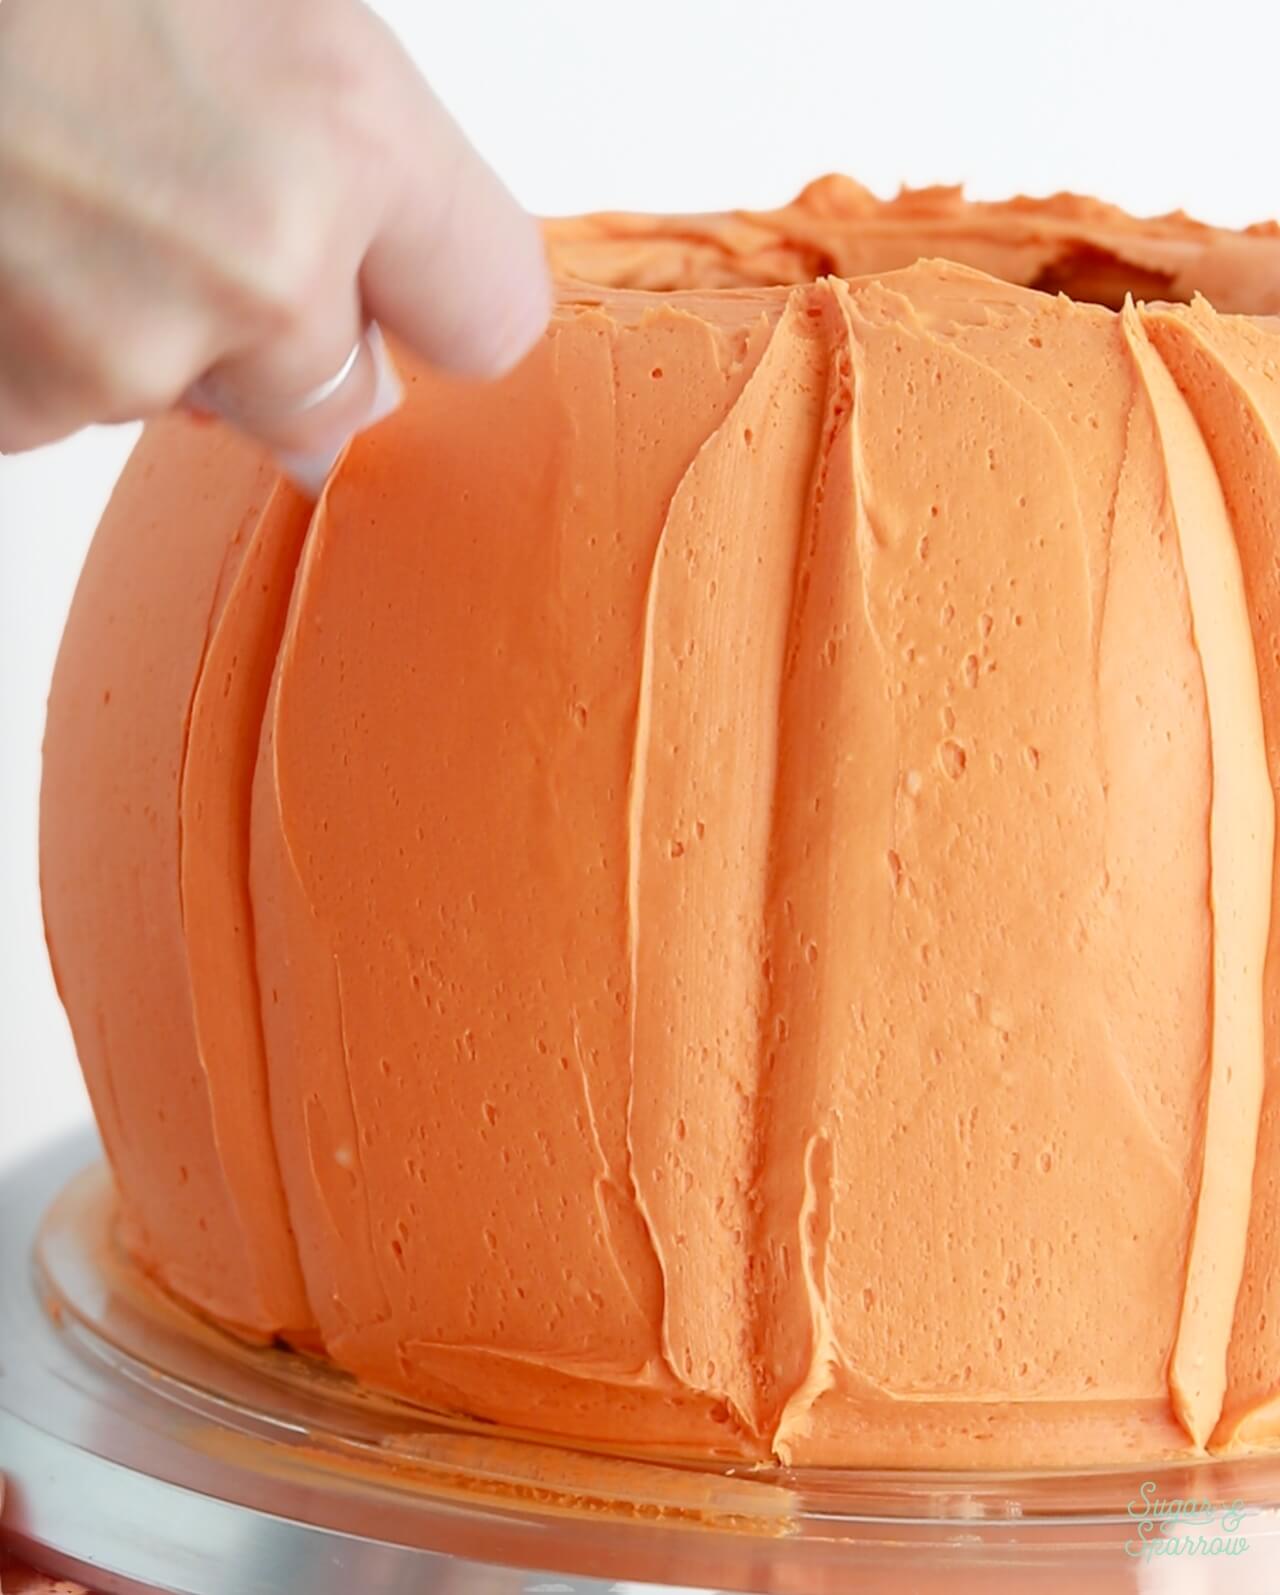
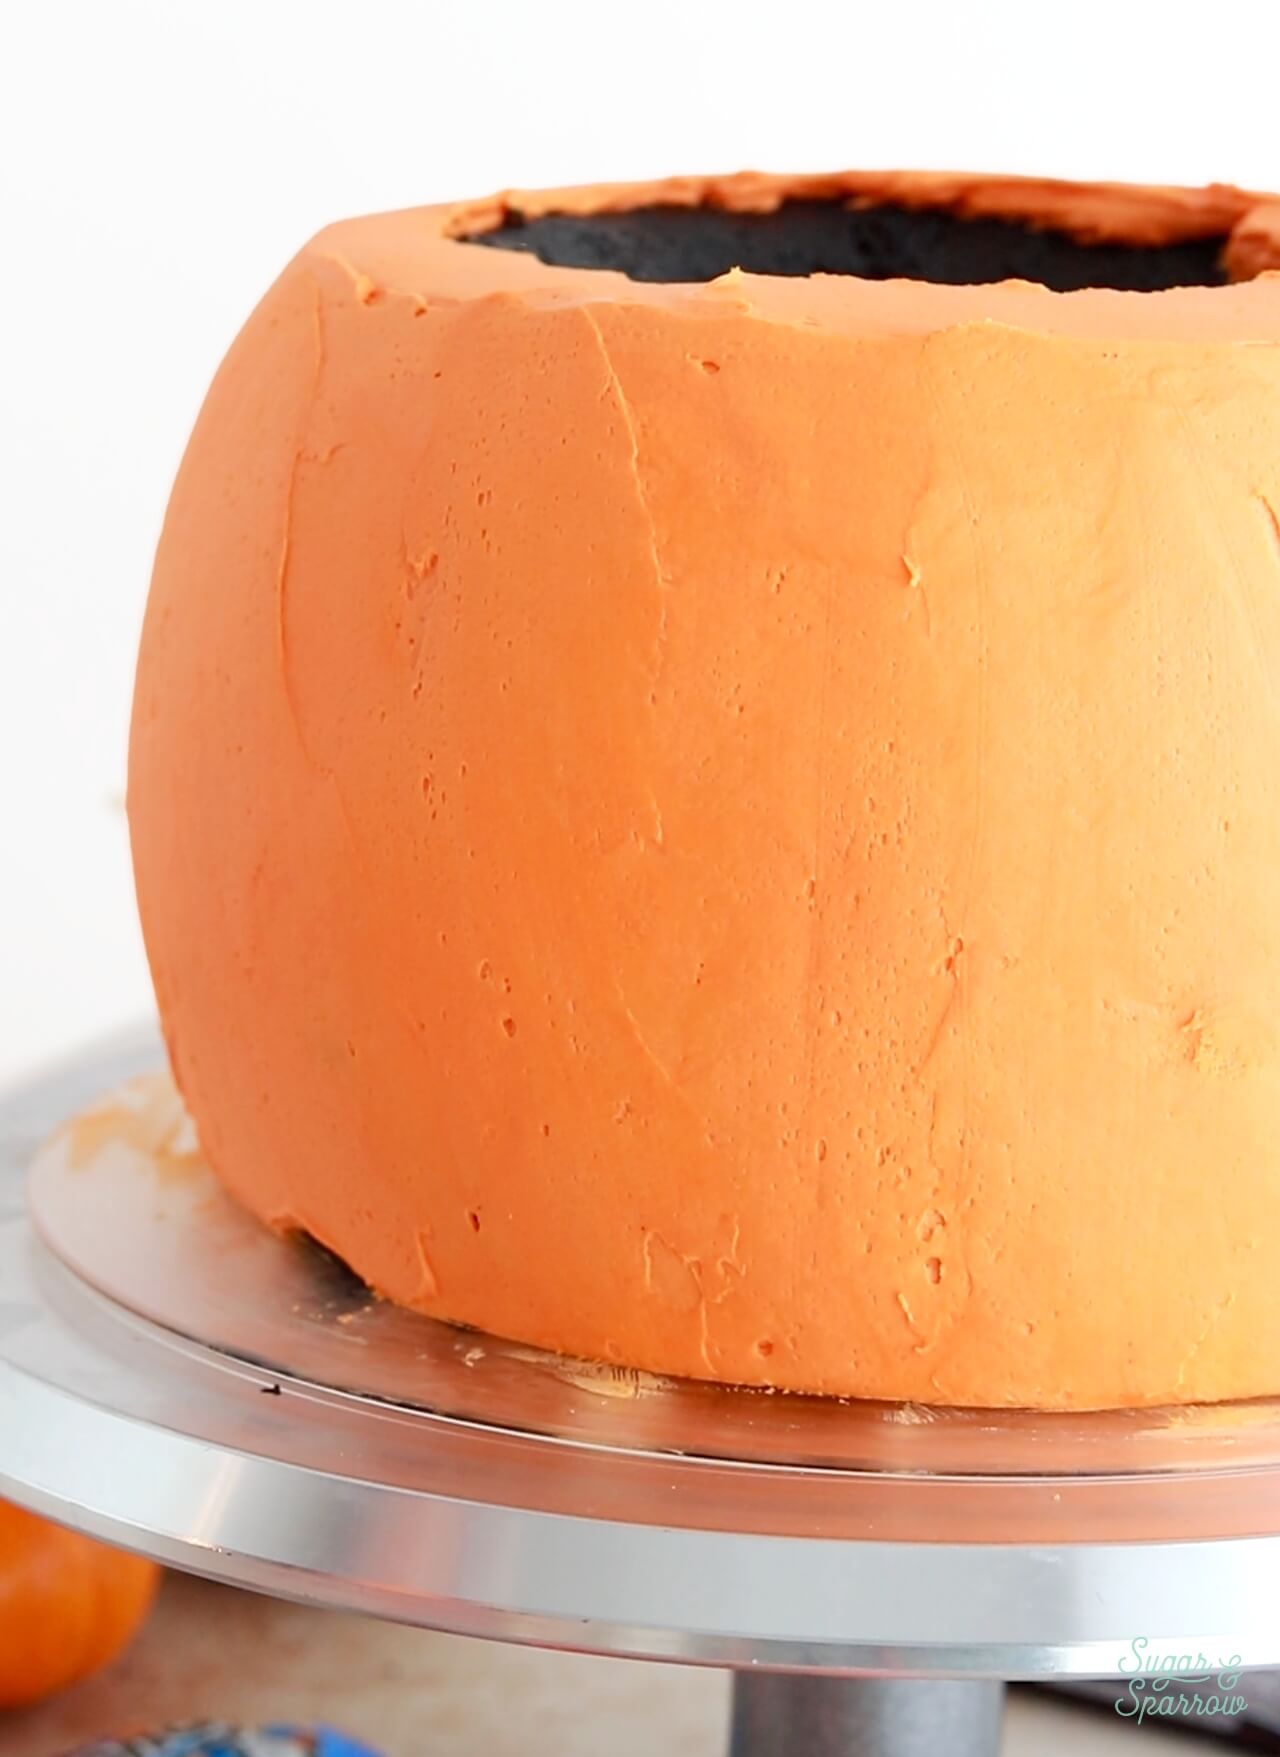
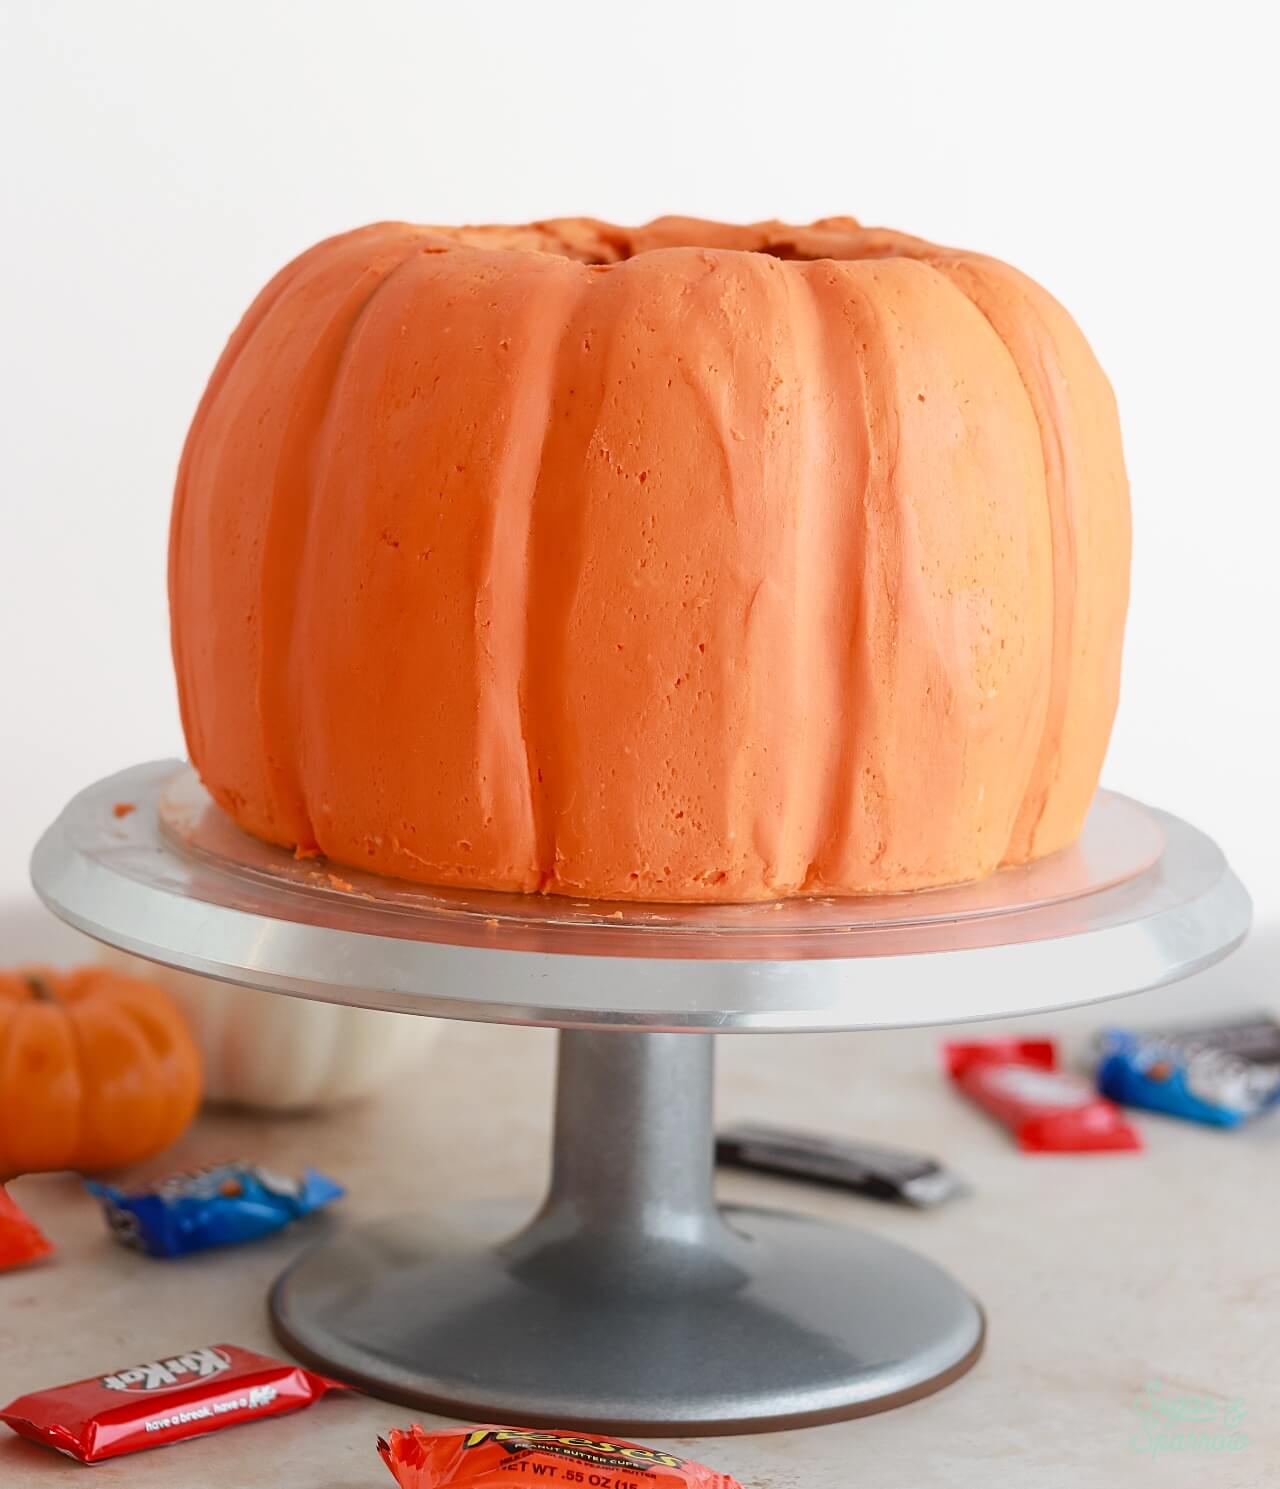
After creating the grooves, I went over each section again with the flexible plastic scraper until the shape resembled more of a pumpkin. Don’t worry about getting it super perfect in this step, because Step 5 will help iron out the imperfections.
Refrigerate the cake for at least 30 minutes to get the frosting firm to the touch, the longer the better.
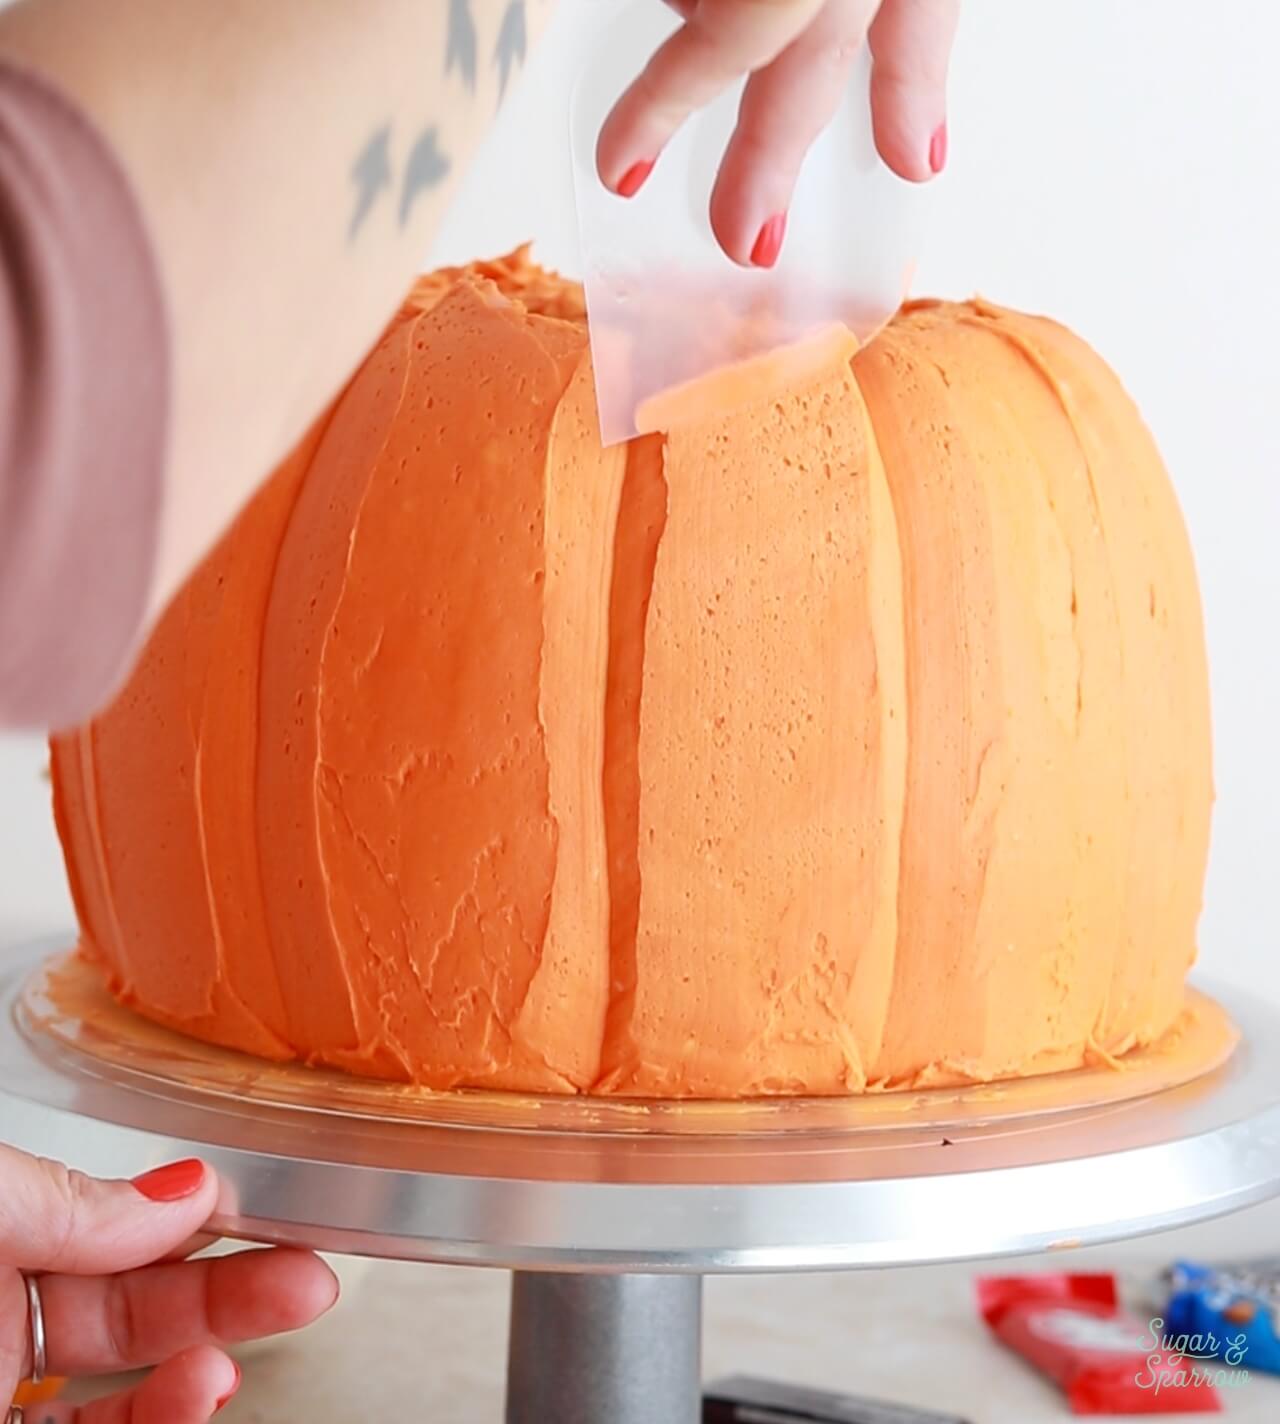
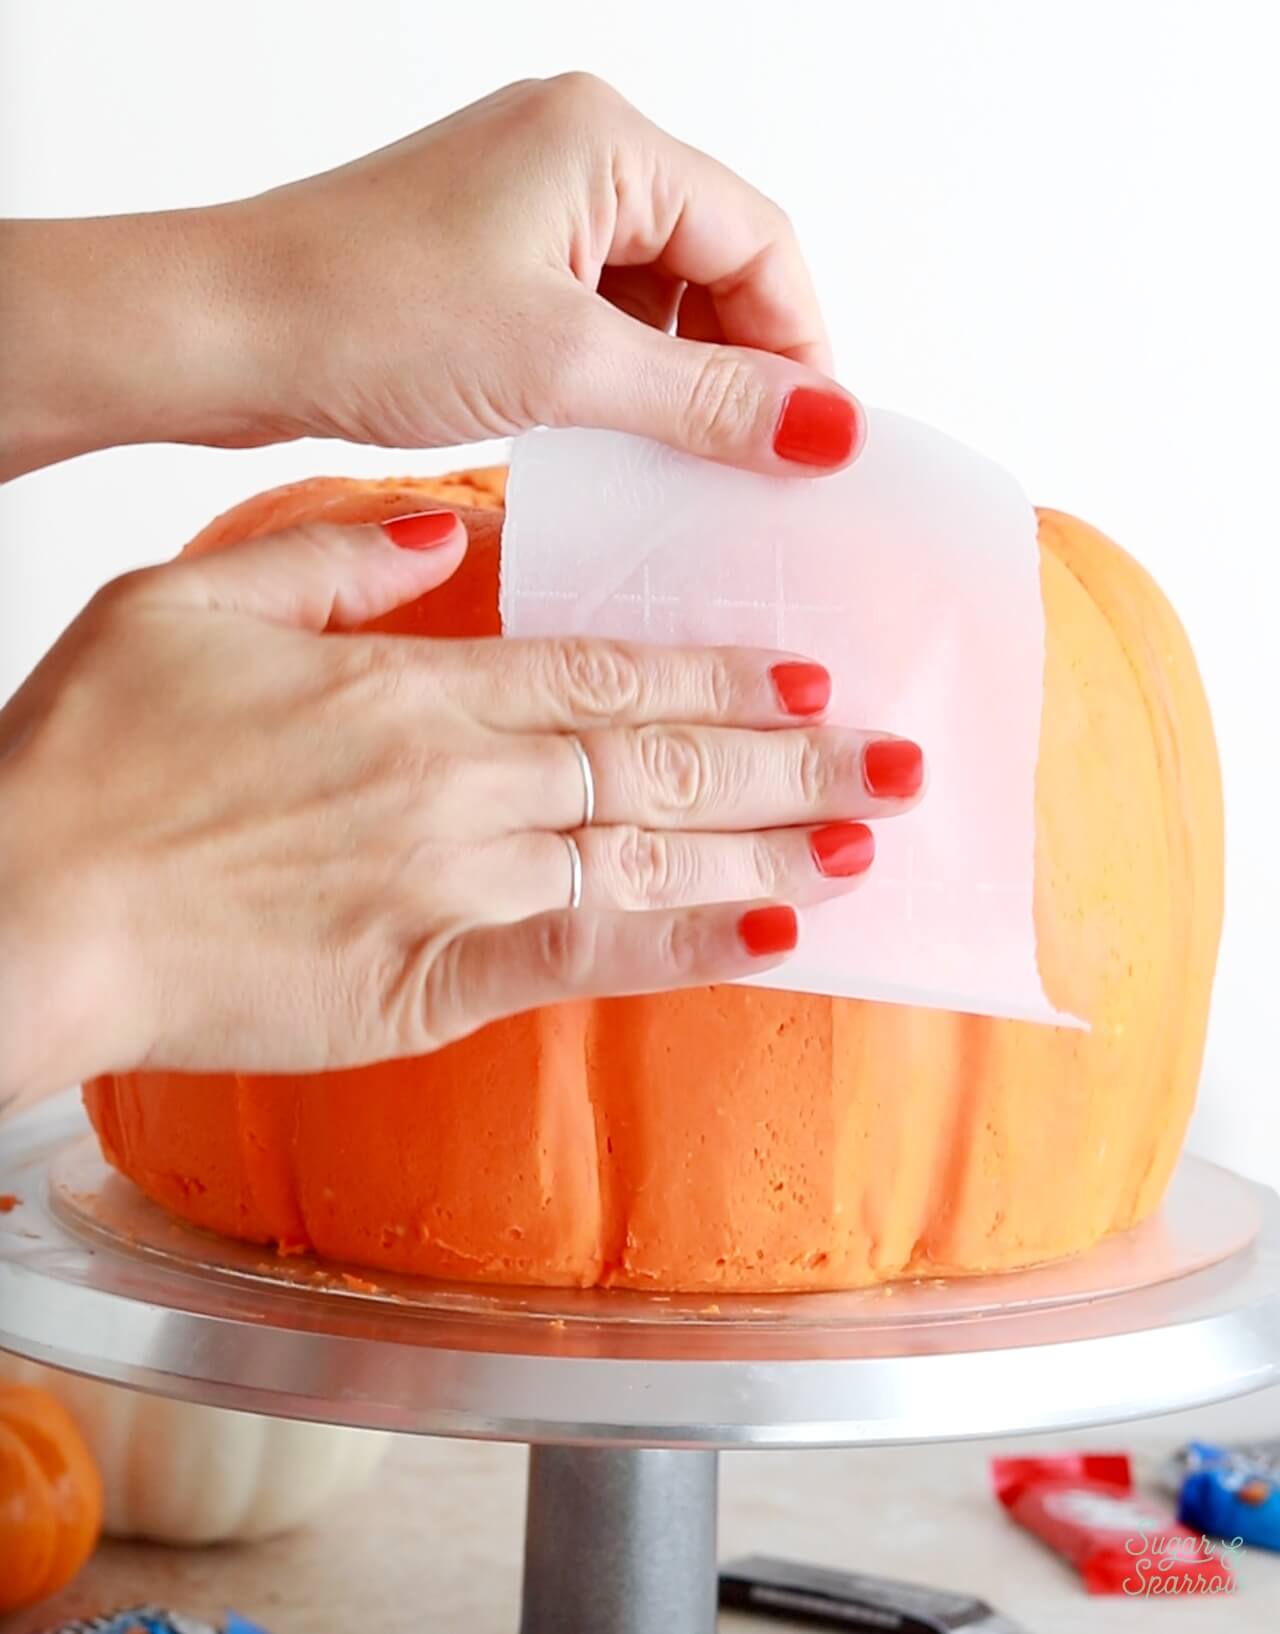
Step 5: Smooth the Surface
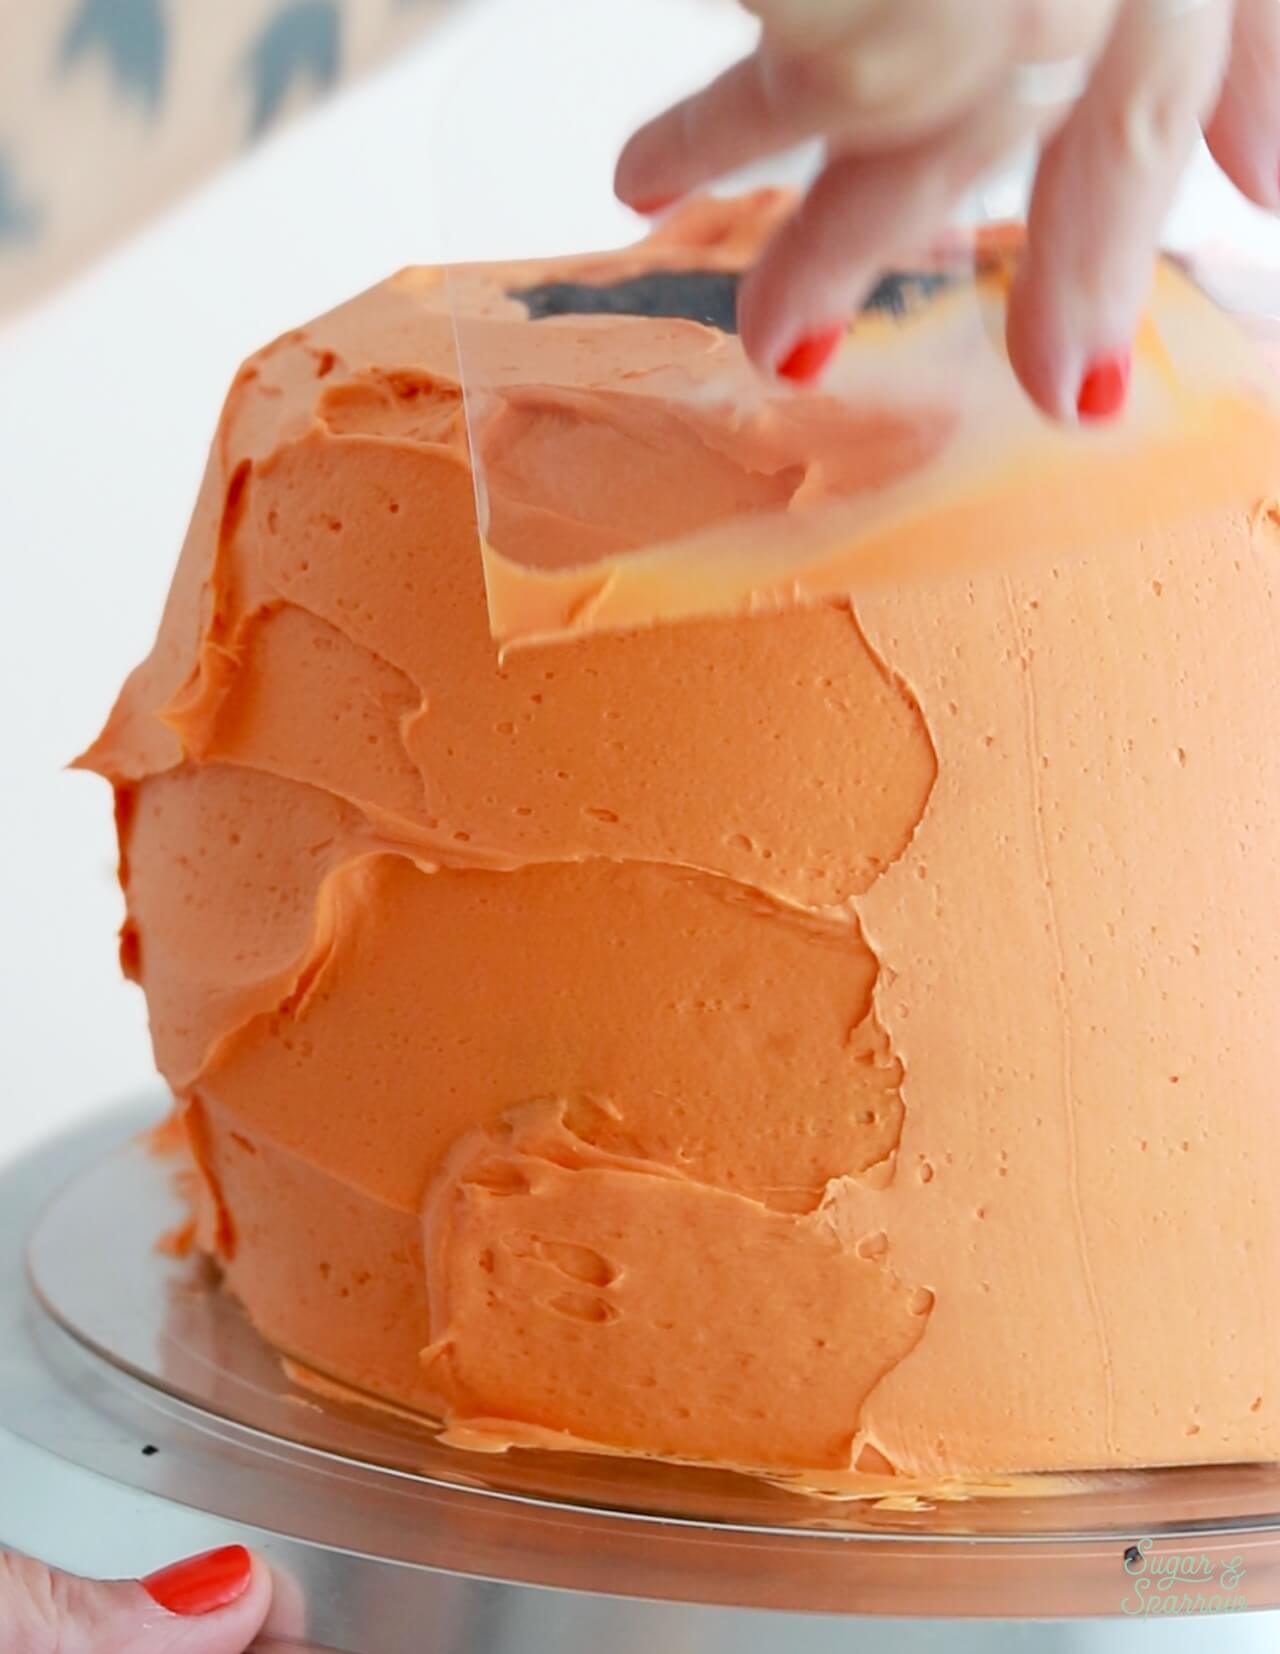
Once the frosting is firm to the touch, place a piece of wax paper over the top of any section and gently smooth it down with your hand, smoothing down into the grooves as well. This will iron out the imperfections on the surface. Try to be quick with this part, because as the frosting warms up it won’t be as easy to smooth.
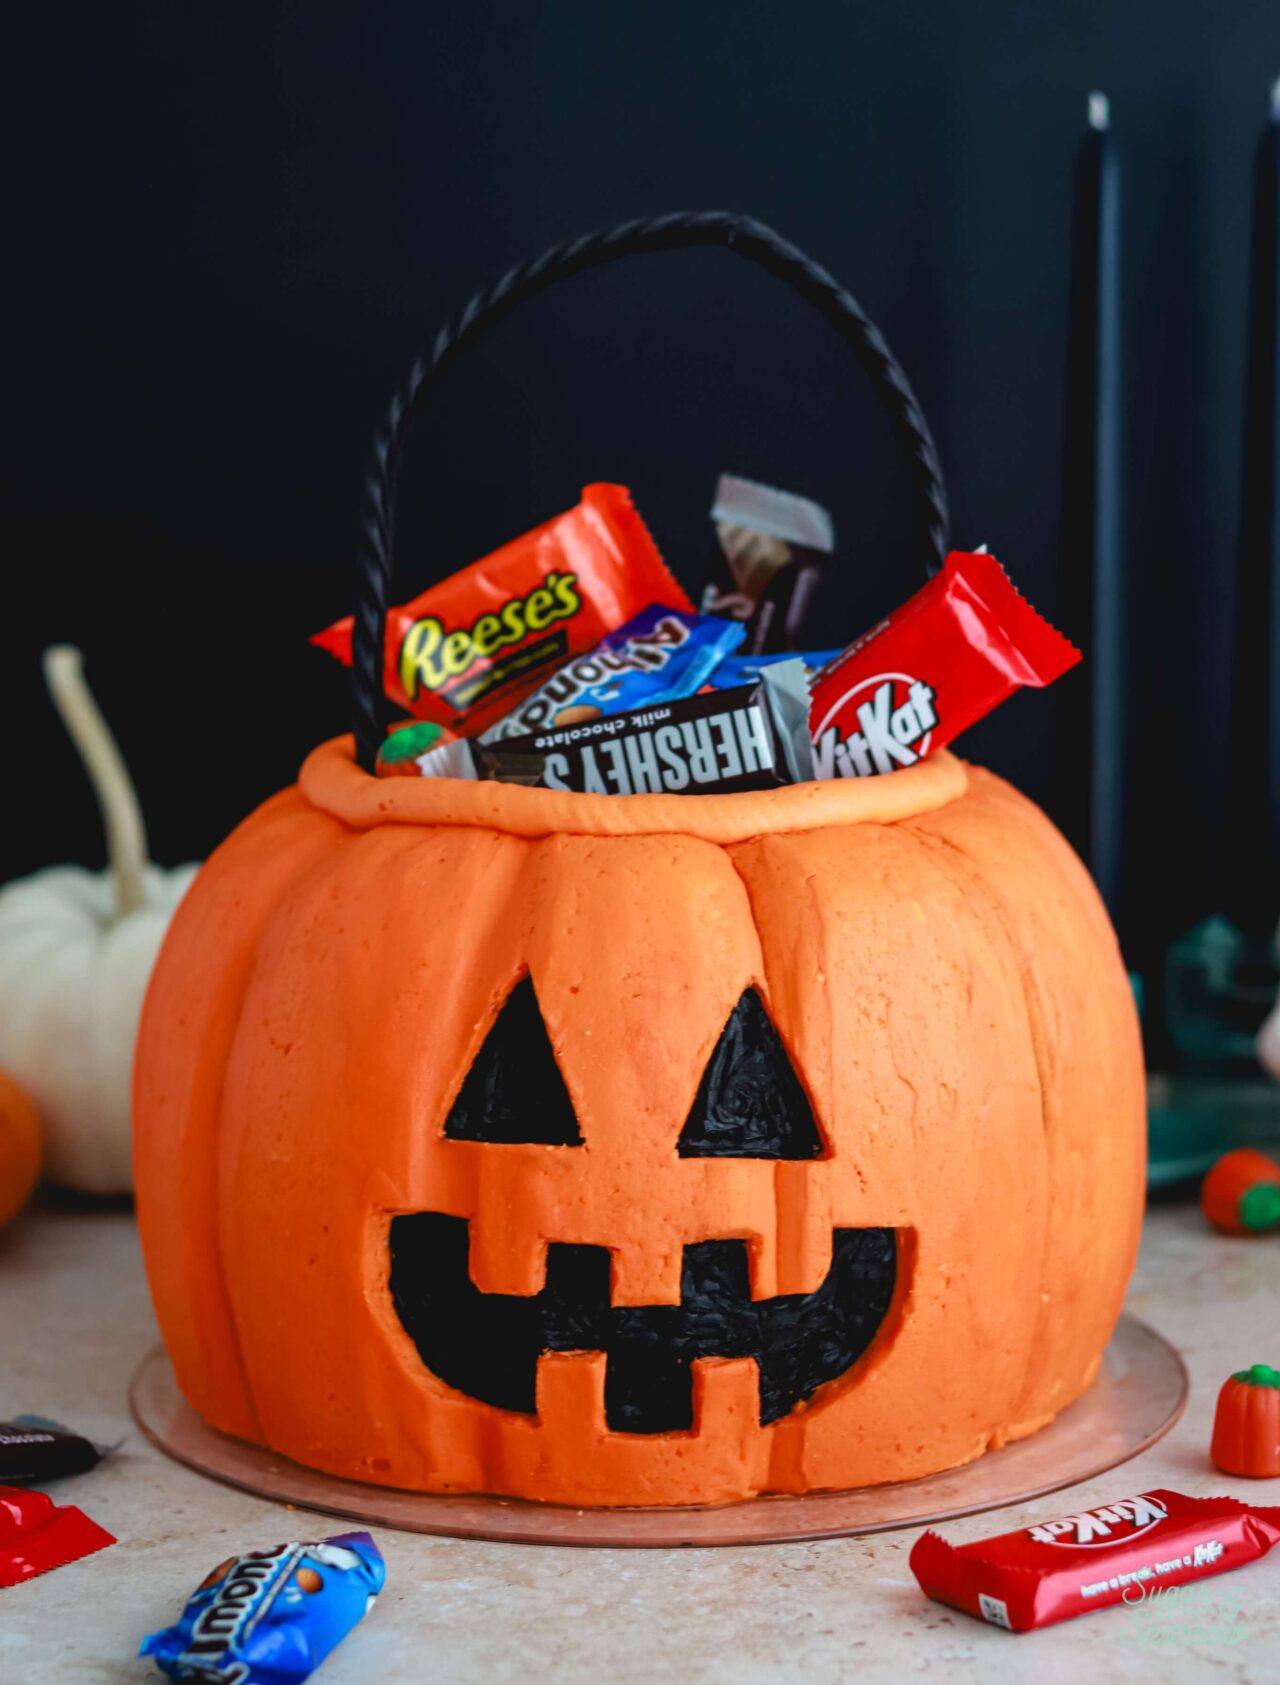
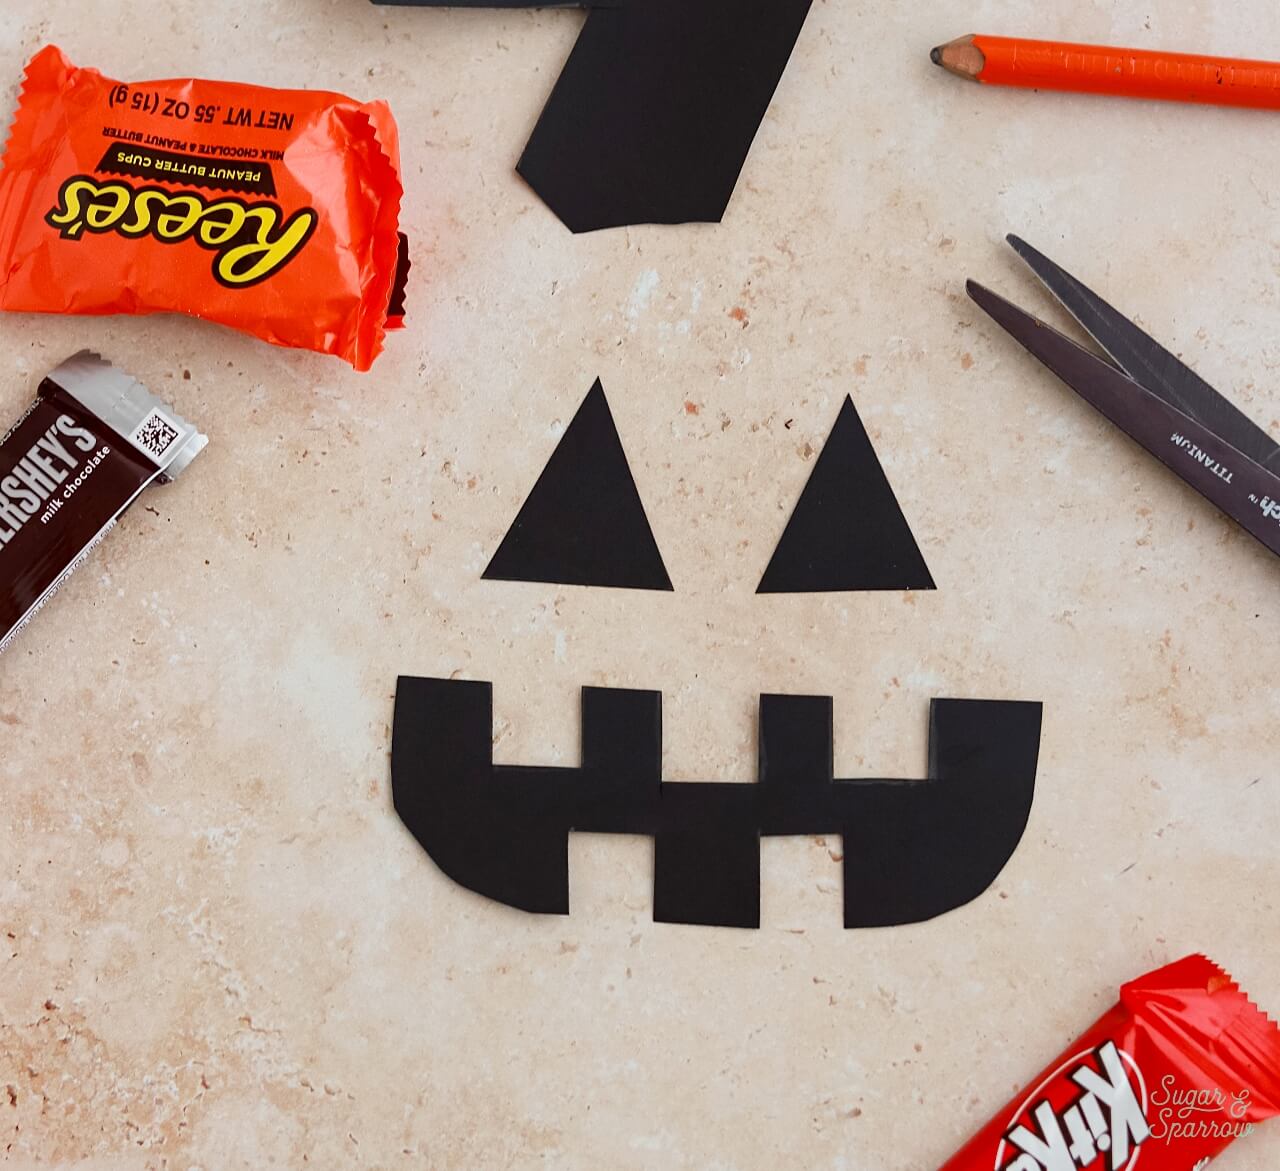
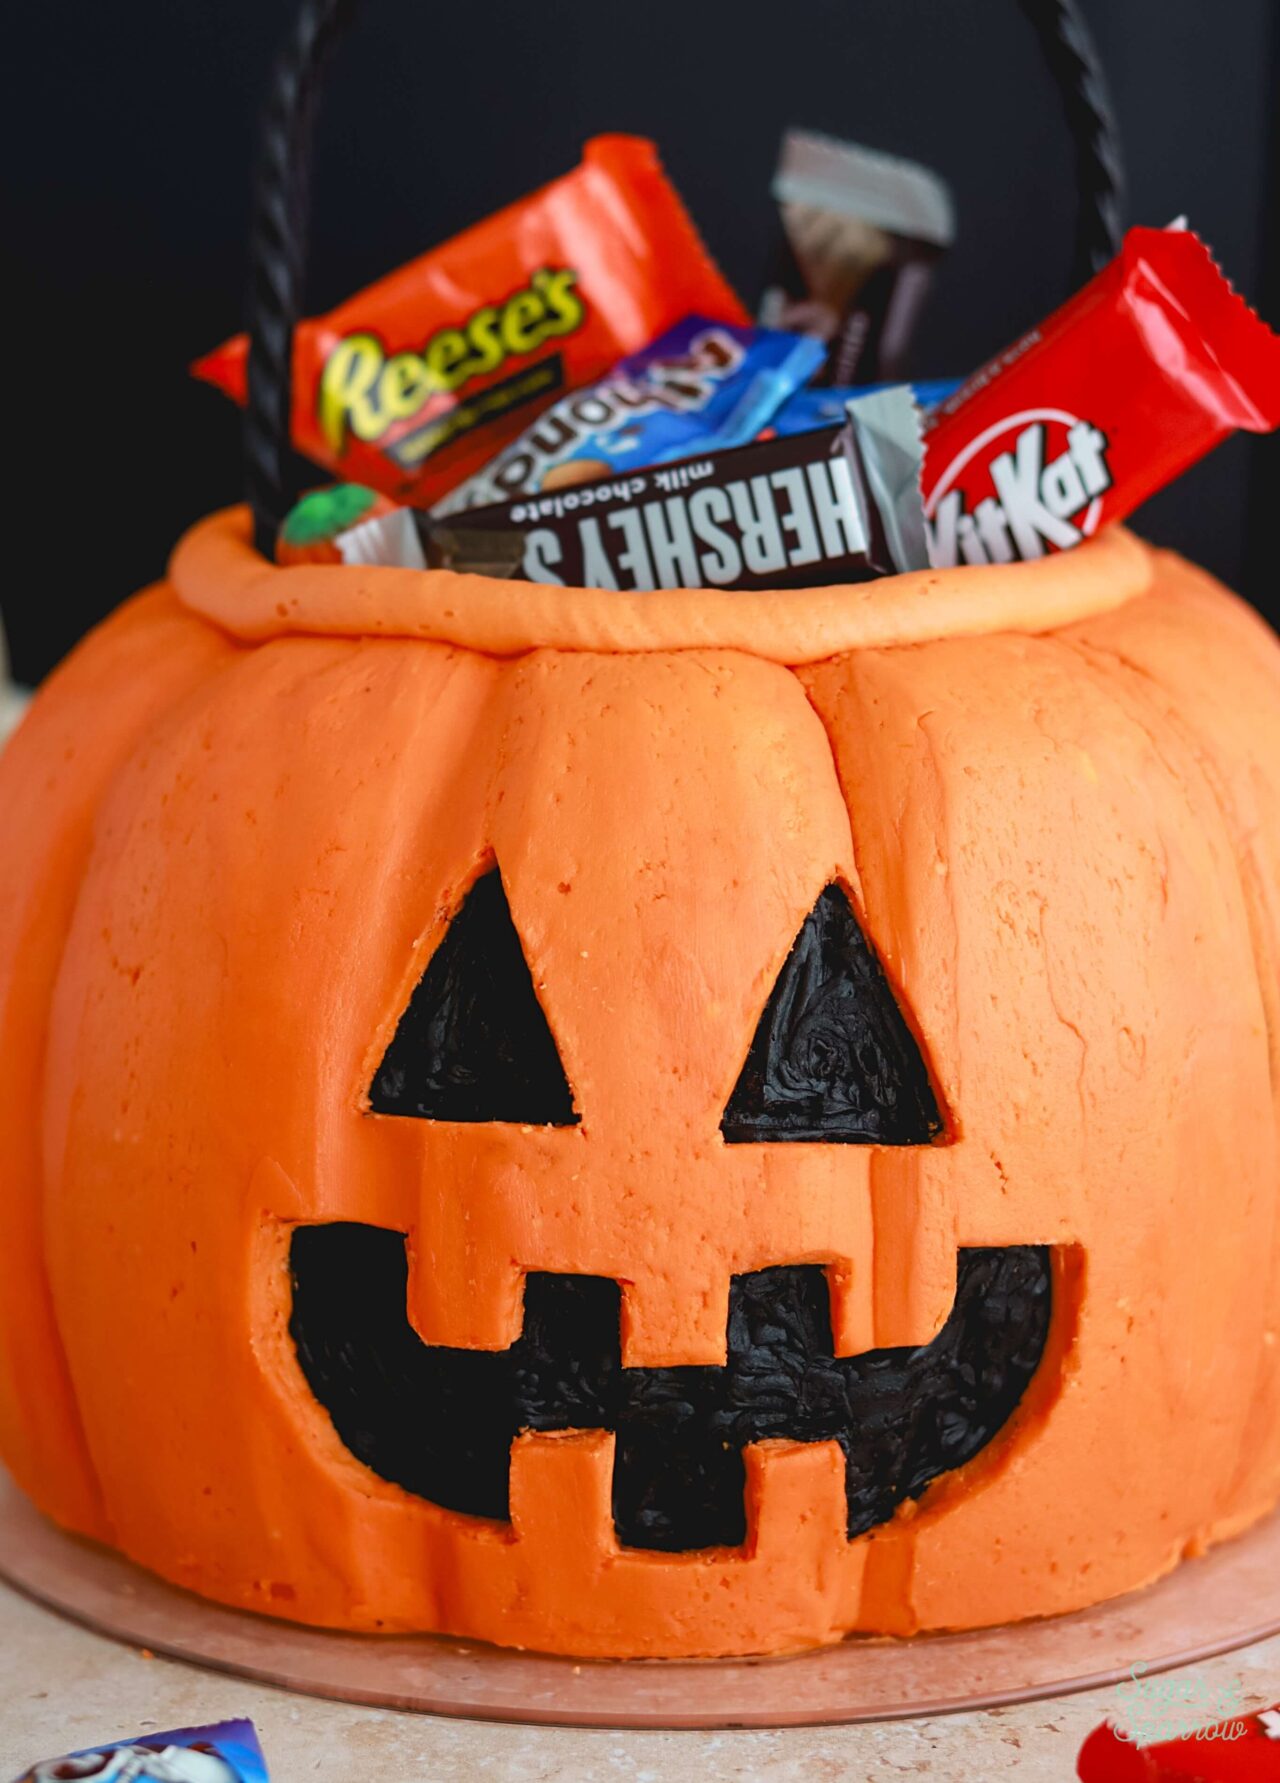
Step 6: Carve the Jack O Lantern
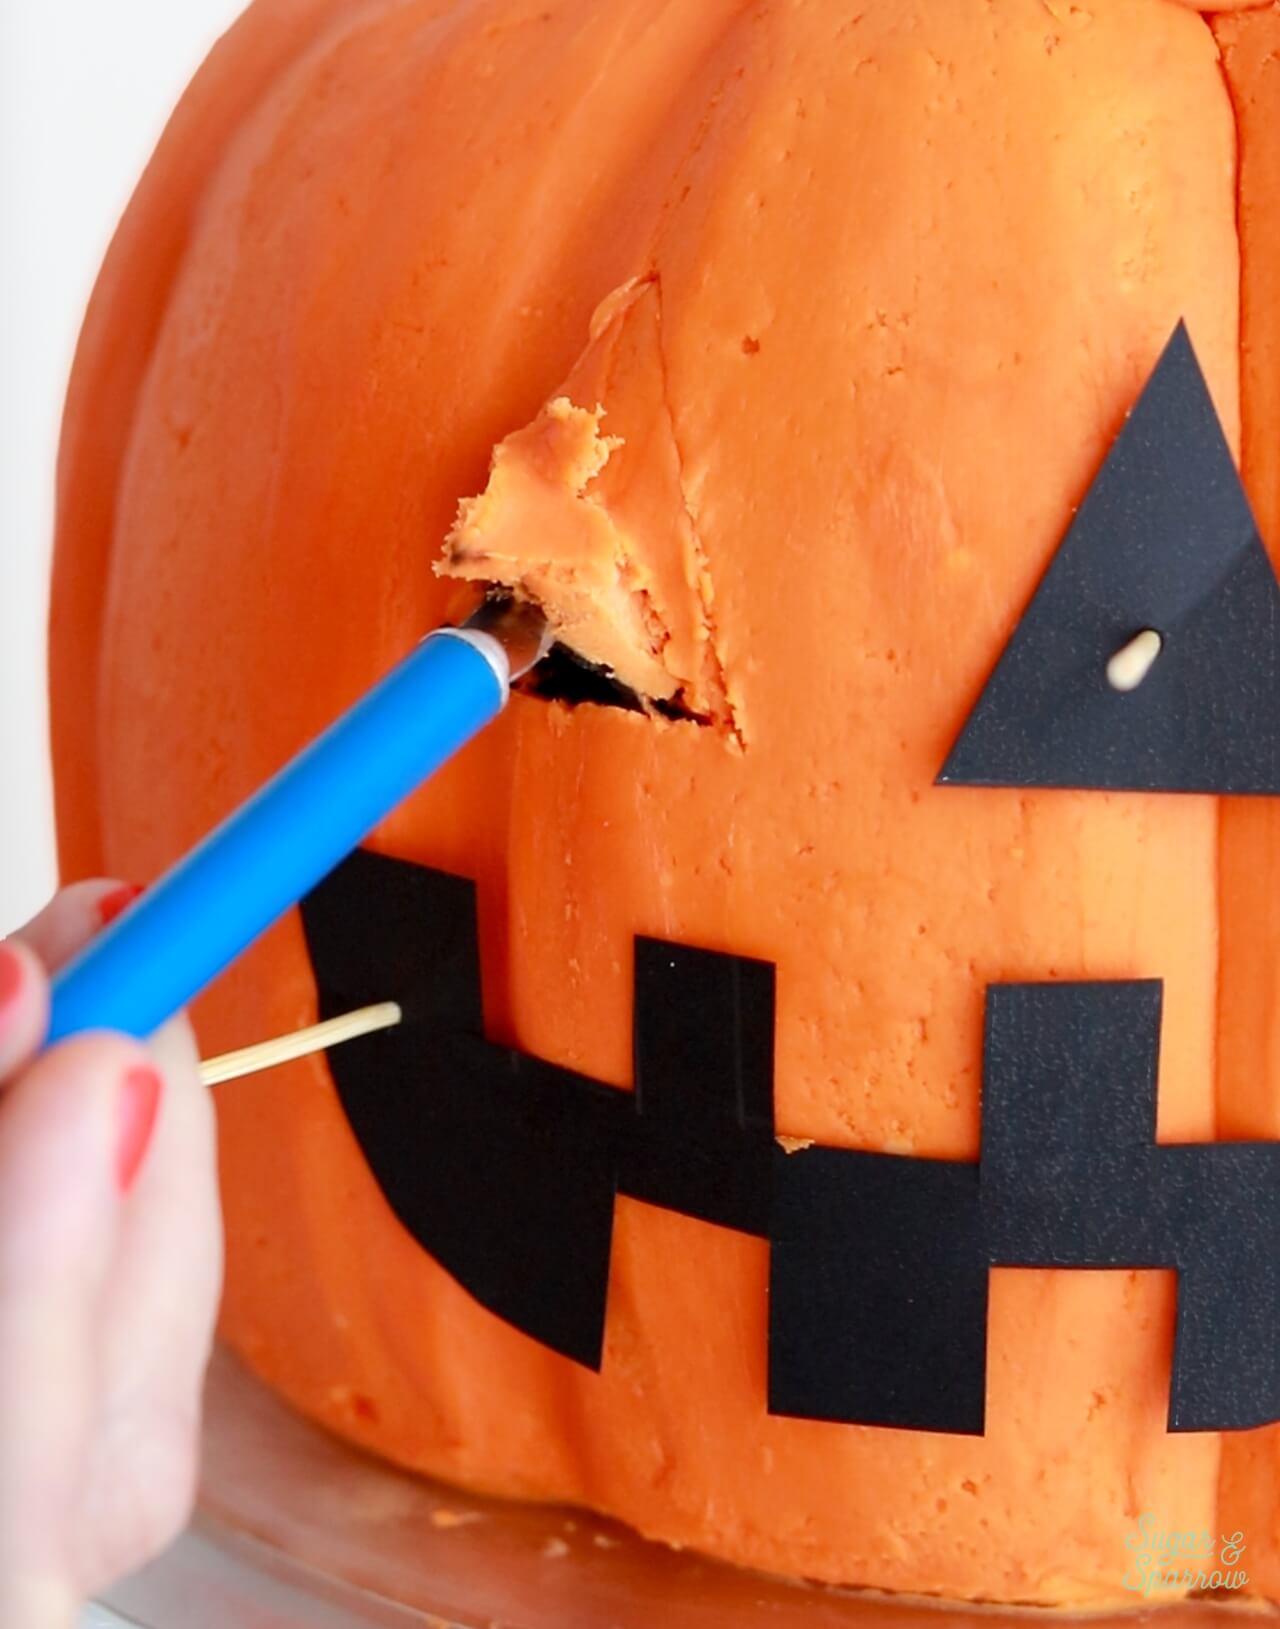
Cut some shapes (2 triangles + 1 mouth) out of a piece of paper or cardstock. I free-handed these templates.
Place the templates onto the cake to create the jack o lantern face and stick them to the cake with toothpicks. Then, carefully carve around each shape with an x-acto knife and remove the carved sections.
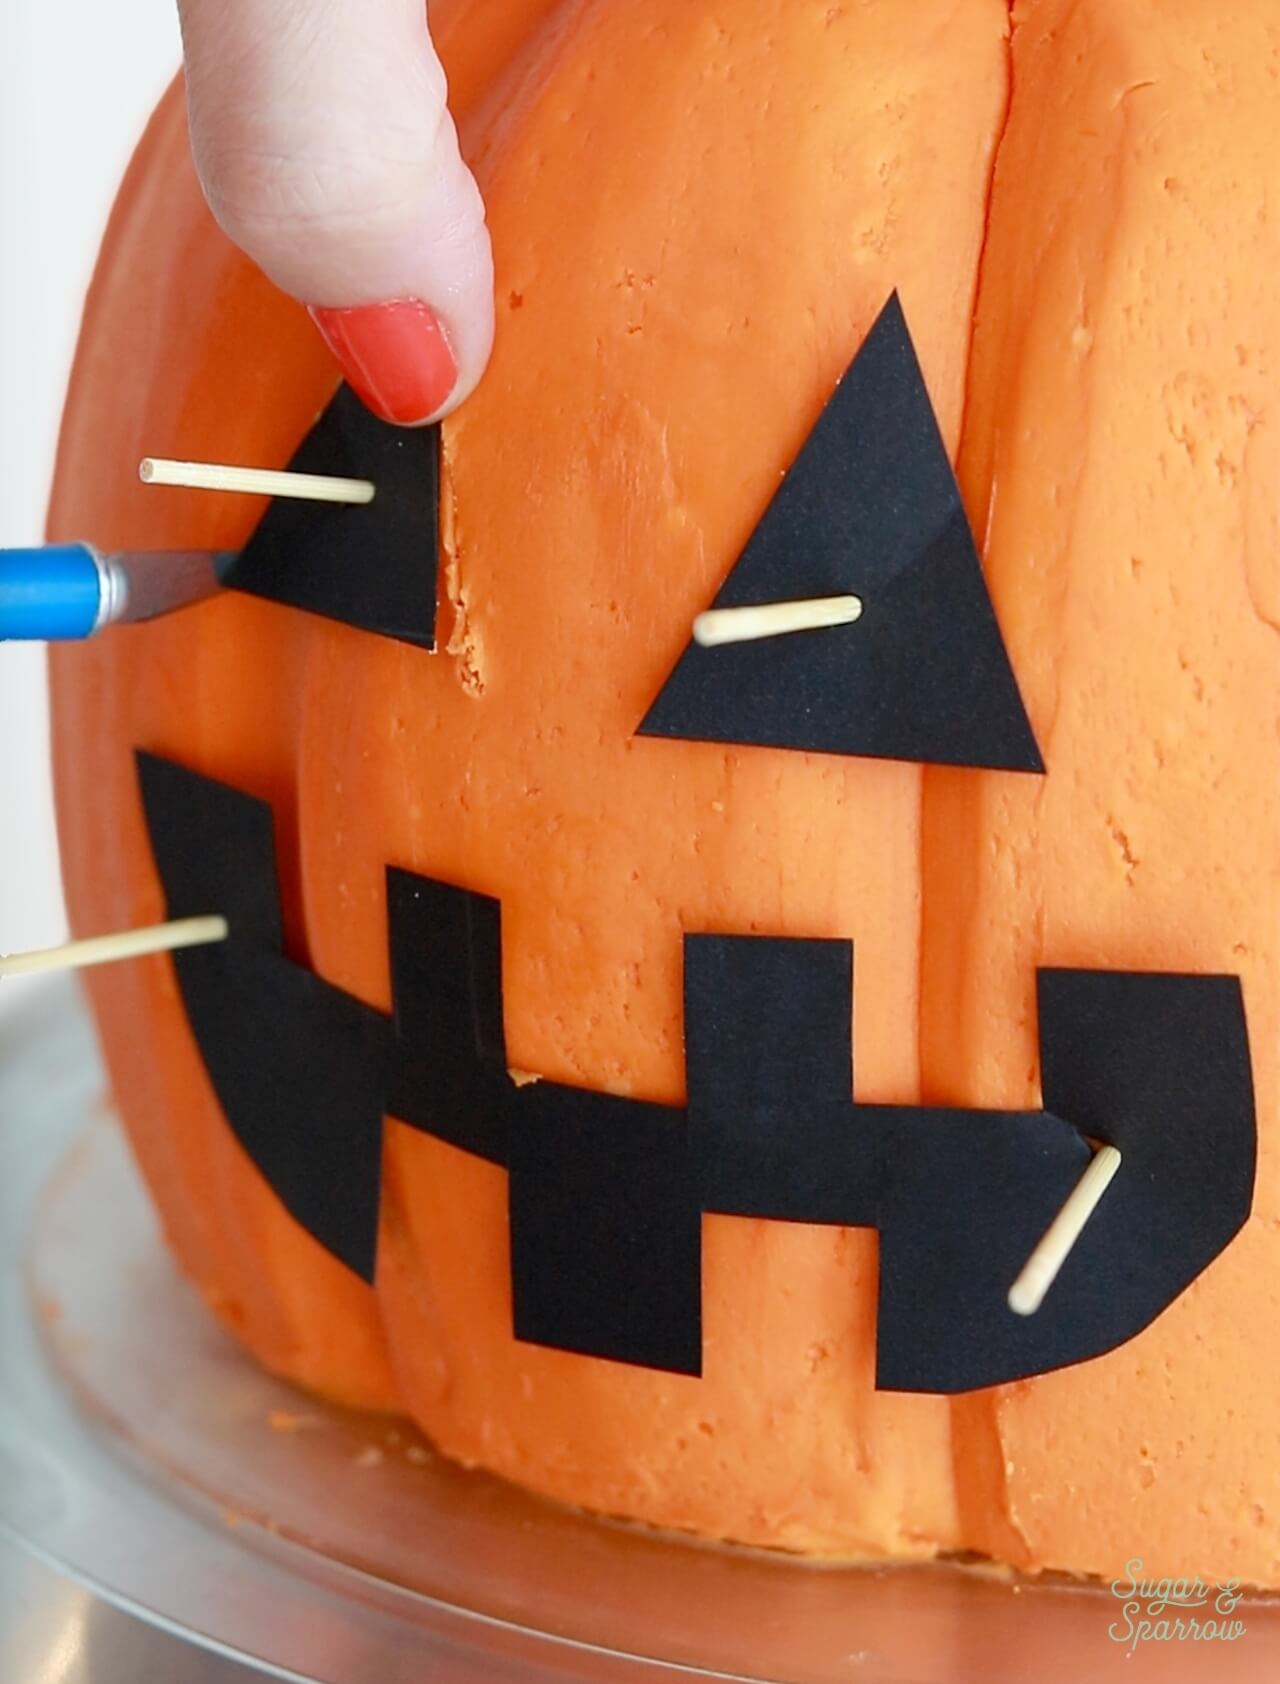
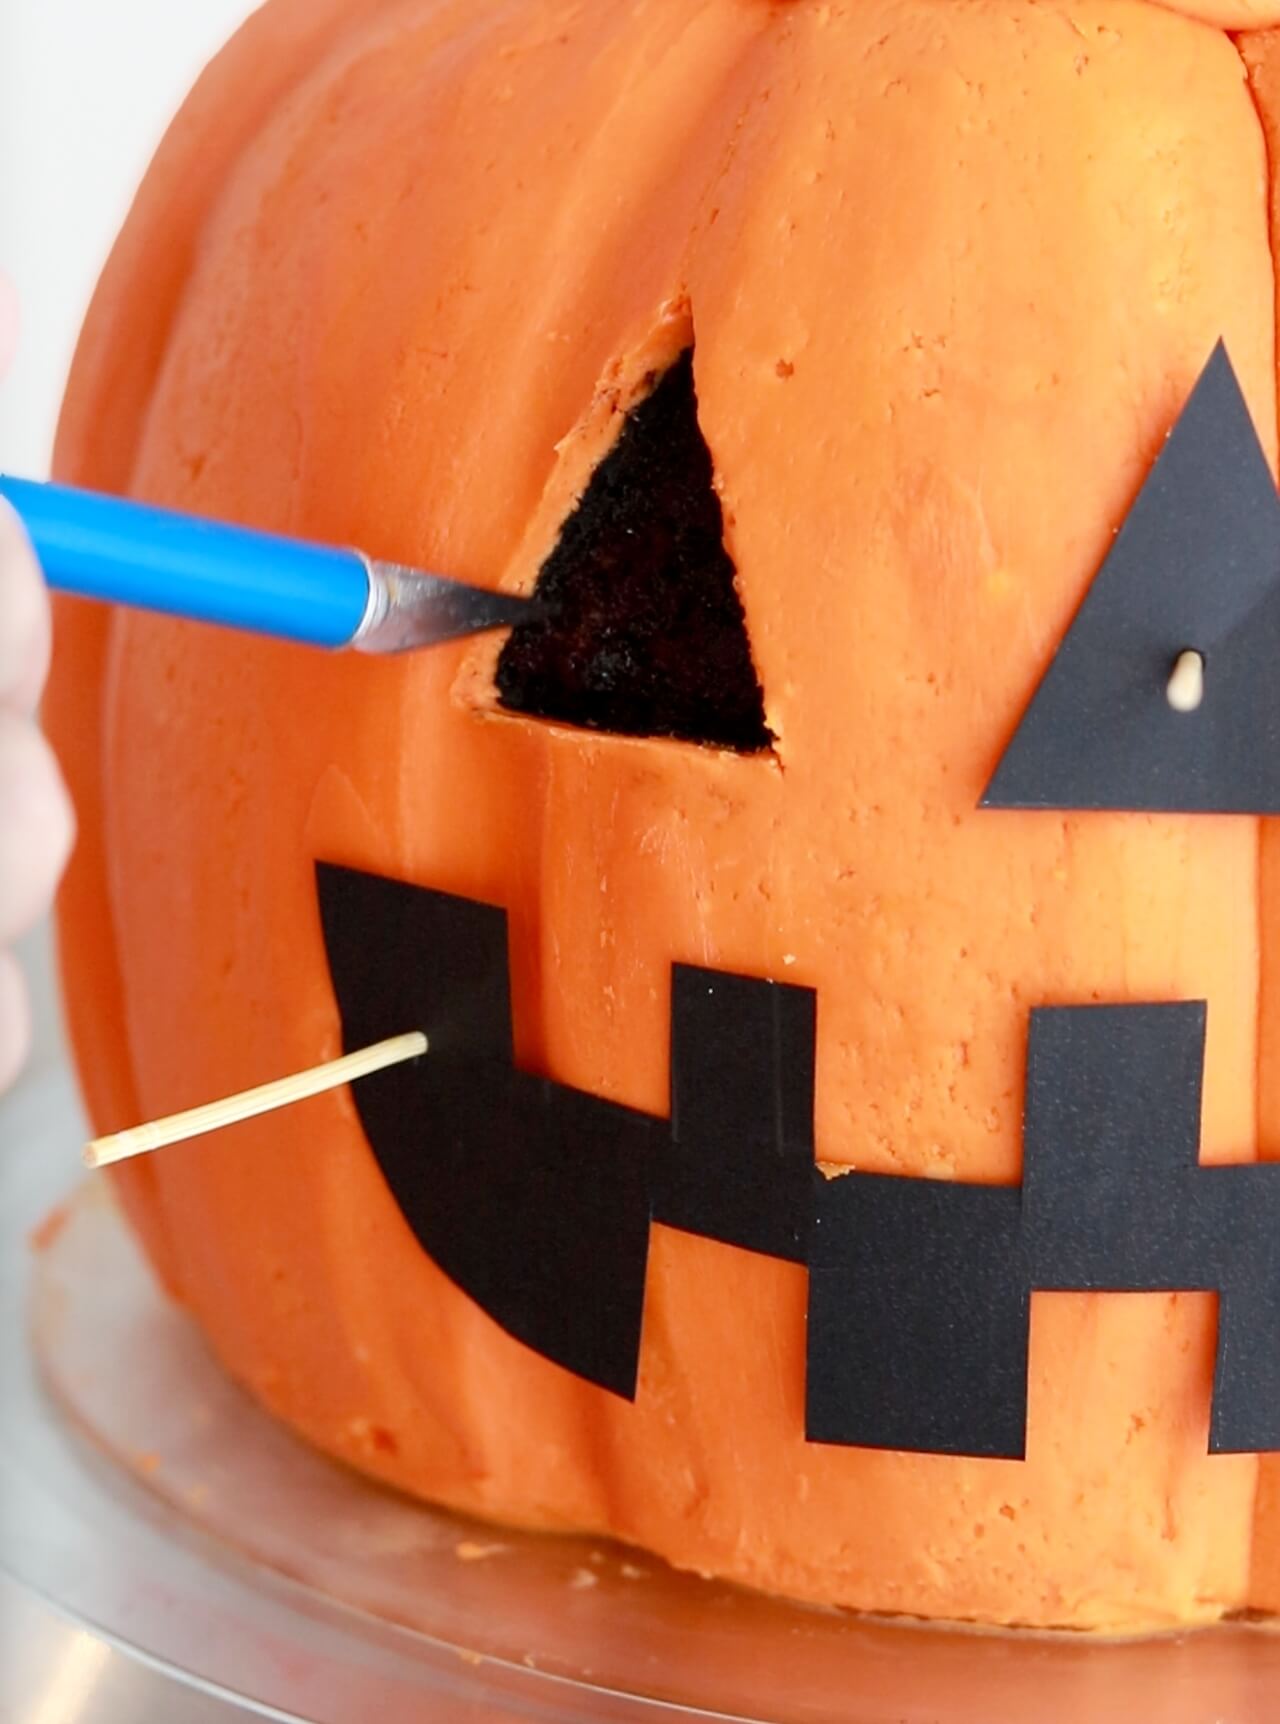
After removing the carved sections, I piped more of the black buttercream into each section to cover up any exposed cake.

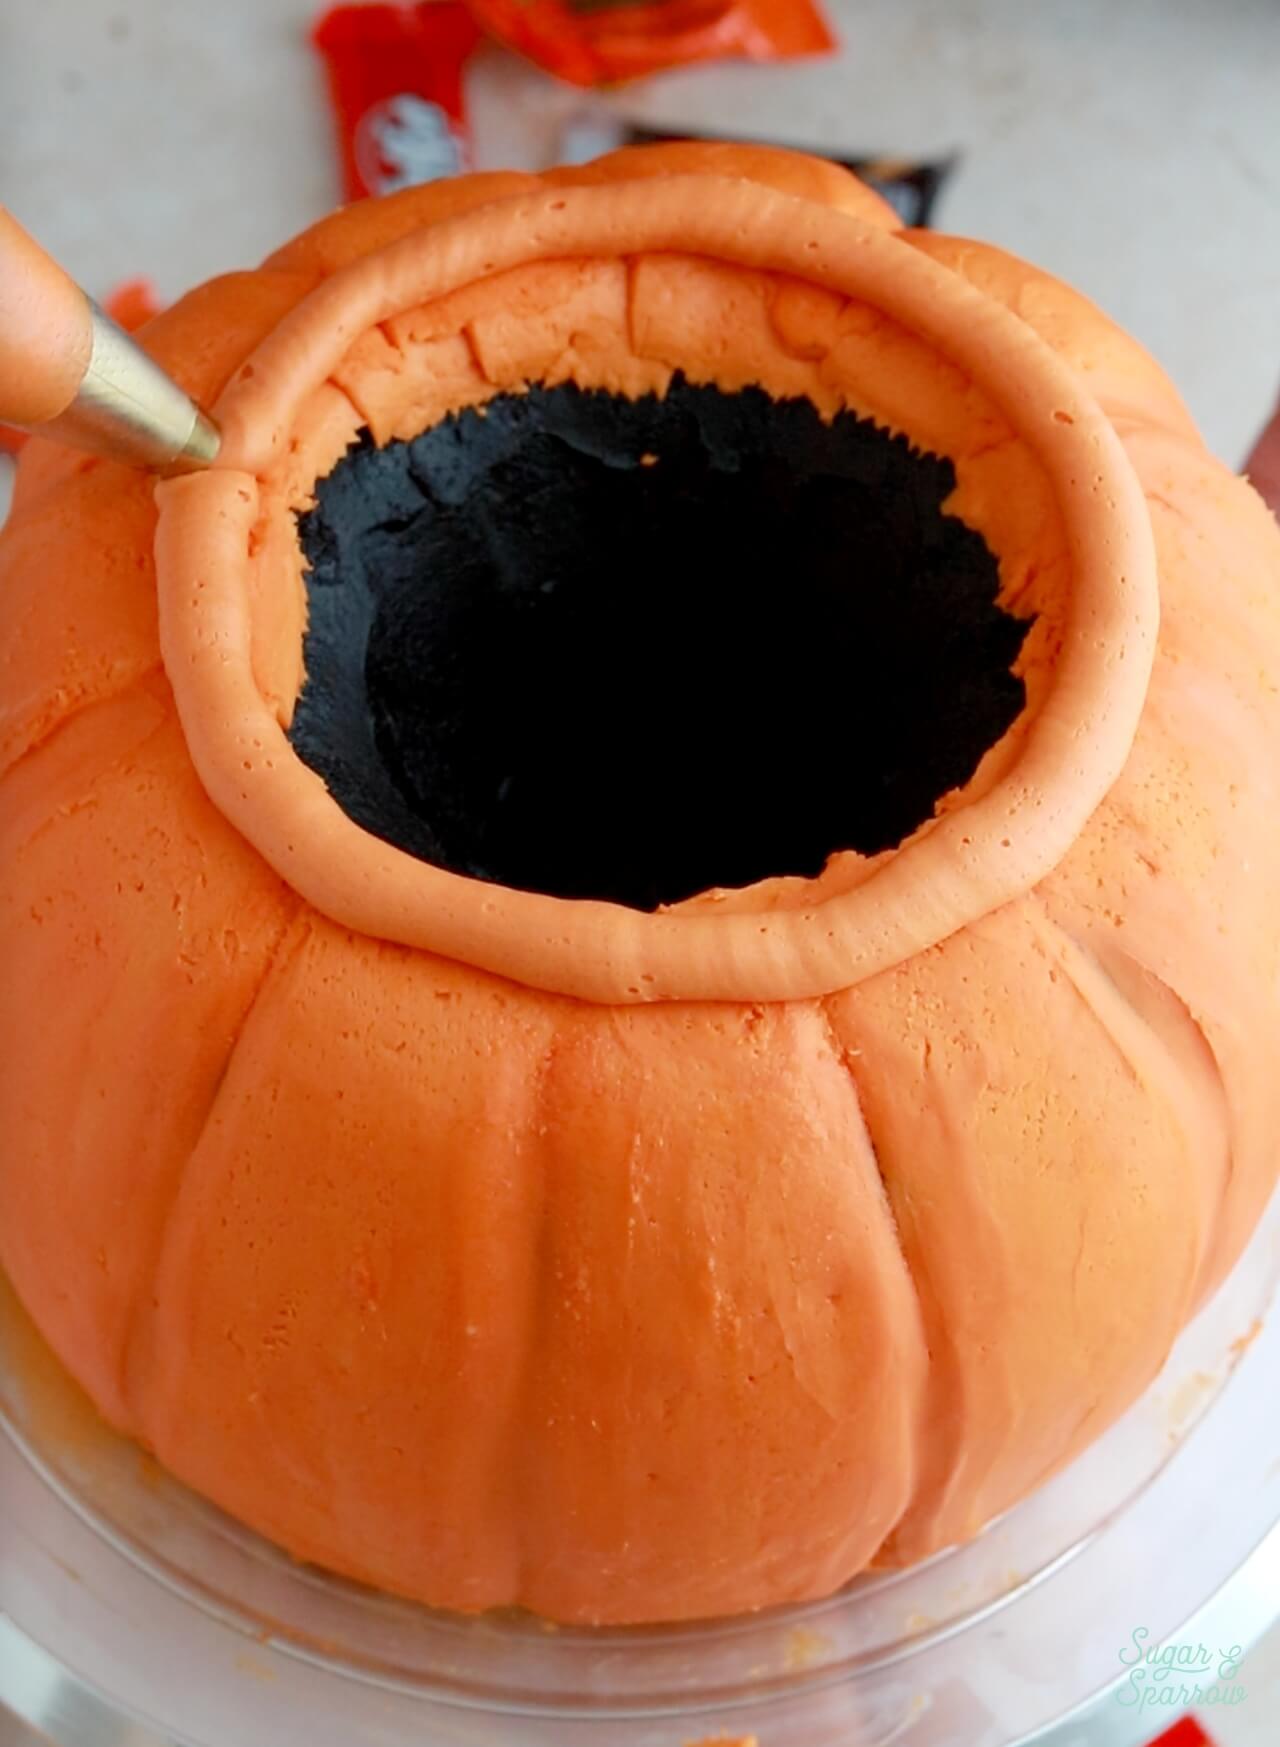
Step 7: Add the Finishing Touches
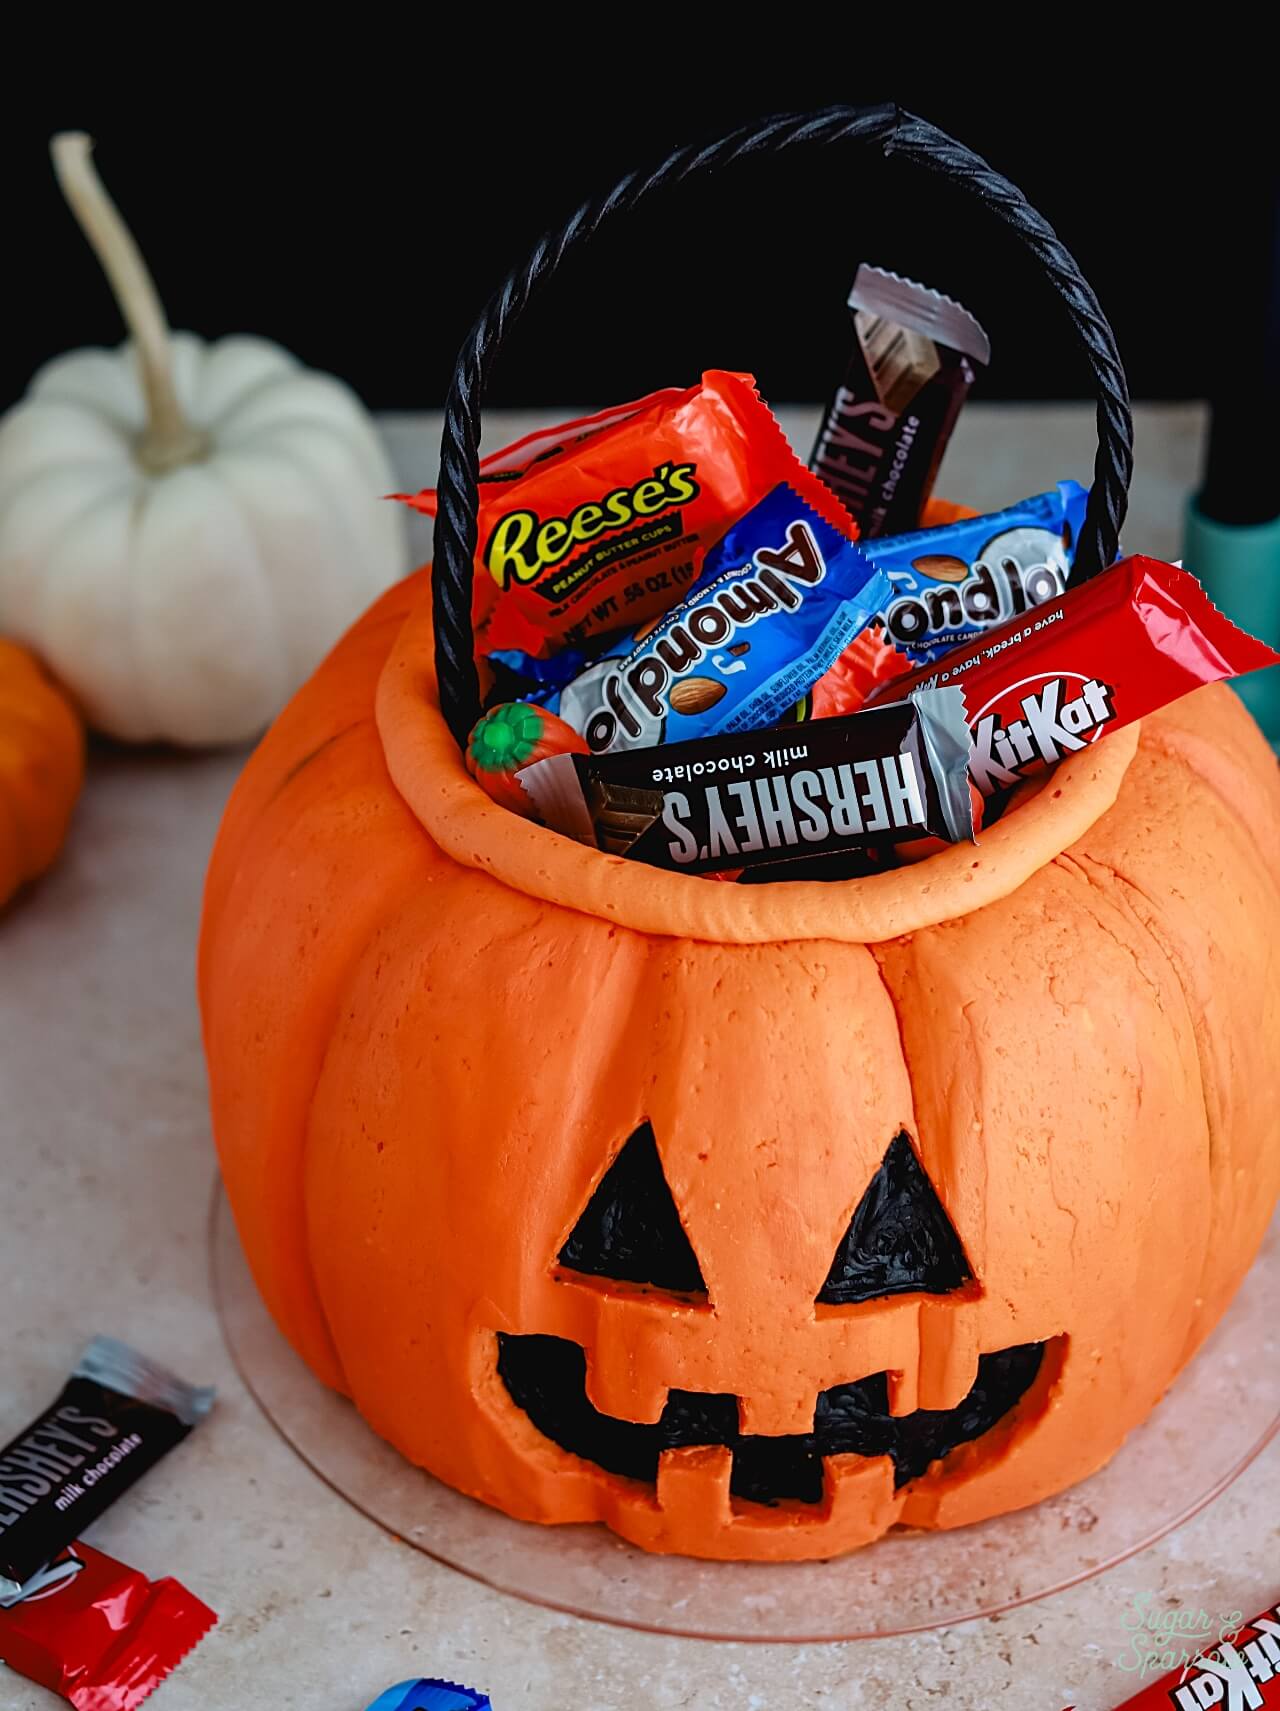
To turn this jack o lantern cake into a candy bucket, I piped a ring of orange buttercream around the top of the cake to create a lip.
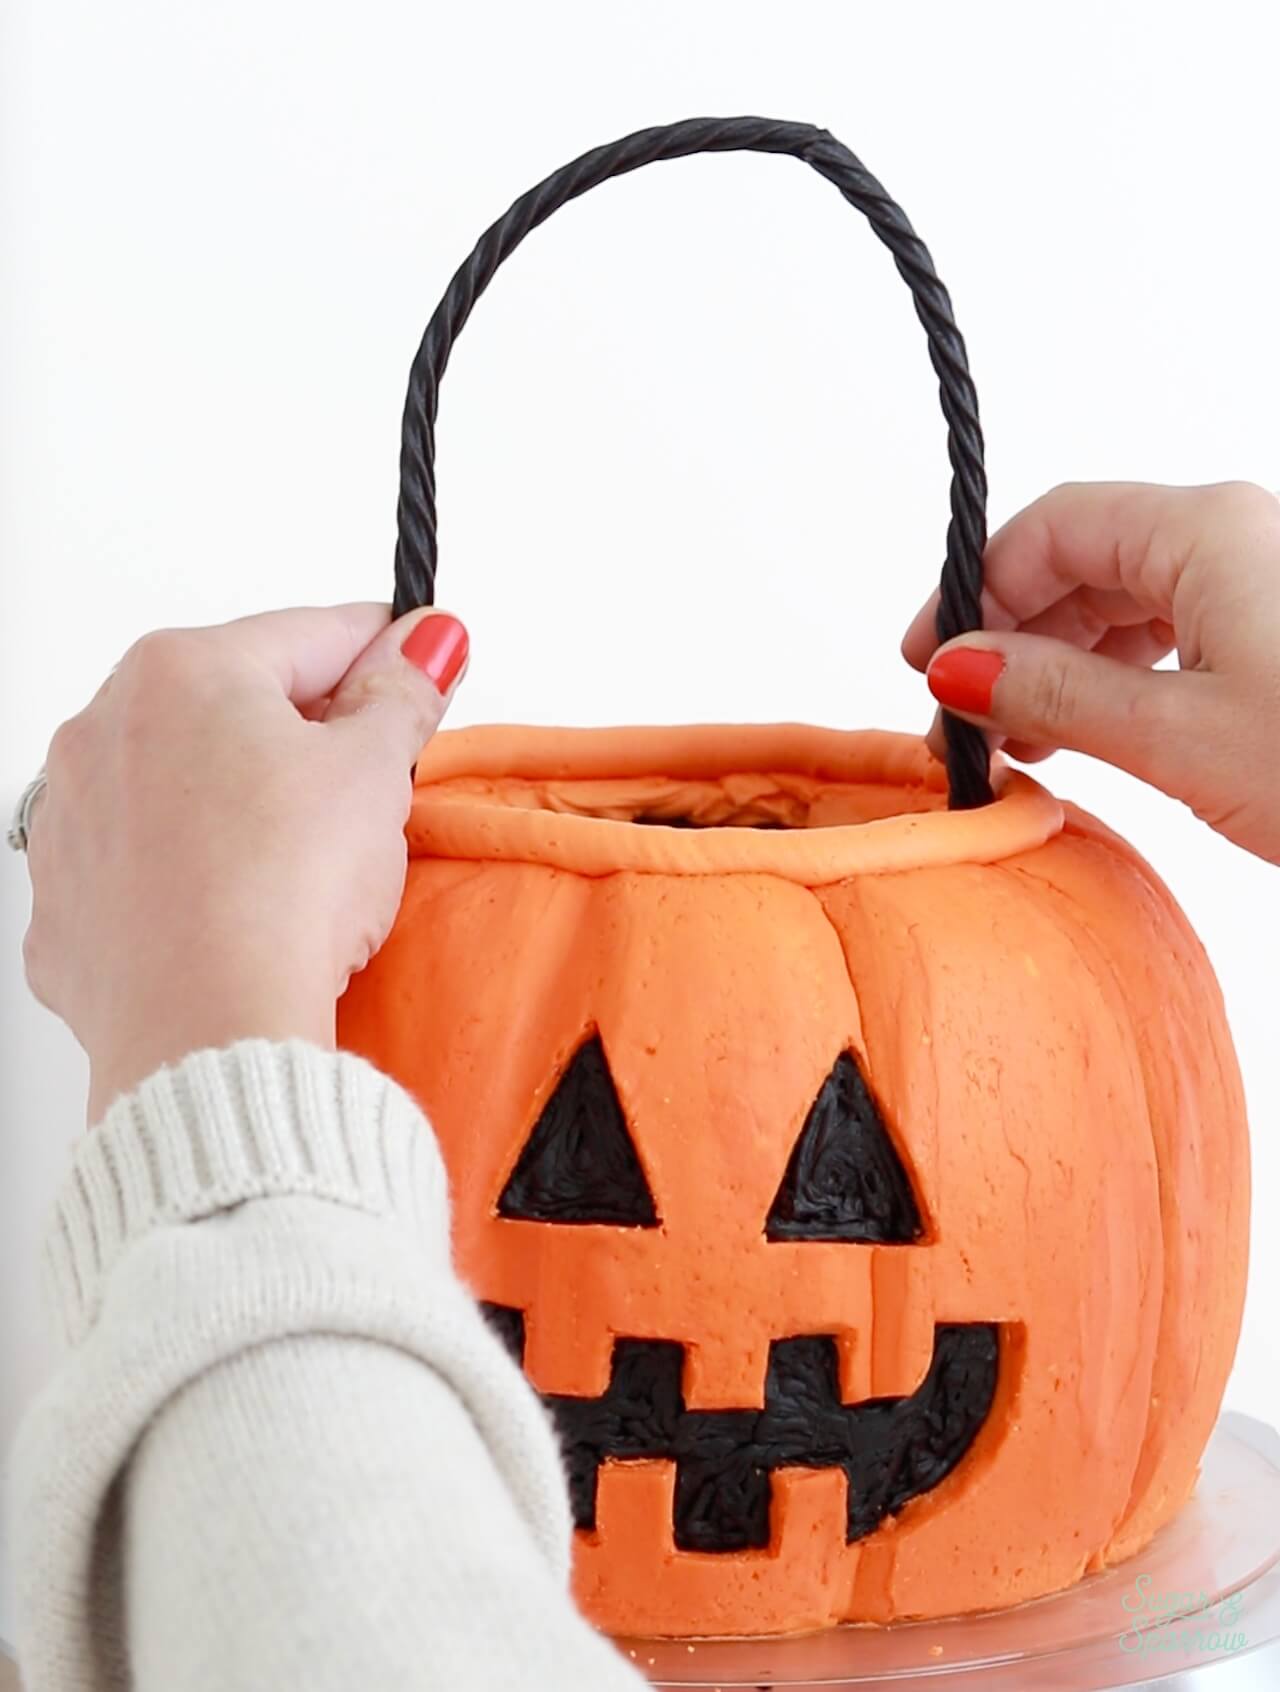
Then, I placed a piece of wire into a couple pieces of hollow black licorice (the two pieces stuck together pretty easily with some pinching) to create the handle. Make sure the wire ends are a little longer than the licorice, then stick the wire ends into the cake.
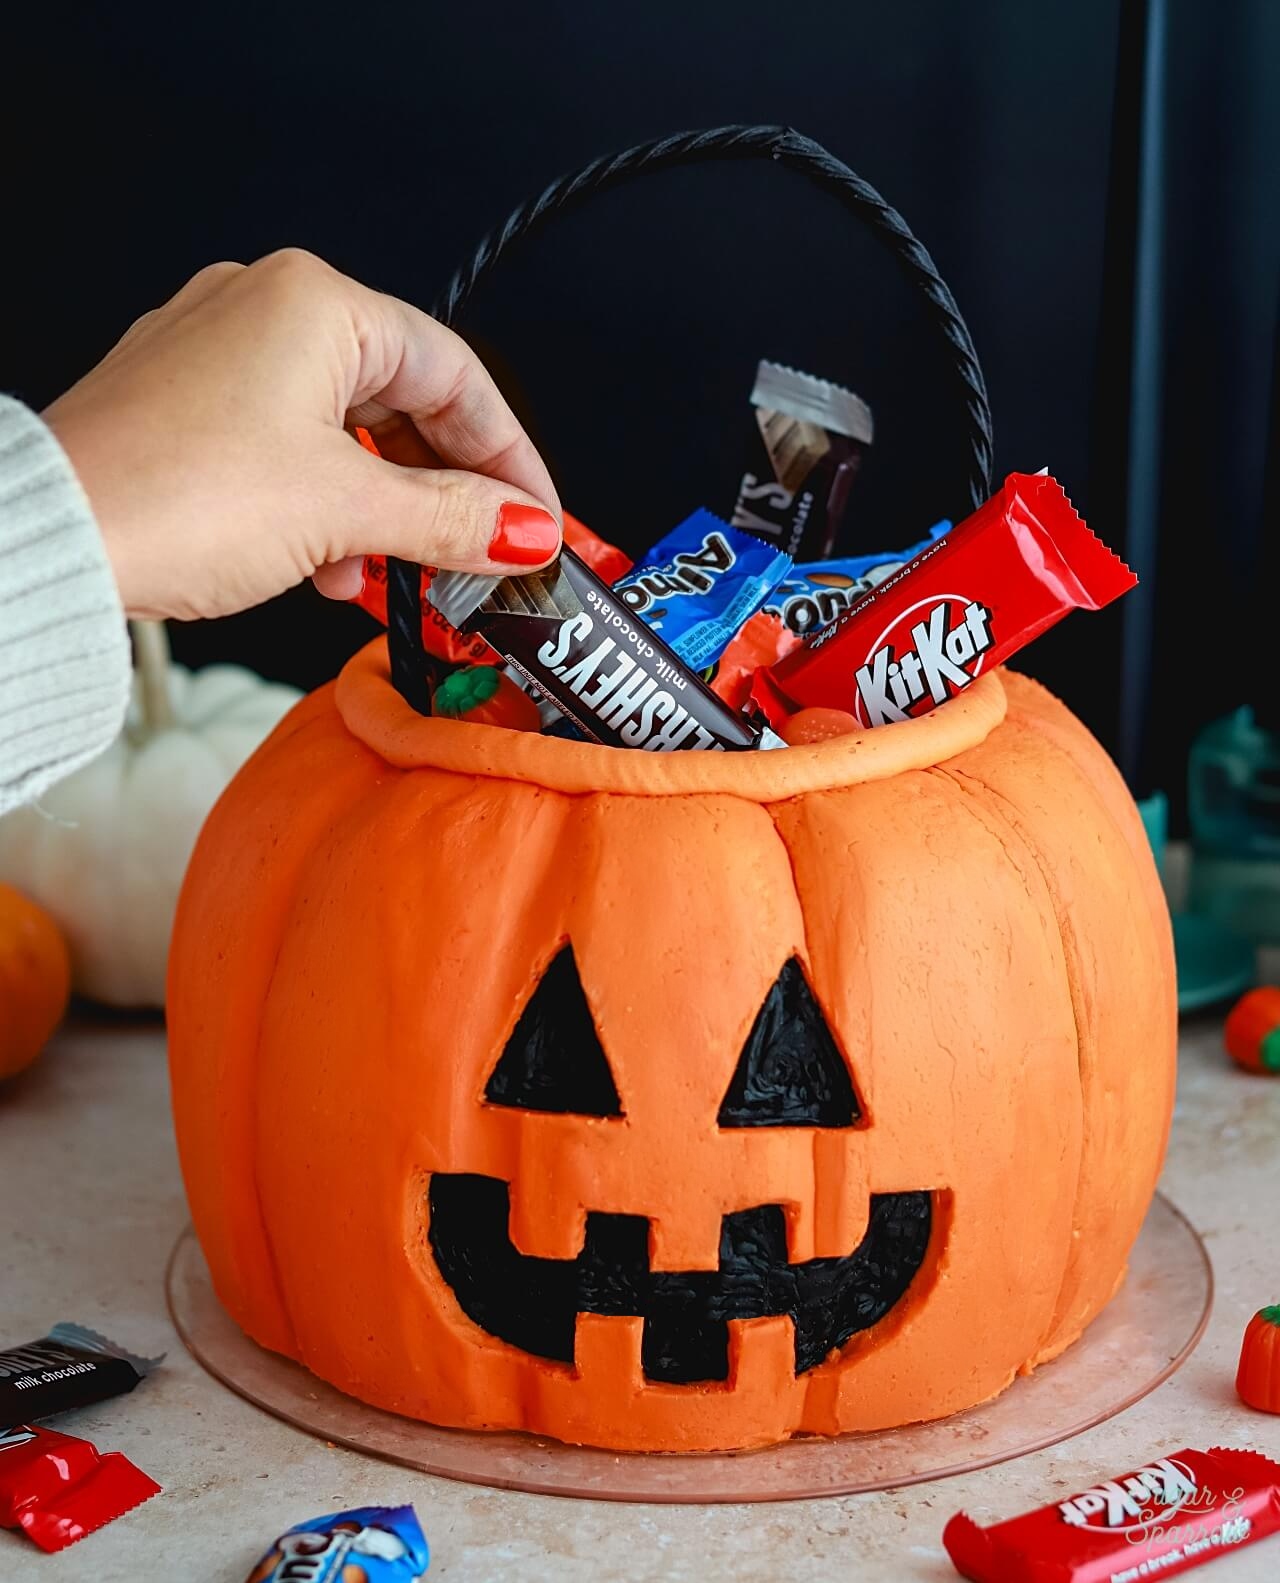
Step 8: Fill it with Candy
When it comes time to serve the candy bucket cake, add all of your favorite Halloween candy into the center cavity!
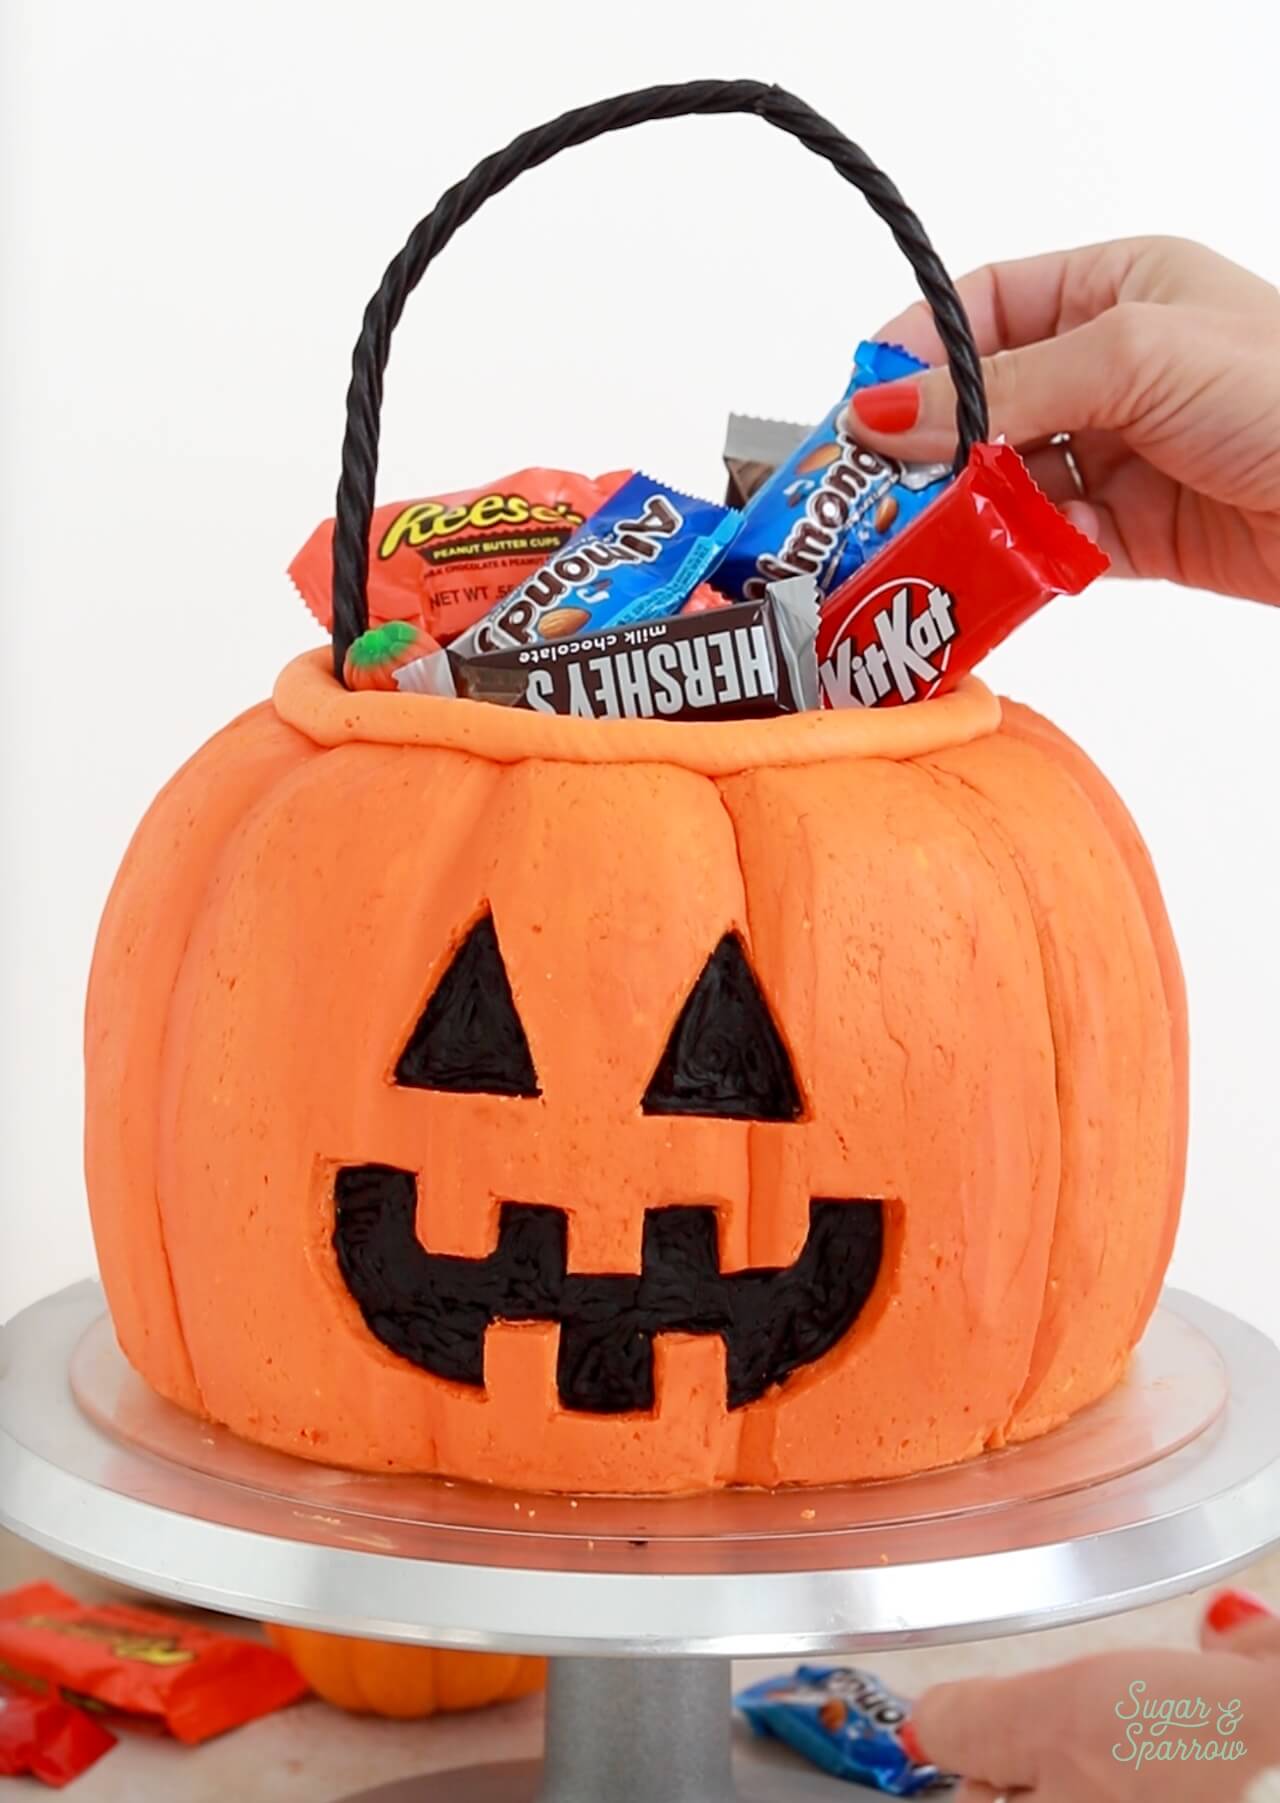
I can’t believe how cute this turned out and it’s perfect for any Halloween party table.
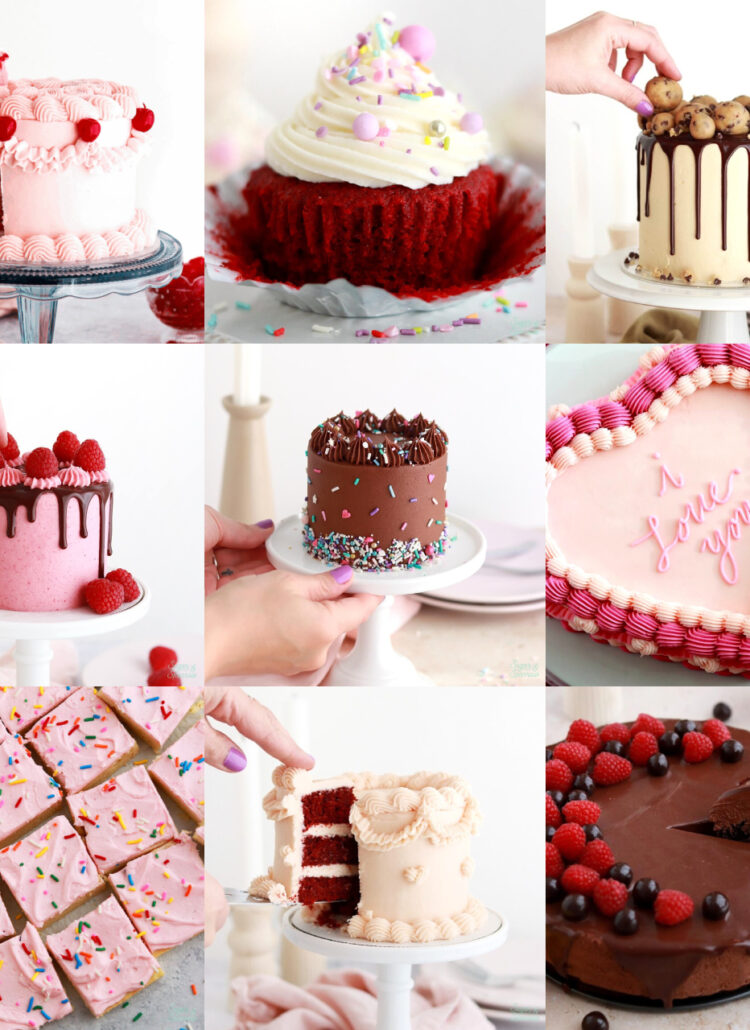
More Halloween Cakes You’ll Love
If you’re looking for more Halloween cake ideas, here are my favorite recipes and tutorials for any spooky party:
I hope you love this jack o lantern candy bucket cake as much as I do! It was so much fun to make even though I was learning every step of the way. Let me know if you make it in the comments below and feel free to tag @sugarandsparrowco on Instagram to show me! I love to see what you create with my recipes and tutorials.

Jack O Lantern Candy Bucket Cake
Equipment
- 1 10-inch cake round cardboard or acrylic
Ingredients
Chocolate Bundt Cakes
- 2 separate batches of one-bowl chocolate cake or any of my cake recipes
Dye-Free Black Buttercream
- 1 Cup (226g) unsalted butter, room temperature
- 2 1/2 Cups (300g) powdered sugar
- 1/2 Cup (56g) black cocoa powder
- 1 tsp pure vanilla extract
- 2 Tbsp whole milk, room temperature
Vanilla Buttercream
- 2 Cups (452g) unsalted butter, room temperature
- 7 Cups (840g) powdered sugar
- 4 tsp pure vanilla extract
- 4 Tbsp whole milk, room temperature
- pinch of salt, or to taste
- 10 drops orange food color gel
Additional Ingredients
- 2 pieces hollow black licorice
- Halloween candy
Instructions
Make the Chocolate Bundt Cakes
- Preheat the oven to 350ºF (177ºC) and prepare two bundt cake pans by spraying the inside surface with baking spray.
- Make two separate batches of one-bowl chocolate cake and pour the batter evenly between the two prepared bundt cake pans. Bake (at the same time or separately) for 35-40 minutes, until a skewer inserted into the cake comes out clean or with just a few moist crumbs.
- Let the cakes cool in the pans for 5-10 minutes, then turn them out onto wire racks for an additional few hours of cooling.
Make the Black Buttercream
- In a stand mixer fitted with a paddle attachment (or with a hand mixer and large bowl), whip the butter on medium speed until creamy and light in color, about 4 minutes. Scrape down the bowl and paddle, then add half of the powdered sugar. Mix on low speed until just incorporated, then add the rest of the powdered sugar. With the mixer still in the off position, sift in the black cocoa powder and add the vanilla, milk, and salt. Mix on low until all ingredients are thoroughly combined, about 2 minutes, scraping down the bowl and paddle as needed.
Make the Vanilla Buttercream
- With a hand mixer or paddle attachment on your stand mixer, cream the butter on medium-high until it’s creamy and light (almost white) in color. About 7 minutes. With the mixer on low, add the sifted powdered sugar one cup at a time, scraping down after each addition and making sure each cup is fully incorporated before adding the next one. Add vanilla, milk, salt, and orange food coloring. Mix on low for another minute until the ingredients are fully incorporated and the color is uniform.
Assembly
- Once the cakes are cooled to room temperature and the buttercream is made, follow the decorating tutorial in the blog post above.
Notes
- The chocolate bundt cakes can be made ahead and stored at room temperature, covered in plastic wrap, for up to two days. Alternatively, you can cover with plastic wrap and store in the freezer for up to two months before thawing to room temperature.
- Both buttercream recipes can be made ahead and stored in airtight containers at room temperature for up to one day. Alternatively, you can store them in airtight containers in the refrigerator for up to two weeks. When you’re ready to use the buttercream, bring it back to room temperature and re-mix with your stand mixer on low speed to bring it back to frosting consistency.

This is so cute! I’m excited to give it a try. Will you be making a video tutorial of how you made it?
Hi Tonya! I posted a short video, but this blog post is much more in depth on the instructions: https://youtube.com/shorts/dT6jkmtnQO4?si=_ZHxtXHTypDjaOZ3