• Cake
  • Frosting
  • YouTube
  • My Favorite Tools
  • Nav Social Icons

  • Skip to primary navigation
  • Skip to main content
  • Skip to primary sidebar
  • Skip to footer
  • Recipes
    • Cake
    • Cupcakes
    • Frosting
    • Ice Cream
    • Vegan
  • Cake Basics
  • Tutorials
  • Blog
  • About
  • Mobile Menu Widgets

    Connect

    Search

Sugar & Sparrow logo in script font

Sugar & Sparrow

Lifestyle and Cake from Portland Oregon

  • Cake Basics
  • Recipes
    • Cake
    • Cupcakes
    • Cookies & Bars
    • Filling
    • Frosting
    • Ice Cream
    • No-Bake
    • Small Batch
    • Vegan
  • Tutorials
  • Book
  • Blog
  • About

Almond Joy Cake Recipe

October 28, 2020 · In: Cake, Recipes, Seasonal, Winter

Jump to Recipe

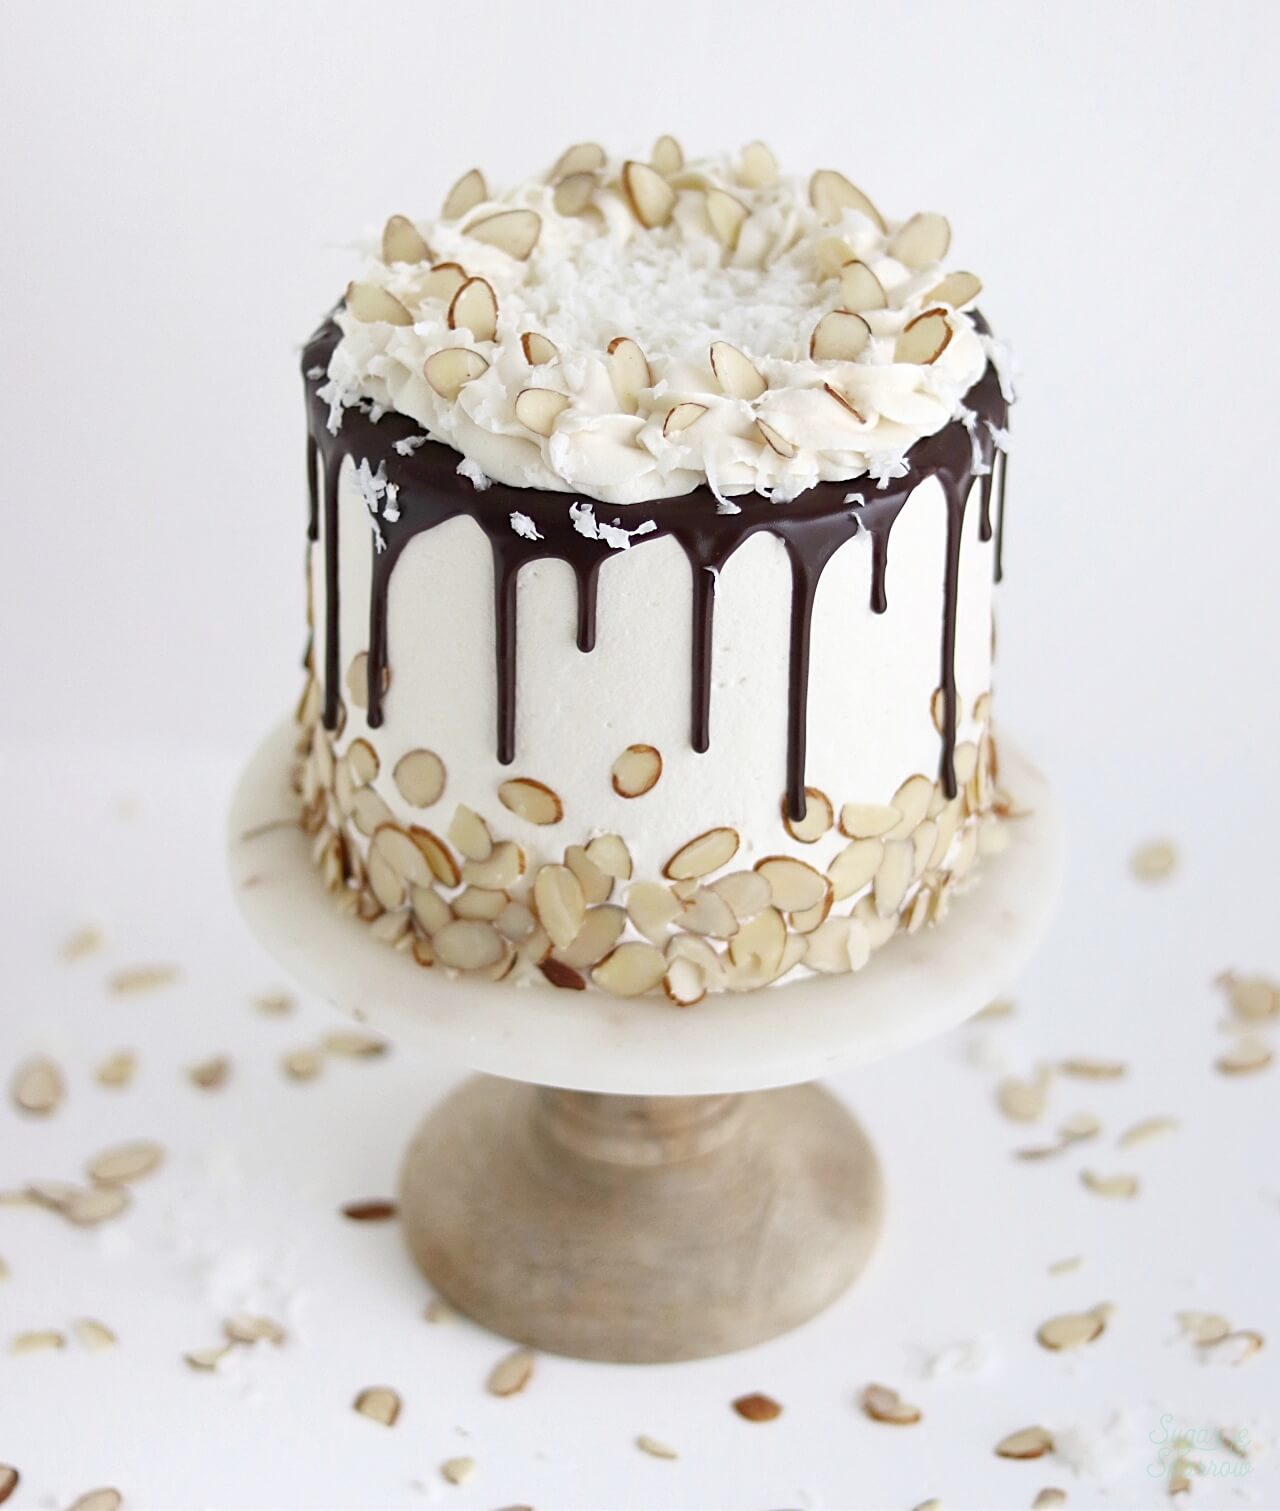
If there are fun-sized Almond Joys anywhere in my general proximity, I will eat them. All of them. I just love the flavor combination of sweet coconut, milk chocolate, and almond. It’s a taste trifecta and if you agree, you’re going to LOVE this cake! Just imagine all the textures and flavors in an Almond Joy candy bar, only in cake form, and behold this beauty:
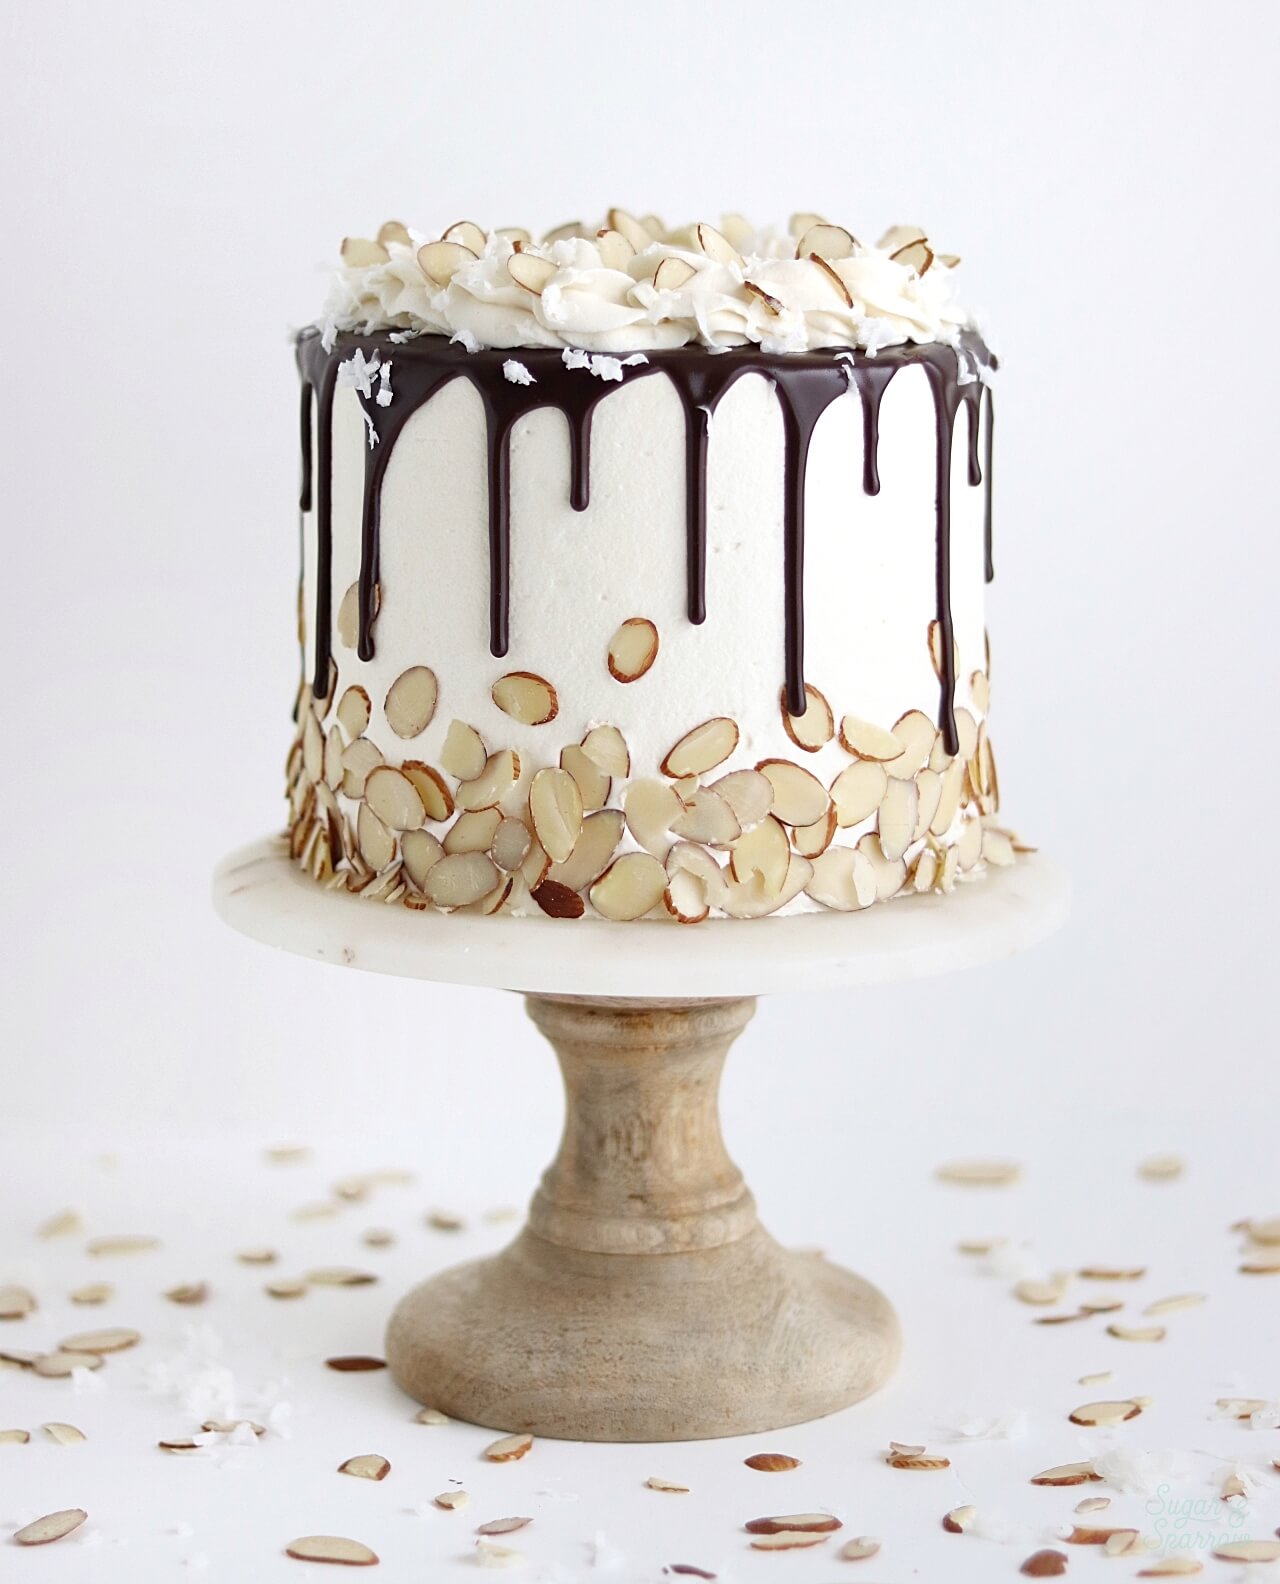
coconut cake recipe by sugar and sparrow

This Almond Joy inspired cake starts with a delicious, fluffy Coconut Cake. It’s packed with so much flavor and texture between the coconut extract, shredded coconut, and canned coconut milk. And side note on the coconut milk: notice that I said canned. You’ll find canned coconut milk in the Asian foods aisle or the baking aisle of your grocery store and it’s loads different than boxed coconut milk (for drinking). The canned version is much more creamy and condensed, making it perfect for baking, so be sure to get the right coconut milk for this cake! It will make all the difference! 

coconut cake with coconut buttercream and chocolate ganache
coconut almond cake with chocolate ganache

The Coconut Cake turned out so delicious that I just sat there eating a bowl of cake scraps for a good ten minutes. It’s so moist due to the sour cream and creamy coconut milk, and the texture with shredded coconut is unreal. I thought to pair it with straight up Almond Buttercream, but adding some coconut extract to the buttercream really brought out the perfect coconut-almond flavor you’d find in an Almond Joy. So Coconut-Almond Buttercream was born, and it could not be a more tasty compliment to this Coconut Cake!
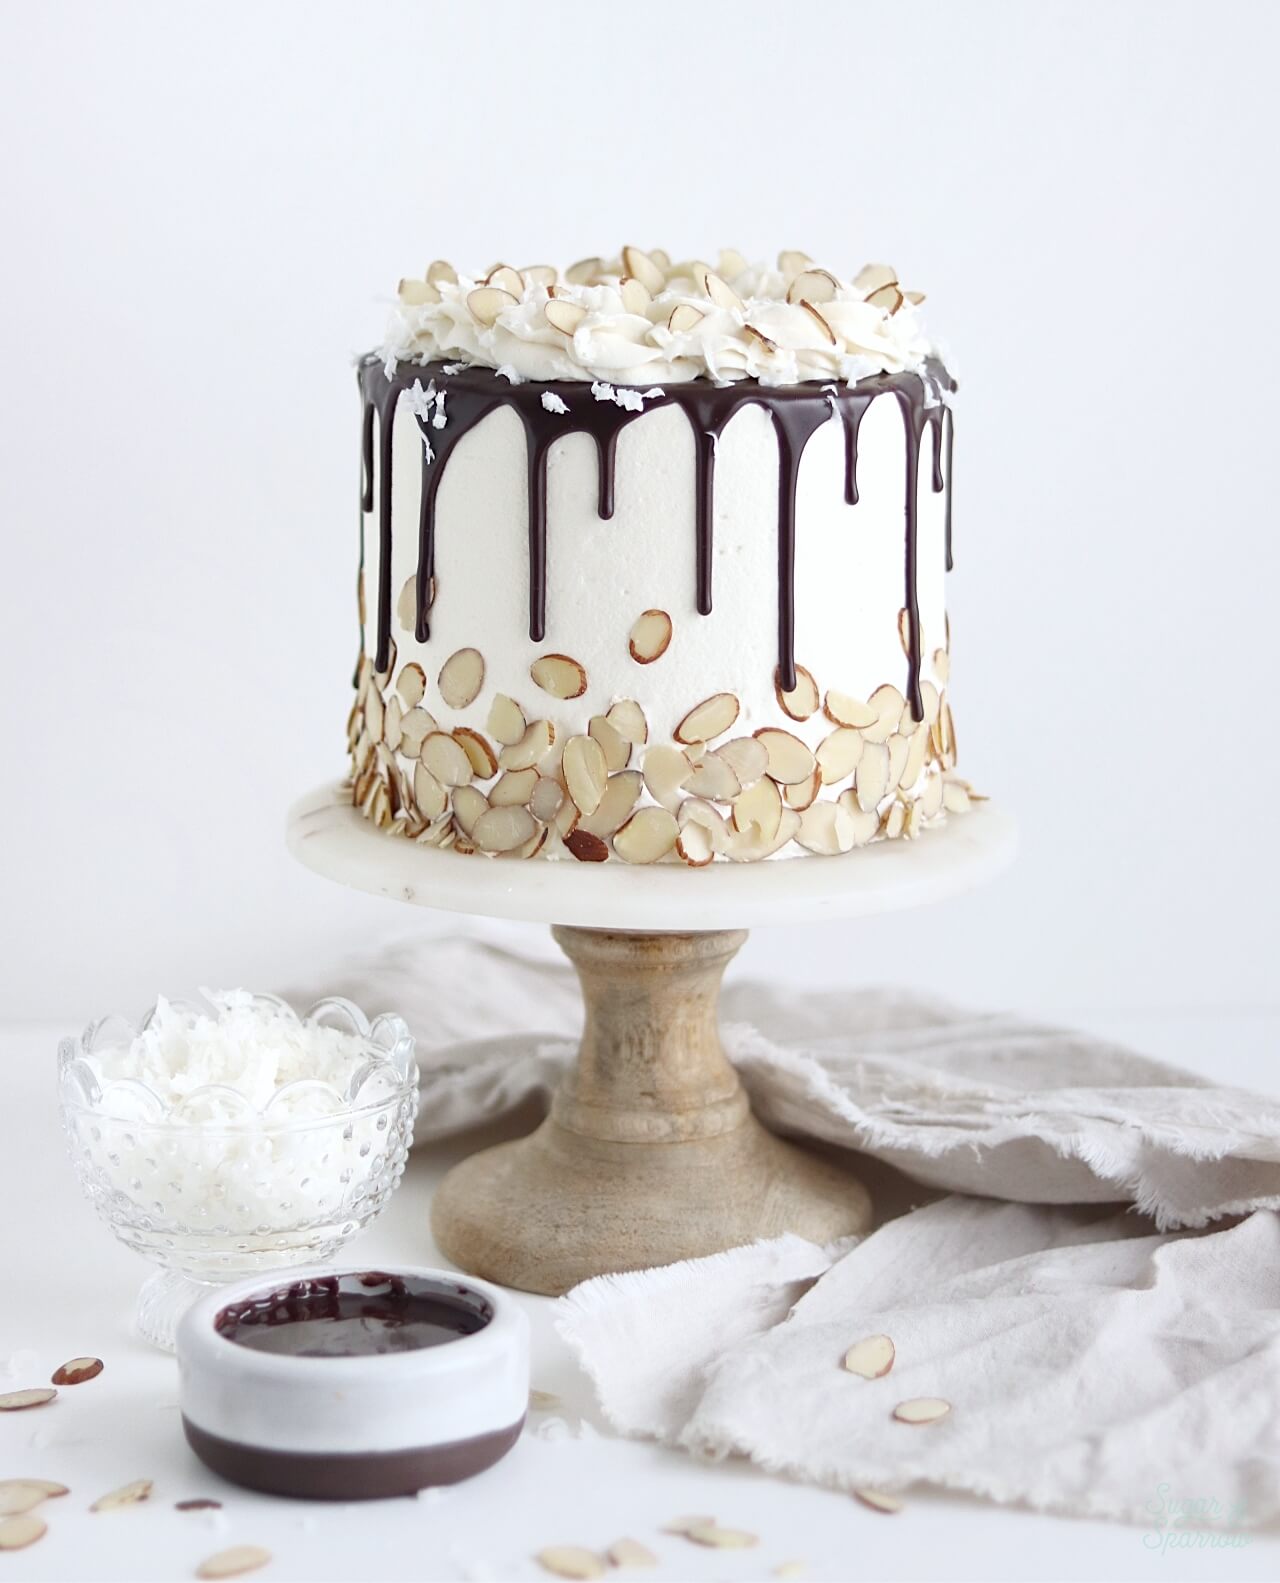
coconut chocolate cake by sugar and sparrow
coconut almond joy cake by sugar and sparrow

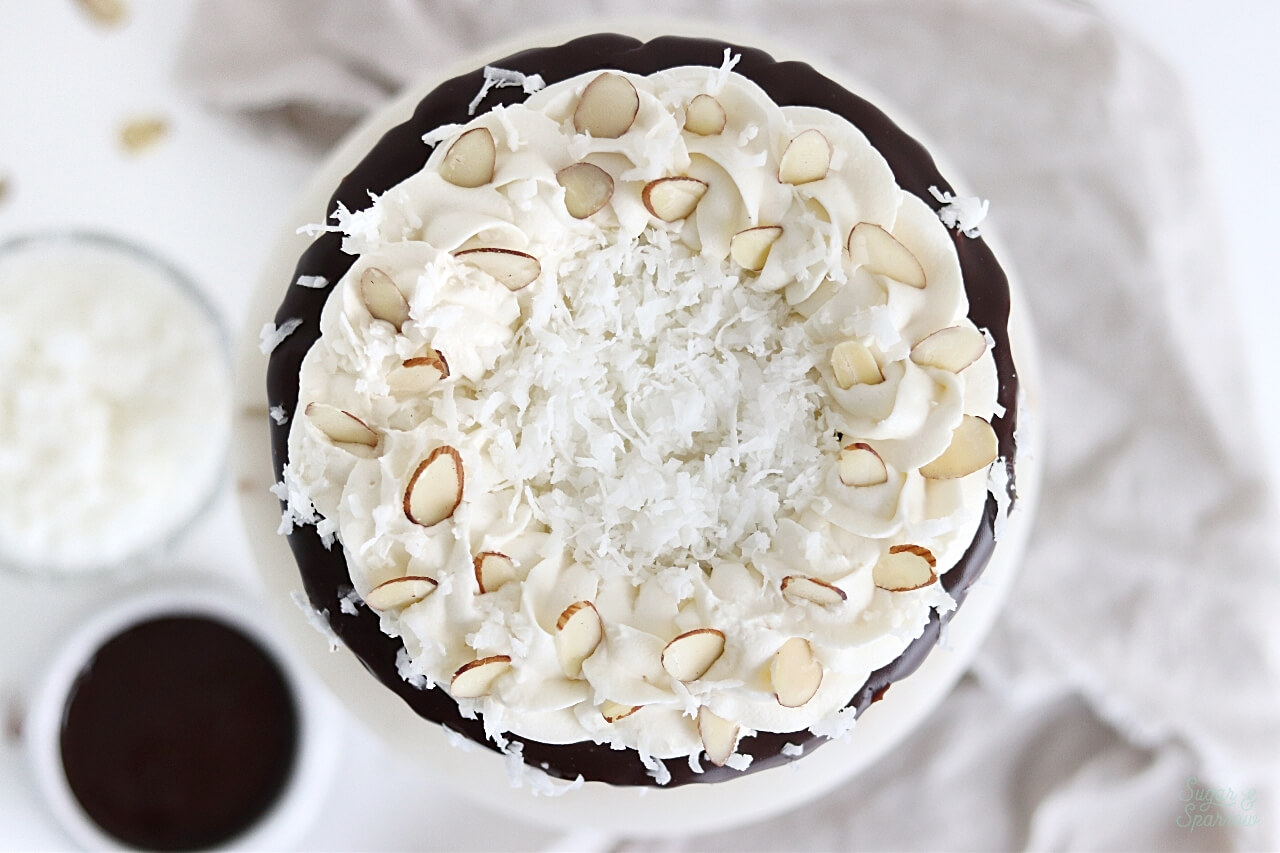
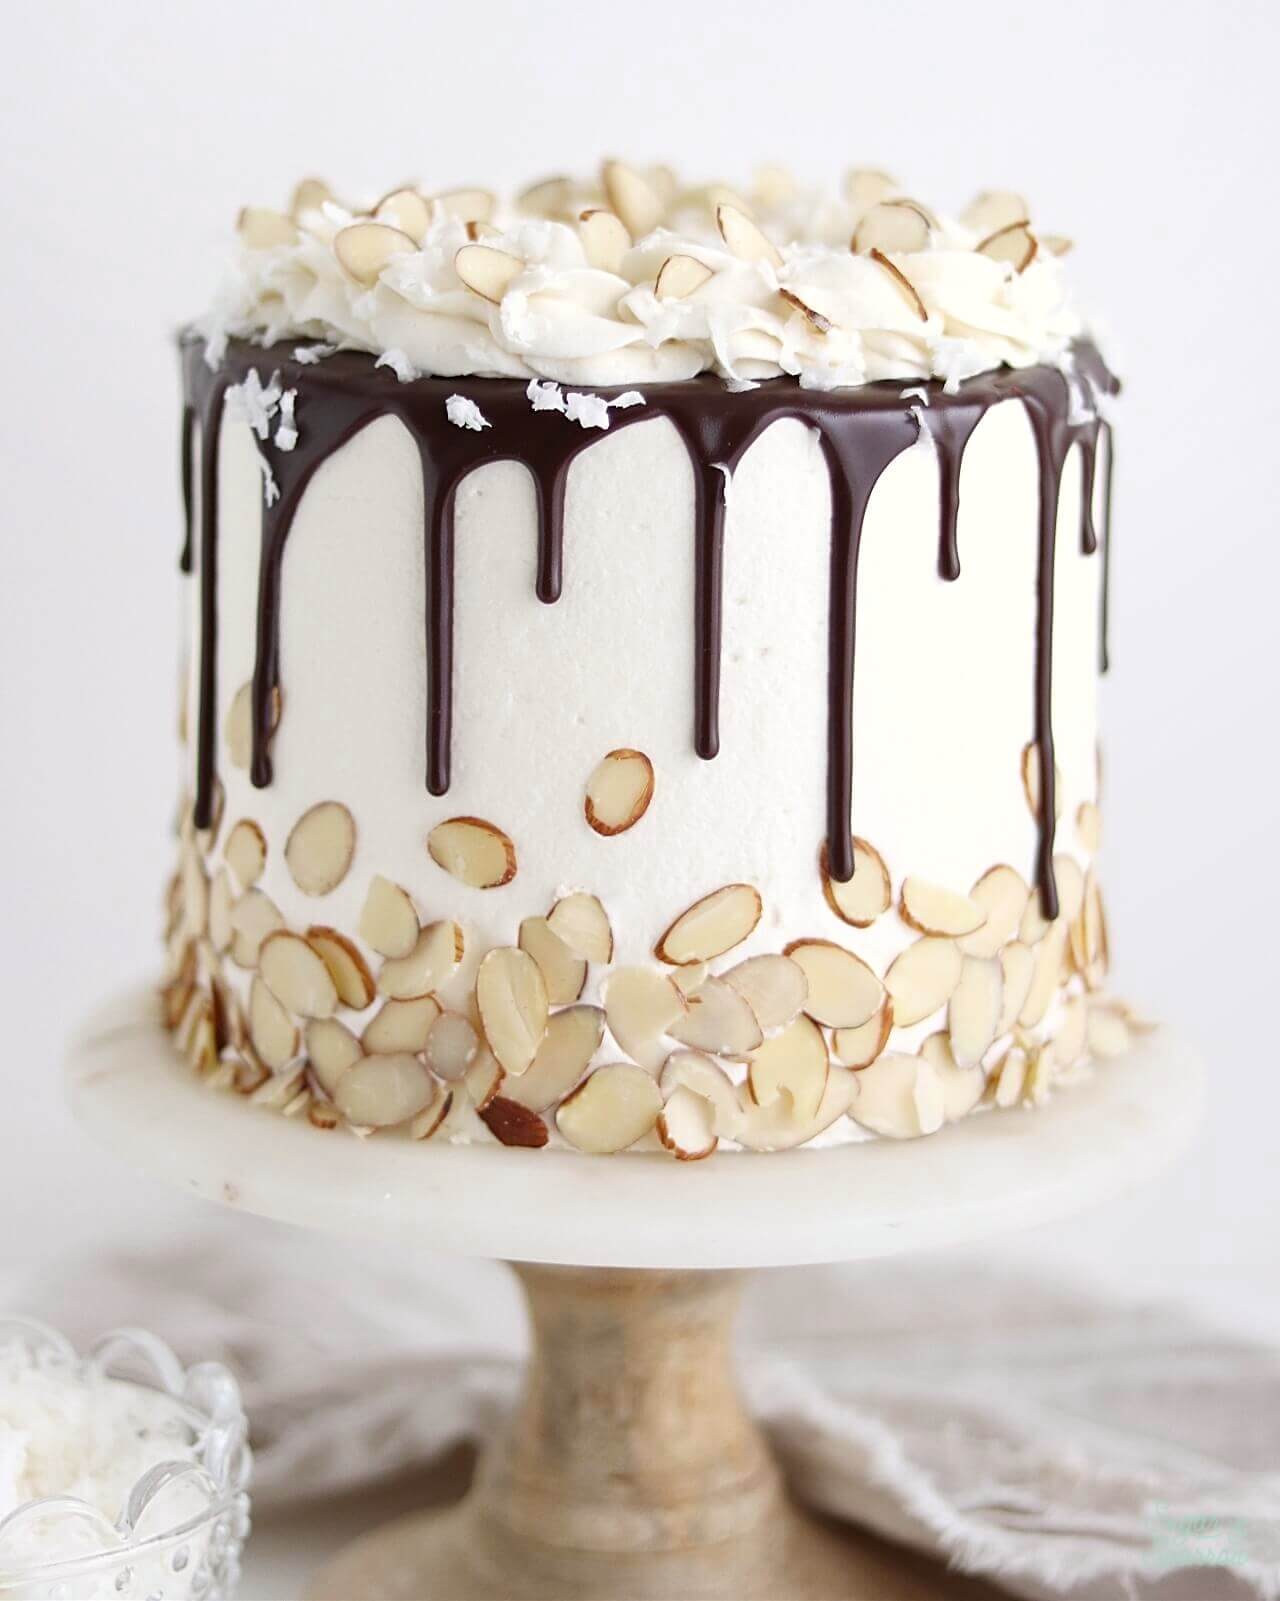
You can’t have an Almond Joy inspired cake without some milk chocolate, so I whipped up some Milk Chocolate Ganache for drizzling between layers and dripping the top of the cake. After decorating it with some almond slices, a Coconut-Almond Buttercream border, and some more shredded coconut, it looks just as heavenly as it tastes. If you’re as much of an Almond Joy fan as I am, this is going to make your cakey dreams come true!
Almond Joy Cake Recipe by Sugar and Sparrow

Almond Joy Cake Recipe

5 from 6 votes
Layers of fluffy, flavorful Coconut Cake with Coconut-Almond Buttercream and Milk Chocolate Ganache.
Print Recipe Pin Recipe
Prep Time:30 minutes mins
Cook Time:40 minutes mins

Ingredients

Coconut Cake

  • 3 1/4 Cups (344g) cake flour, sifted before measuring
  • 2 tsp baking powder
  • 3/4 tsp baking soda
  • 1 1/4 tsp salt
  • 1 Cup (226g) unsalted butter, room temperature
  • 1 1/2 Cups (330g) white granulated sugar
  • 5 egg whites, room temperature
  • 1/2 Cup (168g) sour cream, room temperature
  • 2 tsp vanilla extract
  • 1 tsp coconut extract
  • 1 1/4 Cups (296ml) canned full-fat coconut milk, room temperature
  • 1 Cup shredded sweetened coconut

Coconut-Almond Buttercream

  • 2 Cups (452g) unsalted butter, room temperature
  • 7 Cups (840g) powdered sugar
  • 1 tsp vanilla extract
  • 1 tsp almond extract
  • 2 tsp coconut extract
  • 3 Tbsp whole milk, room temperature
  • 1/4 tsp salt

Milk Chocolate Ganache

  • 1/2 Cup (92g) milk chocolate chips
  • 1/2 Cup (120ml) heavy whipping cream

Additional Garnishes (optional)

  • shredded sweetened coconut
  • almond slices

Instructions

Make The Coconut Cake

  • Preheat the oven to 350°F. Prepare three 6-inch cake pans by spraying the sides with a cooking spray (Baker’s Joy is my favorite) and a wax paper circle fitted to the bottom of the pan. Alternatively, you can grease and lightly flour the pans.
  • Sift the cake flour and then measure by spooning and leveling it in your measuring cup. Add the cake flour, baking powder, baking soda, and salt into a bowl and whisk to combine. Set aside.
  • In the bowl of your stand mixer (a handheld mixer works fine too!), cream the butter on high for two minutes until it’s light and fluffy. Add the sugar and continue to mix on medium-high for another two minutes, scraping down the bowl and paddle as needed. Slowly add the egg whites while mixing on low until well combined. Add sour cream, vanilla extract, and coconut extract and mix for one minute on high, scraping down the bowl and paddle once more.
  • With the mixer on low speed, add in the dry ingredients and mix until just combined. Add the canned coconut milk slowly and mix until just incorporated. Gently fold in the shredded coconut by hand, making sure you scrape down the sides and bottom of the bowl without overmixing.
  • Pour batter evenly into prepared cake pans (no more than 2/3 full) and bake for 40-45 minutes. They’re done when they spring back to the touch and a toothpick inserted into the middle comes out clean. Let the cakes cool in the pan for five minutes before turning them out onto a wire rack for an additional few hours of cooling. Make sure they’re entirely room temperature before applying any frosting.

Make The Coconut-Almond Buttercream

  • With a hand mixer or paddle attachment on your stand mixer, cream the butter on medium-high until it’s creamy and light (almost white) in color. About 7 minutes.
  • Add the powdered sugar, a few cups at a time, scraping down after each addition and making sure each cup is fully incorporated before adding the next one. Add vanilla extract, almond extract, coconut extract, milk, and salt. Mix on medium-low for another minute or two until fully incorporated.

Make The Milk Chocolate Ganache

  • Place milk chocolate chips into a heat resistant bowl (glass or metal) and set aside. In a saucepan over medium-high heat, warm heavy whipping cream until it just starts to boil. I always look for small bubbles forming around the edge and a soft boil starting in the middle. When you see that it’s just starting to boil, pour it into your bowl of chocolate and let sit for twenty seconds.
  • Whisk the mixture together until it’s uniform in consistency and there are no bits of chocolate left on your whisk. Cool ganache at room temperature for about 30 minutes, or until the ganache itself is room temperature.

Assembly

  • Torte the Coconut Cake layers to level off the tops. Place the first cake layer onto a cake circle and fill it with Coconut-Almond Buttercream, then drizzle with a little bit of Milk Chocolate Ganache (make sure it’s room temp or cooler). Place the next cake layer on top and repeat the filling process before adding the last layer of Coconut Cake on top. Crumb coat with Coconut-Almond Buttercream and place the cake in the refrigerator for thirty minutes to firm up before your final frosting.
  • To achieve the design pictured, frost the cake with a final layer of Coconut-Almond Buttercream and add almond slices around the bottom of the cake. Drip the cake with Milk Chocolate Ganache (for tips on dripping a cake read this post!). Fit a piping bag with Wilton Tip 1M and fill it with more Coconut-Almond buttercream, then pipe a rope border around the top edge. Fill in the center with shredded coconut and sprinkle some on top of the rope border, then add more almond slices to the rope border.

Notes

Make Ahead Tips: the cake layers can be made ahead and stored (wrapped in plastic) at room temperature for up to one day. Alternatively, you can wrap the cake layers in plastic and store them in the freezer for up to two months. When you’re ready to use them, thaw them to room temperature before continuing with the frosting and decorating process.
The buttercream can be made ahead and stored in an airtight container at room temperature for up to one day. Alternatively, you can store it in an airtight container in the refrigerator for up to two weeks. When you’re ready to use it, bring it back to room temperature and re-whip with your stand mixer on medium for one minute to bring it back to frosting consistency. 
The chocolate ganache can be made ahead and stored in an airtight container in the refrigerator for up to two weeks. When you’re ready to use it, bring it back to room temperature by microwaving it in ten second intervals, stirring after each one, until it’s drip consistency. 

Did you make this Almond Joy cake? I want to know how it went! Let me know in the comments below or feel free to tag me on Instagram. I love to see what you’re caking!


By: Whitney · In: Cake, Recipes, Seasonal, Winter · Tagged: almond buttercream, almond joy cake, almond joy cake recipe, buttercream recipe, cake decorating, cake recipe, chocolate ganache, chocolate ganache drip cake, coconut buttercream, coconut cake, coconut cake recipe, shredded coconut cake

you’ll also love

the best vanilla cupcakes recipeThe Perfect Vanilla Cupcake Recipe
pumpkin layer cake recipe by sugar and sparrowPerfect Pumpkin Layer Cake Recipe
oreo cookies and cream cakeOreo Layer Cake Recipe

Join the List

Stay up to date & receive the latest posts in your inbox.

Reader Interactions

Comments

  1. Desiree says

    January 31, 2025 at 12:17 pm

    Hi! I am getting ready to make this for my birthday. Can I cut back on the powdered sugar in the buttercream to make it less sweet?

    Reply
    • Whitney says

      January 31, 2025 at 2:30 pm

      Hi Desiree! I’m excited for you to make this for your birthday! If you want to reduce the powdered sugar amount by 1/2 Cup it should still be great consistency for cake decorating and a little less sweet. Enjoy!

      Reply
  2. Dereth says

    April 4, 2024 at 5:49 pm

    Hi Whitney!
    I am in the process of making this cake right now. Question: do you think using some of the leftover coconut milk would do ok in the buttercream instead of whole milk? I was just thinking it could boost the coconut flavor a smidge.

    Reply
    • Dereth says

      April 5, 2024 at 5:13 pm

      Actually, I did it and it was perfect!

      Reply
  3. Olu says

    January 25, 2023 at 11:30 am

    Hello Whitney!

    I’m about to try this out only to find out I only have plain yoghurt and not cream cheese. Can I use that. There is a snow storm here, so I’m trying not to go out .

    Love, love, love your red velvet recipe. I will be trying a lot more soon and also getting your book!

    Reply
    • Whitney says

      January 27, 2023 at 3:06 pm

      Hi Olu! You can use plain yogurt in place of the sour cream here, that’s the best substitute! So happy you love my red velvet cake recipe and cannot wait for you to see the book!

      Reply
  4. Myurell says

    January 18, 2023 at 2:47 pm

    Hello Whitney!
    Can’t wait to try this recipe! It sounds delicious. I want to make it as a birthday cake but with 3 10” layers. Would it work well if I double the recipe??

    Reply
    • Whitney says

      January 20, 2023 at 1:42 pm

      Hi Myurell! You might need closer to 2.5x the recipe for a cake of that size. Each 10″ round cake pan needs about 5.5 Cups of cake batter and this recipe makes about 7 Cups of cake batter as-is. This recipe scale calculator can help you figure out the math if you need it: https://www.inchcalculator.com/recipe-scale-conversion-calculator/ hope that helps!

      Reply
      • Myurell says

        January 20, 2023 at 3:07 pm

        Wow!! Thank you sooo much! This helps a LOT!!!

        Reply
  5. Kaidance says

    January 4, 2023 at 8:33 am

    Hello! I am trying to make this cake for my dad’s birthday but three layers would leave so much leftover (I have to make my moms cake next week), what adjustments should I make to only have two layers?

    Reply
    • Whitney says

      January 9, 2023 at 9:58 pm

      Hi Kaidance! To make this recipe as a 2-layer cake, you’ll need to make 2/3 of the recipe. You can use this recipe scale calculator to scale the recipe by 2/3 and have the perfect amount of each ingredient: https://www.inchcalculator.com/recipe-scale-conversion-calculator/

      Reply
  6. Andrea says

    December 21, 2022 at 6:59 am

    I am making this cake for Christmas Eve and wonder if it needs to be refrigerated. I made the gingerbread latte cake for a party last weekend and it fabulous! Thanks Andrea

    Reply
    • Whitney says

      December 23, 2022 at 9:38 am

      Hi Andrea! I’m so happy you loved the Gingerbread Latte Cake and I’m excited for you to make this one! It doesn’t technically need to be refrigerated but I always like to refrigerate my cakes until about an hour or two before serving, just to keep the decorations looking perfect. Enjoy!

      Reply
  7. Linda barnette says

    September 17, 2022 at 12:46 pm

    Looking forward to making the cake.

    Reply
    • Whitney says

      September 21, 2022 at 11:00 am

      Yay, Linda! I can’t wait for you to try it!

      Reply
  8. Monroe James says

    September 5, 2022 at 2:51 pm

    5 stars
    I have made this once before as a three layer, I was wondering what the measurements would be for 2, 8in. layers?`

    Reply
    • Whitney says

      September 5, 2022 at 7:37 pm

      Hi Monroe! So happy you love this recipe 🙂 for two 8-inch layers, I would keep the measurements as-is. Just be sure to fill the pans no more than 2/3 full and you should have just enough, maybe a little extra for a couple cupcakes.

      Reply
      • Shanice says

        November 2, 2022 at 8:48 am

        Can it be used to make 2 7-inch layers?

        Reply
        • Whitney says

          November 2, 2022 at 9:44 pm

          Hi Shanice! Yes it can, I would just be sure to fill the tins no more than 2/3 full. You’ll have a little more than enough batter.

          Reply
« Older Comments

Leave a Reply Cancel reply

Your email address will not be published. Required fields are marked *

Recipe Rating


Next Post >

Golden Milk Latte Cake Recipe

Primary Sidebar

Welcome to Sugar & Sparrow

Welcome to Sugar & Sparrow

Helping you whip up pretty desserts with confidence and creativity. And hopefully sharing a few laughs with you along the way!

Learn More

Connect

let’s bake!

Get my very best recipes, baking tips, and decorating tutorials sent to your inbox

Featured Posts

chocolate peanut butter cake recipe by sugar and sparrow

Chocolate Peanut Butter Cake Recipe

gender reveal cake by sugar and sparrow

Baby on the Way + Gender Reveal Cake

Anyone Can Cake giveaway with Wilton

Anyone Can Cake x Wilton GIVEAWAY!

Search

Archives

Follow Along

@sugarandsparrowco

OATMEAL CREME PIE CAKE 🙌🏼 I’m always thinking abou OATMEAL CREME PIE CAKE 🙌🏼 I’m always thinking about this cake during back-to-school season because Oatmeal Creme Pies take me right back to my elementary school days! It’s layers of tender brown sugar oatmeal cake with the gooiest homemade marshmallow filling and tastes just like the real deal in cake form – perfect party cake for an Oatmeal Creme Pie lover! 

Full recipe linked in my bio + at https://sugarandsparrow.com/oatmeal-creme-pie-cake/ 
 
#oatmealcremepie #vintagecake #layercake #partycake #cakedecorating
NO-BAKE BISCOFF CHEESECAKE ✨this is the perfect EA NO-BAKE BISCOFF CHEESECAKE ✨this is the perfect EASY no-bake dessert for Fall and I cannot get over the incredible spiced caramel flavor!! I added Biscoff cookie butter to my favorite no-bake cheesecake base, piled it onto a Biscoff cookie crust, then topped it with a melted cookie butter drip + tons of crunchy cookie crumbs.  
 
🤎Full recipe linked in my bio + at https://sugarandsparrow.com/no-bake-biscoff-cheesecake/ 
 
BISCOFF CRUST: 
1 8.8oz package Biscoff cookies (250g) 
1/3 Cup (75g) unsalted butter, melted 
 
FILLING: 
16 Oz (452g) full-fat brick-style cream cheese, room temp 
1/4 Cup (50g) powdered sugar 
3/4 Cup (210g) creamy Biscoff cookie butter 
1 tsp ground cinnamon 
1 tsp pure vanilla extract 
1 Cup (240ml) heavy whipping cream, cold 
 
INSTRUCTIONS: 
1. Combine the Biscoff crust ingredients until the mixture resembles wet sand, then press firmly into the bottom of a 9-inch springform pan.  
2. In a large bowl, whip the cream cheese until smooth, then add the powdered sugar, cookie butter, cinnamon, and vanilla and mix until smooth.  
3. In a separate medium bowl, whip the heavy whipping cream to stiff peaks, then fold into the cream cheese mixture until no streaks remain. 
4. Add the filling on top of the Biscoff crust, cover, and refrigerate for at least 8 hours. 
5. Once set, top with melted cookie butter and crushed Biscoff cookies. 
 
#biscoff #biscoffcheesecake #nobakecheesecake #biscoffcake #nobake 
A mini pumpkin spice latte cake to celebrate my SI A mini pumpkin spice latte cake to celebrate my SIL 🥳 two 6-inch layers of spiced pumpkin cake with the most delicious coffee buttercream + a little vintage piping for good measure ☕️ making a birthday cake for my family and friends will always be my favorite love language!!

👩🏽‍🍳 Recipes: perfect pumpkin layer cake + coffee buttercream (both found at sugarandsparrow.com) or you can find a dedicated PSL cake recipe in my book! 
✨ Piping Tips: @wiltoncakes tip 3 for the writing + tip 4B for the borders
☕️ Garnish: chocolate covered espresso beans

#pumpkincake #birthdaycake #pumpkinspicelatte #minicake #cakedecorating
BROWN BUTTER CREAM CHEESE FROSTING 🤎🧈 brown butter BROWN BUTTER CREAM CHEESE FROSTING 🤎🧈 brown butter is the KEY to making cream cheese frosting even better! You get the tang of cream cheese but with rich, nutty caramelized notes of brown butter and it’s HEAVENLY on any Fall cake 🙌🏼 I paired with my carrot cake recipe here but it’s also incredible with spice cake, pumpkin cake, chocolate cake, and more! 

Full recipe + all my favorite cake pairing suggestions in my bio and here: https://sugarandsparrow.com/brown-butter-cream-cheese-frosting/

BROWN BUTTER CREAM CHEESE FROSTING 
YIELD: 3.5 Cups  
 
INGREDIENTS 
1/2 Cup (113g) unsalted butter 
8 Oz (226g) full-fat brick-style cream cheese, room temperature NOT the spread 
4 Cups (480g) powdered sugar 
1 tsp pure vanilla extract 
pinch of salt, or to taste 
 
INSTRUCTIONS 
1. Brown the butter: Add the butter into a large frying pan and cook over medium heat until the butter melts, stirring occasionally. Continue cooking for 3-5 minutes while stirring constantly. First it will foam, then bubble as little white particles of milk solids separate, then the white specks will caramelize and turn medium-brown and smell deliciously nutty. Remove from heat, transfer to a glass container, and cool until it re-solidifies and is the consistency of softened butter (about 45 minutes in fridge).  
2. Add the cooled brown butter into the bowl of your stand mixer fitted with a paddle attachment and add the cream cheese. Mix on medium-high until fluffy and light in color, 5 min, scraping down the bowl and paddle as needed. 
3. Turn the mixer to low speed and add the powdered sugar a few cups at a time, scraping down the bowl and paddle after mixing in each addition. Add the vanilla and salt and continue mixing on low speed until smooth and uniform. 
 
#brownbutter #creamcheesefrosting #creamcheese #buttercream #cakedecorating
MILKY WAY CAKE 🍫✨this tastes JUST like a Milky Way MILKY WAY CAKE 🍫✨this tastes JUST like a Milky Way candy bar, but in cake form! It’s layers of decadent chocolate cake filled with homemade chocolate nougat and gooey caramel, then topped with chocolate buttercream. A MUST try if you love Milky Way 😍
 
Comment RECIPE and I’ll send it straight to your inbox or find it at https://sugarandsparrow.com/milky-way-cake-recipe/ 
⁣ 
#milkywaycake #caramel #chocolatecake #chocolatecaramelcake #cakesofinstagram

Footer

On the Blog

  • Cake Basics
  • Recipes
  • Tutorials

Info

  • About
  • Privacy Policy & Disclosure

stay in the know

Copyright © 2026 · Theme by Sugar & Sparrow