
It’s not often that you see Betty Crocker’s Cherry Chip Cake mix at grocery stores these days, but it’s one of those flavors that evokes nostalgia for so many people. While I did not grow up eating Cherry Chip, so many of you asked for this flavor that I felt intrigued to give it a go. After all, how could you go wrong with a pink, maraschino cherry-flecked cake? Turns out you can’t go wrong. This cake is super fun to make, pretty to look at, and extremely delicious paired with this Cherry-Almond Buttercream.
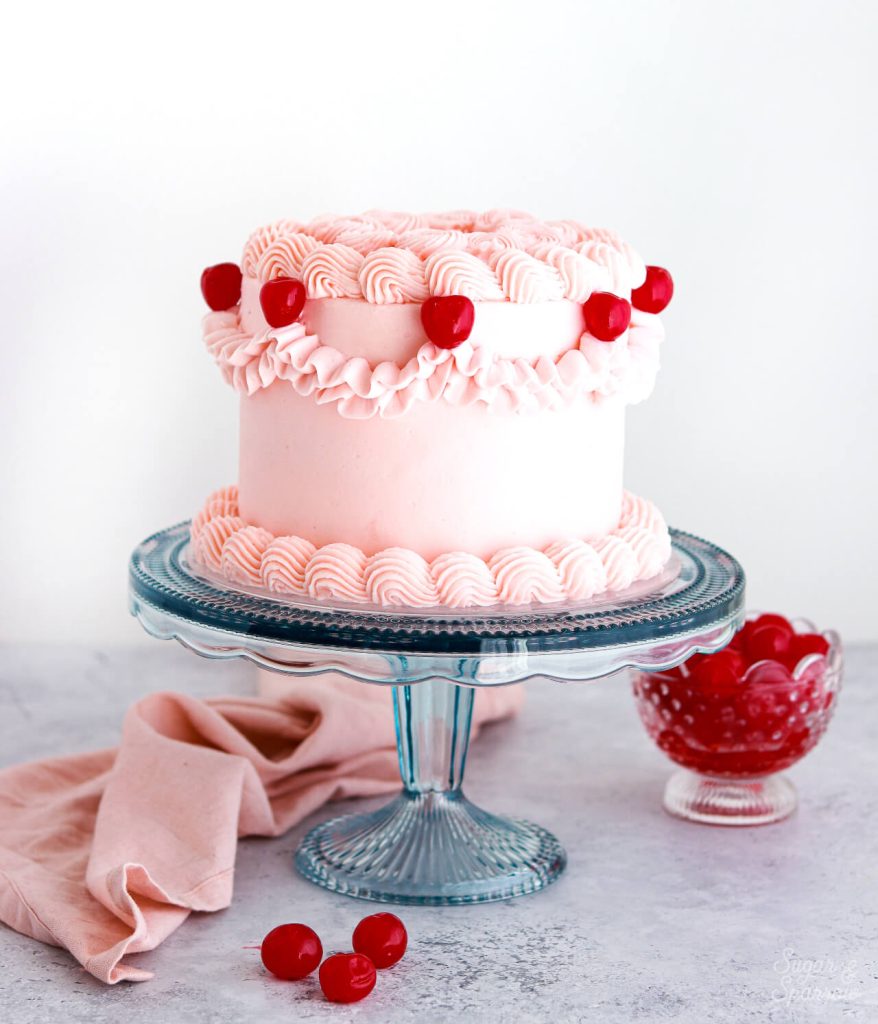
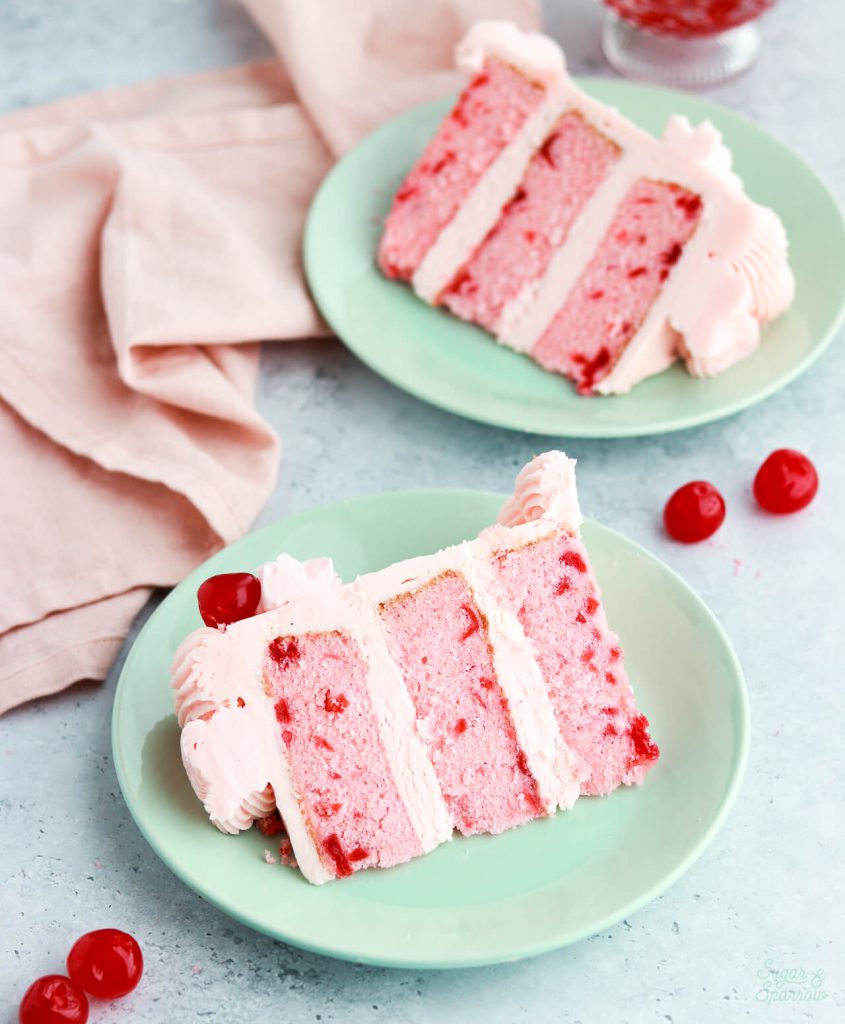
There is something truly special about the flavor of this Cherry Chip Cake. I have no idea when it was invented, but the maraschino cherries throughout give it an undeniable retro vibe. It has the perfect cherry flavor after infusing the batter with maraschino cherry juice and folding in finely chopped cherries at the end. The whole process gives the cake layers a natural pink color, making the dots of cherry look extra fun!
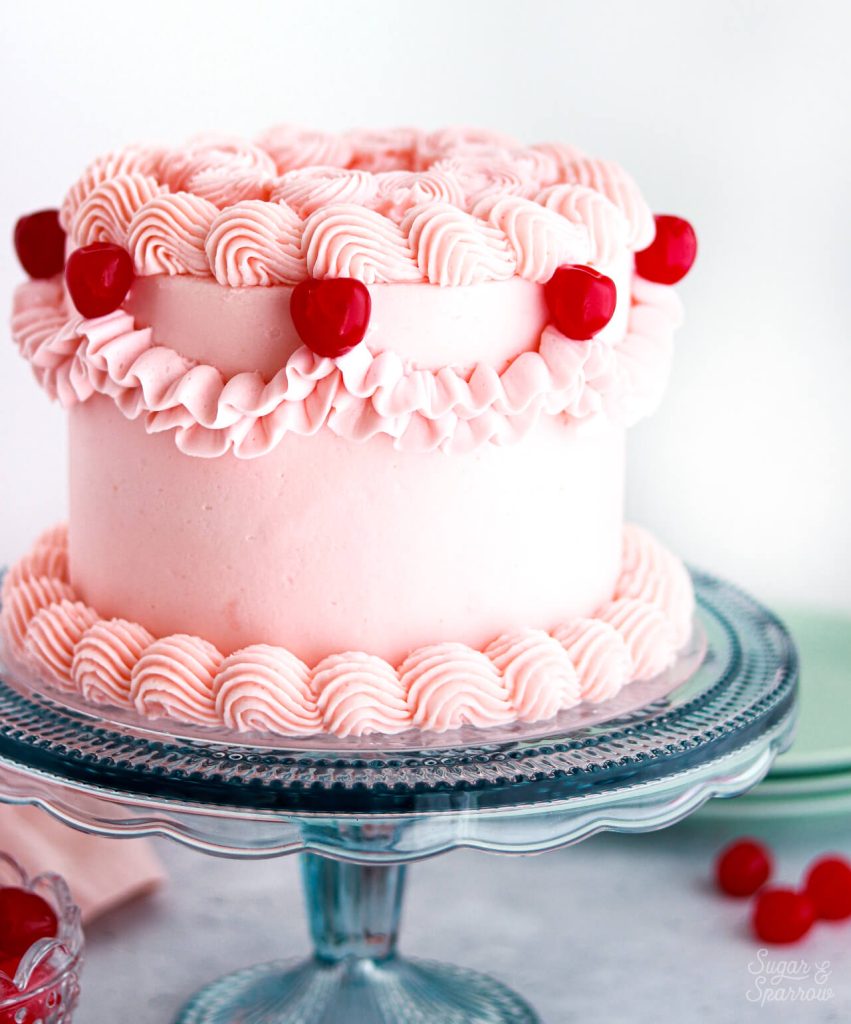
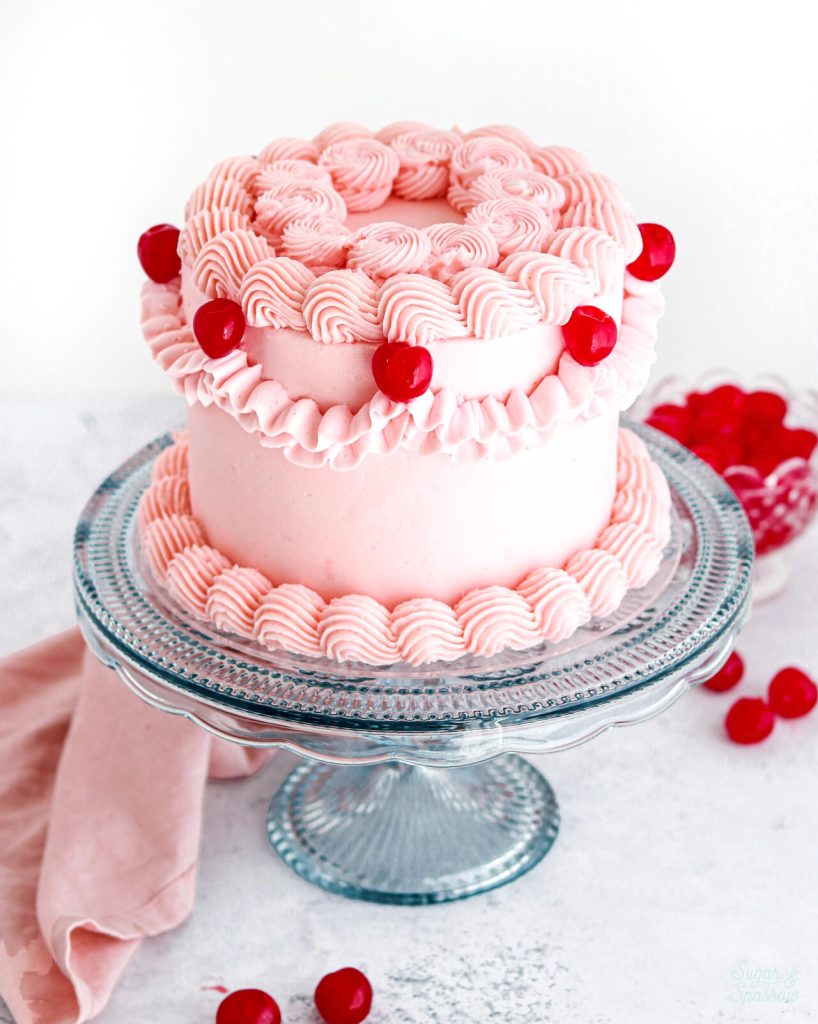
The Cherry-Almond Buttercream is the ideal complement to this Cherry Chip Cake. The hint of almond helps bring out the cherry flavor and turn the whole palette into something sophisticated and lovely. The buttercream should already be the perfect consistency for filling, frosting, and piping the cake, but you can certainly thicken the buttercream for the piped portions if need be. Simply add a little more powdered sugar to the buttercream you’ll be using for piping, a few Tablespoons at a time, until the desired consistency is reached.
Vintage Cake Decorating Details & Tips
To keep with the vintage aesthetic, I decided to pair this Cherry Chip Cake with classic lambeth piping. If you’ve never tried this vintage piping style before, fear not – it’s easier than it looks! I used two piping tips for this look (Wilton Tip 4B and 104) but you can feel free to get creative with whatever piping tips you’d like. After all, the lambeth style is all about over-piping, or creating rows of intricately piped details. Here are a couple tips to keep everything symmetrical as you add piping:
Start with a Chilled Cake – To create the perfect canvas for piping, you’ll want to chill the cake for at least 30 minutes after frosting it smooth with the Cherry-Almond Buttercream.
Make a Template – A template really comes in handy if you plan on creating symmetrical piping on the sides of your cake (like the ruffle garlands pictured in this Cherry Chip Cake design). To make my own template for this lambeth cake, I cut out a parchment paper circle to the same diameter as my cake layer. When you have your parchment circle cut out, fold it in half three times to make 8 equal-sized sections.

Place the template on top of the chilled cake (a) and mark each crease with a toothpick (b). Find a round glass or cookie cutter that’s the same diameter as the sections in your template and place a piece of scotch tape across the middle to create a half circle (c). This will help you line it up with the top of your cake as you press it into the sides (d) to indicate where each garland will go.
Thicken the Buttercream for Piping (if needed) – when you’re ready to pipe, place all of the buttercream you’ll be using for piping back into your stand mixer and add a little more powdered sugar (a few Tablespoons should do the trick) to thicken the consistency. This will help the buttercream hold its shape as you pipe those details. I piped shell borders around the bottom and top edges of the cakes with Wilton Tip 4B, piped the ruffle garlands with Wilton Tip 104, and piped simple flat swirls on the inside of the shell border on top of the cake using Wilton Tip 4B.
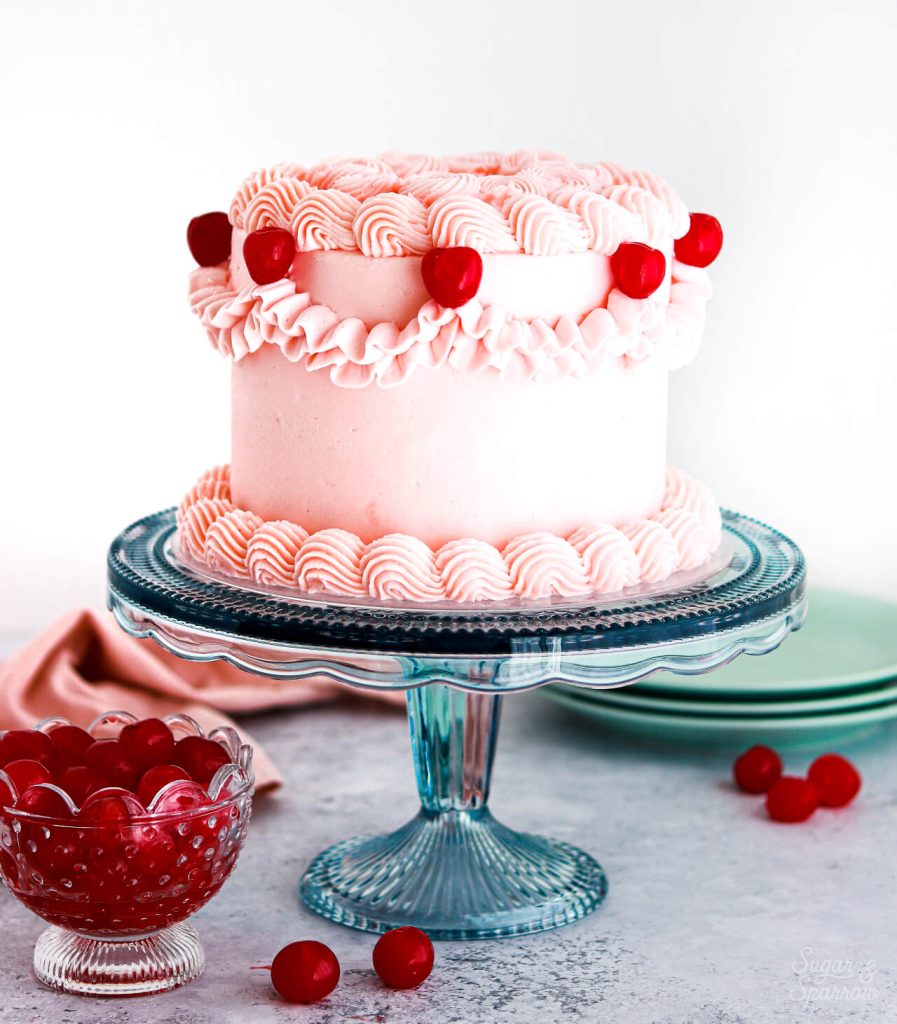
To finish the look, I pressed maraschino cherries where each ruffle garland met. It’s important to dry the cherries thoroughly before pressing them into the frosting, just so they don’t leak juice all over your beautiful piping. Mine still looked picture perfect and didn’t leak one bit even after a few days in the refrigerator!
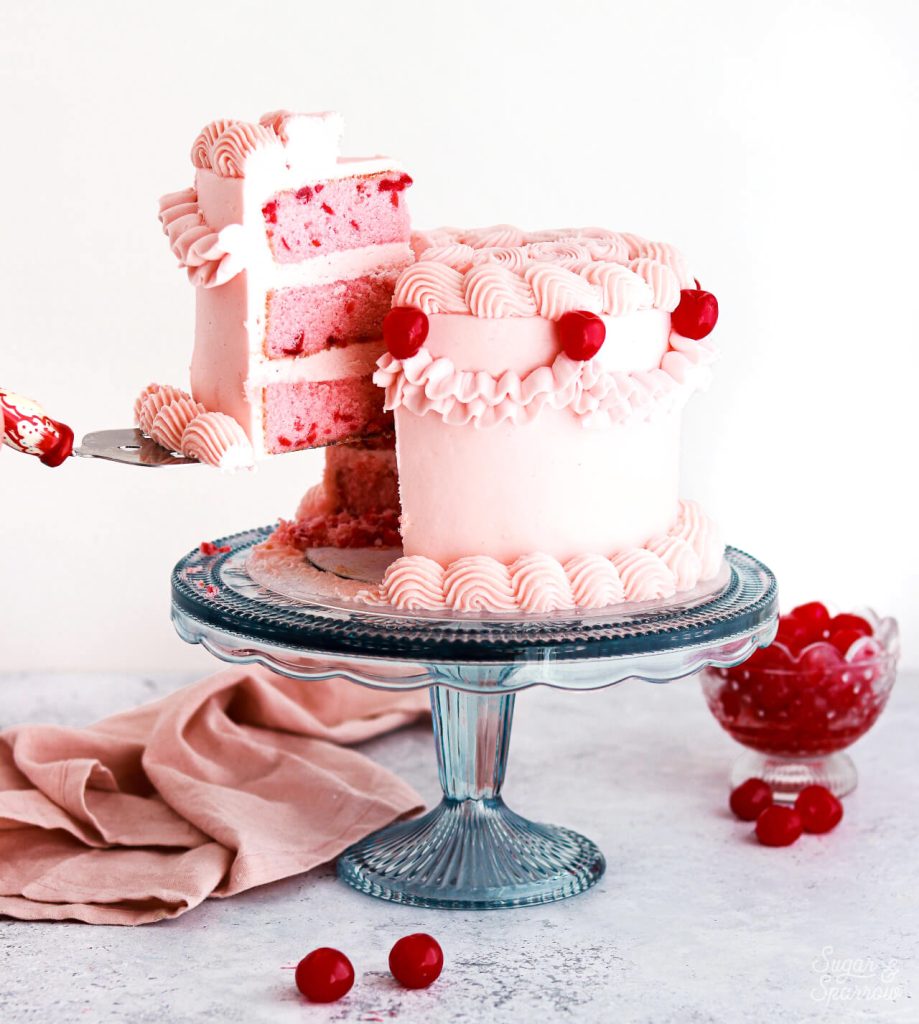
However you decide to decorate, if you’re a fan of Cherry Chip, I hope you absolutely love this cake. Grab yourself a jar of maraschino cherries next time you’re at the grocery store and get ready to have a good time! It’s such a joyful cake that is sure to bring happiness wherever you take it.
UPDATE 2024: I added a little more vegetable oil and changed the order of this recipe slightly to make the crumb more soft and moist than ever!

Cherry Chip Cake
Ingredients
Cherry Chip Cake
- 3/4 Cup maraschino cherries (about 32 cherries)*, finely chopped
- 1/2 Cup (120ml) maraschino cherry juice
- 3/4 Cup (180ml) buttermilk*, room temperature DIY recipe in notes
- 2 1/2 Cups (265g) sifted cake flour* DIY recipe in notes
- 2 tsp baking powder
- 1/2 tsp salt
- 1/2 Cup (113g) unsalted butter, room temperature
- 1 1/2 Cups (300g) granulated white sugar
- 4 large egg whites, room temperature
- 1/2 Cup (120ml) vegetable oil
- 2 tsp pure vanilla extract
- 2 tsp flour for coating the chopped cherries
Cherry-Almond Buttercream
- 2 Cups (452g) unsalted butter, room temperature
- 7 Cups (840g) powdered sugar
- 1/4 Cup (60ml) maraschino cherry juice
- 3 Tbsp (45ml) heavy whipping cream, room temperature
- 1 1/2 tsp pure almond extract
- 1/4 tsp salt, or to taste
Instructions
Make the Cherry Chip Cake
- Preheat the oven to 350°F/177ºC. Prepare three 6-inch or two 8-inch cake pans by spraying the sides with cooking spray and fitting a parchment paper circle to the bottom of the pan.
- Finely chop the maraschino cherries and place them into a fine mesh sieve set over a bowl. This will help drain some of the excess juices while you continue on in the recipe.
- In a liquid measuring cup or jar, mix together the buttermilk and maraschino cherry juice. Set aside.
- In a medium bowl, add the sifted cake flour, baking powder, and salt. Whisk together and set aside.
- In the bowl of a stand mixer fitted with the paddle attachment, beat the butter at high speed until creamy, about 2 minutes. Add the sugar and cream it together with the butter at medium-high speed for another 2 minutes. Turn the mixer to low and add the egg whites one at a time, mixing until they are just combined and scraping down the bowl and paddle as needed. Add the vegetable oil and vanilla, increase the mixer speed to high and beat for 1 minute.
- Turn the mixer off and add the flour mixture all at once. Mix the ingredients on low speed until just combined, then slowly pour in the buttermilk-cherry juice mixture. Continue mixing at low speed for about 30 seconds, until the batter is uniform and combined.
- Add 2 teaspoons of flour onto the chopped maraschino cherries and toss them to coat. Gently fold them into the batter using a rubber spatula. Then, divide the batter evenly between the prepared cake pans and bake for 30 to 35 minutes. They’re done when they spring back to the touch and a toothpick inserted into the centers comes out clean or with just a few moist crumbs on it. Let the cakes cool in their pans for 5 minutes, then remove them from the pans and allow them to cool completely on a wire rack
Make the Cherry-Almond Buttercream
- With a hand mixer or paddle attachment on your stand mixer, cream the butter on medium-high until it’s creamy and light, about 5 minutes.
- With the mixer on low, add the powdered sugar a few cups at a time, scraping down after each addition and making sure each is fully incorporated before adding the next one.
- Add the maraschino cherry juice, heavy whipping cream, almond extract, and salt and mix on low for another minute until fully incorporated.
Assembly
- Once the Cherry Chip Cakes are cooled completely, level them to your desired height before filling and stacking with the Cherry-Almond Buttercream. Crumb coat the cake with Cherry-Almond Buttercream, refrigerate it for at least 20 minutes to let the frosting firm up, then frost the cake smooth with more Cherry-Almond Buttercream.
- To create the vintage piping (lambeth) style pictured, refrigerate the smooth frosted cake for another 30 minutes while you prepare the remaining buttercream for piping and create a template as described in the blog post above. Thicken the Cherry-Almond Buttercream by mixing in a few Tablespoons of powdered sugar until the desired consistency is reached. Prepare two piping bags by fitting one with Wilton Tip 104 and one with Wilton Tip 4B. Add 2/3 of the remaining buttercream into the bag fitted with Tip 4B and the rest into the bag fitted with Tip 104.
- Use the template and a round cookie cutter or glass to create markings on your cake to guide your piping. Pipe a shell border with Wilton Tip 4B around the bottom of the cake, then pipe the same shell border along the top edge of the cake. Pipe swirls with Wilton Tip 4B inside the shell border on the top of the cake. Pipe a ruffle garland with Wilton Tip 104 onto each semi circle indent you created with the round cookie cutter or glass, then pipe a second layer of ruffles directly above each ruffle garland. Finish the look by pressing maraschino cherries (be sure to thoroughly dry them first) into the buttercream where each ruffle garland meets.
Notes
Did you make this Cherry Chip Cake? I want to know how it went! Let me know in the comments below or feel free to tag @sugarandsparrowco on Instagram. I’d love to see how you decorated!


Hi there! I’m so excited to make this cake for my upcoming birthday. I was wondering, am I able to switch out the vanilla extract in the batter with almond so that the cake has more of an almond cherry taste? If so, how much almond extract would you recommend?
Thank you in advance!
Hi Meg! Yes, you totally can add in some almond extract. It’s quite strong, so I’d recommend subbing half of the vanilla with almond (so, 1 tsp almond extract + 1 tsp vanilla). Enjoy and happy birthday!
Hello, I was just wondering if you know how well this cake would freeze, and roughly how long it would last if frozen?
Hi Tamera! You can freeze the unfrosted cake layers for up to two months. If you’re planning on freezing the decorated cake, you can absolutely do that and it will last up to 3 months. I would refrigerate the cake first until the frosting is firm, then wrap it in plastic wrap and freeze. Hope that helps!
Baked today for my baby’s 1st birthday cake! For me, it yielded two 5” cakes for her smash cake as well as 18 cupcakes for guests. It was truly perfect, received SO many compliments, and will now forever be in my cake recipe repertoire! It now has a special place in my heart 🙂 Thank you for creating it!
That is so wonderful, Bre! This comment made my day. Thanks for letting me know it was such a hit and happy birthday to your sweet baby!
Omg this makes me feel so much better choosing this recipe because I was wanting to do a smash cake and cupcakes. It’s also my baby’s first birthday!! Happy Birthday to your little one
Hi! I’m planning to do this, did you bake it for the same amount of time? For the cakes that is.
Hi Lexie! For two 5-inch cakes, I would fill the pans 1/2 full and check for doneness around the 20-25 minute mark. Hope that helps!
Hi is it possible to use cherry extract to amp up the cherry flavor in the batter and the buttercream? If so, how much woukd you recommend?
Hi Nissa! Did you try the recipe as-is yet? I feel like it already has a lot of cherry flavor. If you want to add more, I’d start with 1/2 tsp of cherry extract (add it with the vanilla in the recipe). Hope that helps!
Would it be possible to use the Luxardo Cherries in this recipe? My son in law is having a birthday soon and he loves the Luxardo Cherries. Thanks
Hi Francesca! I haven’t tried it with Luxardo cherries but it sounds delicious! I think it should work.
Baked this yesterday for my 67th birthday, which was the day before! Cake is fabulous!!! I used chocolate frosting as that’s what my mom always put on it and it’s my favorite cake by the way. My wife says it is great. I haven’t had one in over 25 years, and I had a mix, but decided scratch and so glad I made this recipe! Used my mom’s pans to bake in. Pans older than me! Thanks for sharing!! C J
I’m making my annual cherry chip cake for my daughter’s birthday. The last few years it seems the cake is too dry for our like. Would you describe this recipe as moist? Any suggestions for countering dryness?
Hi Fran! Is it my recipe you’ve been making for the past few years or a different recipe? I’d say this recipe is enjoyably moist, but if you’ve been making it and it seems dry, I’d want to know what kind of oven you have (conventional or convection/fan-assisted) and what material your pans are.
Do the cherries sink to the bottom of the cake when baked or do they disperse nicely throughout the cake?
Hi Jill! They don’t sink in this recipe and remain well-dispersed in the baking process.
Hello. Can this recipe be doubled?
Hi Pam! It definitely can be doubled. Enjoy!
Hi! Does this recipe work well for cupcakes?
Hi Julia! I haven’t tried this recipe as cupcakes but my hunch is that it would work. If you want to try it, fill the tins no more than 2/3 full and bake at 350 for 15-18 minutes. Hope that helps!
Hi,
My brother loved cherry chip cake as a kid, and I’d love to make this for his birthday… just looking to simplify a little, so I was wondering how many cups of batter this recipe yields. I’d like to make it as a Texas sheet cake (half sheet) cake. Wondering if it would be enough batter.
Thanks!
Hi Shannon! This recipe yields a little over 6 Cups of batter. I’ve never baked it in a pan that size but after looking it up on Google it looks like you’ll just need to double the recipe for a 1/2 sheet pan. Hope that helps!
Hi can we omit the almond extract in the frosting and use vanilla extract instead or cherry and vanilla extract? Nobody in this house likes almond but we love cherry
Hi Jaclyn! Yes, you can use vanilla extract in place of the almond extract 🙂
If I don’t have cake flour, can I use all purpose flour instead?
Hi Samantha! All purpose flour will make the cake more dense, but if you don’t have access to cake flour you can make a diy version using all purpose flour + cornstarch: https://sugarandsparrow.com/homemade-cake-flour-recipe/
Can you omit the cherry juice? I was hoping the batter would still be white in colour with just the cherry chips… should I replace with anything else?
Hi Natasha! It should be fine to omit the cherry juice!
Can this be made as a sheet cake? I’d like to ask for this for Mother’s Day but I’m not sure the family is up to making a layered cake! 🙂
Hi Vickie! I haven’t tried this one as a sheet cake yet but my hunch is that it will work! Here is a post on how to bake my recipes as sheet cakes for timing: https://sugarandsparrow.com/sheet-cake-recipes/
It made a beautiful sheet cake, thank you!
I’m so happy to hear that! Thanks so much for following up and letting me know 🙂
Made this recipe using gluten free 1-1 flour and it turned out great! So happy to have found a great substitute for a childhood favorite
Yay, McKayla! That’s so helpful to know that it worked with GF flour and I’m so happy to hear it was nostalgic!