• Cake
  • Frosting
  • YouTube
  • My Favorite Tools
  • Nav Social Icons

  • Skip to primary navigation
  • Skip to main content
  • Skip to primary sidebar
  • Skip to footer
  • Recipes
    • Cake
    • Cupcakes
    • Frosting
    • Ice Cream
    • Vegan
  • Cake Basics
  • Tutorials
  • Blog
  • About
  • Mobile Menu Widgets

    Connect

    Search

Sugar & Sparrow logo in script font

Sugar & Sparrow

Lifestyle and Cake from Portland Oregon

  • Cake Basics
  • Recipes
    • Cake
    • Cupcakes
    • Cookies & Bars
    • Filling
    • Frosting
    • Ice Cream
    • No-Bake
    • Small Batch
    • Vegan
  • Tutorials
  • Book
  • Blog
  • About

How to Crumb Coat Cakes (and Why it’s Important)

July 29, 2020 · In: Cake Basics

In the cake making process, you might be tempted to skip ahead to your final coating of frosting after you fill and stack your cake layers. If you’re a perfectionist though (like I am, to a fault), it’s so worth it to go the extra mile and crumb coat your cake. Not only will this prevent crumbs from getting into your final layer of frosting, it also helps to create a stable foundation for your final layer of frosting. In fact, if you’ve ever wondered how to get a super smooth buttercream finish, crumb coating is one of the essential steps. 

how to crumb coat a cake

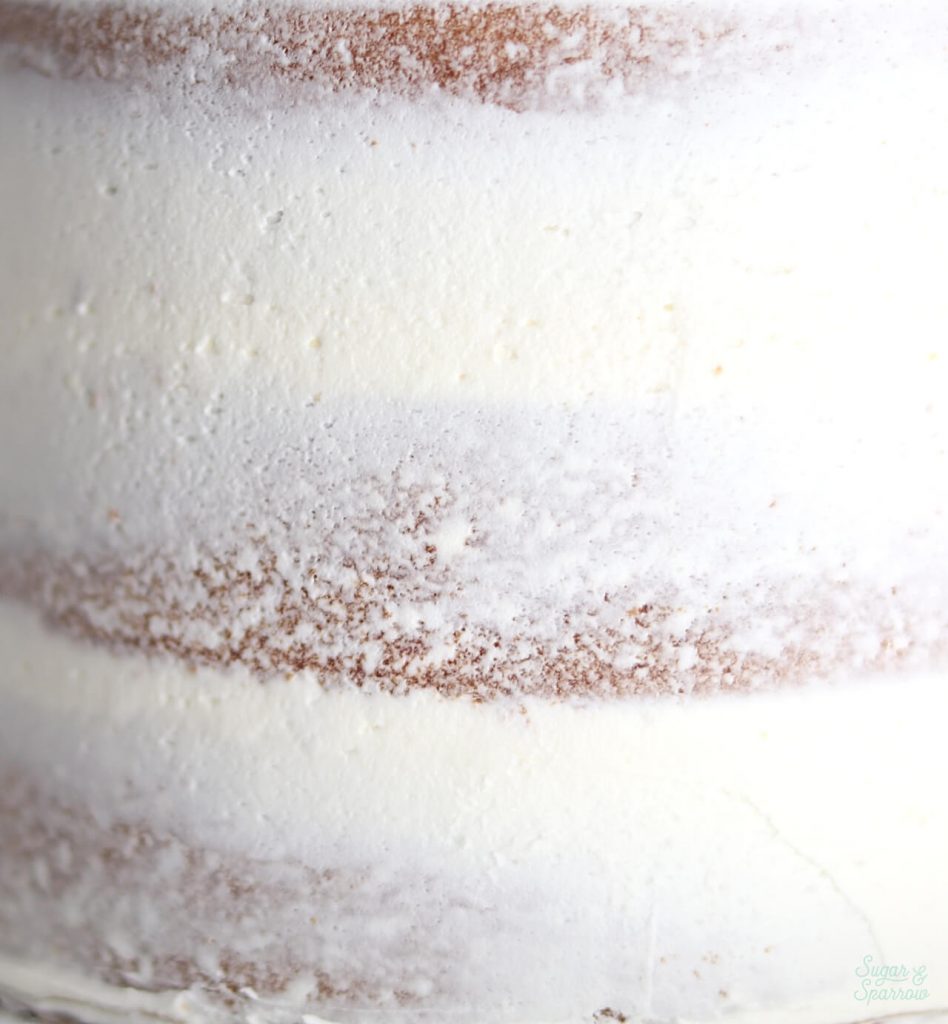
If you’ve never heard of crumb coating a cake, it simply means frosting a thin layer of buttercream all over your cake after it’s been filled and stacked. Here’s a quick video I shot of the process before I walk you through the steps below:

Want to see more Cake Basics videos like this one? Head to my YouTube Channel to see the growing collection. You’ll also find tons of cake recipes and decorating videos to inspire you and broaden your skill set – be sure to hit the subscribe button so you never miss a new one!

Why Crumb Coat?

There are two main reasons why you’d want to crumb coat your cake: 1) catching any loose crumbs that might want to make their way into your final layer of buttercream and 2) creating a smooth, even surface and ensuring your cake is level for your final layer.  

why crumb coat cakes

But it’s not enough to simply crumb coat your cakes. Chilling your cake after crumb coating is what glues all those pesky crumbs down and helps the entire structure set into a firm, sturdy foundation. It’s a step I never miss when making cakes. 

What Type of Frosting is Best for Crumb Coating? 

You can use any type of frosting for crumb coating your cake – basically whatever you’re planning on using for your final layer of frosting. If you need some recommendations, my Basic Vanilla Buttercream, Swiss Meringue Buttercream, or any of my frosting recipes are ideal consistency for both crumb coating your cake and adding your final layer of frosting.

Buttercream recipe for cakes crumb coat

How to Crumb Coat Your Cake

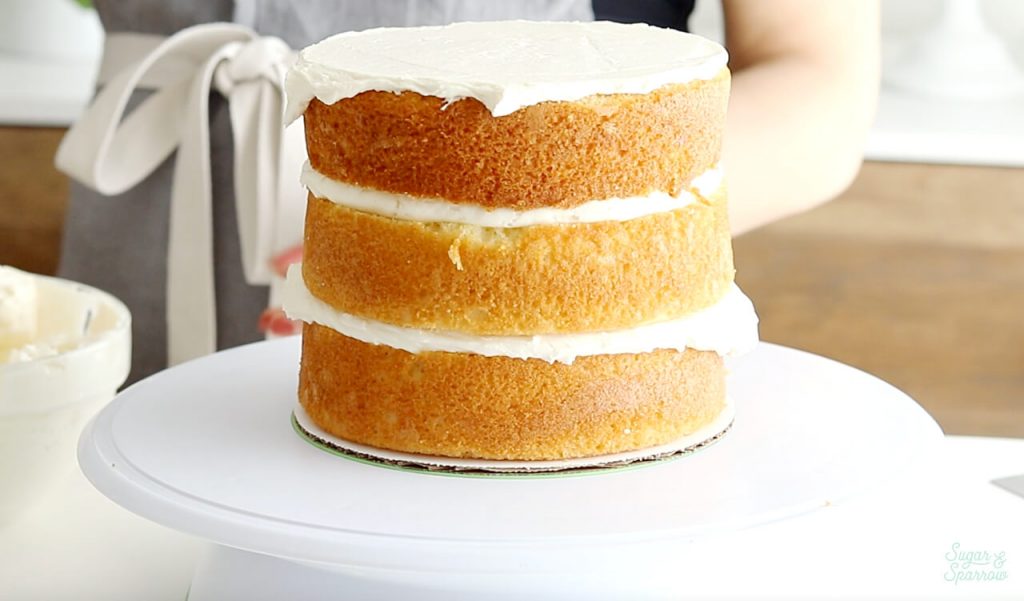
To crumb coat your cake without getting any crumbs in your batch of frosting, you’ll want to start by adding about one cup of that frosting into a small bowl. This is what you’ll use to crumb coat instead of dipping your spatula in and out of the larger bowl of frosting. Place your filled and stacked cake on a turntable. The turntable pictured is no longer available but here is the one I currently use. You’ll want to use an anti-slip pad underneath your cardboard cake circle so it doesn’t slide around.

when to crumb coat a cake

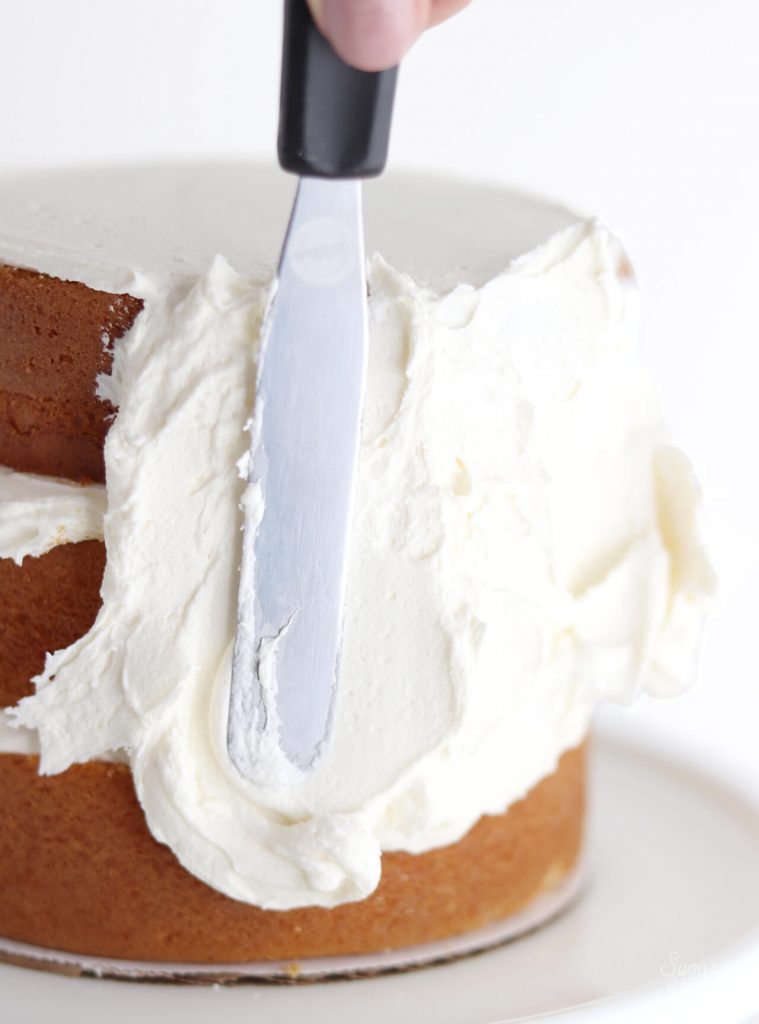
Start by frosting a thin layer of frosting on the top of your cake and smoothing it down with an angled spatula. 

how to frost a cake
why crumb coat a cake

Next, add a thin layer of frosting all around the sides of the cake and use an icing smoother to get the sides smooth and level. Basically hold the icing smoother at a 45 degree angle towards you while you rotate the turntable and scrape off the excess onto the edge of your bowl. Be sure to fill in any patchy areas with more buttercream and repeat the process of smoothing and scraping until you’ve got a thin, yet level crumb coat. 

how to crumb coat cakes
crumb coating a cake
purpose of crumb coating a cake

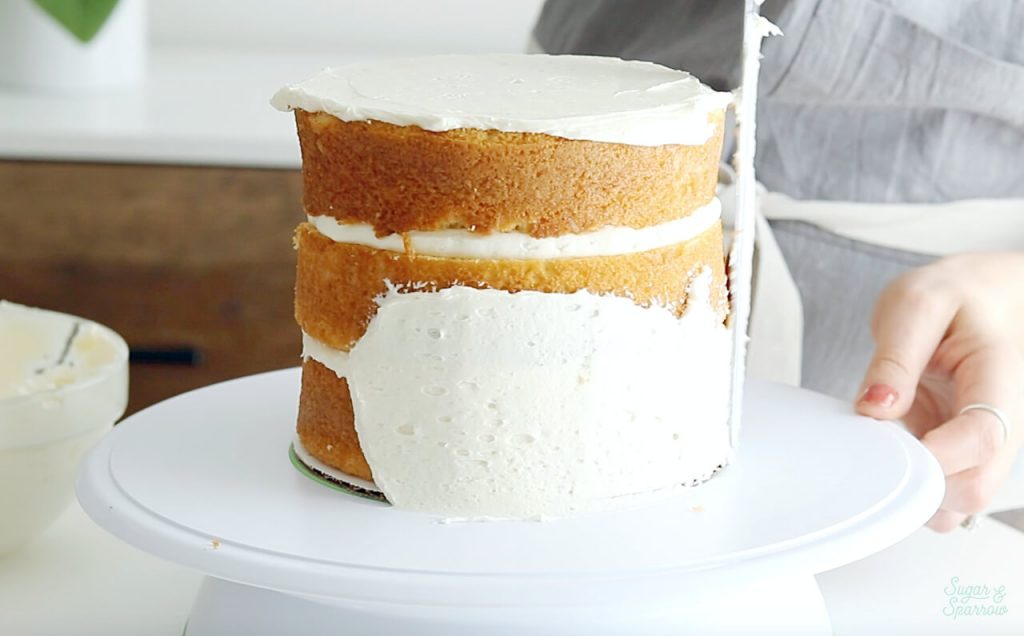
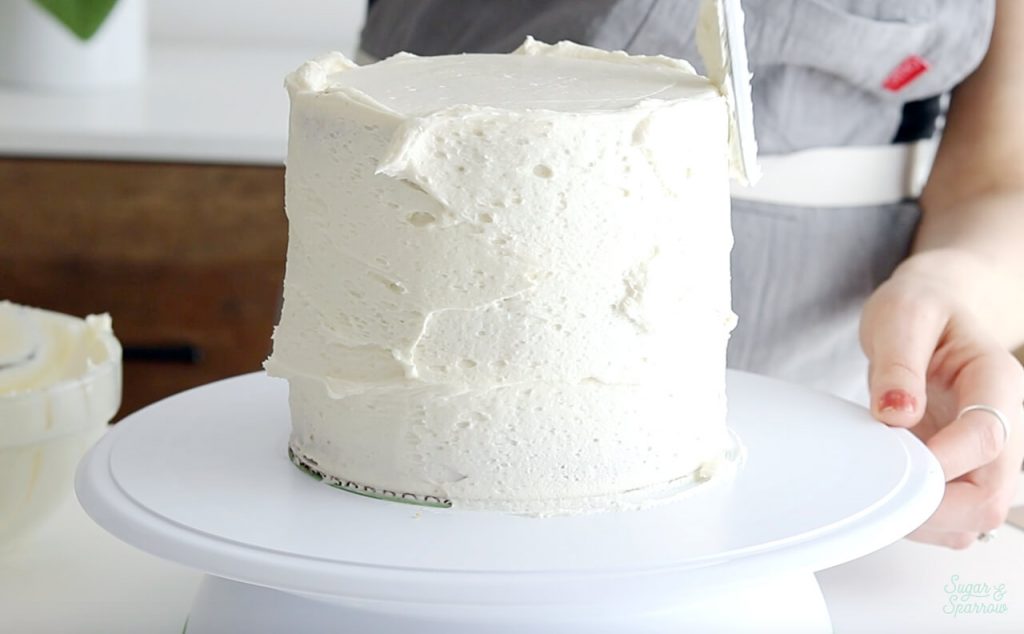
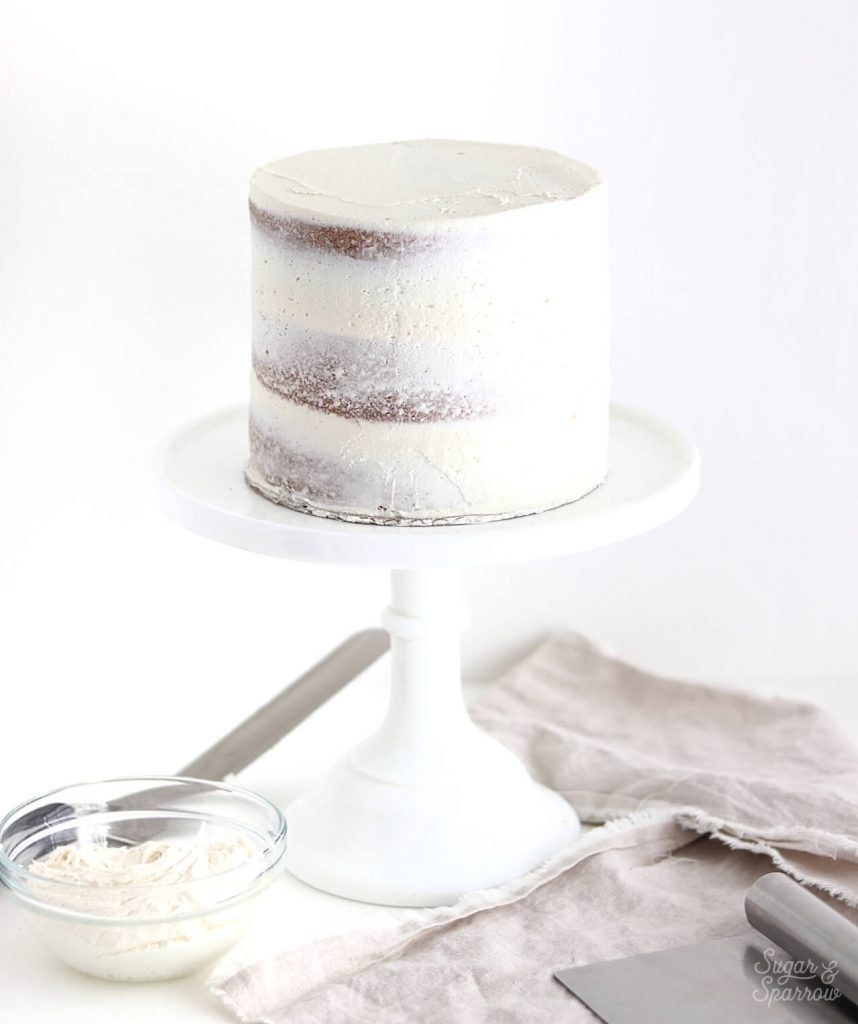
You’ll notice that a frosting “crown” has formed around the top edges of your cake, which is what you want to see. Using a clean angled spatula, swipe those edges toward the center of the cake to create sharp edges all around the top. 

crumb coating cake tutorial

When your cake is looking level and covered in a nice, thin crumb coat, pop the whole thing (turntable and all) into the refrigerator to chill for at least 30 minutes.

how to frost a cake crumb coat

Like I mentioned previously, chilling your cake will make the buttercream firm, essentially glueing down any crumbs within the crumb coat and creating a stable foundation for your next layer of frosting.

Next Steps

After refrigerating for at least 30 minutes, you’re ready to move on to your final layer of frosting. If you’re short on time though, it’s perfectly fine to refrigerate a crumb coated cake overnight. Even though the crumb coat layer of buttercream is thin, it helps preserve the cake layers beneath and keep everything moist and fresh. For an extra layer of protection, you could also wrap the crumb coated cake in plastic wrap and refrigerate it like that.

After the crumb coated cake is firm to the touch, you’re ready to move on to decorating! Here are some helpful posts to inspire you:

  • How to frost a smooth buttercream finish
  • How to frost a rustic buttercream finish
  • How to color your buttercream
  • How to add sprinkles to a cake
  • How to add a chocolate ganache drip
what is a crumb coat on cake

Final Note for Making Cakes Ahead of Time

Do keep in mind that the longer the amount of time between baking your cake layers, decorating them, and serving them, the less fresh your cake will be. I have lots of details and sample timelines for making cakes ahead of time here. A typical timeline for me looks like:

  • Day 1: Bake cake layers + make buttercream
  • Day 2: Fill, crumb coat, frost and decorate the cake 
  • Day 3: Photograph and serve the cake

It’s perfectly fine to split up “Day 2” into two separate days though: filling and crumb coating one day, frosting and decorating the next. This will split the timeline into four days between baking and serving, but the cake will remain fresh.

Want more Cake Basics? Head here to see all of the posts and learn the methods of caking I’ve come to love over the years. I’m cheering you on every step of the way!

By: Whitney · In: Cake Basics · Tagged: buttercream cakes, cake basics, cake timeline, crumb coat, crumb coated, crumb coating, frosting a cake, vanilla buttercream recipe, wilton

you’ll also love

cake decorating tools for beginnersEssential Cake Decorating Tools for Beginners
Anyone Can Cake giveaway with WiltonAnyone Can Cake x Wilton GIVEAWAY!
how to mix rainbow buttercream colorsThe Easiest Way to Make Rainbow Buttercream Colors

Join the List

Stay up to date & receive the latest posts in your inbox.

Reader Interactions

Comments

  1. Erica says

    August 30, 2025 at 12:34 pm

    What a great tutorial! When I baked one of your cake recipes, I ended up needing to make a second batch of buttercream. When you post the recipes with your cakes in your book, is that just for the frosting and I should make an additional batch for the crumb coat? Or should that cover both the crumb coat and frosting? I am loving all of your recipes and am so excited to keep getting better at baking!

    Reply
    • Whitney says

      September 3, 2025 at 9:12 am

      Hi Erica! So happy you found this tutorial helpful! Most of my standalone frosting recipes make about 3 Cups of buttercream, so you’ll need to double them for filling, crumb coating, and frosting a layer cake. The yield should be stated in the notes section of each recipe on my blog. Hope that helps!

      Reply
  2. ROC says

    May 1, 2025 at 4:16 pm

    I can’t wait to bake this!! I do have a question about whether I can use a different colour buttercream to the crumb coat for the final coat? I want to make this cake as is but have it be a pink raspberry buttercream on the outside coat. Will the dark crumb coat bleed into my pink raspberry coat?

    Reply
    • Whitney says

      May 2, 2025 at 2:20 pm

      Hi there! You can totally use a different buttercream to crumb coat than what you use for your final coat! Just be sure to refrigerate after crumb coating so that the colors don’t mix together.

      Reply
  3. Rachel Gregory says

    September 10, 2024 at 1:43 pm

    What crumb coat do you use in a chocolate cake?
    Plain buttercream or chocolate one thanks

    Reply
    • Whitney says

      September 10, 2024 at 9:56 pm

      Hi Rachel! I crumb coat a chocolate cake with whatever frosting I’m using to frost it. So if you’re using a chocolate frosting, crumb coat with chocolate as well.

      Reply
  4. Bev says

    May 3, 2024 at 10:34 am

    Hi,
    How do I convert your “Perfect One-Bowl Chocolate Cake Recipe” from two 8-inch pans to two 10-inch pans?
    Also, do you have a recipe for Carrot Cake that would be suitable for frosting and decorating?
    And the corresponding Cream Cheese Frosting?
    Many thanks,
    Bev

    Reply
    • Whitney says

      May 15, 2024 at 10:35 am

      Hi Bev! I would make 1.5x the chocolate cake recipe to make enough for 2 10-inch pans. I do have a recipe for carrot cake in my book! I also posted it on Instagram here: https://www.instagram.com/p/C4Gi5ABP-uh/ and my cream cheese frosting recipe is here: https://sugarandsparrow.com/cream-cheese-buttercream-recipe/

      Reply
  5. Paige says

    July 29, 2023 at 10:04 pm

    Thank you! One question, have you ever had your buttercream not want to stick to the cake in all places? Yes I eventually got it covered but it was tough because it was moving around.

    Reply
    • Whitney says

      August 8, 2023 at 8:51 am

      Hi Paige! If the buttercream isn’t spreading easily, that usually means it’s a little too thick. Here’s a blog post I wrote on buttercream consistency that explains how to thin it out. This will make the buttercream much easier to work with: https://sugarandsparrow.com/buttercream-consistency/

      Reply
  6. Ardith says

    April 11, 2023 at 10:46 am

    Your tips and recipes are fantastic! What do you do with the crumb coat frosting you scrape off? Is it garbage because it might have crumbs in it?

    Reply
    • Whitney says

      April 11, 2023 at 1:20 pm

      So happy my tips have been helpful, Ardith! Since I start with about 1 Cup of frosting in a separate bowl for the crumb coat, I don’t have much (if any) left over after crumb coating. If I do, I’ll usually spread it onto some cake scraps for a little snack 🙂

      Reply
« Older Comments

Leave a Reply Cancel reply

Your email address will not be published. Required fields are marked *

Recipe Rating


Next Post >

How to Fill and Stack Cake Layers

Primary Sidebar

Welcome to Sugar & Sparrow

Welcome to Sugar & Sparrow

Helping you whip up pretty desserts with confidence and creativity. And hopefully sharing a few laughs with you along the way!

Learn More

Connect

let’s bake!

Get my very best recipes, baking tips, and decorating tutorials sent to your inbox

Featured Posts

pumpkin chocolate marble cake

Pumpkin Chocolate Marble Cake with Brown Butter Frosting

how to transfer cakes to a cake stand

How to Transfer Cakes From a Turntable to a Stand

heat resistant buttercream for hot weather

Stable Vanilla Buttercream Recipe for Hot Weather

Search

Archives

Follow Along

@sugarandsparrowco

Everything I baked in June☀️I was so motivated to Everything I baked in June☀️I was so motivated to bake this month (summer flavors had me INSPIRED!) and could barely keep up with myself but I ended up publishing 7 new recipes on my website + finalized 5 more that will be up ASAP! 

Comment “JUNE” to get all the recipes that are available now:

-Cookie Dough Ice Cream Cake
-Rocky Road Cupcakes (w/ homemade marshmallow creme filling!)
-Blackberry Lavender Cake
-Homemade Blackberry Filling
-Whipped Cream Cheese Frosting
-Strawberry Shortcake Cookie Bars
-Berries & Cream Sheet Cake

https://sugarandsparrow.com/everything-i-baked-in-june
 
#cake #bakersofinstagram #baking #bakinglove #cakedecorating
WHIPPED CREAM CHEESE FROSTING ☁️ this easy 4-ingre WHIPPED CREAM CHEESE FROSTING ☁️ this easy 4-ingredient whipped cream frosting is deliciously light, comes together SO easily, and is stabilized with cream cheese to make it the perfect thick consistency for filling and frosting cakes and cupcakes!! It’s so good with my strawberry shortcake sheet cake and berries & cream cake and I have a feeling I’m going to be whipping it up for many more summer cakes😍

Full recipe with cake pairing suggestions at https://sugarandsparrow.com/whipped-cream-cheese-frosting/ 

INGREDIENTS 
1 Cup (8oz, 226g) full-fat brick-style cream cheese, cold
1 Cup (120g) powdered sugar
1 tsp pure vanilla extract
2 1/2 Cups (600ml) heavy whipping cream, cold

INSTRUCTIONS
1. Chill the bowl of your stand mixer (or the large bowl you’ll be using with your hand mixer) into the refrigerator for 20 minutes.
2. Into the cold mixing bowl, add the cream cheese and beat on medium speed with the whisk attachment until creamy, 2 min. Add the powdered sugar and mix on low speed until mostly incorporated, then turn the mixer to medium-high speed and mix for 1 min.
3. Add the vanilla extract, then turn the mixer to medium-high speed and slowly pour in the heavy whipping cream (down the side of the bowl so it doesn’t fly everywhere). Once all the cream is added, continue mixing on medium-high for just about 30 seconds longer, keeping a close eye on the mixing bowl to watch it thicken. It should come together into a thick, silky frosting consistency at this point, where you can dip the whisk into the frosting and it holds a slight peak when you hold it upright.
4. Use the frosting immediately to decorate cakes and/or cupcakes for best results!

#whippedcreamfrosting #creamcheesefrosting #cakedecorating #whippedcream #frosting
TOP 10 4TH OF JULY DESSERTS 🎆 These are just a few TOP 10 4TH OF JULY DESSERTS 🎆 These are just a few of my favorite summer dessert recipes that will disappear at any Fourth of July celebration.

Comment “JULY” and I’ll send you all 20+ of my favorite 4th of July dessert ideas – naturally red white and blue desserts like my berries and cream cake, easy no-bake desserts, no-churn ice cream, strawberry shortcake inspired recipes, and all the treats that will go FAST at any barbecue.

https://sugarandsparrow.com/4th-of-july-desserts/

#fourthofjuly #4thofjuly #summerdessert #partycake #dessertideas
STRAWBERRY SHORTCAKE COOKIE BARS 🍓my hot take: str STRAWBERRY SHORTCAKE COOKIE BARS 🍓my hot take: strawberry shortcake toppings on a buttery, soft sugar cookie base is WAY BETTER than traditional strawberry shortcake. I topped my favorite sugar cookie bar recipe with silky whipped cream cheese frosting + homemade strawberry sauce and now I’m ruined 😵

Full recipe is linked in my bio + at https://sugarandsparrow.com/strawberry-shortcake-cookie-bars/ 

SOFT SUGAR COOKIE BARS
2 Cups + 2 Tbsp (283g) all purpose flour
1 tsp baking powder
1/2 tsp baking soda
1/2 tsp salt
3/4 Cup (170g) unsalted butter, room temp
1 Cup (200g) granulated sugar
1 large egg
1 large egg yolk
1 1/2 tsp pure vanilla extract

1. Preheat the oven to 350ºF (177ºC). Grease and line an 8-inch square baking pan with parchment paper, leaving a slight overhang for easy release.
2. Whisk together the flour, baking powder, baking soda, and salt. Set aside.
3. Using a stand mixer with the paddle attachment (or hand mixer) cream together the butter and sugar on high speed until pale and fluffy, 2-3 min.
4. Turn the mixer to medium and add the egg, egg yolk, and vanilla. Mix until combined, then add the flour mixture and mix on low speed until a uniform cookie dough forms.
5. Press the cookie dough into the prepared pan in an even layer, all the way to the edges. Bake for 18-20 minutes, until the edges are just starting to brown. 
6. Cool the sugar cookie bars in the pan for 30 minutes, then transfer to a wire rack to cool completely. Top with whipped cream cheese frosting and strawberry sauce (full recipe linked in my bio!)

#strawberryshortcake #strawberries #whippedcreamfrosting #cookiebars #sugarcookies
BLACK FOREST CAKE 🍒 this is my favorite thing to m BLACK FOREST CAKE 🍒 this is my favorite thing to make during cherry season! My version is decadent chocolate cake soaked with homemade cherry syrup, fresh cherry filling, and whipped cream frosting. Top it with a chocolate ganache drip if you want to go the extra mile! 

Full recipe + decorating tutorial is linked in my bio + at https://sugarandsparrow.com/black-forest-cake-recipe/

PS I’m working on a sheet cake version of this recipe that’s even easier! Stay tuned.

#blackforestcake #cherrycake #chocolatecake #cherries #cakedecorating

Footer

On the Blog

  • Cake Basics
  • Recipes
  • Tutorials

Info

  • About
  • Privacy Policy & Disclosure

stay in the know

Copyright © 2026 · Theme by Sugar & Sparrow