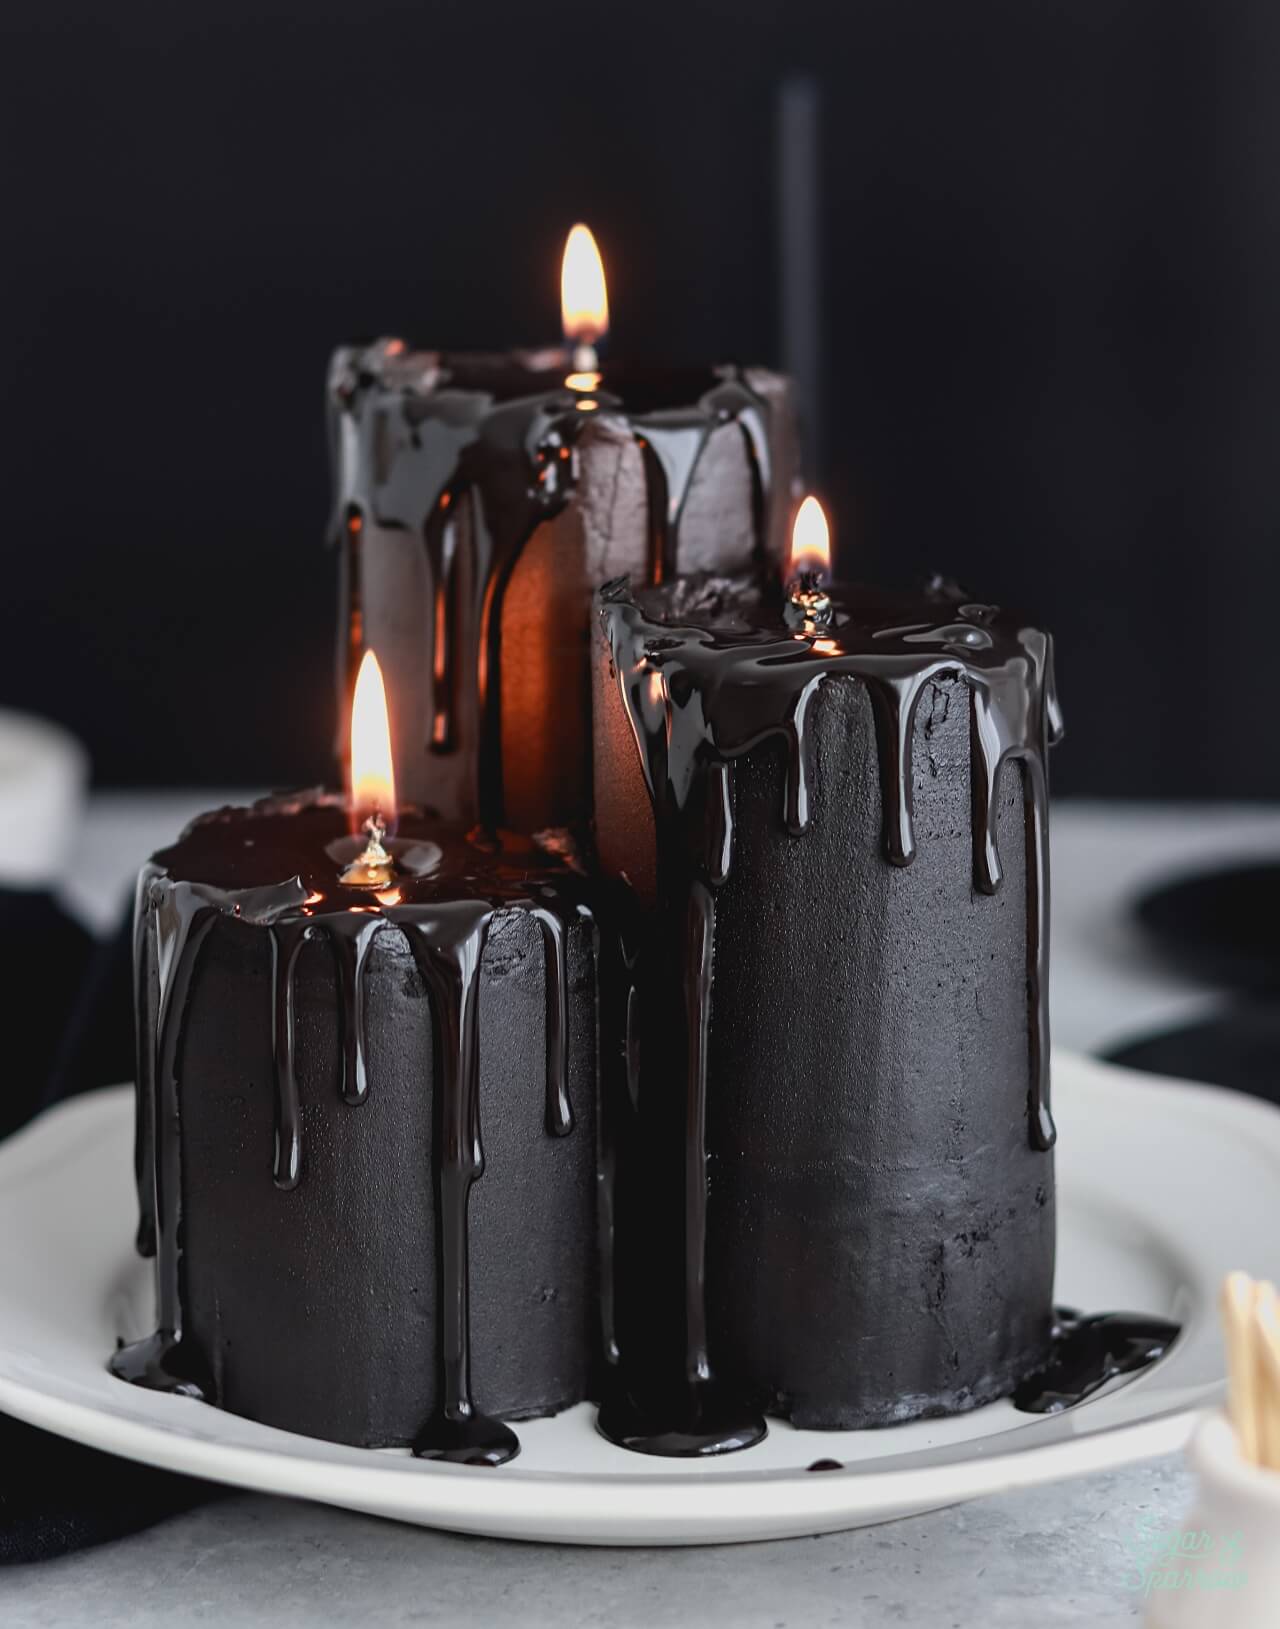
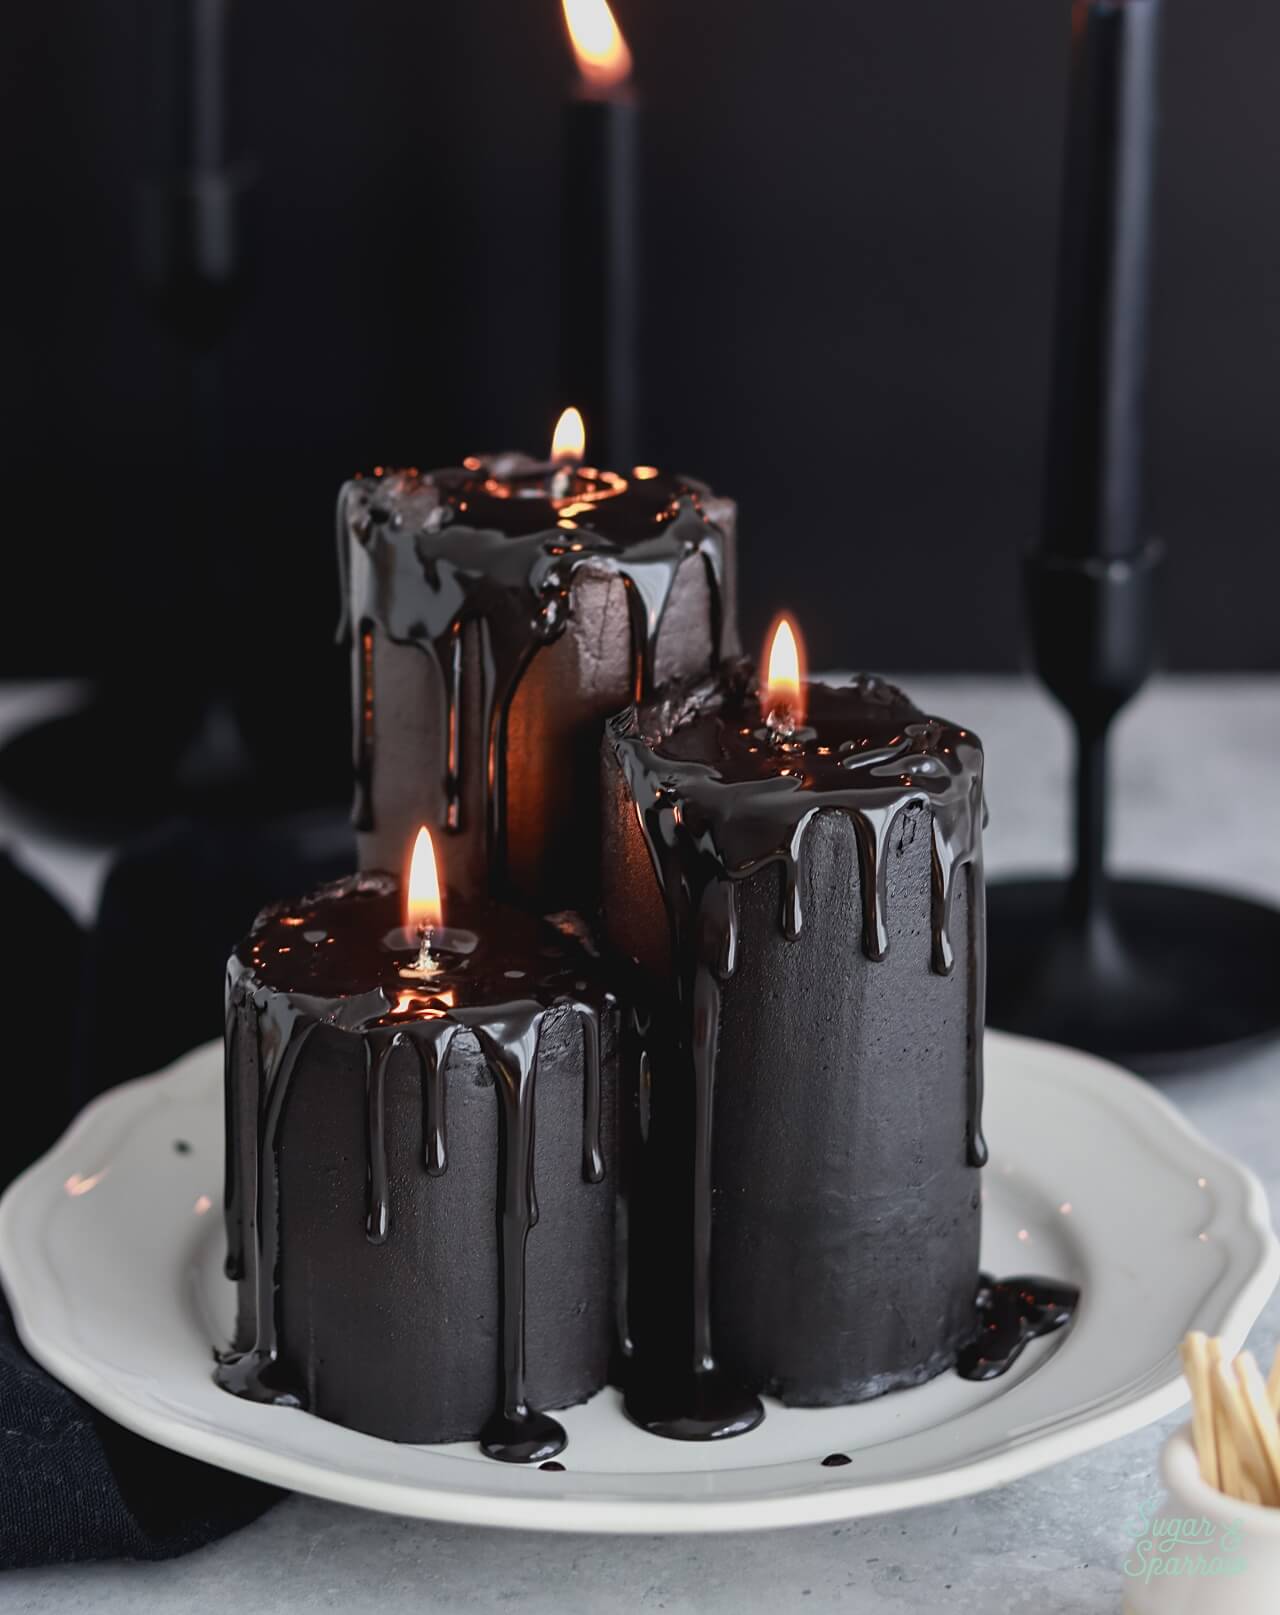
These melting candle cupcakes are such a fun cake project or spooky (edible!) centerpiece for your next gathering! They’re made with standard sized cupcakes filled and stacked together, frosted with my favorite dye free black buttercream, and topped with black chocolate ganache for a melted candle look. Each candle cupcake tower is topped with a cake candle so you can actually light it like a real candle!
Melted Candle Cupcakes vs. a Melted Candle Cake
I’ve seen this melted candle design made with full-sized cake layers before, but I love how realistic the cupcake size is. They’re about the size of real pillar candles, and I was able to make multiple candles of varying sizes. For the three candles pictured I only used 9 standard sized cupcakes (4 for the tallest candle, 3 for the medium one, and 2 for the shortest). So, this project won’t feed a ton of people but if you’re hosting a small gathering or want a fun dessert table centerpiece, these will be perfect.
If you want to make one big melted candle cake, the method of filling, stacking, frosting, and dripping the cake will be the same. You’ll just want to consider how tall you want the cake, how many people you want to feed and how much frosting to make. You could certainly use my small batch black velvet cake recipe to make one triple layer 4 inch candle cake to feed about 4 people. If you need something bigger, my full sized black velvet cake recipe makes a triple layer 6-inch cake that will feed up to 15 people.
Recipes for Melting Candle Cupcakes
Here are the recipes I used for these black melted candle cupcakes, with suggestions for other flavors if you need them:
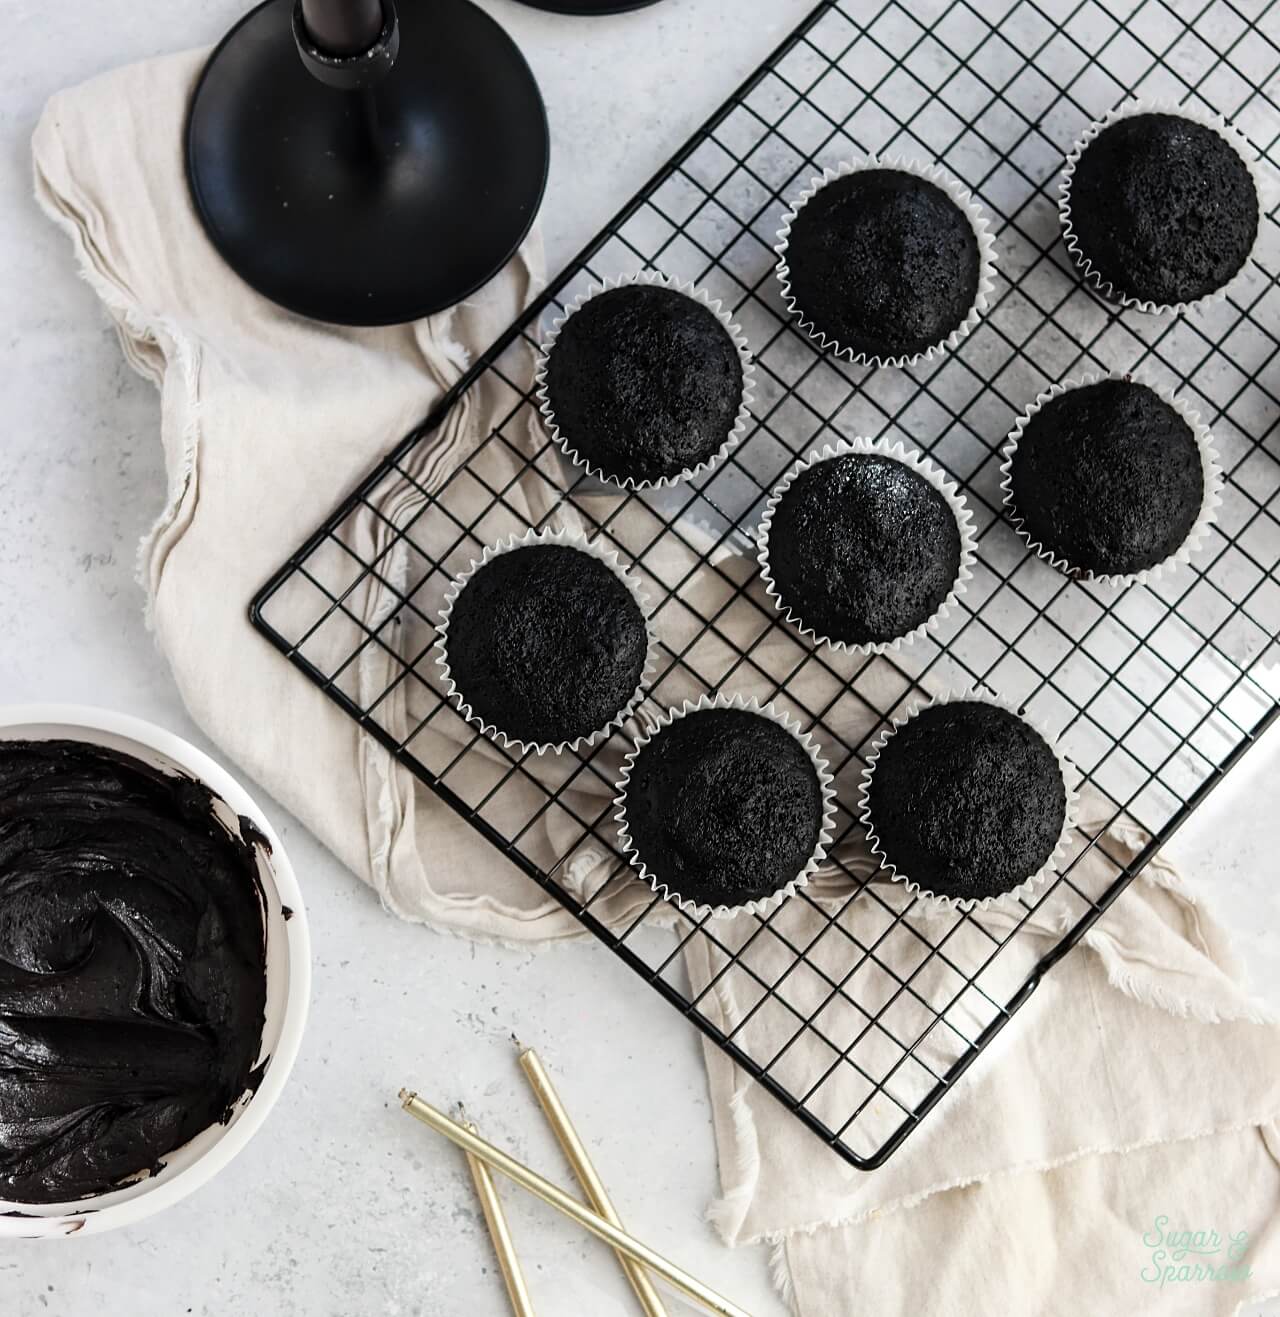
- Cupcakes: For the cupcake candles pictured, I made my small batch black velvet cake as cupcakes. It makes 9 cupcakes, so you’ll have the perfect amount for the three candles pictured. I made the batter, filled my cupcake tins about ⅔ full, and baked at 350ºF for 14-18 minutes. If you want to make different flavors for the candle cupcakes, any of my small batch recipes will work. Just bake them at the same temperature with the same timing.
- Buttercream: I filled and frosted these melted candle cupcakes with a small batch of my dye free black buttercream. You’ll want to make half of the recipe to make just enough for filling and frosting the cupcakes. If you’d rather make different flavors or colors of the frosting for your candles, you can half any of my buttercream recipes for this project.
- Ganache: the dripping chocolate ganache is what makes the candles look melted! I used my black ganache recipe for this part, which you could also half since you don’t need a lot. If you want to make more vibrant colors for the drips, use my white chocolate ganache recipe which can be tinted with food color gel.
Melting Candle Cupcake FAQs
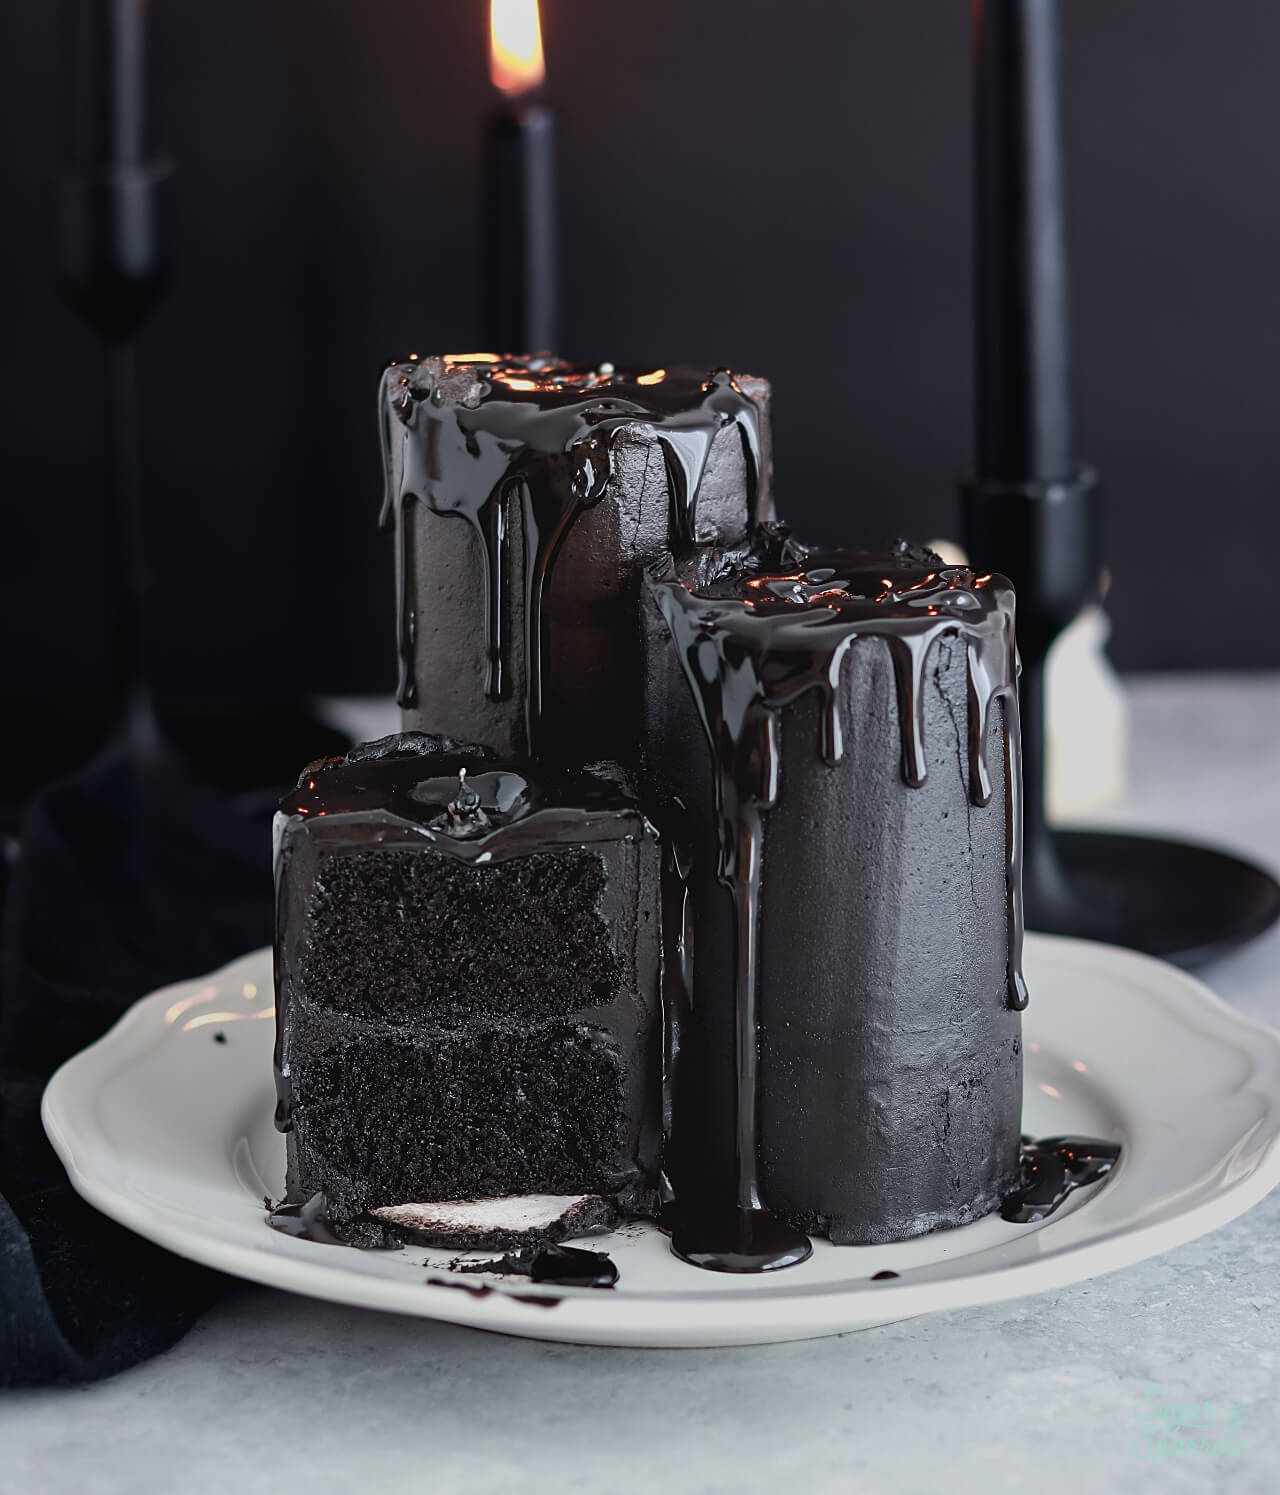
- Will they turn everyone’s mouth black? Nope! Even though these melted candle cupcakes are all black, there’s barely any food color gel in them. The cupcakes and buttercream use black cocoa powder which is what gives them their dark black color. The only element that has a couple drops of black food color gel is the black chocolate ganache. All that said, this project will not turn anyone’s mouths (or anything else) black because it’s nearly dye-free. It’s basically like eating Oreos!
- Can I make other colors? Yes! This tutorial will work in any color you can imagine. You’ll just need to plan out a color palette and use food color gel with your frosting and ganache to create what you’re imagining.
- How do I make these ahead? You can make the cupcakes, buttercream, and ganache ahead of time and follow the Make Ahead Tips section for each individual recipe. This will allow you to make the individual elements days or weeks ahead so you’re ready to go on project day. After you assemble the melted candle cupcakes, you can store them in the refrigerator for a day or two ahead of serving them.
Melted Candle Cupcakes Tutorial
Supplies Needed
- 9 baked cupcakes (I baked this recipe as cupcakes)
- 1 ½ Cups black buttercream (I used ½ batch of this recipe)
- 2 piping bags
- Cake turntable
- 3 cardboard circles cut to the diameter of the cupcake bottoms
- 2 boba straws
- Small angled spatula
- Icing smoother
- Black ganache
- 3 cake candles
- Round cake board for displaying
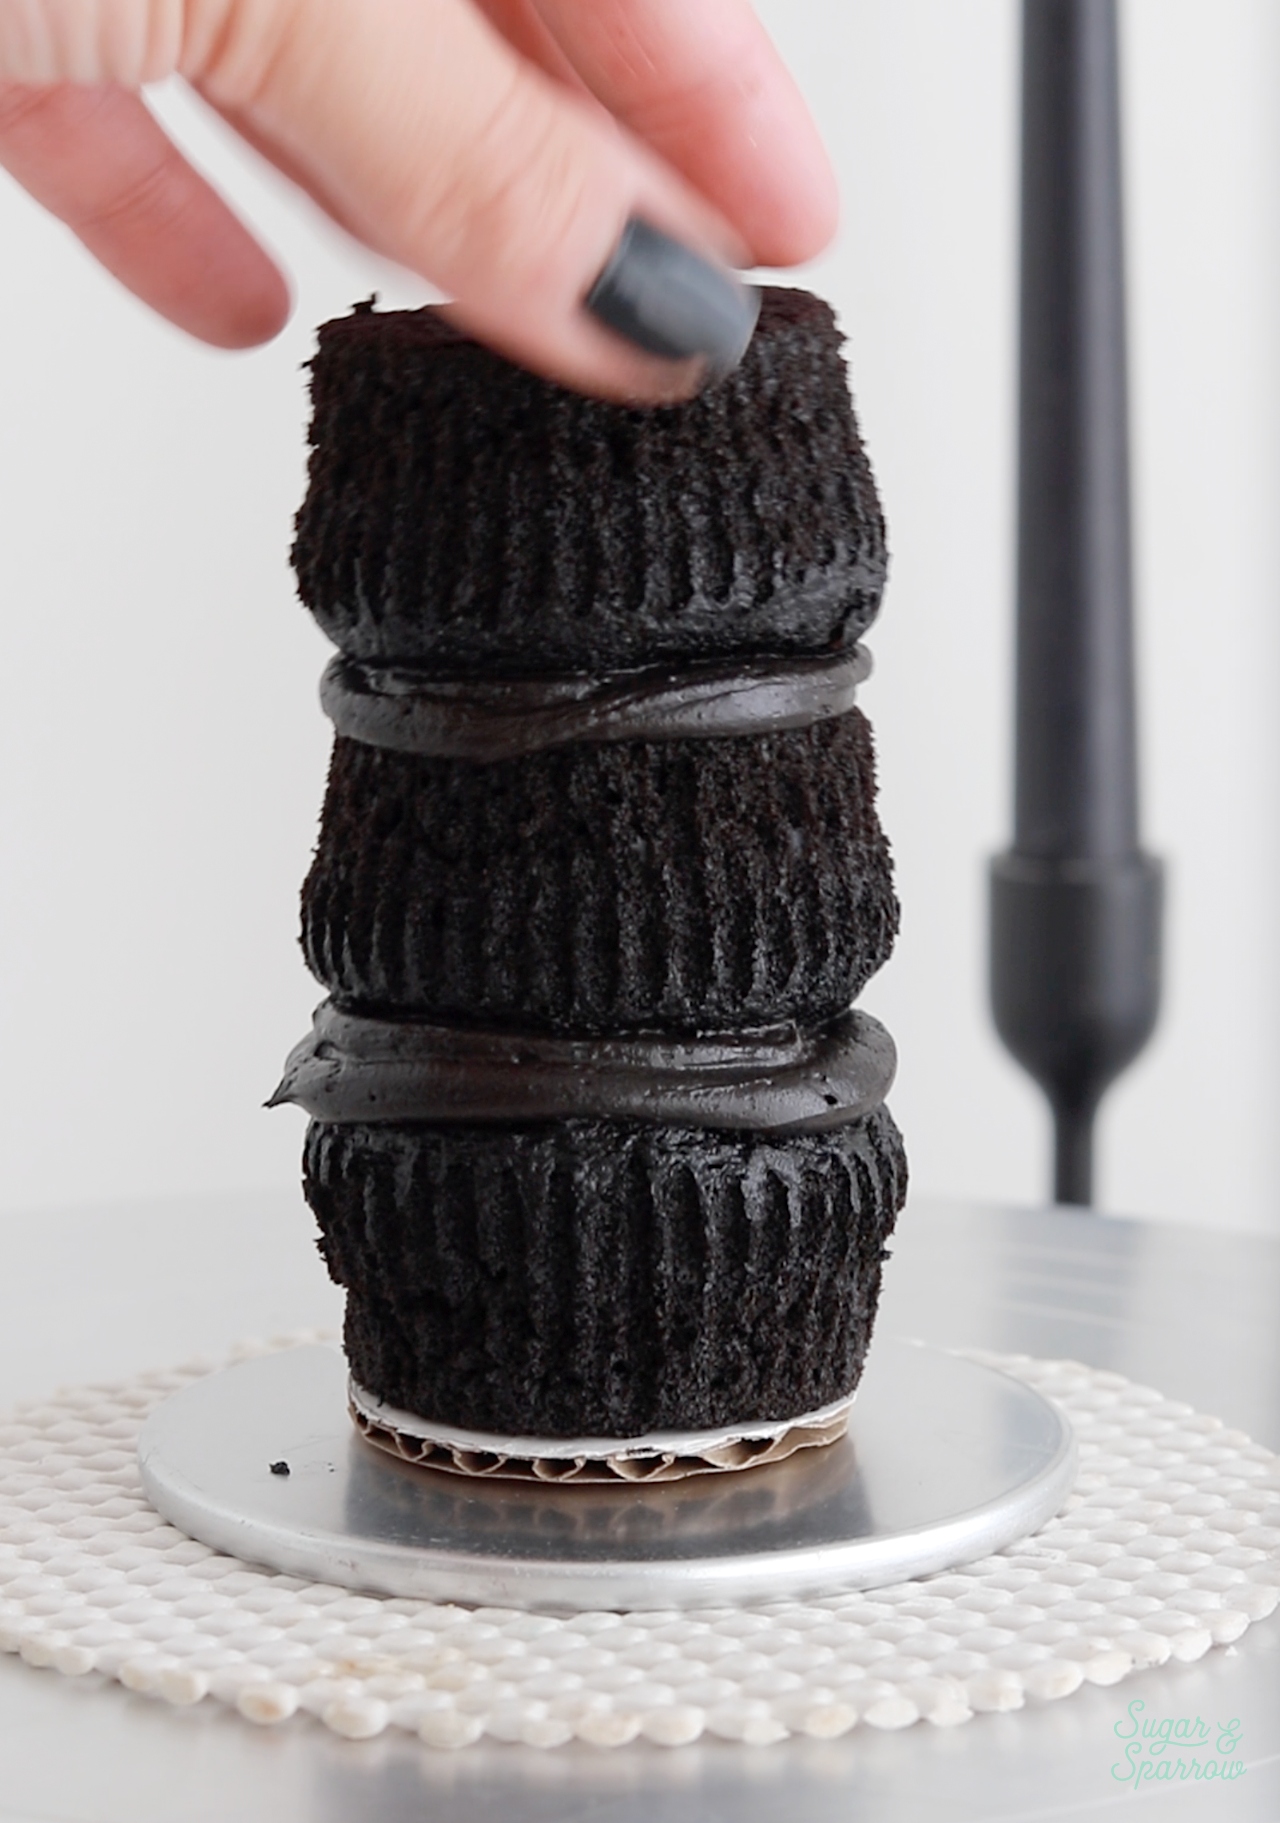
Step 1: Fill & Stack the Cupcakes
Place one of the small cardboard cake circles onto the turntable and add a swipe of buttercream on top before pressing on the first cupcake. Pipe some buttercream on top and smooth it down with your angled spatula until it’s about ⅛ to ¼ inch of filling, then place the next cupcake on top upside down.
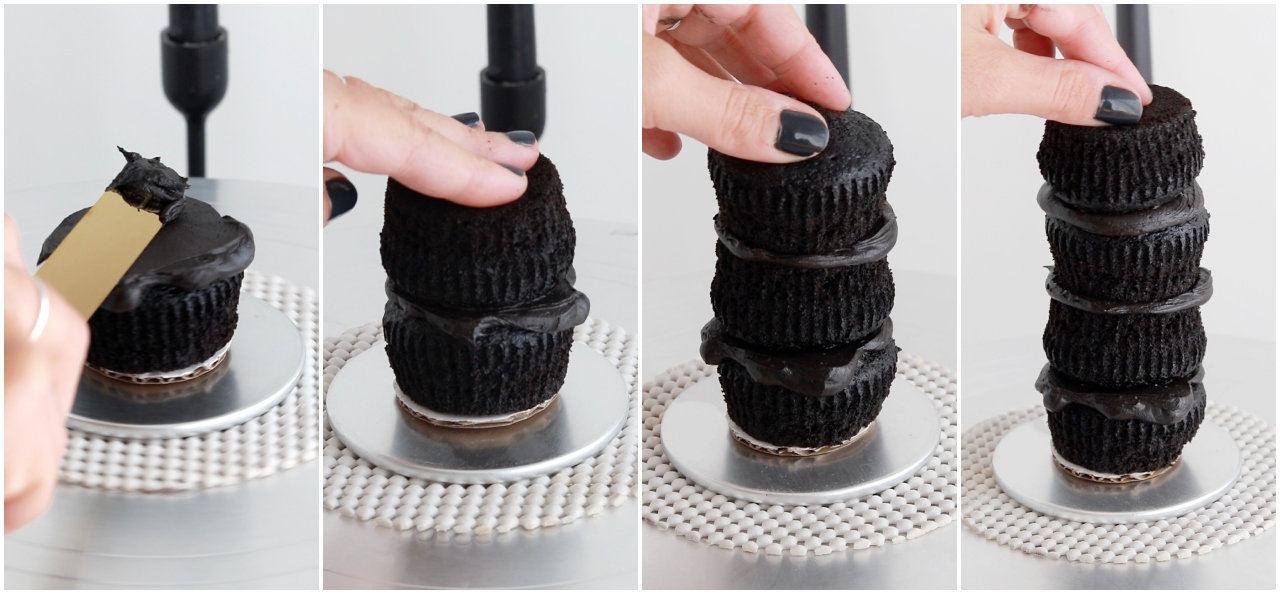
Add another layer of filling and add the next cupcake on top, right side up this time, followed by the final layer of filling and the fourth cupcake upside down.
At this point the stack of cupcakes will be pretty unstable so this is where the boba straw comes in. Insert the boba straw right through the middle of the cupcake stack to stabilize it. You can now hold the boba straw while you crumb coat your candle with more of the buttercream.
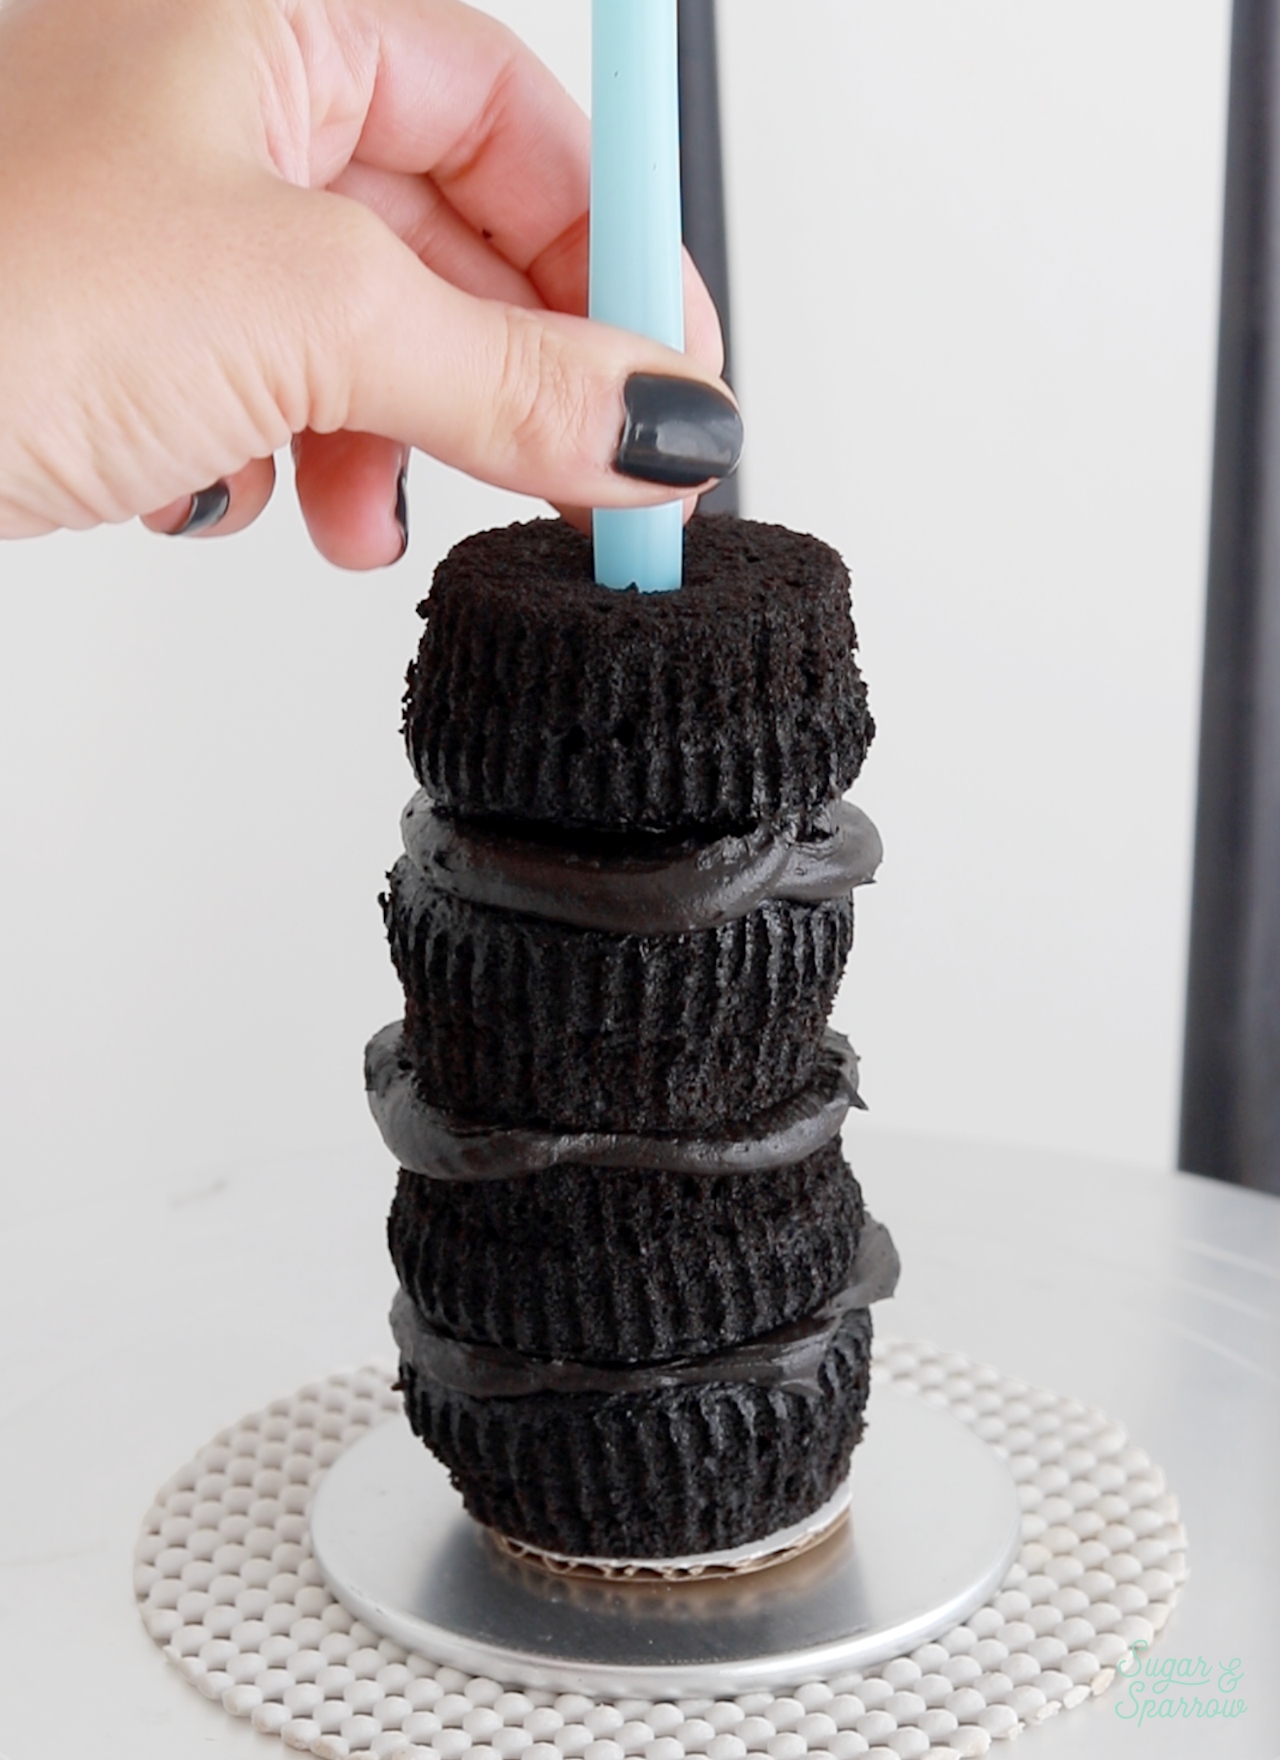
Place the stacked, crumb coated candle into the refrigerator (boba straw and all), then make the next cupcake stack with three cupcakes following the same process above. Then, make the third cupcake with the remaining two cupcakes. You won’t need a boba straw for this one since it’s a short stack.
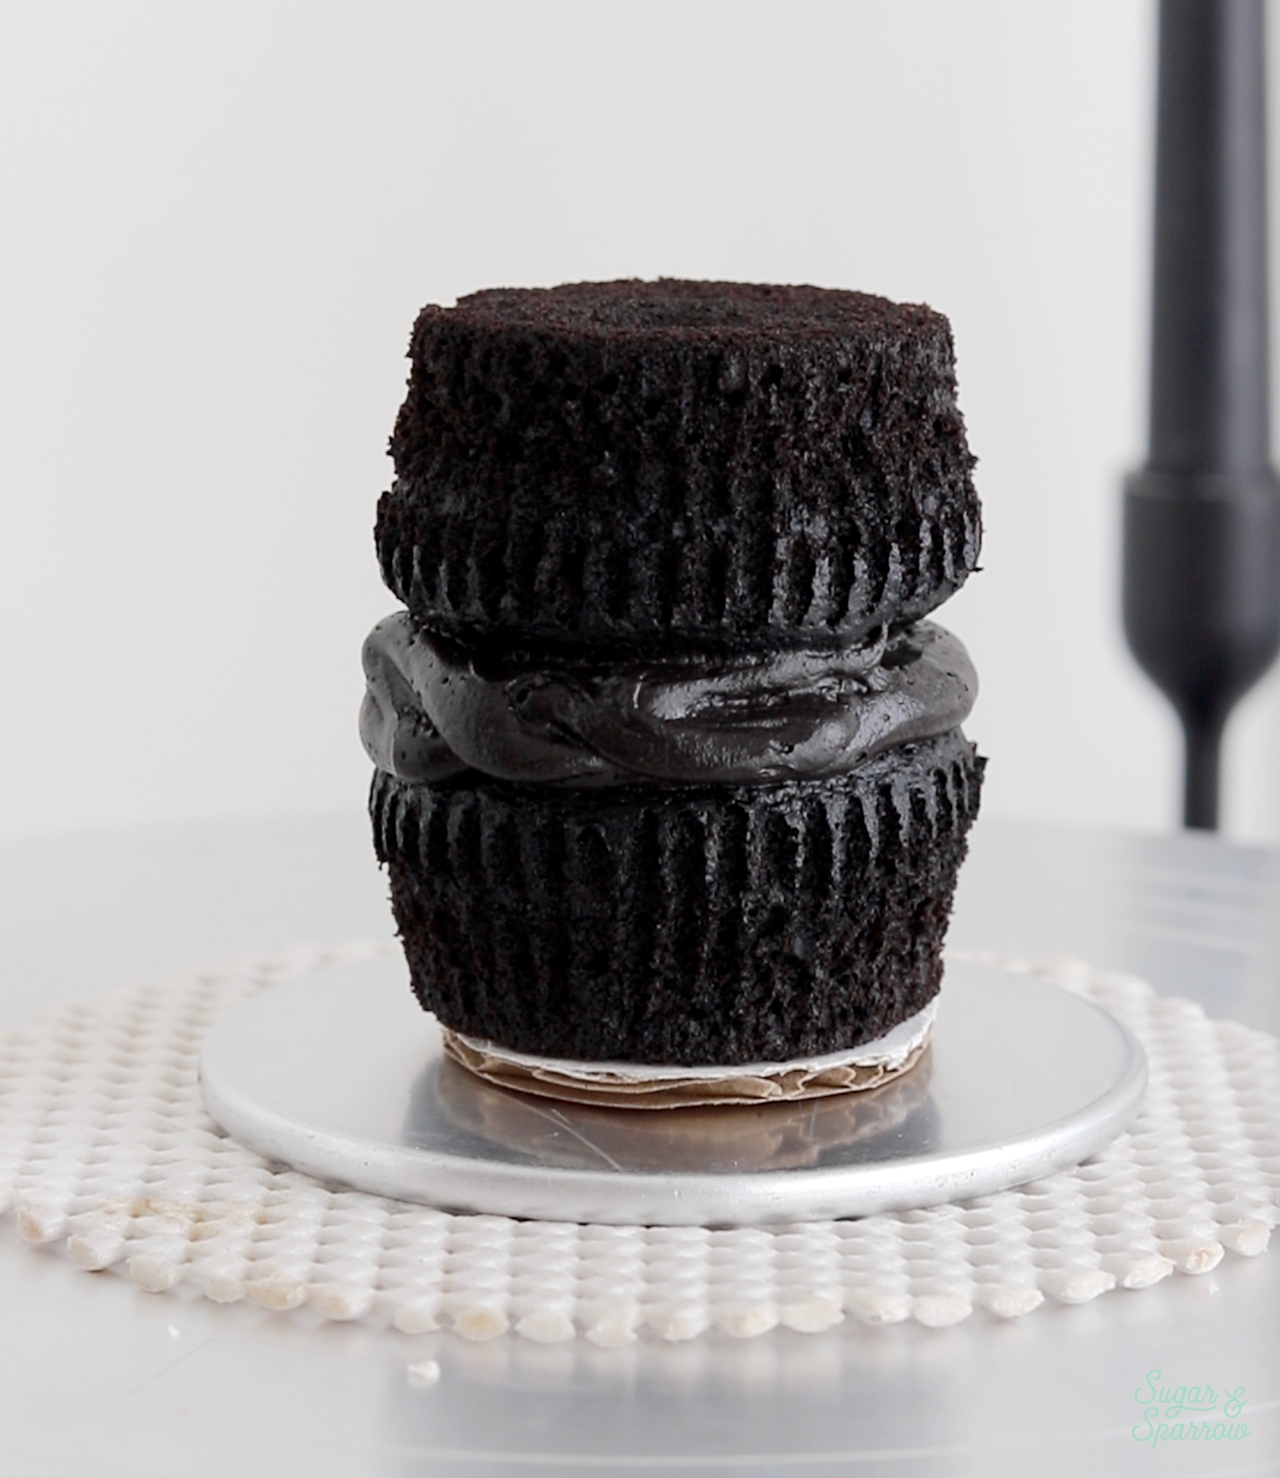
Let all of the crumb coated candles chill in the refrigerator until the frosting is firm to the touch (about 15-20 minutes) before moving on.
Step 2: Frost the Candle Cupcakes
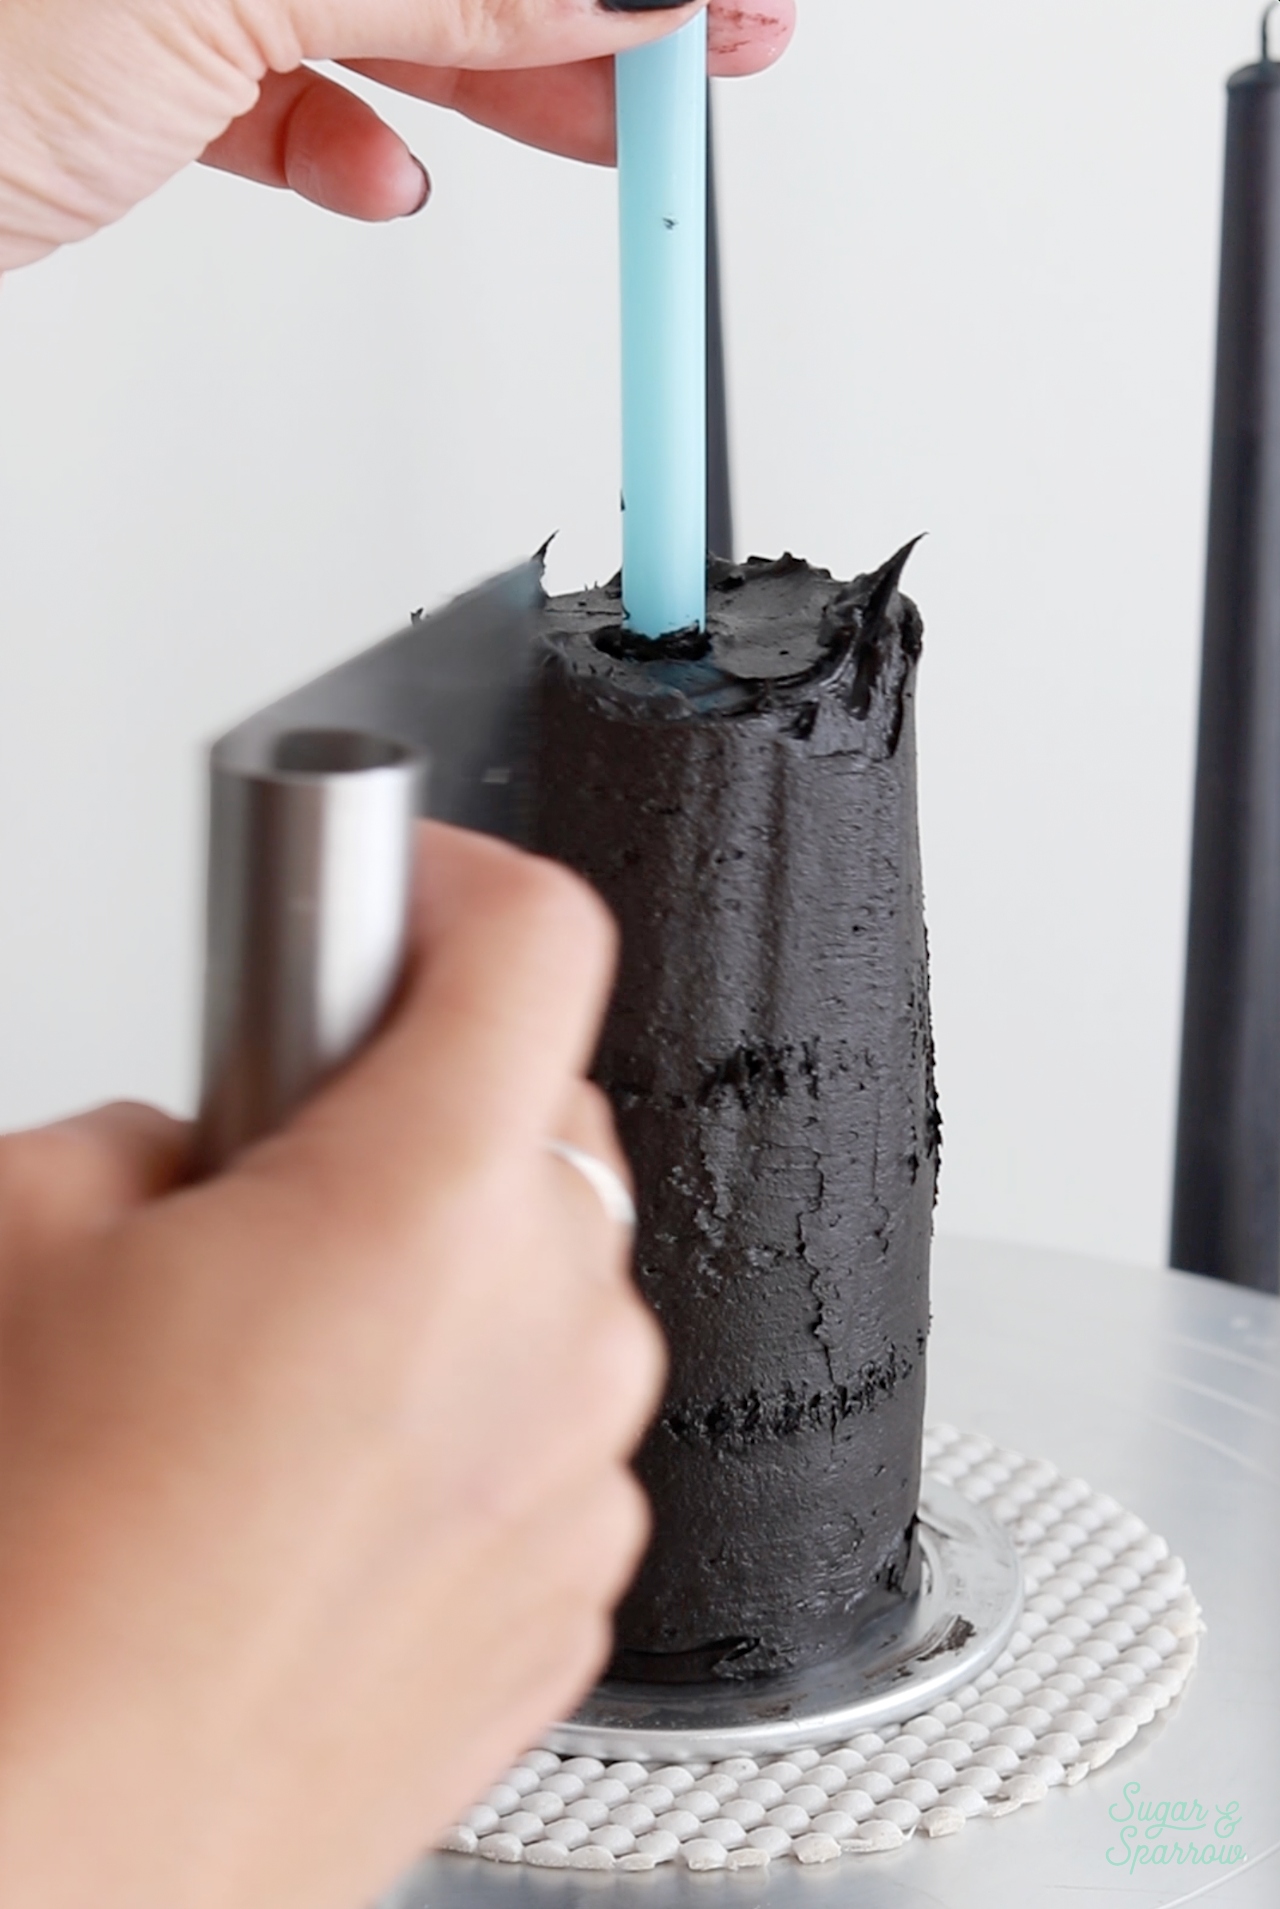
Add the remaining black buttercream into a piping bag if you haven’t already. Snip about ¼ inch opening off the pointy end. One by one, place each crumb coated candle back onto the turntable and use the piping bag to add buttercream before using your angled spatula and icing smoother to frost a smooth finish. Keep the top edge of each candle raw (don’t swipe it inward to make the edges smooth).
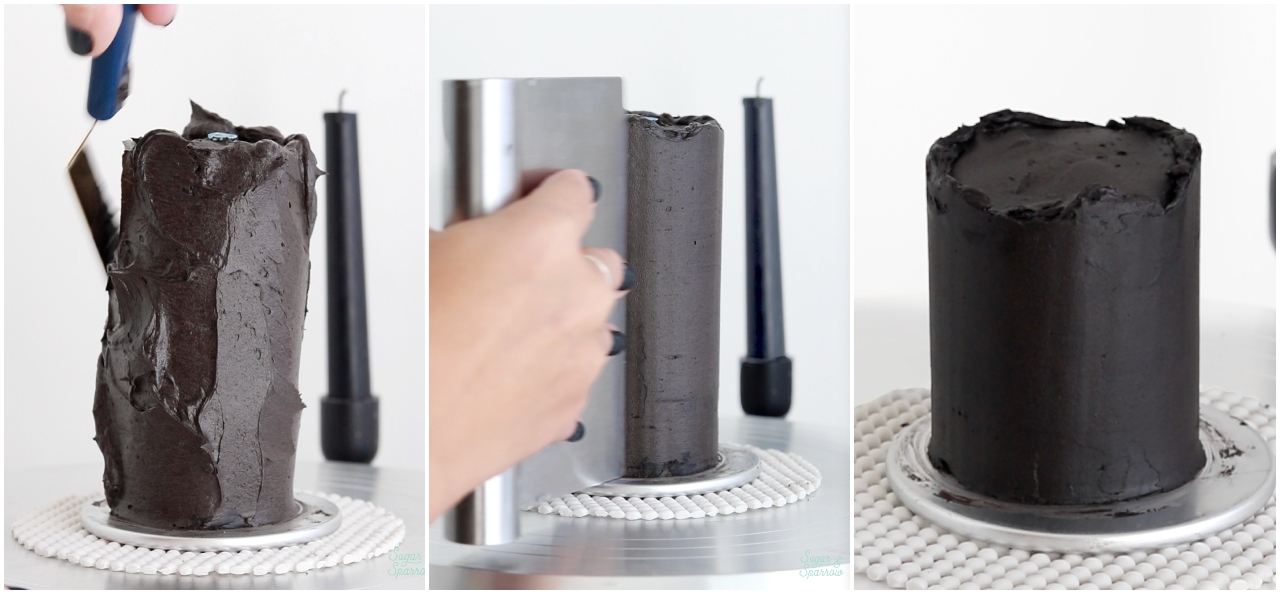
On the taller candles, snip off each boba straw so that it’s flush with the top of the candle surface. If you need to cover it up some, add a little more frosting over the top.
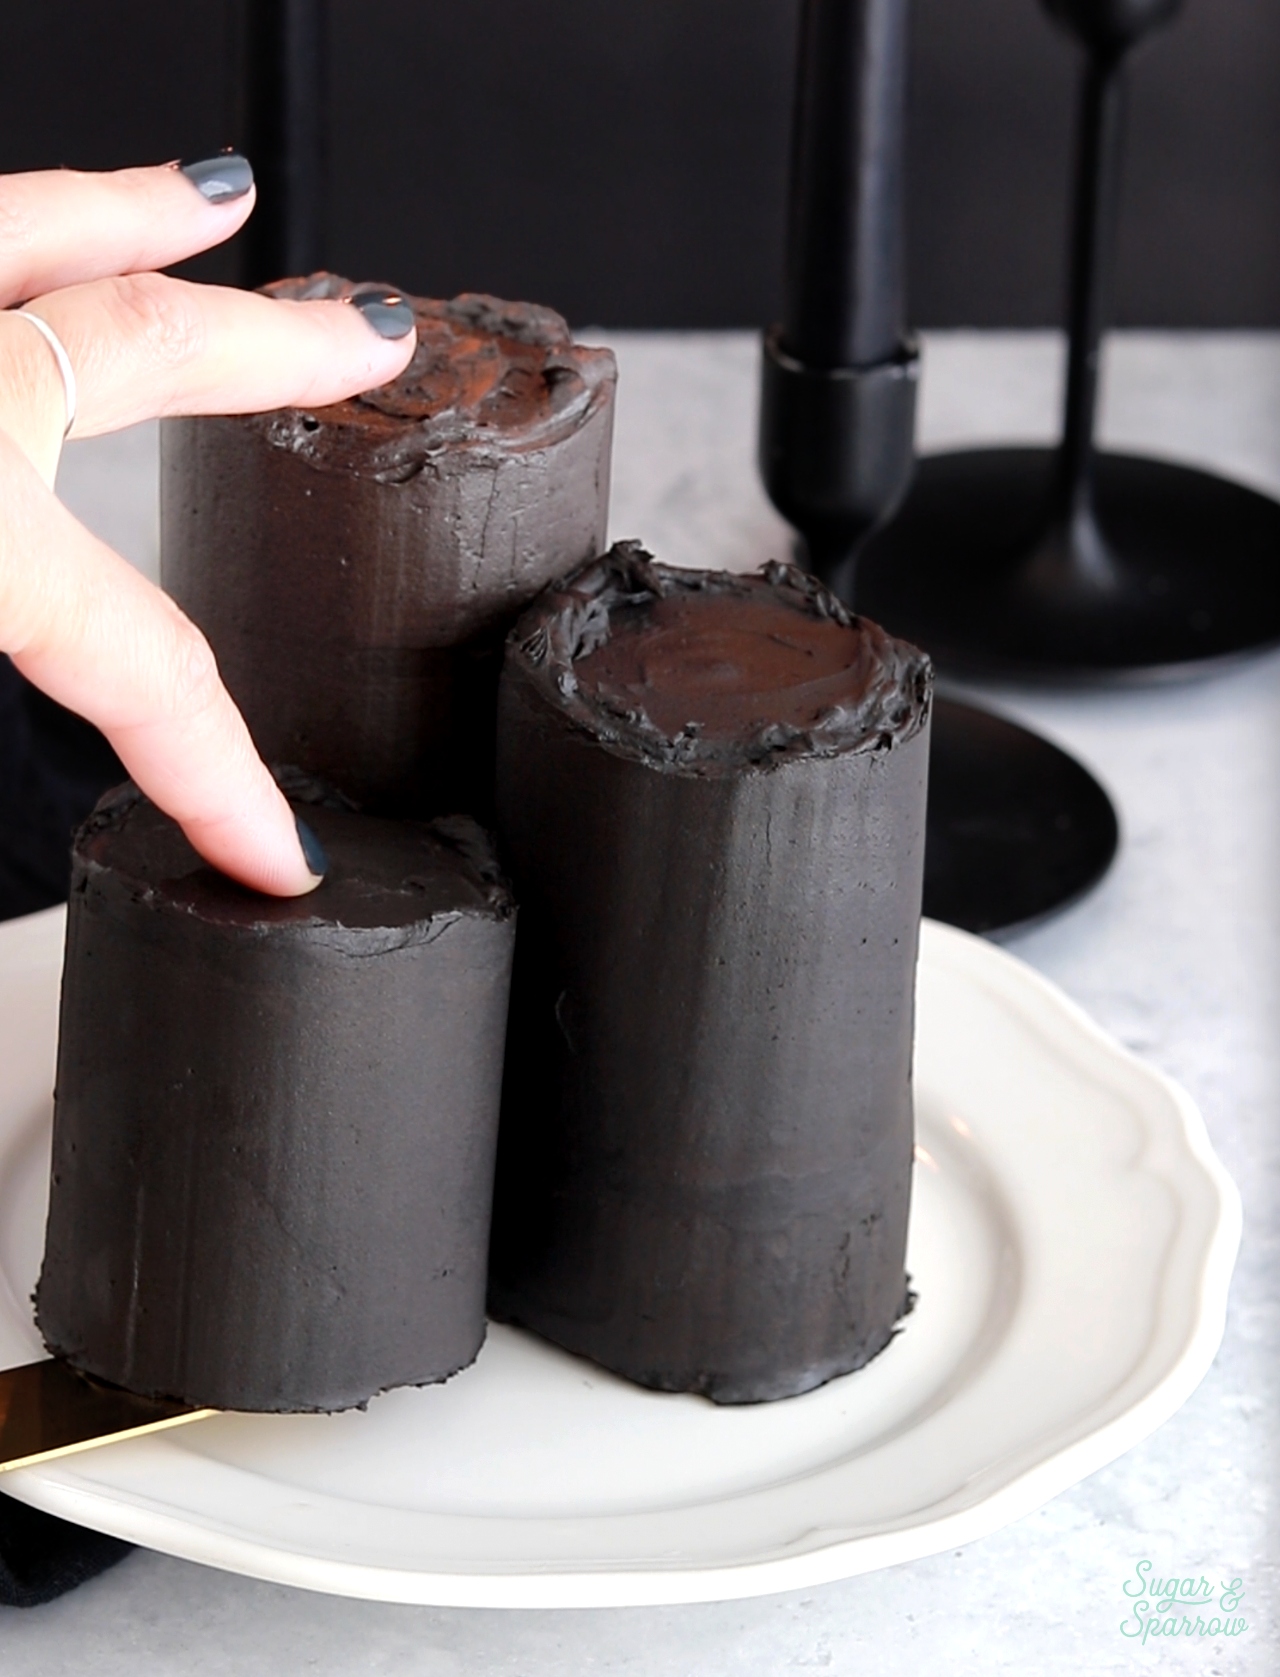
Place each frosted candle back into the refrigerator to chill for another 15-20 minutes. This is a good time to make the black ganache if you haven’t already.
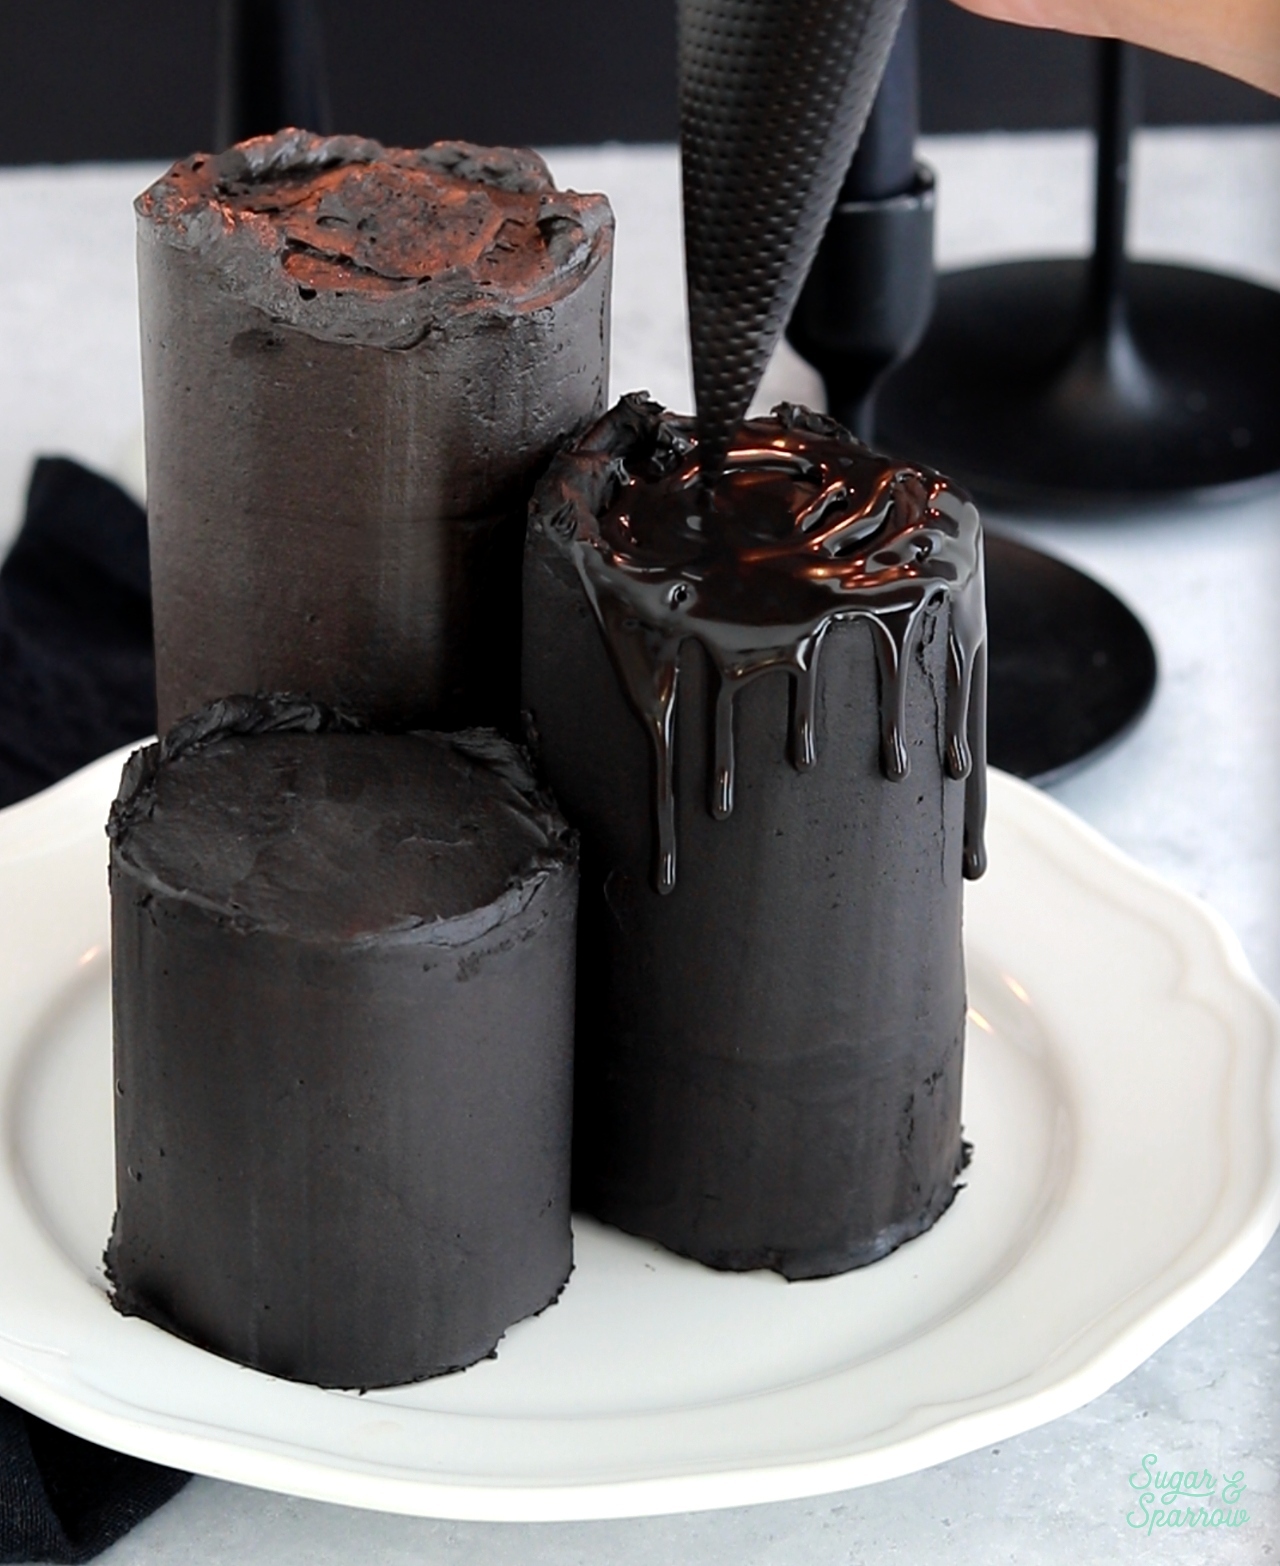
Step 3: Add the Ganache Drips
When the frosting on the candle cupcakes is firm to the touch, carefully move and position each candle onto a round cake board or whatever serving platter you plan on displaying the candles.
Whether you just made the black ganache in the previous step or you made it further in advance, make sure the ganache is slightly above room temperature so that it’s ideal drip consistency. If it’s warmer than this, wait for it to cool. If it’s cooler than room temperature, gently heat it in the microwave in 5-10 second intervals until it’s slightly above room temperature. Feel free to do a test drip on one of the chilled candles to see if you like the consistency.
Once the ganache is ideal drip consistency, add it into a piping bag and snip off about ⅛ inch opening on the pointed end. Then, add drips around the edges of each candle and fill in the tops.
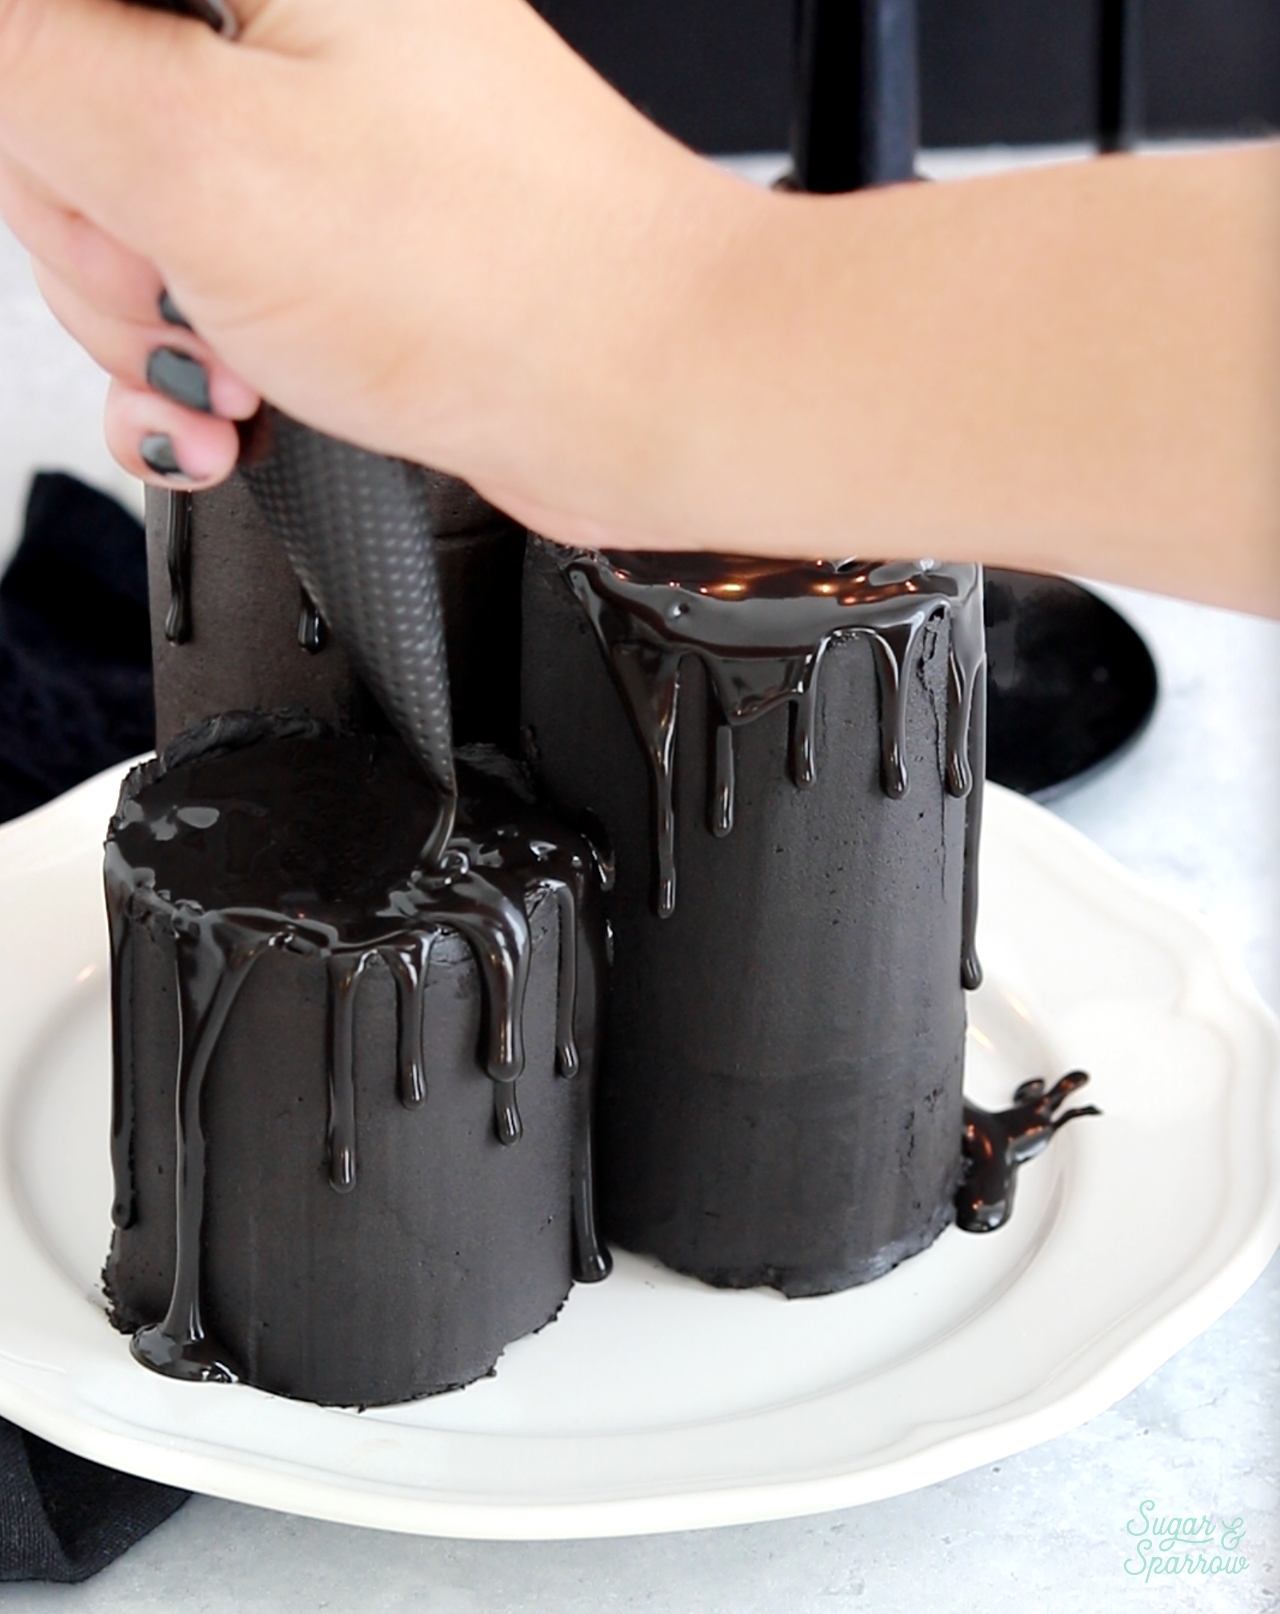
Since this is meant to look like melted candle wax, feel free to make it look perfectly imperfect with a few drips pooling at the bottom of some of the candles.
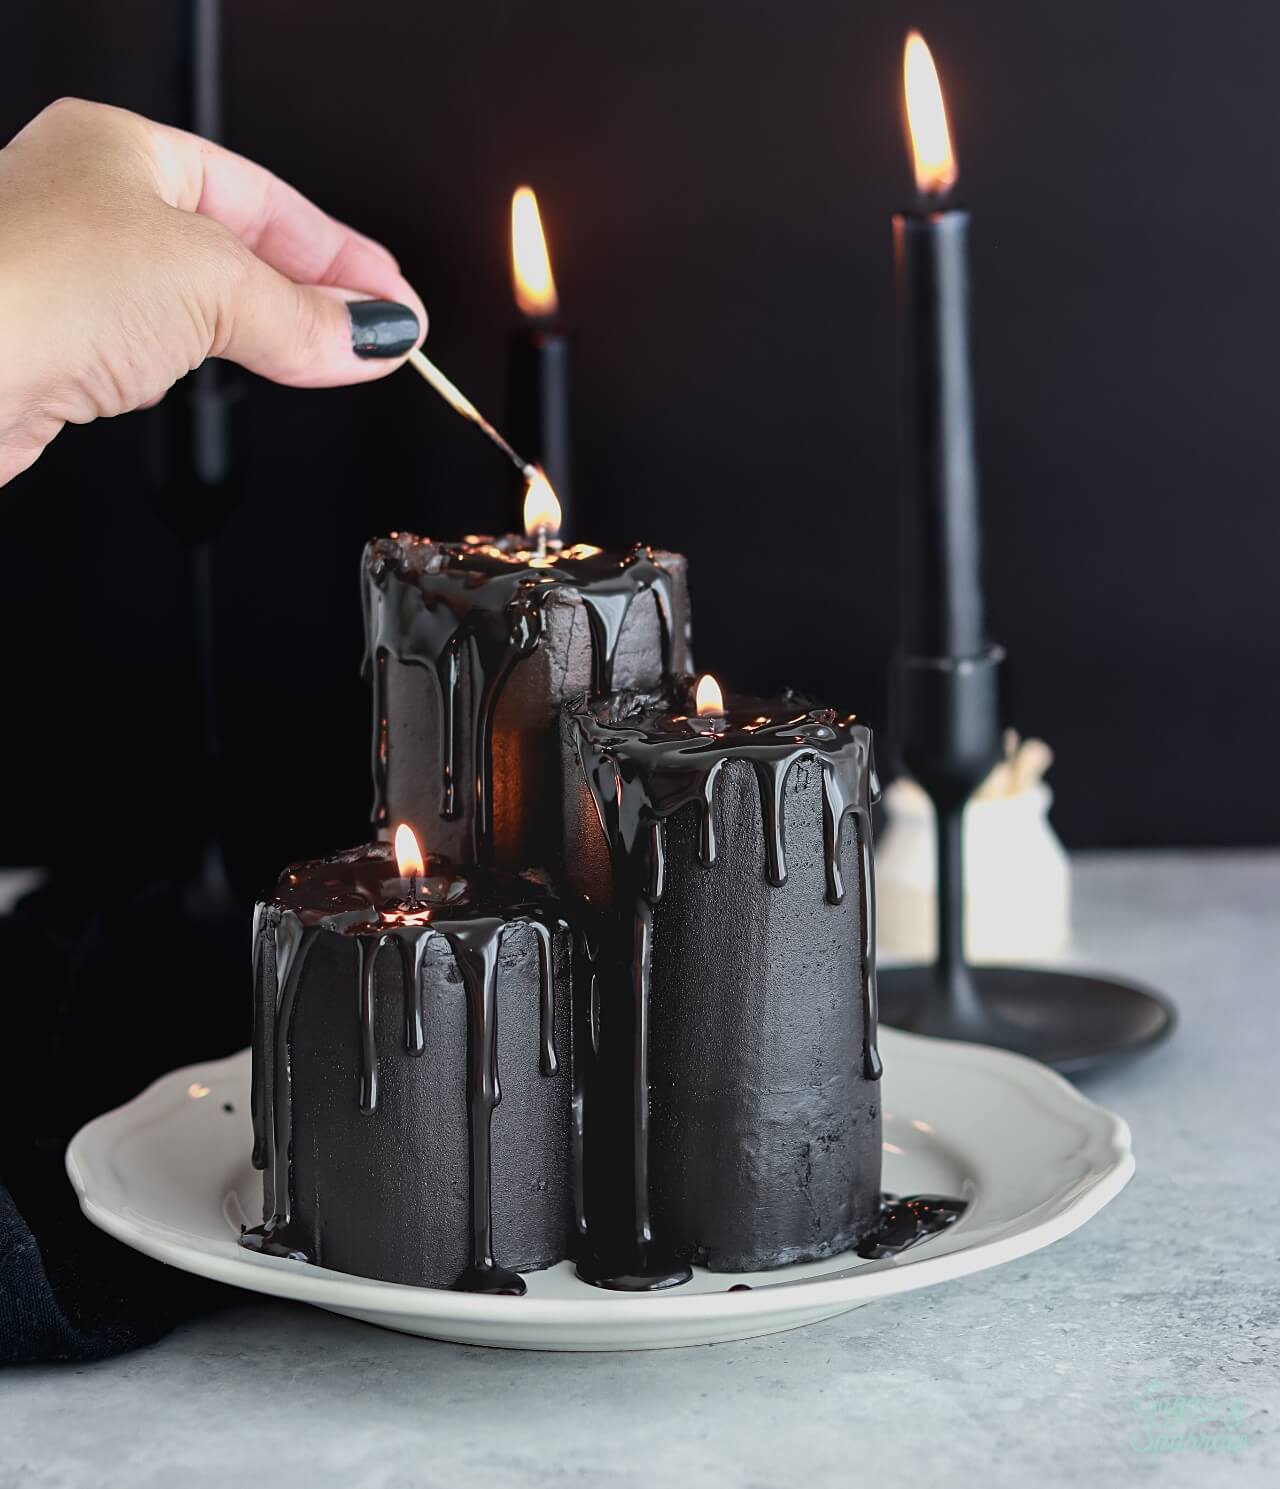
Step 4: Add the Cake Candles
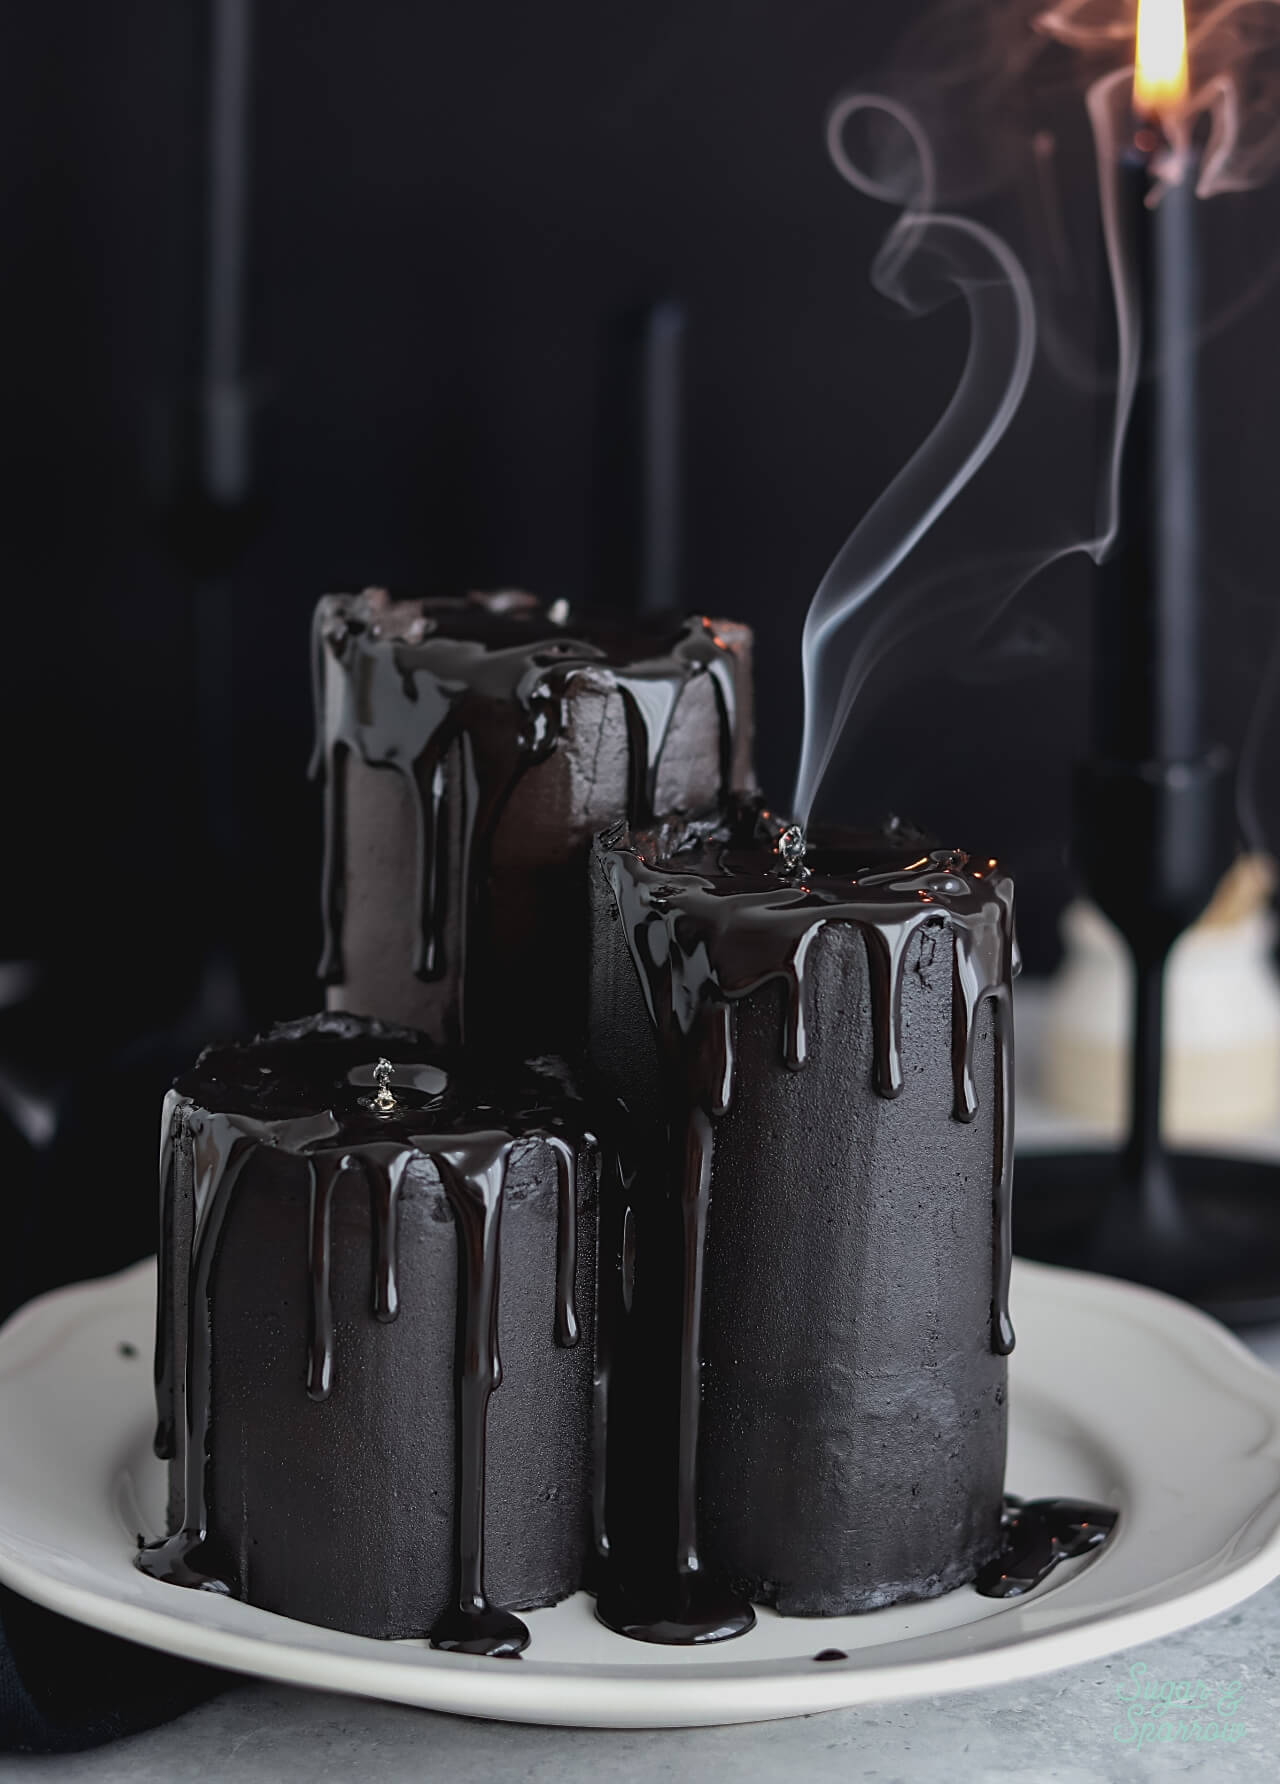
Finally, add the cake candles into the top of each cupcake candle and press them down until only the tops (the wicks and partial top of each candle) are showing. If you press them too far down they won’t stay lit, so keep that in mind. You may need to cut some of the candles with a sharp knife so they’re short enough. When you’re ready to serve or photograph your melting candle cupcakes, light each wick and summon all the spooky vibes!
More Ideas for Your Spooky Dessert Table
If you’re looking for more spooky showstoppers, here are some of my favorite Halloween cake projects:
- Buttercream Monster Cake
- Black Velvet Cupcakes
- Halloween Lambeth Cake
- Black Velvet Cake
- Witch Cauldron Cake
- Candy Corn Cake
PS: Let me know if you make these melted candle cupcakes in the comments section below or feel free to tag @sugarandsparrowco on Instagram to show me! I love to see what you create with my recipes and tutorials.


I’m a little confused with the boba straw part of the cupcake..you say to snip off part of it then covering it with some ganache if it’s poking out. However.. If you’re inserting it with another thinner candle, won’t it jiggle around since the boba straw will have a big enough gap for a thinner candle to be placed there? How will the thinner candle not move around? I don’t think the ganache on top will do much to hold it in place. Do you fill the straw with ganache so the thinner candle can stick to something? Thanks!
Hi Danielle! When I stick the boba straw in, the cake inside the straw stays (I don’t remove it), so I just stick the smaller candle into the cake inside the boba straw. I hope that makes sense!