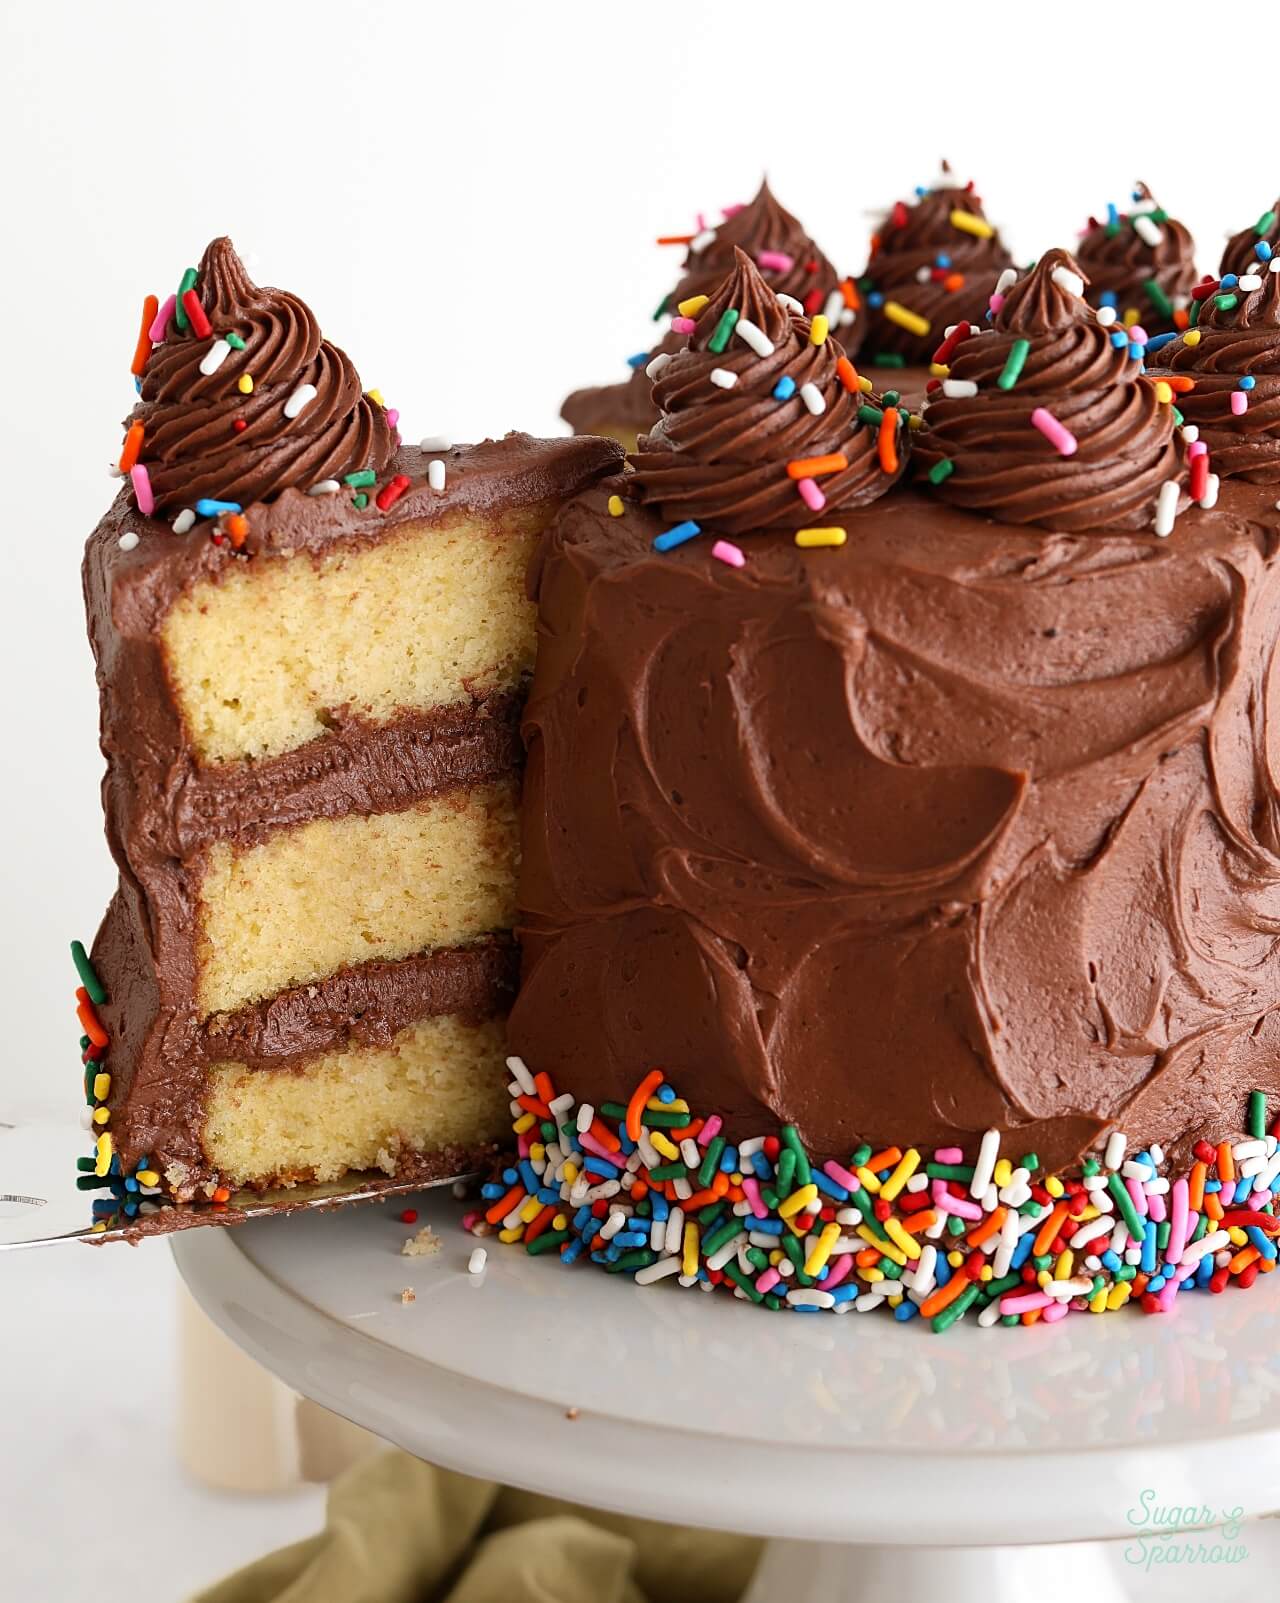
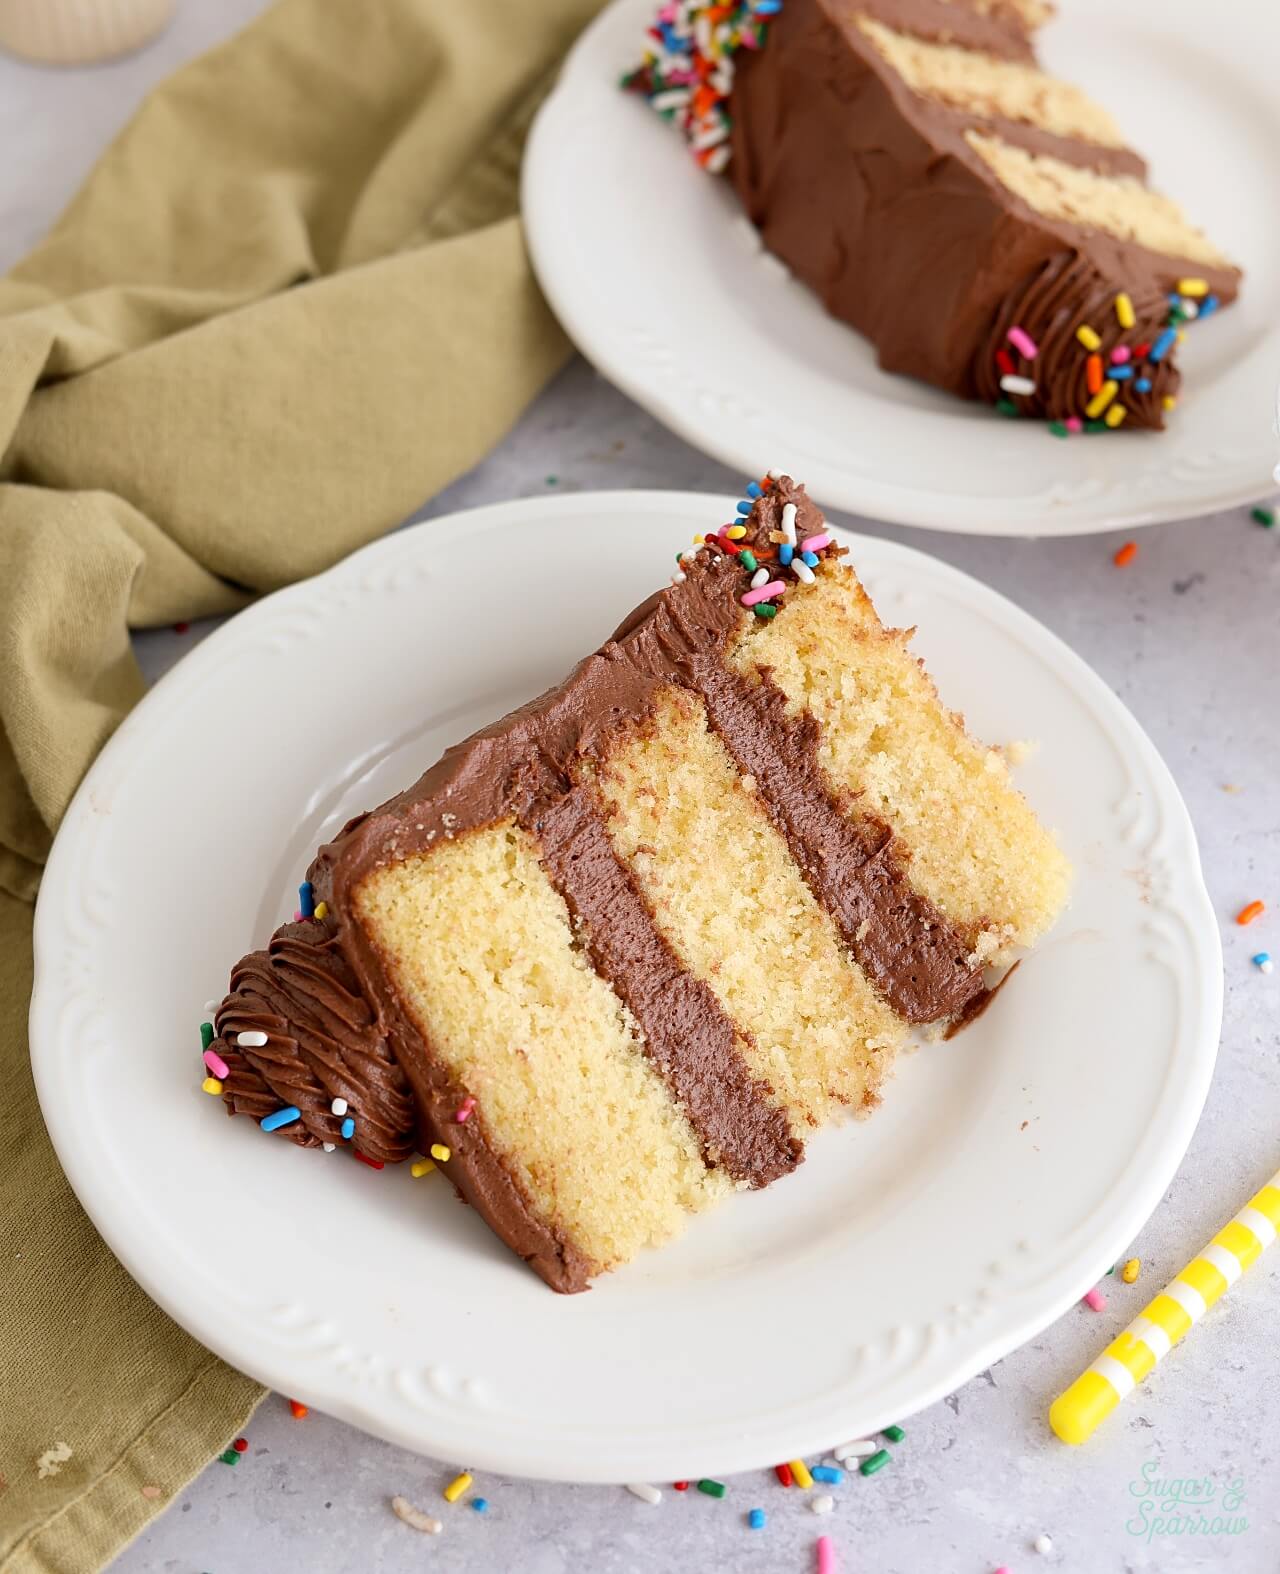
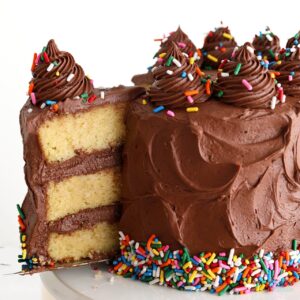
When you think of the most classic birthday cake ever, what comes to mind? For me, it’s always been what my mom made for my birthdays growing up – yellow cake with chocolate frosting. This from-scratch yellow cake recipe has been ultra tested to create the perfect moist and fluffy texture that is reminiscent of the box mix yellow cake I loved as a kid. It’s naturally yellow with extra egg yolks and tastes incredible with my favorite fudgy chocolate frosting.
UPDATE 2025: I recently re-tested this recipe and made a few changes from the original, which was posted in 2020. Same ingredients and methods for making the batter, just new measurements to ensure the best texture and perfect amount of batter.
One Reader, Ciara, says: “Absolutely love this recipe! It was not overly sweet and the cake was super moist and just perfect! I’m sure I’ll have to make it every year now for my husband‘s birthday.” ★★★★★
Moist & Fluffy Yellow Cake
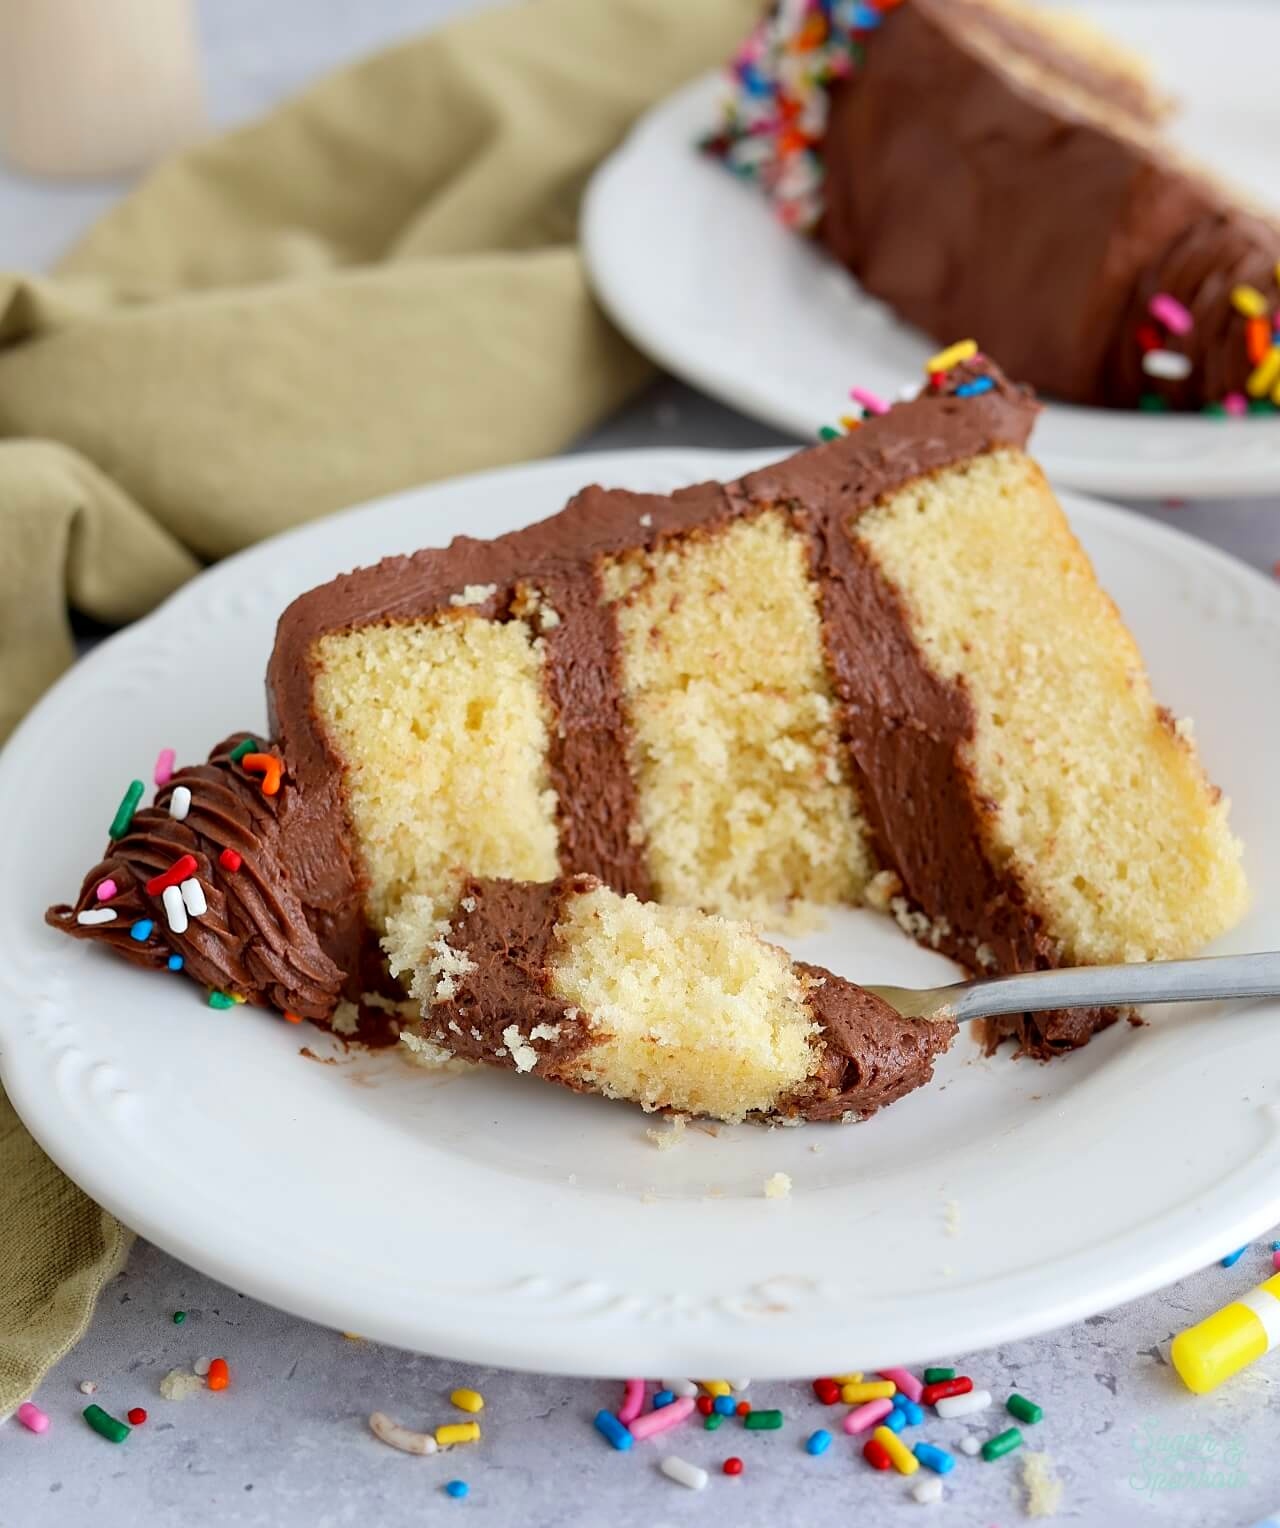
This yellow cake is the definition of light and fluffy – It is SO incredibly soft! I kept poking it over and over in disbelief because I swear it’s as close to box mix (but from scratch) as you’re gonna get. This recipe pulls all the stops to get the perfect texture and flavor:
- A combination of butter and vegetable oil keeps it fluffy and flexible even when refrigerated.
- Two large eggs + two extra egg yolks gives it that signature yellow color and also adds richness to the crumb.
- Using cake flour keeps the crumb supremely soft. If you don’t have access to store bought cake flour I have instructions on how to make an easy homemade version in the notes of the recipe below.
- Adding sour cream gives it amazing moisture and also creates a rich tangy flavor that is unparalleled.
- Pure vanilla extract lends the ideal flavor.
- Whole milk adds the right amount of protein and fat to bring the batter together and maintains the perfect texture.

Why is it Called a Yellow Cake?
Yellow cakes get their name from the signature yellow color. It’s technically a vanilla cake, but made with whole eggs and often additional egg yolks to make the layers appear more yellow. In contrast, a white cake recipe is a vanilla cake made with only egg whites to keep the color pure white. The egg yolk is where the yellow cake gets its yellow color in a from-scratch recipe, and if you want it to be the most saturated you’ll want to use organic eggs. Look at the color difference between the organic eggs (on the left) and the non-organic eggs (on the right)!
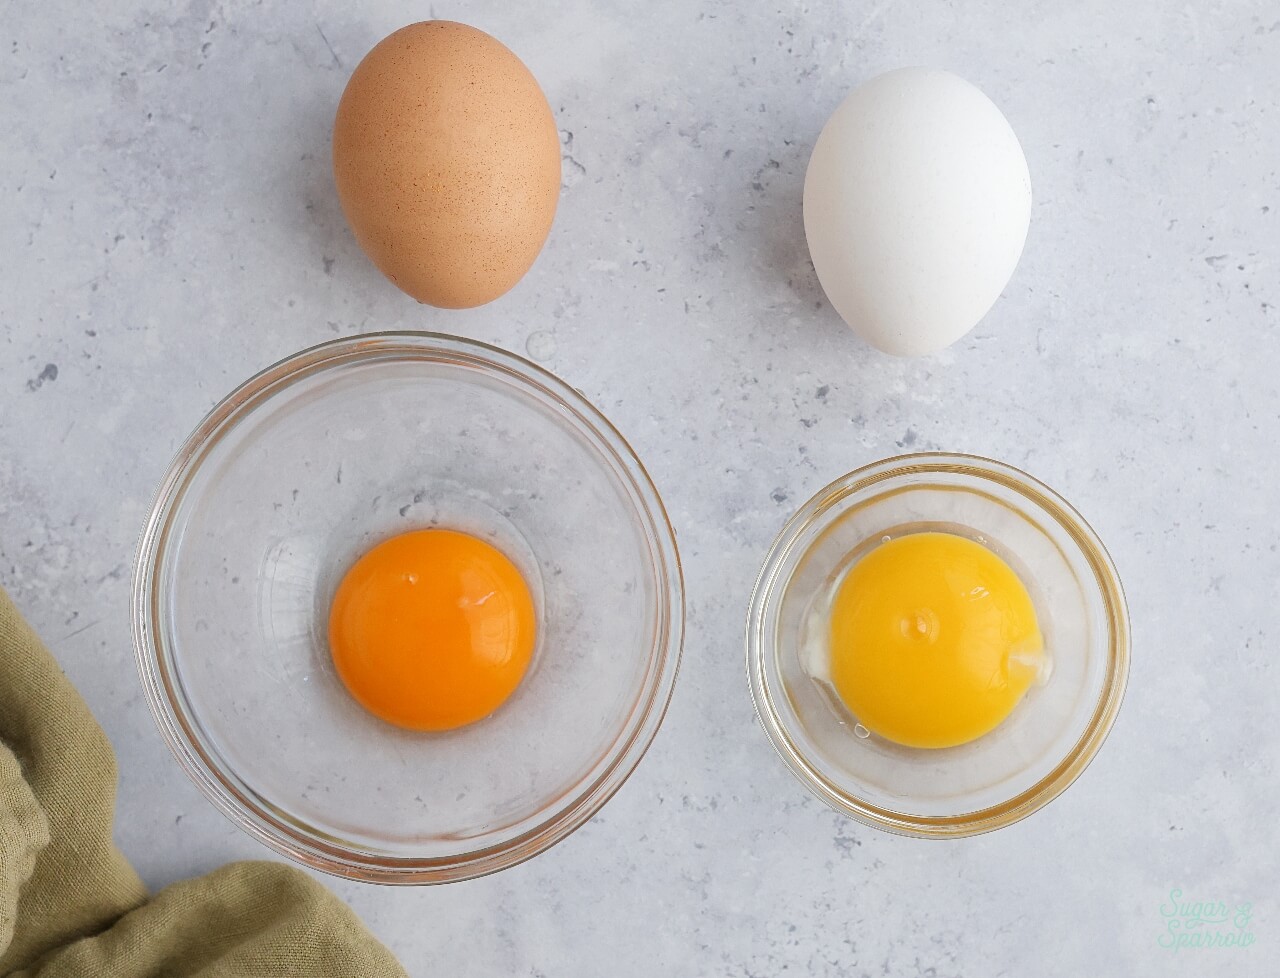
Just keep in mind that regardless of the kind of eggs you use, the from-scratch cake layers will never be as saturated as a box mix unless you add yellow food coloring (an ingredient actually listed on the box mix).
How to Make a Yellow Cake
If you’ve made any of my other vanilla cake recipes before, the process for this one is quite similar. Here’s how the process goes:
Step 1. Preheat the oven to 350ºF (177ºC), then grease and line your cake pans.
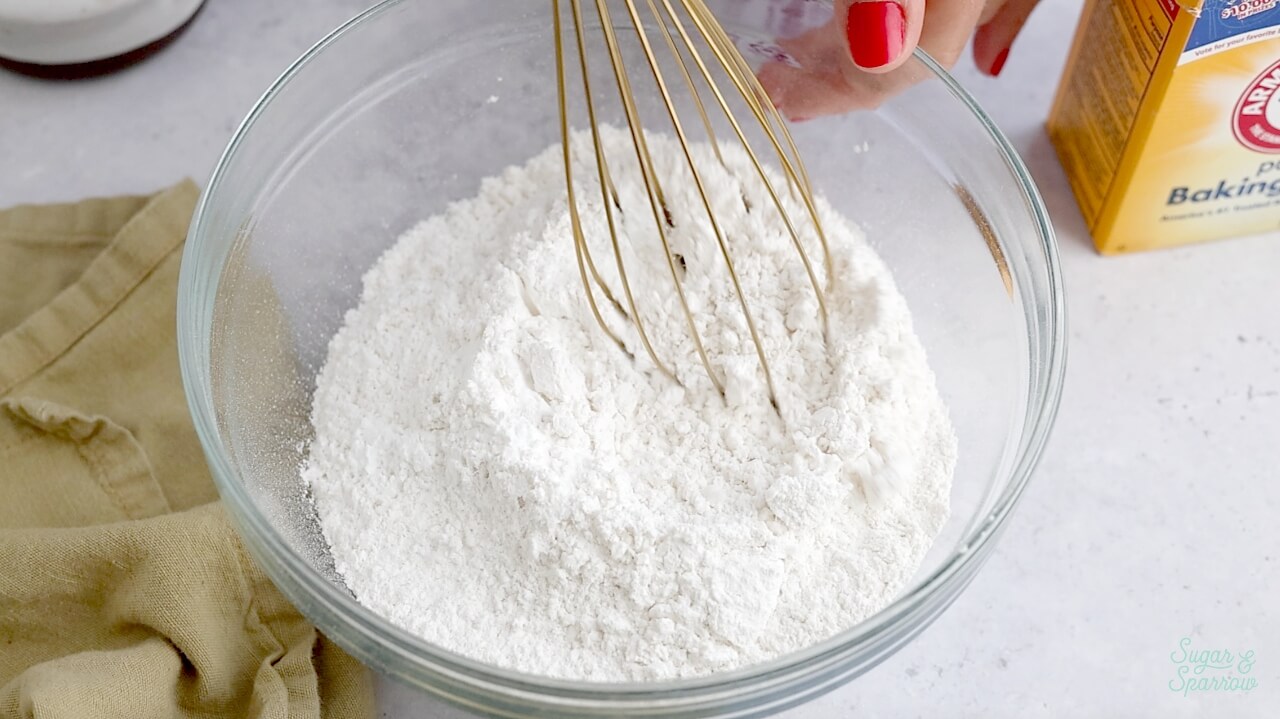
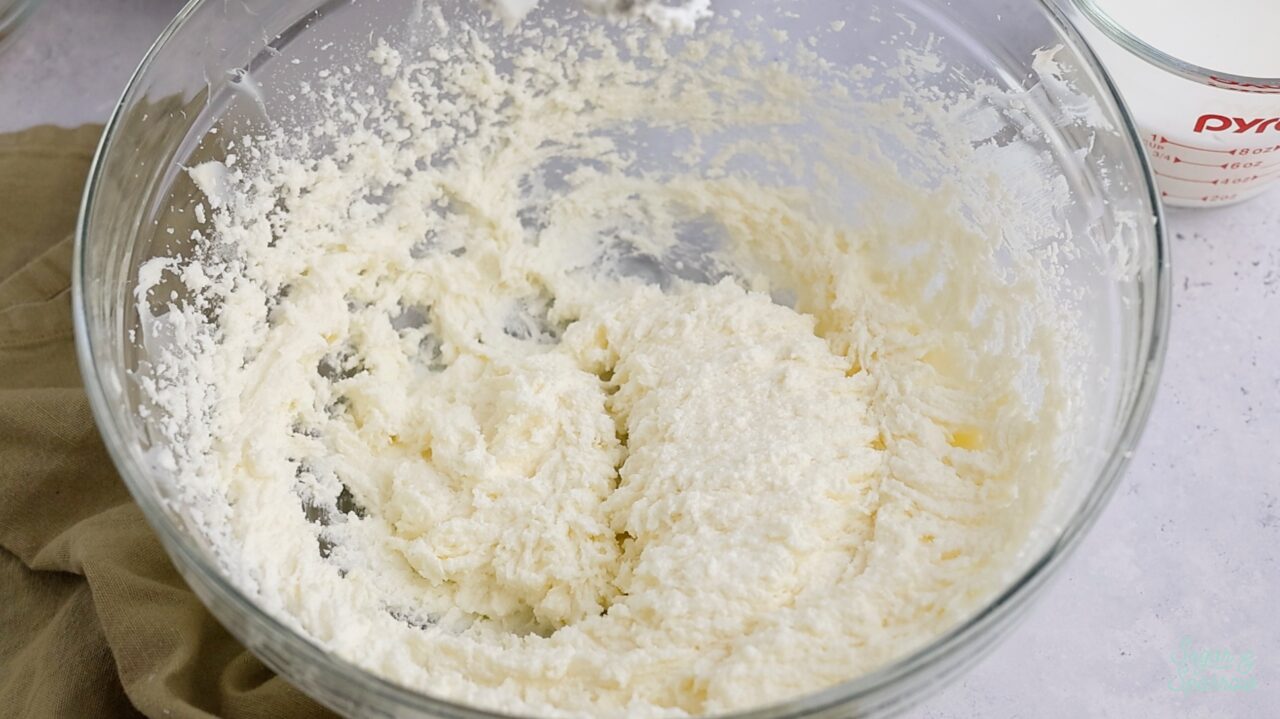
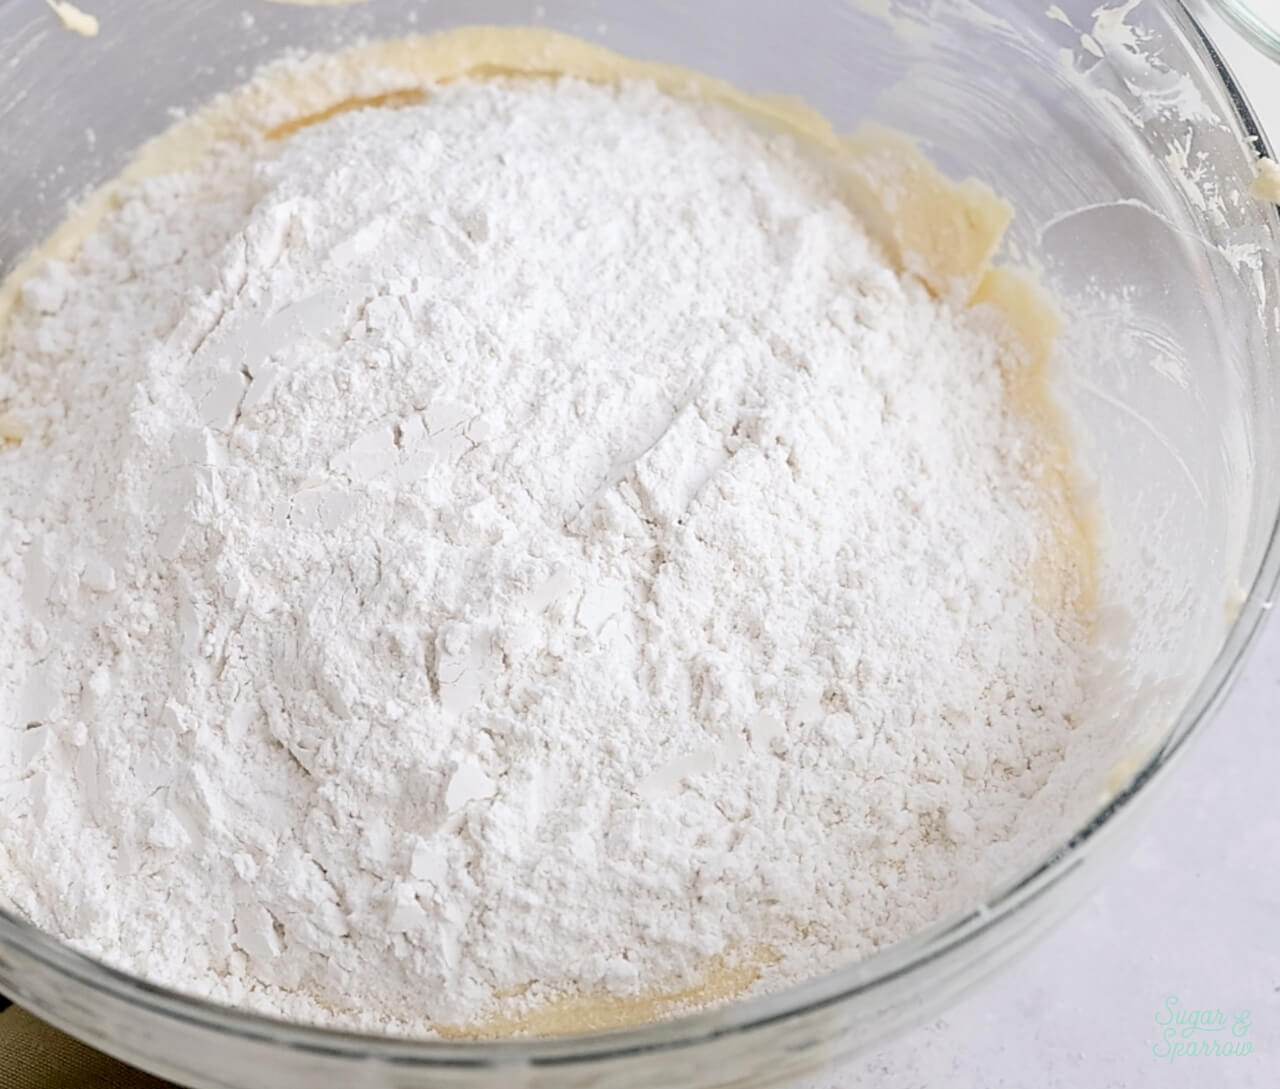
Step 2. Whisk together the flour, baking powder, baking soda, and salt. Set aside.
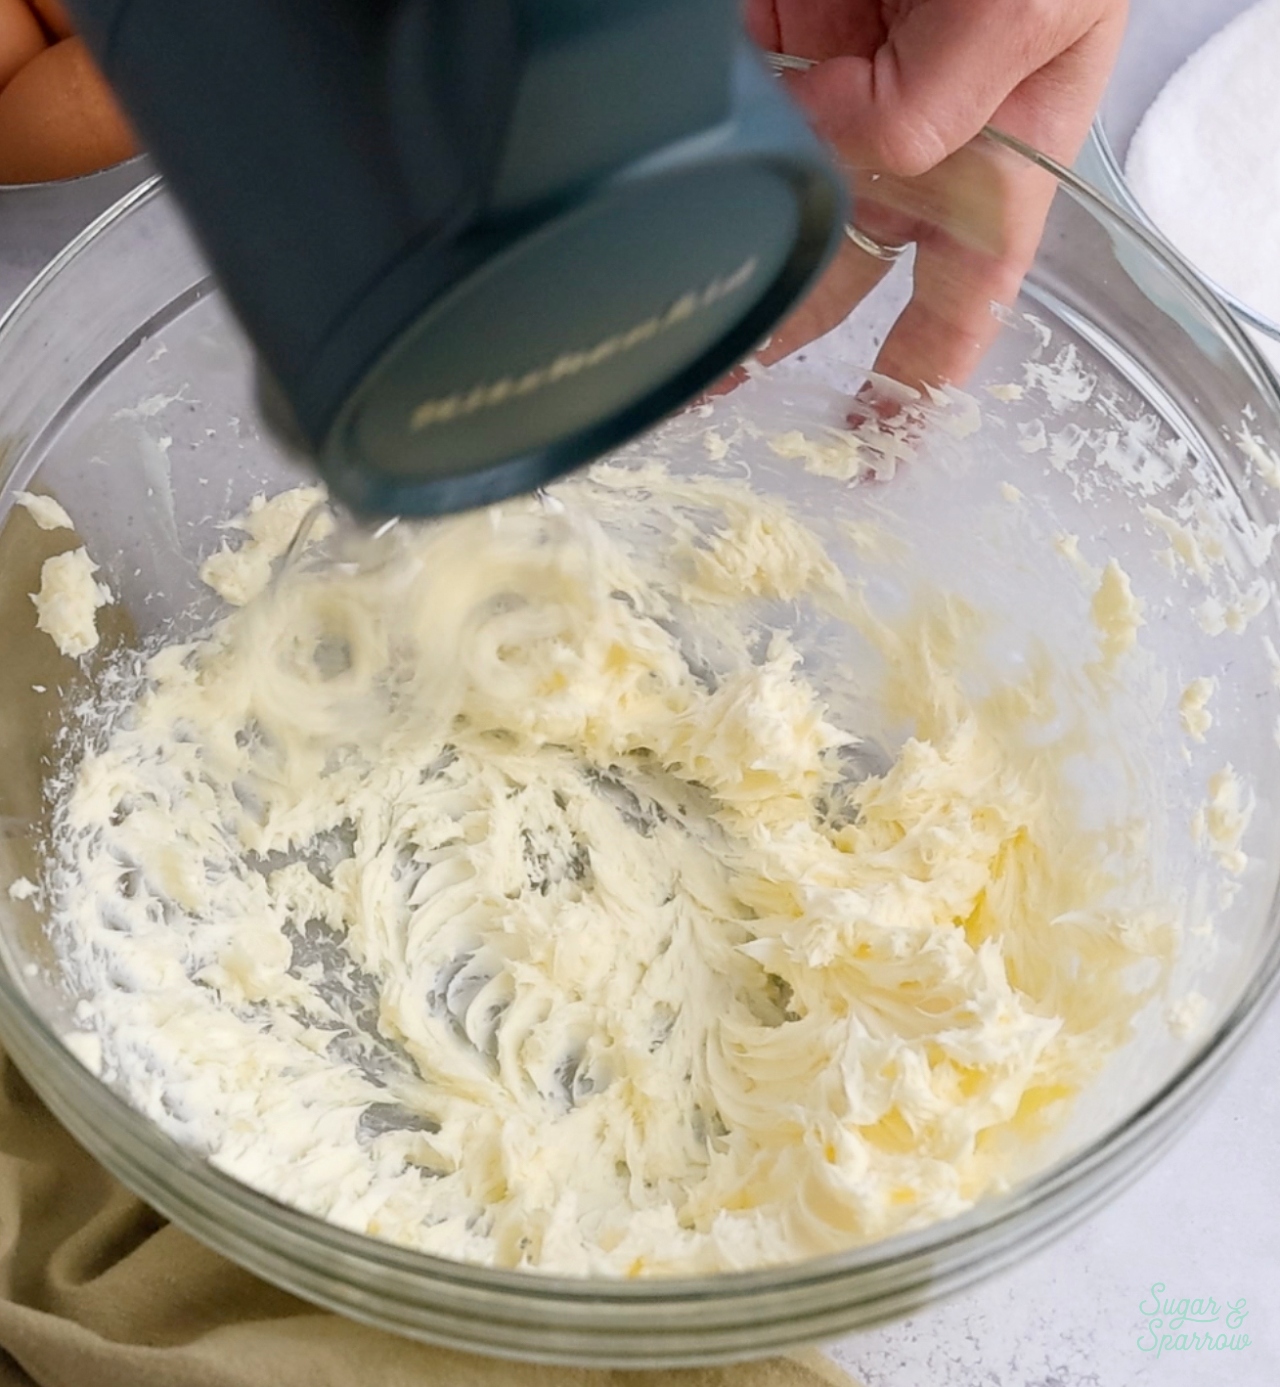
Step 3. Cream the butter, then beat it together with the sugar and vegetable oil until it’s pale and fluffy.
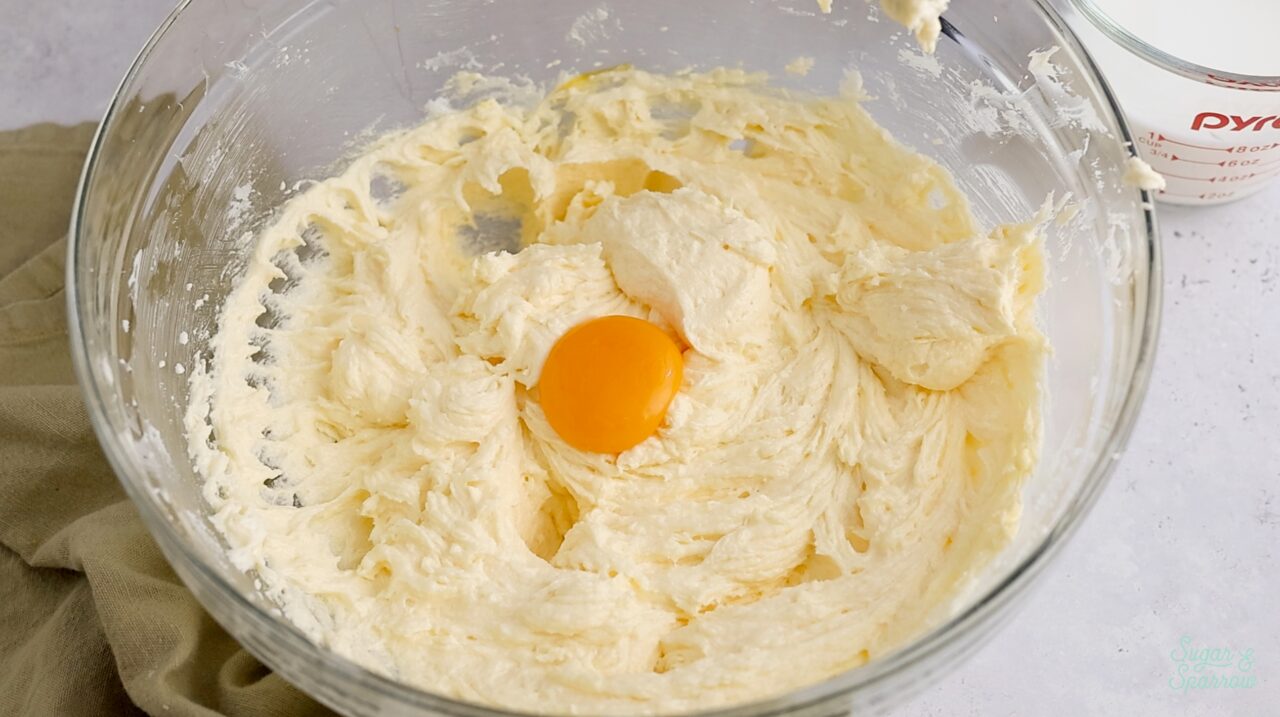
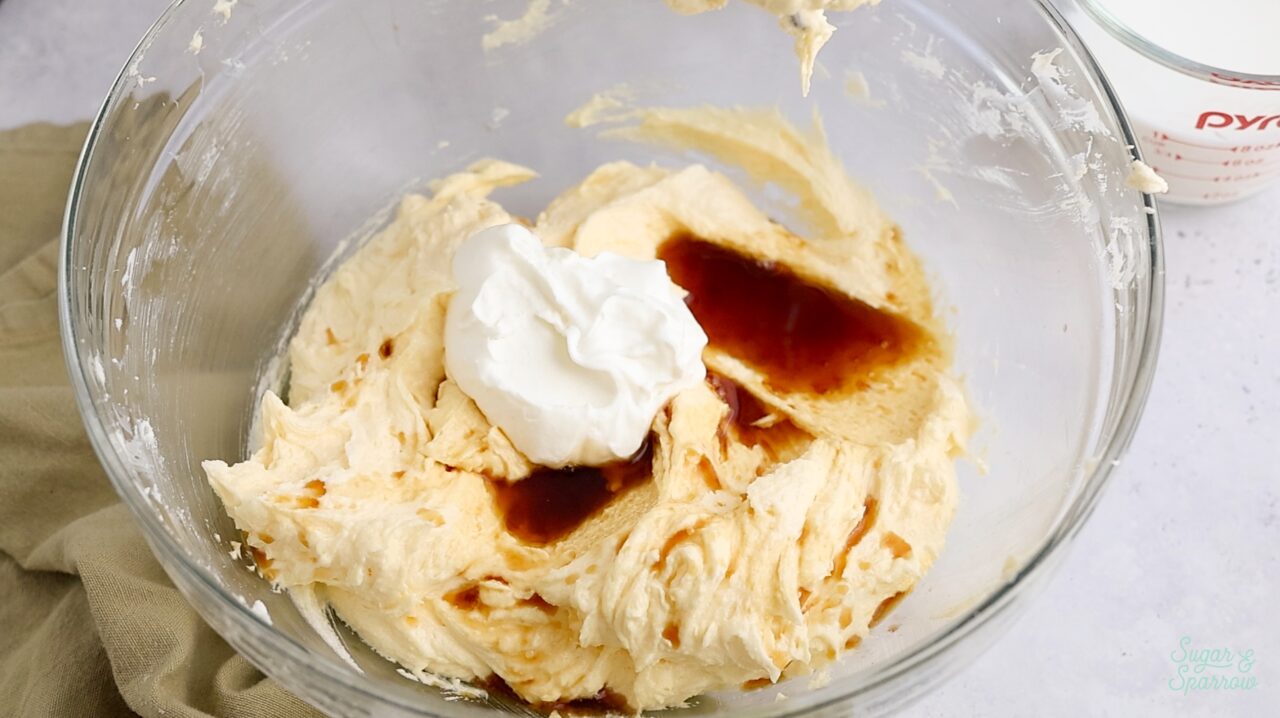
Step 4. Mix in the eggs and egg yolks one at a time, then add the sour cream and vanilla before whipping everything together on high speed for one minute.

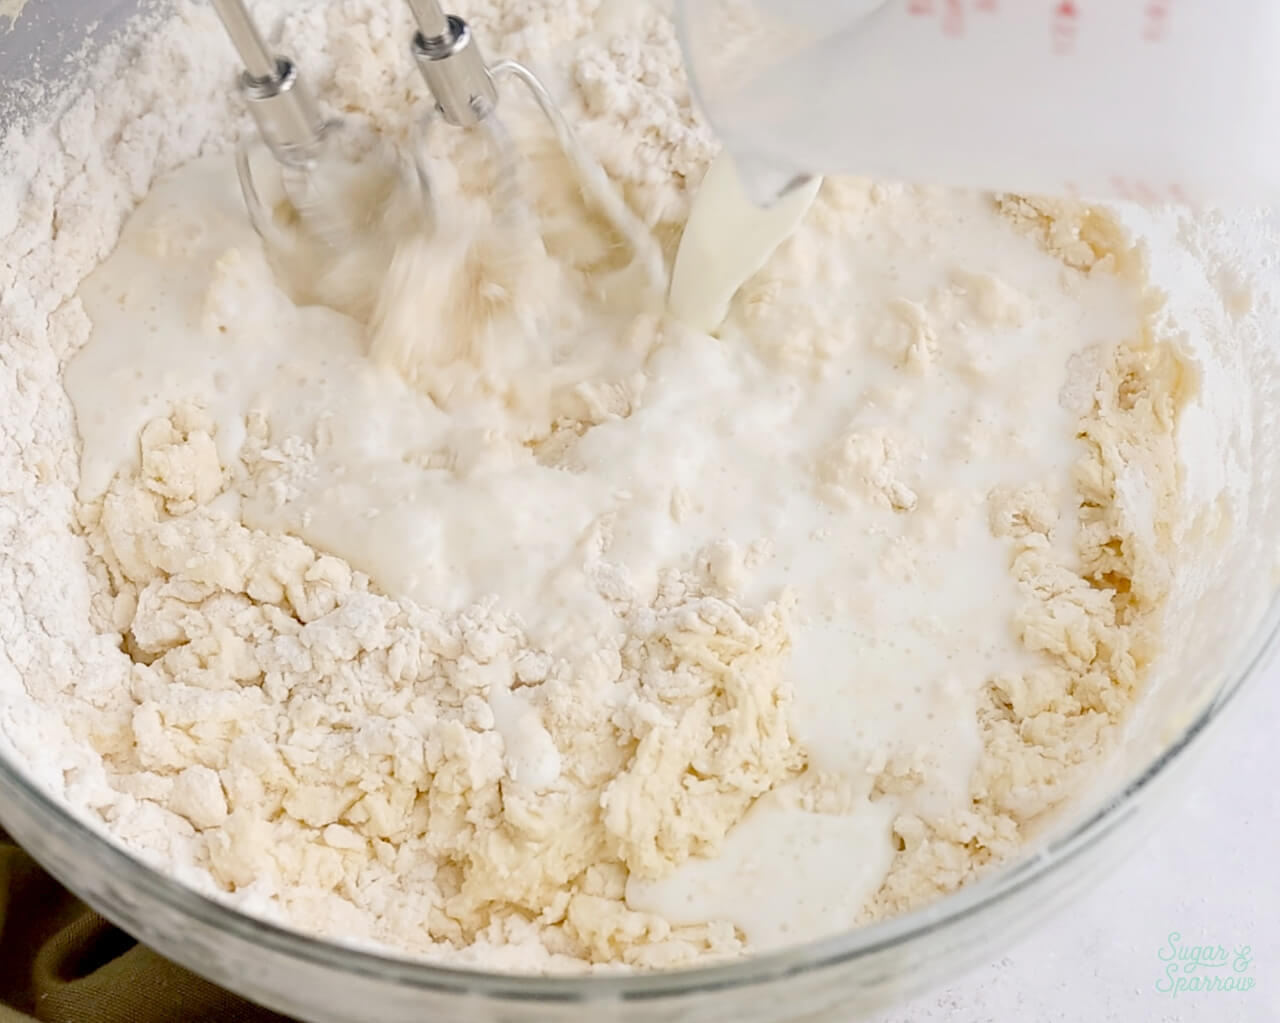
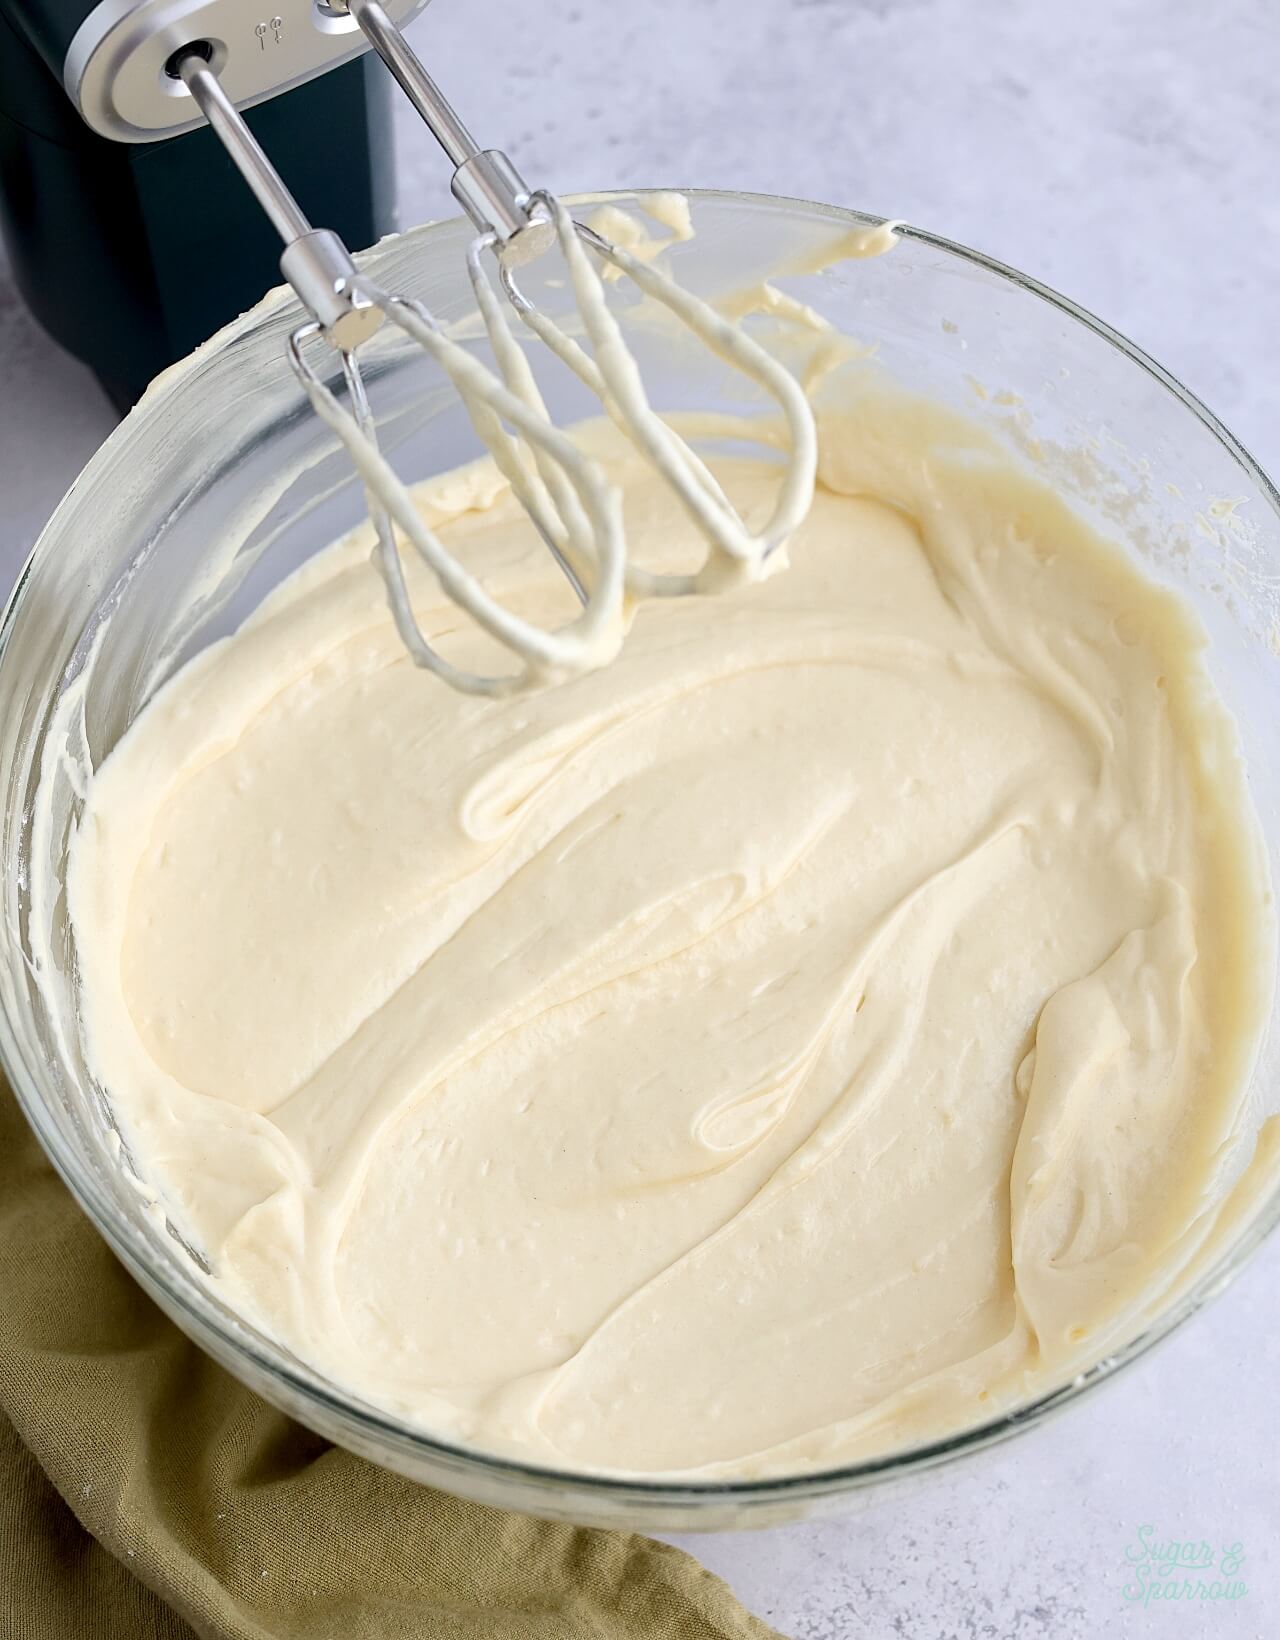
Step 5. Add the dry ingredients all at once, mix on low speed until they begin to incorporate, then add in the whole milk in a steady stream while continuing to mix on low speed. Mix until the ingredients are well incorporated, about 15-30 seconds.
Step 6. Pour the batter into your prepared cake pans and bake for 28-32 minutes.
Step 7. Let the cake layers cool completely to room temperature before assembling and decorating with chocolate buttercream.

How to Decorate a Classic Birthday Cake
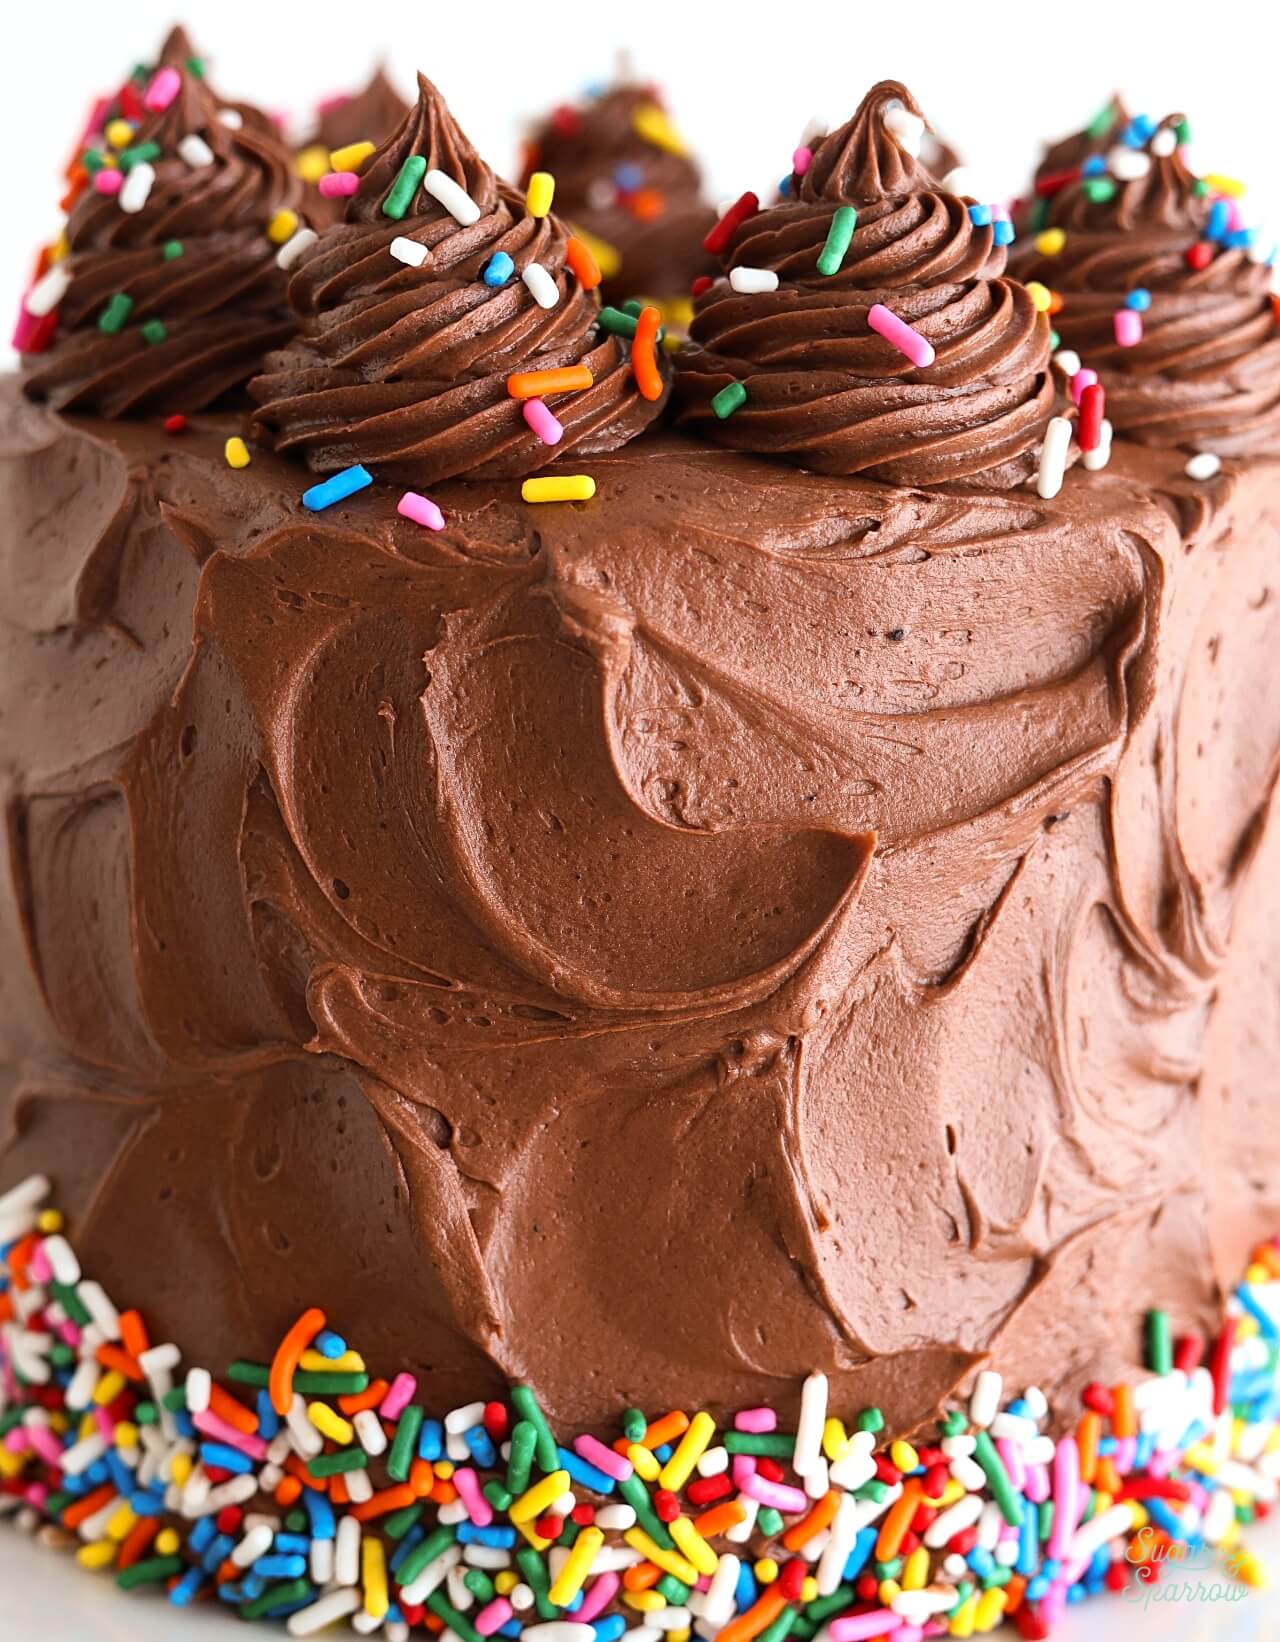
This yellow cake pairs so beautifully with chocolate buttercream, and it’s truly a classic flavor combination. I filled and frosted the cake layers with chocolate buttercream and used a small icing spatula to create rustic texture in the frosting finish. To make it extra celebratory, I added some rainbow sprinkles around the bottom edge of the cake.

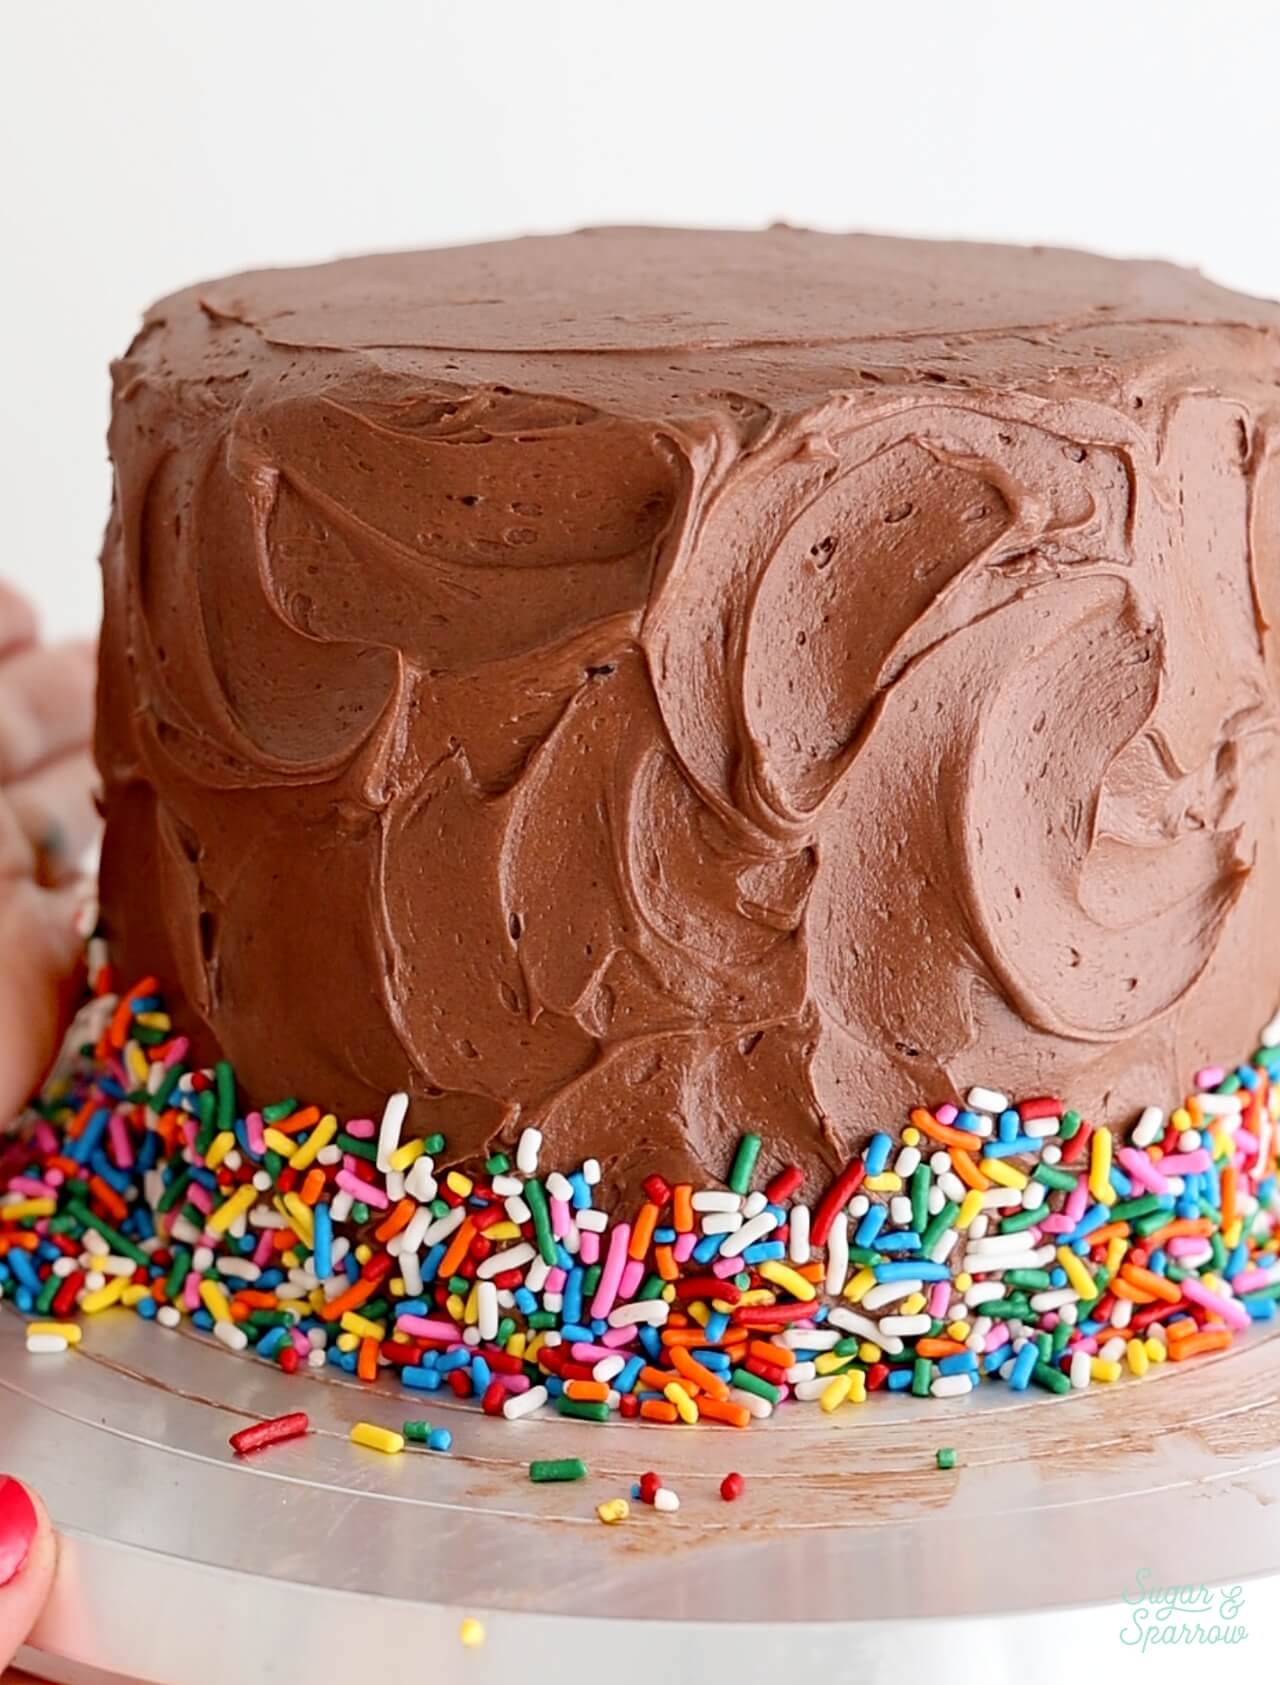
I topped the cake with swirls of chocolate buttercream using Wilton Tip 4B, then added more rainbow sprinkles on top.
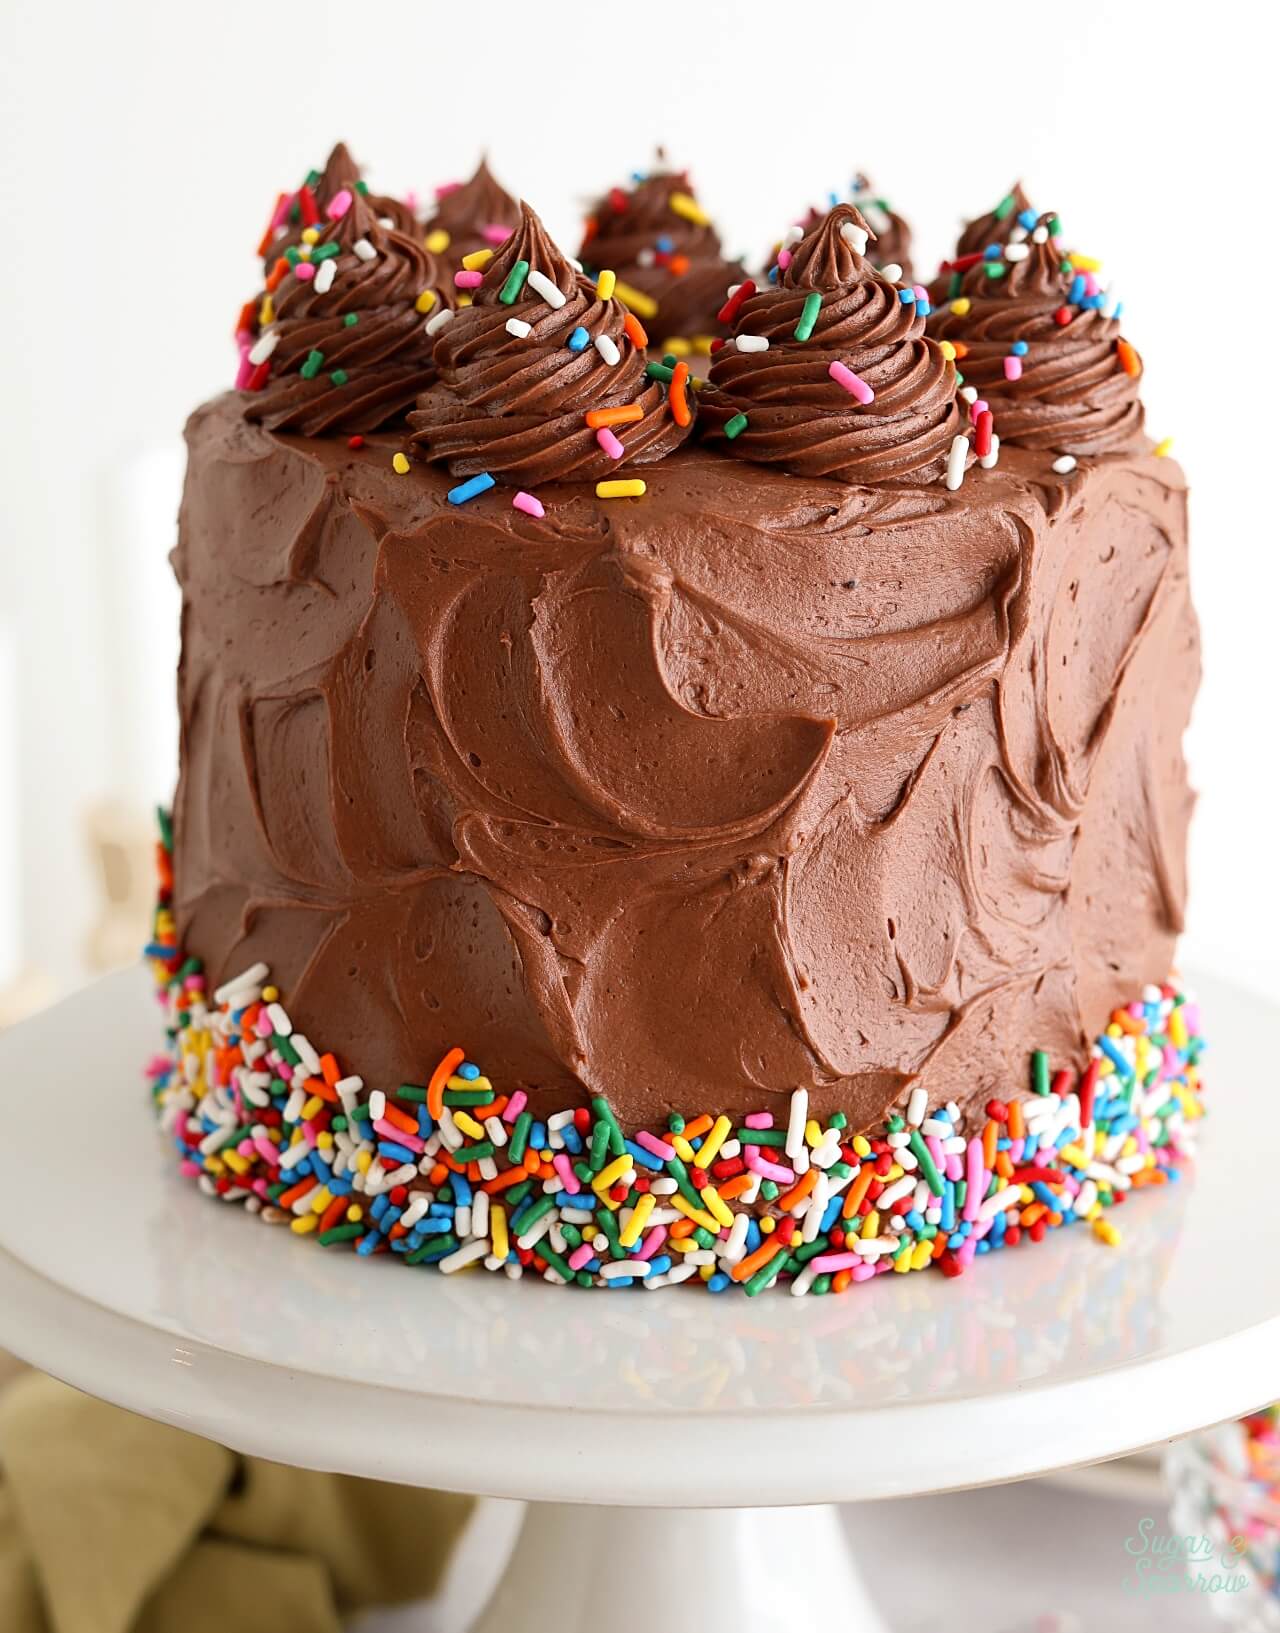
A birthday cake isn’t complete without some candles, so I finished the look with these cute striped candles from Meri Meri Party. They make my favorite cake candles ever (more styles here).

You can decorate this yellow cake any way you want, so feel free to go simple, over-the-top, or anywhere in between! It also bakes great in a 9×13 baking dish if you’d rather make a sheet cake. Just see the notes of the recipe below for the baking time and oven temp.
Yellow Cake Recipe Video
Here’s a quick video to show you the process of making this yellow cake recipe before you read all about it below:
If you love recipe videos like this one, be sure to check out my YouTube channel! I’ve got a growing collection of cake recipes, decorating tutorials, and Cake Basics over there. Hit the subscribe button on my page so you never miss a new video.
Yellow Cake with Chocolate Frosting
Ingredients
Yellow Cake
- 2 Cups (210g) sifted cake flour* DIY recipe in notes
- 1 1/2 tsp baking powder
- 1/2 tsp baking soda
- 1/2 tsp salt
- 1/2 Cup (113g) unsalted butter, room temperature
- 3 Tbsp (45ml) vegetable oil
- 1 1/3 Cups (267g) granulated sugar
- 2 large eggs, room temperature
- 2 large egg yolks, room temperature
- 1/3 Cup (80g) sour cream, room temperature
- 2 tsp pure vanilla extract
- 3/4 Cup (180ml) whole milk, room temperature
Chocolate Buttercream
- 2 Cups (452g) unsalted butter, room temperature
- 6 Cups (720g) powdered sugar
- 1 Cup (90g) unsweetened cocoa powder natural or Dutch-processed
- 6 Tbsp (90ml) whole milk, room temperature
- 4 tsp pure vanilla extract
- 1/4 tsp salt, or to taste
Garnish (Optional)
- 1/2 Cup rainbow sprinkles
Instructions
Make the Yellow Cake
- Preheat the oven to 350°F (177°C) and prepare three 6-inch or two 8-inch cake pans by spraying the sides with baking spray and fitting a parchment paper circle to the bottom of each pan.
- In a medium bowl, add the sifted cake flour, baking powder, baking soda and salt. Whisk together and set aside.
- In the bowl of your stand mixer fitted with the paddle attachment (or with a handheld mixer and large bowl), beat the butter on high speed until it's creamy, about 2 minutes. Add the vegetable oil and sugar, then continue to mix on medium-high until pale and fluffy, about 2 minutes. Add the eggs and egg yolks one at a time, mixing on low speed for 10-15 seconds after each addition. Scrape down the bowl and paddle, then add the vanilla and sour cream and turn the mixer to high speed for one minute. The batter may look curdled at this point but don't worry – it will come together in the next step!
- Turn the mixer off and add the dry ingredients all at once. Mix on low speed until the ingredients just start to combine, then add the milk in a steady stream and continue mixing until incorporated, about 30 seconds. Scrape down the sides and bottom of the bowl and give it a few stirs to make sure there are no lumps (without over-mixing). The batter will be slightly thick, but pourable.
- Pour the batter evenly into the prepared cake pans and bake for 28-32 minutes, until a toothpick inserted comes out clean or with just a few moist crumbs. Let the cakes cool in the pan for five minutes before turning them out onto a wire rack for an additional few hours of cooling. Make sure they're entirely room temperature before applying any frosting.
Make the Chocolate Buttercream
- In a stand mixer fitted with a paddle attachment, whip butter on high speed until creamy and light in color, about 5 minutes. Scrape down the bowl and paddle and add half of the powdered sugar, half of the cocoa powder, and half of the milk. Mix on low speed until combined, then add the rest of the powdered sugar, the rest of the cocoa powder, the rest of the milk, the vanilla extract, and the salt. Continue mixing on low speed until combined and smooth, 1-2 minutes, scraping down the bowl and paddle as needed.
Assembly
- Once the yellow cake layers are completely cooled, level them to your desired height. Add a swipe of chocolate buttercream onto a cardboard cake circle and place the first cake layer on top. Fill and stack the cake with chocolate buttercream, then crumb coat the cake. Refrigerate the cake for 15-20 minutes to let the crumb coat firm up before frosting the cake with the rest of the chocolate buttercream.
- To create the design pictured, use a small spatula to create a rustic textured finish on the sides of the cake, then added rainbow sprinkles around the bottom edge. I piped swirls of chocolate buttercream with Wilton Tip 4B, then added more rainbow sprinkles on top.
Notes
- The yellow cake layers can be baked, cooled, wrapped in plastic wrap, and left out at room temperature up to two days ahead of decorating. Unfrosted cake layers can be wrapped tightly in plastic wrap and stored in the freezer for up to two months before thawing and frosting.
- The chocolate buttercream can be made ahead and stored in an airtight container at room temperature for up to 1 day. Alternatively, you can store it in an airtight container in the refrigerator for up to two weeks. When you’re ready to use it, bring it back to room temperature and rewhip with your stand mixer to bring back to frosting consistency.
Let me know if you make this yellow cake recipe in the comments below! And feel free to tag @sugarandsparrowco on Instagram to show me a photo. I love to see what you create with my recipes!

Hi, love this recipe. A question. Is there enough batter for two 9″ cakes?
Hi Christine! There is enough batter for two 9″ cakes, they’ll just be shorter layers (about 1 inch tall each). Hope that helps!
Hi Whitney,
I’m planning on doing this cake but I want to use the decoration on the video “How to Decorate a Cake With Sprinkles”, I usually see people doing that type of decorations on vanilla cakes not yellow cakes – would it work fine?
And I want to use dulce de leche, have you tried something similar yet? I want to use your tip of putting buttercream on the sides so hopefully it keeps 3 9inch layers good.
Thanks 🙂
Hi Laura! I haven’t tried dulce de leche before but I definitely want to someday! And you can absolutely decorate this cake in the style of that “How to Decorate a Cake with Sprinkles” cake! This recipe is basically a rich vanilla cake at its core, so it should taste great with any frosting that pairs well with vanilla. Enjoy!
Thank you Whitney! I’ll give it a try and hopefully I’ll have some good pics to share haha
Hi! This recipe looks promising! If I just wanted to bake 2 layers how would I divide the recipe?
Thanks a lot!
Hi Noreen! For just two layers, you’ll want to scale the recipe down by 2/3. You can use this recipe calculator to help: https://www.inchcalculator.com/recipe-scale-conversion-calculator/
I made this cake last year for my husband’s birthday and now he won’t ever eat another cake haha. I need to make this recipe into cupcakes since we are going to a restaurant and it will be easier for me. Do I need to adjust the cook time or temperature for cupcakes?
Thanks~
That is amazing, Lizzy! I’m so happy to hear it was a hit! To make this recipe as cupcakes, be sure to fill the tins no more than 2/3 full and bake at 350F for 15-18 minutes (or until a toothpick inserted comes out clean). Enjoy!
Hey Whitney,
Regarding the Wilton comb, did you just use the regular stripe comb… (the same one you’d use if you were adding in stripes, but you just didn’t pipe in different icing for stripes?)
Thanks!! – Matt
I made this in three 6” pans and faced the same issue as a previous reviewer. All three sank in the middle. I weighed my ingredients wherever weight measures were provided, everything was room temperature, my oven is calibrated correctly, and my baking soda is fresh. I also followed the mixing times and speeds specified in the recipe. I’m not a novice baker either, and this has never happened before..
Hi there! So sorry to hear that your cakes sank. I can assure you that this recipe has been tested a ton and I’ve never had a problem with it sinking. I know you said that your baking soda is fresh but have you checked your baking powder? That tends to expire quicker – every 6 months. It’s one of the most common culprits, but here are a few more reasons why cakes sink: https://sugarandsparrow.com/why-cakes-sink/ hope you give it another go someday with better results!
Hello there! I can’t wait to make this cake for my nephew birthday! I have only 8 inch cake pans. If i use those would it be a problem for the quantity of the dough or the time of baking?
Hi Melina! If you want to make a triple layer 8-inch cake I would 1.5x the recipe, but if you’re making just two layers you can make this recipe as-is. The bake time should end up being about the same. Check it around 35 minutes and see if it needs more time from there. Enjoy!
Did you use heat rods in your 6×3 cake pans?
Hi Stacie! I do not use heat rods or anything other than the pan itself.
Wonderful cake! Turned out perfect!
Yay, Audrey! So happy to hear that!
Hi, if you were to use buttermilk and omit the sour cream and whole milk, how much buttermilk do you have to use. Thank you
Hi Rosie! If you omit the sour cream, use an equal amount of buttermilk in place of the whole milk (so 1 Cup). Hope you love this recipe!
When I was making this cake it smelled so good! Unfortunately, even though I followed the recipe exactly the cake sunk in the middle when I took the cake out, and I don’t know how to fix it or what went wrong.
Hi Rachel! So sorry to hear that your cake sunk in the middle. This recipe has been extensively tested to ensure the proper rise, but still, a cake sinking could be a number of things. Here are some common reasons why that happens so you can see what the culprit was: https://sugarandsparrow.com/why-cakes-sink/
Hello, what do you suggest is the best vegetable oil to use.
Im about to attempt this and really want to get it right!
thanks
Sara
Hi Sara! I just use generic store-brand vegetable oil (just says “vegetable oil” on the label), but you could also use canola oil!
This cake and frosting were fantastic. A little technical for a beginner but I got it done!!!
I’m so happy you love this recipe, Tammy! Thanks for taking the time to let me know!
how would you do the eggs if you multiply by 1.5?
Hi Becca! For eggs, I count the yolk as .5 egg so the math would be 3.5 x 1.5, which equals 5.25. In which case I would round up and do 5 eggs + 1 egg yolk. Hope that helps!
Will it work to multiply all the amounts by 1.5 to make this into a three-layer 9″ pan cake? Thanks!
Hi Terri! Yes, it totally would!