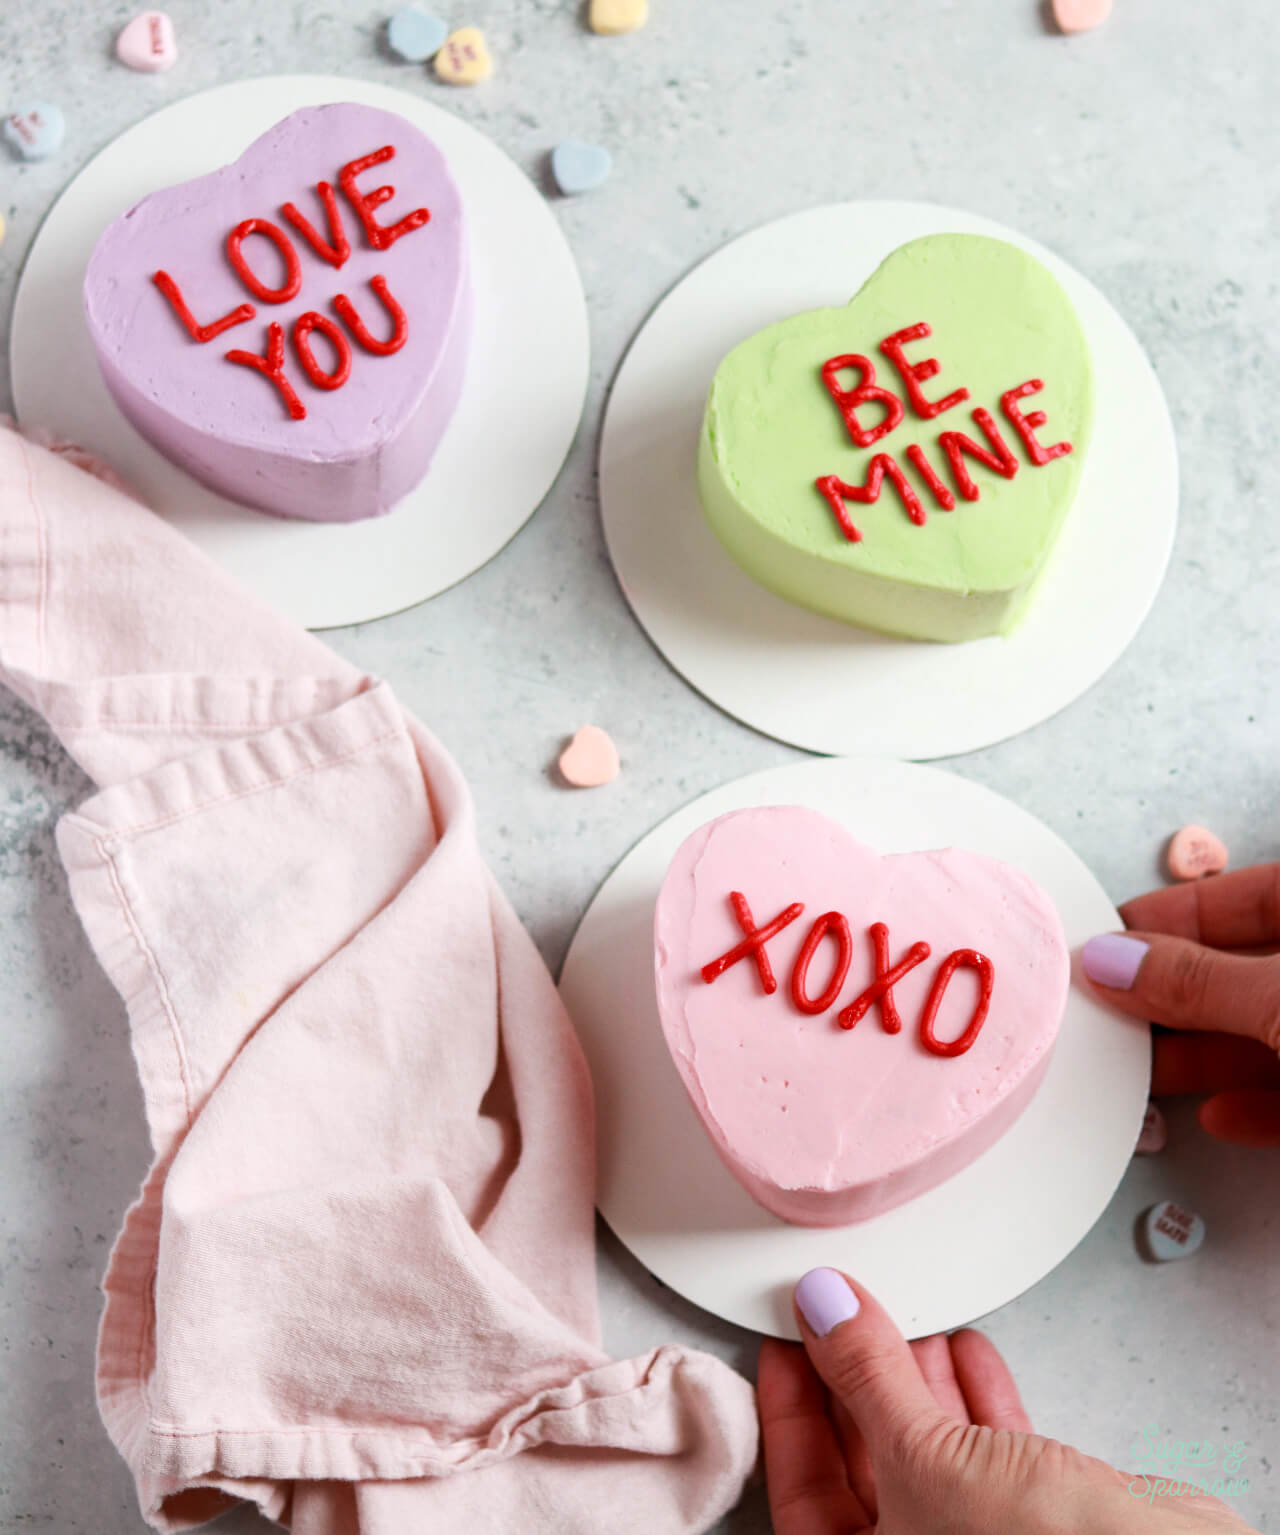
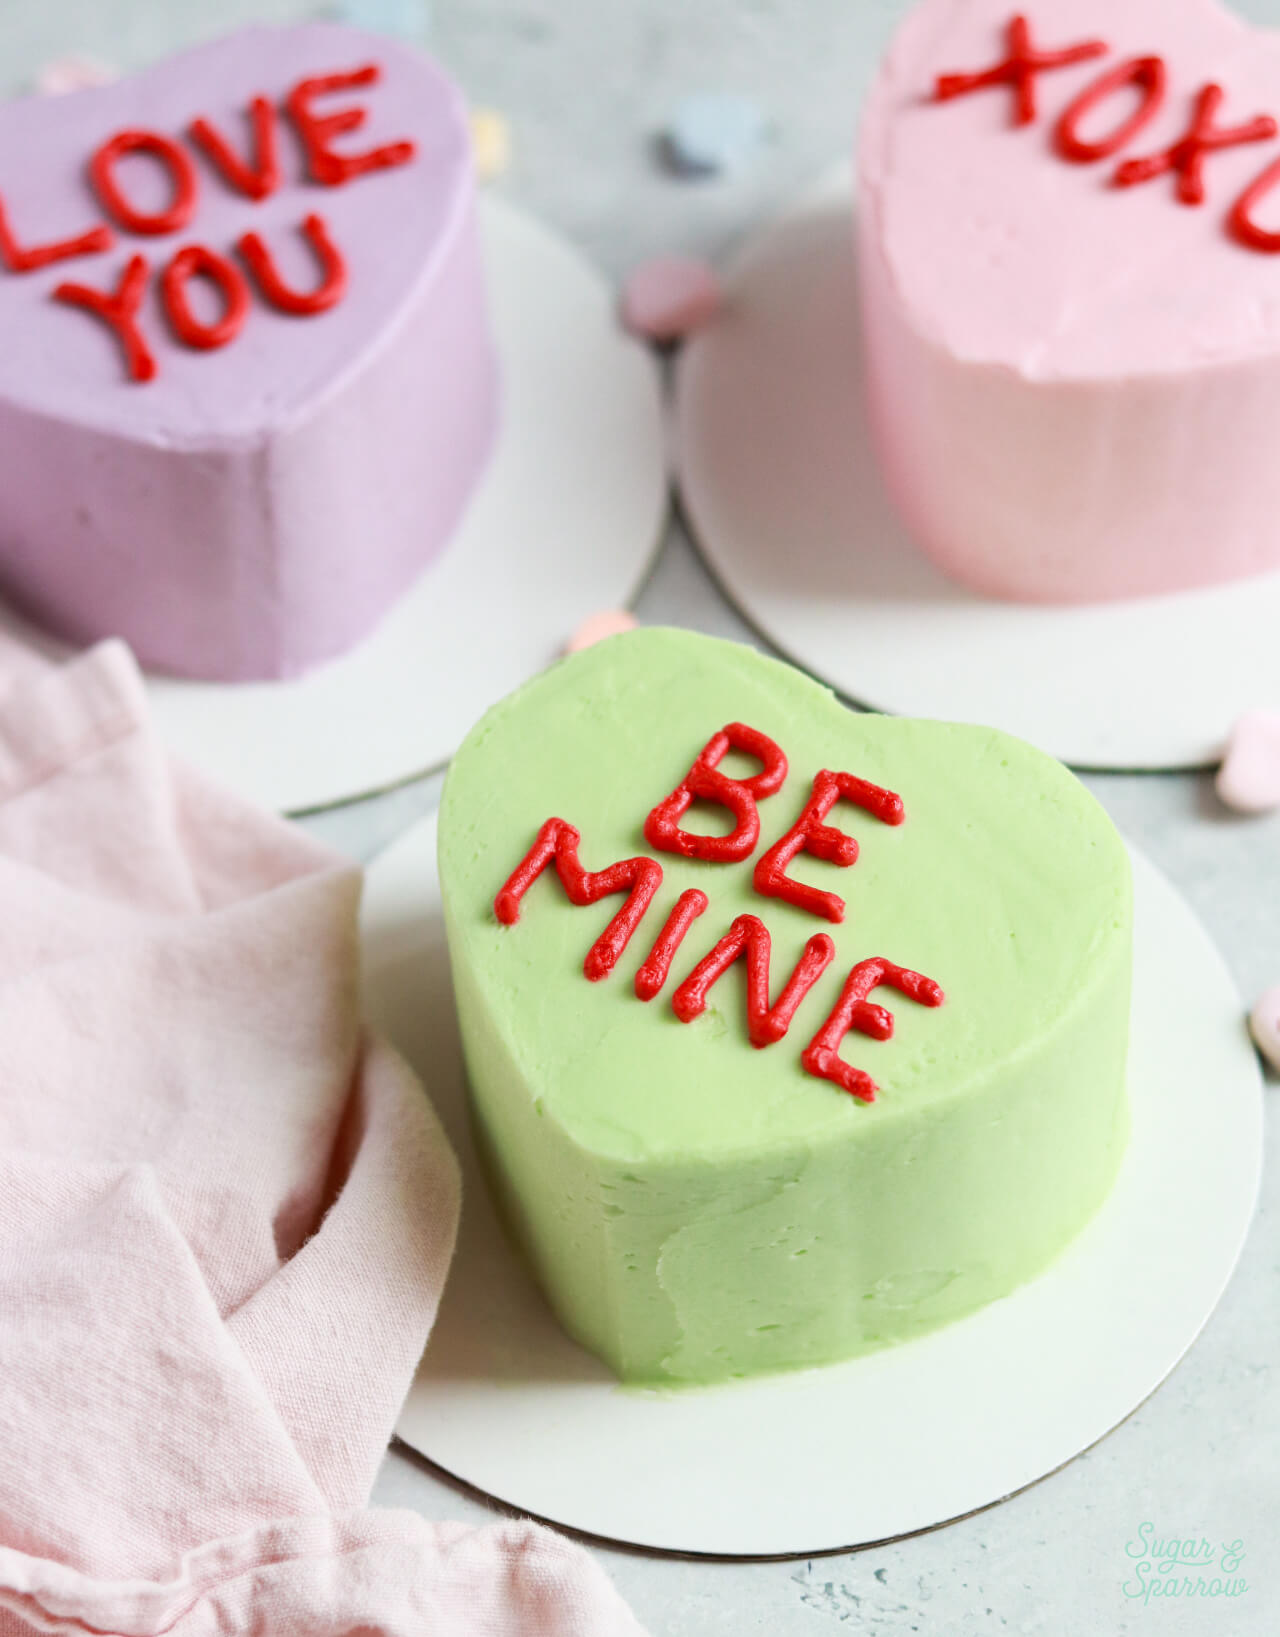
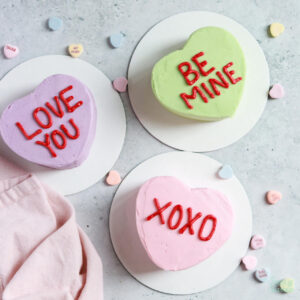
If you’re looking for a fun and delicious Valentine’s Day cake project, these mini conversation heart cakes check all of the boxes! I made them with my favorite extra moist and decadent one-bowl chocolate cake recipe, scaled down to make three 2-layer mini heart cakes (or seven single-layer heart cakes if you prefer) but you can halve any of my cake recipes for the cake part. I love how customizable they are – you can pipe any message you want on top and make them in any pastel color scheme. Making them with your loved ones would be the perfect Valentine’s Day (or Galentine’s Day) party activity!
2 Ways to Bake the Mini Heart-Shaped Cakes
There are two ways you can make these mini cakes heart-shaped:
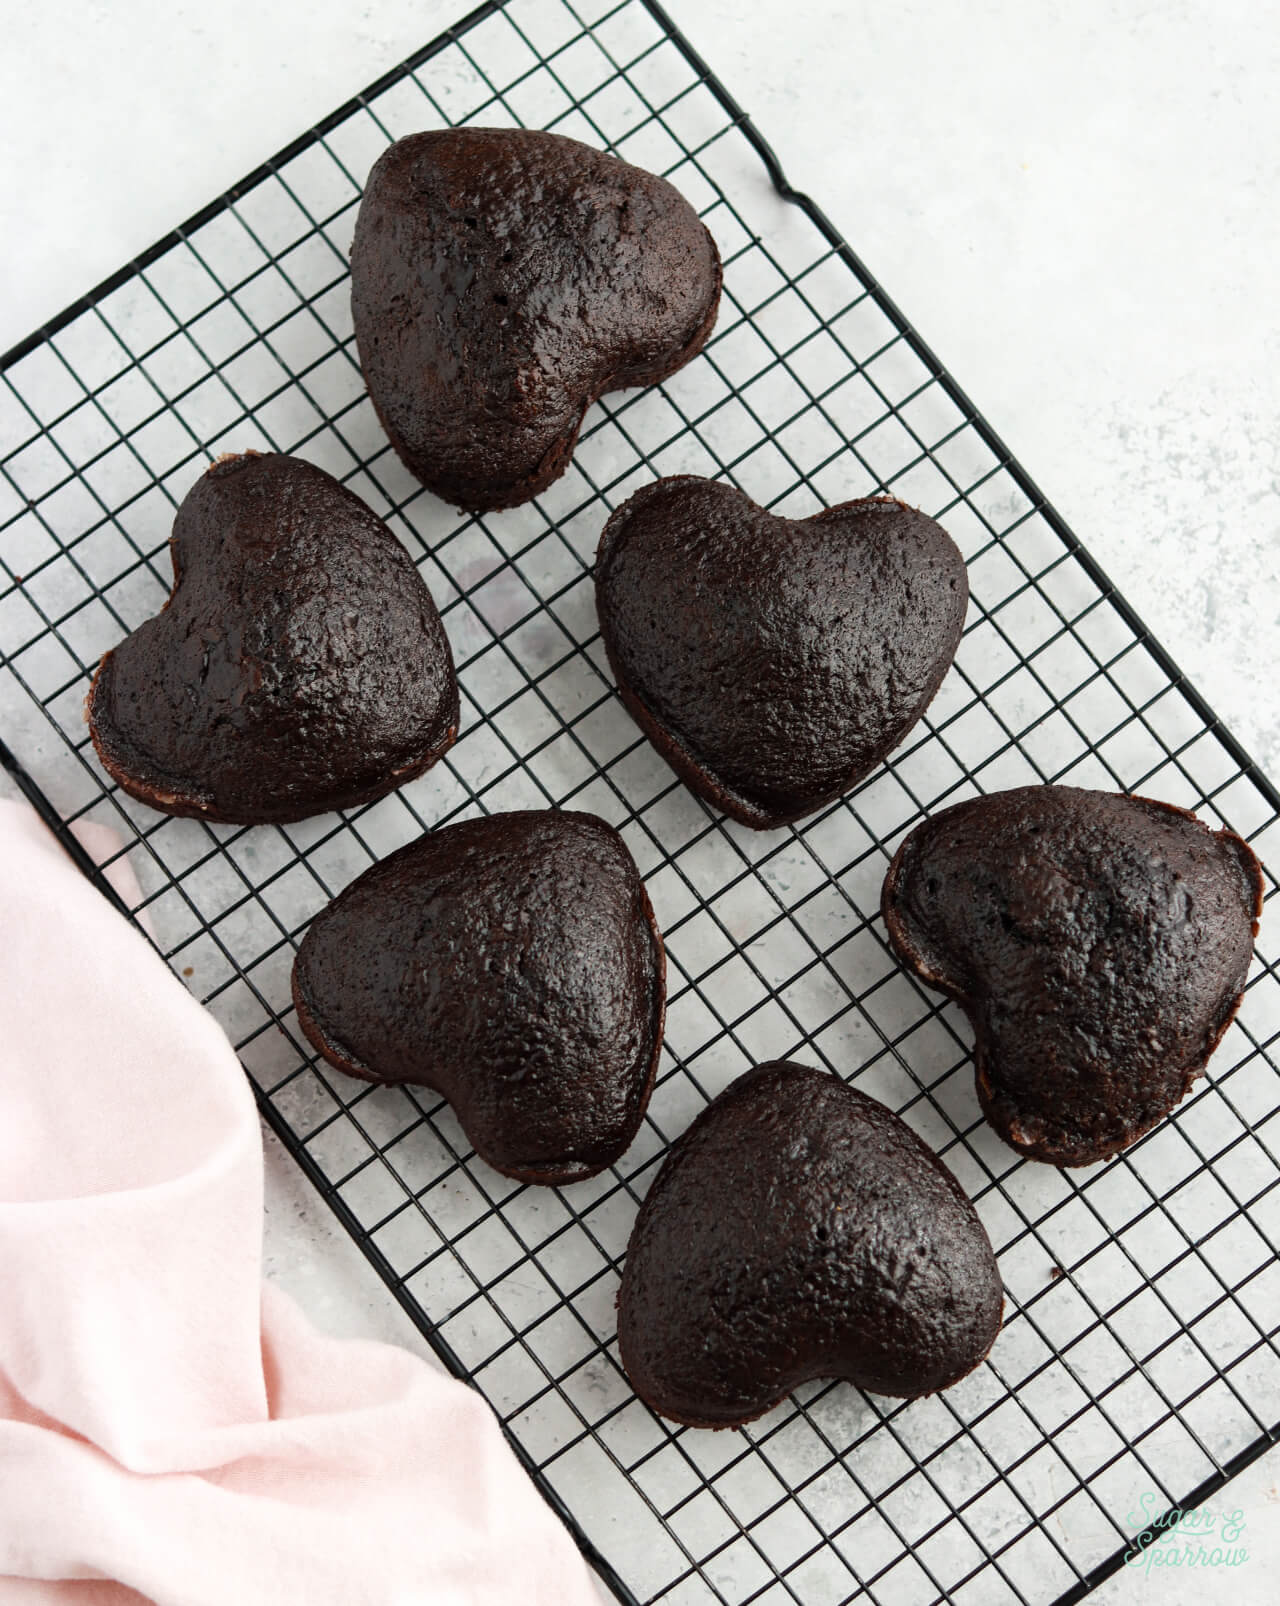
- Mini Heart-Shaped Cake Pans. The easiest way (and the method I used) is to bake them in these mini heart shaped cake pans. Using the recipe below, you’ll have enough batter for 7 single-layer mini heart cakes. I used 6 layers (and had a little batter left over) to create the three 2-layer cakes pictured.
- DIY Mini Heart Cakes. If you don’t have access to heart-shaped cake pans (or simply don’t want to add to your cake pan collection), you can make heart-shaped cakes from round cake layers using this tutorial. It’s an easy method that doesn’t waste any cake, but it will take a little extra time. To keep the heart cakes mini size, I recommend using 4-inch round cake pans.
Mini Conversation Heart Cake Supplies
Here’s everything you’ll need to make these mini conversation heart cakes:
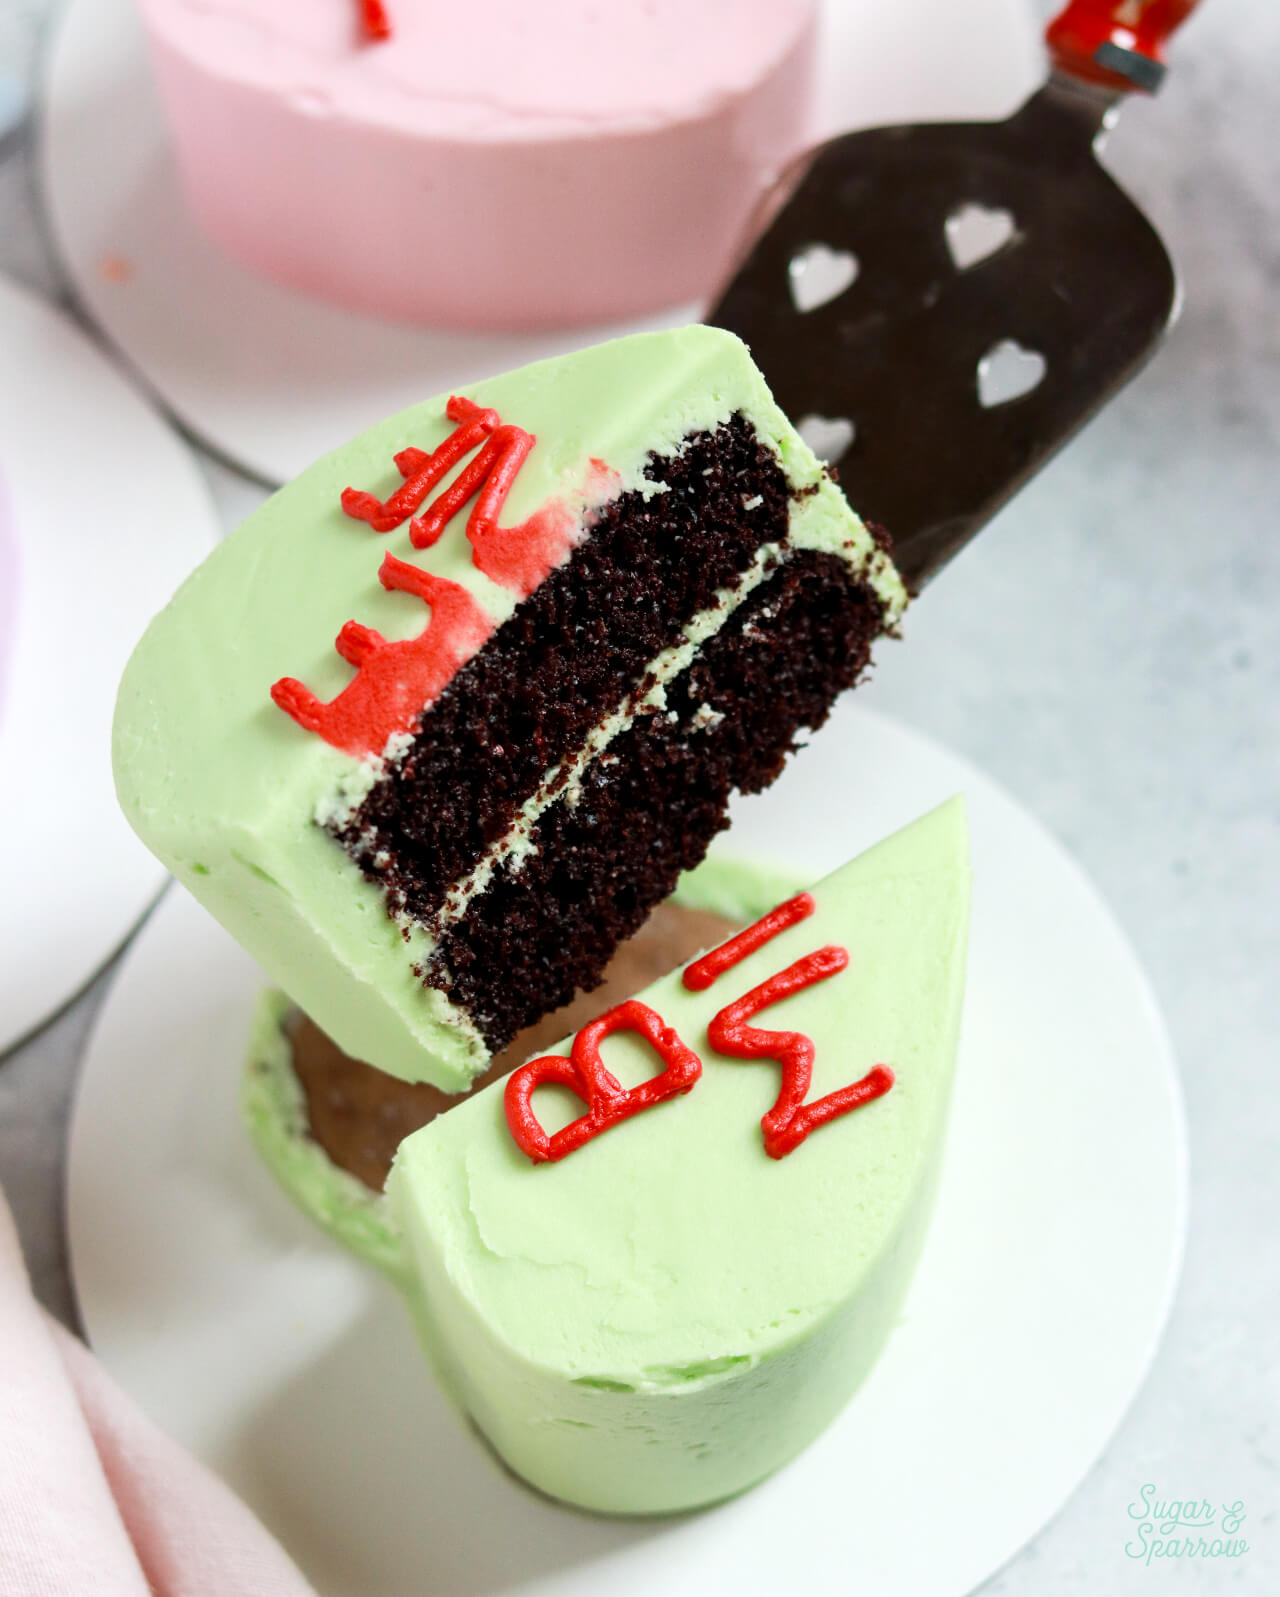
- Heart-shaped cake layers, baked and cooled. I used a half batch of my favorite chocolate cake recipe for these but you can half any of my cake recipes and use the methods in the next section to bake them into heart shapes.
- 4-5 cups of vanilla buttercream (or any tintable buttercream)
- Food color gels of your choice for the main frosting (I used AmeriColor Electric Purple, Deep Pink, and Mint Green)
- Red food color gel for the messages on top
- Cardboard cake circles
- Cake turntable
- Angled icing spatula
- Icing smoother
- Piping bag
- Wilton Tip 5 or other round tip for piping the messages
How to Decorate Mini Conversation Heart Cakes
Once you have your heart-shaped cake layers, level them to your desired height so you have a completely flat surface for decorating. After that, here’s how I transformed the cake layers into conversation hearts:
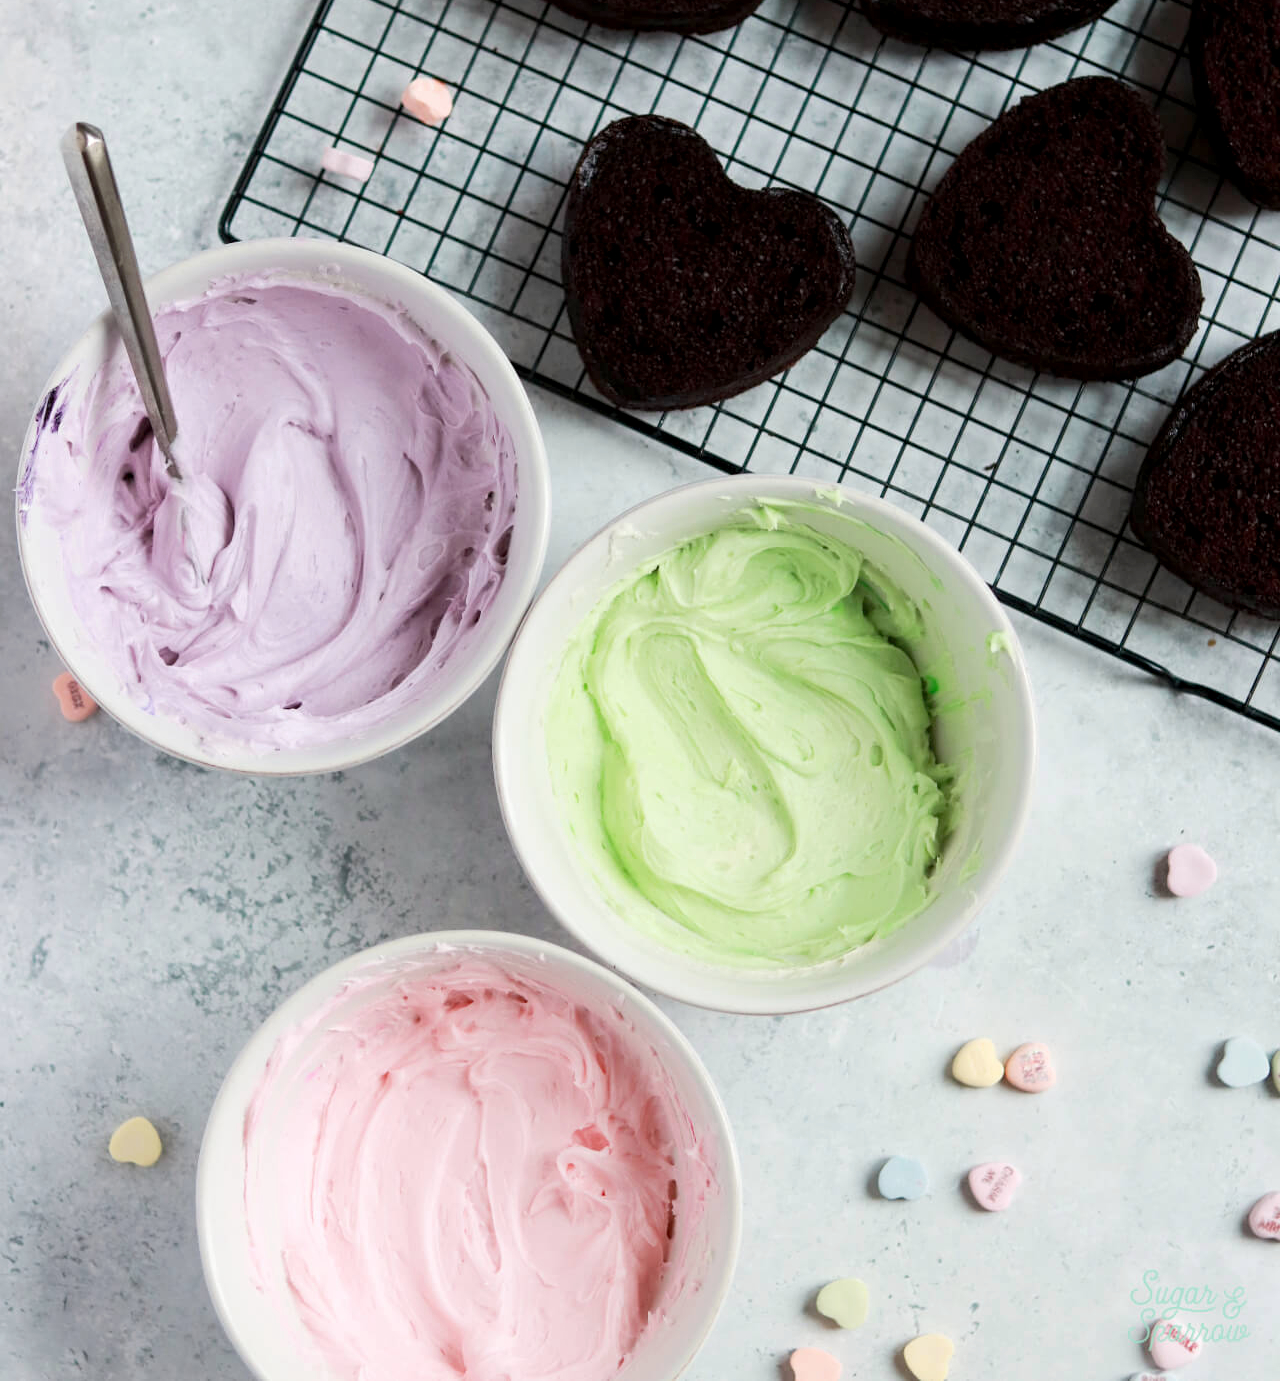
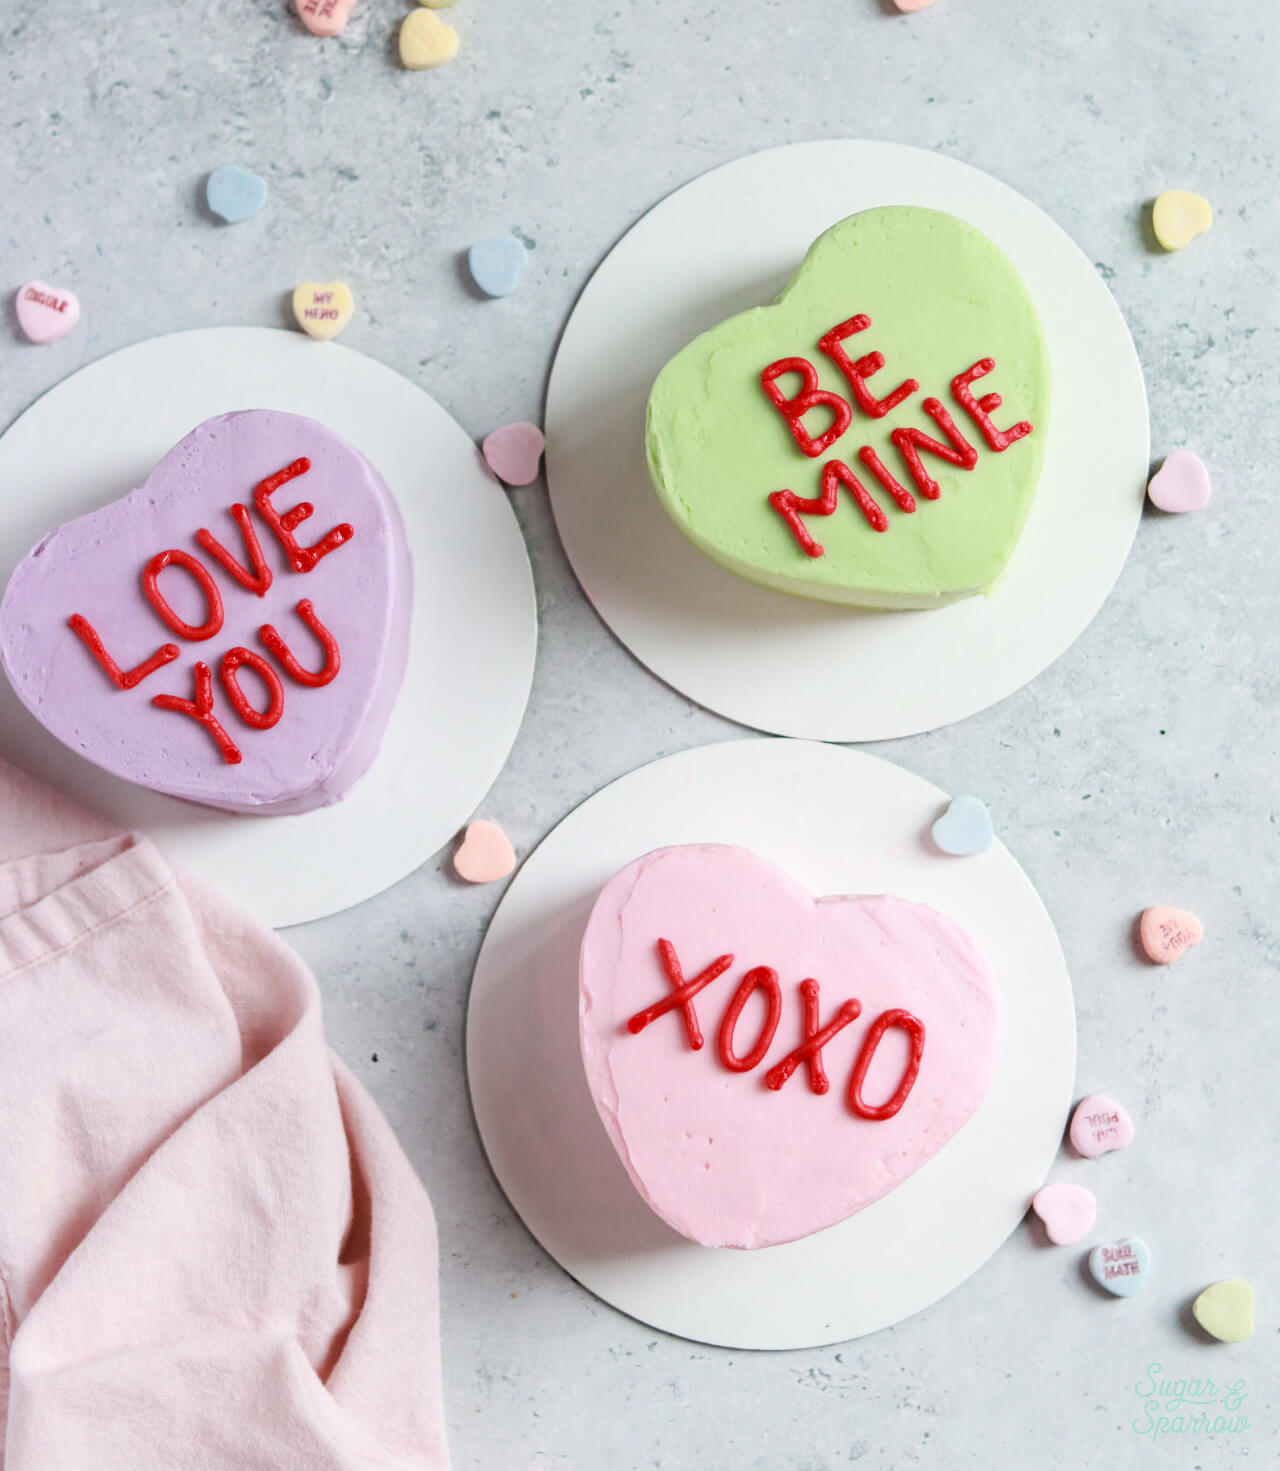
Step 1: Color the Buttercream. After reserving about ¼ Cup of frosting for the piped messages on top, divide the remaining buttercream into three separate bowls (or more bowls depending on how many heart cakes you plan to frost). Choose a pastel color palette using actual conversation hearts as your inspiration. I went with pastel purple, pink, and green and the colors I used are AmeriColor Electric Purple, Deep Pink, and Mint Green. Be sure to start small when adding the coloring to your buttercream so you keep the color palette pastel and not too vibrant.
Step 2: Prepare the Cardboard Base. I ended up cutting a custom heart shaped cardboard base for each cake using the mini cake pans as a tracing guide, then taped those bases onto a grease proof cardboard cake circle. This helped with easily transporting and displaying the heart cakes once finished.
Step 3: Fill and Crumb Coat the Heart Cakes. Place the first cake layer onto the custom base you made in step 2 using a little bit of frosting as glue. Starting with your first pastel color, add about ⅛ inch layer of buttercream filling on top of the cake layer, then place the next cake layer upside down on top of the filling so the bottom of the cake layer becomes the top.
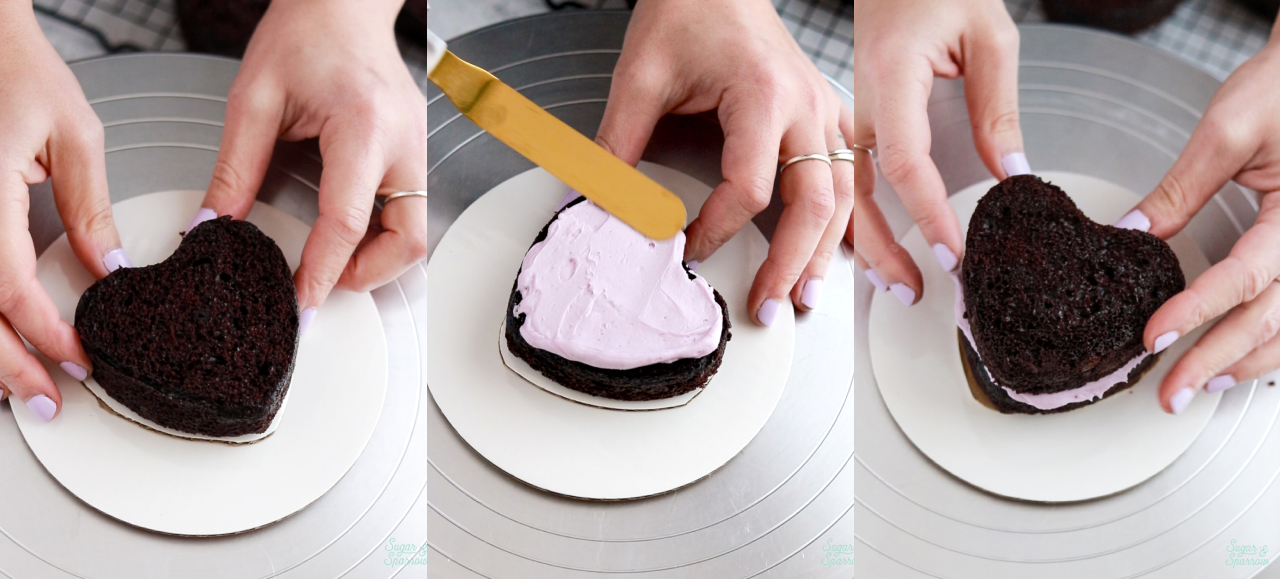
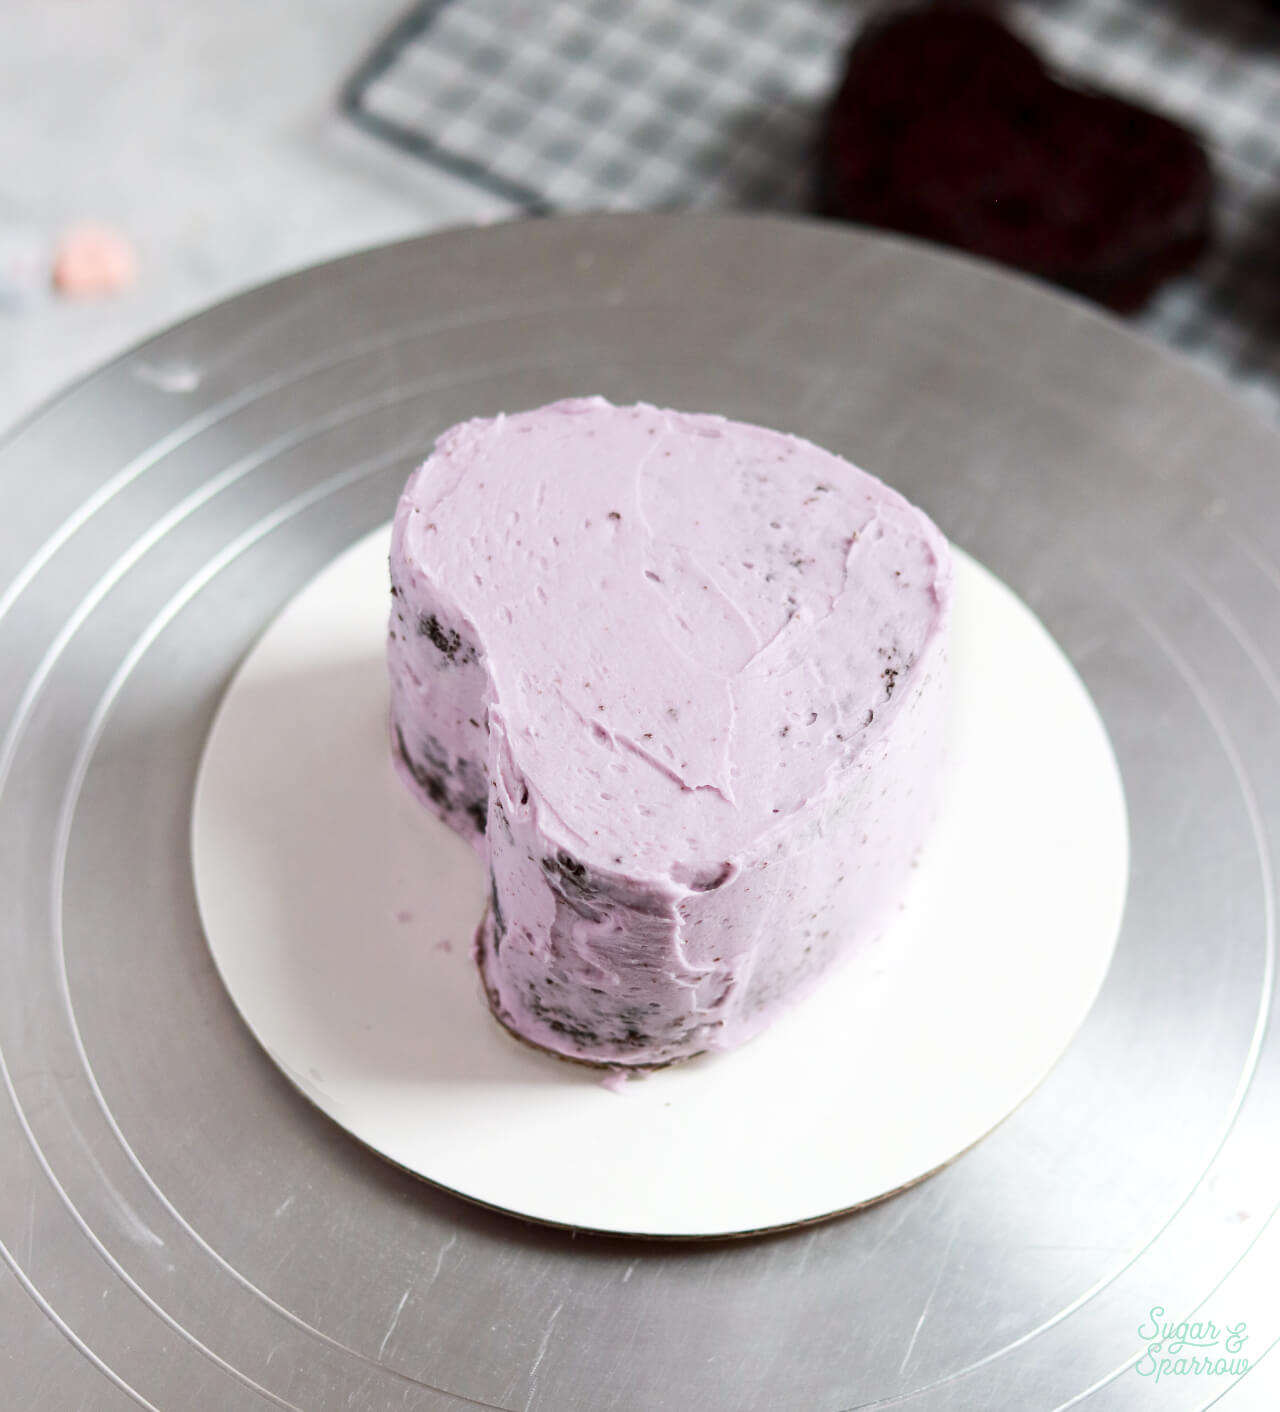
Crumb coat the cake with a thin layer of the same color buttercream, then place the heart cake in the refrigerator so the frosting firms up and locks in the heart shape. Repeat this process with the additional cake layers and other frosting colors.
Step 4: Frost the Heart Cakes. Place the first crumb coated cake back on the turntable and use the corresponding buttercream color to frost a smooth finish on the cake. This can get a little tricky with the heart shape but the rules of frosting a smooth cake are the same. I piped the buttercream all over the cake, then started by smoothing the top of the cake down with an angled spatula until it reached over the edges.
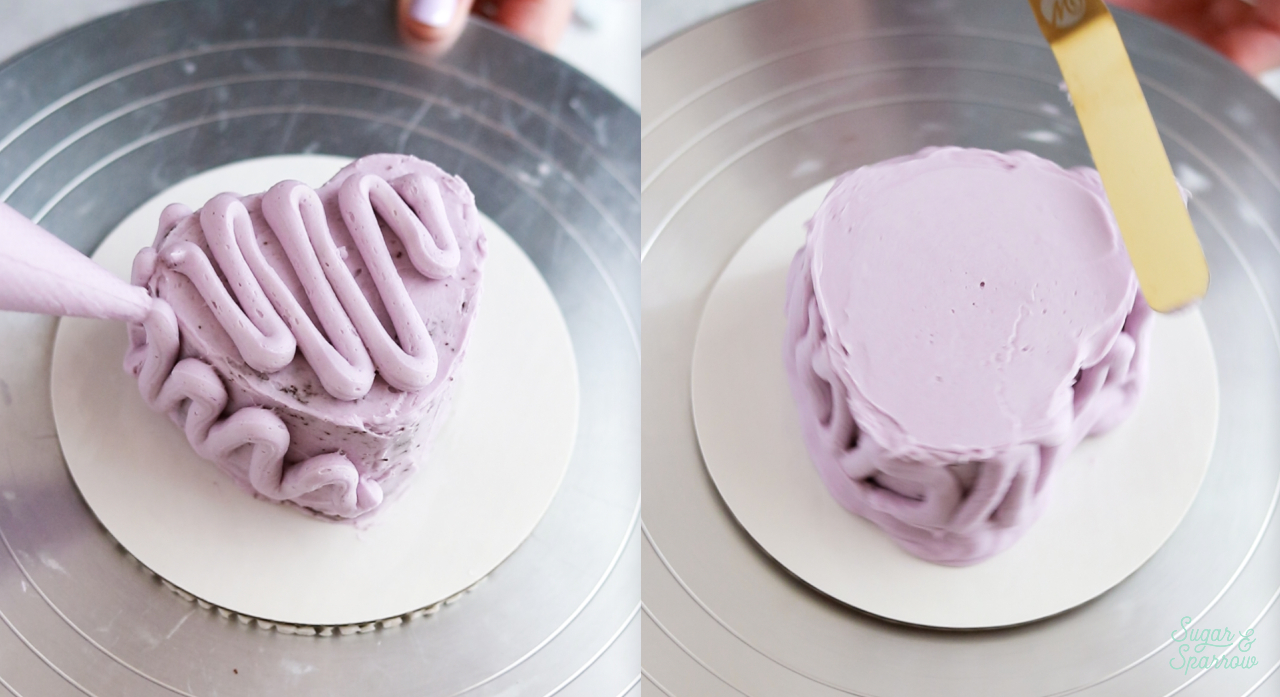
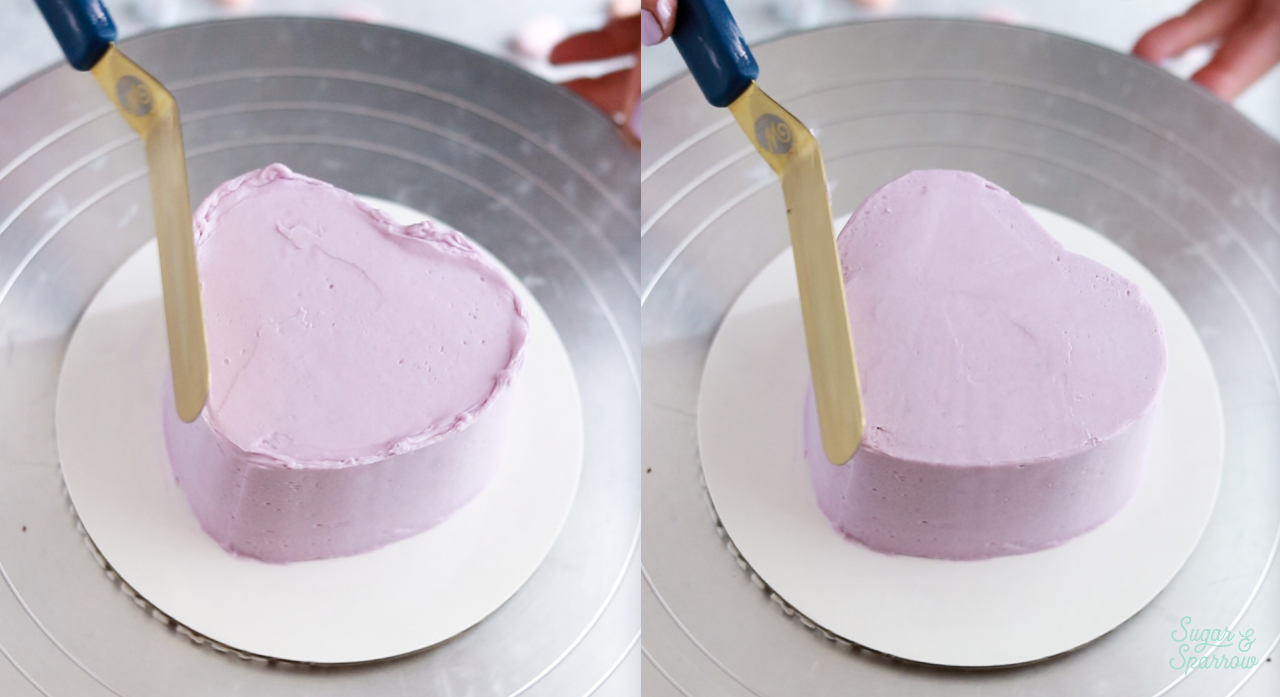
Then spread the buttercream onto the sides of the cake and used an icing smoother to create smooth sides while rotating the turntable.

Finally, swipe the crown that forms around the edges of the cake inward toward the center to create sharp edges.
After finishing the first cake, place it into the refrigerator to let the frosting firm up and repeat step 4 with the remaining cakes.
Step 5: Pipe the Messages on Top. Add a few drops of red food coloring to the reserved buttercream from step 1, then add it into a piping bag fitted with Wilton Tip 5. Pipe any message you want on top of each cake using all caps.
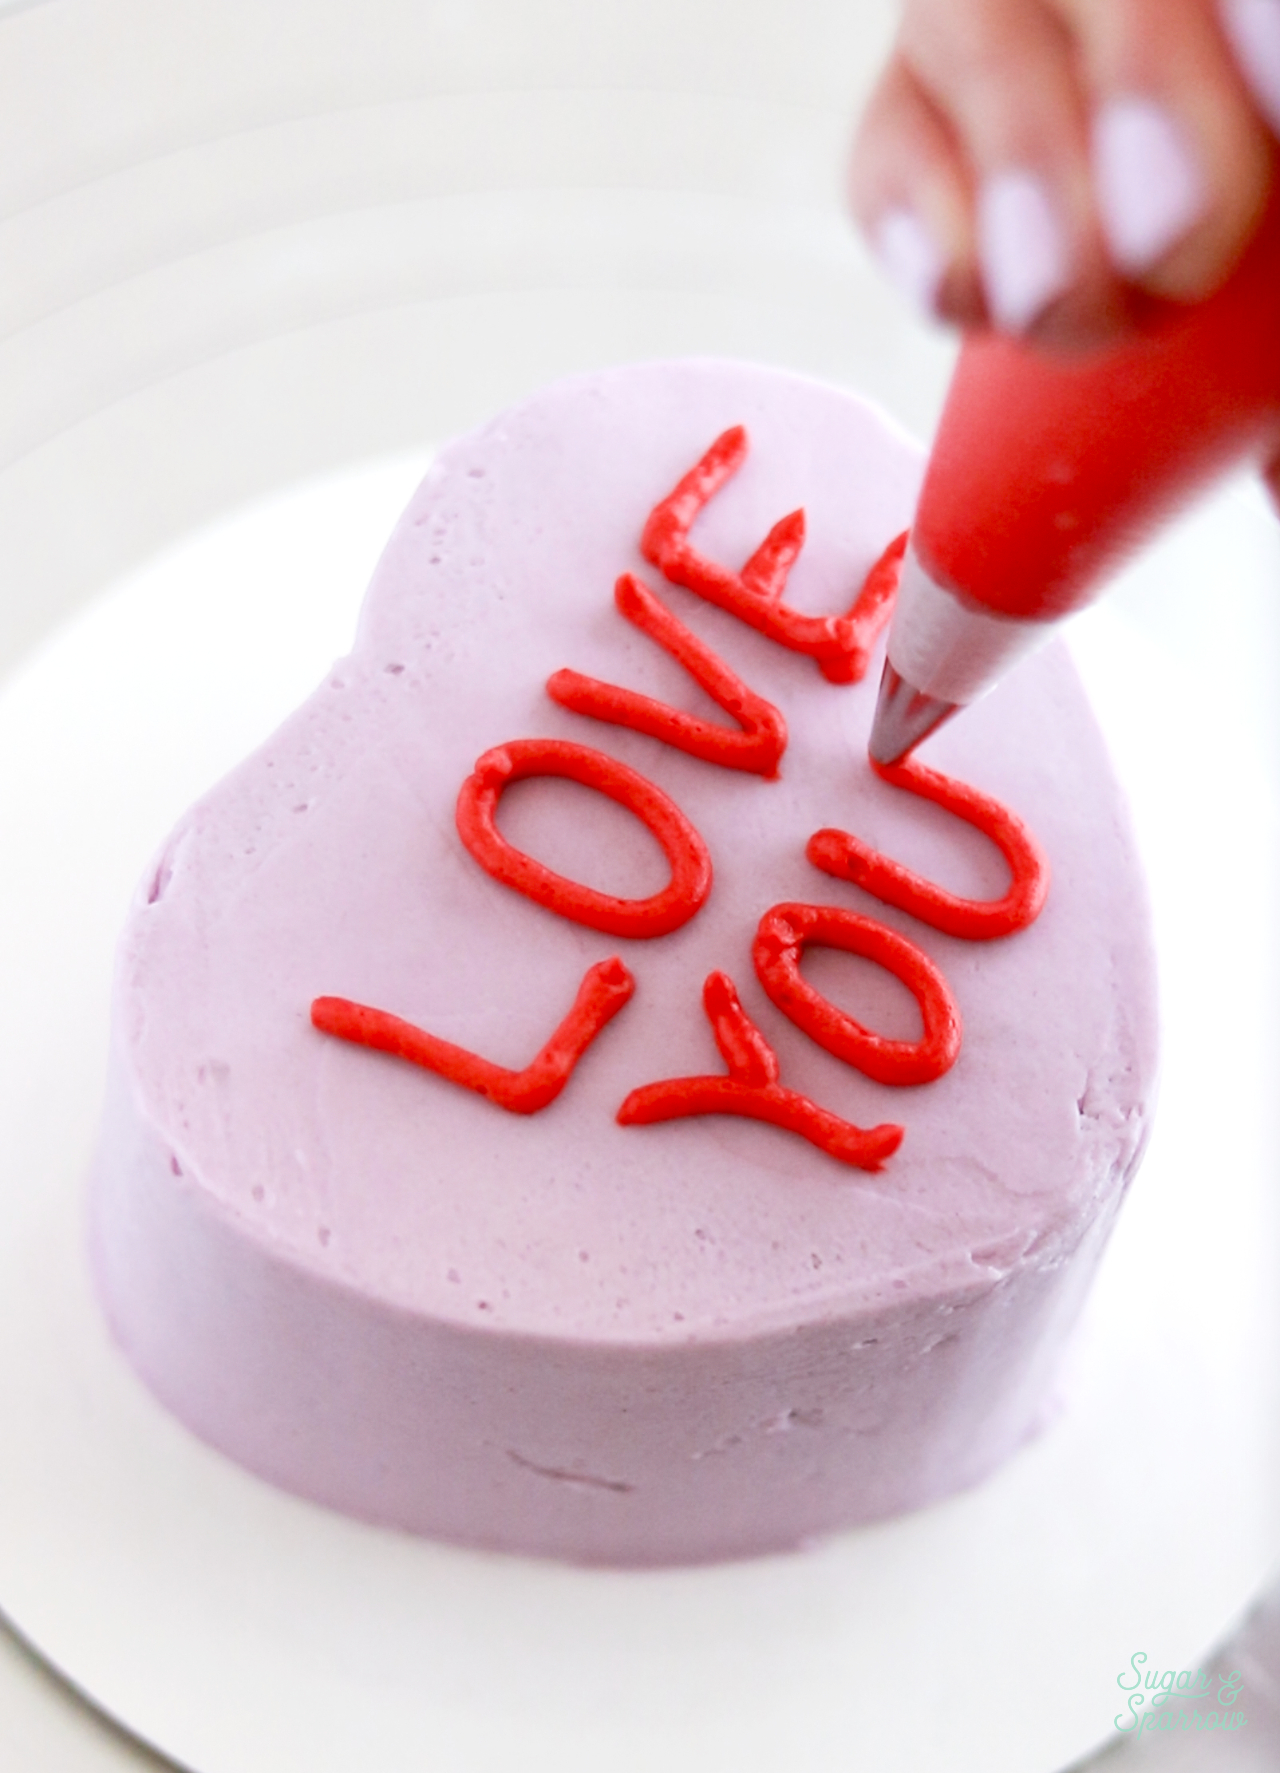
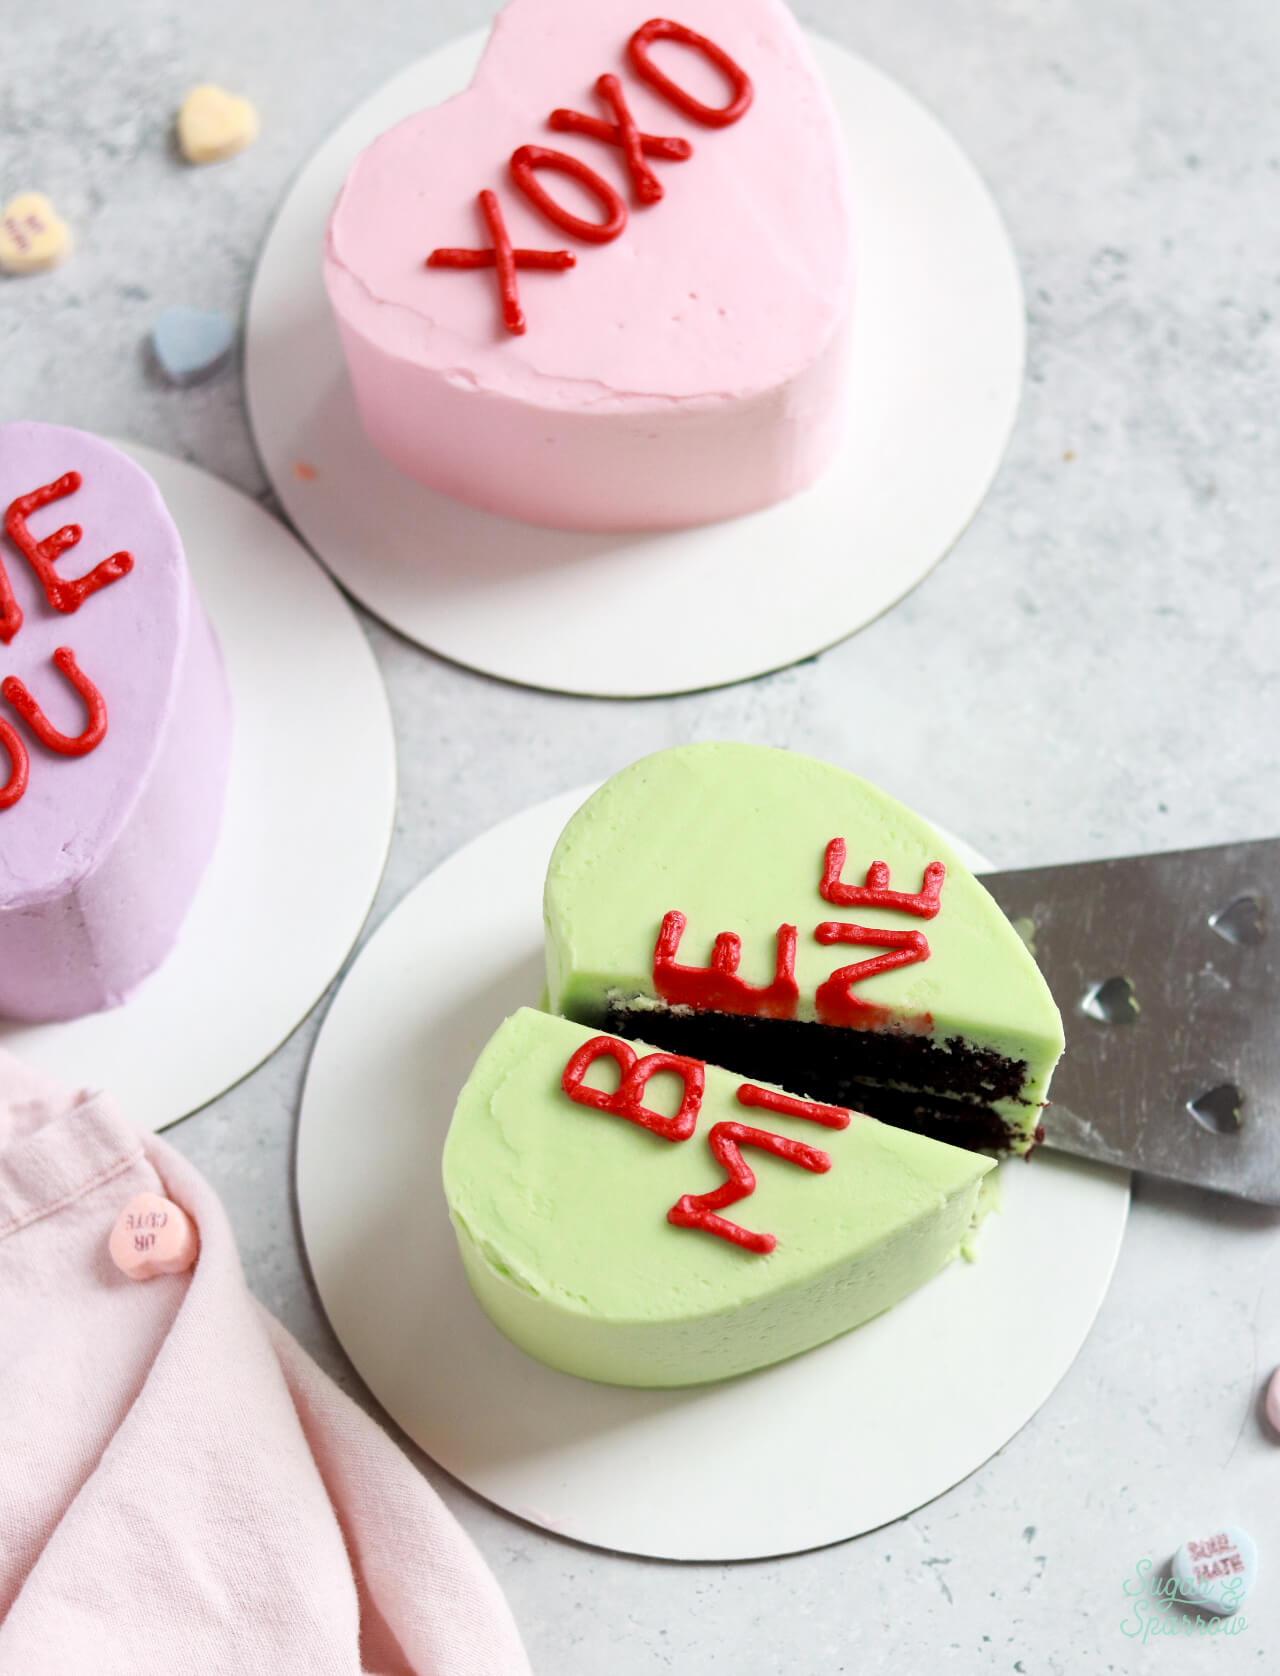
I went with XOXO, LOVE YOU, and BE MINE. The classics.
More Valentine’s Day Recipes You’ll Love
If you’re looking for more festive ideas, I’ve collected a list of all of my favorite Valentine’s Day dessert ideas here! On the list you’ll find more fun Valentine’s Day cake decorating tutorials like this one, plus recipes for small batch cakes, decadent chocolate desserts, pretty pink cakes, love themed cupcakes, and more.
I hope you love these mini conversation heart cakes as much as I do! If you make them, be sure to leave a comment below and let me know how it went. You can also tag @sugarandsparrowco on Instagram to show me a photo. I would love to see the messages you wrote on top!
Mini Conversation Heart Cakes
Equipment
Ingredients
Mini Chocolate Heart-Shaped Cakes
- 1 Cup (133g) all purpose flour
- 3/4 Cup (150g) granulated sugar
- 1/3 Cup (30g) unsweetened natural cocoa powder
- 1 tsp baking soda
- 1/2 tsp baking powder
- 1/4 tsp kosher salt
- 1/4 Cup (60ml) vegetable oil
- 1 large egg, room temperature
- 1 tsp pure vanilla extract
- 1/2 Cup (120ml) buttermilk*, room temperature DIY recipe in the notes
- 1/2 Cup (120ml) hot coffee or hot water
Vanilla Buttercream
- 1 1/2 Cups (339g) unsalted butter, room temperature
- 5 Cups (600g) powdered sugar
- 1 Tbsp pure vanilla extract
- 3 Tbsp whole milk, room temperature
- 1/4 tsp salt, or to taste
- 3-4 drops red food coloring for the messages on top
- pastel food coloring of your choice
Instructions
Make the Mini Chocolate Heart-Shaped Cakes
- Preheat the oven to 350ºF and prepare six 4-inch heart-shaped cake pans* by spraying the sides with baking spray and fitting the bottoms with parchment paper.
- Place all of the dry ingredients into the bowl of a stand mixer and stir on low for 30 seconds to fully combine them. Add the vegetable oil, egg, vanilla, and buttermilk and mix on low until just combined. With the mixer still on low, add the hot coffee (or hot water) in a slow stream, then turn the mixer to medium and beat until smooth, about 2 minutes. The batter will be very thin.
- Pour into prepared cake pans no more than 1/2 full (you'll have a little bit of batter left over) and bake for 18-22 minutes, until a toothpick inserted comes out clean. Cool completely before assembling and frosting.
Make the Vanilla Buttercream
- With a hand mixer or paddle attachment on your stand mixer, cream the butter on medium-high until it’s creamy and light (almost white) in color. About 7 minutes.
- With the mixer on low, add the powdered sugar a few cups at a time, scraping down after each addition and making sure each cup is fully incorporated before adding the next one.
- Add vanilla, milk, and salt and mix on low for another minute until fully incorporated.
- Color the Buttercream: Reserve about ¼ Cup of frosting for the piped messages on top and tint it with a few drops of red food coloring. Set aside. Divide the remaining buttercream into three separate bowls (or more bowls depending on how many heart cakes you plan to frost). Choose a pastel color palette using actual conversation hearts as your inspiration. I went with pastel purple, pink, and green and the colors I used are AmeriColor Electric Purple, Deep Pink, and Mint Green. Be sure to start small when adding the coloring to your buttercream so you keep the color palette pastel and not too vibrant.
Assembly
- Once the mini heart-shaped chocolate cakes are cooled completely to room temperature, level them to your desired height. Adhere the first cake layer onto a cardboard base and place it onto your turntable. Starting with your first pastel buttercream color, add about ⅛ inch layer of buttercream filling on top of the cake layer, then place the next cake layer upside down on top of the filling so the bottom of the cake layer becomes the top. Crumb coat the cake with a thin layer of the same color buttercream, then place the heart cake in the refrigerator so the frosting firms up and locks in the heart shape. Repeat this process with the additional cake layers and other frosting colors.
- Place the first crumb coated cake back on the turntable and use the corresponding buttercream color to frost a smooth finish on the cake. Place the frosted cake back into the refrigerator and repeat with the remaining cakes.
- Place the red buttercream into a piping bag fitted with Wilton Tip 5 and pipe any message you want onto each cake.
Notes
- The cake layers can be made ahead and stored at room temperature, covered tightly in plastic wrap, for up to two days. Alternatively, you can cover with plastic wrap and store in the freezer for up to two months before thawing to room temperature.
- The buttercream can be made ahead and stored in an airtight container in the refrigerator for up to two weeks. When you’re ready to use it, bring it back to room temperature and re-whip in your stand mixer to bring back to smooth buttercream consistency.
- The assembled and decorated cakes can be stored in the refrigerator or at room temperature for up to 5 days.

Leave a Reply