• Cake
  • Frosting
  • YouTube
  • My Favorite Tools
  • Nav Social Icons

  • Skip to primary navigation
  • Skip to main content
  • Skip to primary sidebar
  • Skip to footer
  • Recipes
    • Cake
    • Cupcakes
    • Frosting
    • Ice Cream
    • Vegan
  • Cake Basics
  • Tutorials
  • Blog
  • About
  • Mobile Menu Widgets

    Connect

    Search

Sugar & Sparrow logo in script font

Sugar & Sparrow

Lifestyle and Cake from Portland Oregon

  • Cake Basics
  • Recipes
    • Cake
    • Cupcakes
    • Cookies & Bars
    • Filling
    • Frosting
    • Ice Cream
    • No-Bake
    • Small Batch
    • Vegan
  • Tutorials
  • Book
  • Blog
  • About

Oreo Layer Cake Recipe

July 27, 2025 · In: Cake, Featured, Recipes

Jump to Recipe

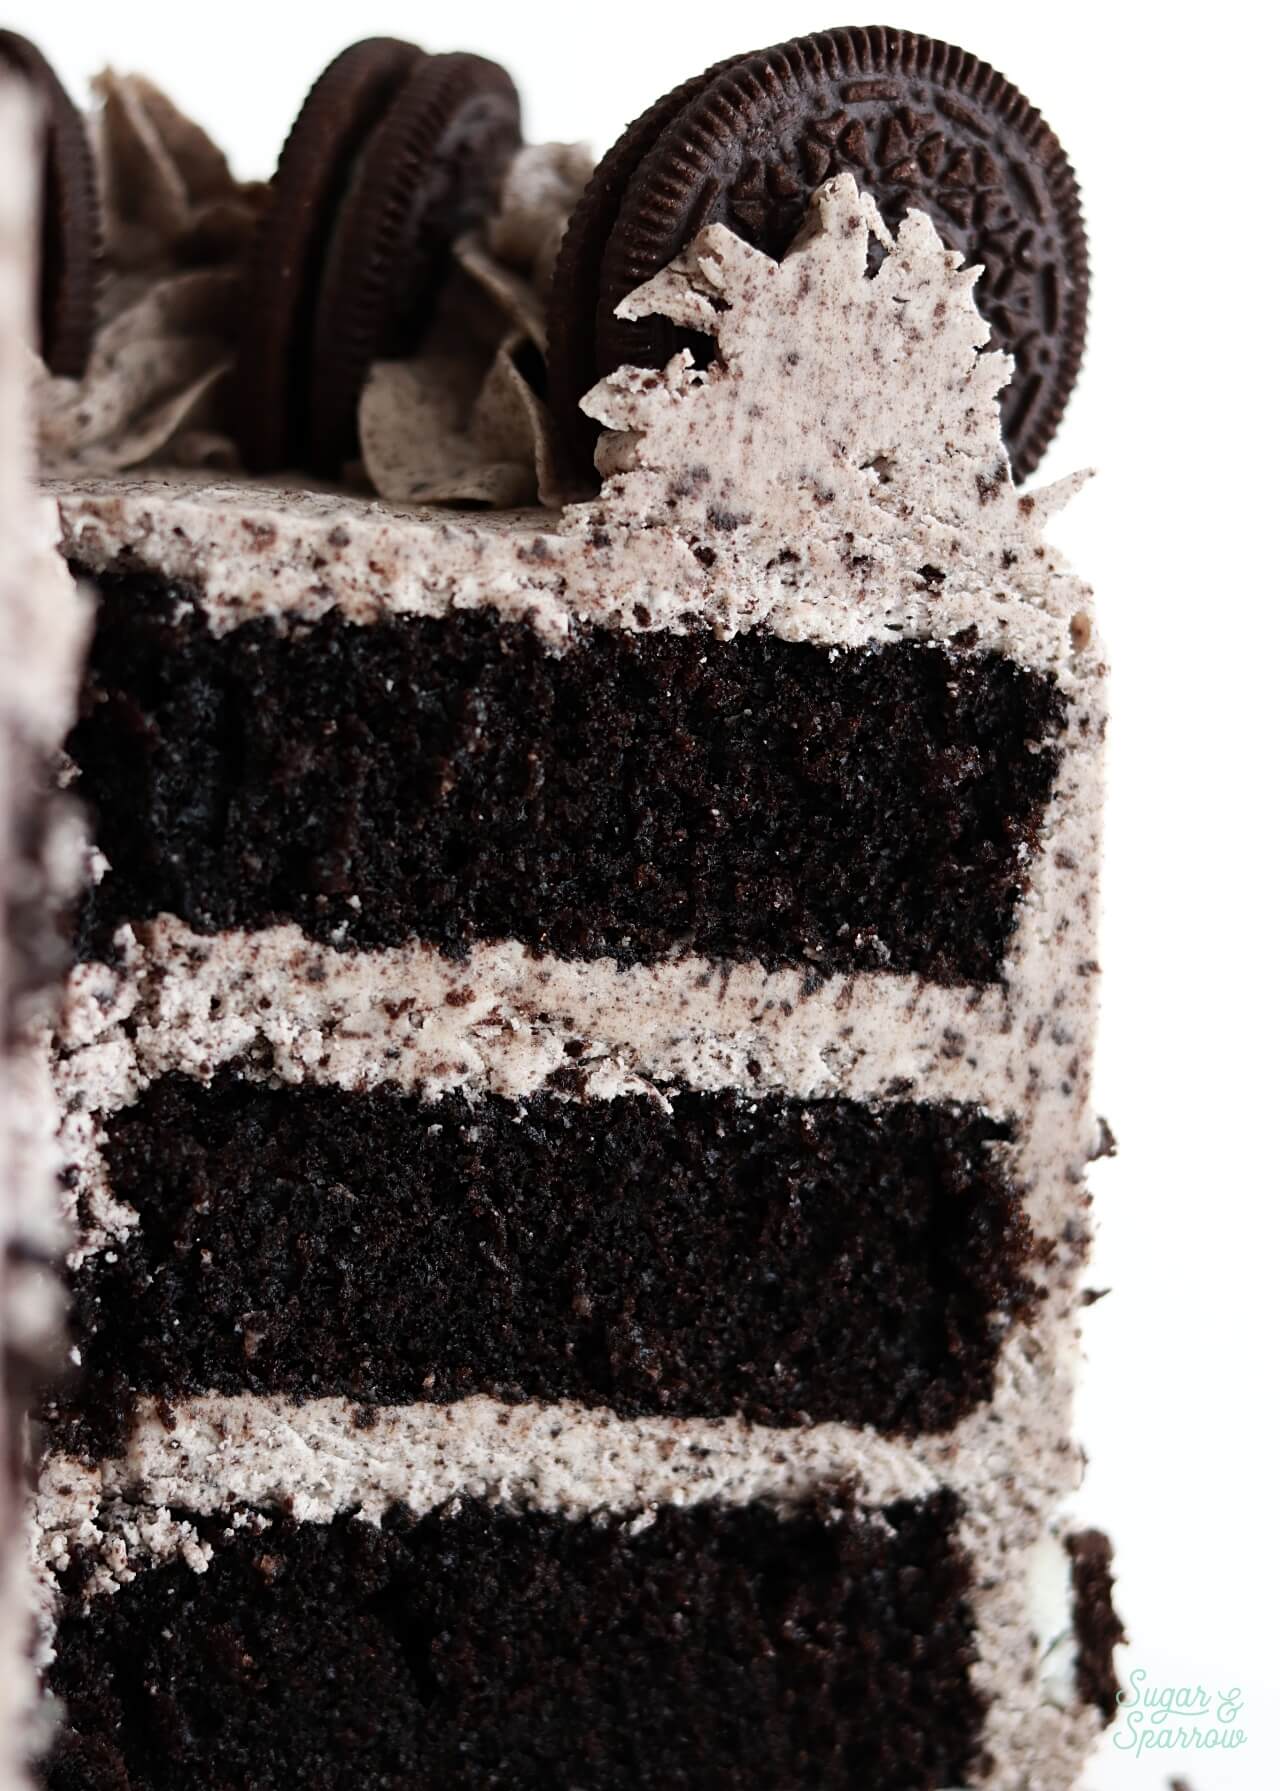
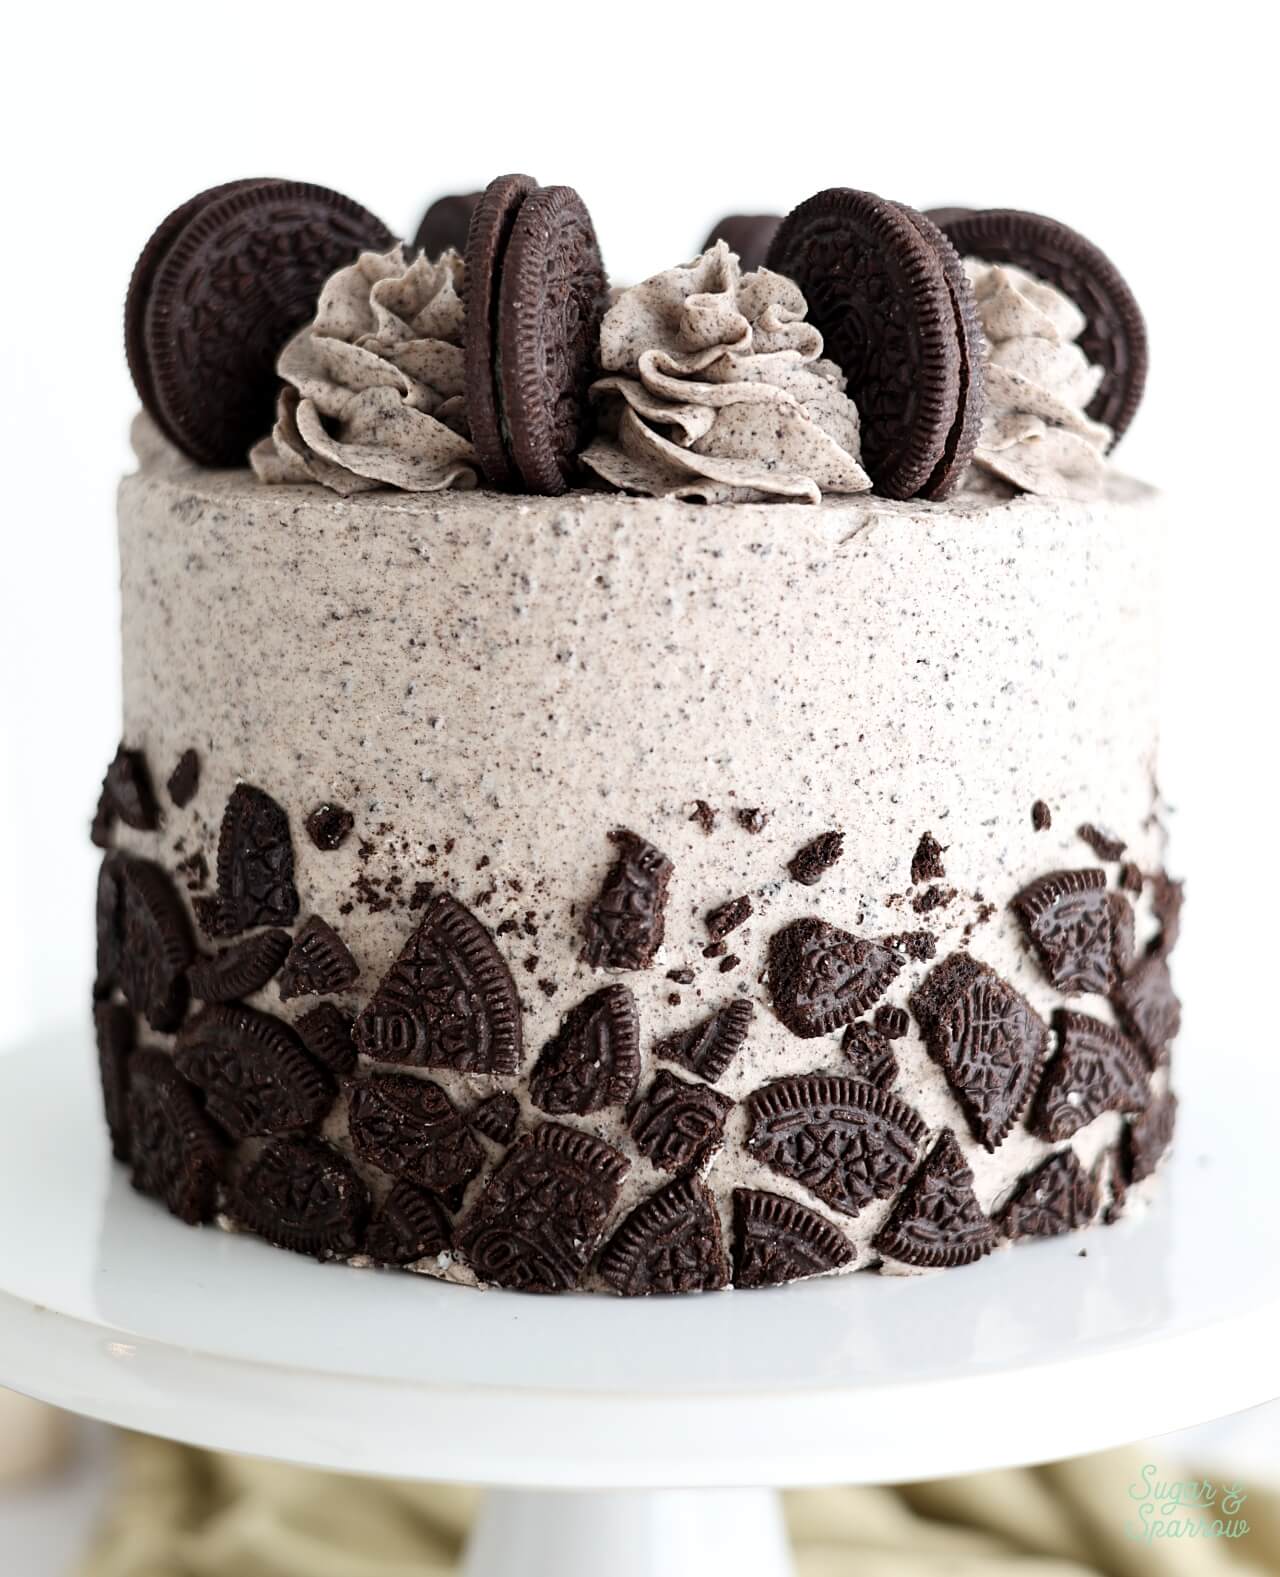
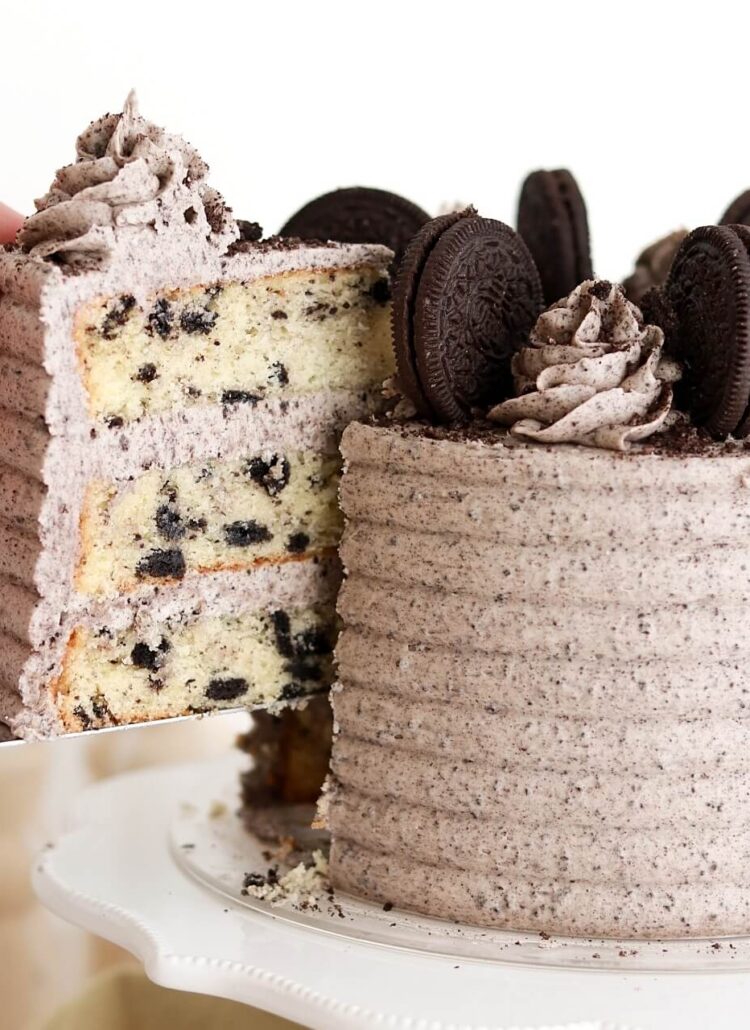
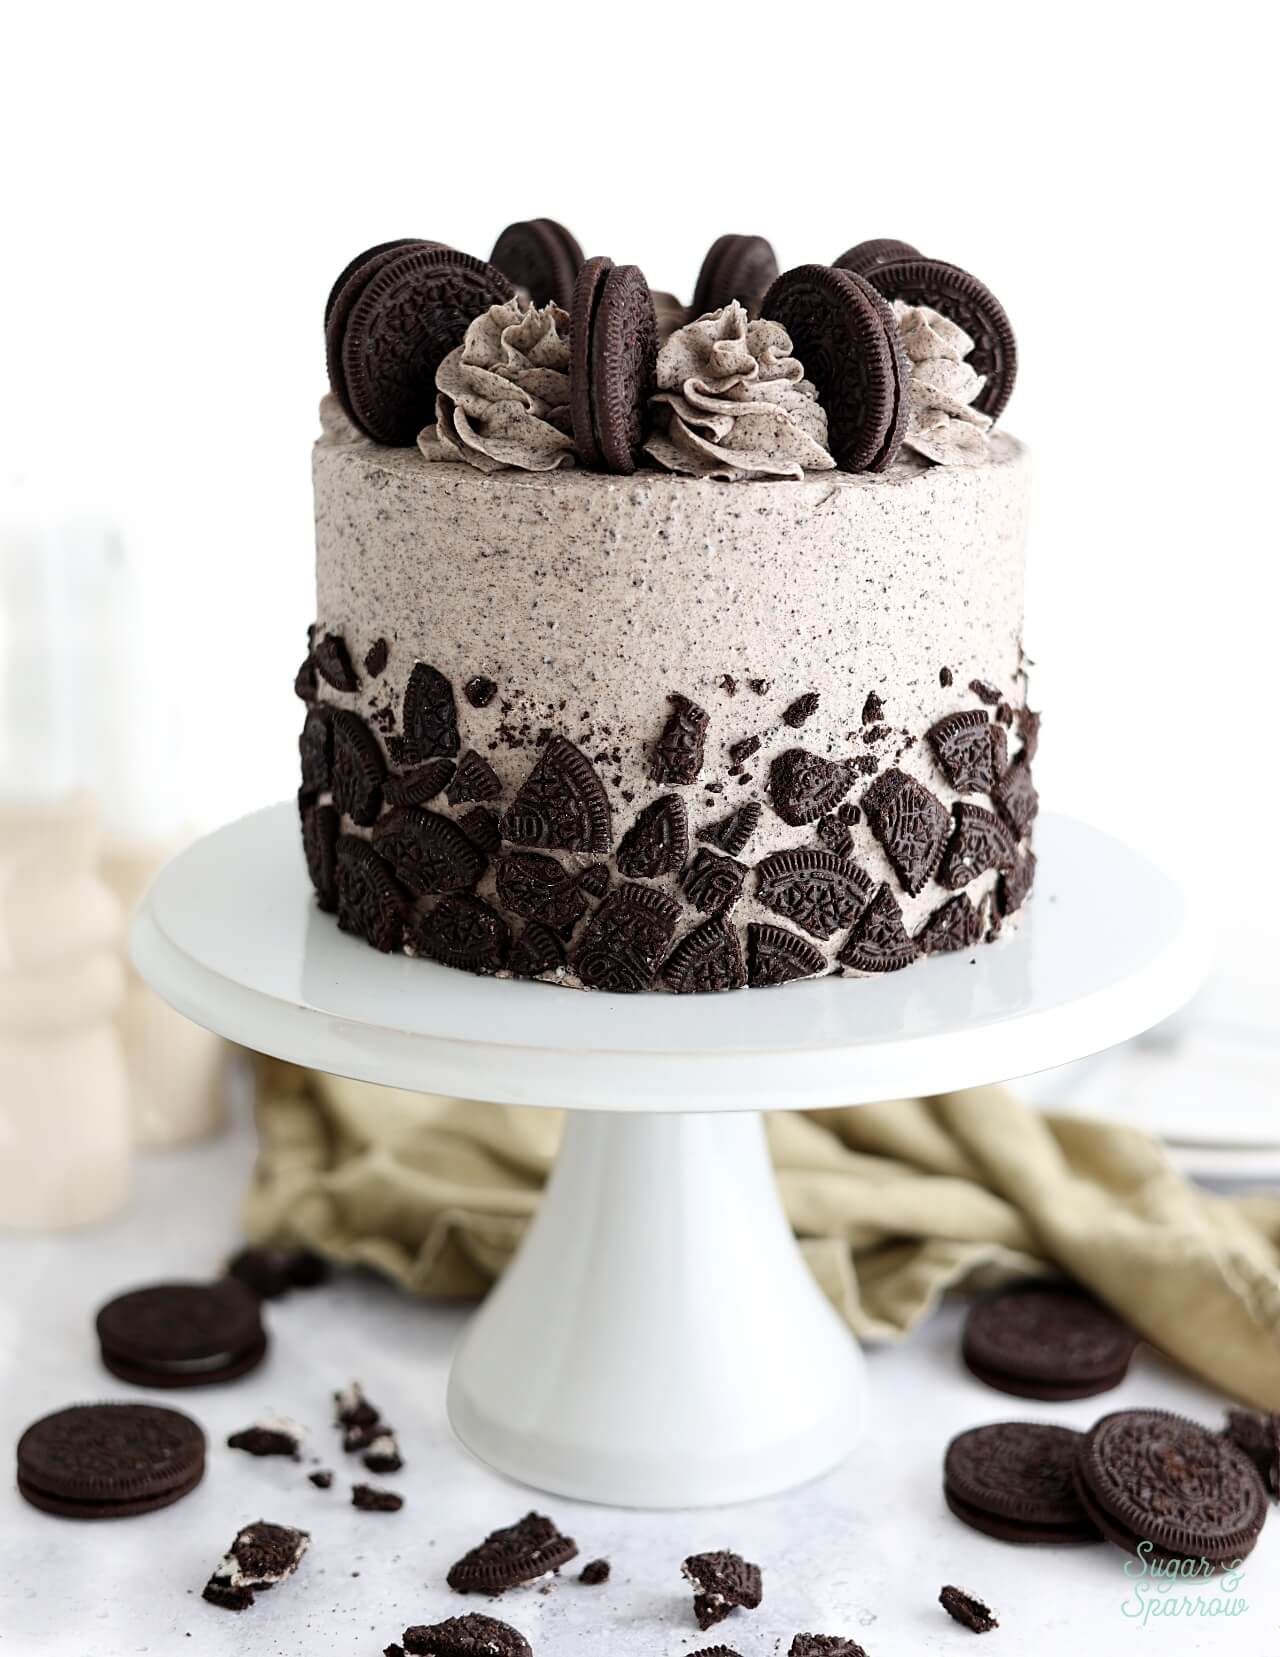
I absolutely LOVE Oreo cookies, so I made sure this cake has the best Oreo flavor in every way. It starts with layers of soft and moist black velvet cake made with black cocoa powder – the same ingredient responsible for the color and flavor of Oreo cookie shells. Those cake layers are filled and frosted with cookies and cream buttercream that’s speckled with delicious Oreo cookie crumbs, then decorated with more cookies. It tastes just like a cakey version of an Oreo in the very best way and it’s so easy to make!
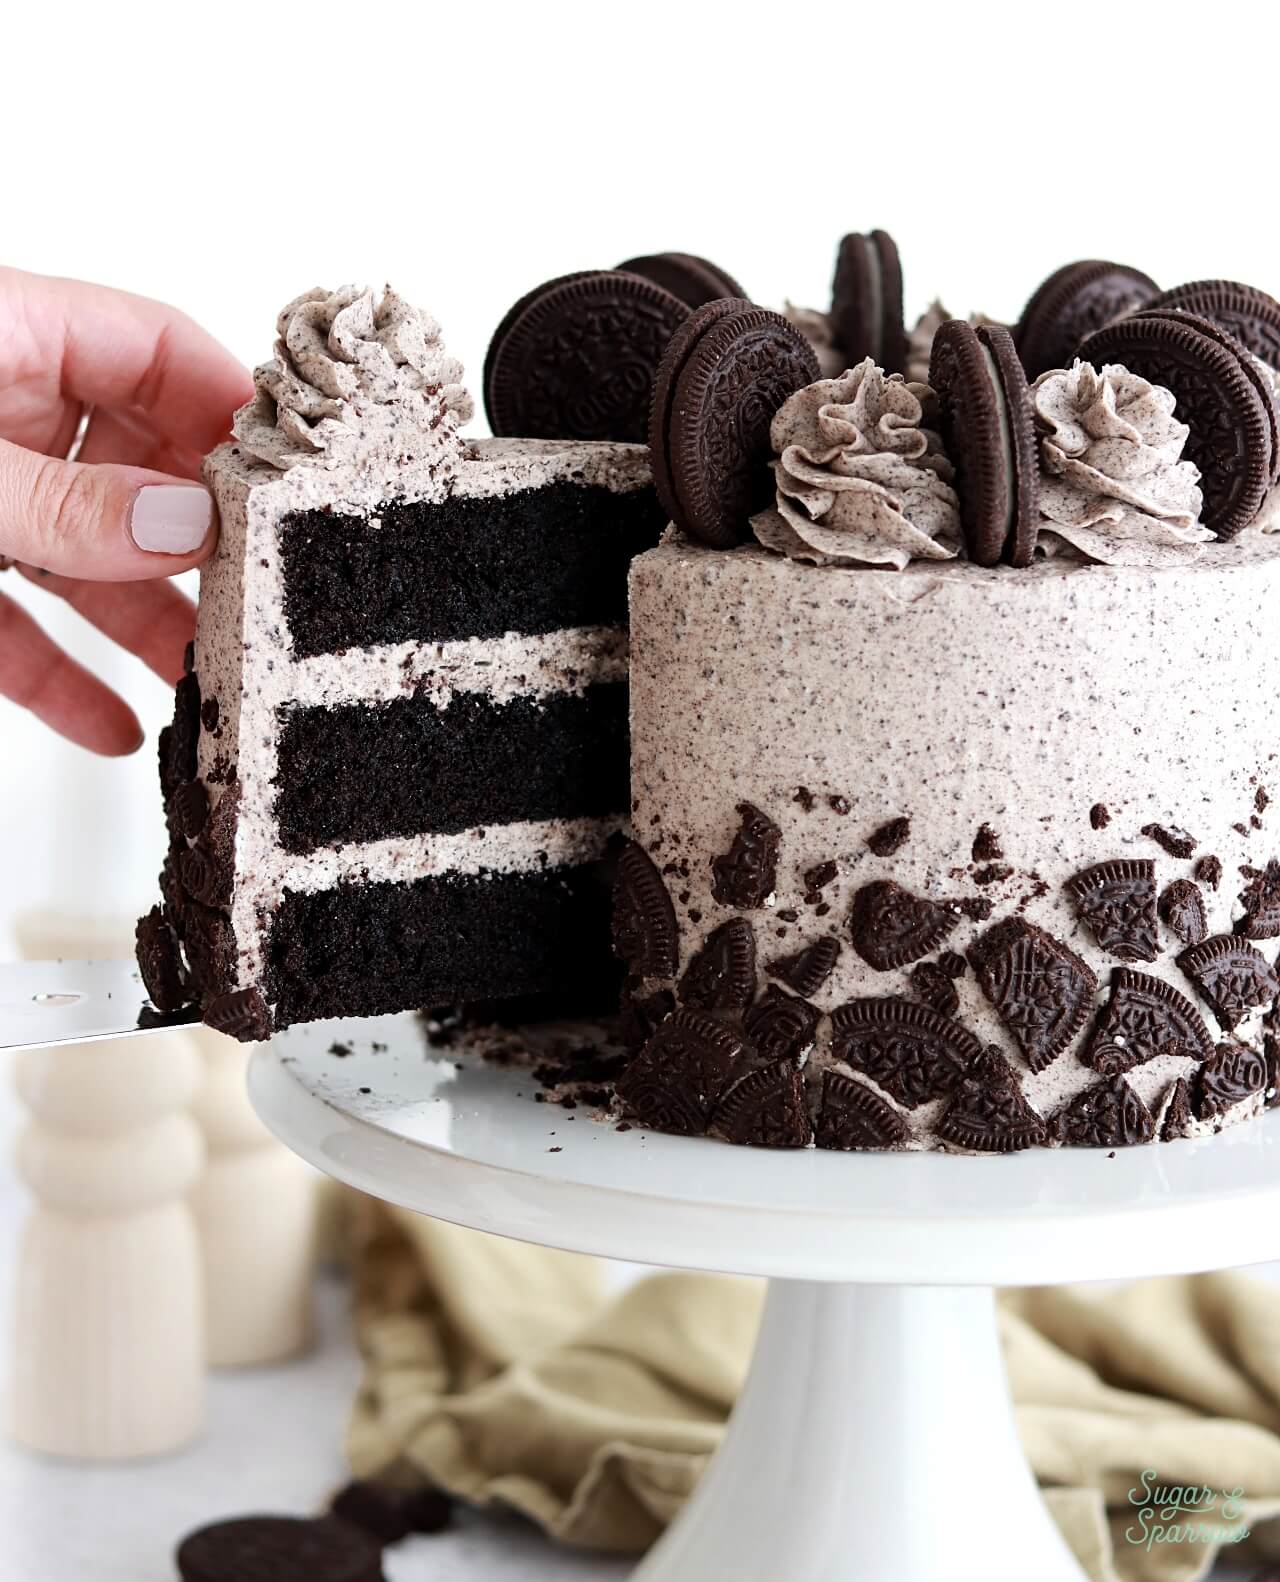
oreo cake recipe with cookies and cream buttercream
chocolate oreo cake recipe with black velvet cake layers

One Reader, Cynthia, Says: “This cake is fantastic! It was so moist and delicious. Even after putting it in the fridge, it was still very soft and moist. And the frosting, oh my gosh! This one is a keeper for sure.” ★★★★★

Oreo Cake Ingredients & Substitutions

This cake is extra soft and moist with the perfect Oreo flavor thanks to black cocoa powder in the cake layers + cookie crumbs in the buttercream. Here are some of the key ingredients and substitutions you can make:

  • Black Cocoa Powder. Adds a deep black color and the most authentic Oreo flavor to this cake. If you don’t have it on hand, it’s easy to find on Amazon OR you can use an equal amount of Hershey’s Special Dark Cocoa Powder or any Dutch-processed cocoa powder instead. Either of those should be easy to find at your local grocery store. 
  • All Purpose Flour. Otherwise known as plain flour, this creates gluten and helps build structure for the cake. I know that most of my other cake recipes call for cake flour, but I like to use all-purpose flour for my chocolate based cakes. It yields the best texture.
  • Granulated Sugar. Not only sweetens the cake but helps soften the overall cake texture.
  • Baking Soda + Baking Powder. The leavening agents that help this cake rise. 
  • Vegetable Oil. Provides a good amount of moisture for this cake. I like to use plain vegetable oil, but you can use any clear cooking oil that you prefer. Just keep in mind that whatever you use might flavor the cake, so choose something you love and are used to baking with. 
  • Large Eggs. To bind all of the ingredients together and give the cake structure.
  • Pure Vanilla Extract. Adds dimension to the Oreo flavor of this cake. 
  • Full-Fat Buttermilk. Provides tons of moisture while binding the ingredients together. If you don’t have buttermilk on-hand, see the notes section of the recipe card for an easy DIY version using whole milk + vinegar or lemon juice! 
  • Hot Coffee. This helps bring all of the ingredients together into a cohesive batter at the end of the recipe, and the heat of the coffee blooms the cocoa powder to bring out the beautiful chocolate notes. You won’t end up tasting coffee in the final baked cake, but if you’d rather not use coffee, you can use an equal amount of hot water instead. And if you’re using instant coffee or espresso powder, just follow the instructions on the container to make 1 Cup (8oz) of coffee. It’s usually one heaping teaspoon per 8 oz of water. 
  • Oreo Cookies. It wouldn’t be an Oreo cake without these! I grind Oreo cookies into fine crumbs and fold them into the buttercream, plus decorate the cake with them! 
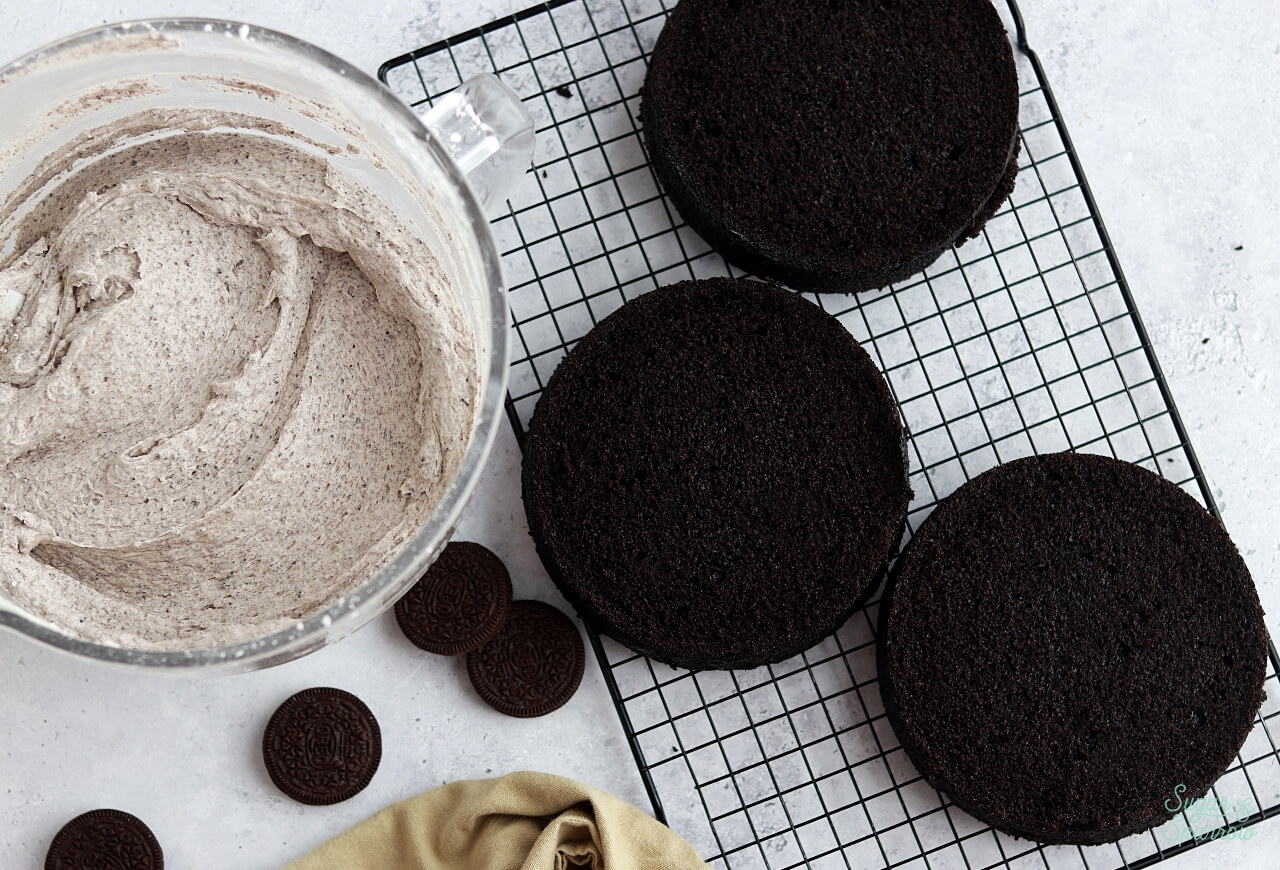
black velvet cake layers with cookies and cream buttercream
black velvet oreo cake with cookies and cream frosting

Delicious Cookies & Cream Buttercream

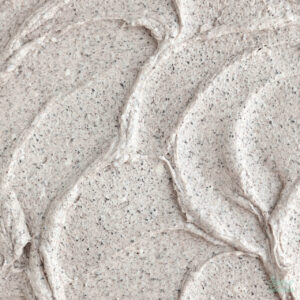
This starts by making my favorite vanilla buttercream recipe, then grinding Oreo cookies into fine crumbs and mixing them in until you have a beautifully speckled buttercream! The flavor and texture are out of this world. The vanilla buttercream essentially becomes the cream filling element for the Oreo cookie crumbs and it’s so easy to work with as a filling and frosting. And just look how pretty the Oreo flecks are: 
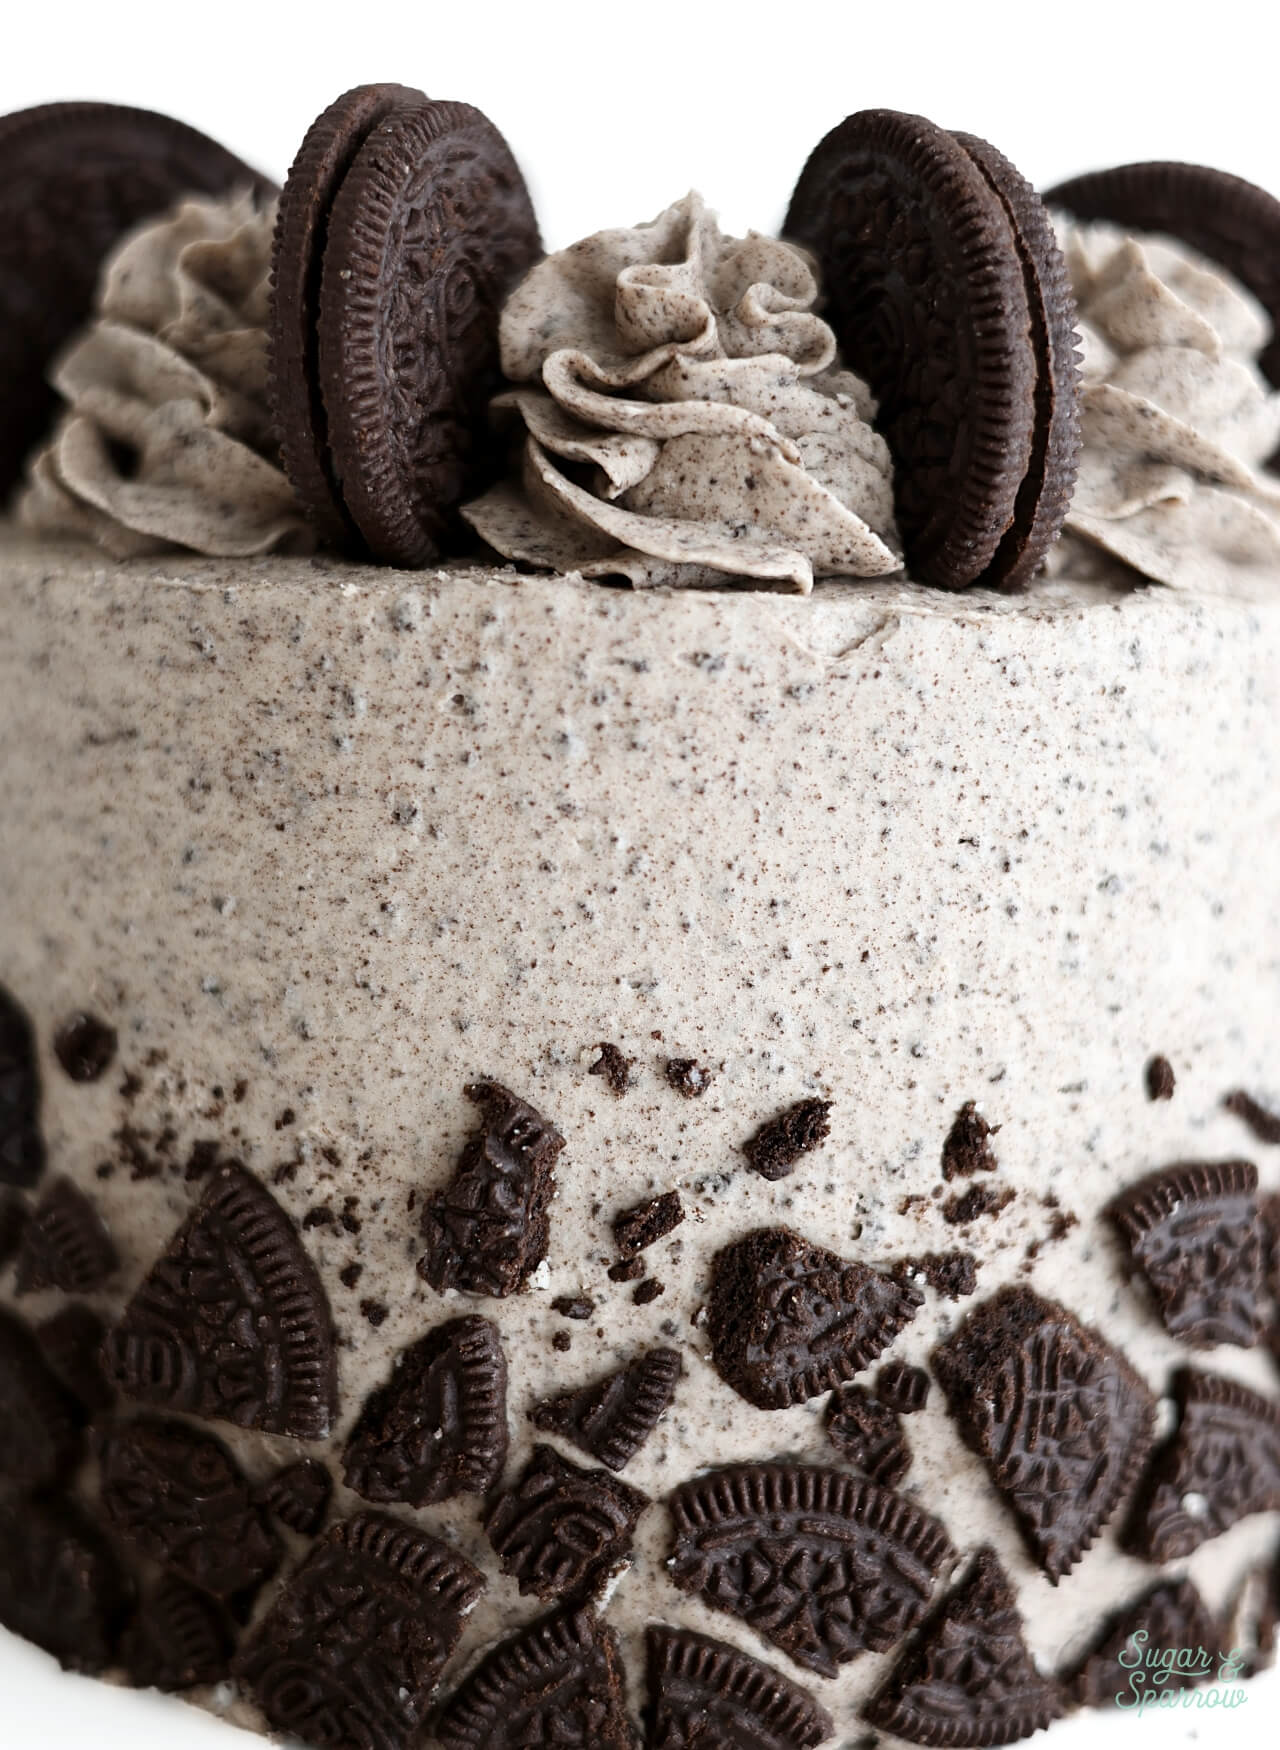
oreo cookies and cream buttercream recipe

My one bit of advice is to grind those cookie crumbs very finely with a food processor if you plan on piping swirls on top of the cake. If you have any large cookie bits in the buttercream, they could end up clogging the piping tip and make things frustrating! If this happens, you can usually dig the piece out with a toothpick, but save yourself the stress and grind those crumbs as small as you can. 

How to Decorate an Oreo Layer Cake 

There are so many fun ways you can decorate this cake. In the past I’ve added a chocolate ganache drip to the design pictured, and added colorful sprinkles to the swirls in this vegan chocolate Oreo cake. Feel free to use either of those ideas as inspiration or follow the tutorial below to create the look you see here: 

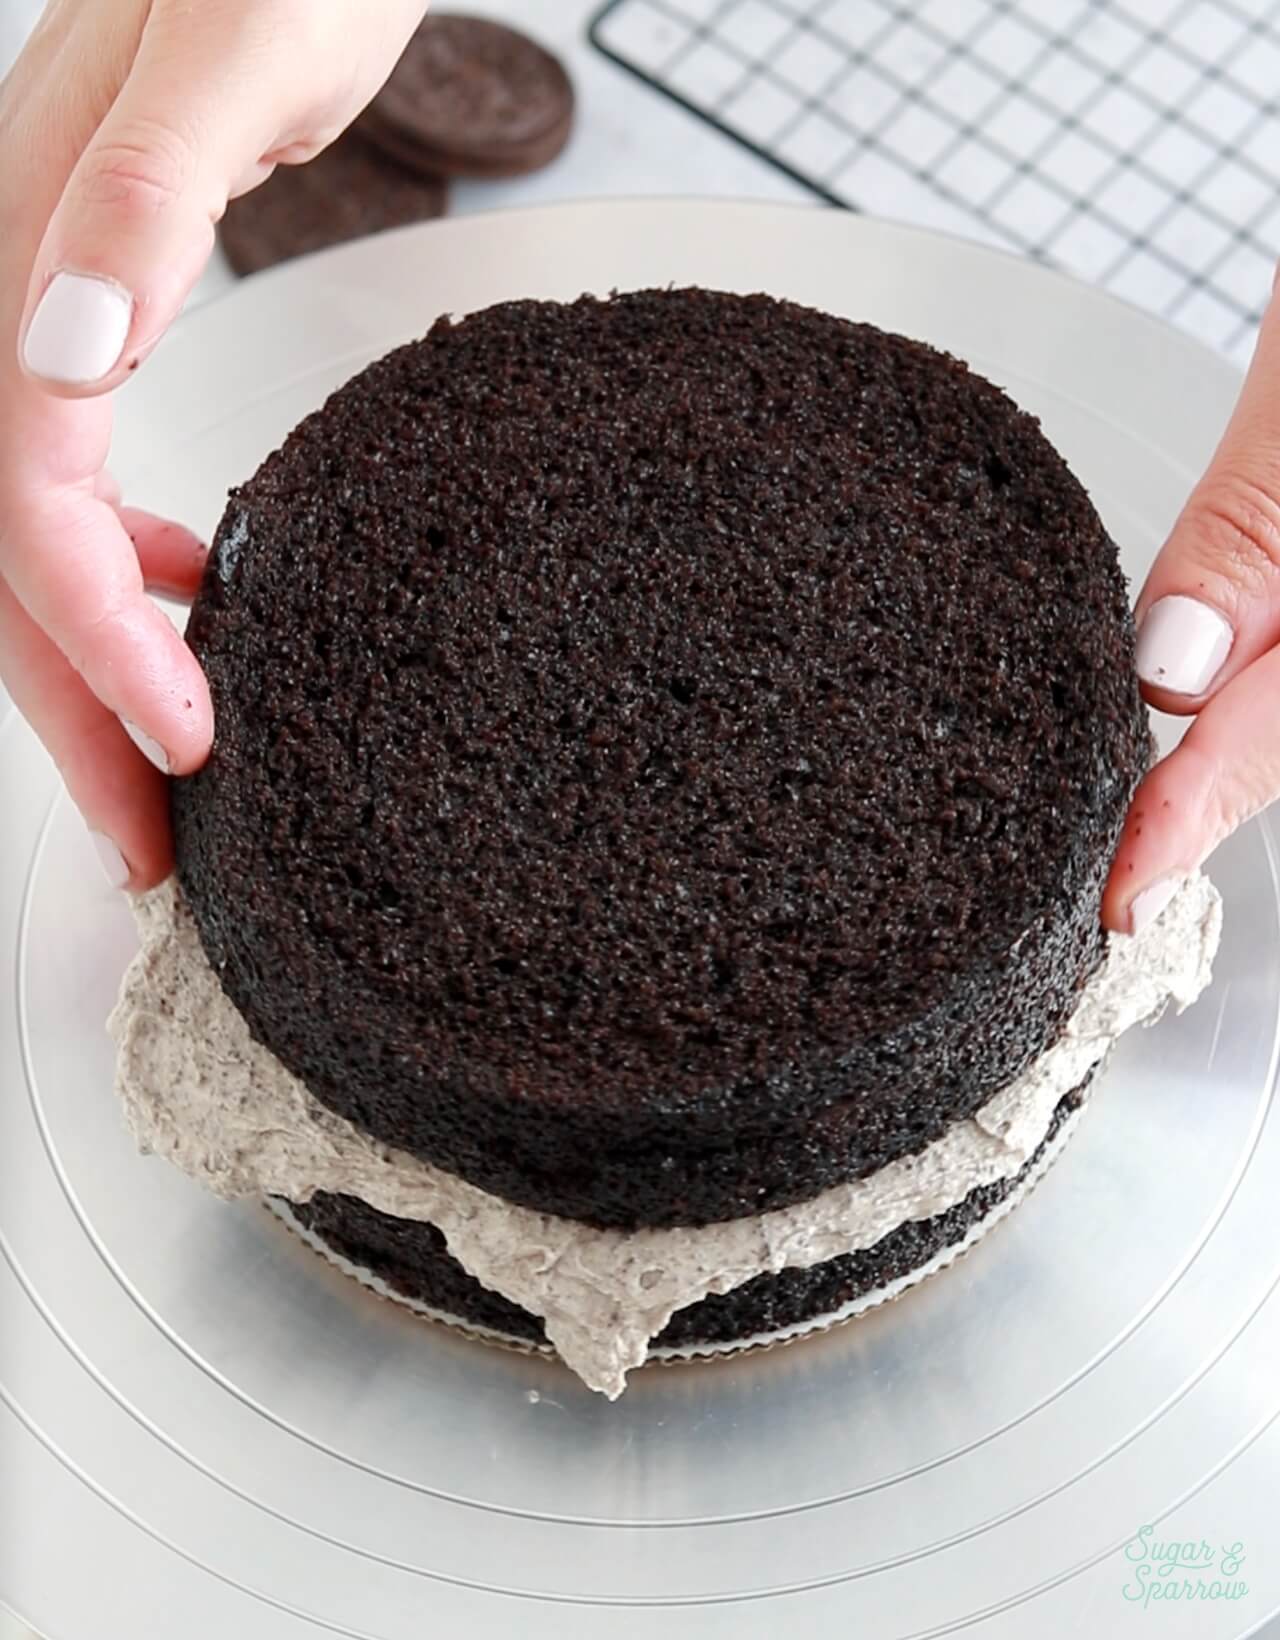
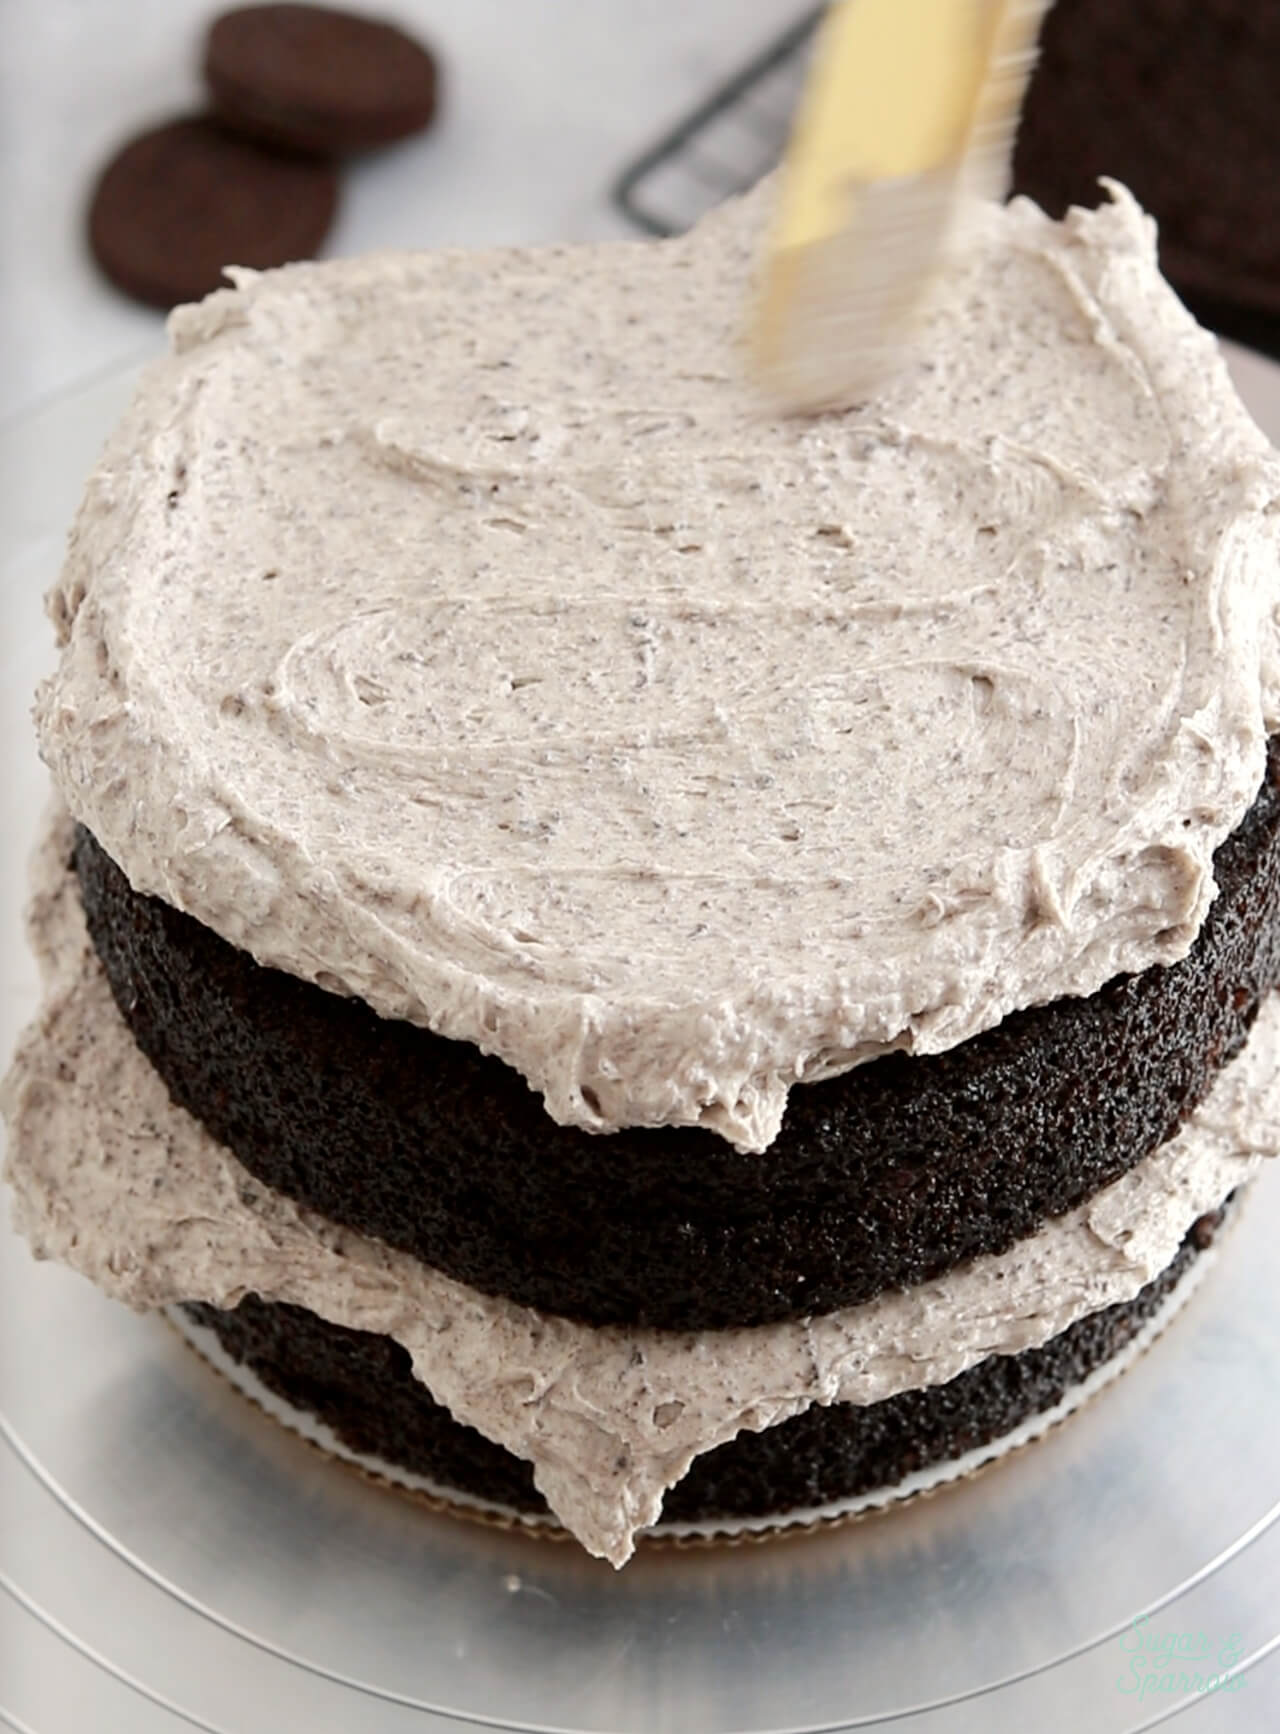
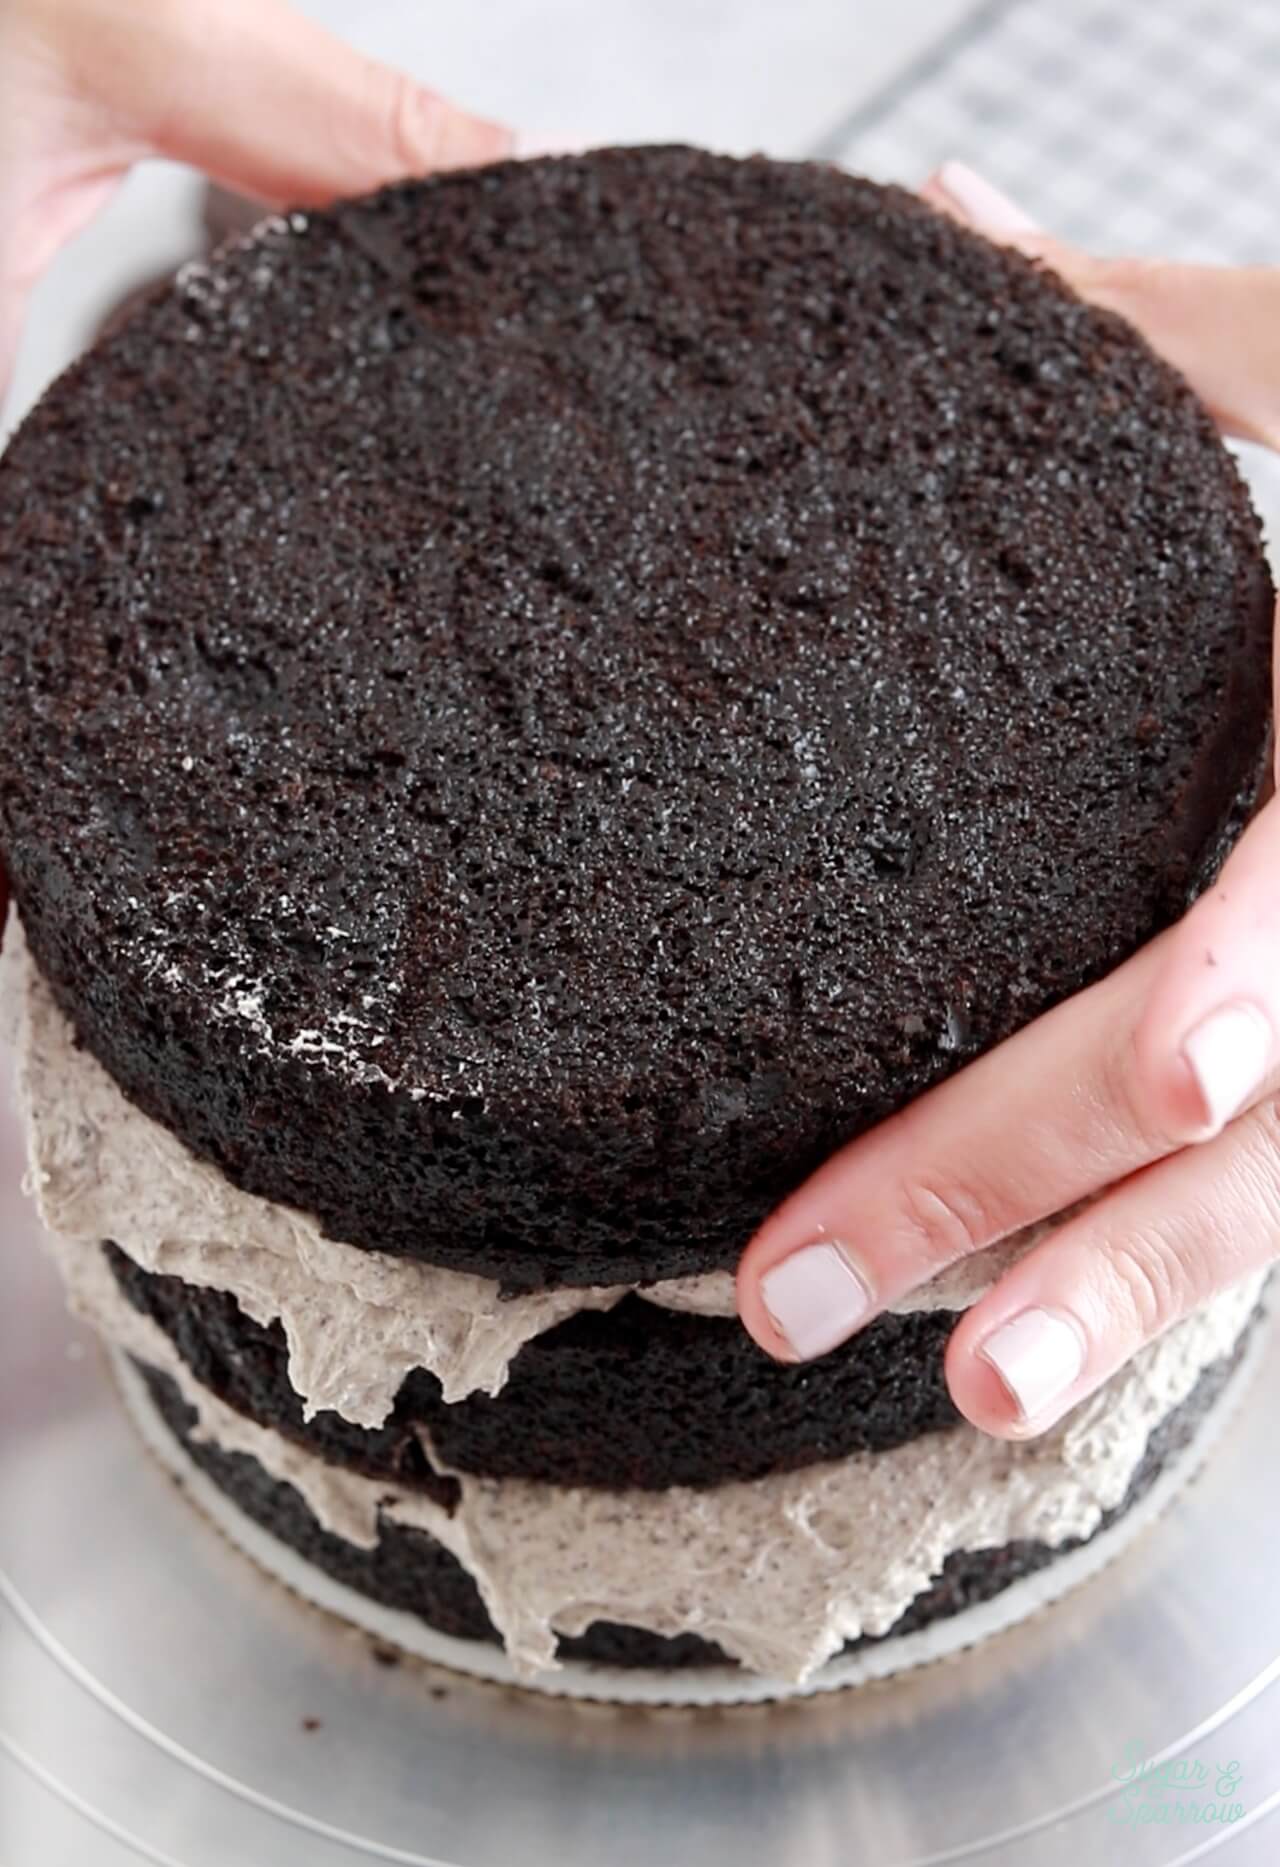
Step 1: Fill and Stack the Cake. Use the cookies and cream buttercream to fill and stack the black velvet cake layers, then crumb coat the cake. Chill the crumb coated cake in the refrigerator for about 20 minutes to lock in the perfect shape before frosting. 
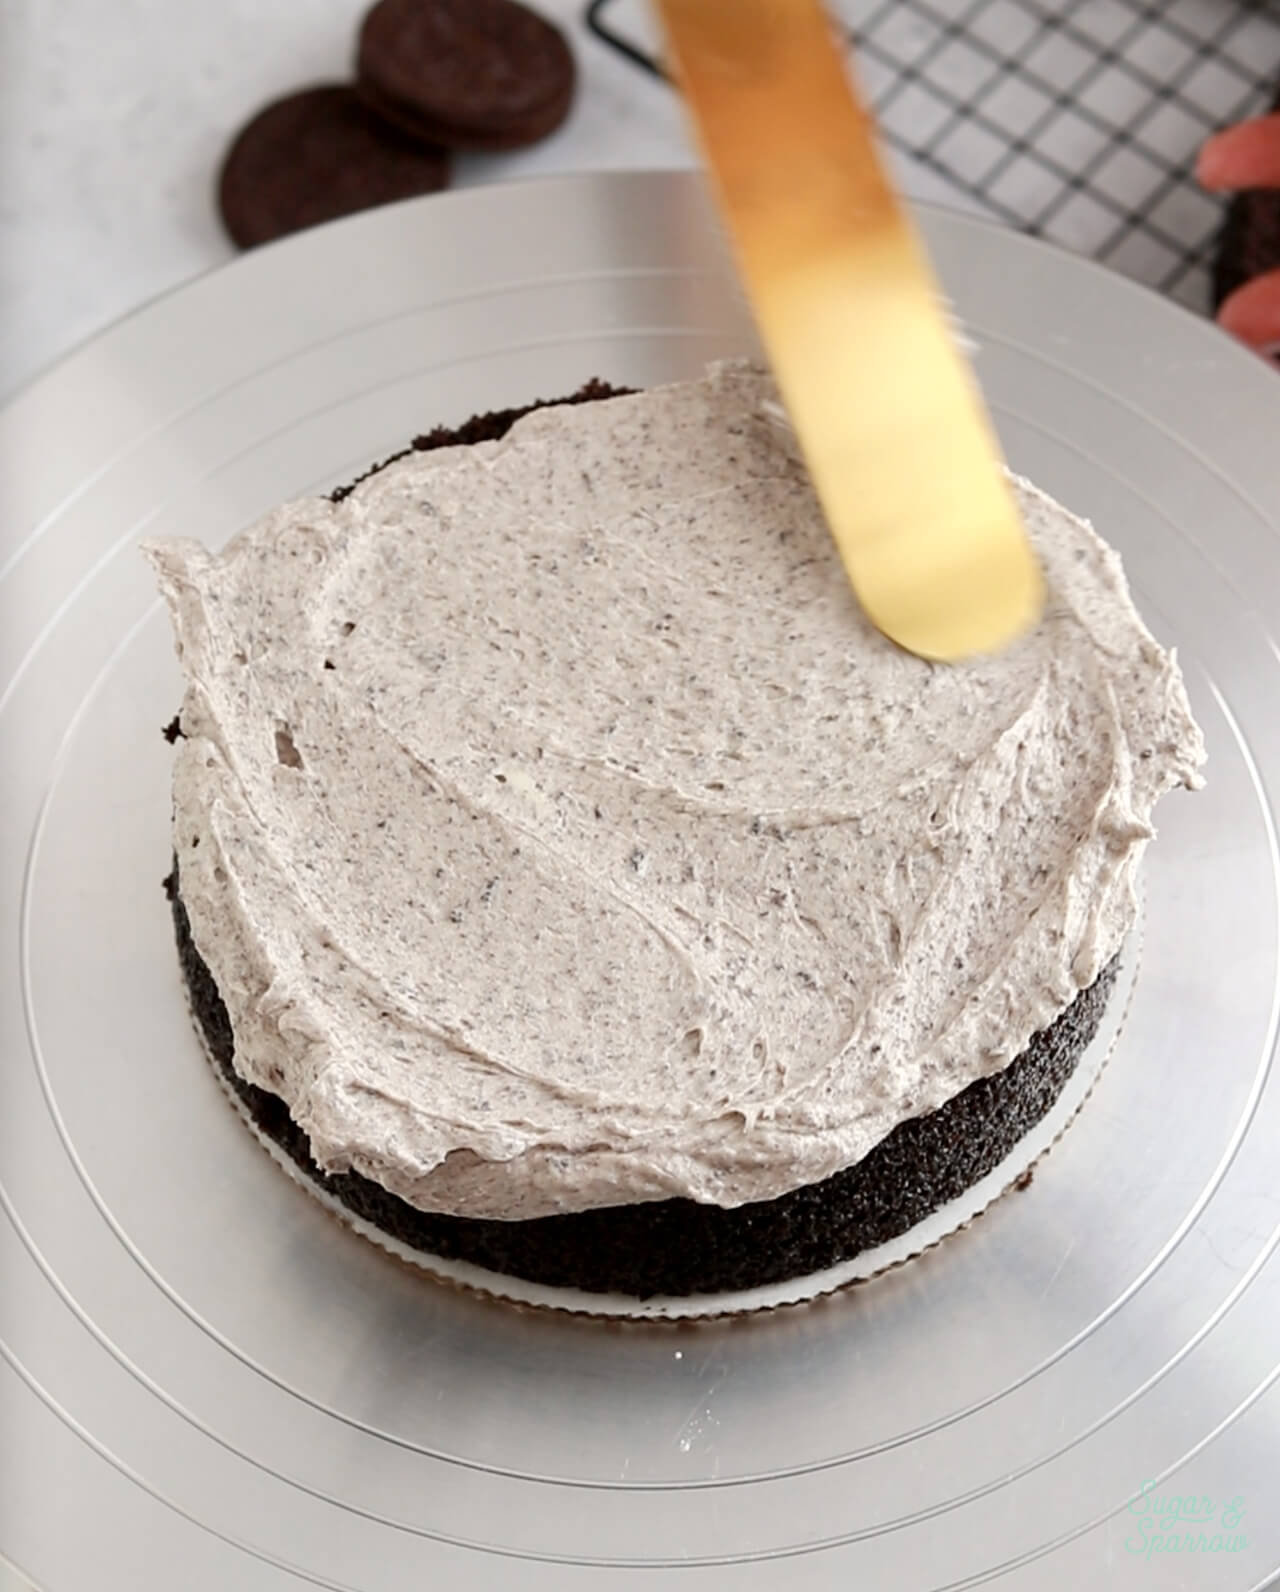
filling and stacking a cake with buttercream
how to build a layer cake
spreading buttercream filling in between cake layers
placing the final cake layer upside down on a layer cake

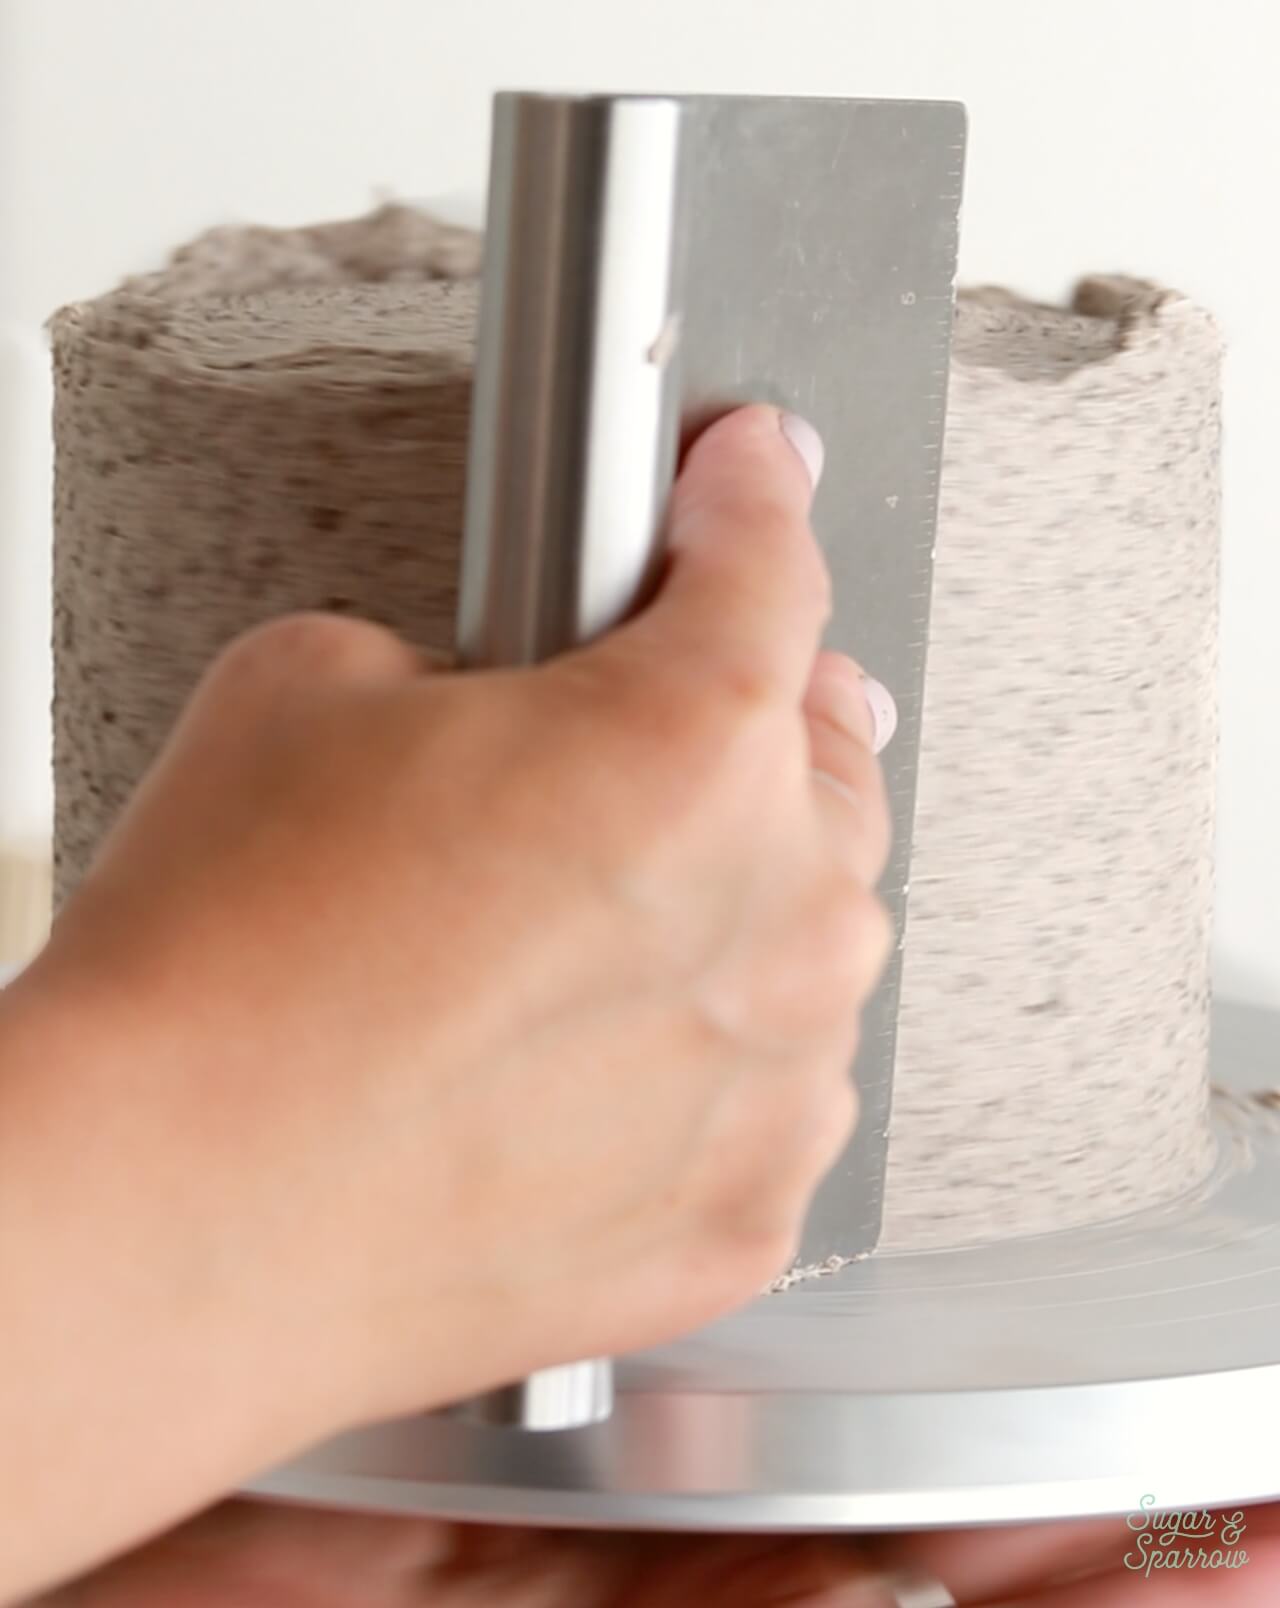
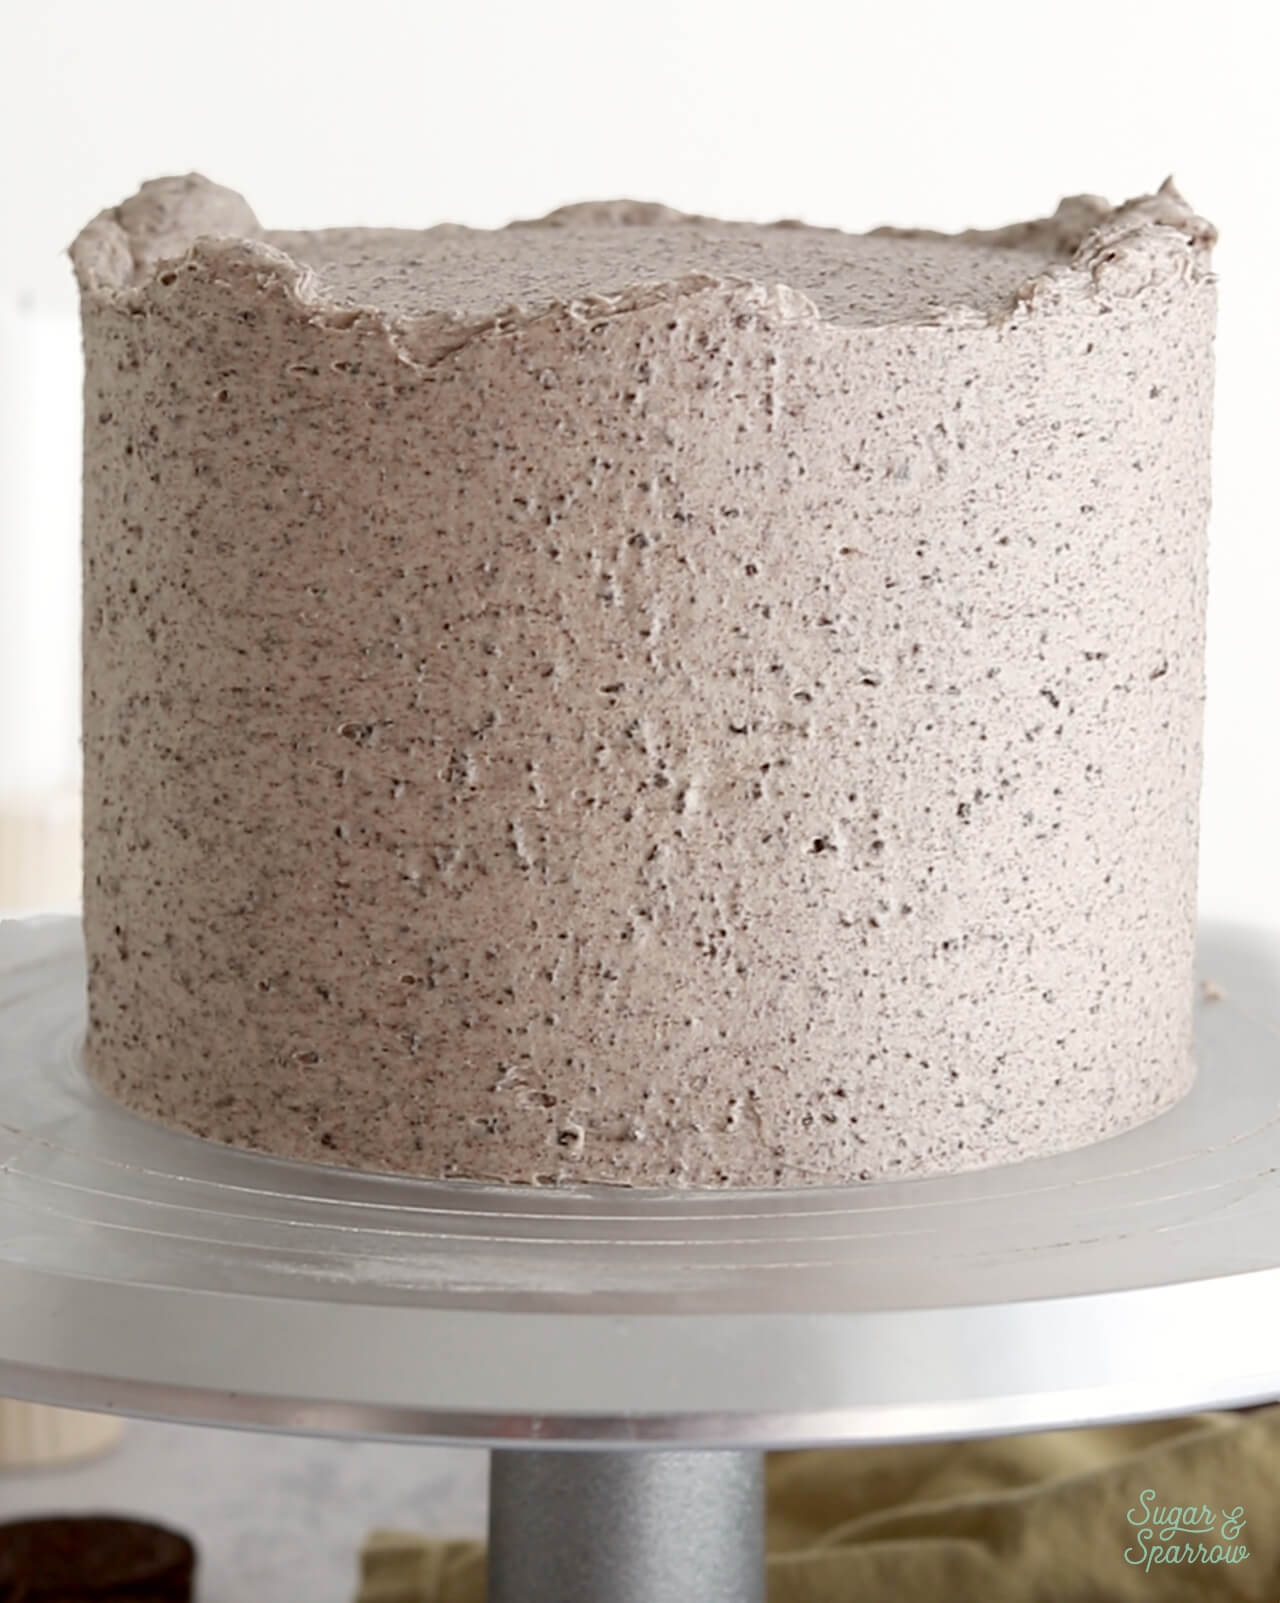
Step 2: Frost the Cake. Use an icing smoother to frost a smooth buttercream finish with cookies and cream buttercream. The cookie crumbs somehow make it really easy to frost smooth! 
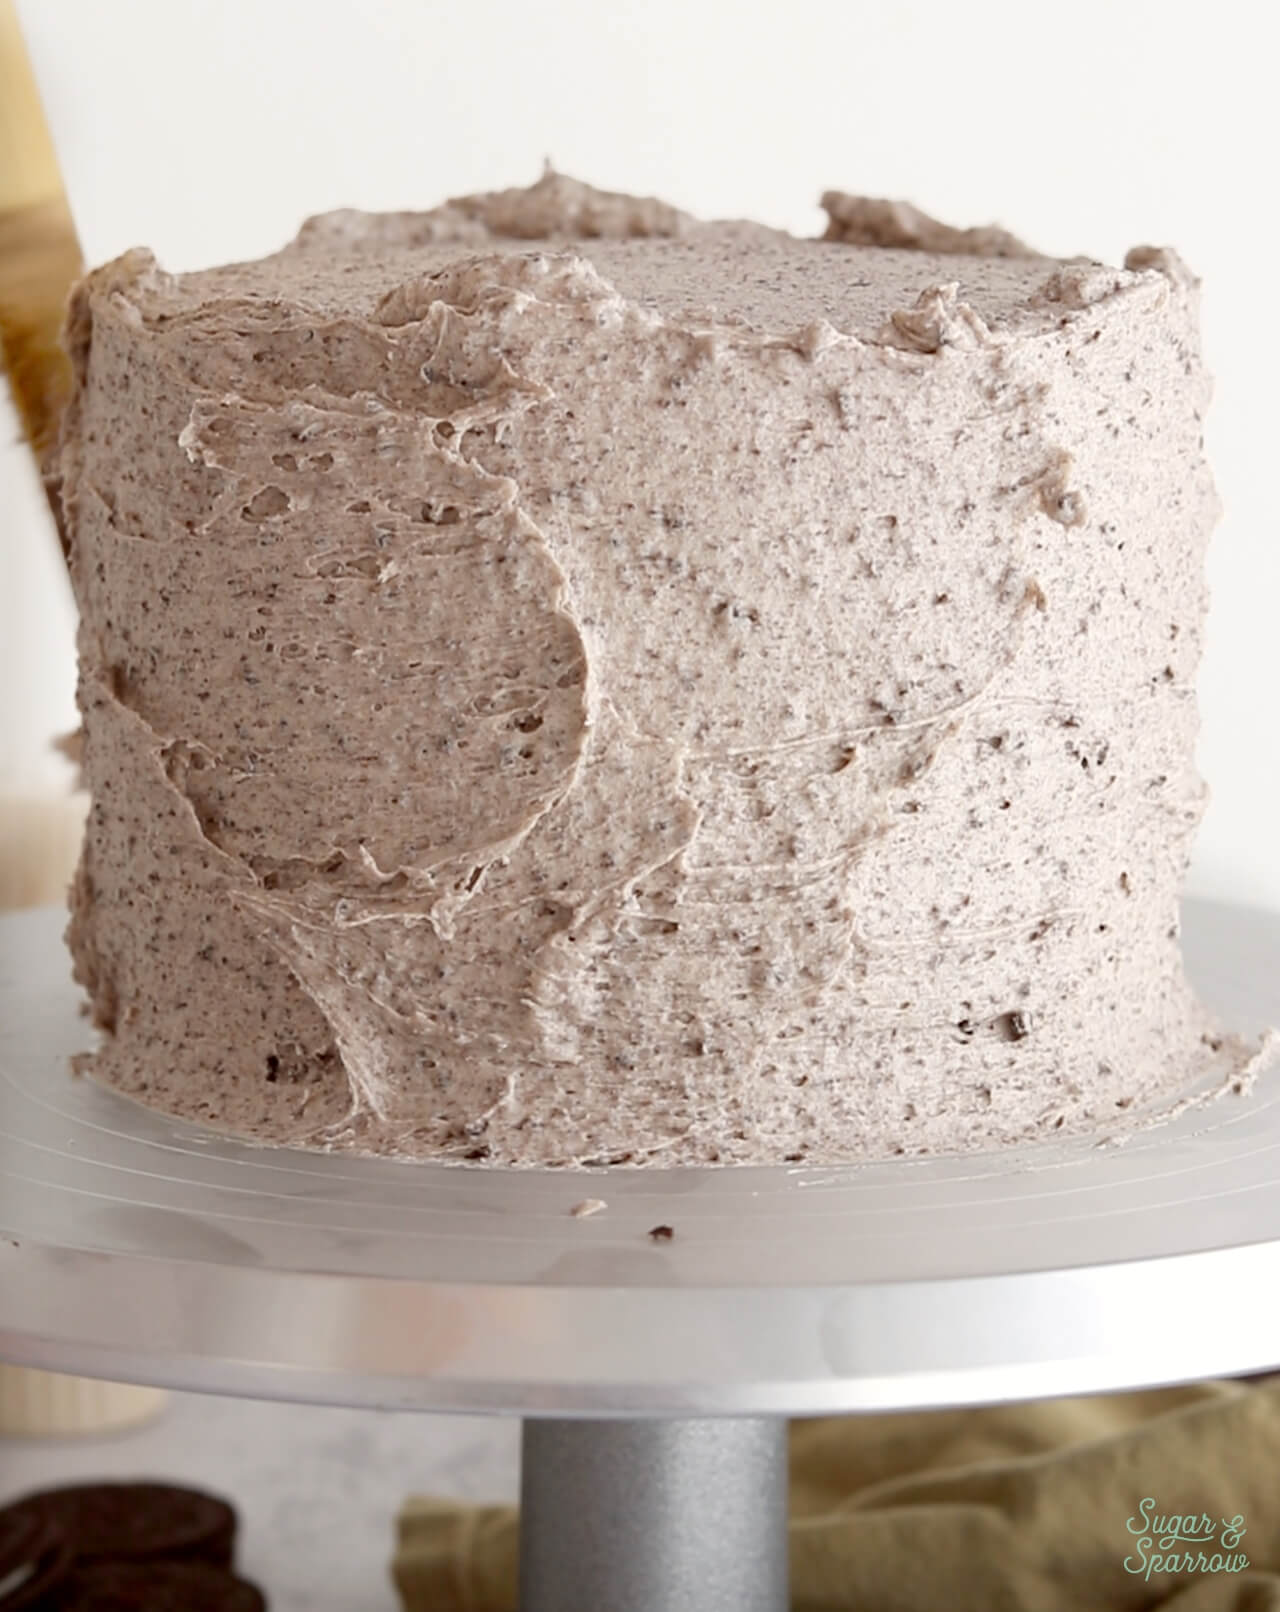
frosting a cake with oreo buttercream
smoothing icing on oreo cake
cookies and cream buttercream smooth frosting

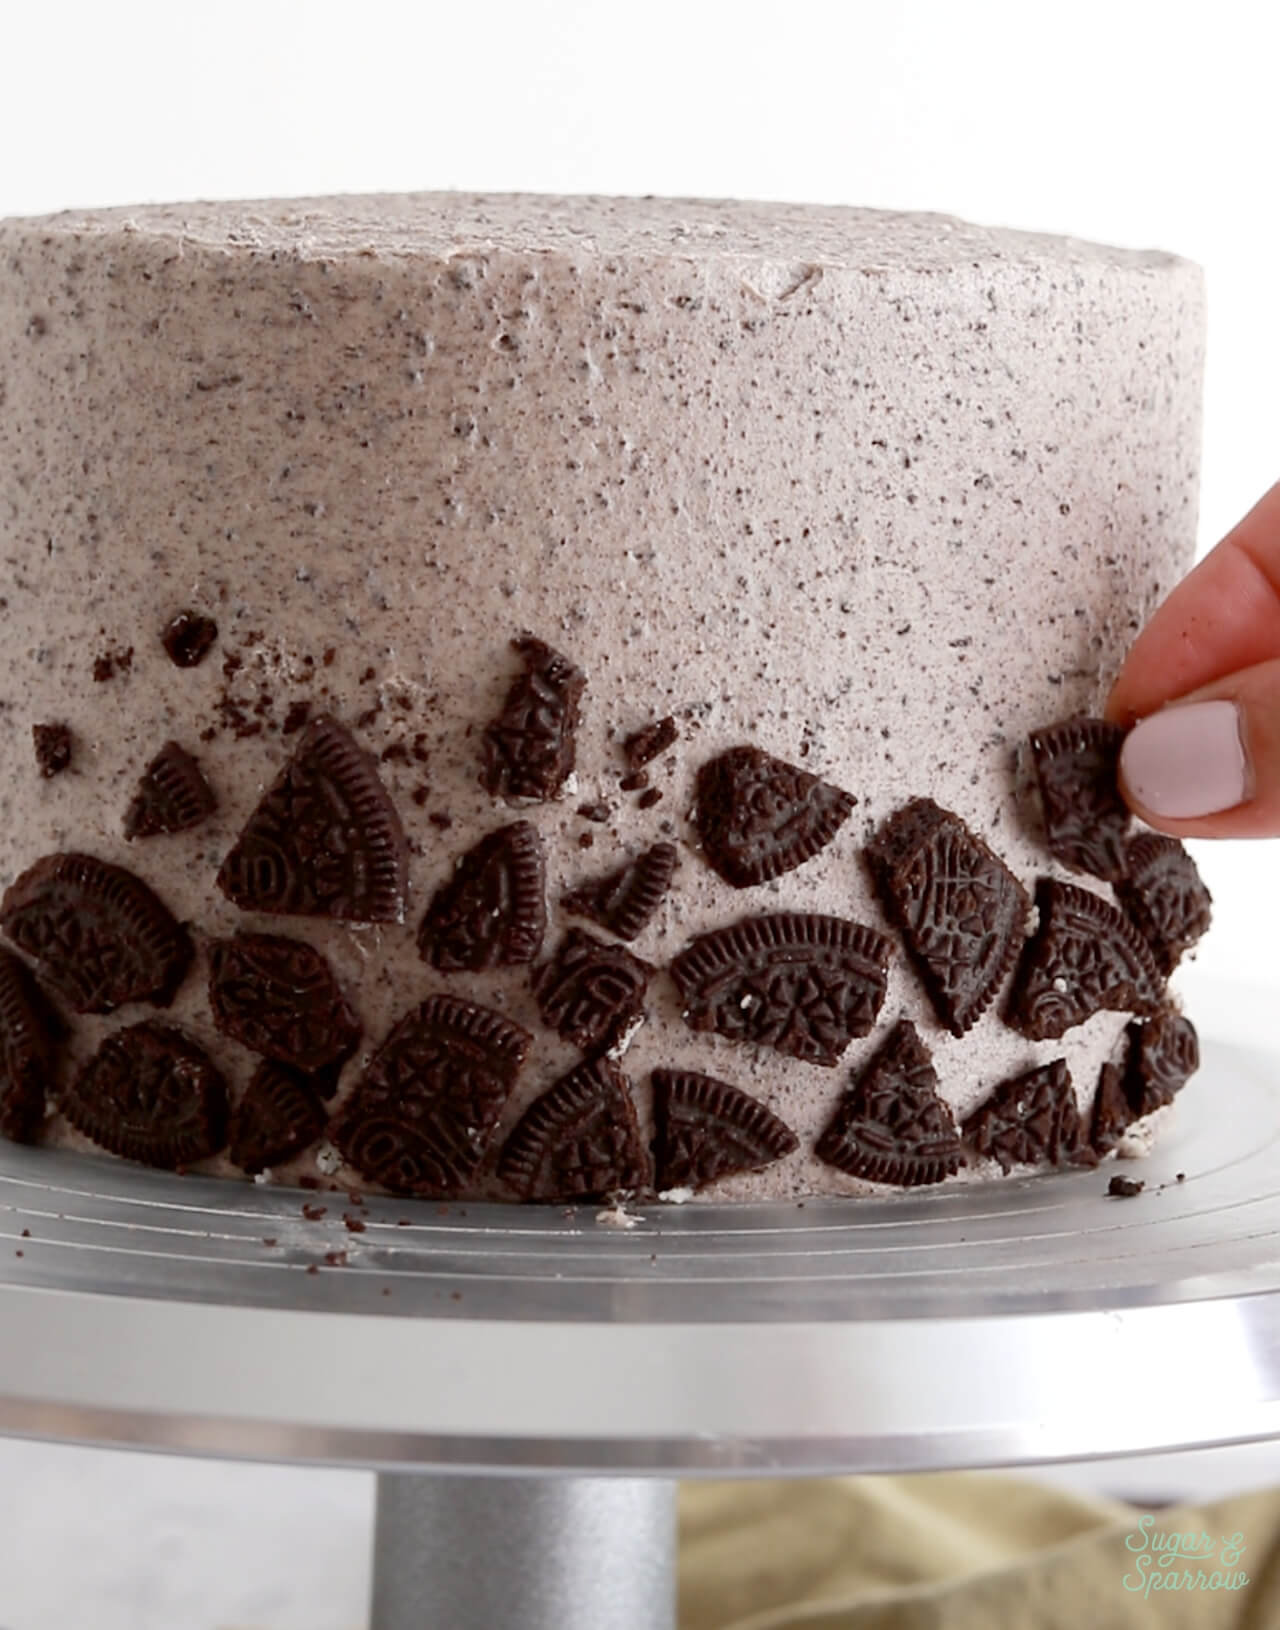
Step 3: Create the Oreo Cookie Mosaic. Chop up some Oreo cookies into randomly sized pieces and place them along the bottom third of the cake in a mosaic pattern. I spaced mine about ⅛ to ¼ inch apart. I also placed some of the smaller pieces and crumbs toward the top of the mosaic. 
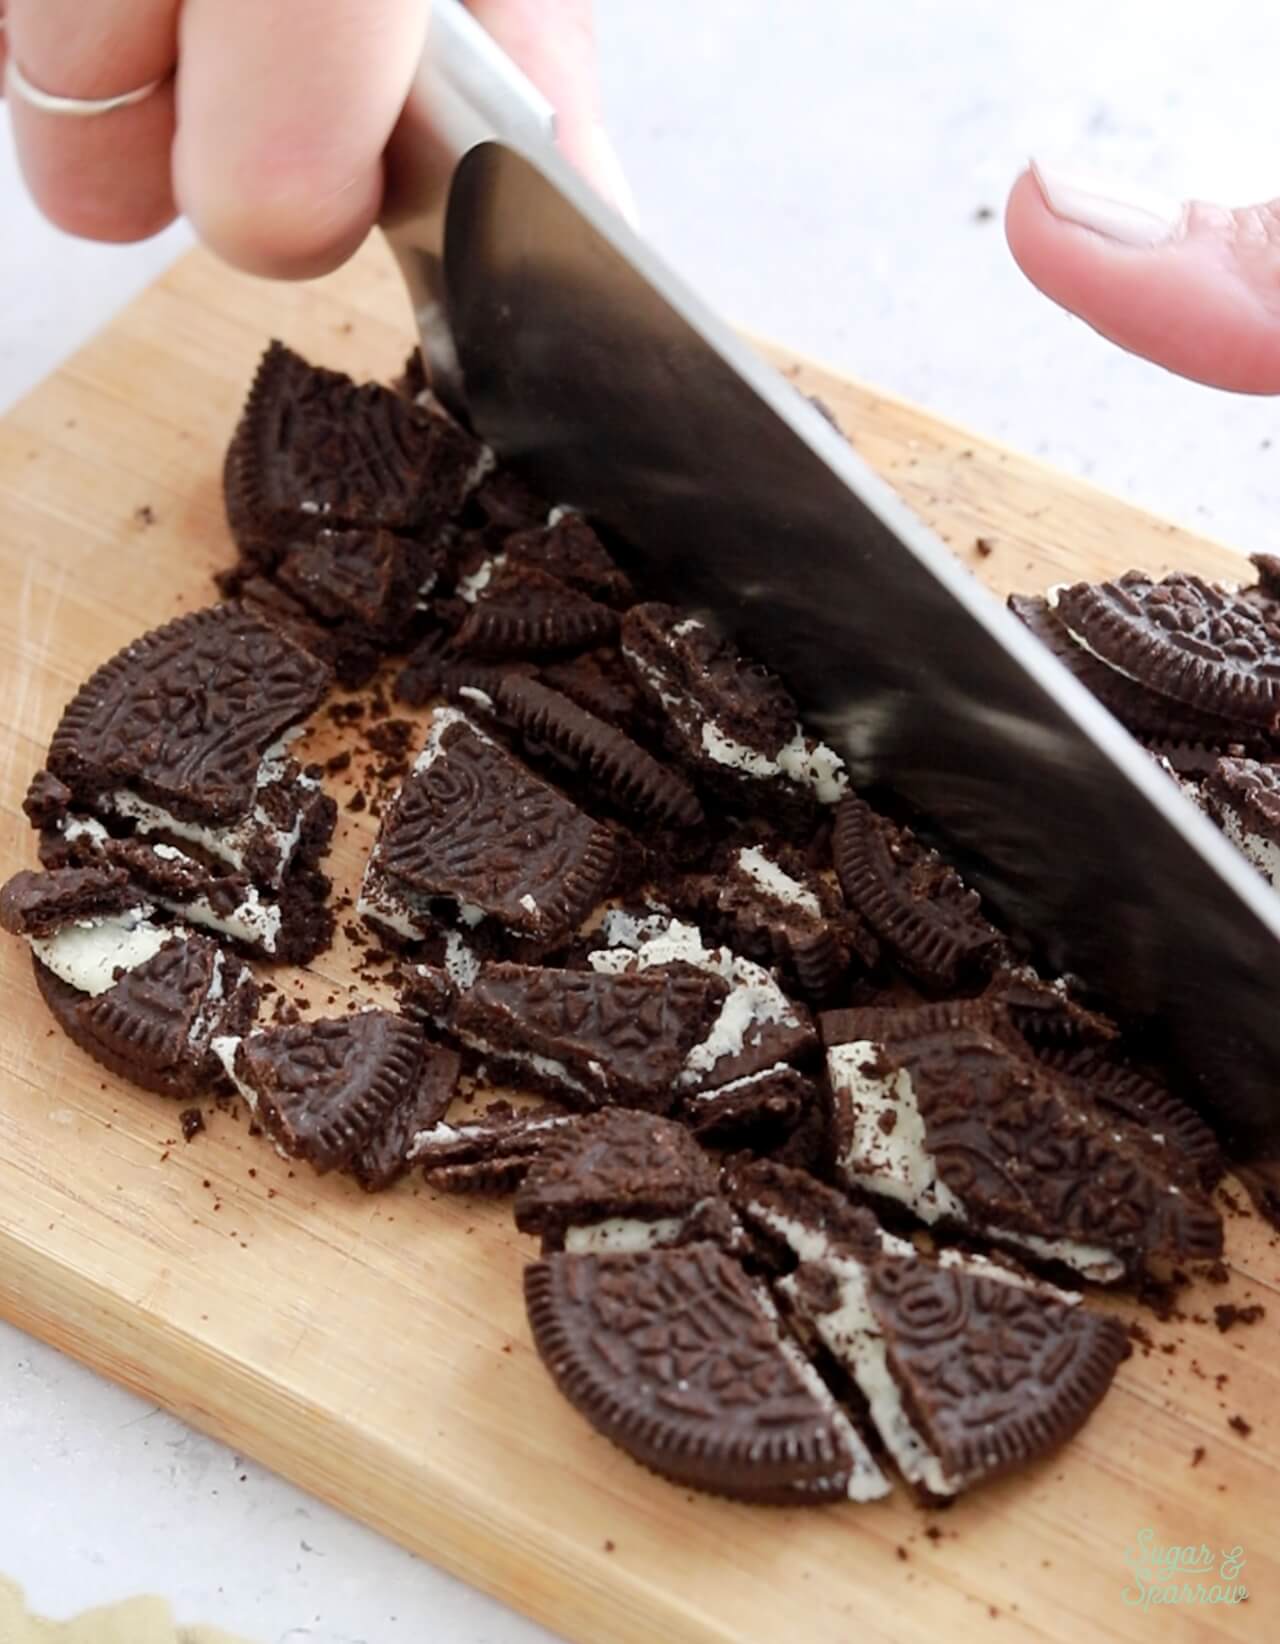
chopping oreo cookies
decorating a cake with oreo cookies

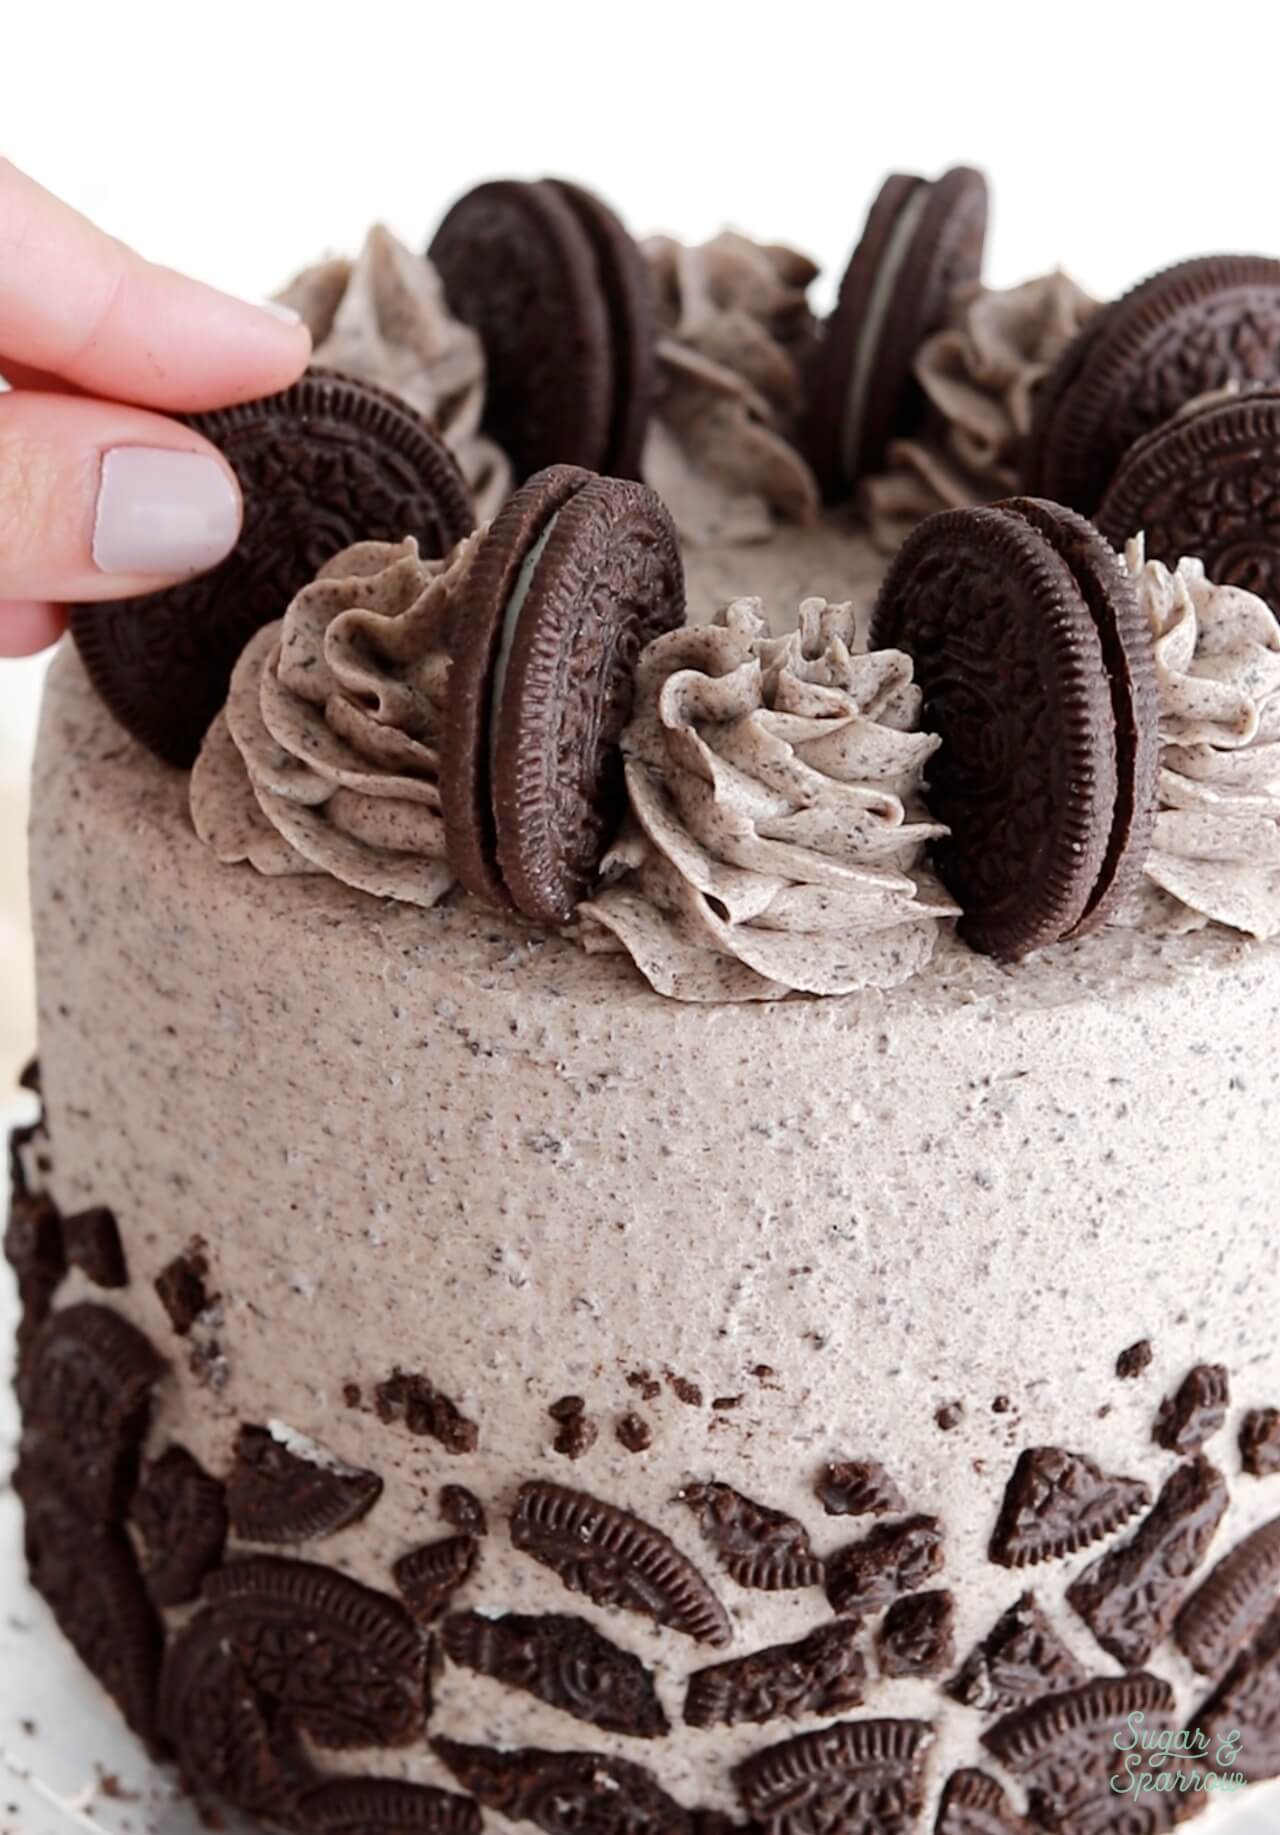
Step 4: Pipe Swirls and Top with Oreo Cookies. Fit a piping bag with Wilton Tip 1M (or other piping tip of your choice) and fill it with the remaining cookies and cream buttercream. Pipe swirls on top of the cake spaced about ¼ inch apart, then place a whole Oreo cookie between each swirl. 
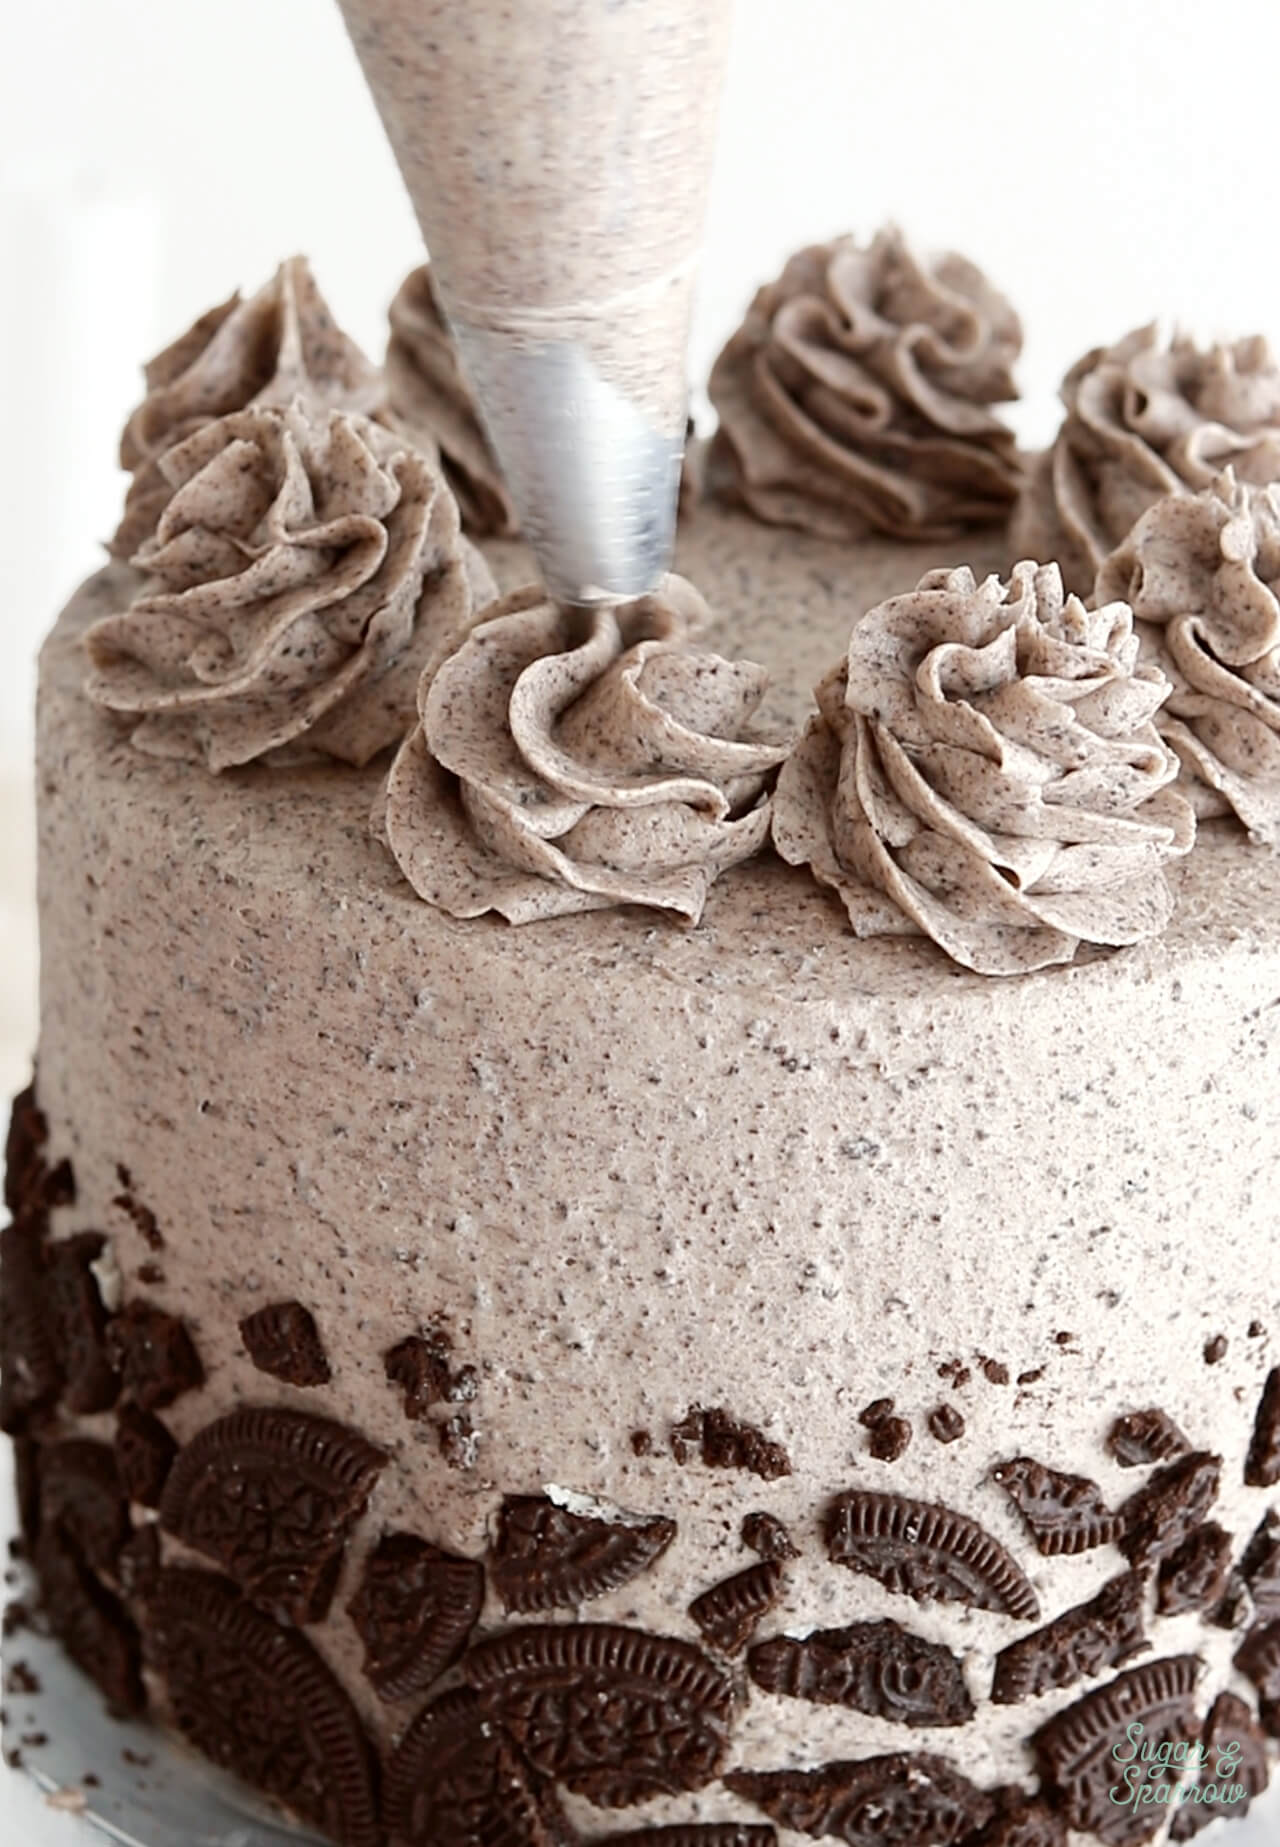
Piping swirls with Wilton Tip 1M and oreo buttercream
placing oreos onto cake
oreo cookie cake recipe by sugar and sparrow

More Oreo Recipes You’ll Love

If you love Oreos as much as I do, you’ll want to add these recipes to your baking list:

  • Oreo Cupcakes
  • Easy Oreo Icebox Cake
  • No-Bake Oreo Cheesecake
  • 4-Ingredient Oreo Truffles
  • Vegan Chocolate Oreo Cake
  • Mint Chocolate Chip Ice Cream Cake (with Mint Oreos!)
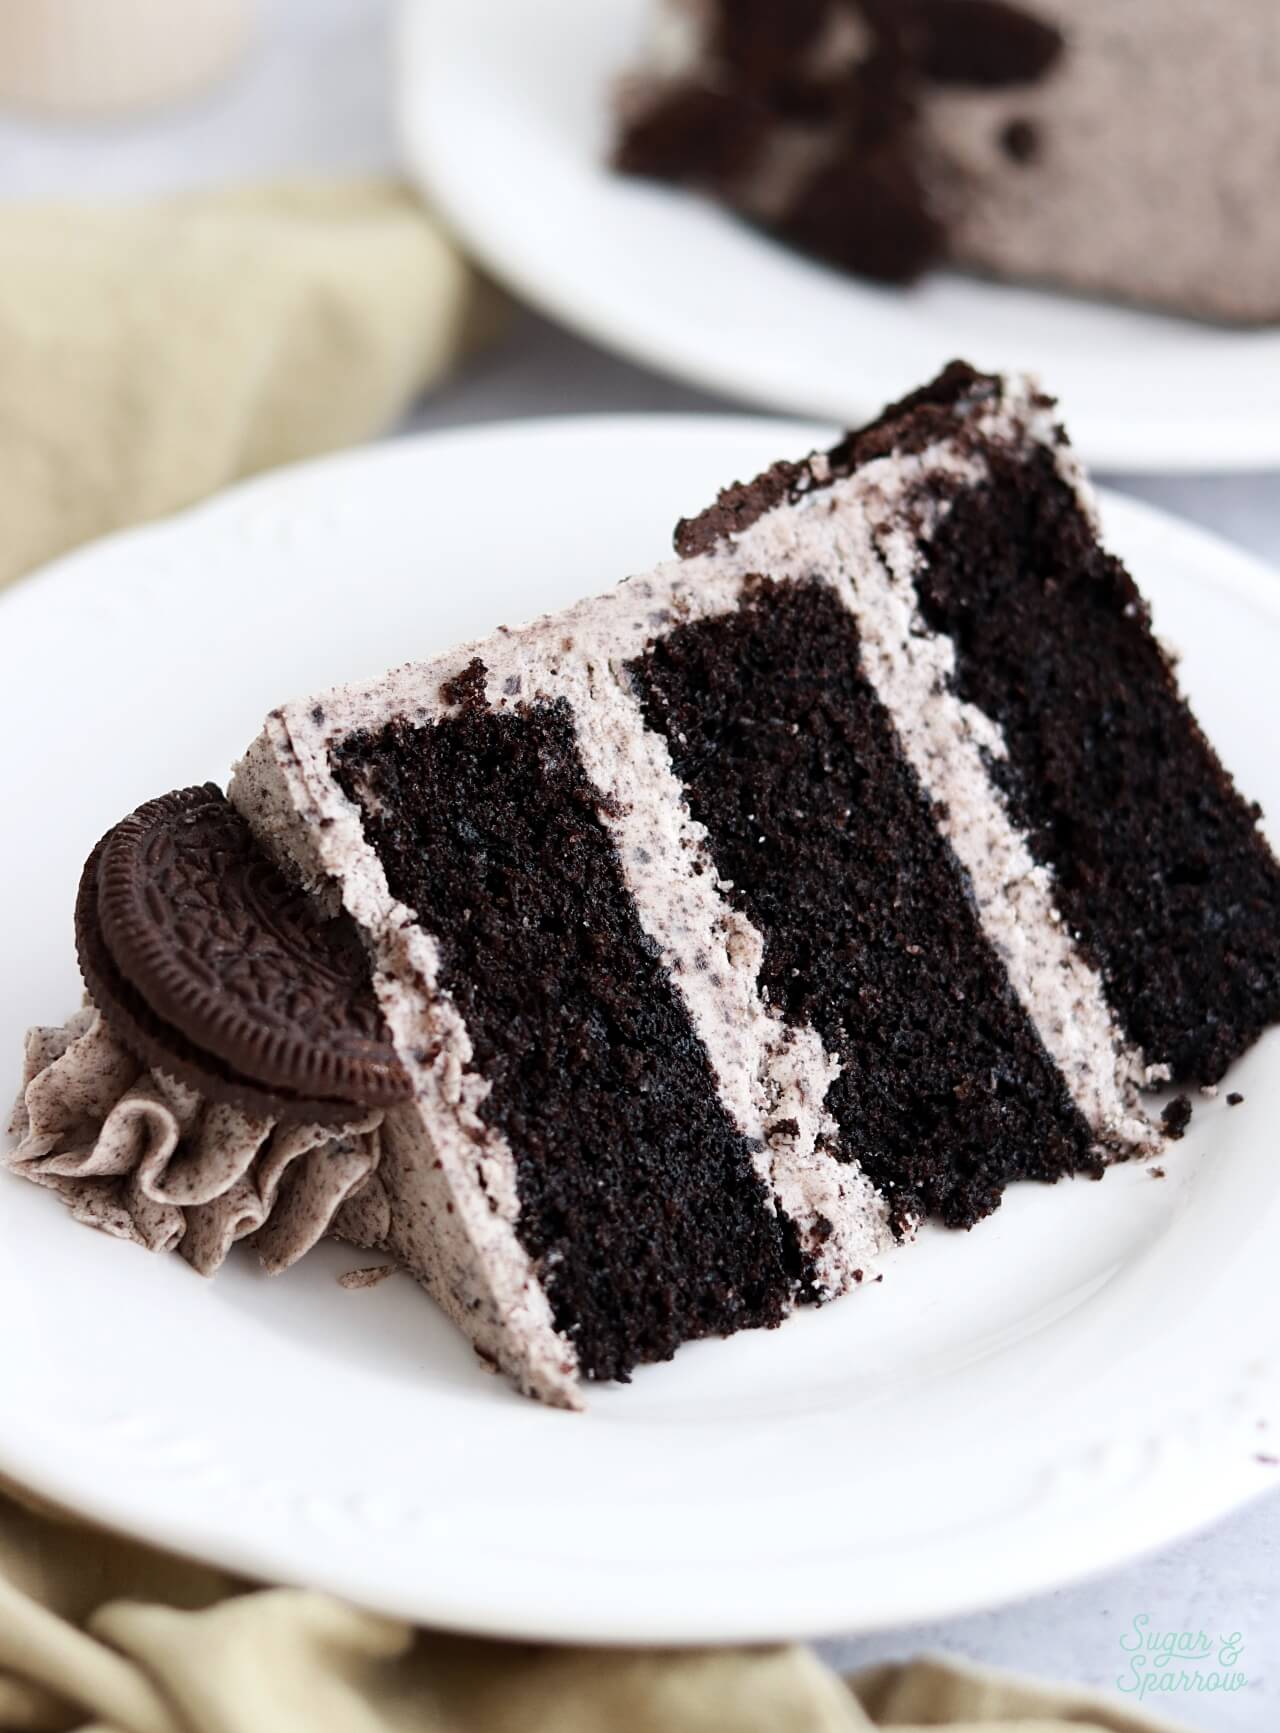
oreo cookie cake slice

Let me know if you make this chocolate Oreo cake in the comments below! And feel free to tag @sugarandsparrowco on Instagram to show me a photo. I love to see what you create with my recipes!
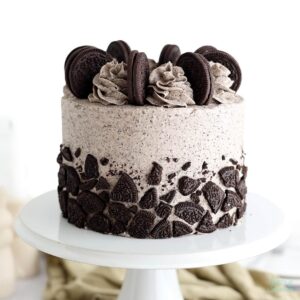
oreo cookies and cream cake

Oreo Layer Cake Recipe

5 from 10 votes
Layers of moist and decadent black velvet cake that tastes just like an Oreo cookie shell, filled and frosted with cookies and cream buttercream. The perfect cake for any Oreo lover!
Print Recipe Pin Recipe
Prep Time:30 minutes mins
Cook Time:30 minutes mins
Cooling Time:3 hours hrs
Total Time:4 hours hrs
Course: Dessert
Cuisine: American

Ingredients

Black Velvet Cake

  • 2 Cups (265g) all purpose flour
  • 1 2/3 Cups (340g) white granulated sugar
  • 2/3 Cup (60g) black cocoa powder* or Dutch-processed cocoa powder
  • 2 tsp baking soda
  • 1 tsp baking powder
  • 1/2 tsp salt
  • 1/2 Cup (120ml) vegetable oil
  • 2 large eggs, room temperature
  • 1 1/2 tsp pure vanilla extract
  • 1 Cup (240ml) full-fat buttermilk*, room temperature DIY recipe in the notes
  • 1 Cup (240ml) hot coffee or hot water

Cookies & Cream Buttercream

  • 13 Oreo cookies (139g)
  • 1 1/2 Cups (339g) unsalted butter, room temperature
  • 4 1/2 Cups (540g) powdered sugar
  • 3 tsp vanilla extract
  • 3 Tbsp whole milk, room temperature
  • pinch of salt, or to taste

Garnish (Optional)

  • 12 Oreo cookies

Instructions

Make The Black Velvet Cake

  • Preheat the oven to 350ºF (177ºC) and prepare three 6-inch or two 8-inch cake pans by spraying the sides with cooking spray and fitting the bottoms with a wax paper or parchment cake circle. 
  • Place all of the dry ingredients into the bowl of a stand mixer and stir on low for 30 seconds to fully combine them. Add the vegetable oil, eggs, vanilla, and buttermilk and mix on low until just combined. With the mixer still on low, add the hot coffee (or hot water) in a slow stream, then turn the mixer to medium and beat until smooth, about 2 minutes. The batter will be very thin. 
  • Pour into prepared cake pans no more than 2/3 full and bake for 32-36 minutes, until a wooden toothpick inserted comes out clean. Cool completely.

Make The Cookies & Cream Buttercream

  • Place the Oreo cookies into a food processor and grind them into fine crumbs. It's important to get the crumbs as small as possible without over-grinding (which can turn them into an Oreo paste).
  • In the bowl of a stand mixer fitted with the paddle attachment (or with a large bowl and hand mixer), cream the butter on medium-high speed until it's creamy and pale in color, about 5 minutes. Scrape down the bowl and paddle as needed.
  • Add the powdered sugar a few cups at a time, mixing on low speed and scraping down bowl and paddle in between intervals. Keep the mixer on low speed and add the vanilla, milk, and salt. Mix until fully incorporated and uniform, 1-2 minutes, scraping down the bowl and paddle as needed.
  • Mix in the Oreo cookie crumbs on low speed until uniform and well-dispersed.

Assembly

  • Once the black velvet cake layers are completely cooled, level them to your desired height. Add a swipe of cookies and cream buttercream onto a cardboard cake circle and place the first cake layer on top. Fill and stack the cake with cookies and cream buttercream, then crumb coat the cake. Refrigerate the cake for 15-20 minutes to let the crumb coat firm up before frosting the cake with the rest of the cookies and cream buttercream.
  • To create the look pictures, frost a smooth buttercream finish onto the cake. Reserve 8 Oreo cookies for the top of the cake, then chop the rest into pieces of various size and shape. Press the chopped cookies onto the bottom third of the cake in a mosaic pattern. Place the remaining cookies & cream buttercream into a piping bag fitted with Wilton Tip 1M and pipe swirls around the top of the cake, spaced about 1/4 inch apart. Place an Oreo cookie in between each swirl.

Notes

*Black Cocoa Powder: I get my black cocoa powder on Amazon. If you don’t want to get it online, you can substitute it with an equal amount of Hershey’s Special Dark Cocoa Powder or Dutch-processed cocoa powder, either of which can be found at most grocery stores. Just keep in mind that if you use those substitutes the cake will be dark brown in color, not black. 
*DIY Buttermilk Recipe: add 1 Tbsp of white vinegar to a jar and top it with 1 Cup of whole milk. Stir and let sit for at least 15 minutes before using in the recipe. 
Make Ahead Tips:
  1. The black velvet cake layers can be made ahead and stored at room temperature, covered tightly in plastic wrap, for up to two days. Alternatively, you can cover with plastic wrap and store in the freezer for up to two months before thawing to room temperature.
  2. The cookies & cream buttercream can be made ahead and stored at room temperature in an airtight container for up to one day. Alternatively, you can store it in an airtight container in the refrigerator for up to two weeks. When you’re ready to use it, bring it back to room temperature and re-whip with your stand mixer to bring it back to frosting consistency. 

To Make as Cupcakes: fill the cupcake tins no more than 2/3 full and bake at 350ºF (177ºC) for 14-18 minutes. This recipe will make 28-30 cupcakes. If you’d rather make a smaller batch, use this recipe!

By: Whitney · In: Cake, Featured, Recipes · Tagged: cake decorating, cake recipe, chocolate cake recipe, chocolate ganache, chocolate ganache drip cake, cookies and cream buttercream, cookies and cream cake, cookies and cream cake recipe, oreo buttercream, oreo cake, oreo cake recipe, oreo cookies, oreos

you’ll also love

the best vanilla cupcakes recipeThe Perfect Vanilla Cupcake Recipe
vanilla oreo cake with cookies and cream buttercreamCookies & Cream Cake (Vanilla Oreo Cake)
pumpkin layer cake recipe by sugar and sparrowPerfect Pumpkin Layer Cake Recipe

Join the List

Stay up to date & receive the latest posts in your inbox.

Reader Interactions

Comments

  1. Alice says

    April 3, 2026 at 8:58 am

    hey whitney, I’m trying to bake this cake right now but something feels not right about the recipe, it says that 2 cups of flour is needed and written 265g in the brackets and 1 2/3 cups of sugar and 340g in brackets which doesn’t make sense at all 2 cups is more than 1 2/3 cups and 265g is less than 340g i know you probably won’t reply in time but i’d still like to know and thank you

    Reply
    • Whitney says

      April 3, 2026 at 10:20 am

      Hi Alice! Different ingredients weigh different amounts by volume. For example, 1 Cup of granulated sugar (200 grams) is going to weigh more than 1 Cup of all purpose flour (132 grams). Sugar is just more dense and heavy in comparison. I always bake by weight using the gram measurements in the brackets, so these metric measurements are accurate and trustworthy. I hope this helps explain!

      Reply
  2. Sharon Rensing says

    March 21, 2026 at 4:29 pm

    Such a good, easy to follow recipe! I added a chocolate ganache and it looks so beautiful!!

    Reply
    • Whitney says

      March 21, 2026 at 6:39 pm

      Yay, Sharon! I’m so happy you loved this recipe. A ganache drip sounds perfect!!

      Reply
  3. Chelsea P says

    January 17, 2026 at 4:48 pm

    Hello! I’d like to make this cake this weekend for my daughter’s 13th (!!) birthday, but I was hoping to use three 9″ pans. Could I please ask what adjustment I’d need to make to the recipe? Would a 1.5x do it, or would I need to double it? Thank you!!!

    Reply
    • Whitney says

      January 17, 2026 at 9:00 pm

      Hi Chelsea! 1.5x the recipe will be the perfect amount. Use the same oven temp and start checking for doneness around the 30 minute mark. Enjoy!

      Reply
  4. Suzette says

    November 15, 2025 at 6:51 pm

    Hi! Wondering if you have this recipe for a mini cake version? Like your funfetti one 🙂

    Reply
    • Whitney says

      November 15, 2025 at 10:05 pm

      Hi Suzette! I don’t have an official mini cake version BUT you could easily halve the Oreo frosting recipe from this recipe and pair it with my small batch black velvet cake: https://sugarandsparrow.com/mini-black-velvet-cake-recipe/

      Reply
  5. Holly says

    October 15, 2025 at 5:23 pm

    Hi Whitney! Thanks for this recipe. I plan on making it this weekend! Any advice on storage of this cake or how long it can be kept on the counter? Should it be room temperature prior to serving or straight from the fridge? Thanks!

    Reply
    • Whitney says

      October 16, 2025 at 6:12 pm

      Hi Holly! Excited for you to make this cake. Once decorated, I usually store this cake in the refrigerator until about 2 hours before serving. It tastes best at room temperature. It can technically be kept on the counter (covered) for a few days since the sugar content helps preserve what little dairy is in the buttercream. Hope that helps!

      Reply
      • Holly says

        October 17, 2025 at 6:15 pm

        Thanks Whitney for your fast response! Is this recipe for the frosting enough to just crumb coat or also for decorations? Will decorate tomorrow!

        Reply
        • Holly says

          October 17, 2025 at 6:29 pm

          Sorry Whitney, I see the answer below!

          Reply
          • Holly says

            October 18, 2025 at 6:45 pm

            It was a success Whitney! My family absolutely loved it! Thank you so much!! The cake was so moist and fluffy at the same time. Will definitely be saving this recipe. Thank you again!

          • Whitney says

            October 22, 2025 at 12:03 pm

            Yay, Holly! I’m so happy to hear that!! Thanks for letting me know 🙂

  6. Suzanne de Silva says

    October 14, 2025 at 2:08 pm

    Hi. I’m going to make this cake tomorrow and I have a couple of questions.

    When you grind up the Oreo cookies for the buttercream, is it just the cookies or the cream as well? If it’s just the cookies, is it 13 halves of an Oreo cookie or both chocolate halves of 13 Oreos(26 halves/pieces)?

    Does it matter if I use regular Oreos or Double Stuff Oreos?

    Thanks!

    Reply
    • Whitney says

      October 14, 2025 at 3:19 pm

      Hi Suzanne! I’m excited for you to make this cake! I have made the frosting both ways – scraping the filling out before grinding the cookie pieces, and leaving the filling in and grinding the whole cookie. I didn’t notice much of a difference between the two methods, so for the sake of ease these days I usually just grind up 13 whole cookies. I haven’t tried it with Double Stuff Oreos but they should work just fine!

      Reply
  7. JJ says

    October 9, 2025 at 10:37 pm

    Hi, I have some leftover full fat sour cream. I mix 1/2 cup sour cream and 1/2 cup whole milk to sub for 1 cup buttermilk in pancakes. Do you think O can do the same for the Oreo cake recipe? Thank you so much! I went out today to get a 3rd 6×3 pan just to make this cake. 🙂

    Reply
    • Whitney says

      October 10, 2025 at 8:24 am

      Hi JJ! Yes, you can absolutely do that substitution for the buttermilk in this recipe. Enjoy!!

      Reply
  8. Cynthia says

    September 1, 2025 at 4:13 pm

    5 stars
    This cake is wonderful! I got my black cocoa powder off Amazon since I couldn’t find it at my local market. I went with the three layer 6 inch cake. You guys! The cake is fantastic! It was so moist and delicious. Even with putting it in the fridge, it was still very soft and moist. The frosting, oh my gosh! So so good!!! The recipe if made to the last detail with the frosting you’ll have enough to do your cake, I had a little bit leftover. I made my cake the same as in the photos. This one’s a keeper for sure!!!

    Reply
    • Whitney says

      September 3, 2025 at 9:05 am

      I’m so happy you loved this recipe, Cynthia! Thanks so much for letting me know!

      Reply
  9. Genesis says

    August 8, 2025 at 1:28 pm

    Hi! Would it be possible to make this recipe eggless?

    Reply
    • Whitney says

      August 10, 2025 at 8:25 pm

      Hi Genesis! I haven’t tried an eggless version of this recipe but you could sub the cake layers for this eggless chocolate cake recipe and have a delicious chocolate oreo cake: https://sugarandsparrow.com/eggless-chocolate-cake-recipe/

      Reply
  10. Ryan-Michelle says

    April 16, 2025 at 2:37 pm

    Hello! I’m hoping you can help! I need to convert this to a recipe that I can use with Dutch process cocoa.

    Unfortunately, there is no natural cocoa available in my area right now. I’ve looked everywhere with no luck and the prices on Amazon are through the roof ($30 for 8 oz!).

    I can’t seem to wrap my brain around the science of converting it – any help you can offer would be greatly appreciated!!

    I’ve relied in your recipes for a few years now (they’re all so perfectly amazing!) and your tutorials/cake basics lessons have been so helpful! Thanks for all your work and content you put out!

    Reply
    • Whitney says

      April 16, 2025 at 4:15 pm

      Hi Ryan-Michelle! This recipe actually can be made with Dutch process cocoa powder. When I originally wrote this recipe in 2019 I hadn’t tested it with Dutch process cocoa and was under the impression that it wouldn’t work, but I’ve made it tons of times with Dutch process cocoa with great success. I’ve updated the recipe to reflect that it can be made with both. Enjoy!

      Reply
  11. Julie says

    May 28, 2024 at 7:02 pm

    5 stars
    I made this for my sister in laws birthday and it was a BIG HIT! Even family who say they don’t like chocolate loved it. I’m wondering if I can make this into cupcakes. How much would the batter yield (I only need 12), and how long to bake at what temperature? Thanks for the great recipes!

    Reply
    • Whitney says

      June 2, 2024 at 2:30 pm

      Yay, Julie! I’m so happy this was such a hit! This recipe makes great cupcakes, but it will make quite a lot of them (about 28). You can half the recipe to make about 14 cupcakes. Fill the tins no more than 2/3 full and bake at 350F for 14-18 minutes. Enjoy!

      Reply
  12. Jasmine says

    February 4, 2024 at 12:09 pm

    Hi, hoping to make this cake for an order I have the weekend! The temp of your oven so that for fan assisted? X

    Reply
    • Whitney says

      February 4, 2024 at 9:45 pm

      Hi Jasmine! The temperature specified in this recipe is for a conventional oven, you’ll need to lower it for a fan assisted oven. Here’s some more info I found about how to convert the temperature: https://www.marthastewart.com/8071049/convection-oven-recipe-conversion

      Reply
  13. Andrea says

    January 11, 2024 at 4:57 pm

    I’m planning on making this cake this weekend for my birthday. How long should I bake 2 8in pans?

    Reply
    • Whitney says

      January 15, 2024 at 8:55 pm

      Hi Andrea! 8-inch pans are ready in about 30-35 minutes. Enjoy and happy birthday!

      Reply
  14. Kyla says

    October 27, 2023 at 9:30 am

    Hi, can I add black coloring to the oreo buttercream, was not sure if it would alter taste as I’m trying to get a deep black color.

    Thanks

    Reply
    • Whitney says

      November 1, 2023 at 7:48 pm

      Hi Kyla! You can add black food color gel to this buttercream, but I’m not sure how much you’ll need. As an alternative, I just posted this recipe for Dye-Free Black Buttercream that tastes just like Oreos (it’s made with black cocoa powder which is the main ingredient in Oreo cookies). You’d need a double batch to fill and frost this cake: https://sugarandsparrow.com/dye-free-black-buttercream/

      Reply
  15. Dennille says

    July 9, 2023 at 8:29 am

    Hi your cake pictures here is 3 6 inch cakes, correct? It just looks bigger/wider?
    Thanks

    Reply
    • Whitney says

      July 10, 2023 at 10:12 pm

      Hi Dennille! It’s a triple layer 6-inch cake. My layers are about 1.5 inches tall each. It’s the magic of photography!

      Reply
  16. Abby says

    May 3, 2023 at 8:45 am

    Hi! Would it be possible to substitute dairy-free milk and still have this recipe work? I am trying to bake for a family member who is lactose-intolerant, and prefers to eat mainly dairy-free. He’s okay with eating chocolate in things, but I usually substitute dairy free milk and vegan butter.

    Do you think this would still work? Thank you so much!! I’m really looking forward to trying to make this.

    Reply
    • Whitney says

      May 6, 2023 at 9:47 pm

      Hi Abby! I have never tried a non-dairy milk in this recipe so I’m not sure what the results would be. Instead, I would recommend the chocolate cake recipe from this vegan version (it truly rivals the non-vegan chocolate cake!): https://sugarandsparrow.com/vegan-chocolate-oreo-cake-recipe/

      Reply
  17. Vickie R. says

    February 23, 2023 at 11:33 am

    5 stars
    My son requested this cake for his 10th birthday and it turned out amazing!! I used two 8″ round pans and it was perfect. I wish I knew how to attach a photo! Thank you for a wonderful recipe!

    Reply
    • Whitney says

      February 25, 2023 at 3:38 pm

      Yay, Vickie! I’m so happy to hear that this recipe was a hit!

      Reply
  18. David says

    November 5, 2022 at 10:22 am

    Hi if i making 3 8 inch tins how much do i need to multiply the recipe by thanks

    Reply
    • Whitney says

      November 6, 2022 at 8:22 pm

      Hi David! For three 8 inch tins, you’ll want to make 1.5x the recipe. Enjoy!

      Reply
  19. Kate R says

    September 9, 2022 at 8:12 pm

    Hi Whitney!

    First off, thank you so much for always answering all my questions. You are so helpful, patient and so kind.

    What would be the bake time for three 6inch pans vs three 8inch pans? (This kind of stuff hurts my head)

    Also, could regular milk be substituted for buttermilk or is the buttermilk a game changer here?

    Thanks so much!!!

    Reply
    • Whitney says

      September 14, 2022 at 7:35 pm

      Hi Kate! I think the buttermilk is a game changer, and I always make mine the DIY way by adding vinegar to whole milk (instructions are in the notes of the recipe). Three 6-inch pans will be about 32 minutes and three 8-inch pans will be about 36 minutes. Be sure to check with a toothpick for doneness regardless of the pan size. Hope that helps!

      Reply
  20. Grace says

    July 1, 2021 at 11:01 am

    How would I make this as a two-tier 9inch cake?

    Reply
    • Whitney says

      July 1, 2021 at 2:49 pm

      Hi Grace! You could make this recipe as is and have thinner layers (about an inch tall) or you could make 1.5x the recipe and make taller layers but you’ll have a little extra batter left over. I have never baked this in a 9 inch pan before so I’m unsure of the baking time but I would check the cakes at 30 minutes and go from there. Hope that helps!

      Reply
  21. Kathy says

    June 4, 2021 at 2:33 pm

    All of you’re recipes are out of this world. Is this enough frosting for crumb coating, filling and frosting?

    Reply
    • Whitney says

      June 4, 2021 at 7:40 pm

      Thank you so much, Kathy! Yes – this buttercream recipe makes enough to fill, crumb coat, frost the cake, and pipe on top.

      Reply
  22. Whitney says

    February 28, 2021 at 7:37 pm

    Hi Edna! You totally can. Just make sure the coffee is hot!

    Reply
  23. Danelle says

    February 13, 2021 at 6:00 pm

    Hi Whitney,

    Just wondering if you think it would be ok if the entire cake gets frozen (frosting and all). I need to make it a week in advance and won’t have a chance to assemble and frost the cake when I want it for. Thanks

    Reply
    • Whitney says

      February 14, 2021 at 6:15 pm

      Hi Danelle! I’ve never frozen a decorated cake before, but I know people do it! That said I’m not entirely sure what the best practices for storing a decorated cake in the freezer are, but I’m sure there’s a lot of info out there on the topic. I would do a little Google research to see how to best make it happen and go from there 🙂

      Reply
  24. John Courtney says

    February 8, 2021 at 9:38 am

    5 stars
    Make sure that your icing has a fine consistency. If it has a thick consistency, add a tablespoon of fresh cream to it and whisk again.

    Reply
  25. Tasha says

    February 1, 2021 at 7:24 pm

    Hello, are the Oreos used for the buttercream mini Oreos or regular sized Oreos

    Reply
    • Whitney says

      February 1, 2021 at 8:16 pm

      I used regular sized Oreos, but I’m sure you could use minis!

      Reply
    • Amanda says

      February 24, 2022 at 11:17 am

      Hi Whitney! I’d like to use your Oreo buttercream recipe for four 6-inch layers. Is there typically extra buttercream in this recipe or how much extra should I make? Looks delicious!

      Reply
      • Whitney says

        February 25, 2022 at 8:32 am

        Hi Amanda! This recipe makes about 6 Cups of frosting, which should be enough for that additional layer of filling. You might not have enough to add any decorations with the frosting at that point though. If you’re planning on doing any additional decorations after filling and frosting the cake, I recommend making 1.25x the recipe (multiply each ingredient by 1.25) just to make sure you have enough. Hope that helps!

        Reply
  26. Whitney says

    January 12, 2021 at 8:59 pm

    Yay, Emily! So happy to hear that this recipe is a hit! Thanks for taking the time to let me know 🙂

    Reply
  27. Whitney says

    November 30, 2020 at 10:05 pm

    Hi Olivia! I’m so sorry to hear your cake sunk! Did you use dutch process cocoa? I only ask because this recipe specifies to use non-Dutch process cocoa because it adds too much leavening agent. There are so many reasons why a cake might sink in the middle and it’s hard to tell without seeing your method of making this cake, quality of ingredients, etc. The most common reasons are expired baking powder (it expires every 6 months!), opening the oven door too much or prematurely, and not using room temperature ingredients (unless otherwise specified). I’ve listed all the most common reasons here to help you troubleshoot: https://sugarandsparrow.com/why-cakes-sink/ hope that helps!

    Reply
  28. Charlotte says

    September 18, 2020 at 5:10 pm

    Hi, did you crumbcoat this cake & if so did you use the Oreo buttercream? Is the quantities above for crumbcoat & final layer?

    Looks beautiful x

    Reply
    • Whitney says

      September 20, 2020 at 10:28 pm

      Hi Charlotte! I did crumb coat this cake (always do!) and used the Oreo buttercream. Crumb coating will work with any buttercream you’re using for the final frosting layer.

      Reply
  29. Whitney says

    September 15, 2020 at 7:00 pm

    Hi Angela! You can certainly try adding the filling in if you’d like! I don’t add it because it clogs up the piping tip and also makes the buttercream a little chunkier (not as easy to get a smooth finish). I also think the taste of the vanilla buttercream paired with the Oreo crumbs mimics the taste of the filling. So at the end of the day, it tastes just like Oreos in buttercream form as-is, but if you’d like to add additional filling, go for it!

    Reply
  30. Belinda Charles says

    August 26, 2020 at 10:08 am

    Hi Whitney, this cake looks delicious! I am interested in trying this recipe out for a cake this weekend, but I would be doing 2 10-inch layers instead. Do you have any idea as to how I can alter the cake & buttercream recipe to do so successfully? Also, would it be okay for me to add oreo crumbs into the batter itself? Thank you!

    Reply
    • Whitney says

      August 26, 2020 at 8:22 pm

      Hi Belinda! To make enough batter for two 10-inch cakes, I would make 1.5x this recipe (multiply each ingredient by 1.5). You’ll have more than enough with that amount, but it’s better than having just shy of enough batter. You can keep the buttercream recipe as-is. As far as the Oreo crumbs, I haven’t tried that so I’m not sure if the batter is thick enough to keep them suspended. If you want more of a crunch with this cake I would sprinkle some Oreo crumbs in between layers on top of the filling.

      Reply
      • Belinda Charles says

        August 27, 2020 at 5:21 am

        Got it! Thanks so much!!

        Reply
        • S!D says

          February 10, 2026 at 8:43 pm

          Hi Whitney…
          I’m planning to make your cake recipe this weekend and I’m really excited to try it
          I wanted to ask how would I adjust the recipe to make 1.5x the original quantity? I’m hoping to bake it in three 8-inch pans. Could you please let me know what the exact ingredient quantities would be if I make it 1.5x?

          Also, would the baking time and temperature stay the same, or would you recommend any changes for this size and pan setup?

          Thank you so much for your help!

          Reply
          • Whitney says

            February 11, 2026 at 9:36 am

            Hi Sid! Here are the quantities for three 8-inch cake layers. The baking time and temperature will be the same. Hope this helps!

            3 Cups (398g) all purpose flour
            2 1/2 Cups (500g) granulated sugar
            1 Cup (90g) black cocoa powder or Dutch-processed cocoa powder
            1 Tbsp baking soda
            1 1/2 tsp baking powder
            3/4 tsp salt
            3/4 Cup (180ml) vegetable oil
            3 large eggs, room temperature
            2 1/4 tsp vanilla
            1 1/2 Cups (360ml) buttermilk
            1 1/2 Cups (360ml) hot coffee or hot water

  31. Vicki says

    August 8, 2020 at 7:49 pm

    Can this cake be made with a hand mixer if you don’t have a stand mixer?

    Reply
    • Whitney says

      August 10, 2020 at 9:07 am

      Hi Vicki! It can be made with a hand mixer. Just follow the same mixing times/speeds!

      Reply
      • Vicki Whitten says

        September 11, 2020 at 11:36 pm

        thanks so much! Making this for a Special birthday!!

        Reply
        • Whitney says

          September 12, 2020 at 2:56 pm

          Yay, Vicki! I hope it’s a hit!

          Reply
  32. Jordanne says

    July 4, 2020 at 8:35 pm

    5 stars
    Your recipes make the most amazing cakes! We used the hot coffee instead of water and added 1.5 TB espresso powder to both the cake and icing. The coffee flavor balances the sweetness so nicely.
    Also filled our 6” pans a bit less than usual (decorations always get squished in our cake dome!) and managed to squeeze 12 cupcakes out of the batter. Baked them for 17 minutes and they turned out perfect.

    Reply
    • Whitney says

      July 6, 2020 at 3:57 pm

      Yay, Jordanne! So happy to hear this recipe was a hit!

      Reply
  33. Kim says

    July 1, 2020 at 1:21 am

    Hello,

    Can this recipe be used for two or three tier wedding cakes? Will it hold up nicely?

    Reply
    • Whitney says

      July 1, 2020 at 9:04 am

      Hi Kim! This recipe will work perfectly as a tiered cake!

      Reply
  34. Vicki says

    June 10, 2020 at 12:11 pm

    5 stars
    This recipe is AMAZING!!! So moist and delicious, went down a treat. Thanks for sharing it Xx

    Reply
    • Whitney says

      June 10, 2020 at 1:25 pm

      Yay, Vicki! So happy you love this recipe and thanks for taking the time to let me know 🙂

      Reply
  35. Winces says

    May 28, 2020 at 8:46 am

    Hi, Whitney! Can i use brown sugar instead of white? Thanks!

    Reply
    • Whitney says

      May 28, 2020 at 1:33 pm

      Hi Winces! I’ve never tried it before, so I can’t say how it will affect the texture or taste of the cake (brown sugar is made with molasses), but I’ve heard it works.

      Reply
  36. Gina says

    May 10, 2020 at 8:09 pm

    5 stars
    Hi, I made this cake for Mother’s Day, it turned out pretty good for the first time. With a little more practice it will perfect like your cakes Thank you for such good teaching! You really explain everything that goes in to making these cakes. Keep up the good work!!! This is great therapy, I really enjoy it

    Reply
    • Whitney says

      May 11, 2020 at 8:09 pm

      Thank you! So happy that this recipe was a hit and you’re finding some therapy in baking. That’s one of the reasons I love it so much!

      Reply
  37. Michele says

    April 22, 2020 at 12:18 pm

    Hi!! I’ll be making this tomorrow for a birthday. Can I use hot coffee instead of water?

    Reply
    • Whitney says

      April 22, 2020 at 8:31 pm

      Hi Michele! You can certainly use hot coffee instead of hot water – it makes the flavor of the chocolate even more rich! Enjoy!

      Reply
      • Michele says

        May 21, 2020 at 7:37 am

        5 stars
        It was outstanding!!! Making it for another birthday today! I wanted to do 3-8inch layers. I was going to do 1.5 recipe. That should work, right?

        Reply
        • Whitney says

          May 21, 2020 at 2:40 pm

          Yay, Michele! So happy you love this recipe! And yes, for three 8-inch layers just multiply all the ingredients by 1.5 and you’ll have the perfect amount.

          Reply
  38. Christina Gonzalves says

    April 12, 2020 at 2:21 pm

    5 stars
    Hi!! I made this cake before and I LOVED it!! Just wondering, would it be ok if instead of 3x 6inch cake pans I used 2x 8inch pans? Would the cake still be high enough to decorate then? Thank you!!!

    Reply
    • Whitney says

      April 13, 2020 at 9:34 am

      Hi Christina! Yes, you can definitely use 2 8-inch pans instead of 3 6-inch pans. I’ll add that to the recipe instructions for future reference. So happy you loved the recipe!!

      Reply
  39. Kayla says

    February 5, 2020 at 3:34 pm

    Your frosting looks so smooth! Mine came out pretty thick and isn’t smoothing very well. I did have to use heavy cream vs whole milk but typically those are interchangeable. Any thoughts?! ThAnks so much!

    Reply
    • Whitney says

      February 6, 2020 at 10:31 am

      Hi Kayla! You can definitely interchange heavy whipping cream and whole milk (I do all the time!), and if your frosting is too thick, just add a little more milk/heavy whipping cream to thin it out to your liking. An extra Tbsp or two should do the trick!

      Reply
  40. Chesca Rogers says

    February 3, 2020 at 11:08 am

    5 stars
    Hello, I made this recipe last week for an 18th birthday cake and it went down a storm. Sorry to be a pest but please can I have the original quantities for the 3 8inch tin recipe. It made the most delicious moist cake and I’m a 8 inch pan kinda girl thank you

    Reply
    • Whitney says

      February 5, 2020 at 9:21 am

      So happy you love this recipe, Chesca! To make enough batter for three 8″ cake pans, make 1.5x the recipe (multiply each ingredient by 1.5).

      Reply
    • Judith says

      August 16, 2023 at 2:52 pm

      Hi, can I use table salt instead of kosher salt?

      Reply
      • Whitney says

        August 18, 2023 at 1:00 pm

        Hi Judith! Yes, you can!

        Reply
        • Chance Davis says

          August 15, 2025 at 1:00 pm

          In the frosting when grinding the Oreo cookies, do we keep the frosting and all in the middle or just the”cookie” part? Thank you!

          Reply
          • Whitney says

            August 15, 2025 at 1:19 pm

            Hi Chance! Yes, I kept the cream filling in there before grinding the cookies. If you want you can scrape the cream filling out first – I’ve done that in the past and it works great but is a little more time consuming. Surprisingly the flavor isn’t much different whether you scrape the filling out or not, so I chose to keep things simple!

  41. Whitney says

    February 2, 2020 at 7:24 pm

    Hi Anna! Thanks for catching that. I originally wrote it for three 6-inch cake layers, but it actually made a lot of batter (enough for three 8 inch layers), which is why the recipe states 8-inch. It’s the same cake recipe as my chocolate cake recipe though, which I recently converted to make just enough batter for three 6 inch cake pans, so I’ve gone ahead and updated it here as well. Thanks for catching that!

    Reply
  42. Whitney says

    June 28, 2019 at 9:47 am

    Hi Zoey! Thanks for the feedback! I’ll look into decreasing the ingredient amounts to ensure that there’s a more exact amount of batter in this recipe.

    Reply
  43. Whitney says

    June 17, 2019 at 2:00 pm

    Hi, Trish! This recipe does make a little extra batter (it’s really hard to make a recipe exact for one specific size pan). I always fill the cake tins 2/3 full and haven’t had a problem with them spilling over. Maybe next time just add batter until they’re 1/2 full to prevent spillage. So sorry about that!

    Reply

Leave a Reply Cancel reply

Your email address will not be published. Required fields are marked *

Recipe Rating


Next Post >

Oreo Buttercream

Primary Sidebar

Welcome to Sugar & Sparrow

Welcome to Sugar & Sparrow

Helping you whip up pretty desserts with confidence and creativity. And hopefully sharing a few laughs with you along the way!

Learn More

Connect

let’s bake!

Get my very best recipes, baking tips, and decorating tutorials sent to your inbox

Featured Posts

oatmeal creme pie cake recipe

Oatmeal Creme Pie Cake

cake decorating tools for beginners

Essential Cake Decorating Tools for Beginners

cake basics by sugar and sparrow

Coming Soon: Cake Basics

Search

Archives

Follow Along

@sugarandsparrowco

WHIPPED MASCARPONE FROSTING ✨silky smooth, delicio WHIPPED MASCARPONE FROSTING ✨silky smooth, deliciously light, and the perfect consistency for cake decorating (including filling layer cakes + piping)! Imagine a whipped cream frosting with notes of rich mascarpone cheese and that’s what this frosting tastes like. It’s a DREAM on my orange poppyseed cake and I can’t stop thinking of other Spring/Summer cake flavors I want to try it with! 

Full recipe with cake pairing suggestions at https://sugarandsparrow.com/whipped-mascarpone-frosting/ 

INGREDIENTS:
1 Cup (8oz, 227g) mascarpone cheese, cold
2 tsp pure vanilla extract
1/8 tsp salt
1 Cup (240ml) heavy whipping cream, cold
2 Cups (240g) powdered sugar

INSTRUCTIONS:
1. With the whisk attachment on a stand mixer (or hand mixer with a large bowl), beat the mascarpone, vanilla, and salt together at medium speed until creamy, 1-2 min
2. Turn the mixer to low and add the heavy whipping cream slowly, then turn the mixer to medium speed and beat until soft peaks form, which could take less than 1 min (keep an eye on it!). You should be able to dip a spatula into the mixture and see a peak that slightly droops when held upright. 
3. Add the powdered sugar all at once and mix on low speed until incorporated, then turn the mixer to medium speed and whip for about 30 seconds longer, until the frosting is thick and silky. Use right away or refrigerate for up to 4 days.

#mascarpone #mascarponecream #whippedcreamfrosting #whippedcreamcake #cakedecorating
BERRY CHANTILLY CAKE 🍓🫐fully inspired by the iconi BERRY CHANTILLY CAKE 🍓🫐fully inspired by the iconic Whole Foods Chantilly cake (iykyk 🙌🏼) and every bit as delicious! My homemade version is layers of extra soft and fluffy vanilla cake, berry jam, Chantilly cream frosting with rich notes of mascarpone and a hint of almond, and fresh berries throughout. It’s the idealideal berries and cream cake and ALWAYS a hit!! 
⁣
Full recipe is linked in my bio (or at https://sugarandsparrow.com/berry-chantilly-cake-recipe/)

PS: I also have a sheet cake version of this recipe! Google “sugar and sparrow berry Chantilly sheet cake” to find it! 

#chantillycake #whippedcreamcake #berrycake #cakedecorating #vanillacake
STRAWBERRY SHORTCAKE SHEET CAKE 🍓aka classic straw STRAWBERRY SHORTCAKE SHEET CAKE 🍓aka classic strawberry shortcake toppings on a fluffy vanilla sheet cake and ideal for a crowd! It’s my favorite bakery-style white cake that’s so soft and moist, topped with silky whipped cream cheese frosting and thick homemade strawberry sauce. So easy to throw together with simple ingredients + a total showstopper ✨

Grab the recipe link in my bio or find it at https://sugarandsparrow.com/strawberry-shortcake-sheet-cake/ 

#strawberrycake #strawberryshortcake #sheetcake #whippedcreamfrosting #cakedecorating
ORANGE POPPYSEED CAKE 🍊this cake is unbelievably d ORANGE POPPYSEED CAKE 🍊this cake is unbelievably delicious with whipped mascarpone frosting!! The cake layers are soft and moist, packed with fresh citrus flavor, and has the satisfying crunch of poppy seeds in every bite. The mascarpone frosting keeps it light and refreshing and I love that it comes together in just about 5 minutes with minimal effort. A fancy cake that’s secretly simple!

Grab the recipe link in my bio or find it at https://sugarandsparrow.com/orange-poppyseed-cake-with-mascarpone-frosting/

#poppyseedcake #layercake #mascarpone #whippedcreamfrosting #cakedecorating
VANILLA SHEET CAKE (recipe below) 🥳 this cake is p VANILLA SHEET CAKE (recipe below) 🥳 this cake is packed with vanilla flavor, SO soft and fluffy, fun to decorate, and ideal for feeding a crowd. It makes me so nostalgic for my childhood birthday cakes!! 
 
Full recipe (w/ frosting!) at https://sugarandsparrow.com/vanilla-sheet-cake-recipe/
 
INGREDIENTS: 
2 1/2 Cups (265g) sifted cake flour
2 tsp baking powder 
1/2 tsp baking soda 
1 tsp salt 
3/4 Cup (170g) unsalted butter, room temp 
1 3/4 Cup (340g) granulated sugar 
3 large eggs, room temp 
1/2 Cup (120g) sour cream, room temp
1 Tbsp pure vanilla extract 
1 Cup (240ml) whole milk, room temp
 
INSTRUCTIONS: 
1. Preheat the oven to 325°F. Grease and line a 9×13 baking dish. 
2. Add the sifted cake flour, baking powder, baking soda, and salt into a medium bowl and whisk to combine. Set aside. 
3. In the bowl of your stand mixer fitted with the paddle attachment (or with a hand mixer and large bowl), beat the butter on high speed for two minutes until creamy. Add the sugar and continue to beat on high speed until light and fluffy, about 2 minutes. Scrape down the bowl and paddle as needed. Add the eggs one at a time, mixing for about 10-15 seconds after each addition. Add the vanilla and sour cream and mix for one minute on high speed. 
4. Turn the mixer off and add the dry ingredients all at once. Mix on low speed until just combined, then add the milk in a steady stream and mix until just incorporated. 
5. Pour the batter into the prepared baking dish and bake for 30-35 minutes, or until the cake springs back to the touch and a toothpick inserted into the middle comes out clean. Let the cake cool in the baking dish until room temperature, then frost with vanilla buttercream. 
 
#vanillacake #sheetcake #birthdaycake #vanilla #cakedecorating

Footer

On the Blog

  • Cake Basics
  • Recipes
  • Tutorials

Info

  • About
  • Privacy Policy & Disclosure

stay in the know

Copyright © 2026 · Theme by Sugar & Sparrow