
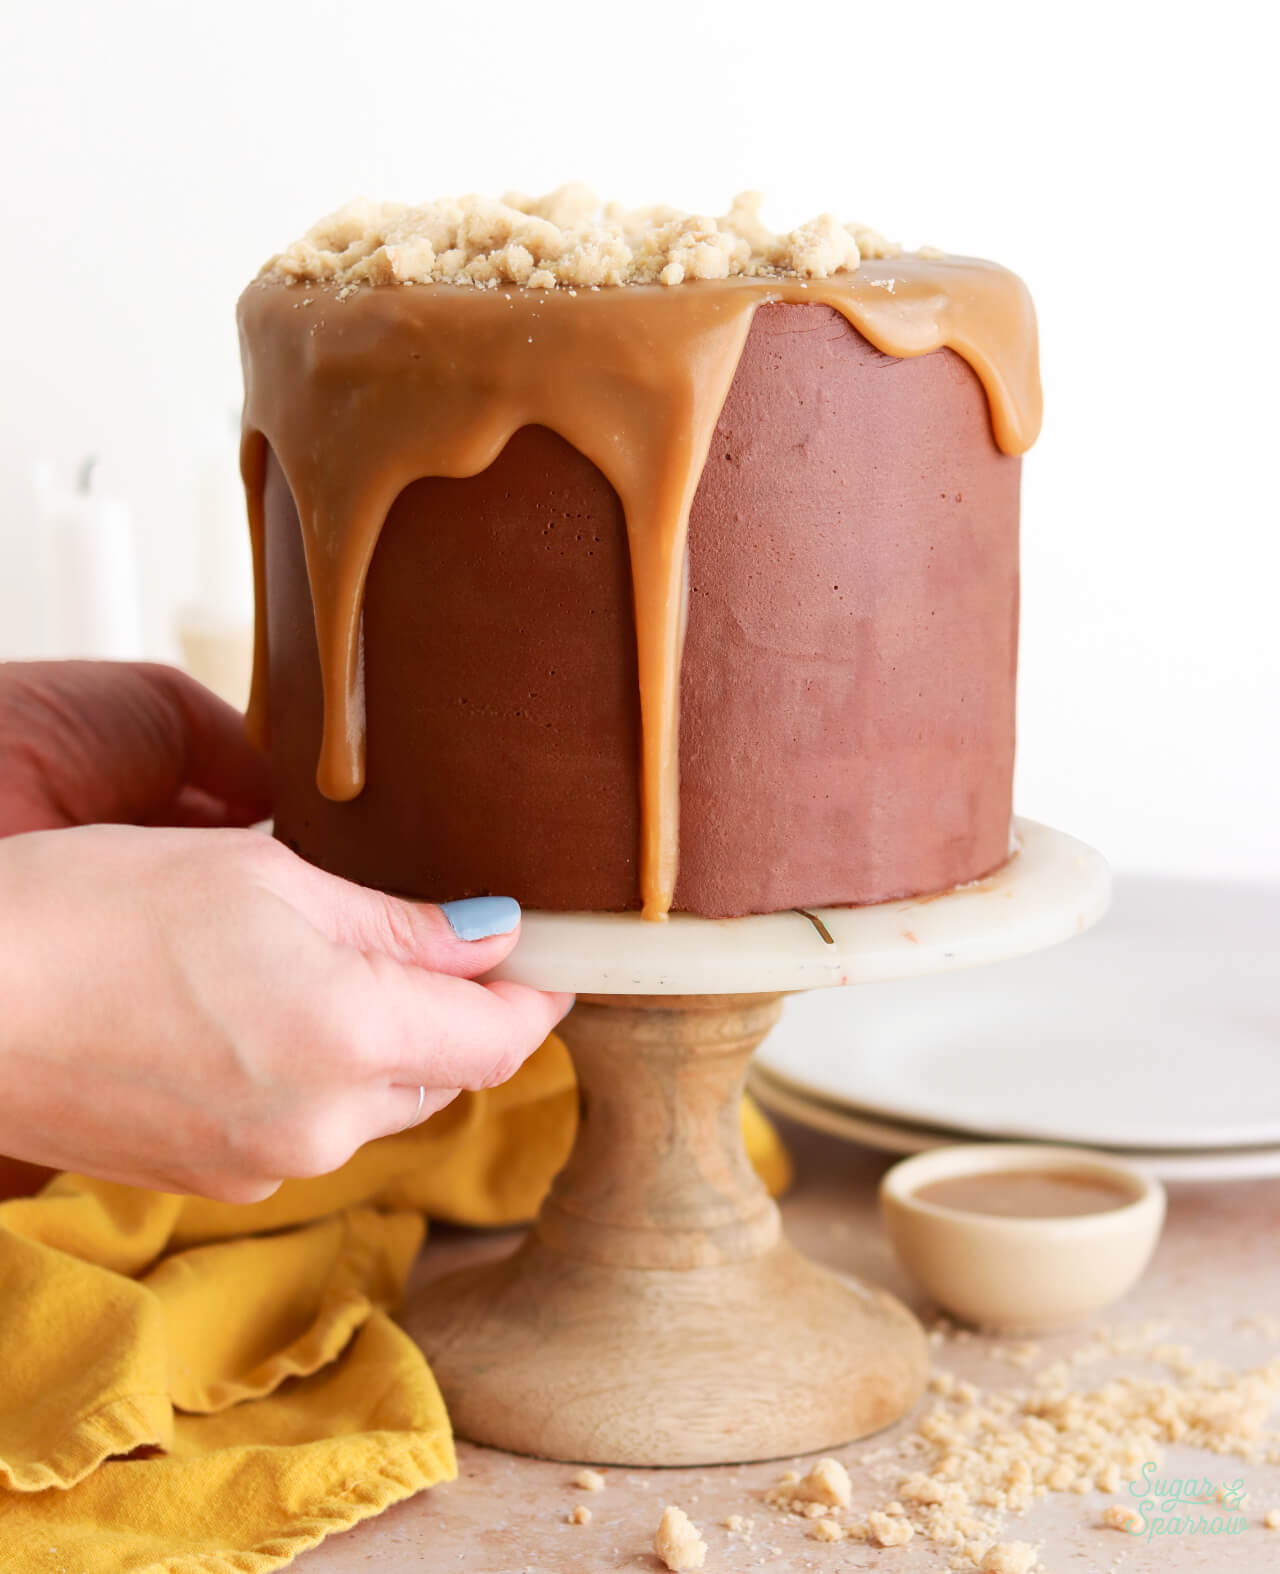
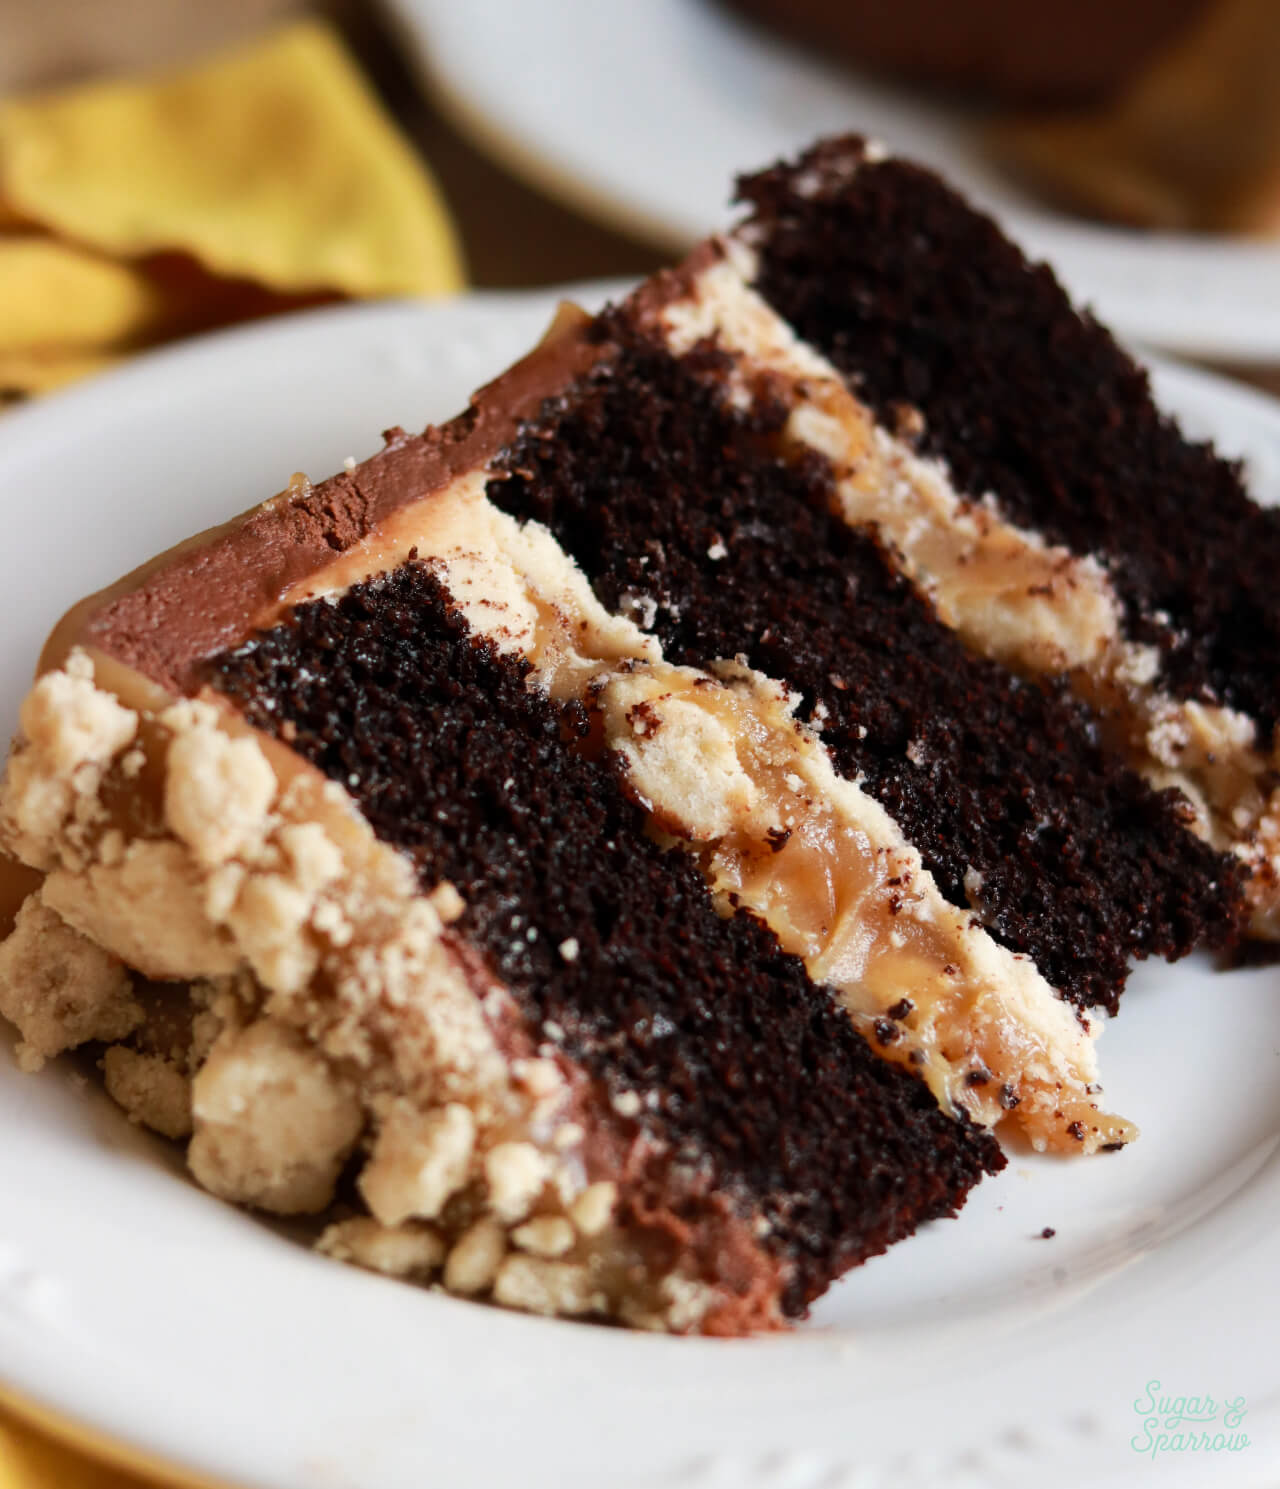
Inspired by the $22 slice of Millionaire Cake from The Cake Bake Shop at Disney’s Boardwalk (Disney World), this homemade version features layers of decadent chocolate cake, thick caramel filling topped with shortbread crumbles, caramel buttercream, and whipped chocolate ganache frosting. The flavors and textures are so incredible with the crunch of the shortbread, the gooey caramel, and the blend of sweet and salty elements – it’s rich in the best ways, just like its name! This homemade Millionaire cake has a lot going on, but it’s so worth making and I’ll show you how to plan it all out so it doesn’t feel like a marathon.
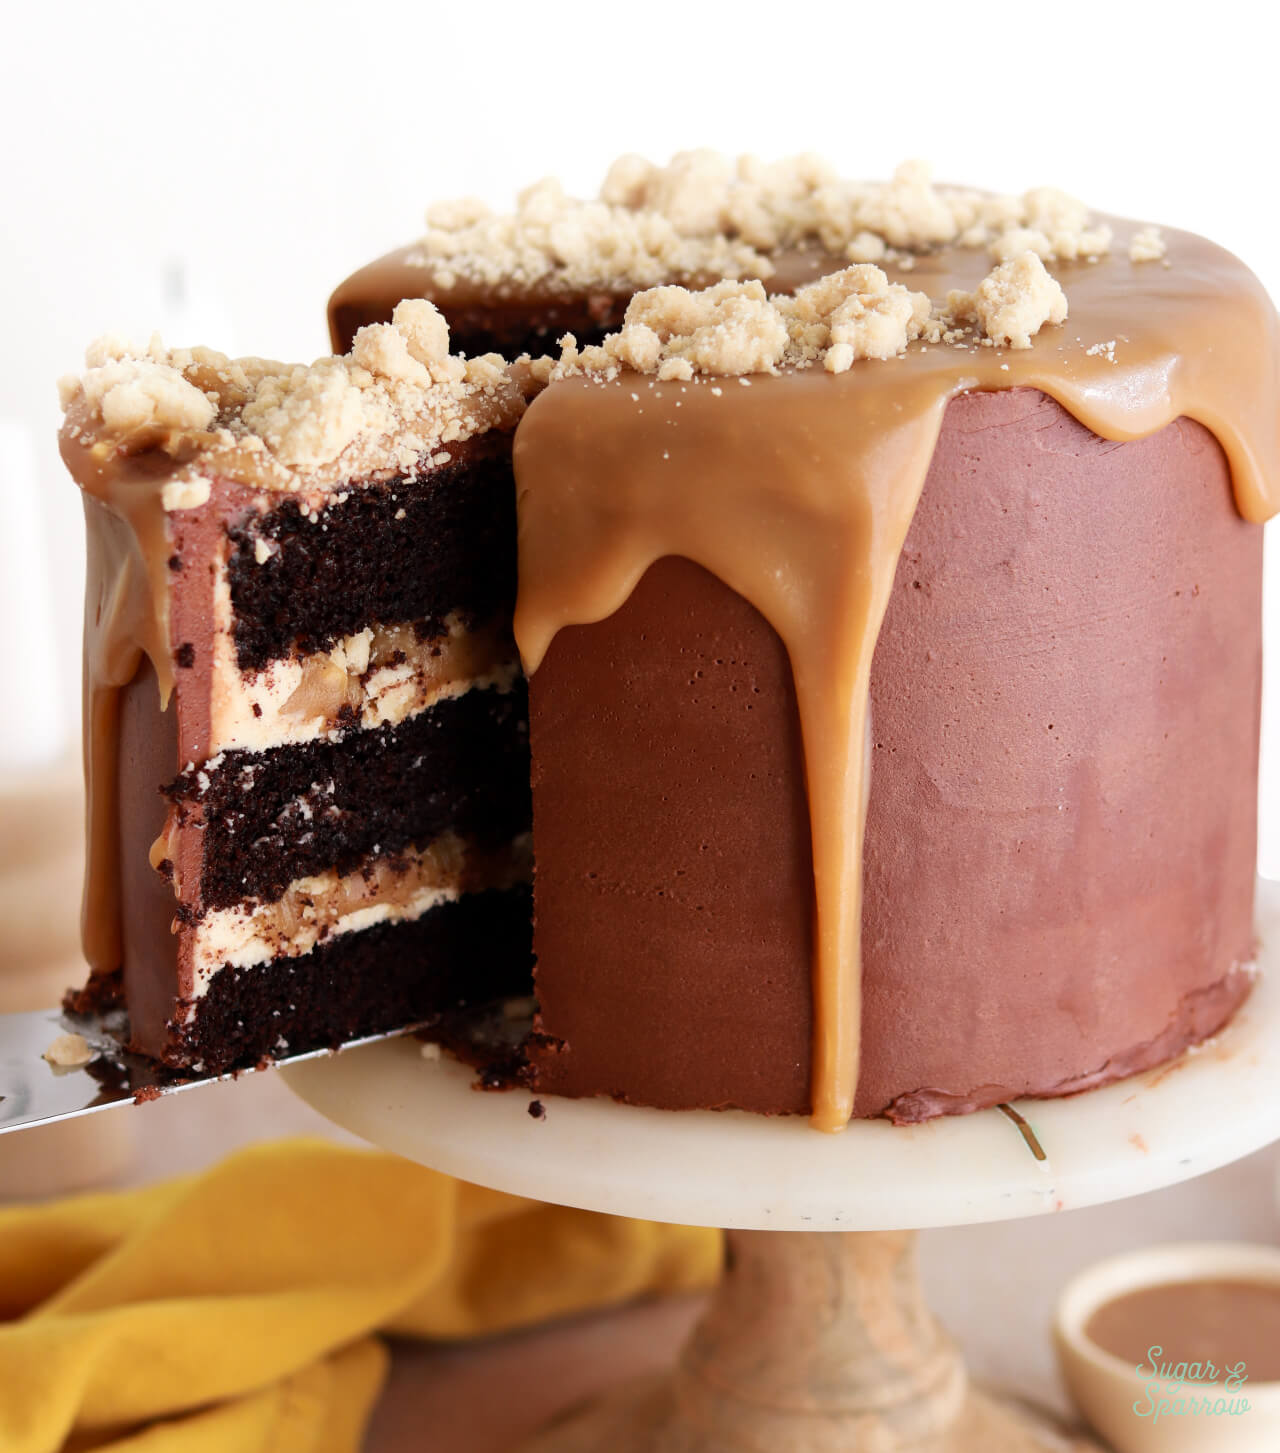
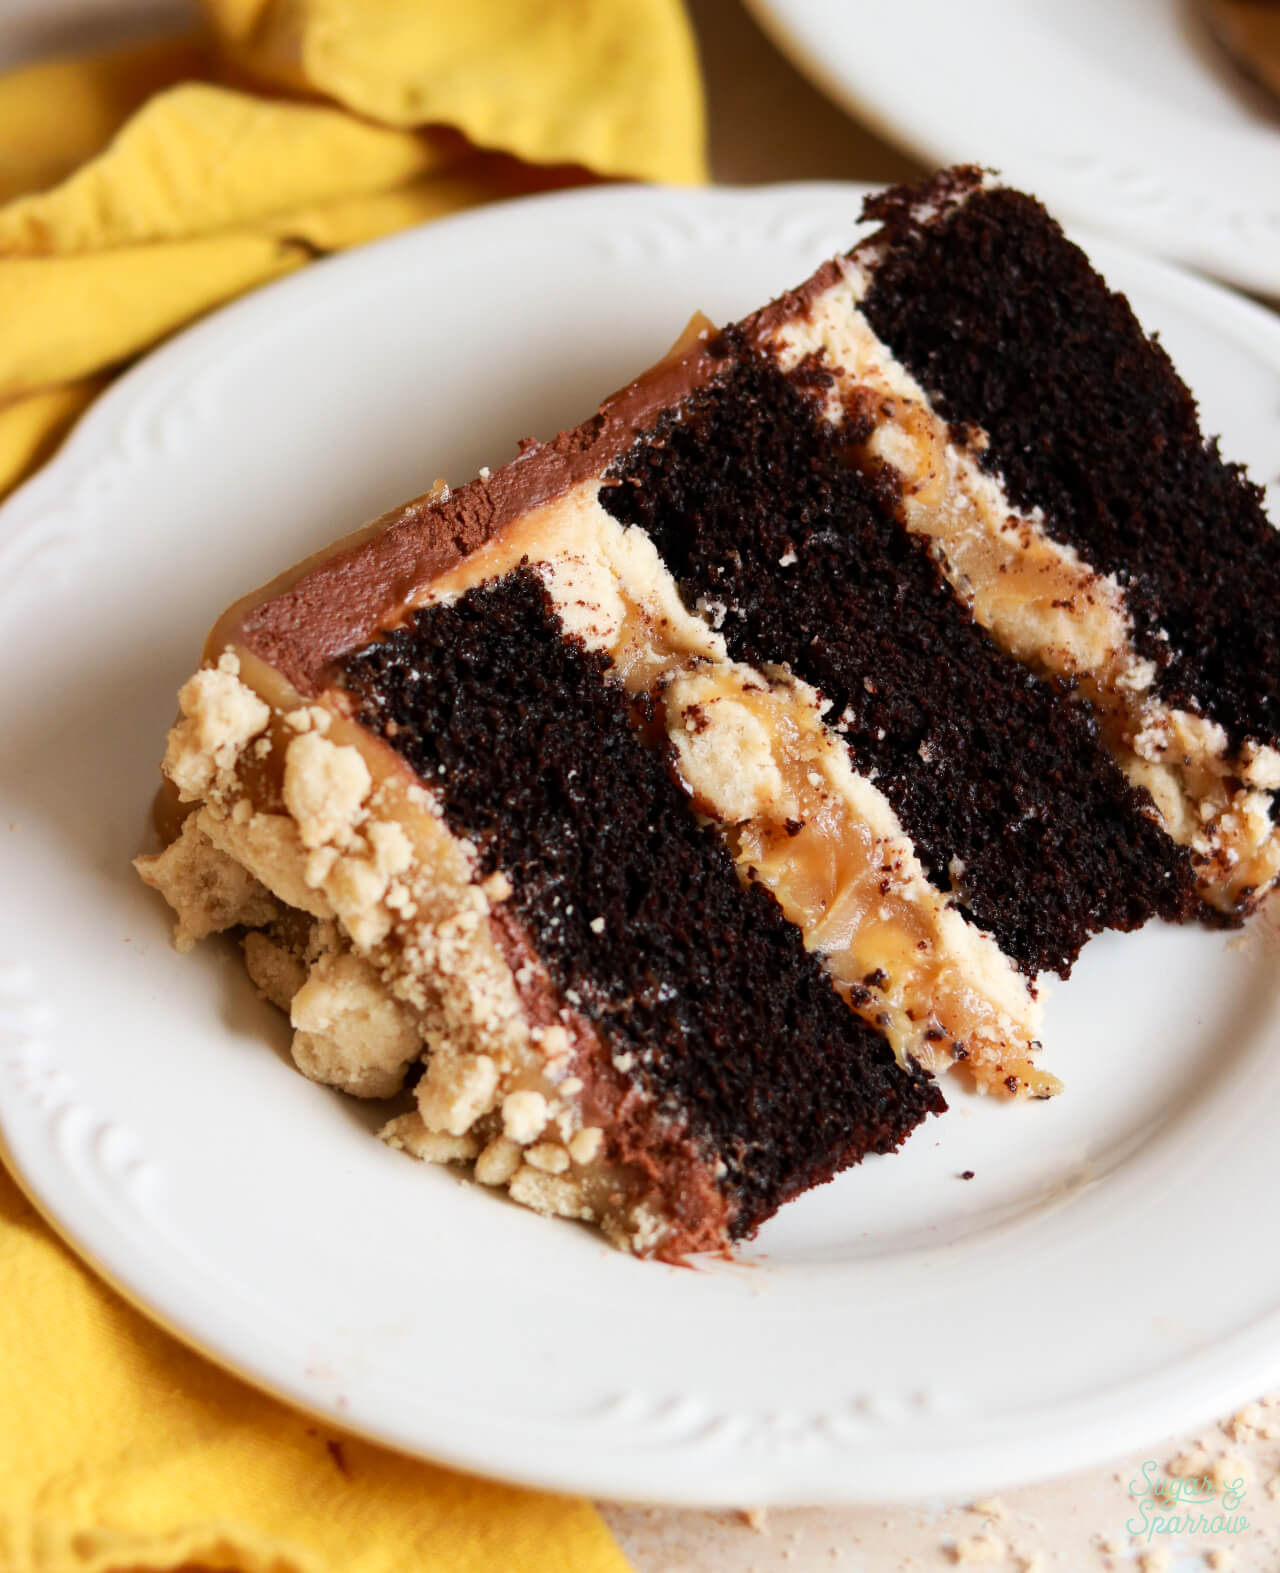
What’s in a Millionaire Layer Cake?
There are a handful of elements that go into making this chocolate Millionaire cake, and I’ll talk about each of them in detail in the next sections:
- Decadent chocolate cake layers. This homemade Millionaire cake begins with my one bowl chocolate cake recipe, which is so easy to make and uses ingredients you probably already have in your pantry. It’s super moist and decadent, and you can use Dutch-processed cocoa powder or regular cocoa powder interchangeably (I used Dutched cocoa for this one).
- Thick caramel filling. I used my favorite thick caramel recipe as the filling and the drip topping for this cake. I originally developed this recipe for my Twix cake, and I love that it’s thick and gooey yet holds its shape when you slice the cake layers instead of oozing out. It’s basically like the soft caramel filling you’d find in a Twix or Snickers candy bar.
- Caramel buttercream. I used some of the caramel filling to make a caramel buttercream that I use as the dam in between layers (to keep that thick caramel contained) and as a crumb coat.
- Shortbread crumbles. These baked shortbread crumbles add the perfect crunchy texture to the filling. They’re easy to make, perfectly buttery, and lend a little saltiness to this cake which is a delightful contrast to the sweetness.
- Whipped chocolate ganache frosting. My whipped chocolate ganache frosting is the perfect topping for this cake. It’s rich and chocolatey without being overly sweet, with a sophisticated flavor profile worthy of a Millionaire cake.
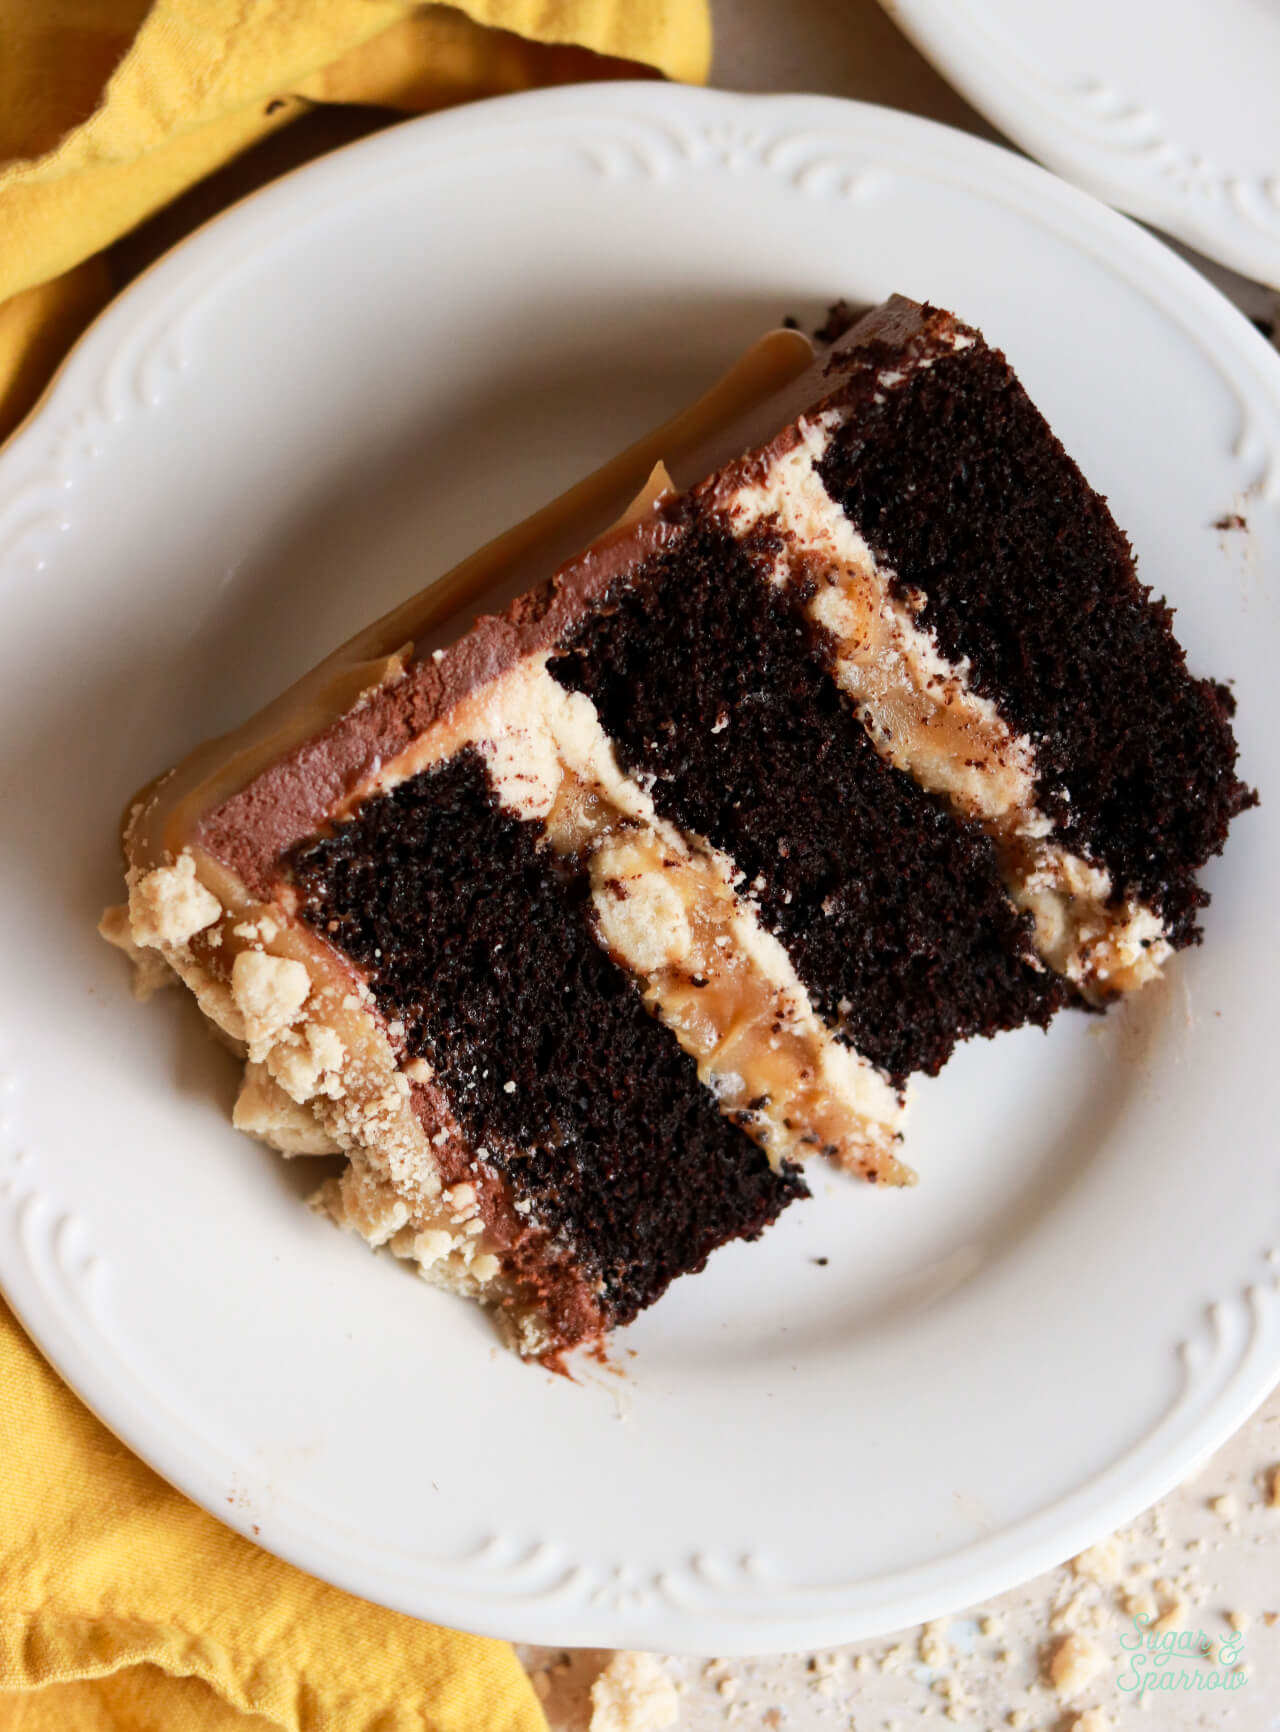
How to Assemble a Millionaire Cake
Once you have all your elements made, cooled, and ready to go, here’s how to assemble the Millionaire cake:
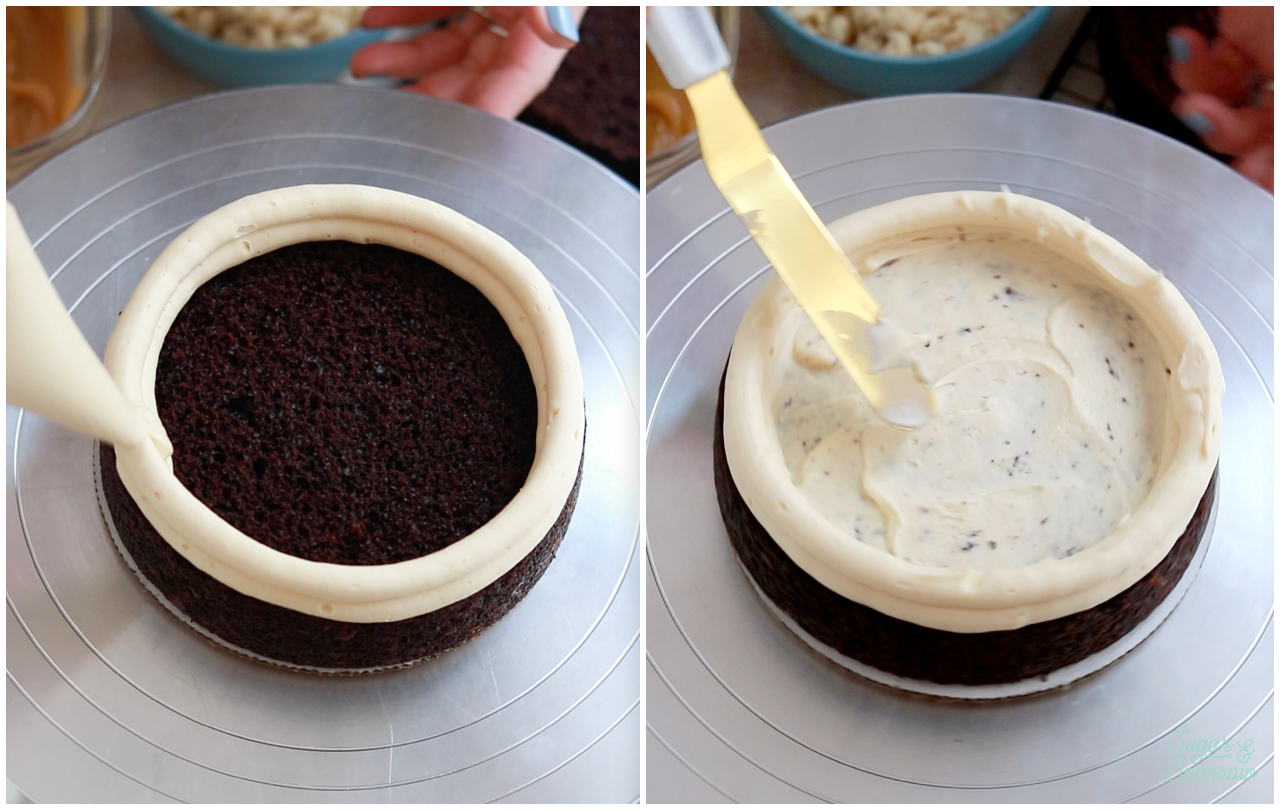
Step 1: Pipe the buttercream dam. Place your first cake layer on your turntable and pipe a ring of the caramel buttercream around the edge. I actually like to pipe two rings, one on top of the other, to make the dam a little taller. I added a thin layer of caramel buttercream into the center of the dam as well.
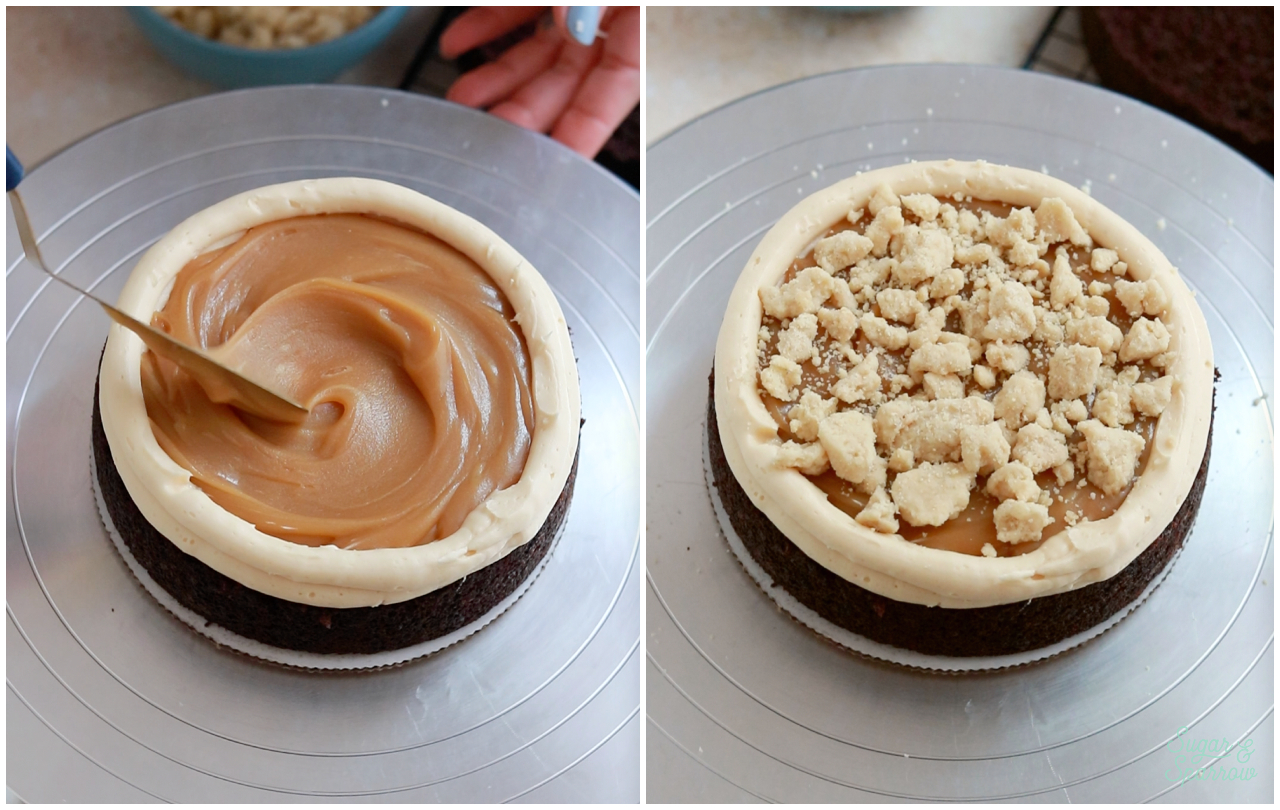
Step 2: Add the fillings. Fill the center of the buttercream dam about ⅔ of the way with the thick caramel filling, then sprinkle some shortbread crumbles on top. Gently press the shortbread down.
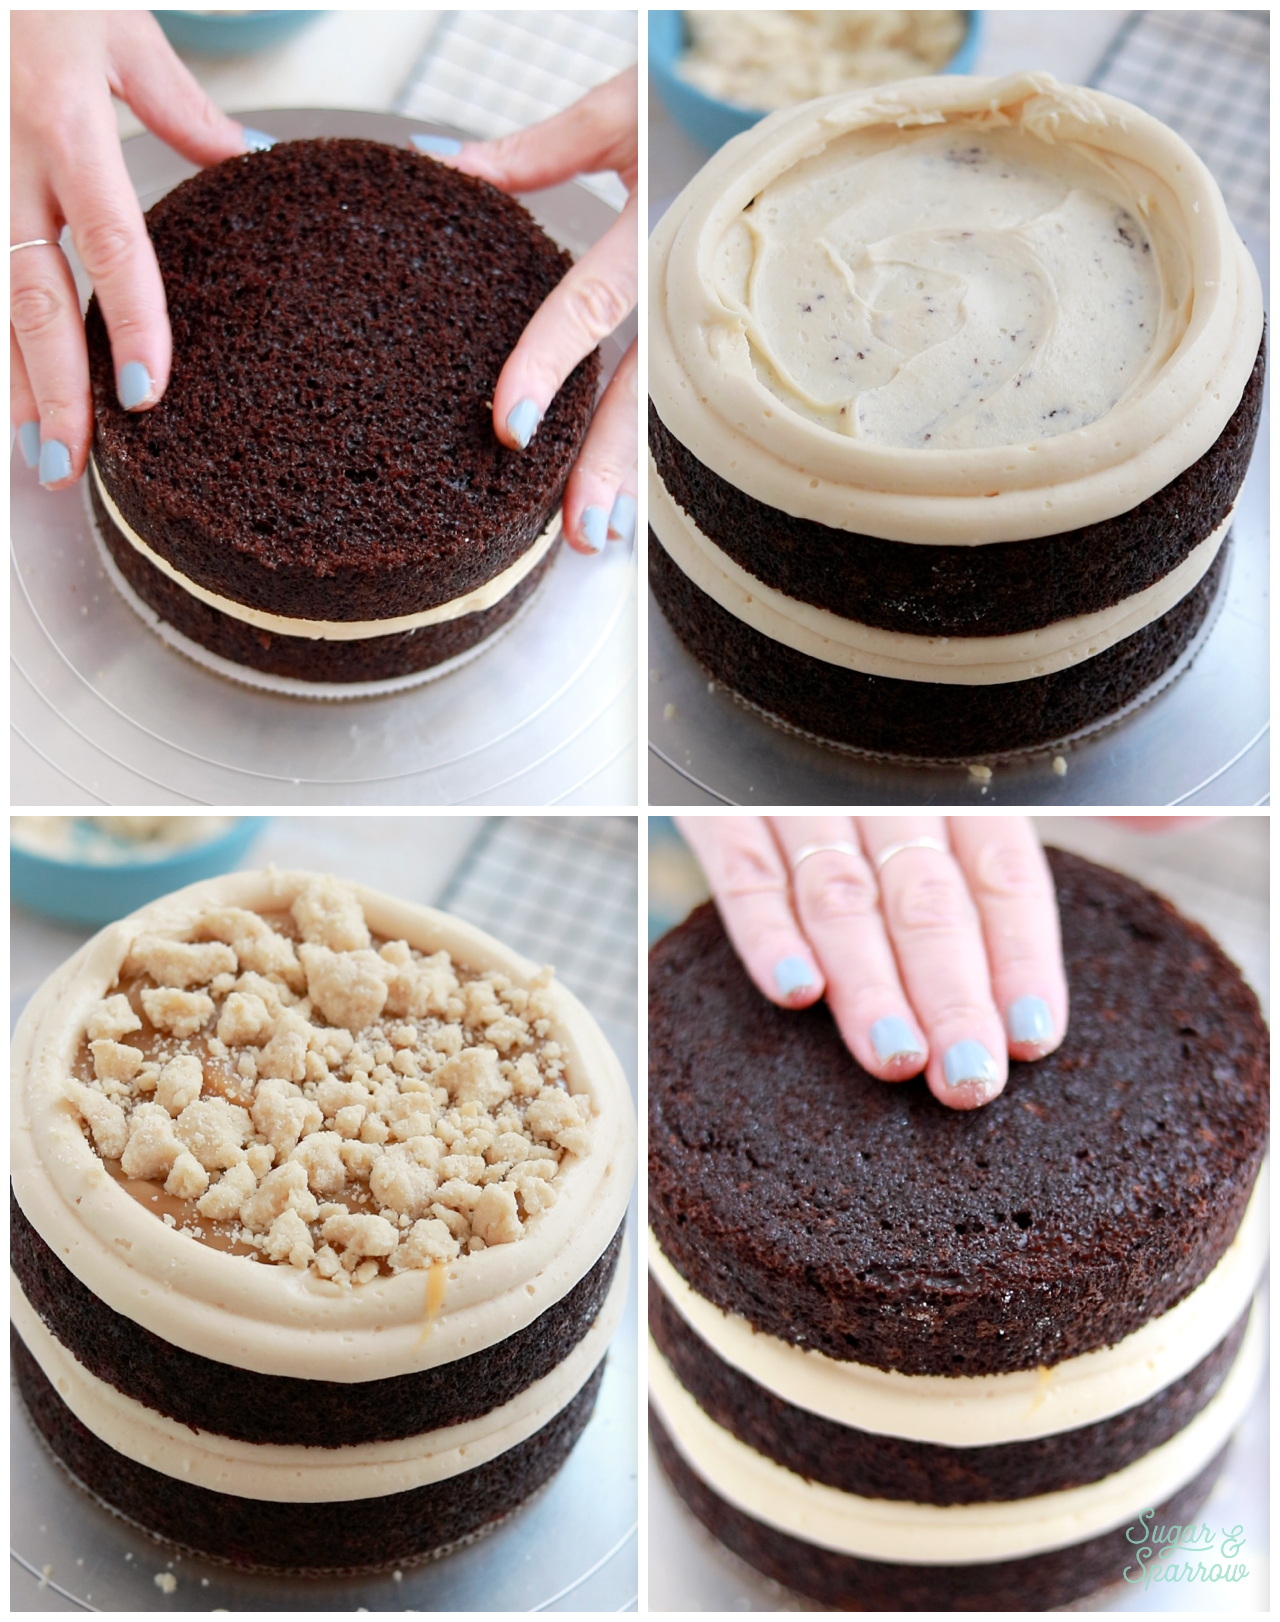
Step 3: Add the next cake layer and repeat (if using 3 cake layers). Add the next cake layer on top and repeat steps 1 and 2 before placing the final cake layer upside down so that the bottom of the cake layer is the top of the cake.
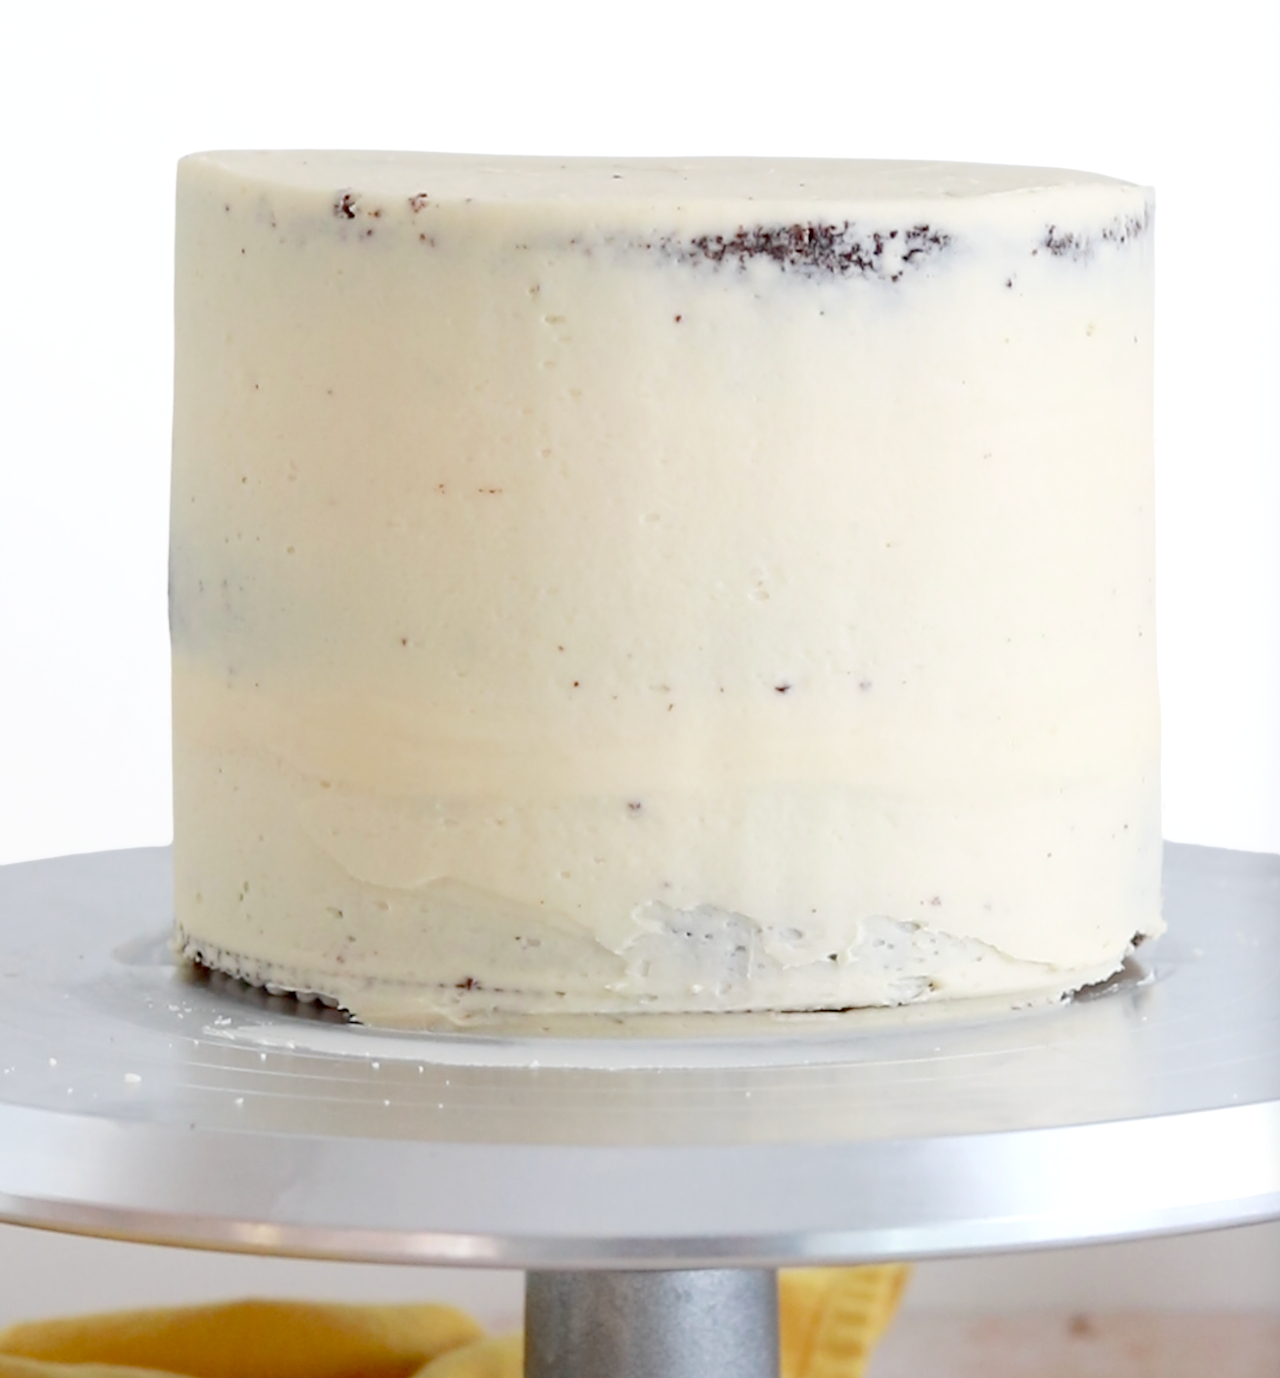
Step 4: Crumb coat the cake. Use the rest of the caramel buttercream to crumb coat the cake. I like to mix in a few teaspoons of room temperature milk to thin it out a little more for this part. Once it’s crumb coated, chill the cake for at least 30 minutes to let the frosting firm up.
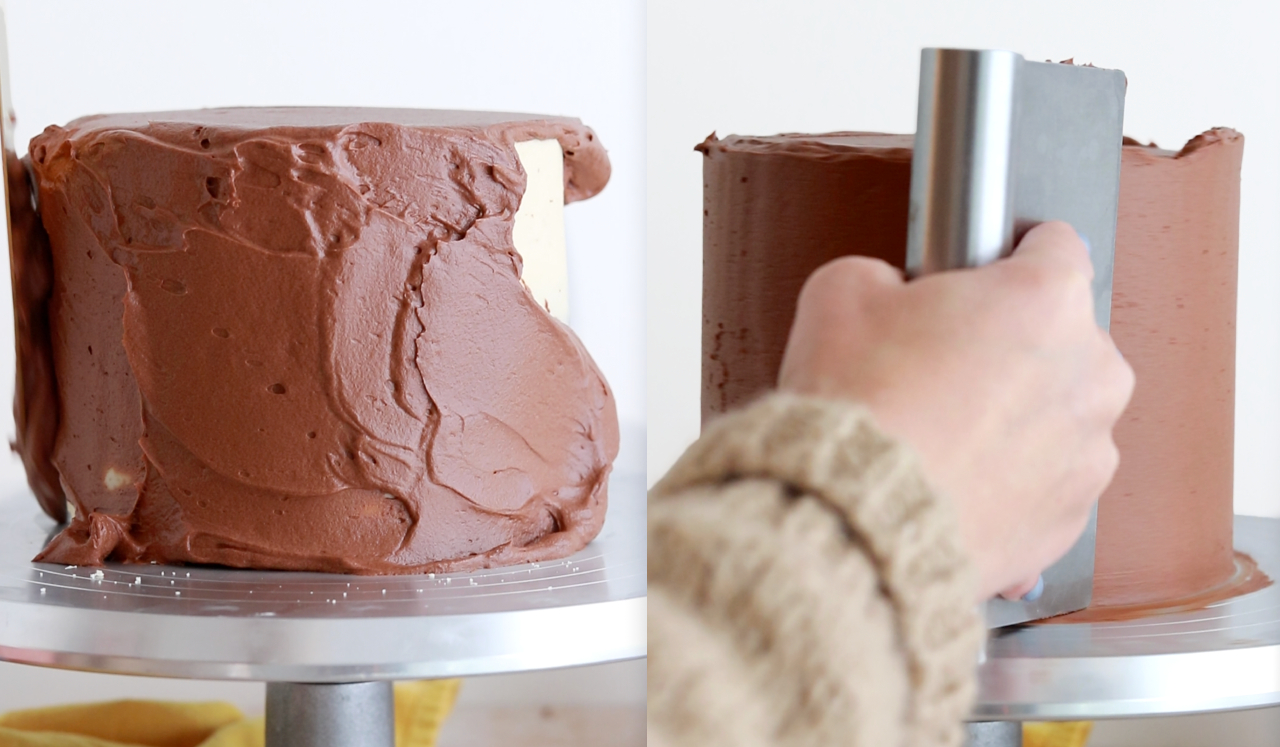
Step 5: Whip the ganache and frost the cake. Make sure the ganache has chilled to the consistency of creamy peanut butter, then whip it with a hand mixer or stand mixer on medium-high speed for 1-2 minutes, until it reaches soft peak consistency. Then, immediately frost the cake with a smooth finish.
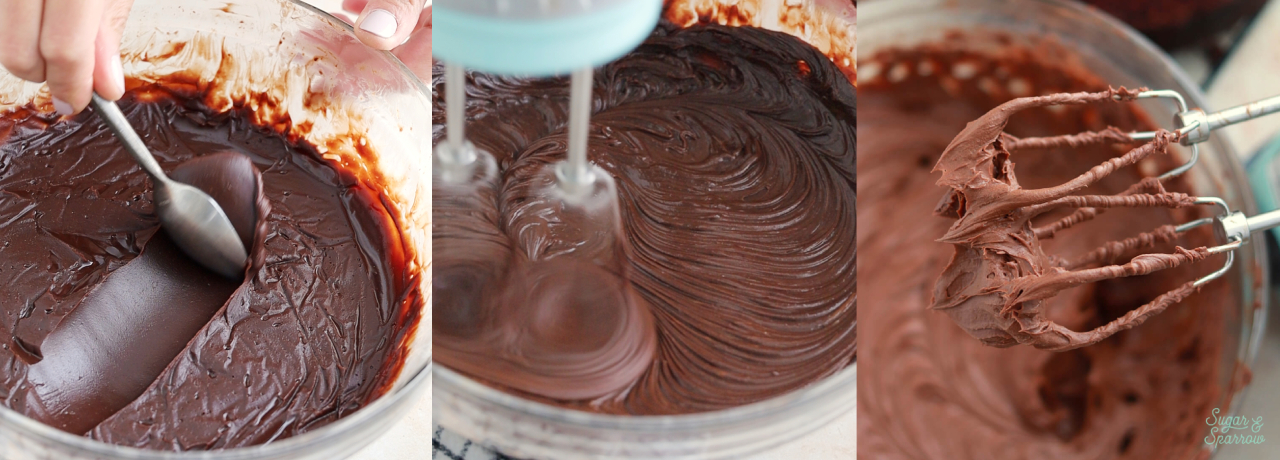
You’ll need to work quickly with the whipped ganache because it will start to set after about 10 minutes, but even if that happens you can troubleshoot with the tips below. Once the cake is frosted, chill it in the refrigerator while you prepare the caramel drip.
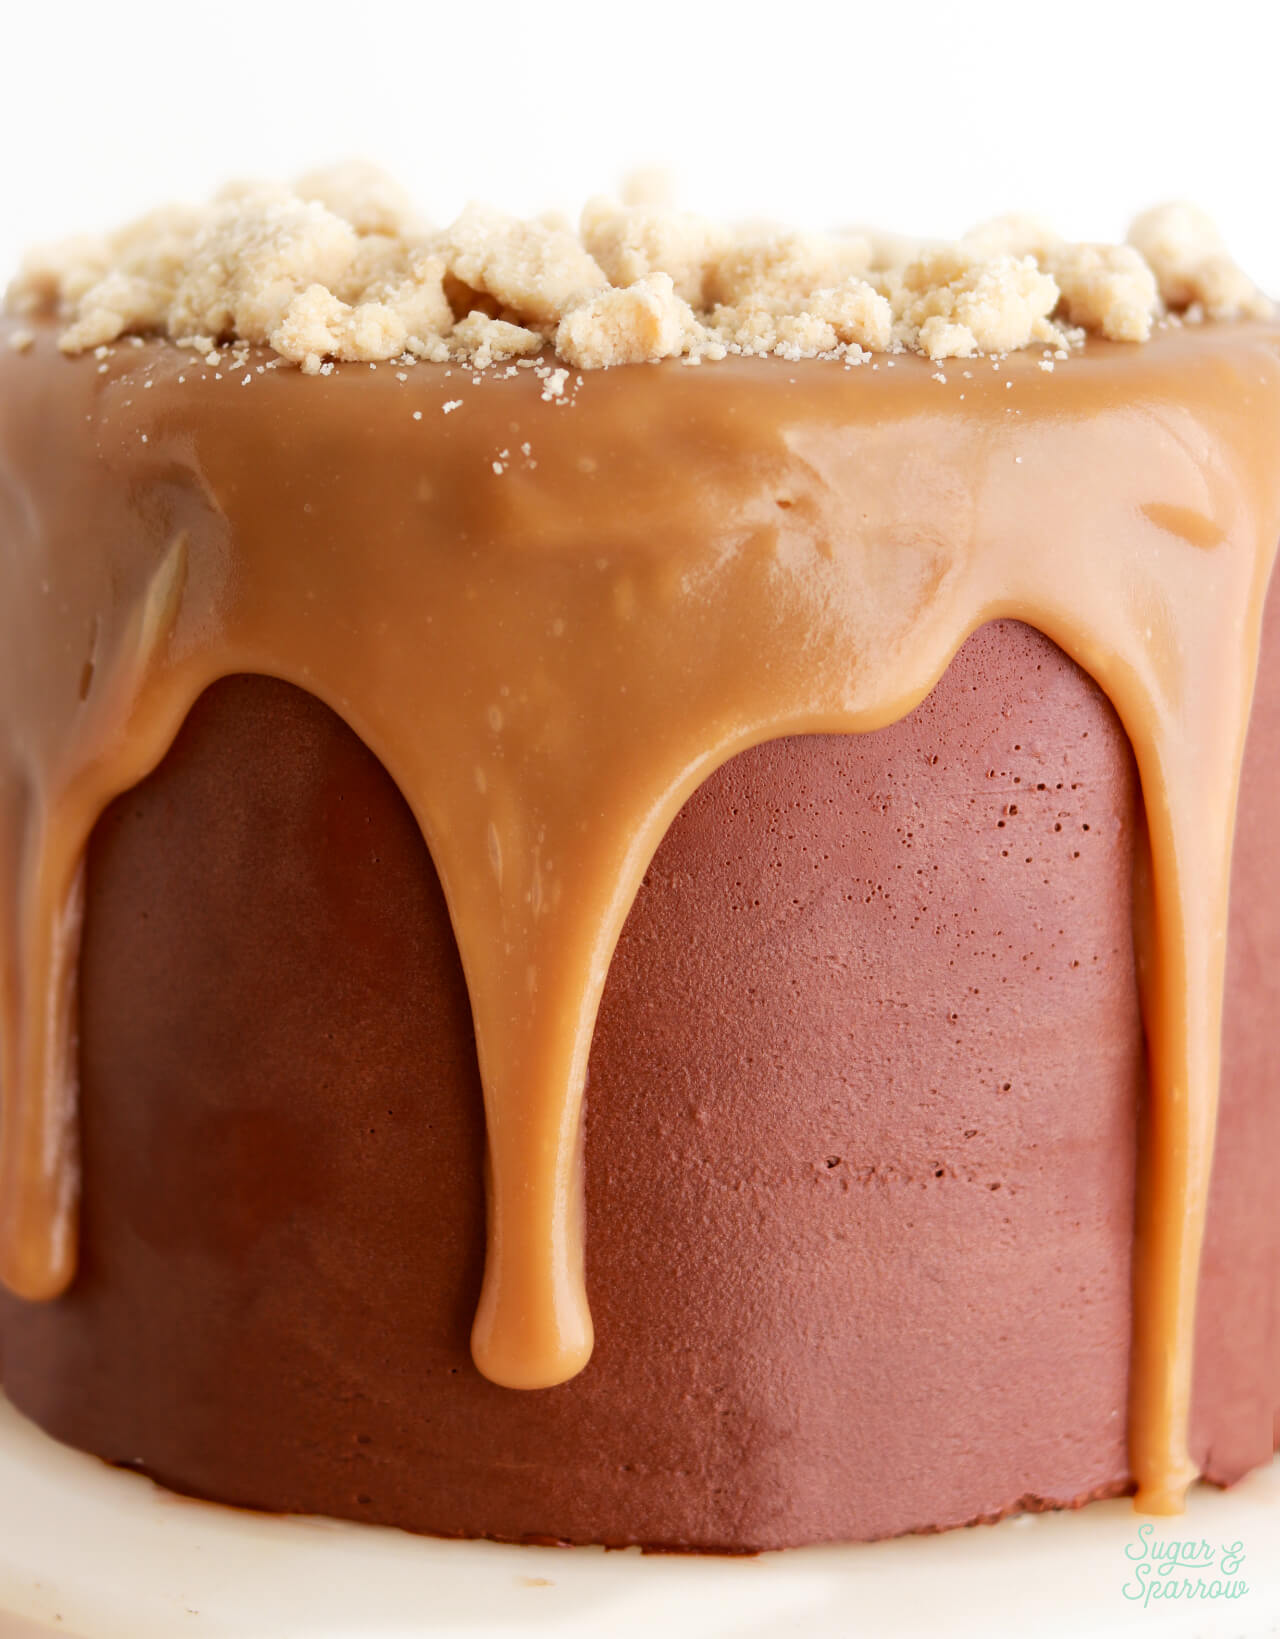
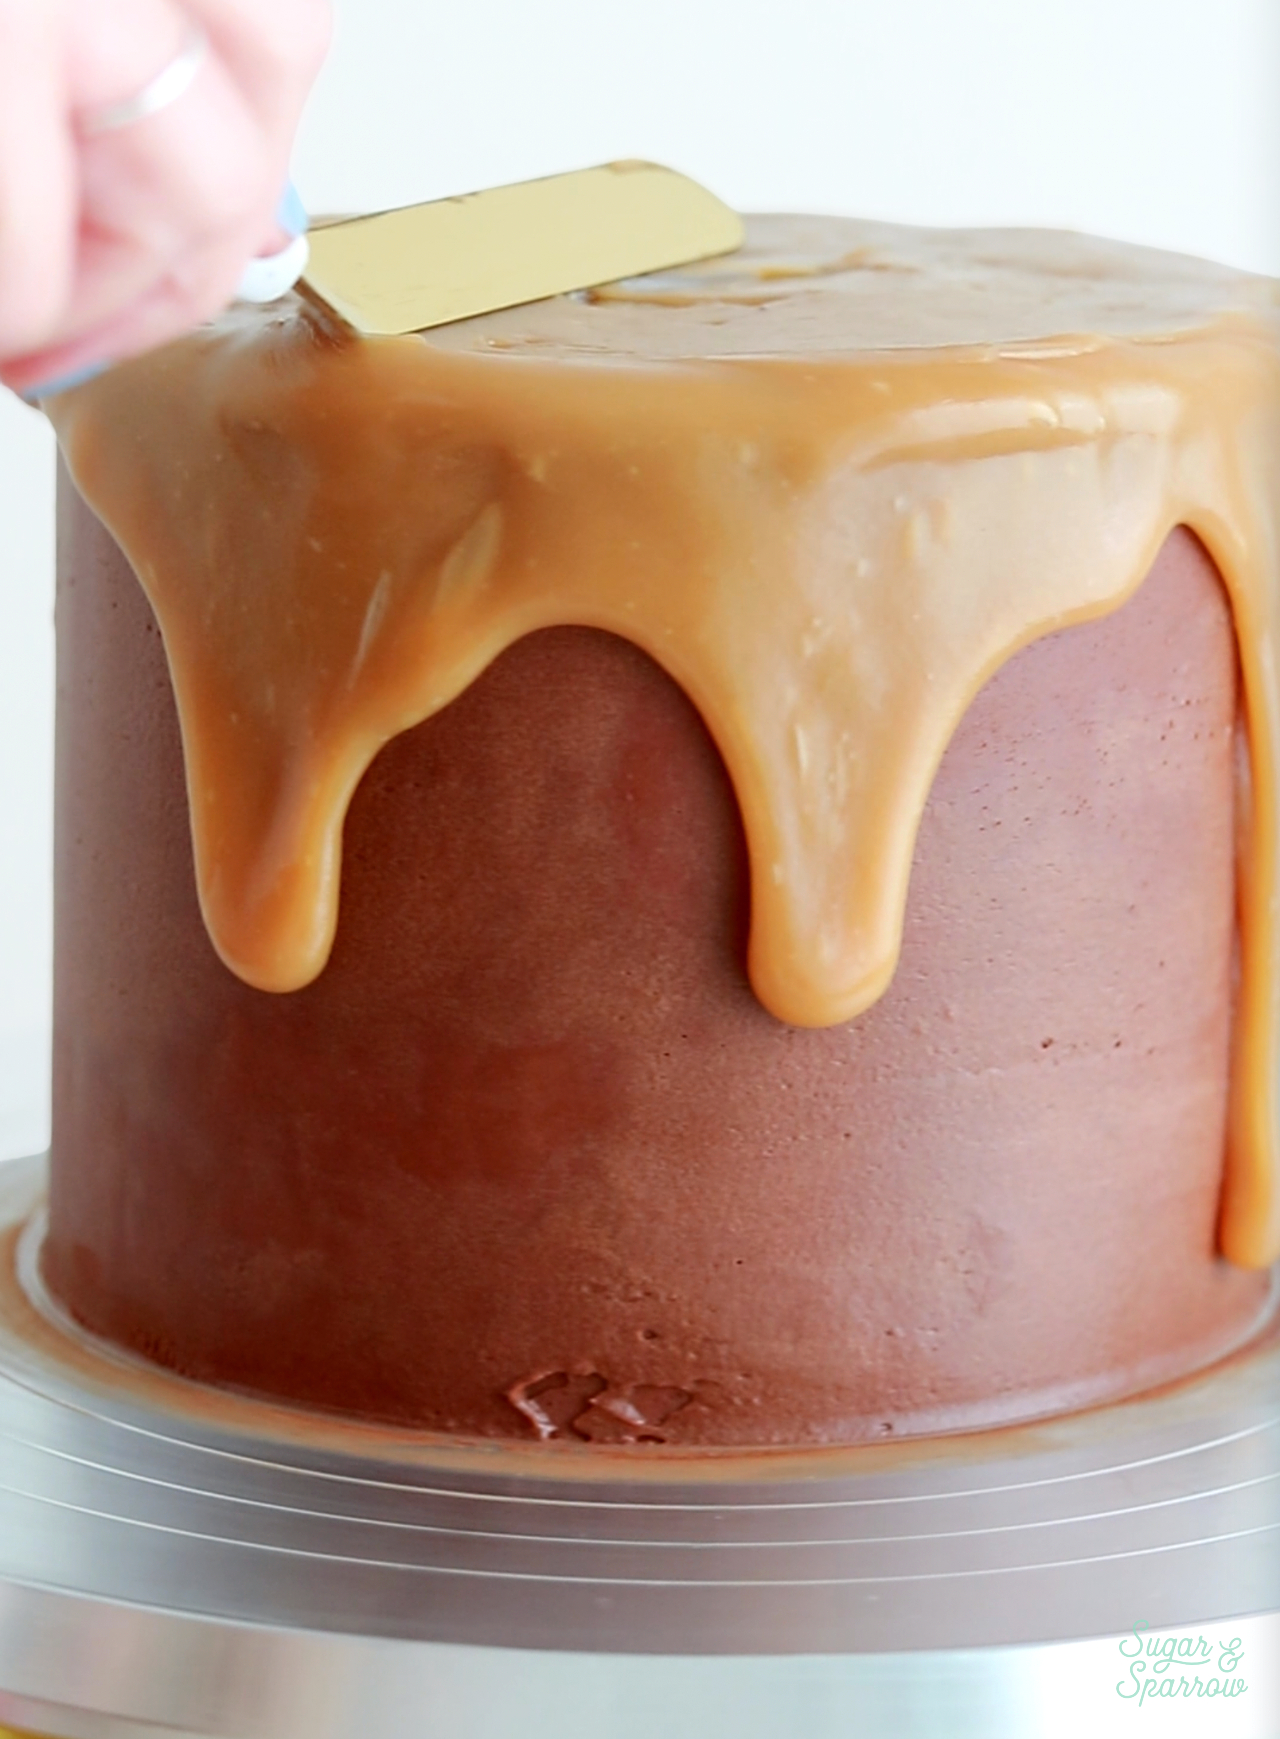
Step 6: Add the caramel drip and finishing touches. Gently microwave the rest of the caramel in 5-10 second intervals until it’s a little above room temperature and still thick, but pourable. Take the chilled cake out of the refrigerator and pour the caramel on top, then use an angled spatula to gently push it over the edges. The result should be a thick curtain drip of caramel.
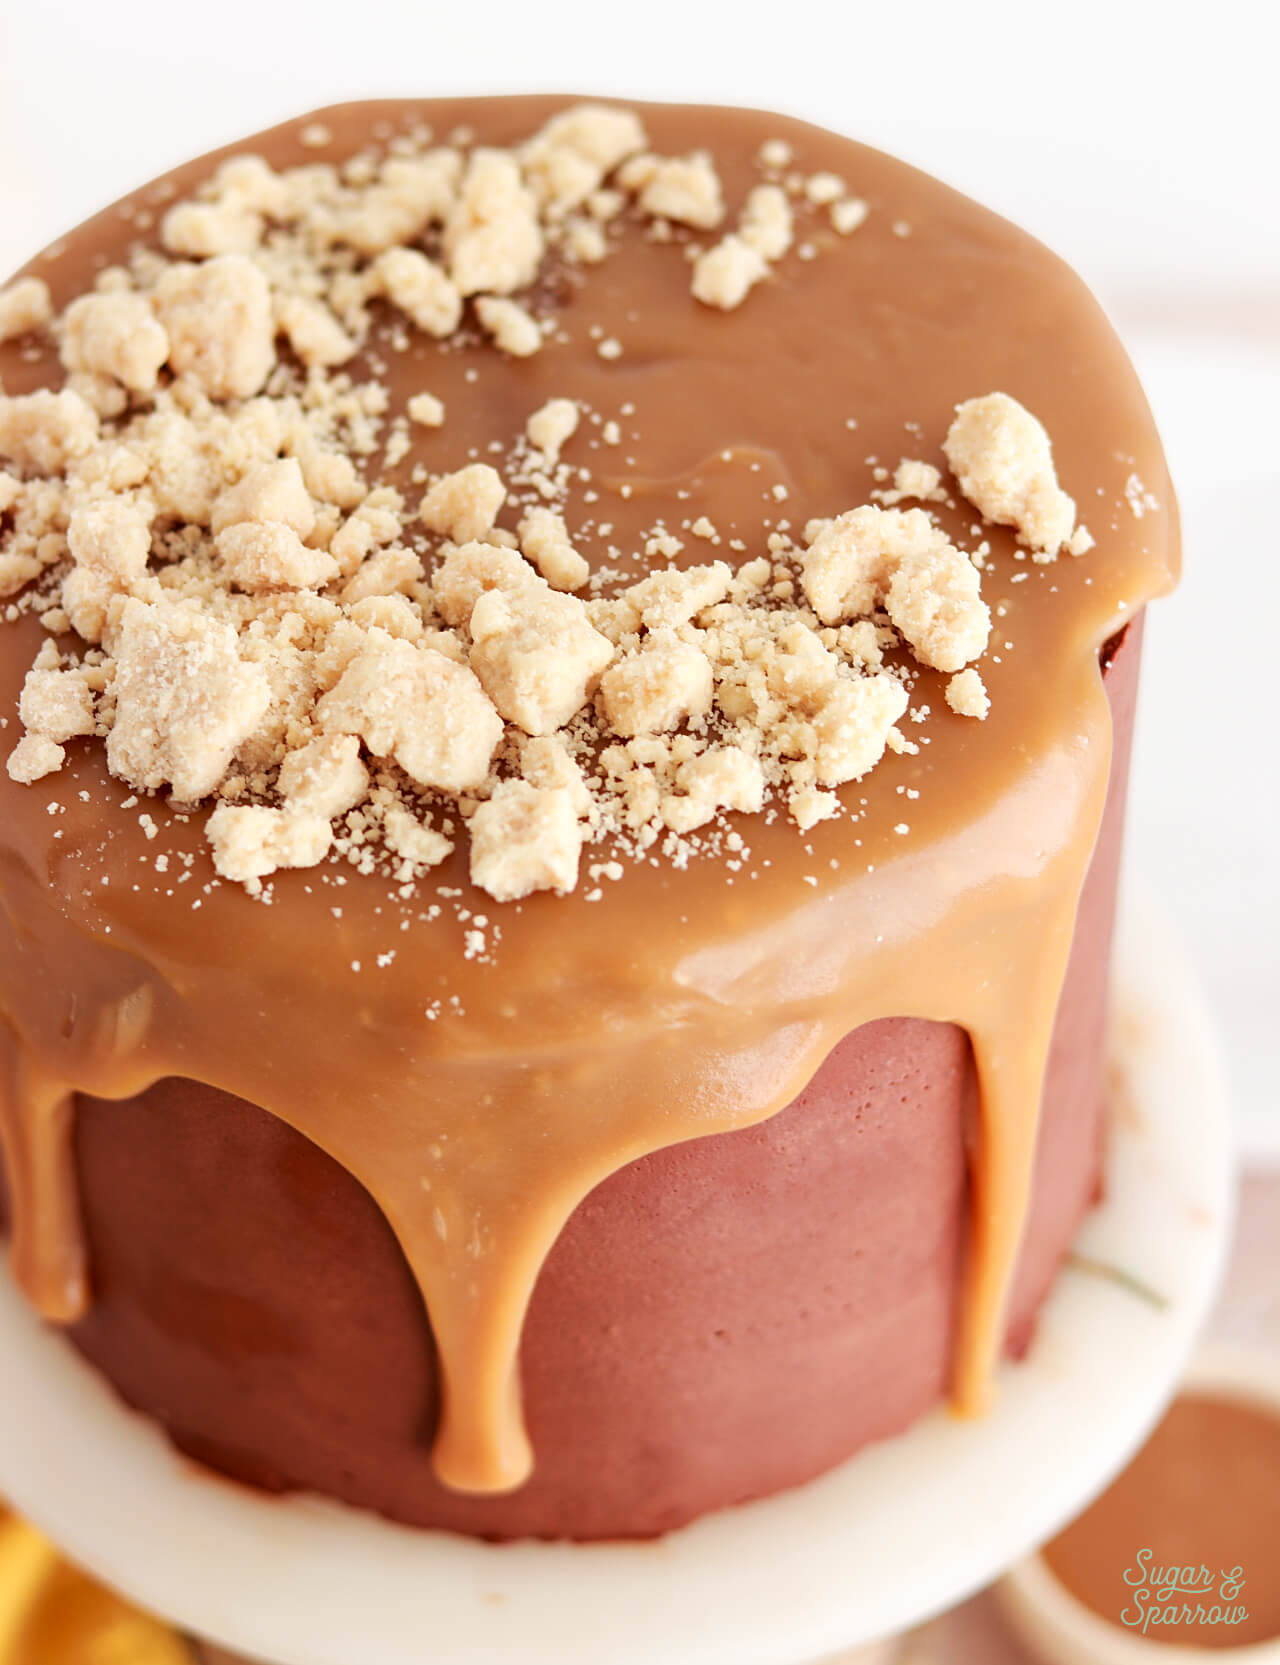
Finally, sprinkle the rest of the shortbread crumbles on top of the cake.
Best Practices for Making this Millionaire Cake
- Plan ahead. There’s a fair amount of cooling involved in this cake – cooling the cake layers, cooling the caramel to thicken it for the cake filling, and cooling the ganache to the right consistency for whipping into a frosting. With that in mind, I wrote this recipe in order of efficiency just in case you’re making it all in one day, but making elements ahead of time is going to be key to making this recipe not feel like so much of a marathon. I have instructions for making each of the elements ahead of time in the notes section of the recipe card below.
- Use a candy thermometer with the caramel. Cook the caramel to 225ºF (107ºC) and no further. If you cook it beyond this point, it will become really solid at room temperature (like caramel candy). Since we want this to be a thick yet gooey caramel filling, pay attention to the temperature.
- Work quickly with the ganache frosting. Whip the ganache right before you want to frost the cake, then work quickly to add and smooth it down. If the ganache starts to set while you’re frosting the cake, gently heat the rest of the whipped ganache in the microwave in 3-5 second increments and fold it with a rubber spatula until it’s extremely soft peaks. Then, go over the whole cake with the softened ganache. This will fill in all your imperfections!
- Know how to troubleshoot. The whipped ganache can seem finicky if you’ve never worked with it before. I wrote a blog post all about the whipped chocolate ganache frosting, so reference it if you need to troubleshoot the consistency or just see more pictures of how it should look. If you think you’re in over your head, you can easily substitute the frosting with this chocolate buttercream.
Other Cake Recipes You’ll Love
If you love this Millionaire cake, save these other cake recipes for your future bakes:
- Twix Cake
- Snickers Cake
- Milky Way Layer Cake
- Fudgy Chocolate Nutella Cake
- Chocolate Chip Cookie Dough Cake
I hope you love this chocolate Millionaire cake as much as I do! Let me know if you make it in the comments below and feel free to tag @sugarandsparrowco on Instagram to show me if you post a photo. I love to see what you create with my recipes!
Millionaire Cake
Ingredients
Chocolate Cake
- 2 Cups (265g) all purpose flour
- 1 2/3 Cups (340g) granulated sugar
- 2/3 Cup (60g) unsweetened natural cocoa powder
- 2 tsp baking soda
- 1 tsp baking powder
- 1/2 tsp kosher salt
- 1/2 Cup (120ml) vegetable oil
- 2 large eggs, room temperature
- 1 1/2 tsp pure vanilla extract
- 1 Cup (240ml) buttermilk*, room temperature DIY recipe in the notes
- 1 Cup (240ml) hot coffee or hot water
Thick Caramel Filling
- 2/3 Cup (210g, 160ml) sweetened condensed milk
- 1/2 Cup (113g) unsalted butter
- 1 Cup (200g) packed brown sugar light or dark
- 1/3 Cup (80ml) light corn syrup
- 5 Tbsp (75ml) heavy whipping cream
- 1 tsp salt
- 1 tsp pure vanilla extract
Whipped Chocolate Ganache Frosting
- 1 1/4 Cup (8oz, 185g) chopped semi-sweet chocolate bar or chocolate chips
- 1 Cup (8oz, 240ml) heavy whipping cream
Baked Shortbread Crumbles*
- 3/4 Cup (99g) all-purpose flour
- 2 1/2 Tbsp (32g) granulated sugar
- 1/8 tsp baking powder
- 1/4 tsp salt
- 4 Tbsp (57g) unsalted butter, melted
- 1/2 tsp pure vanilla extract
Caramel Buttercream
- 3/4 Cup (170g) unsalted butter, room temperature
- 2 1/4 Cups (270g) powdered sugar
- 1 tsp pure vanilla extract
- 1/3 Cup (80ml, 115g) thick caramel filling recipe above
- 1 Tbsp whole milk, divided, room temperature
- pinch of salt, or to taste
Instructions
Make the Chocolate Cake
- Preheat the oven to 350ºF (177ºC) and prepare three 6-inch or two 8-inch or 9-inch cake pans by spraying the sides with baking spray and fitting the bottoms with a parchment cake circle.
- Place all of the dry ingredients into the bowl of a stand mixer and stir on low for 30 seconds to fully combine them. Add the vegetable oil, eggs, vanilla, and buttermilk and mix on low until just combined. With the mixer still on low, add the hot coffee (or hot water) in a slow stream, then turn the mixer to medium and beat until smooth, about 2 minutes. The batter will be very thin.
- Pour into prepared cake pans no more than 2/3 full and bake for 32-36 minutes, until a toothpick inserted comes out clean. Cool completely before assembling.
Make the Thick Caramel Filling
- In a large saucepan over medium heat, add the sweetened condensed milk, butter, brown sugar, corn syrup, heavy whipping cream, and salt. Stir with a rubber spatula constantly until the mixture is fully combined and begins to bubble, about 5 minutes.
- Continue stirring until the caramel begins to thicken, 6-7 minutes. If you have a candy thermometer, you’ll want to cook this until it reaches 225ºF (107ºC). That is the temperature that will thicken the caramel while keeping it nice and soft at room temperature.
- Remove the caramel from the heat and mix in the vanilla extract. Pour into a separate container and let the caramel cool completely to room temperature before using it to fill the cake. You can either leave the container on the counter for about 2 hours or speed the cooling process slightly by placing the container in the refrigerator. It will thicken significantly as it cools.
Make the Chocolate Ganache
- Place the chocolate chips into a heat resistant bowl (glass or metal) and set aside. In a saucepan over medium-high heat, warm the heavy whipping cream until it just starts to simmer. I always look for small bubbles forming around the edge and a soft simmer starting in the middle. When it's reached this point, pour the cream into your bowl of chocolate, cover it with a plate, and let it sit for 2 minutes.
- Whisk the chocolate and heavy cream mixture together until it’s uniform in consistency and there are no bits of chocolate left on your whisk. Cover the surface of the ganache with a piece of plastic wrap and refrigerate until the ganache is room temperature and the consistency of creamy peanut butter. This can take up to 2 hours depending on how deep your bowl of ganache is (the shallower the container the quicker it will set). With my medium sized bowl it took 1 hour and 15 minutes minutes to chill.
- Wait to whip the ganache into frosting until you've assembled the cake and are ready to frost it (instructions below).
Make the Shortbread Crumbles
- Preheat the oven to 250°F (121ºC) and line a baking sheet with parchment paper. In a medium bowl, whisk together the flour, sugar, baking powder, and salt.
- Add the melted butter and vanilla extract. Mix with a rubber spatula until the mixture begins to form small clusters, then press the ingredients together with your hands to form even more clusters. Spread the clusters onto the prepared baking sheet and bake for 30 minutes. Cool the crumbs completely before using in the cake assembly.
Make the Caramel Buttercream
- When the caramel is cooled to room temperature, make the caramel buttercream. In a stand mixer fitted with the paddle attachment, whip the butter on high until it’s creamy and light in color, 5-6 minutes.
- Add the powdered sugar and mix on low speed until combined, scraping down the bowl and paddle afterward. With the mixer still on low, mix in the vanilla extract, the caramel, salt, and 1 teaspoon of the milk. Continue mixing on low speed until fully combined. It will be slightly thick, which is perfect for assembling the dam for the filling. We will thin it out with the rest of the milk when it comes time to use it as a crumb coat.
Assembly
- Once the chocolate cake layers have cooled completely, level and torte each layer to your desired height. Add about 1.5 Cups of caramel buttercream into a piping bag and snip off about 1/2 inch opening.
- Place the first cake layer on a turntable and pipe a circle of caramel buttercream around the edge of the cake layer, then pipe another circle of buttercream on top of the first to make it slightly taller. Fill in the center 2/3 of the way with the thick caramel filling and smooth it down. Then, sprinkle some shortbread crumbles on top and press them down. Here's a detailed tutorial on this filling method in case this is your first time working with soft fillings.
- Place the next cake layer on top and repeat the process of piping the caramel buttercream circle and filling in the center with the caramel and shortbread crumbles. Place the final layer on top, upside down so that the bottom of the cake layer is the top of the cake.
- Mix the remaining 1-2 teaspoons of milk into the caramel buttercream to thin it out, then use it to crumb coat the cake. Place the cake into the refrigerator to firm up before adding the frosting.
- Whip the Chocolate Ganache: When the ganache is ready to whip it will be about the consistency of smooth peanut butter. Use a stand mixer with the whisk attachment or a hand mixer, whip the ganache on medium-high speed just until it lightens in color and maintains a nice soft peak (similar to the consistency of buttercream frosting), about 1-2 minutes*.
- Immediately use the whipped chocolate to frost the cake with a smooth finish, then place the cake back into the refrigerator while you prepare the caramel for the drip.
- Add the Caramel Drip: Place the remaining caramel into a microwave safe bowl and microwave in 5-10 second intervals until it's slightly above room temperature and thick, yet pourable. Pour the caramel over the cake and use an angled spatula to push it over the edges. Sprinkle the top of the cake with the remaining shortbread crumbles.
Notes
- The chocolate cake layers can be made ahead and stored at room temperature, covered tightly in plastic wrap, for up to two days. Alternatively, you can cover with plastic wrap and store in the freezer for up to two months before thawing to room temperature.
- The thick caramel filling can be made ahead and stored in an airtight container in the refrigerator for up to two weeks. When you’re ready to use it, bring it back to room temperature before using as filling. It should be spreadable consistency at room temperature, but if you need it to be easier to spread you can microwave it in 5-10 second increments.
- You can make the chocolate ganache, cover with plastic wrap, and store in the refrigerator for up to two weeks before bringing it back to room temperature and whipping into frosting. The already whipped ganache frosting can be stored in an airtight container in the refrigerator for up to two weeks. When you’re ready to use it, bring it back to room temperature and re-whip until it reaches smooth frosting consistency.
- The baked shortbread crumbles can be made ahead and stored in an airtight container in the refrigerator for up to two weeks.
- The caramel buttercream can be made ahead and stored in an airtight container at room temperature for up to 1 day. Alternatively, you can store it in an airtight container in the refrigerator for up to two weeks. When you’re ready to use it, bring it back to room temperature and remix with your stand mixer to bring back to frosting consistency.



I made this cake after seeing my sister make it. She shared this recipe with me. She did a great job. It looked beautiful but I did not feel confident enough that I would decorate it as well so I made it in a 13 by 9 pan and layered it buttercream then caramel then ganache with shortbread crumbles and drizzled caramel. Thanks for great recipe. Everyone loved it and asked me about the steps to make it.
Hi Barbara! I’m so happy you loved this recipe! It’s one of my favorite flavors and I love that you made a sheet cake version. That’s so smart!
This cake is so amazing! Your make ahead instructions were very helpful. I made the cake in 2 8×8 pans and torted each layer. (I should have increased the yield slightly so they were a little thicker but it still worked out nicely) I assembled as two 4×8, 4 layer cakes for individual cake slices. I crumb coated both “logs” then piped the buttercream and chocolate frosting along the side of each slice in my to go boxes then drizzled a little caramel over the top. It was all super delicious. I wanted to just eat the caramel sauce and caramel buttercream with a spoon. Thanks so much. I’m looking forward to trying many more of your recipes!
This was not only delicious, your instructions were so clear and simple, it led me to the most picture perfect layer cake I’ve ever made. I did two 6-inch layers and that was plenty decadent for my teen’s birthday!
Oh my gosh, Whitney! This cake is divine! It is a labor-intensive cake, but well worth it. All the components were so delicious, but the ganache frosting was outstanding! Thank you for the wonderful recipe.
Yay, Lori! I’m so happy you loved this recipe as much as I do!!
This looks absolutely incredible! I love how you recreated the Disney World cake with so much detail. Your step-by-step guide and tips for planning ahead are so helpful—it makes this beautiful, complex cake feel achievable. That thick caramel filling and shortbread crumble combo sounds like pure heaven.
For anyone who has made this (or a similar multi-component cake), what was your biggest time-saving trick or “make ahead” element that made the assembly day much smoother?
Hi Christine! I’m excited for you to make this cake. If you only have time to make a few elements ahead, I’d say the biggest time savers will be the caramel, the cake layers, the shortbread crumbles, and the ganache. Then on assembly day, all you have to do is make a quick caramel buttercream for filling and stacking, then whip the ganache for the frosting. All of the make ahead instructions are in the notes section of the recipe card. I hope that helps!
I thought you couldn’t just replace normal cocoa powder with dutch process powder because it has leveling agents to it? I thought I remember you saying that in one of your vids before. I would prefer to use dutch cocoa in this to make it as chocolatey as possible. Thanks!
Hi Bryce! In some recipes (ones that exclusively use baking soda as the leavening agent), Dutch-processed cocoa powder won’t work. It works wonderfully in this recipe though!