
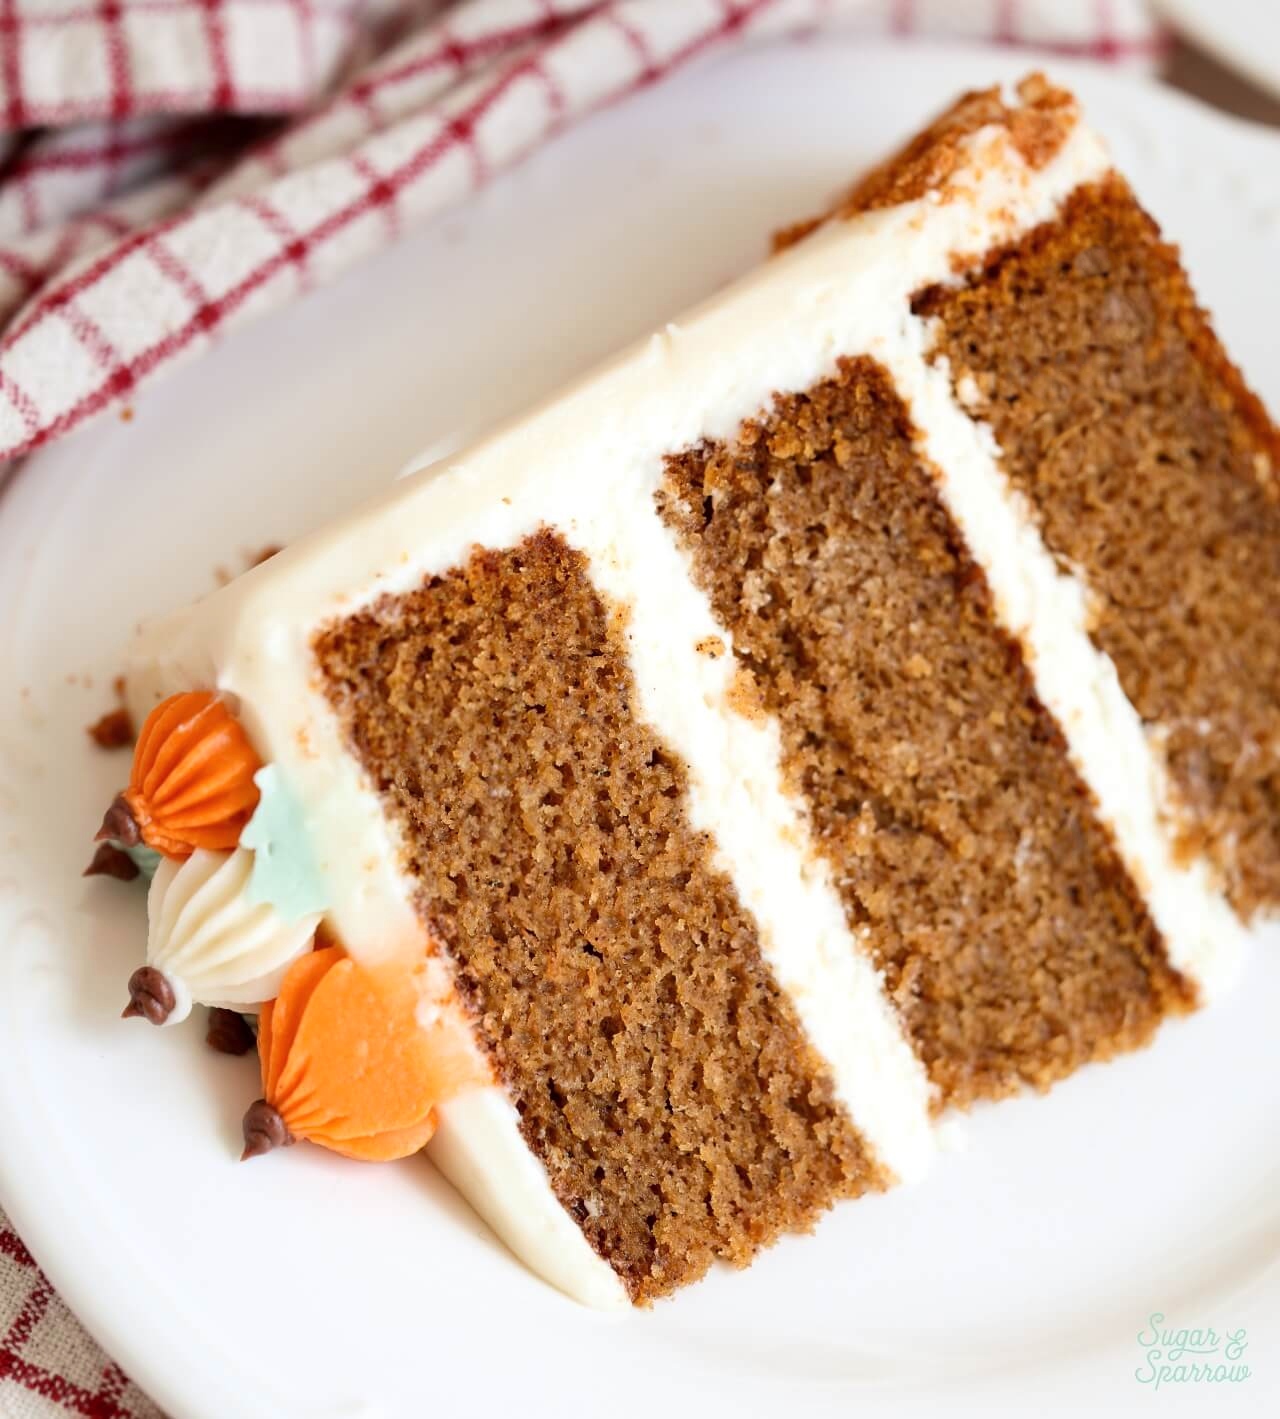
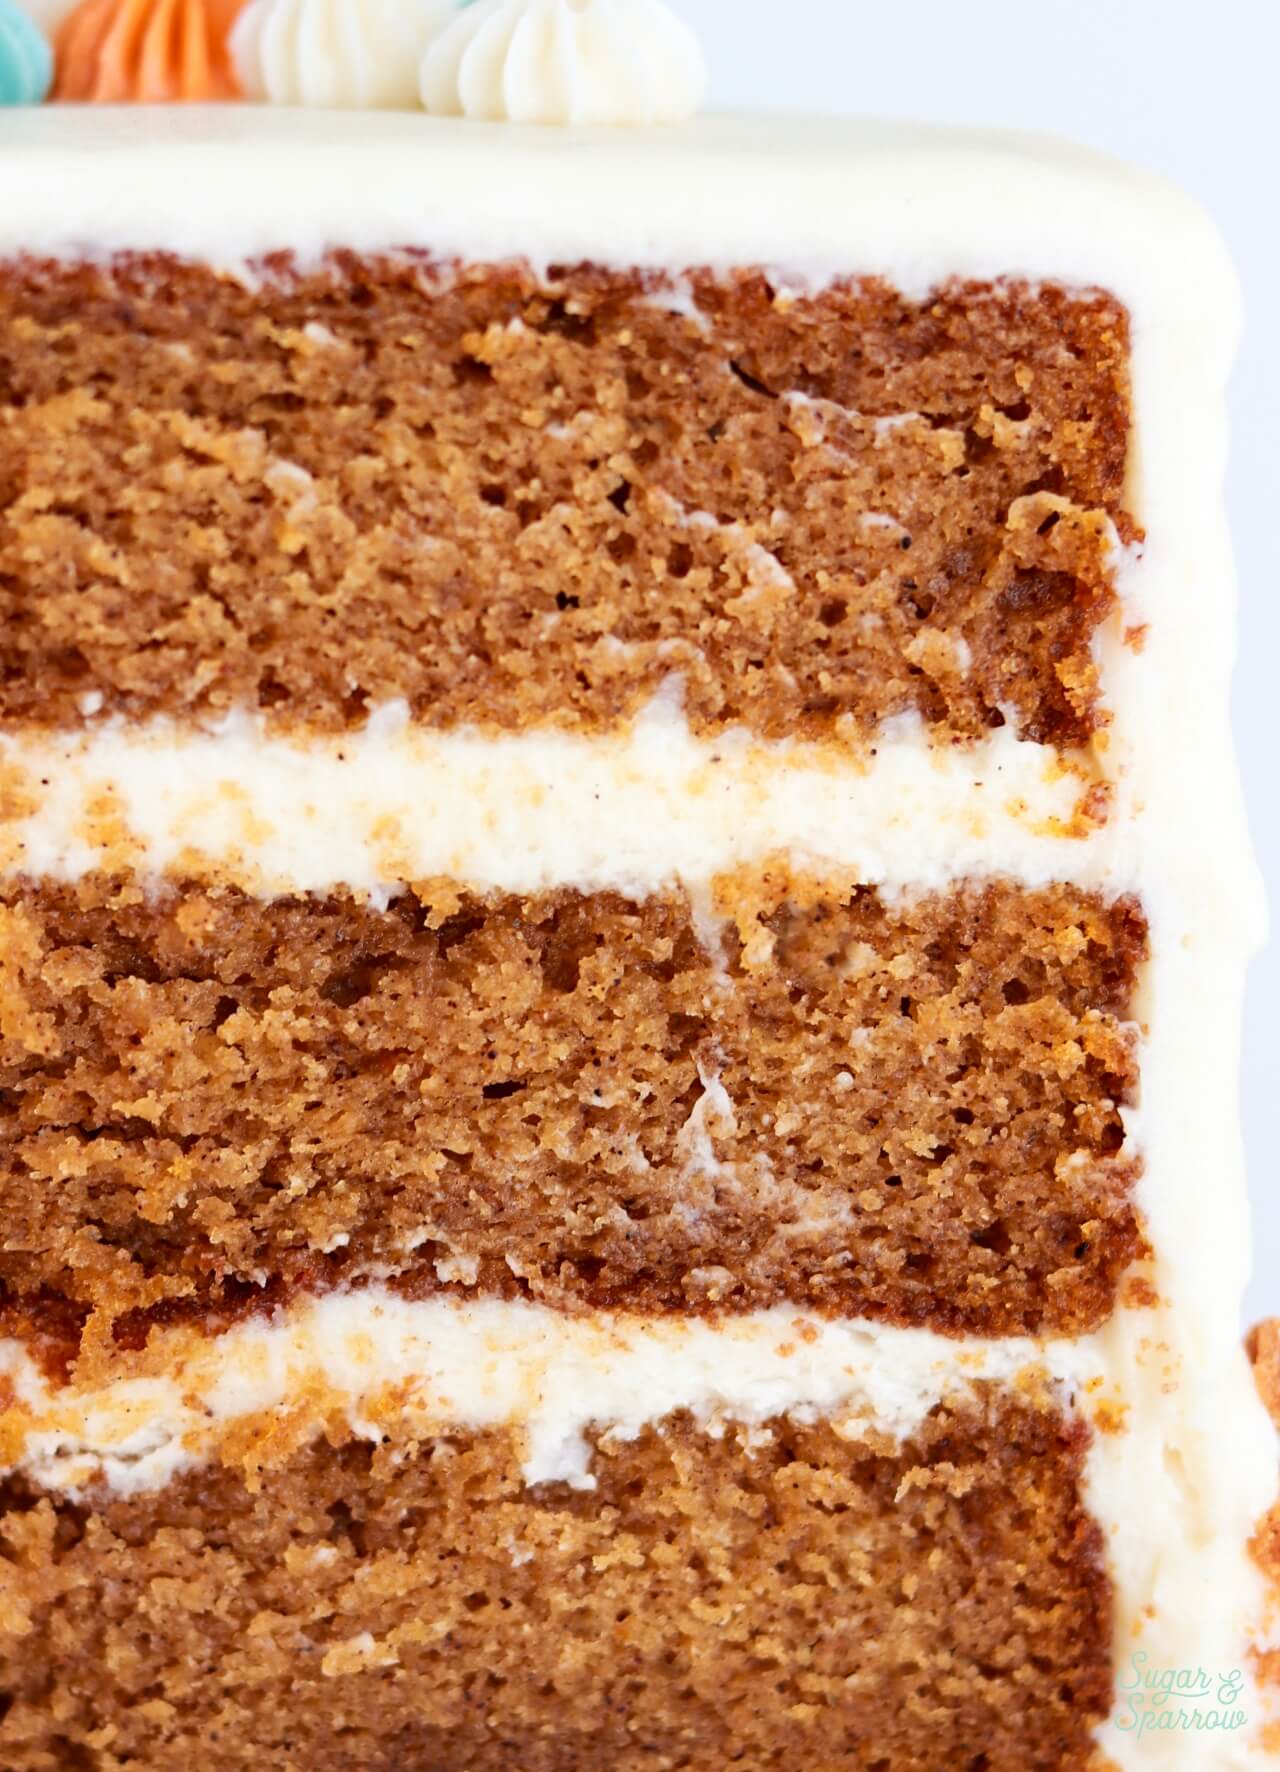
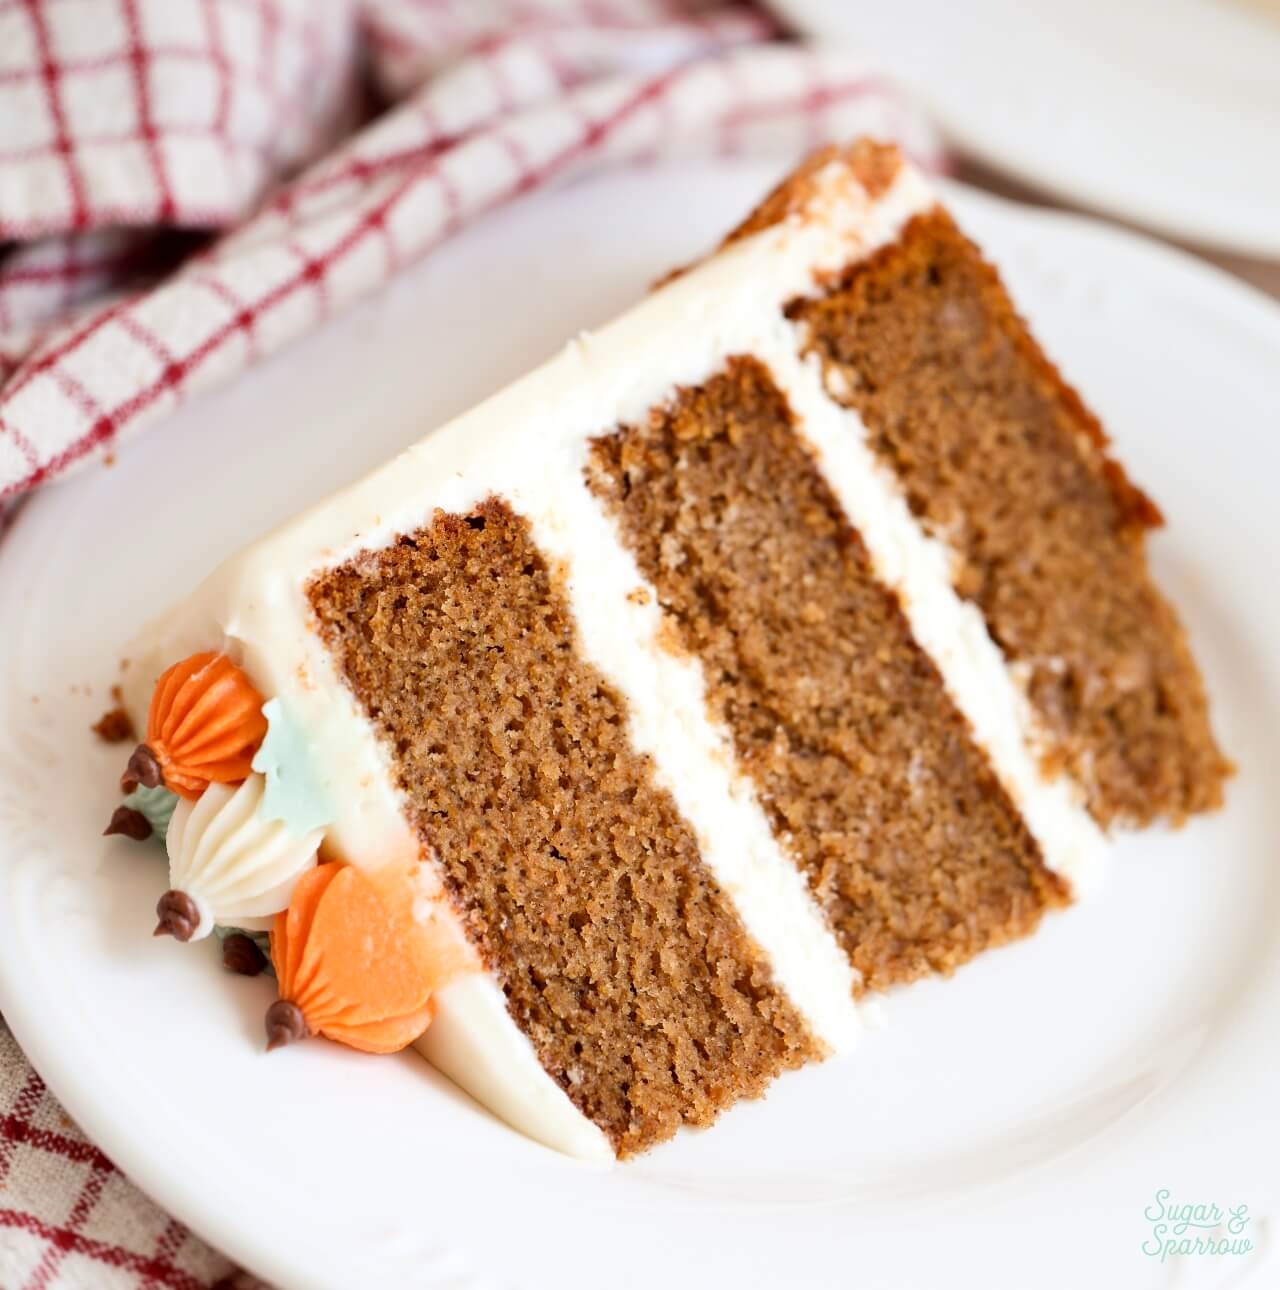
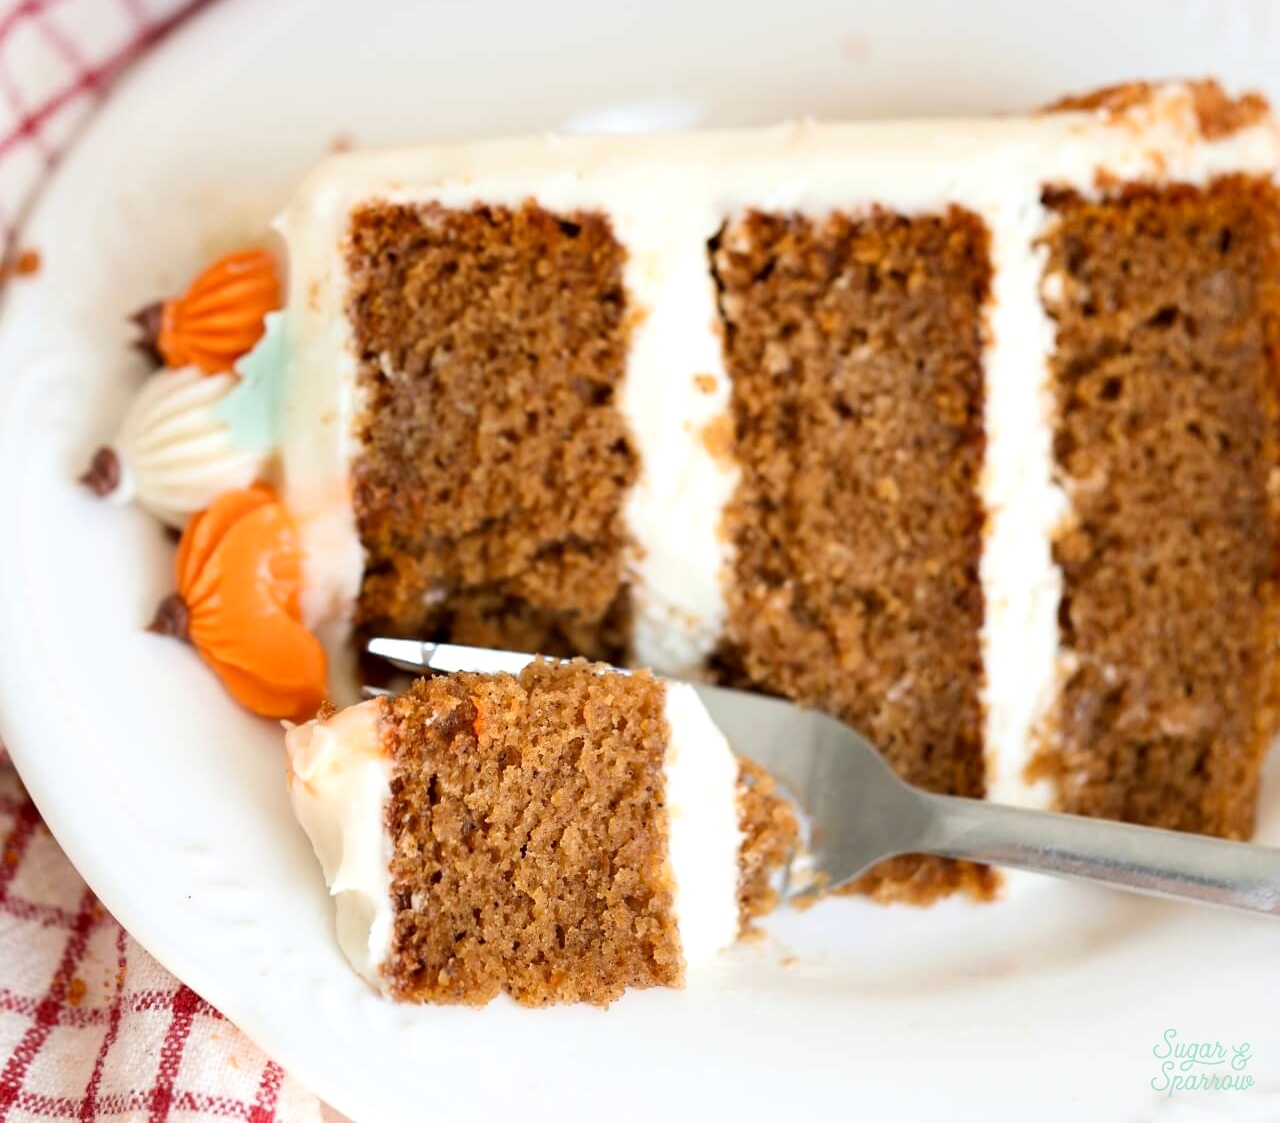
This is my all-time favorite pumpkin layer cake recipe that I can’t help but bake all cozy season long! The cake layers have amazing spiced pumpkin flavor, are so tender and moist, and taste incredible with cream cheese buttercream. Some of my favorite things about this recipe are that it uses an entire 15-ounce can of pumpkin puree and you can use oil and melted butter interchangeably and have an incredibly moist, irresistible texture. It’s the perfect Fall cake you’ll love for years to come!
One Reader, Katherine, says: “I just had to come back and say I made this recipe and it was AMAZING! The cake turned out sturdy but moist, and so flavorful.” ★★★★★
Why You’ll Love this Pumpkin Layer Cake
- Incredibly easy to make. Simply whisk together the dry ingredients in one bowl, whisk together the rest of the ingredients in another, and combine the two. The batter comes together in minutes and is super fail proof!
- Perfect spiced pumpkin flavor. The cake is flavored with 100% pumpkin puree and all of the spices compliment it beautifully. You can either use the cinnamon, allspice, nutmeg, and ginger listed in the ingredients or substitute the spices listed with pumpkin pie spice – either way you’ll end up with the ideal spiced pumpkin cake!
- Uses a whole can of pumpkin. This recipe uses all 15 ounces, so there’s no awkward pumpkin leftovers to figure out what to make with!
- Can be made with oil or melted butter. You can make this cake with vegetable oil (or any neutral oil you love for baking), an equal amount of melted butter, or brown butter. All three ingredients yield an incredibly moist cake!
- Everyone’s favorite Fall cake. Pumpkin cake with cream cheese frosting is a flavor combination that few can resist, especially during the coziest time of the year!
Perfect Pumpkin Layer Cake Ingredients
Here are all of the most important ingredients and substitutes you can make if need be:
- Canned pumpkin puree. The pumpkin flavor of this cake comes from an entire 15 oz can of pureed pumpkin (not to be confused with canned pumpkin pie filling). Any brand will do, you’ll just want to make sure that pumpkin is the only ingredient listed on the label.
- All-purpose flour. Also known as plain flour, all-purpose flour gives these pumpkin cake layers the perfect structure.
- Baking powder + baking soda. The leavening agents used to make this cake rise.
- Spices. I use four beautiful warming spices in this recipe: cinnamon, allspice, nutmeg, and ginger. These spices perfectly compliment and enhance the pumpkin flavor! Feel free to experiment with the spices used if you want, or use 2 teaspoons of cinnamon + 3 teaspoons of pumpkin pie spice as a substitute for the rest of the spices.
- Vegetable oil or melted butter. You can use a neutral oil (like vegetable oil, canola oil, or whatever you love for baking) or melted butter in this recipe. Either ingredient choice will create a super moist crumb, and I do love the extra rich flavor that melted butter adds. If you’re feeling like going the extra mile, brown butter makes an incredible substitute here. Just be sure to start with 1 ¼ cups of butter before browning it since some of that butter will evaporate in the cooking process.
- Brown sugar + granulated sugar. Both sugars together not only sweeten this cake and soften the crumb, but I use more brown sugar in this ratio to add even more moisture.
- Eggs. The main binding agents in this recipe that blend the ingredients together and give the cake structure.
- Pure vanilla extract. A little vanilla rounds out the pumpkin flavor beautifully.
How to Make a Pumpkin Layer Cake
This pumpkin cake batter comes together so easily in minutes! I love that you can whisk it by hand the whole time:
Whisk Together the Dry Ingredients
In a medium bowl, combine the all-purpose flour, baking powder, baking soda, salt, and spices.
Combine the Rest of the Ingredients
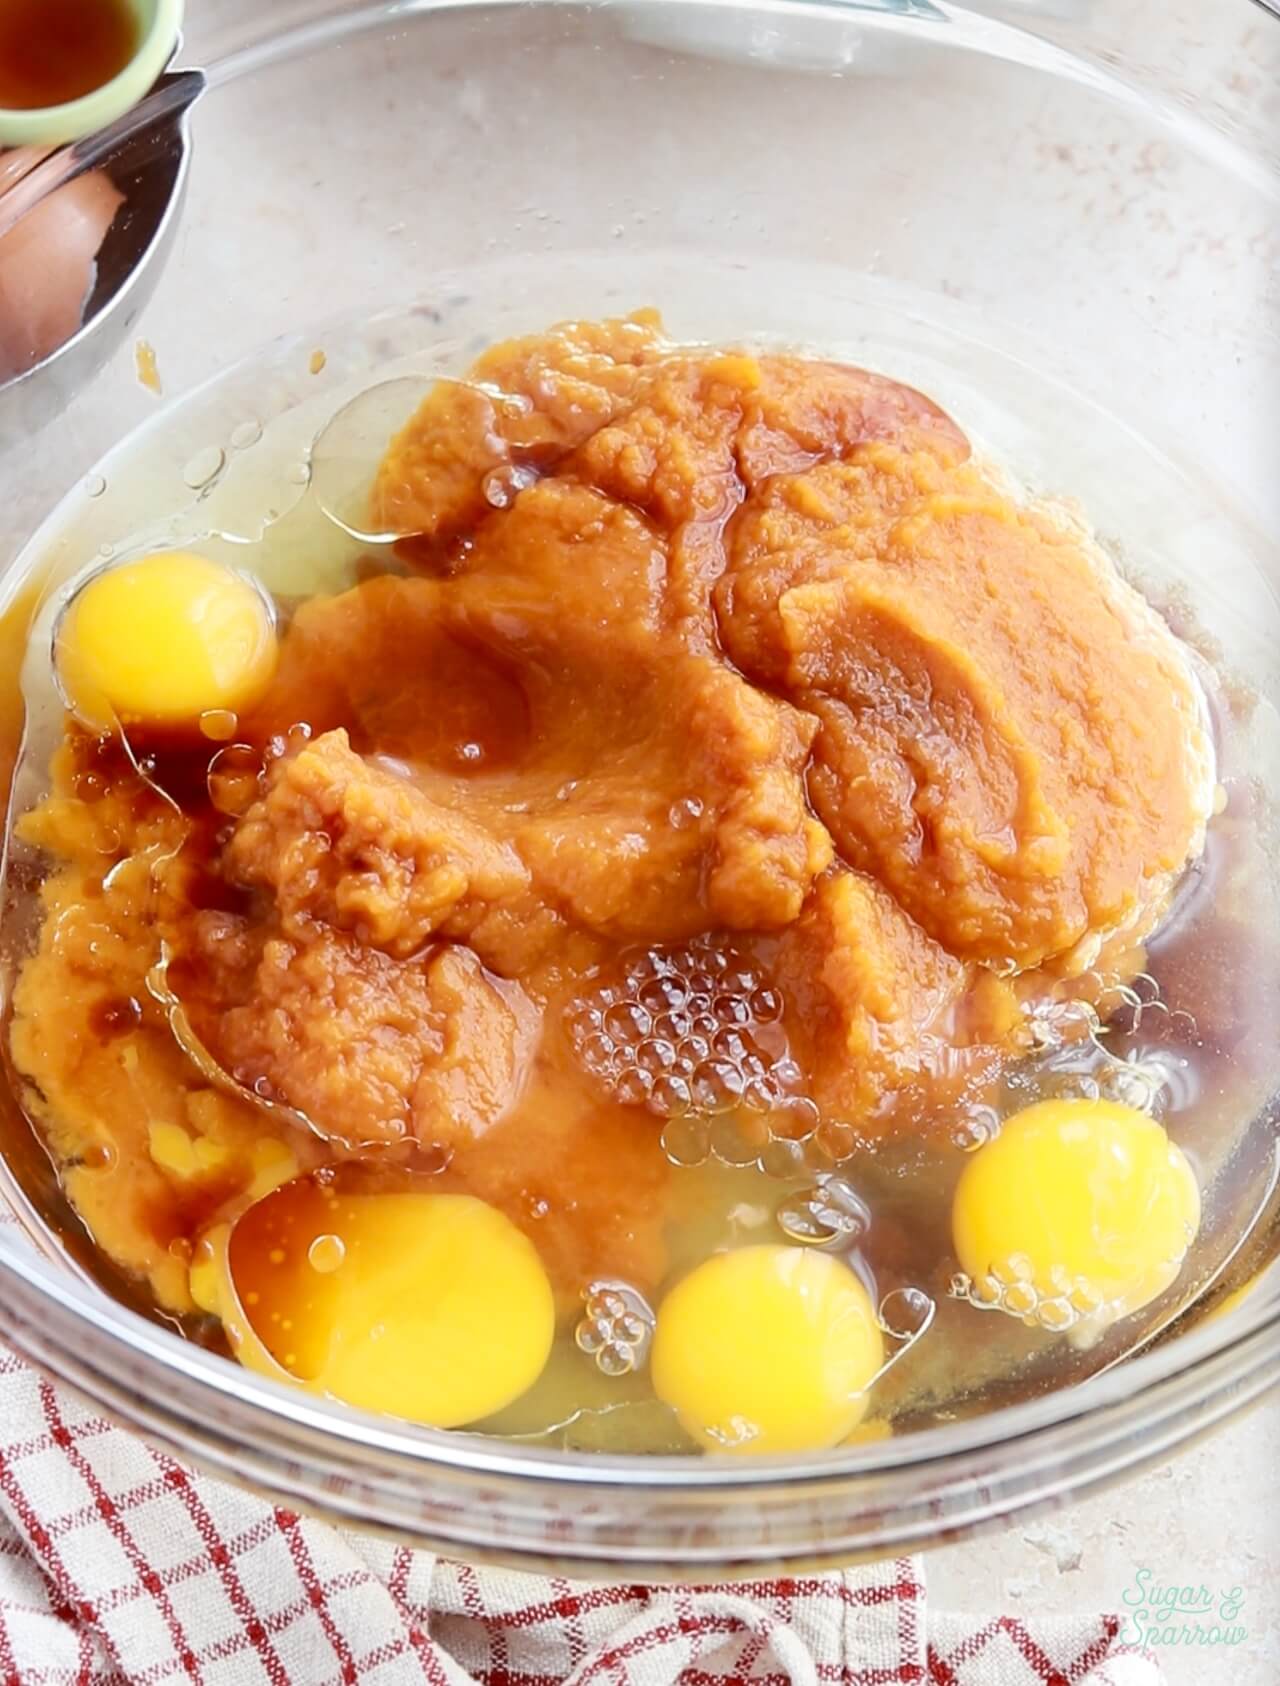
In a large bowl, whisk together the sugars, canned pumpkin, melted butter or oil, eggs, and vanilla.
Whisk the Dry Ingredients into the Wet Ingredients
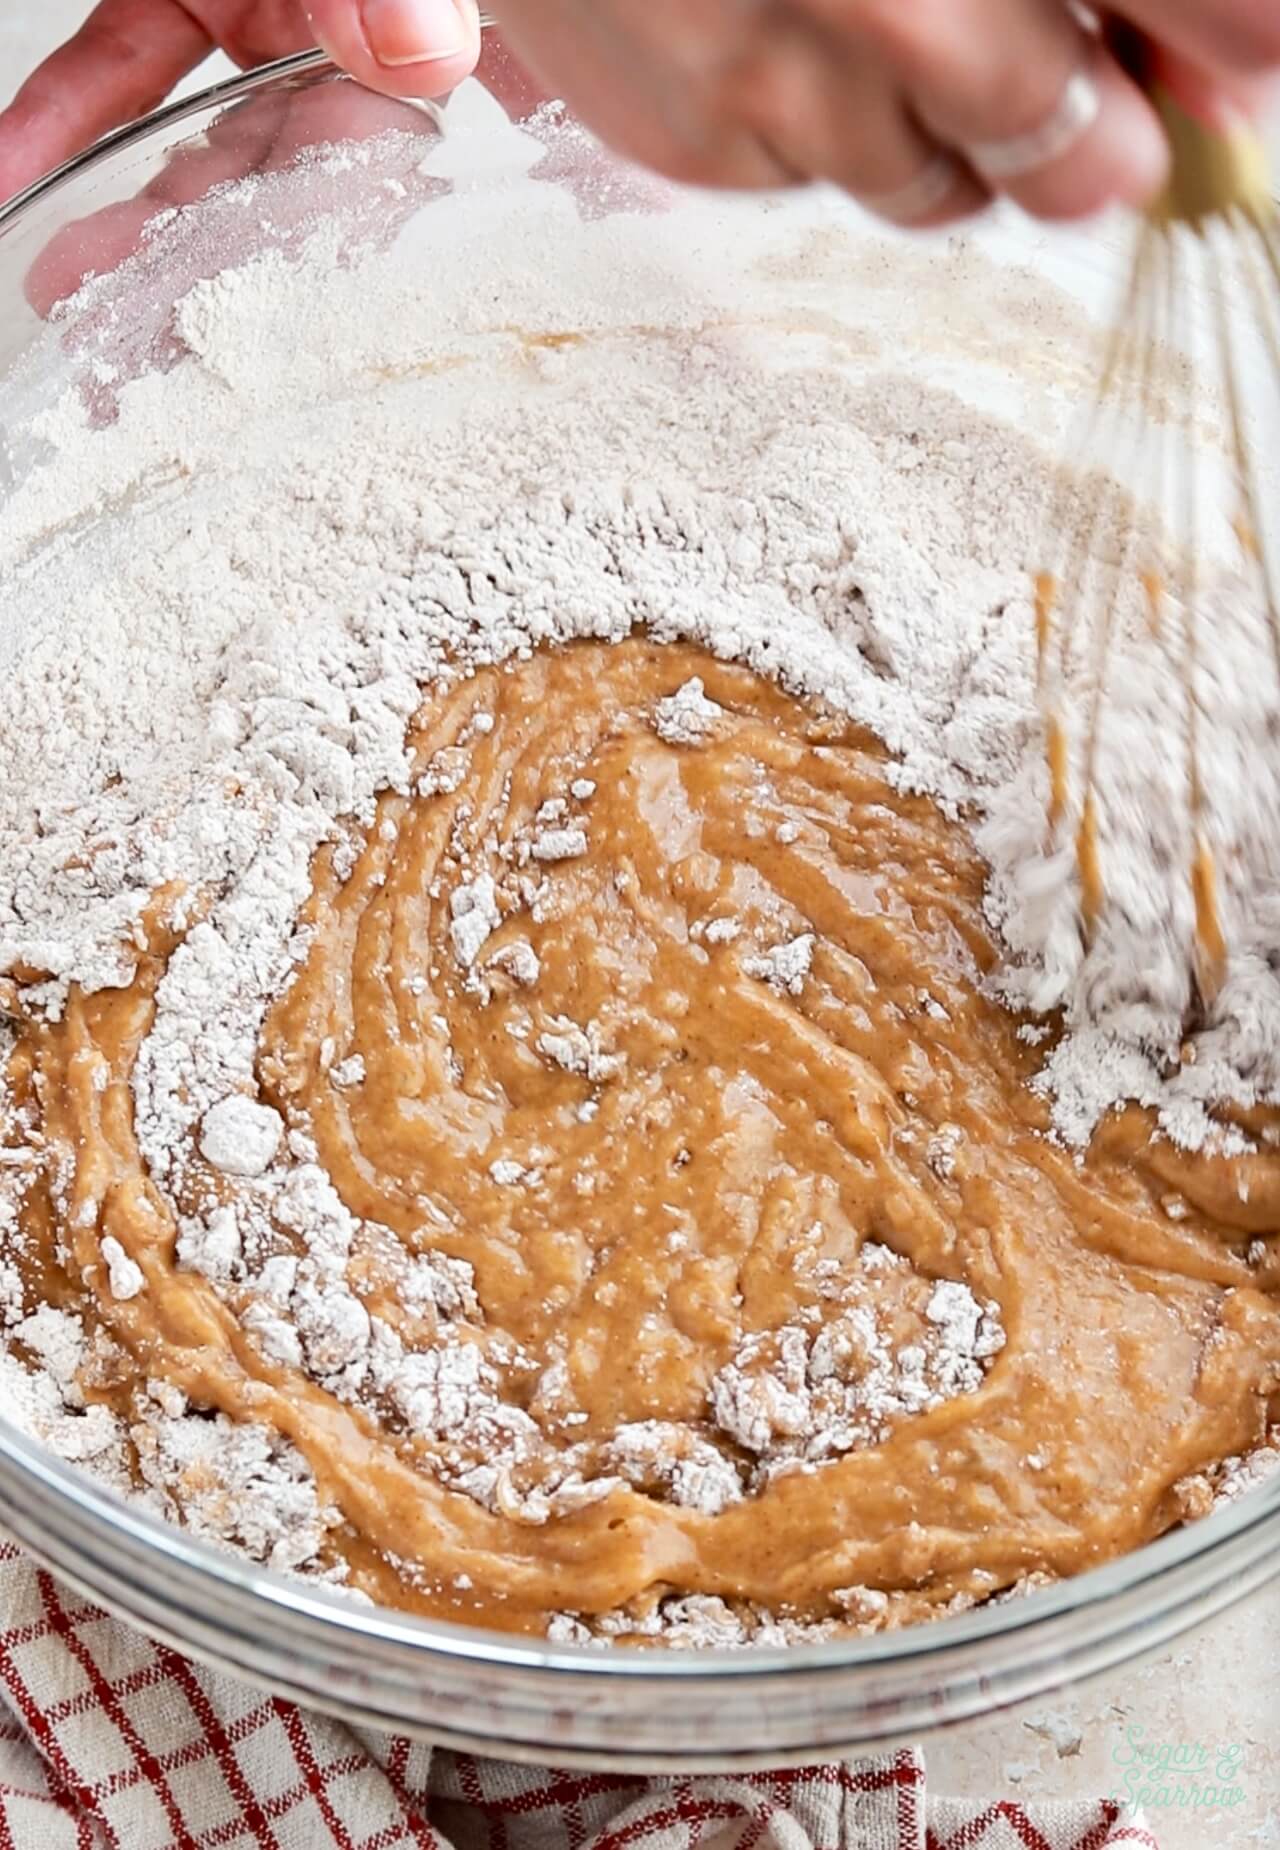
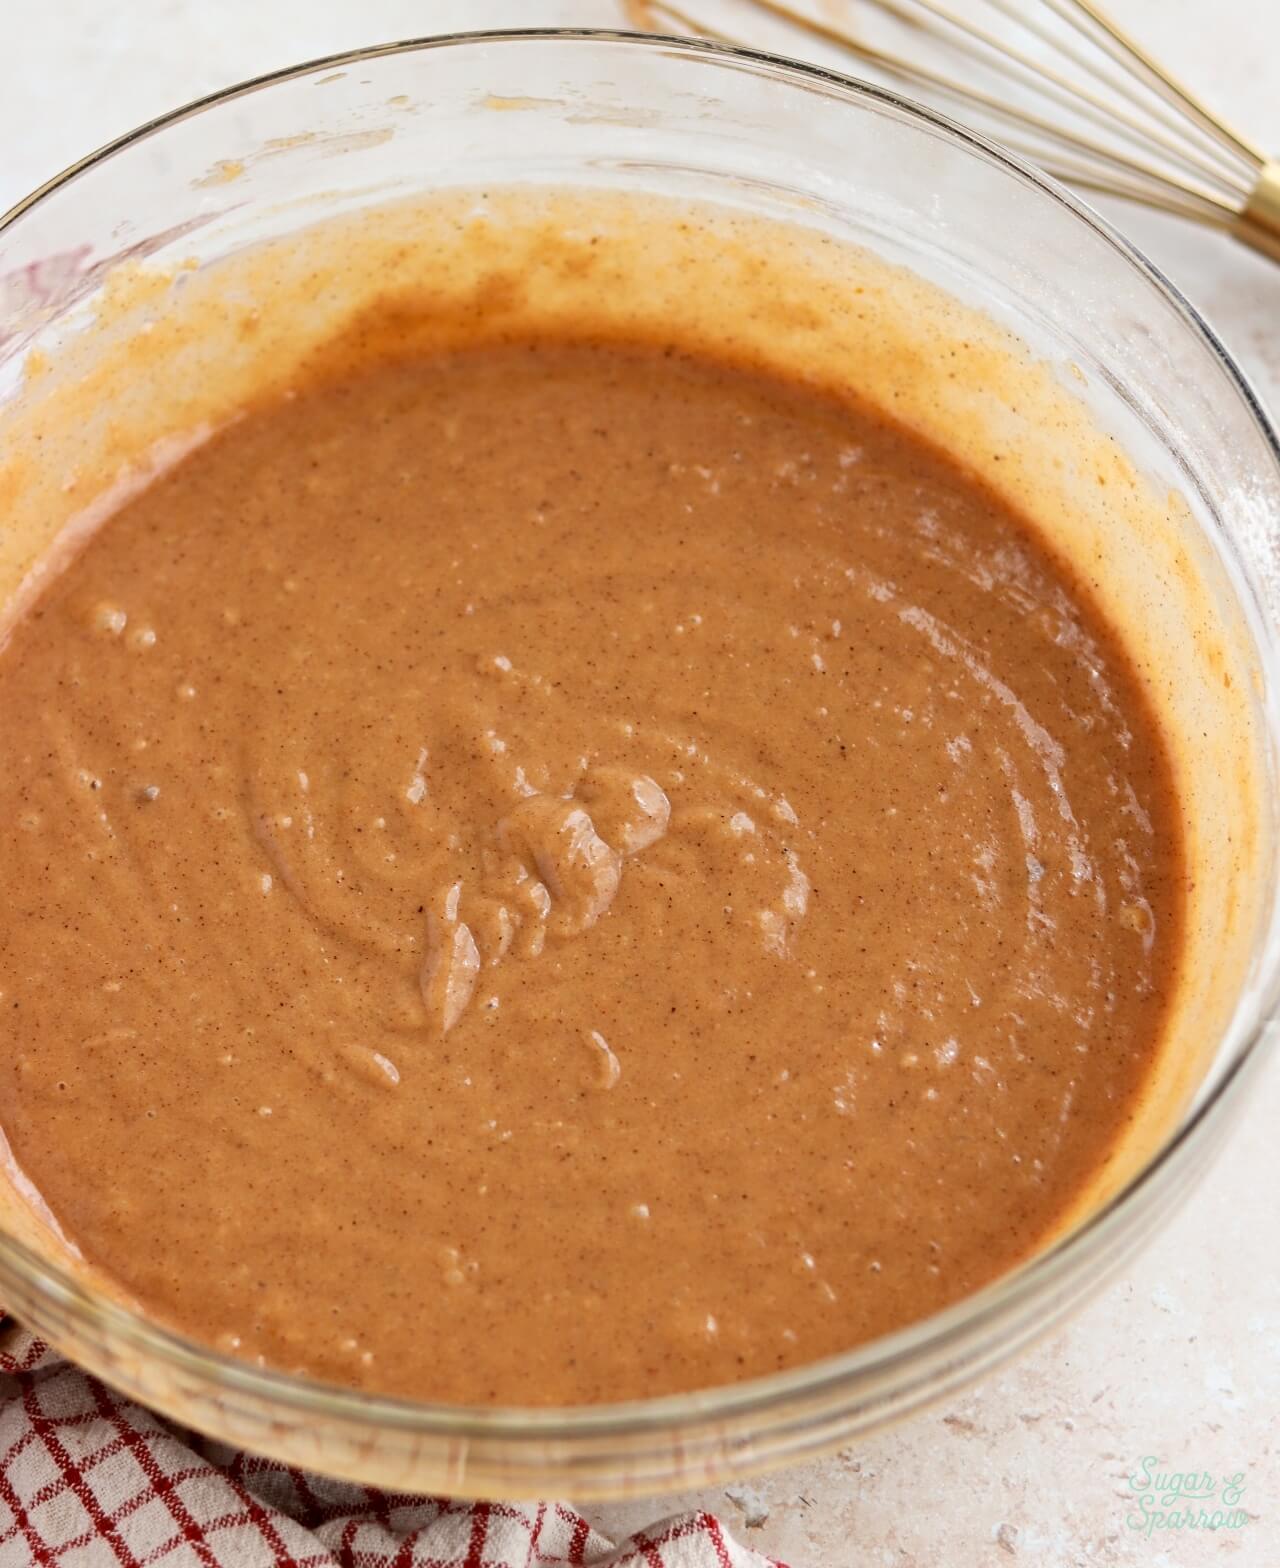
Add the dry ingredients into the wet ingredients and whisk until just combined.
Bake the Pumpkin Cake Layers
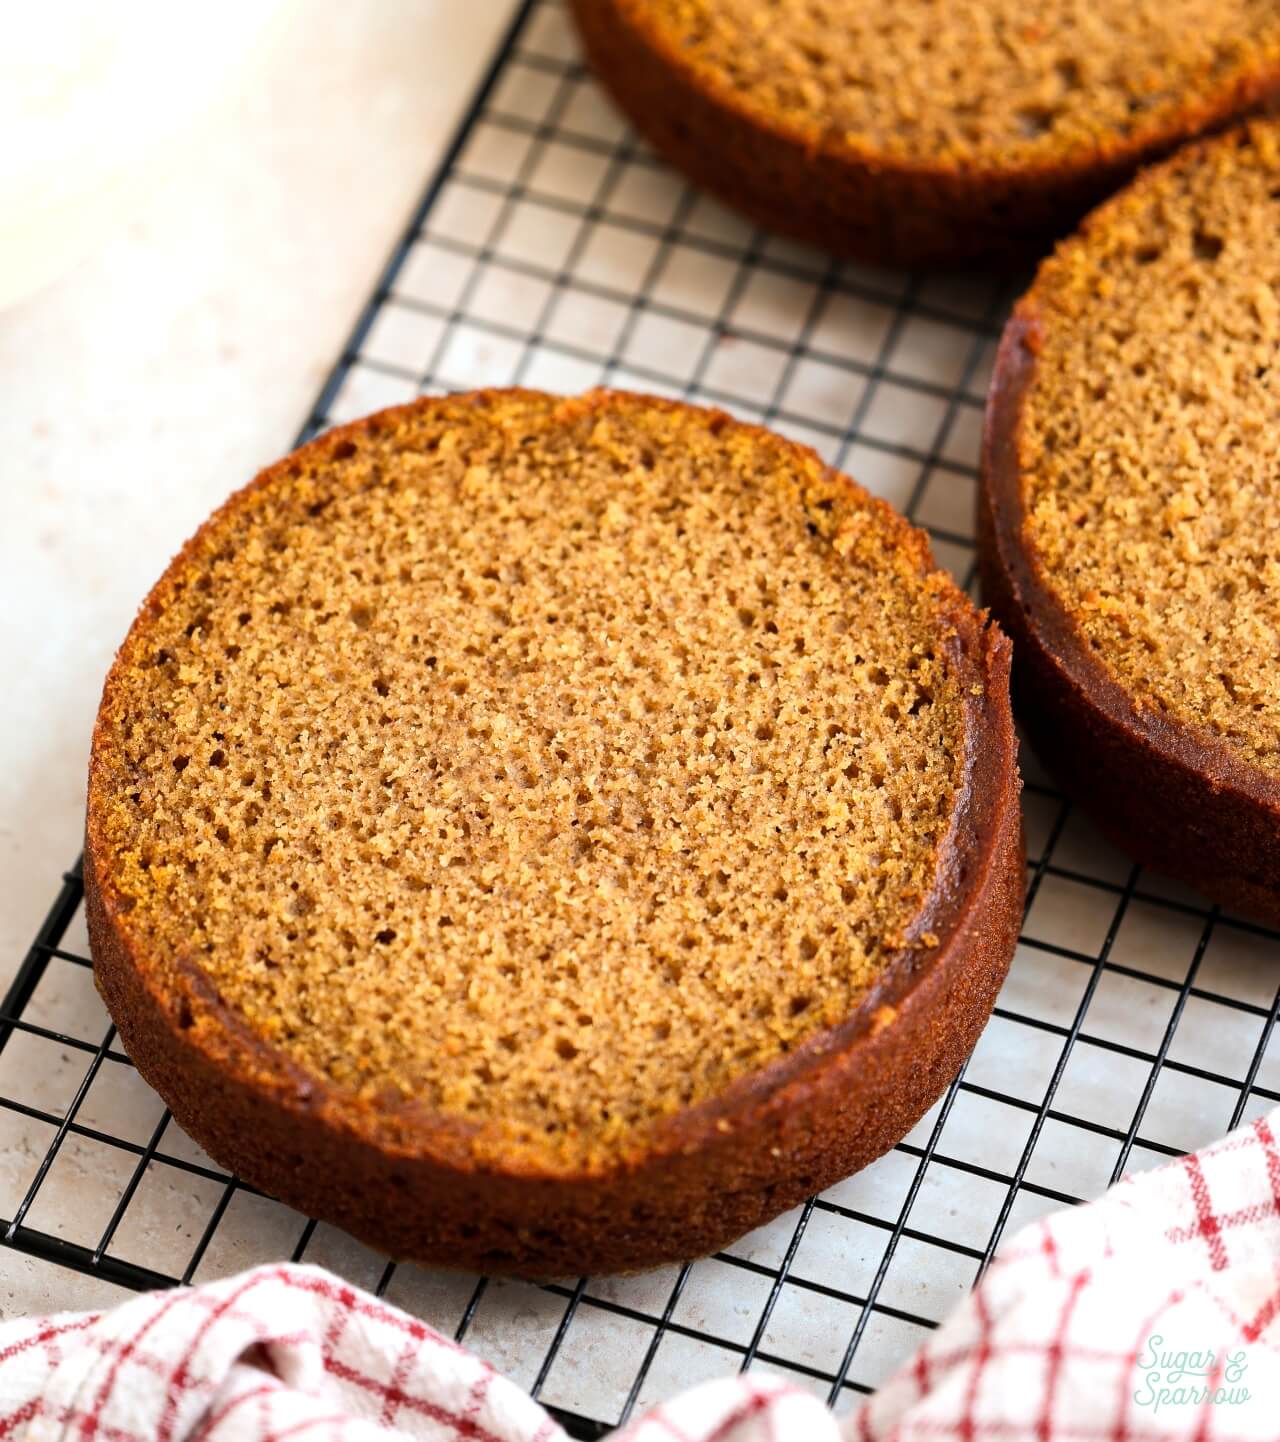
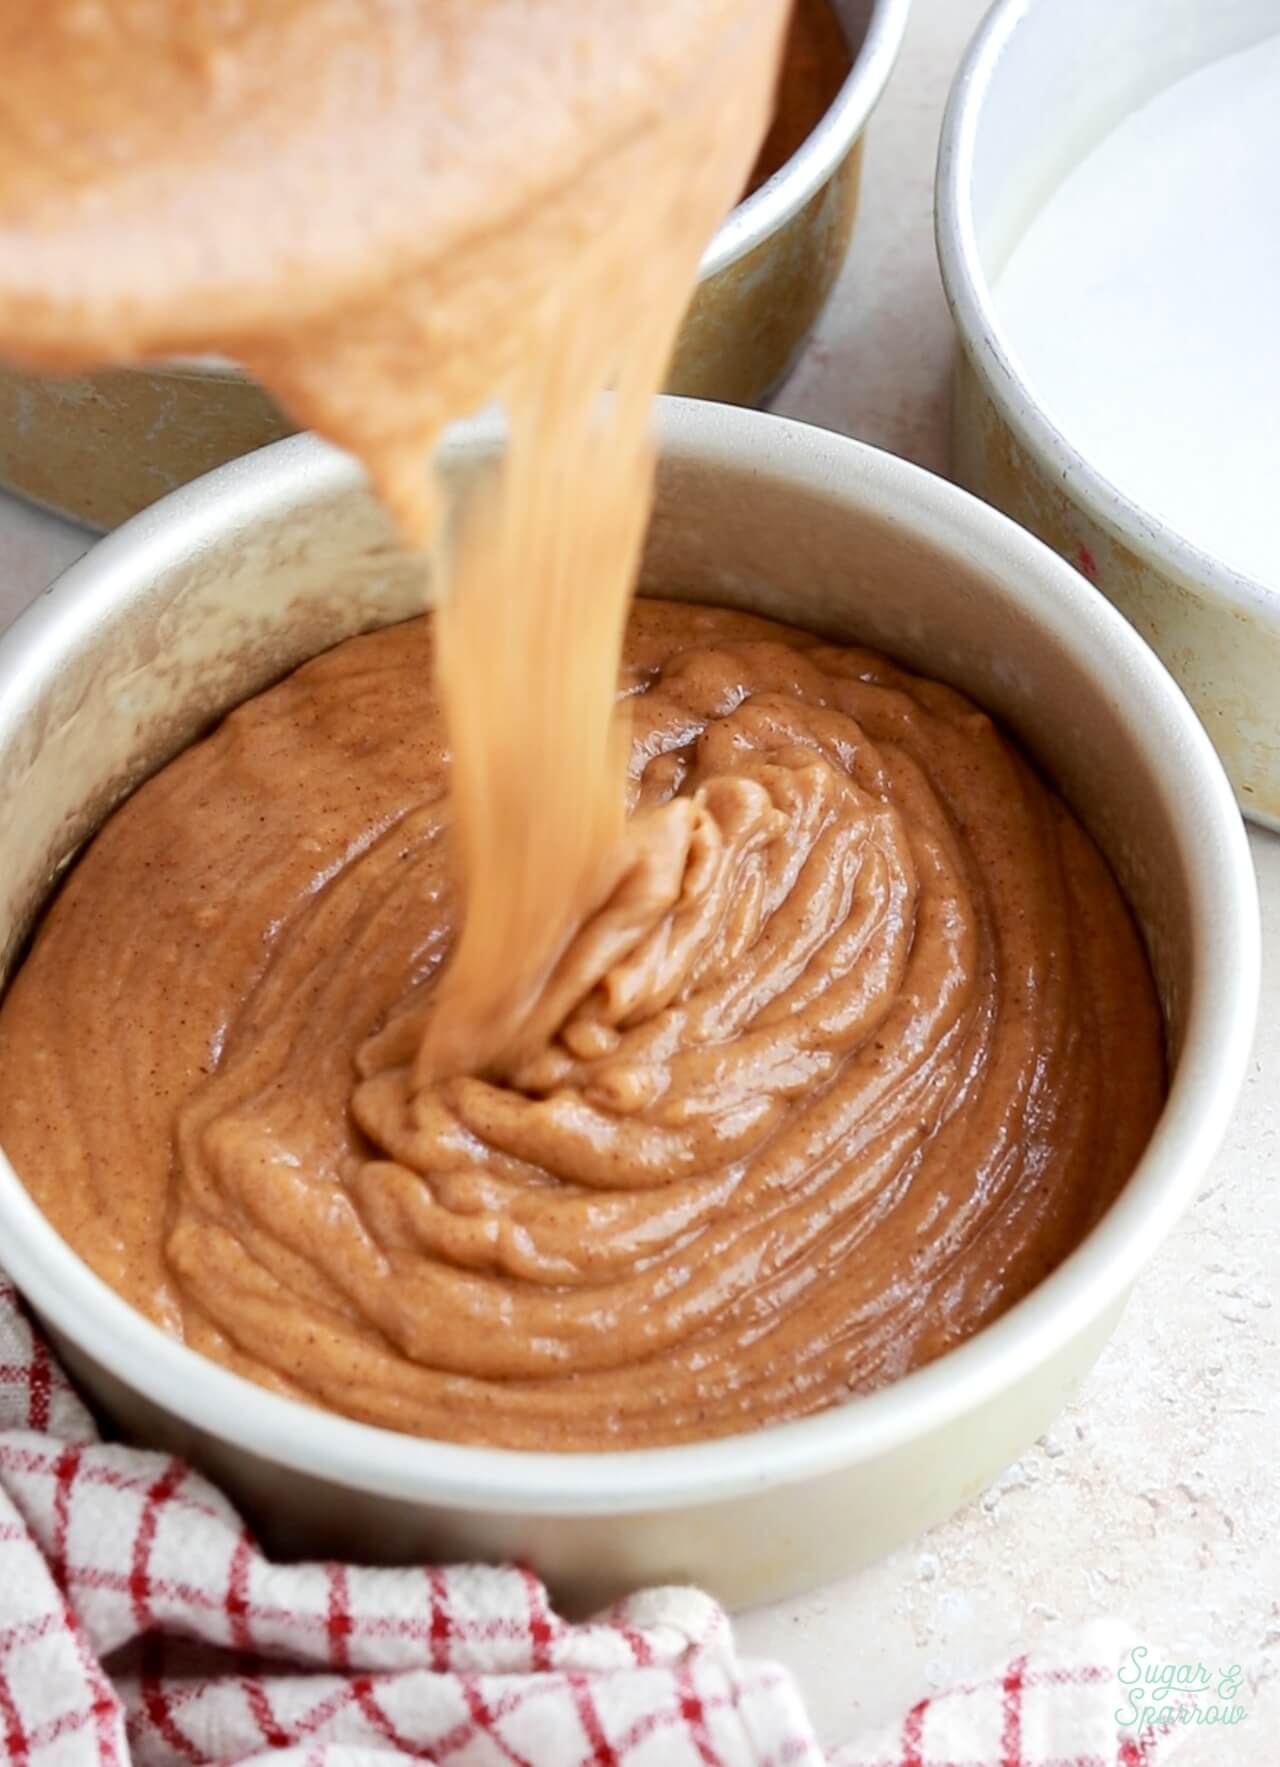
Pour the pumpkin cake batter into three 6-inch cake pans or two 8-inch cake pans that have been previously greased and lined. Bake at 350ºF (177ºC) for 32-36 minutes, or until a toothpick inserted comes out clean.
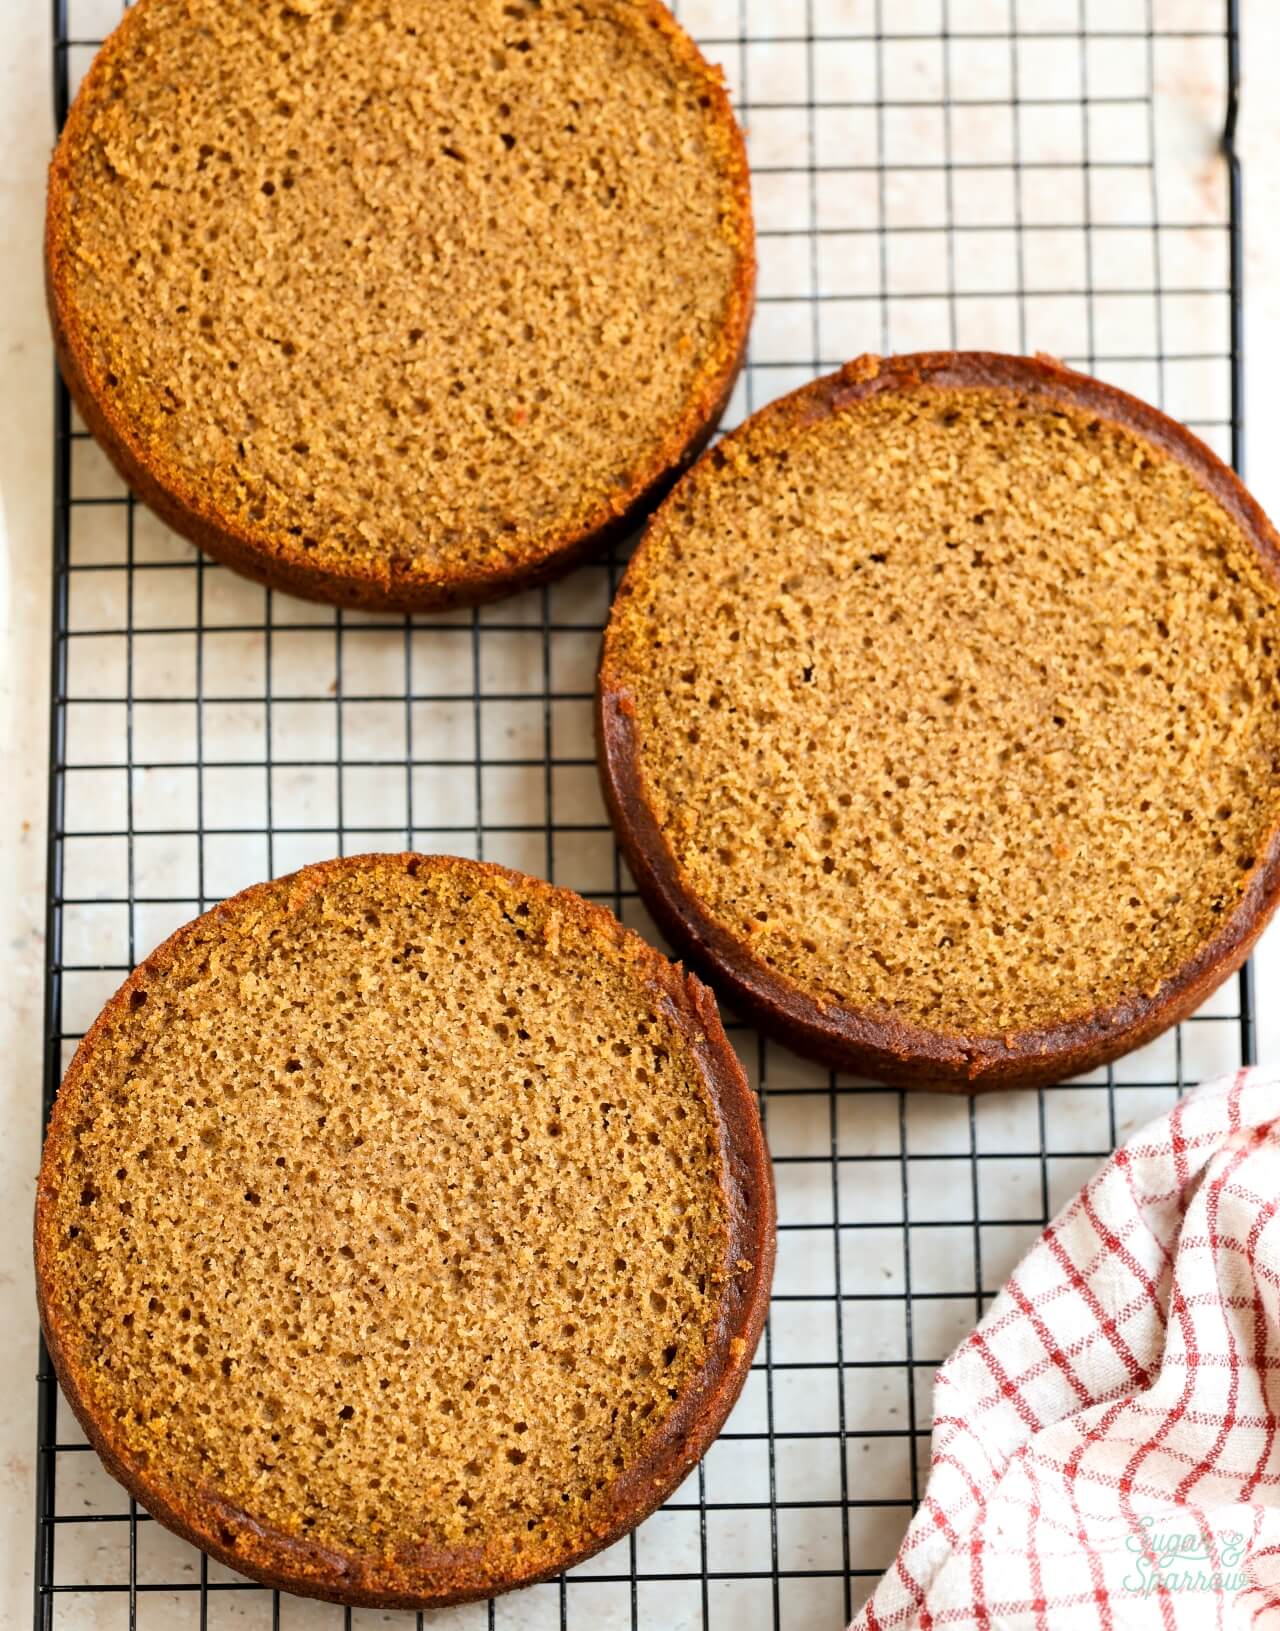
From here, let the cake layers cool in the pan for about five minutes before transferring to a wire rack to cool completely to room temperature.
Stable Cream Cheese Frosting for Cake Decorating
It’s so classic to pair this pumpkin layer cake with cream cheese buttercream, and in my opinion the flavor combo never gets old. Although cheese frosting cream has a reputation for being notoriously soft and frustrating to work with, the cheese buttercream recipe you’ll find below is sturdy and pipeable without being overly sweet, which is why it’s my forever go-to. I’ve noticed that block cream cheese seems to be even less stable these days, so I have been making cream cheese frosting in a different order than usual and find that it yields a much thicker, stable frosting. Here are some additional tips for making it the perfect consistency for filling, frosting, and decorating this cake:
- Use full-fat brick style cream cheese. I use Philadelphia brand, but any brick-style cream cheese that’s not low fat will do. Other kinds of cream cheese (low fat or the spreadable kind in the tub) contain too much water content and will always result in a soupy frosting that’s too thin for filling and frosting a cake. If you don’t have access to brick-style cream cheese, make a double batch of my vanilla buttercream to pair with this cake instead.
- Make sure the butter and cream cheese aren’t too soft. Before you start mixing up the buttercream, it’s super important that the butter and cream cheese are room temperature, but not warmer (like from softening in the microwave). These ingredients should be left out on the counter at room temperature for 45 minutes to an hour.
- Refrigerate to thicken the consistency. If you make the cream cheese frosting and find that it’s not thick enough for your liking or your kitchen environment is super warm, pop the frosting in the refrigerator for 20-30 minutes to let the butter solidify a bit. Then, re-mix it on low speed with your stand mixer to make it smooth and uniform. The trip to the refrigerator will thicken the entire buttercream to a workable consistency.
How to Decorate a Pumpkin Layer Cake
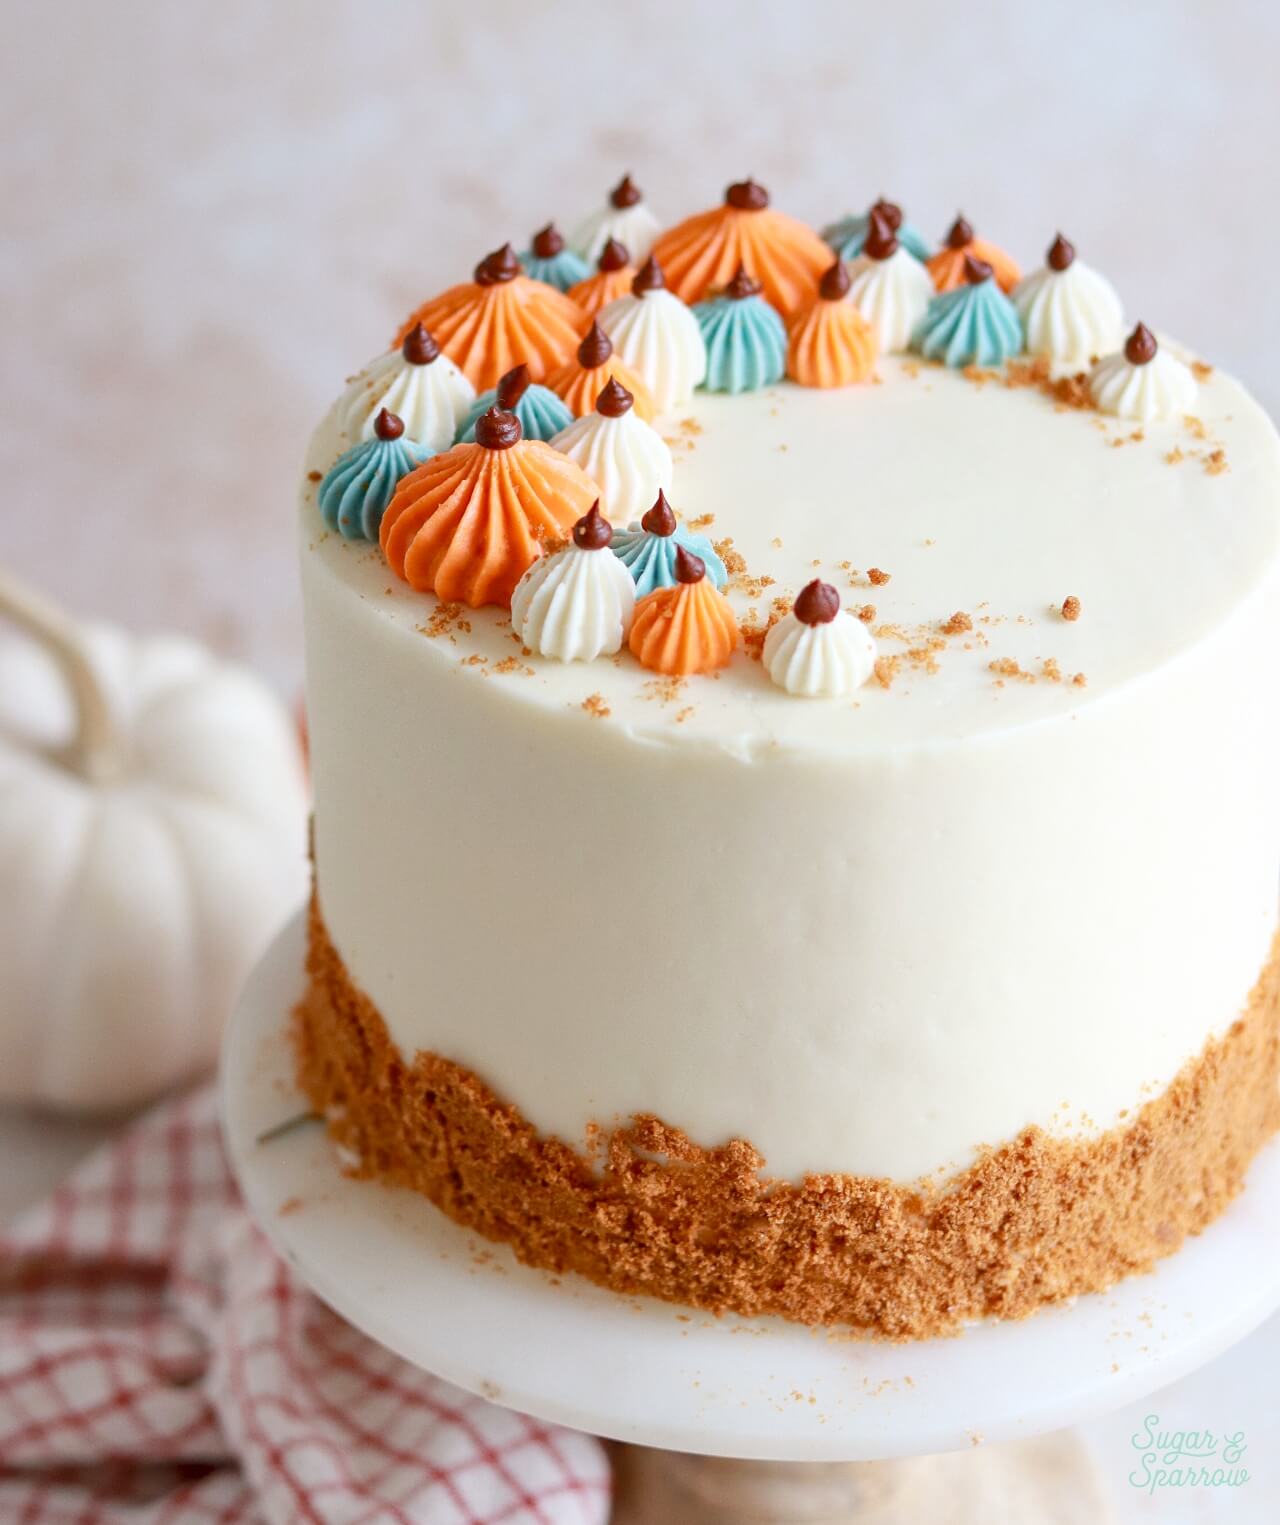
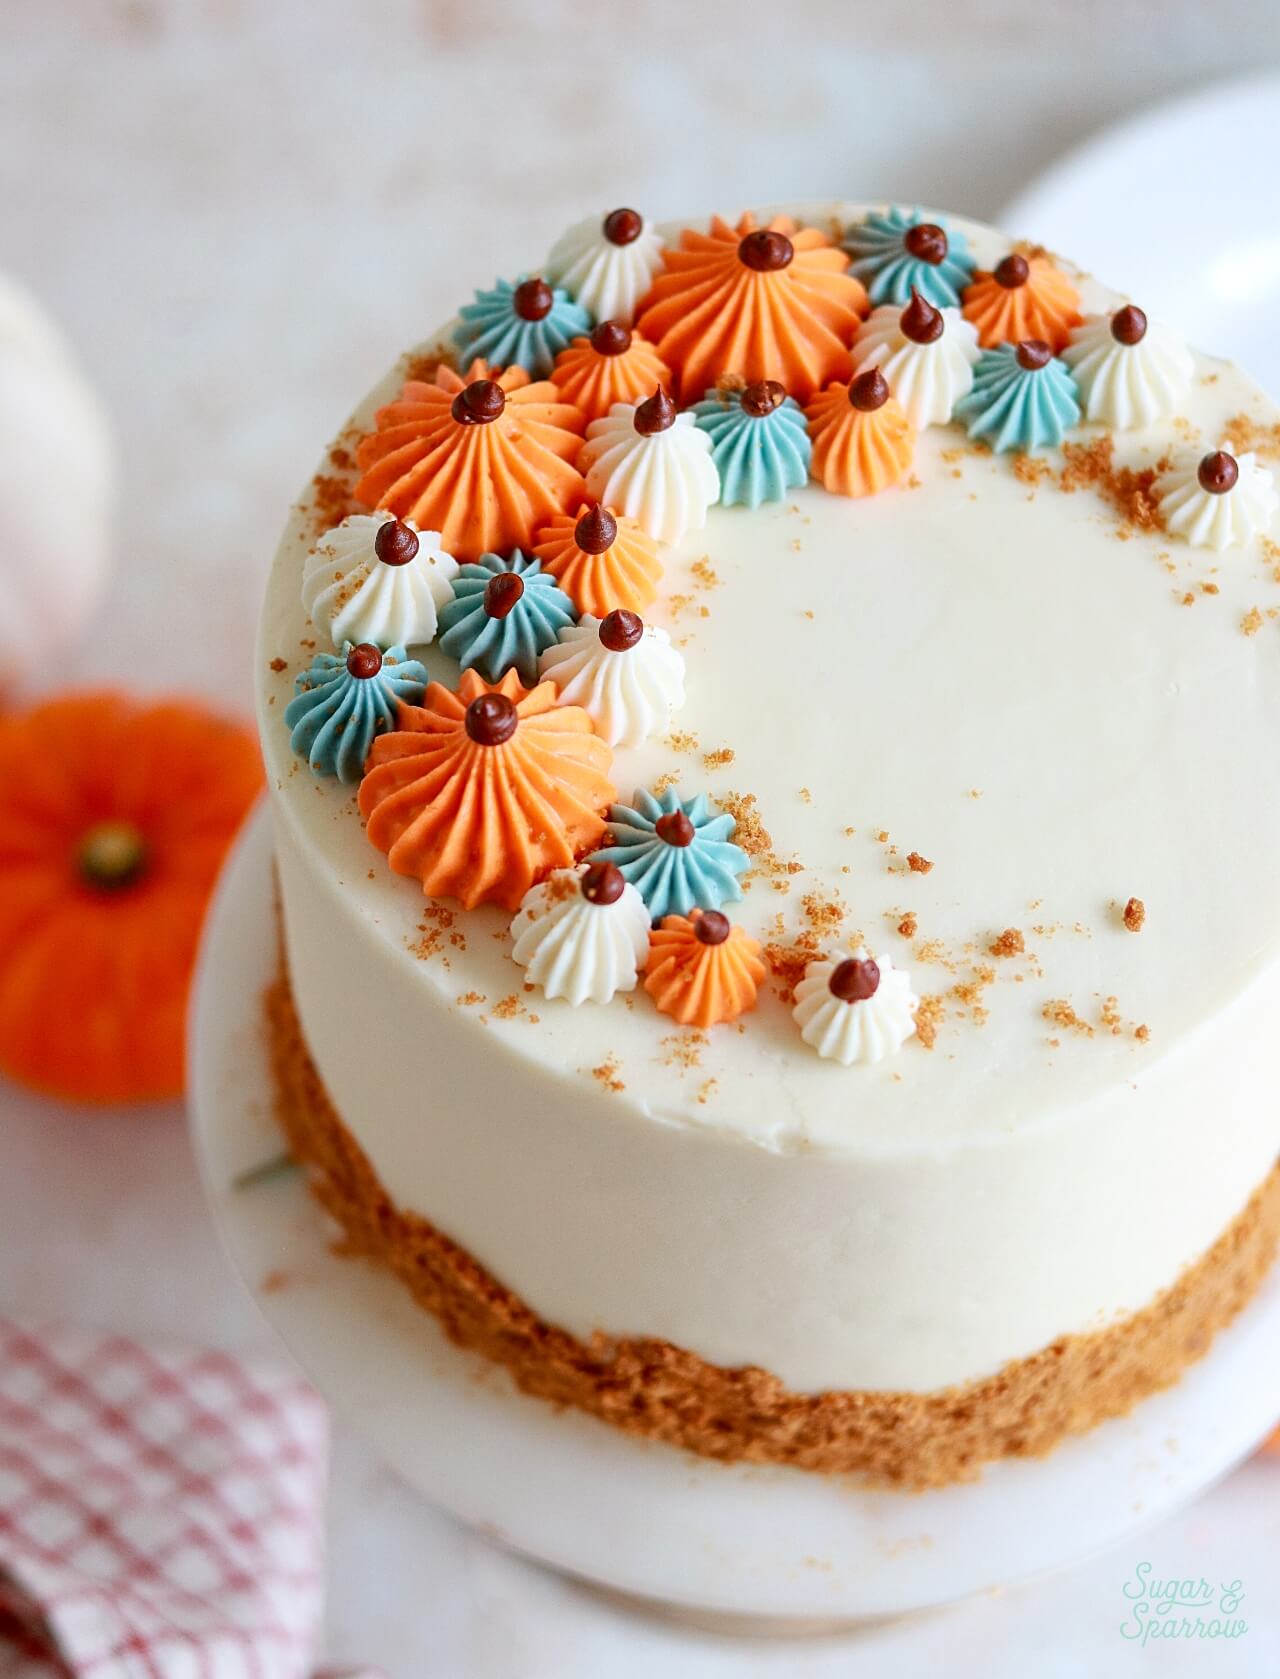
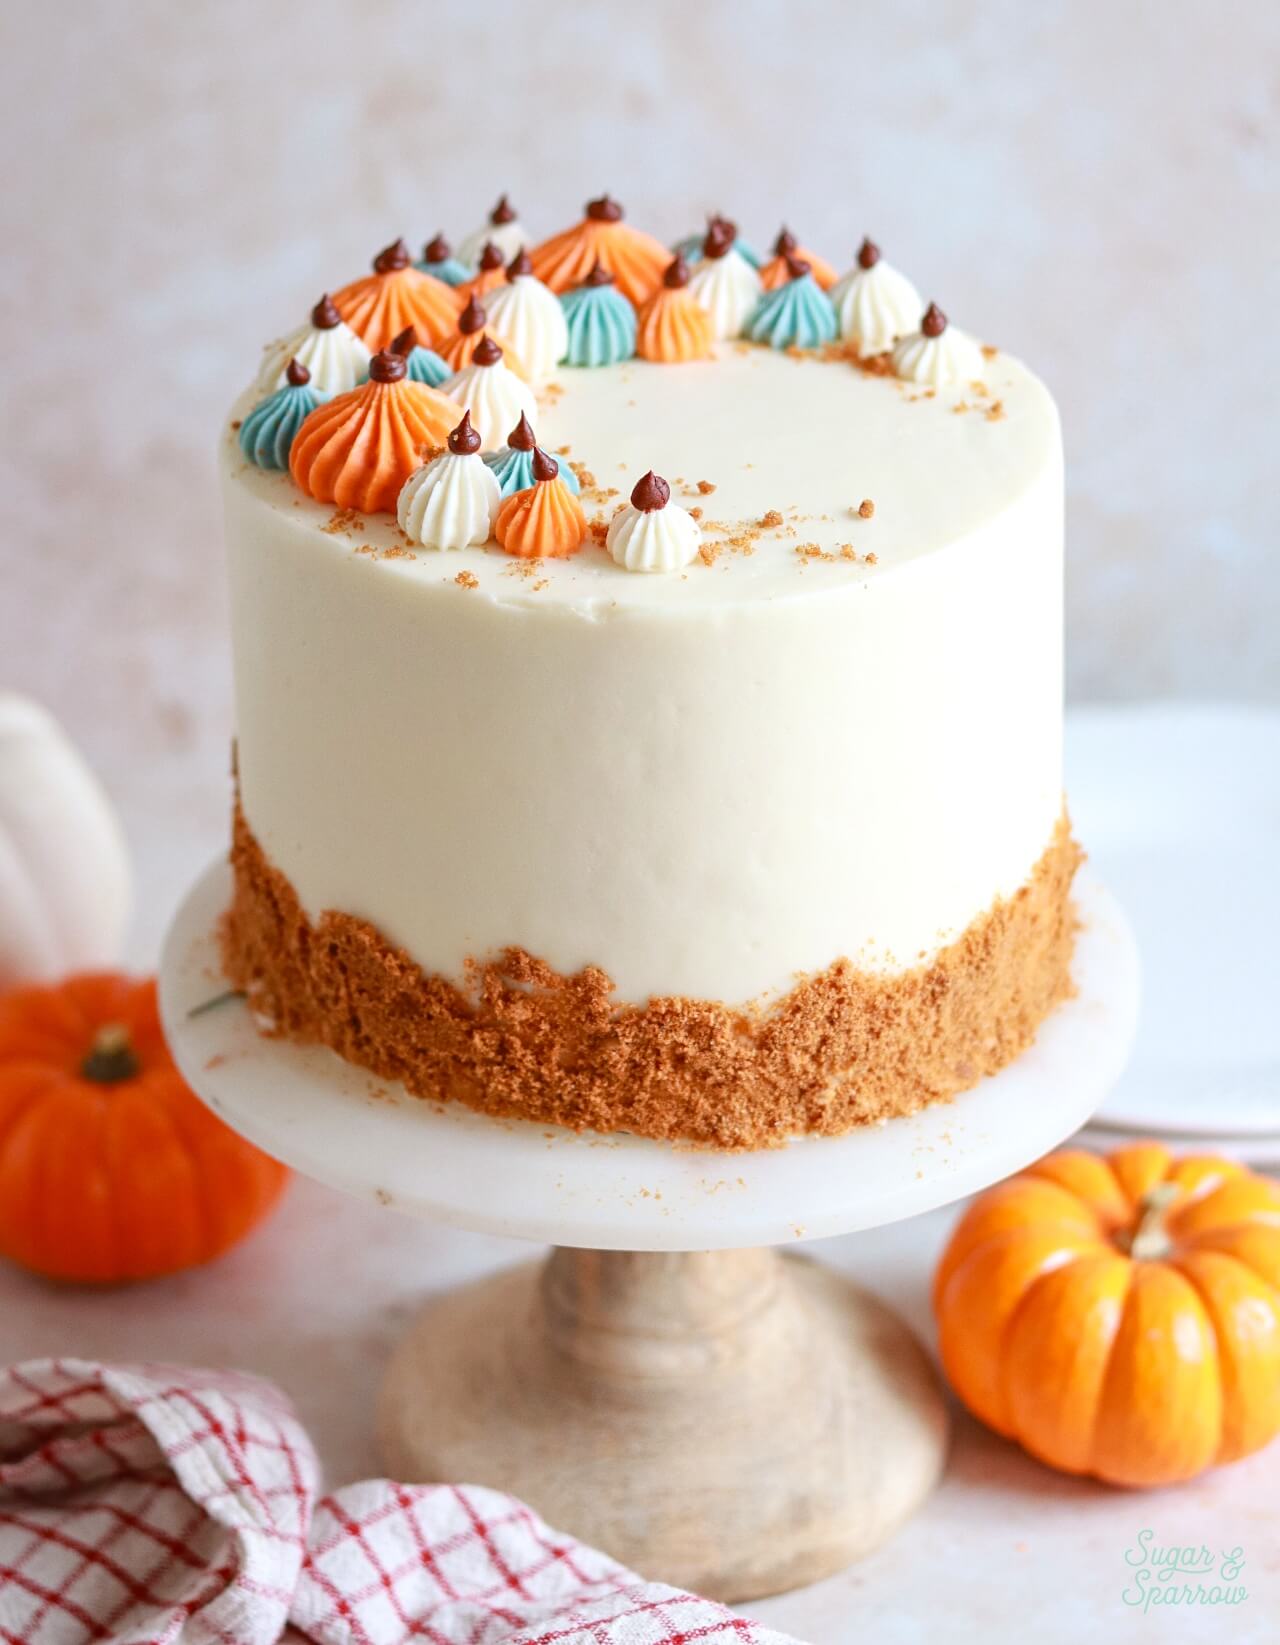
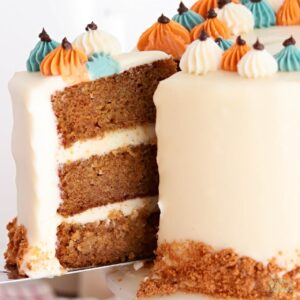
Even though I recently updated these photos, the cake design pictured has been around since 2019 and highly replicated, which I love! Here are all the details so you can replicate it too:
After filling and stacking the cake with cream cheese buttercream, I frosted a smooth buttercream finish and pressed some Biscoff cookie crumbs around the bottom third of the cake.
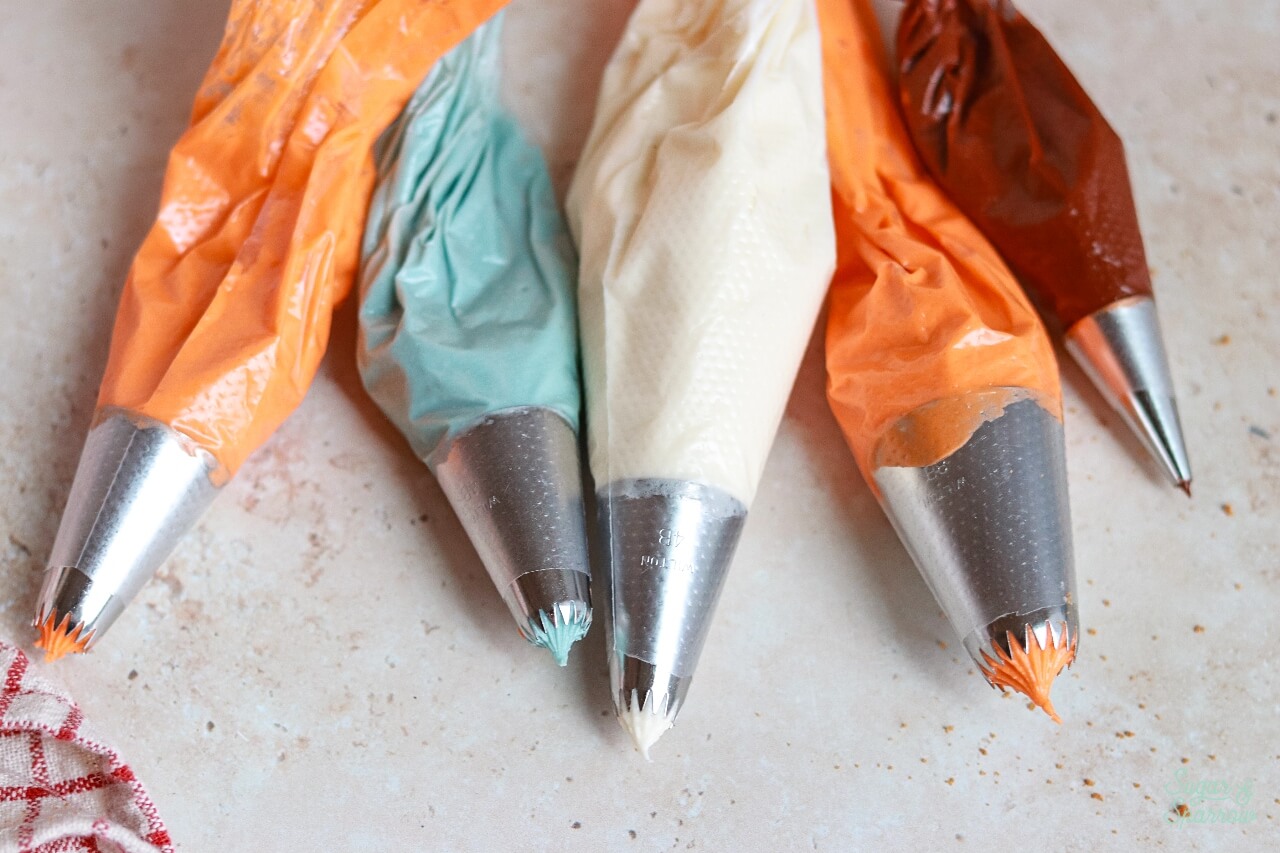
For the piped pumpkins on top of the cake: I divided the remaining cream cheese frosting into 4 different bowls and colored one bowl with Americolor Orange, the second bowl with a dusty blue called Wedgewood, the third bowl with Chocolate Brown, and left the last bowl uncolored. Then, I fitted one piping bag with Wilton Tip 6B to pipe the large orange pumpkins and three piping bags with Wilton Tip 4B for smaller orange, blue, and white pumpkins. I fitted one piping bag with Wilton Tip 3 for the brown pumpkin stems.
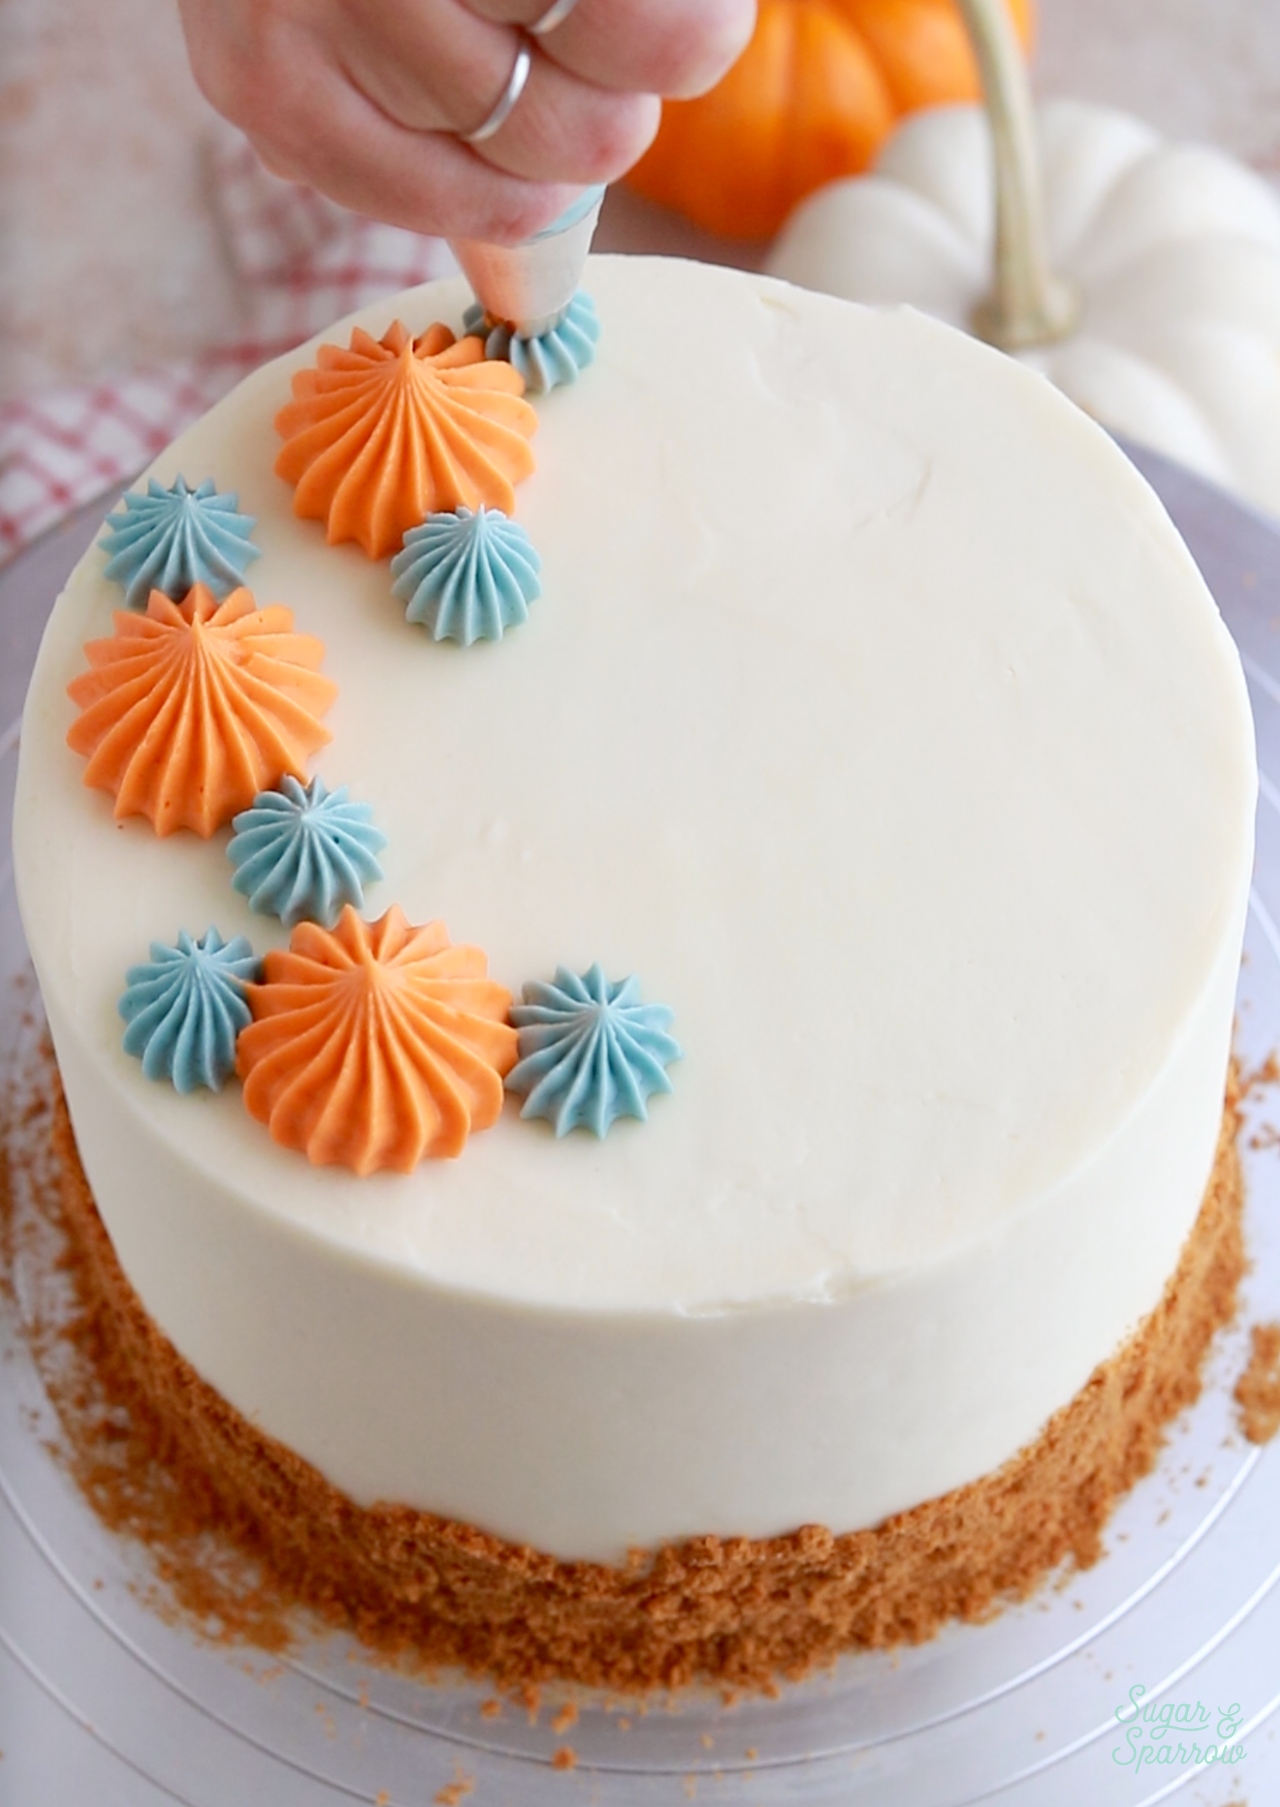
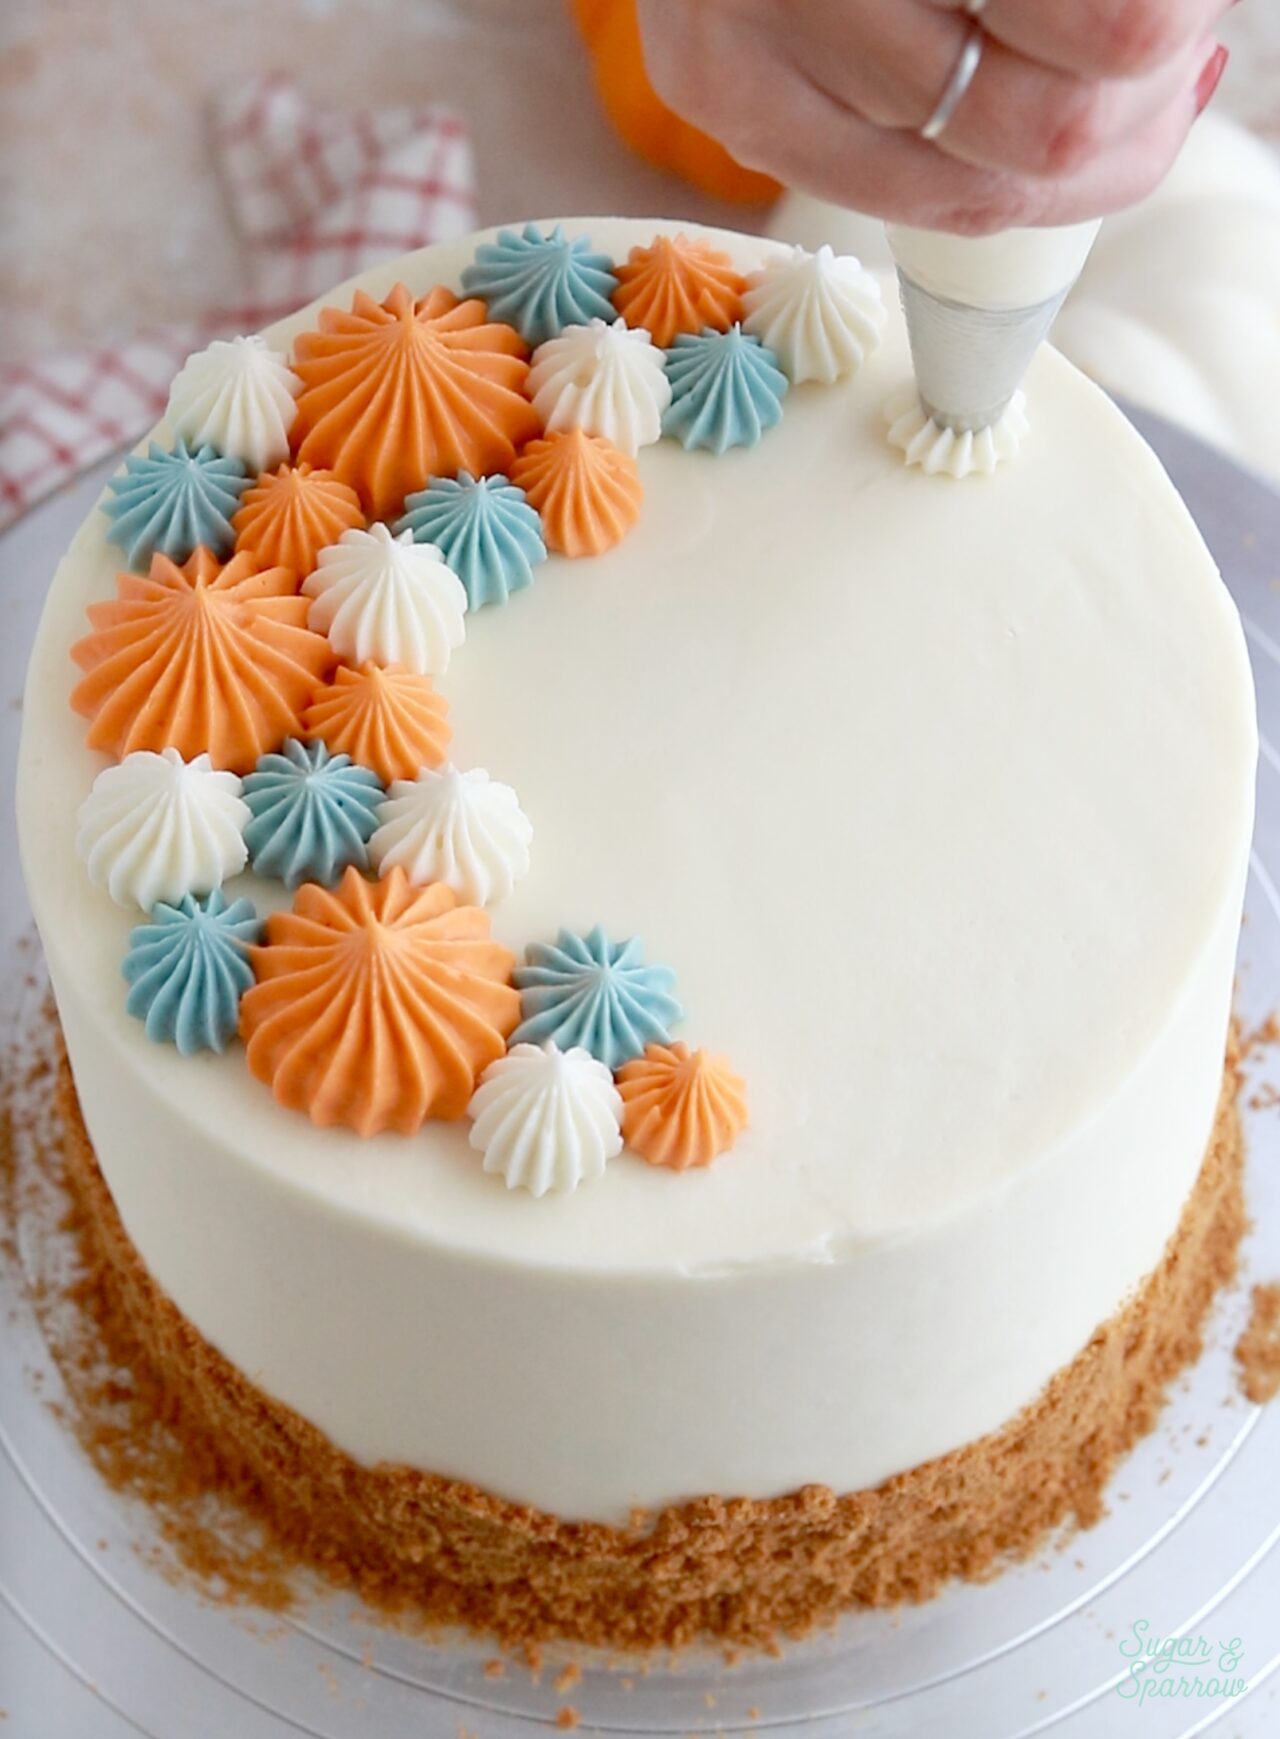

I piped the pumpkins into a crescent moon shape because it gives me all the feels, but you do you.
Pumpkin Layer Cake Recipe Video
Here’s a detailed video on how to make and decorate this pumpkin layer cake from start to finish:
If you love recipe videos like this one, be sure to check out my YouTube channel! I’ve got a growing collection of cake recipes, decorating tutorials, and Cake Basics over there. Hit the subscribe button on my page so you never miss a new video.
More Pumpkin Cake Recipes You’ll Love
If you’re a fan of pumpkin cake, here are some other recipes you’re sure to love:
- Pumpkin Biscoff Cake
- Spiced Chai Pumpkin Cake
- Pumpkin Cupcakes
- Pumpkin Chocolate Chip Cake
- Easy Pumpkin Sheet Cake
- Pumpkin Pie Layer Cake
I hope you love this recipe as much as I do! Let me know if you make it in the comments below (be sure to leave a star rating!) and feel free to tag @sugarandsparrowco on Instagram to show me if you post a photo. I love to see what you create with my recipes!
Perfect Pumpkin Layer Cake
Ingredients
Pumpkin Layer Cake
- 2 Cups (265g) all-purpose flour
- 2 tsp baking powder
- 1 tsp baking soda
- 1 tsp salt
- 2 tsp ground cinnamon
- 1 tsp allspice
- 1 tsp nutmeg
- 1/2 tsp ground ginger
- 1 Cup (200g) packed brown sugar
- 1/2 Cup (100g) granulated sugar
- 1 Cup (240ml) vegetable oil or melted butter
- 4 large eggs, room temperature
- 15 Oz (425g) canned pumpkin puree
- 2 tsp pure vanilla extract
Cream Cheese Buttercream
- 3/4 Cup (170g) unsalted butter, room temperature
- 6 Cups (720g) powdered sugar
- 2 tsp pure vanilla extract
- 12 Oz (339g) full-fat brick-style cream cheese, room temperature not the spread
- 1/4 tsp salt
Garnish (Optional)
- 3 Biscoff cookies, crushed into crumbs
Instructions
Make The Pumpkin Layer Cake
- Preheat the oven to 350ºF (177ºC) and prepare three 6-inch or two 8-inch cake pans by spraying the sides with baking spray and placing a parchment paper circle into the bottom of each one.
- In a medium bowl, whisk together the all-purpose flour, baking powder, baking soda, salt, cinnamon, allspice, nutmeg, and ground ginger. Set aside.
- In a separate large bowl, add the brown sugar, granulated sugar, oil (if using melted butter in place of the oil, cool it for 5-10 minutes prior to adding here), eggs, pumpkin puree, and vanilla extract. Whisk together until uniform, then add the flour mixture and whisk until smooth.
- Pour the batter evenly between the prepared cake pans and bake for 32-36 minutes, until a toothpick inserted comes out clean or with just a few moist crumbs. Cool the cakes in the pan for five minutes before removing and transferring to a wire rack to cool completely to room temperature.
Make The Cream Cheese Buttercream
- Note before you start: Since cream cheese frosting is notoriously soft (and block cream cheese seems to be even less stable these days), I have been making cream cheese frosting in a different order that yields a thicker, more stable frosting that’s easier to work with for cake decorating.
- In the bowl of a stand mixer fitted with the paddle attachment, beat the butter on high speed until creamy and smooth, about 5 minutes.
- This part is very trust the process: add half of the powdered sugar and mix on medium speed until it resembles coarse sand. Mix in the vanilla, followed by the rest of the powdered sugar. It will continue to look sandy and clumpy at first and then will eventually combine into a very thick mixture that almost resembles pie dough.
- Add the cream cheese and salt and mix on low speed until combined, then turn the mixer to high speed and beat for about 1 minute until the frosting is smooth.
Assembly
- Before you begin, make sure your cream cheese frosting is stable enough for cake decorating (it can be notoriously soft, especially in a warm kitchen). If it seems too soft, refrigerate the whole bowl for about 15-20 minutes before re-mixing with your stand mixer on low speed.
- Once the pumpkin cake layers have cooled completely, level them to your desired height. Add a swipe of cream cheese frosting onto a cardboard cake round and place one of the cake layers on top. Place onto a turntable with a non-slip pad underneath. Add cream cheese frosting on top of the cake layer and smooth it down until it’s about ½ inch tall, then place the next cake layer on top and repeat. When you reach the final cake layer, place it upside down so that the bottom of the layer is the top of the cake. Then, crumb coat the cake with a thin layer of cream cheese frosting and refrigerate the cake for 15-20 minutes to let the crumb coat firm up.
- To create the look pictured, use the cream cheese frosting to create a smooth buttercream finish on the cake and press the Biscoff cookie crumbs onto the bottom third of the cake. Divide the remaining cream cheese frosting amongst four small bowls.
- Create the Piped Pumpkin Design: Add orange food coloring to the first bowl, dusty blue food coloring to the second bowl, chocolate brown to the third bowl, and keep the fourth bowl uncolored. Fit a piping bag with Wilton Tip 6B and fill it with the orange frosting, then fit two piping bags with Wilton Tip 4B and fill one with the white frosting and one with the blue frosting. Fit a final piping bag with Wilton Tip 3 and fill it with the brown frosting. On the top of the cake, use the piping bag with the orange buttercream to pipe pumpkins of various sizes in a crescent shape (halfway along the top edge with space in between for other pumpkin colors). Fill in the spaces of the crescent shape with white and blue pumpkins. Finish the look by piping stems on each pumpkin using the brown frosting.
Notes
- The pumpkin cake layers can be made ahead and stored, wrapped in plastic wrap, at room temperature for up to two days. Alternatively, you can store the wrapped cake layers in the freezer for up to 2 months before thawing and frosting.
- The cream cheese buttercream can be made ahead and stored in an airtight container in the refrigerator for up to two weeks. When you’re ready to use it, bring it back to room temperature and re-whip in your stand mixer to bring back to smooth buttercream consistency.
- The assembled pumpkin layer cake can be made ahead and must be stored in the refrigerator. It will last 4-5 days refrigerated, but is freshest closer to the assembly date. When you’re ready to serve, bring the cake back to room temperature by taking it out of the refrigerator 1-2 hours beforehand.
Looking for the Original Recipe? This pumpkin layer cake has been a Sugar & Sparrow favorite since 2019! I’ve continued to test and refine the recipe over the years, and the recipe above is the version I currently recommend. If you’ve made the original version and would like to revisit it, I’ve saved a copy here.

I’ve never understood blogs and used recipes from them. I stumbled across this cake recipe on Pinterest and gave it a try! It was so light, and the frosting was amazing! Thank you for this recipe!
Yay, Stella! I’m so happy to hear that this recipe was a hit! Thanks for taking the time to let me know 🙂
Hello! Do you think the fully decorated cake would hold in the refrigerator for 24 hrs in a tupperware cake dome? Making this for my daughters birthday, but would love to have it completely done the night before. Thank you! Excited to try this.
Hi Angie! It would absolutely be ok to refrigerate the decorated cake a day ahead. I do that all the time. Just be sure to bring it to room temp by taking it out of the fridge an hour or two before you plan on eating the cake. It tastes better at room temp. Enjoy!
Would this work in terms of “cake pops”? By adding the icing in with the cake and molding it into balls and dipping it in almond bark/choice of chocolate?
Hi Shay! It absolutely would work. That sounds divine!
Hi. Just wanted to ask if I would be able to use all-purpose flour rather than cake flour in this recipe? I’m from the UK and we don’t have cake flour. I read that whilst you were recipe testing, you used both cake and all-purpose flour, and would using all-purpose drastically change this cake. Thanks.
Hi Zak! All purpose flour will make this cake more dense than cake flour, but it shouldn’t affect the taste. If you don’t have access to cake flour, here’s a DIY version made with all purpose flour and it’s what I’d recommend: https://sugarandsparrow.com/homemade-cake-flour-recipe/
Hi…Wanted to know if had to bake in one 6inch or 7inch tray and frost…how should the whole.recipe be converted?
Hi Mary! If you want to make just one layer, you’ll need to divide this entire recipe by 3. Basically divide each ingredient by 3 and you’ll have the correct amount of ingredients. Hope that helps!
I didn’t use your recipe this time but I followed your decorating scheme and it was absolutely adorable! I just loved the little pumpkins on top. 🙂
Here’s my cake: https://i.imgur.com/jCKTC2k.jpg
What a beautiful cake, Mina! So happy you loved this decorating technique!
Made this for family for Thanksgiving and it was a hit! Only issue I had was when smoothing sides, the icing kept thinning to show slightly the layers of the dark cake. I did two crumb coat layers with chilling between to help but so much of icing kept coming off when smoothing sides. Should I just thicken next time with powdered sugar/salt? I loved the taste of icing so def want to use more going forward
Hi Callie! So happy this recipe was a hit for Thanksgiving! This cream cheese buttercream is a little trickier to work with and what I recommend if it seems too thin is doing a few layers of buttercream and chilling in between layers. Adding more powdered sugar only seems to sweeten the buttercream and takes a lot to thicken it up, so instead I would add one layer on top of the crumb coat and smooth it, chill for 20 minutes, add another layer of buttercream and smooth it, repeat until you’re satisfied!
I only have low fat buttermilk will the cake still be okay?
Hi Leah! I’ve never tried that before but the recipe should be fine with low fat buttermilk. It may not be as moist, but it should work!
I have made this cake many times with lowfat buttermilk and it always comes out great! Super moist still!
I made this cake and it was fantastic! I’d like to use it for pumpkin crumb muffins, Have you ever tried the recipe as muffins or cupcakes?
Hi Lisa! I have tried this recipe as cupcakes and it works really well! If you want to try it, be sure to fill your cupcake tins no more than 2/3 full and bake for 15-18 minutes at 350. So happy you loved this recipe in cake form!
Do you have any tips for piping the pumpkins? I just practiced and I can’t seem to get them to look as round and uniform as yours. Can’t wait to eat this cake tomorrow. It smells amazing in the oven right now!
Hi Kristy! The only tips I really have for the pumpkins are to make sure you’re using the piping tips specified, hover the tip a few centimeters off the surface of the cake while squeezing the piping bag to make more of a rounded shape. If the tip is too close to the surface of the cake it won’t be as round and voluminous. Hope that helps!
I was going to frost it and put it in the fridge until the party, how early would you suggest to take it out of the fridge to thaw.
Hi Juby! Cakes take about an hour to come to room temperature and I usually leave mine in the fridge until right before the party begins.
Can this same recipe be used for 8 inch cake pans, or how would I adjust it?
Thanks so much! Can’t wait to try this!
Hi Katherine! This recipe makes just enough for three 6 inch pans or two 8 inch pans. If you want more 8 inch layers I would 1.5 the recipe!
I just had to come back and say I made this recipe and it was AMAZING! The cake turned out sturdy but moist, and so flavorful. Can’t wait to share this cake at my company’a Thanksgiving luncheon tomorrow!
Yay, Katherine!! So happy you love this recipe as much as I do and I hope it’s a hit at your company’s Thanksgiving lunch!
I loved it! But I tried to make your buttercream recipe but it was watering and doesnt look good the different shapes
Glad you loved the cake recipe, Hany! Next time if the buttercream ends up too thin, you can always add a little more powdered sugar to thicken it up. Just be sure to add a little extra salt if you do that so you can balance out the sweetness!
Absolutely AMAZING cake!!!! Super moist and tender. Made a streusel topping with it and turned it into a pumpkin coffee cake. For my fall baby shower :). Thanks for the recipe!
That sounds incredible, Amanda! I am going to have to try this with a streusel topping. So happy you love this recipe as much as I do!
I made this as a sheet cake & it was AMAZING!! It’s reminiscent of carrot cake, but so much better.
The icing recipe makes enough for 2 sheet cakes (FYI) which came in handy since I broke my first cake.
My sister in law asked for the recipe immediately & it’ll be going into my fall baking repertoire for sure!
That’s amazing to hear, Kimberly! So happy that the recipe was such a hit and it worked well as a sheet cake!